
The finished braid could be used as a lanyard, zipper pull or keychain as well, but all the Scouts chose to make theirs into bracelets.
To make this bracelet, you need:
- a piece of chipboard
- yarn (approx. 14 feet total)
- scissors
Begin by cutting the chipboard into an octagon. It does not need to be perfect. Aim for the size of a CD so that it's comfortable in your hand. Poke a hole in the center of the octagon and cut a 1/4" slit into each side.
Next, cut seven pieces of yarn, each approximately 2 feet. They can be the same color or different colors. We used three blue strands, two red strands, and 2 white strands. Tie a knot on one end connecting all the pieces of yarn. Thread the strand through the center of the octagon. Holding the octagon with the knot on the bottom, take each of the yarn strands and put them into one of the eight slots. Note that there are 7 strands and 8 slots, so you will have an empty slot.
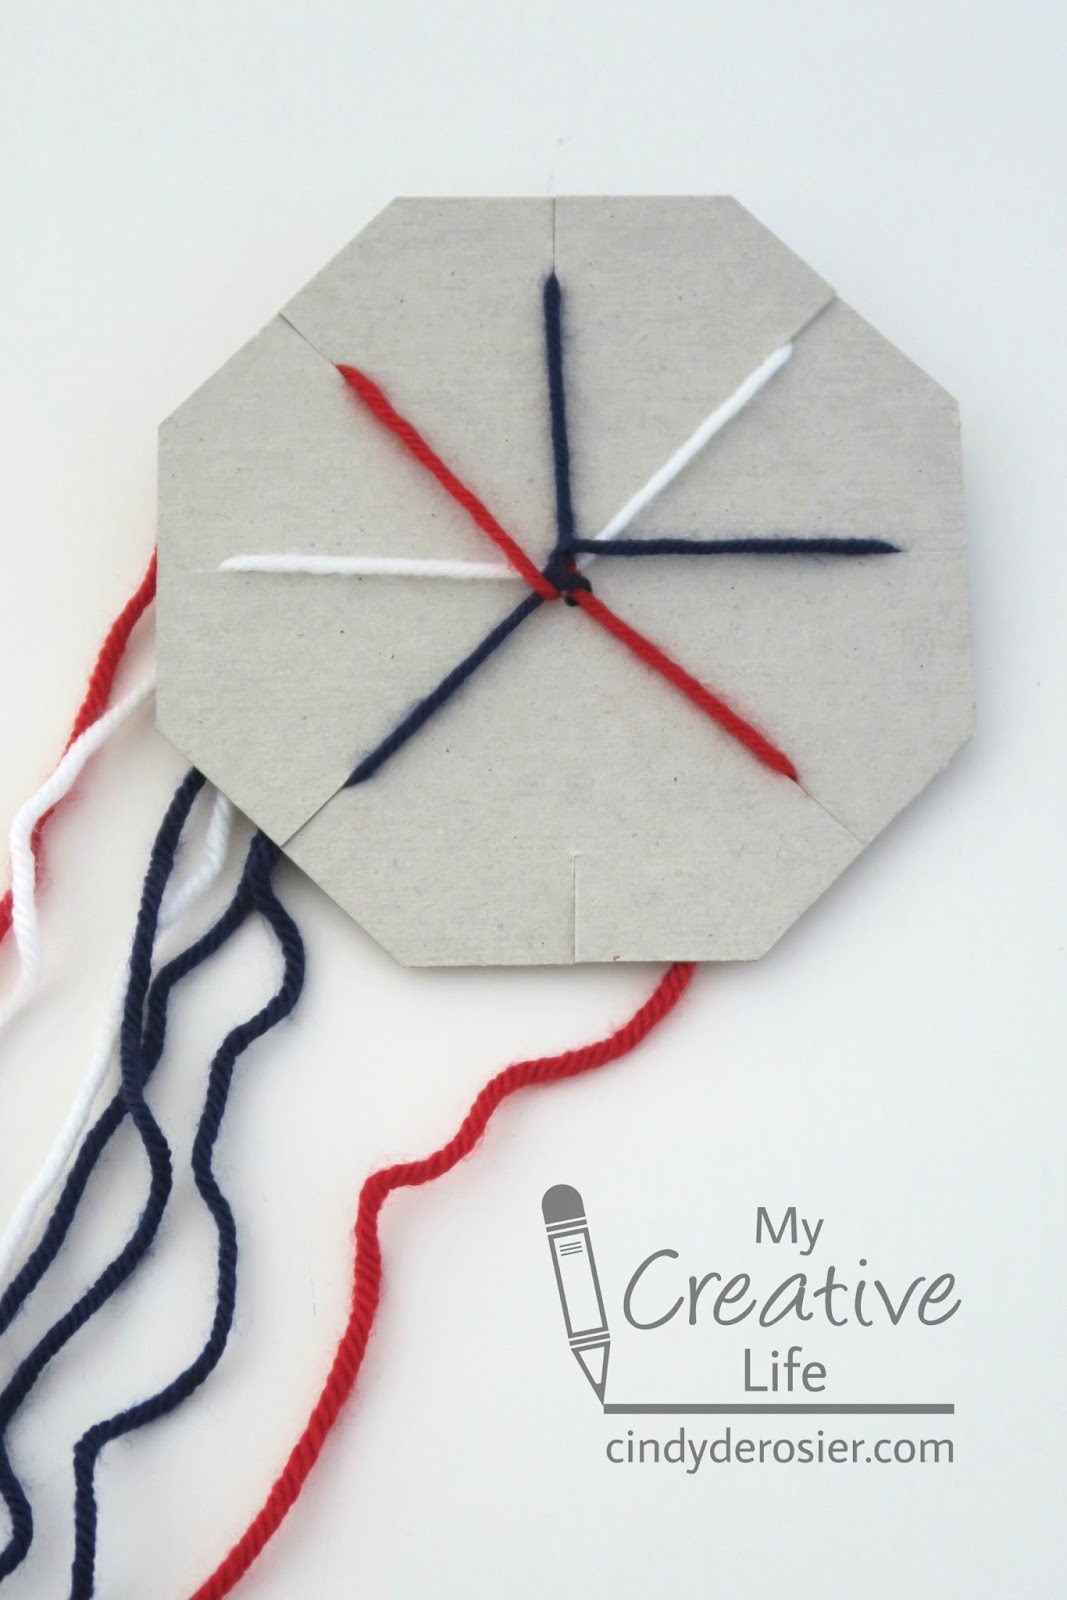
Rotate the octagon so that the empty slot is facing you. Moving counter-clockwise, count three slots and remove that piece of yarn.

Put it into the empty slot.

Rotate the octagon so that the empty slot is facing you again. Repeat the previous step, counting three slots counter-clockwise, then moving that piece of yarn to the empty slot. Repeat these steps over and over. It's that easy. Rotate, count, move the yarn. Rotate, count, move the yarn.

As you work, the finished braid will start emerging from the bottom.

When it is the length you want, simply remove each yarn piece from the slots, then pull the whole braid out from the bottom. The octagon is ready to be used again.

Tie a knot at the end of the braid. Leave a 1/2" gap, then tie a second knot. Trim the excess yarn off both ends.

To wear the bracelet, slip the knot through the gap between the two knots.

This easy craft is great to pass the time during travel, waiting for appointments, in restaurants, or any time. Customize it with your favorite colors! Thanks to Premier Yarn for providing us with the materials for our project.

Wow! That looks awesome!!!!!!!!!!!
ReplyDeleteIt turned out really nice!
ReplyDelete