Showing posts with label Hands-on History. Show all posts

7/12/19

Fun with Food!

Eagle-eyed readers may have noticed that there is a new tab on my site called FUN WITH FOOD. When you click it, it takes you to a landing page that gives me a place to organize everything food-related on my blog. I've added my Edible Crafts to this tab, along with five other categories. Four of them aren't done yet (going through all my old posts - over 2100 of them - is a huge job), but one is. Recipes from United States History is live.


I've divided the recipes into three categories: Native Americans and Early European Exploration; Colonial America and the Revolutionary War; and Expansion, Civil War, and the Industrial Revolution. I might add more, but for now those are the recipes I've posted since those are the broad categories covered in fifth grade.

While I'm very happy to have all the recipes in one place, I'm cringing at the photography. I'm not a great photographer even under the best of circumstances, but taking a quick snapshot in a dark classroom with 32 kids clamoring for samples leads to some pretty lousy photos. If/when I make these recipes again at home, I'll take the time to redo the photos.

---------

As an Amazon Affiliate, I would be remiss if I didn't remind you that Amazon Prime Day starts on Monday. Find these and thousands of other items at Amazon. I get a small commission for purchases and using my affiliate links won't cost you anything more. Thank you!

6/26/18

Hands-On History

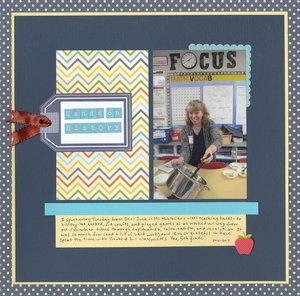
I did a thorough job documenting the hands-on history I taught to Trevor's fifth grade class here on the blog, but I wanted some record in the scrapbook album. I made this page, using what might be the only picture of me taken during a year's worth of history lessons. 

Hands-On History (affiliate link)

What fun memories! I really do love teaching, particularly when I get to come in when I want, teach my favorite subject, and leave all the discipline, paperwork, staff meetings, etc. to the actual classroom teacher! Thanks, Ms. Muhlbeier. It was an honor and a privilege to teach your students.

6/5/17

Patriotic Mystery Picture Graph

As part of my last history lesson with the fifth graders, we did a patriotic mystery picture graph. They enjoyed it and were very excited to see what their pictures would be. Half the kids worked on this Liberty Bell, while the other half solved this USA rocket ship


I challenged the early finishers to design their own patriotic mystery picture graph. I demonstrated how to draw a picture on graph paper, then write down the ordered pairs.

Here is the one that I designed:


I did a version with one quadrant, which I've shown above, plus the same picture using four quadrants. You are more than welcome to use either with your students or children. Please do not share it online, though I do appreciate links to this post. 


I have one more day with the fifth graders, but it's not history-related this time. I'll share it soon. 

5/26/17

Rhubarb Shrub

After making (and enjoying) blueberry shrub with the fifth graders, I was eager to try making rhubarb shrub. (I'm obsessed with rhubarb.)

I followed the same process I'd used with the blueberries. Combine equal amounts of fruit and sugar and let it sit at room temperature for 2 days, stirring each day. Strain that syrup from the pulp


Add an equal amount of apple cider vinegar to the syrup. At this point, I tasted my shrub. Yikes! Sticky-sweet blueberry syrup had been perfect with the tartness of the apple cider, but tart rhubarb syrup combined with apple cider tasted like the equivalent of being punched. Lesson learned - when using a sweet fruit, an equal amount of sugar to fruit will make an appropriate syrup for shrub. When using a tart fruit, add extra sugar so that you don't end up with something so tart it's undrinkable!

I added a bunch more sugar to the shrub and let it mellow in the refrigerator for a few days. Finally, I had a delicious drinking vinegar. There was a still a small amount of blueberry shrub left, so I poured each so I could compare their colors side by side. Beautiful. 


Come winter when our orange tree goes crazy and we have more oranges than we can use, remind me to try making orange shrub, OK? Thanks!

5/22/17

Embossed Great Seal

The fifth graders and I are wrapping up our study of US history by looking at national symbols and icons. We examined money and noticed that the Great Seal appears on the reverse of a $1 bill. If you look carefully at the Seal, the number 13 is present over and over, representing the original 13 colonies. The eagle is clutching 13 arrows in his left talon and an olive branch with 13 leaves in his right. This eagle's head is turned toward the olive branch, showing that the US strongly prefers peace over war.


We made an embossed version of the Great Seal to take home.


---------

Embossed Great Seal


Materials:

  • scissors
  • printed copy of the Great Seal (4" diameter to fit the plates)
  • foam plate (we used 6" plates)
  • pencil or ballpoint pen
  • black paint
  • paper towel


Steps: 


1. Cut out the seal so that it fits in the center of the foam plate. 


2. Use the pen or pencil to trace over every part of the design. Press hard enough to leave a deep impression, but not so hard that you poke through the plate. 


3. Rub a small amount of black paint over the design, then wipe it away. The paint will stay in the embossed area, revealing the design. Add a solid coat of paint around the rim, or leave it plain. 


To see other patriotic crafts that are quick and easy to make, check out the May edition of Craft Lightning!

5/16/17

Westward Expansion

The fifth graders and I worked on a project together to answer the question, "How did the United States grow from the 13 original states to the 50 we have now?" Obviously, there are many factors that contributed to the westward expansion of the United States. I selected 35 key events, inventions, discoveries, etc. that were instrumental in the growth of the US and assigned one to each of the 34 students. 

I assigned myself the discovery of gold at Sutter's Mill in Coloma, CA in 1848. (The kids studied the Gold Rush in-depth last year as 4th graders and even went to a 3-day Gold Rush Camp, so it wouldn't have been fair for one of them to get that one.) I modeled putting a summary sentence (or two) at the top of the paper, then illustrating it with pictures that help explain the concept. This was my sample:


I put it together as a slideshow with the events in chronological order. The slides without pictures were assigned to students who did not turn in their work. 


Did you learn anything new about the Westward Expansion of the United States? I hope so!

5/11/17

Colonial Syllabub (Kid-friendly, of course)

Have you ever heard of syllabub? It's a drink and a dessert (sort of the way a milkshake is a drink and a dessert) that was served for special occasions during colonial times. The fifth graders and I are wrapping up our study of the American Revolution, so we celebrated with some tasty syllabub. Syllabub can be made with wine or with apple cider. We chose the kid-friendly version, of course.


Apple Cider Syllabub

                               
                                                  2 cups apple cider                  juice of half a lemon
                                                  2 cups heavy cream               1 T. sugar


Use a funnel to pour 2 cups of cider and 2 cups of cream into a clean, empty bottle with a screw-top lid. Add sugar and the juice of one lemon. 


Put the lid securely on top and shake vigorously until the liquid thickens somewhat, approximately 5-10 minutes. Pour it into cups. (The colonists would have used a syllabub glass, which is pretty awesome. But alas, I don't have one, let alone 34.)


As you can see, the syllabub looks like cream at this point. It takes about 30 minutes for it to separate into the layers that characterize a syllabub. While we waited for our drinks, we did Reader's Theater. Half the class performed one play about the Constitution for the other half, then we switched and they performed a second play.


Finally, we enjoyed our syllabub. Yum! Not everyone liked it, but most did. It reminds me a little bit of an Orange Julius, if an Apple Julius were a thing. 

---------


4/28/17

Blueberry Shrub

Time to catch up with what's been going on with the fifth graders! The same day we made Hasty Pudding, we did the prep work for our next historical recipe, Blueberry Shrub.


Shrub dates back to colonial times. It was one of many ways that people could preserve fresh fruit in the days before refrigeration. To make a shrub, combine equal amounts of fruit and sugar. (It's a lot of sugar, but trust me.) We used blueberries, but you can use other fruit. Let this sit at room temperature for 2 days. Stir once or twice. The sugar won't entirely dissolve, but most of it will. 


At this point, you can proceed with making your shrub. I'm only in the classroom once a week, so I popped it into the refrigerator until my next teaching session. 

Strain the liquid from the fruit, pressing down to get as much syrup extracted as you can. (You don't need the fruit for this recipe, but don't throw it away. It is amazing on Greek yogurt.) Add an equal amount of apple cider vinegar to the syrup. You can sip it at this point. It is quite tart, but very tasty. If you have time, let it mellow in the fridge for a few days, weeks, or even months. It will become much less harsh. If it is still a bit too harsh for your taste, or if you want to guzzle rather than sip, add water. (Sparkling water is fun.) 

Cheers!


Here's the 'recipe' in picture form. It really is ridiculously easy.  


Enjoy! I'm going to be trying this with other fruits, starting with rhubarb. It's been awhile since I've fed my obsession


---------


4/17/17

Hasty Pudding

The fifth graders and I are continuing our study of the American Revolution. We learned about key battles in the war and did some activities related to the song Yankee Doodle. We made Hasty Pudding, which is referenced in the American version of the song. 


Hasty Pudding

(36 small servings)


                                 3 cups cornmeal                                         9 cups boiling water
                                 3 cups cold water                                       1 tsp. salt

Combine the cornmeal and cold water. Set aside. In a heavy saucepan, bring 9 cups water and salt to a boil. Carefully pour in the cornmeal mixture, stirring constantly to make sure it doesn't lump. Turn the heat to low and stir frequently until the mixture is very thick (10-15 minutes). Spoon into bowls. Serve with a pat of butter, maple syrup, brown sugar, molasses, or cream. (We used brown sugar and cream.)


On to the Declaration of Independence!

4/11/17

Boston Tea Party Drawing

The fifth graders made boycott posters after we studied the various taxes Parliament levied on the American colonists. For our next session together, I did a draw-along as I taught them about the Boston Tea Party.


I drew on the white board and obviously wasn't able to photograph myself as I was teaching, but I did take pictures as I made my sample drawing. 

---------

Boston Tea Party Drawing


Materials: 


  • white drawing paper
  • colored pencils

Steps:


Orient your paper horizontally (landscape). With a brown colored pencil, draw the top portion of five rectangular prisms in the middle third of the paper. (I use geometry terms, like rectangular prism, when teaching directed drawings to reenforce what they are studying in math. This lesson integrates math, social studies and art with listening skills.)


Use red and blue pencils to draw the British flag on the front face of each prism. 


With a black pencil, add the word TEA and the logo of the British East India Company on the short faces of the rectangular prisms. Use the brown pencil to shade in the prisms to look like wooden crates.


Use a blue pencil to make short, horizontal strokes around the boxes to mimic water.


Use different blues and purples to fill in the water. Use greys and blacks to make shadows immediately below each of the prisms. 


Add "Boston: December 16, 1773" and "No taxation without representation!" to the poster. 


When our posters were done, we drank Liberty Tea (made with local fruits, herbs, etc) instead of British black tea. 


I always tell my students that studying history is a bit like reading a mystery book when you already know how it's going to end. They know that the American colonists are going to declare independence and that the United States will win the war against England, but how they accomplish that exceedingly unlikely result is fascinating. It's fun to help the students put the pieces together of what they already know with the who, what, when, where, why and how our country came to be. 

Next time, the Declaration of Independence!

4/6/17

Colonial Boycott Posters

I'm continuing to have a blast teaching US history in Trevor's fifth grade class. We're currently studying the events that led up to the American Revolution. After a discussion about the colonists' loyalties and ties to Britain, we enjoyed black tea with sugar and a snack of bread and homemade butter. We watched a video about the French and Indian War and learned that the British taxed the colonists to pay for the war debt. Like many of the colonists at the time, many of the students felt that it was unfair for Parliament to tax the colonists who did not have representation there. 

We learned about the Sons of Liberty and Daughters of Liberty who organized boycotts against the British goods in protest of the taxes. We looked at examples of modern-day boycott posters and observed that many boycott posters feature large print, capital letters, the colors red and black, skulls, and catchy slogans, and that almost all are vertical. That became our inspiration for posters that the colonists would have made to spread the word about their boycotts. Here are a few of my favorites, starting with Trevor's:


Better not get used to that British tea... major changes are ahead for the American colonists of the 1770s!