9/29/23

Cooking with Cranberries, and Introducing the Cranberry Faux-Mo

One of the highlights from our time in Massachusetts in June was touring a cranberry bog. It was really interesting and we learned so much about cranberries. Of course, we were several months too early to see the harvest, which is typically mid-September to early-November. If you are anywhere near the Bay State, many Massachusetts cranberry growers are offering public bog tours right now! 

The wonderful people of the Cape Cod Cranberry Growers Association (CCCGA) sent me a box of freshly harvested cranberries last week. What a treat! We don't get fresh cranberries around here, except in bags at the grocery store right before Thanksgiving. I freeze those so that I can have cranberries whenever I want, but nothing beats fresh. Look at these beauties! 


The CCCGA website (cranberries.org) has dozens of cranberry recipes that I've been eager to try. Some use dried cranberries or cranberry juice, but since those are easily accessible year-round, I focused on recipes that feature fresh berries. With a plan in place, I invited friends over and cooked up a cranberry-themed dinner. 

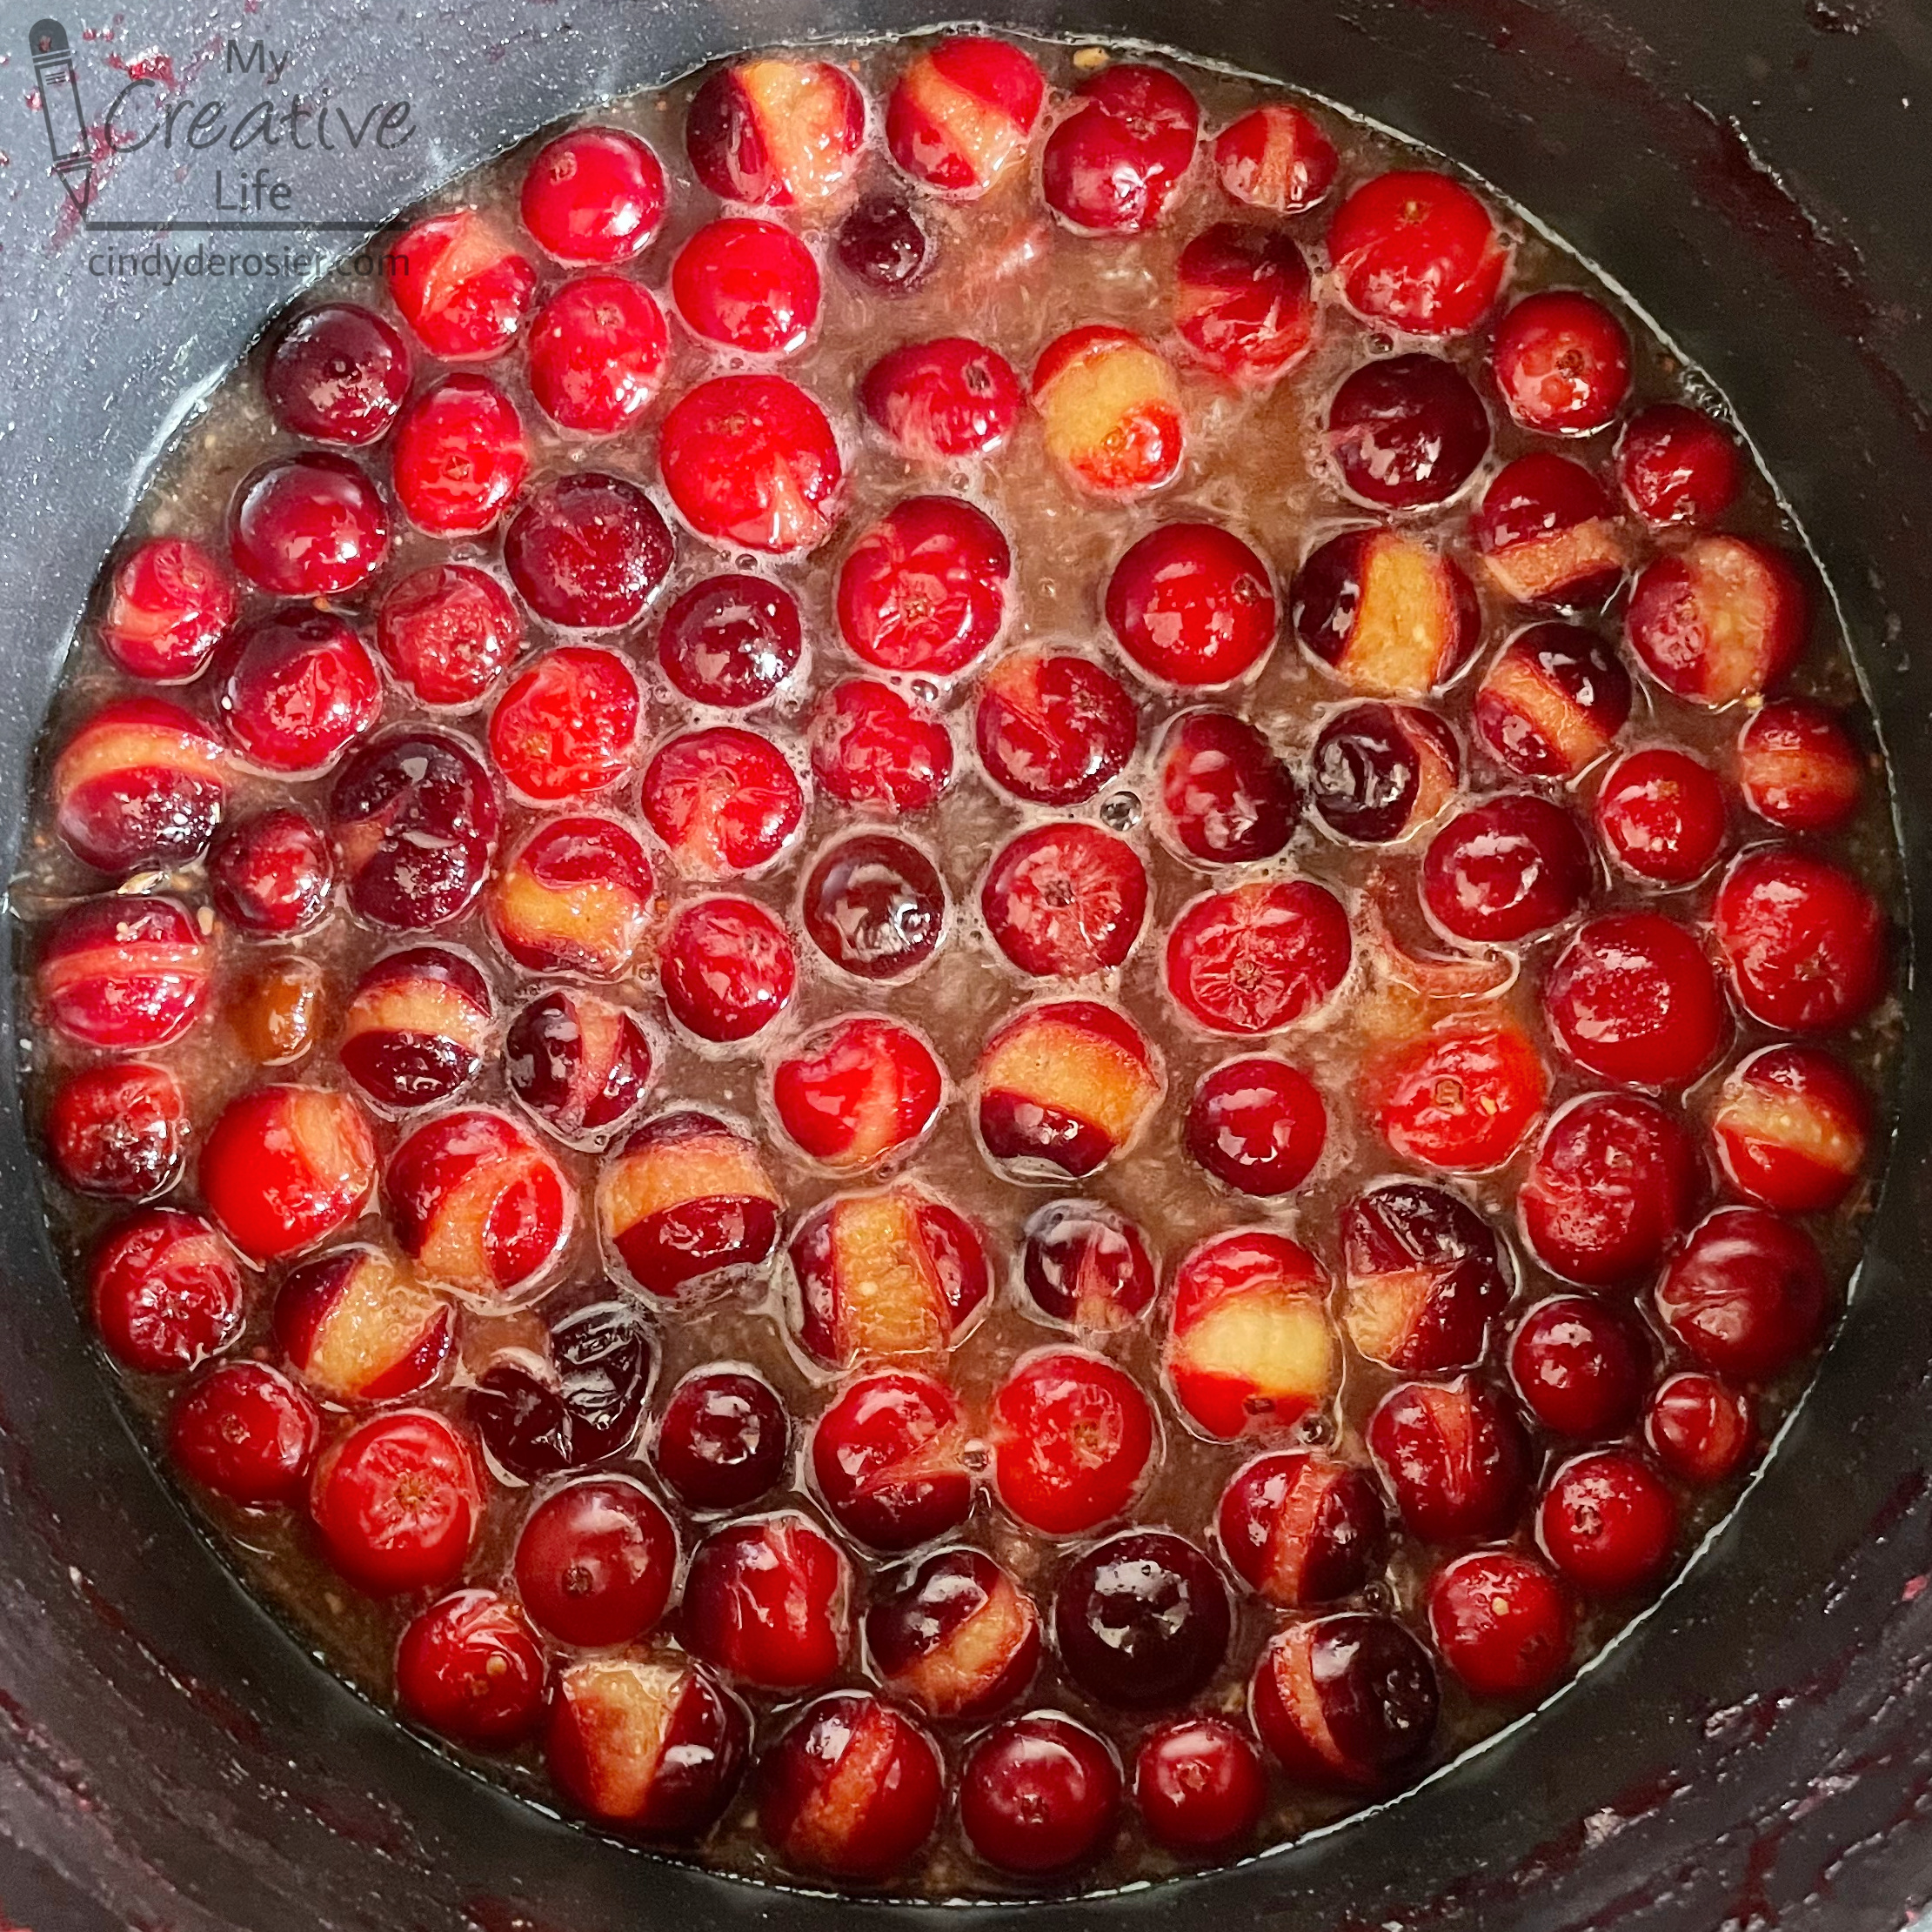
Many of the recipes start by cooking the cranberries in a small amount of water. I love watching (and hearing) them pop! 
 

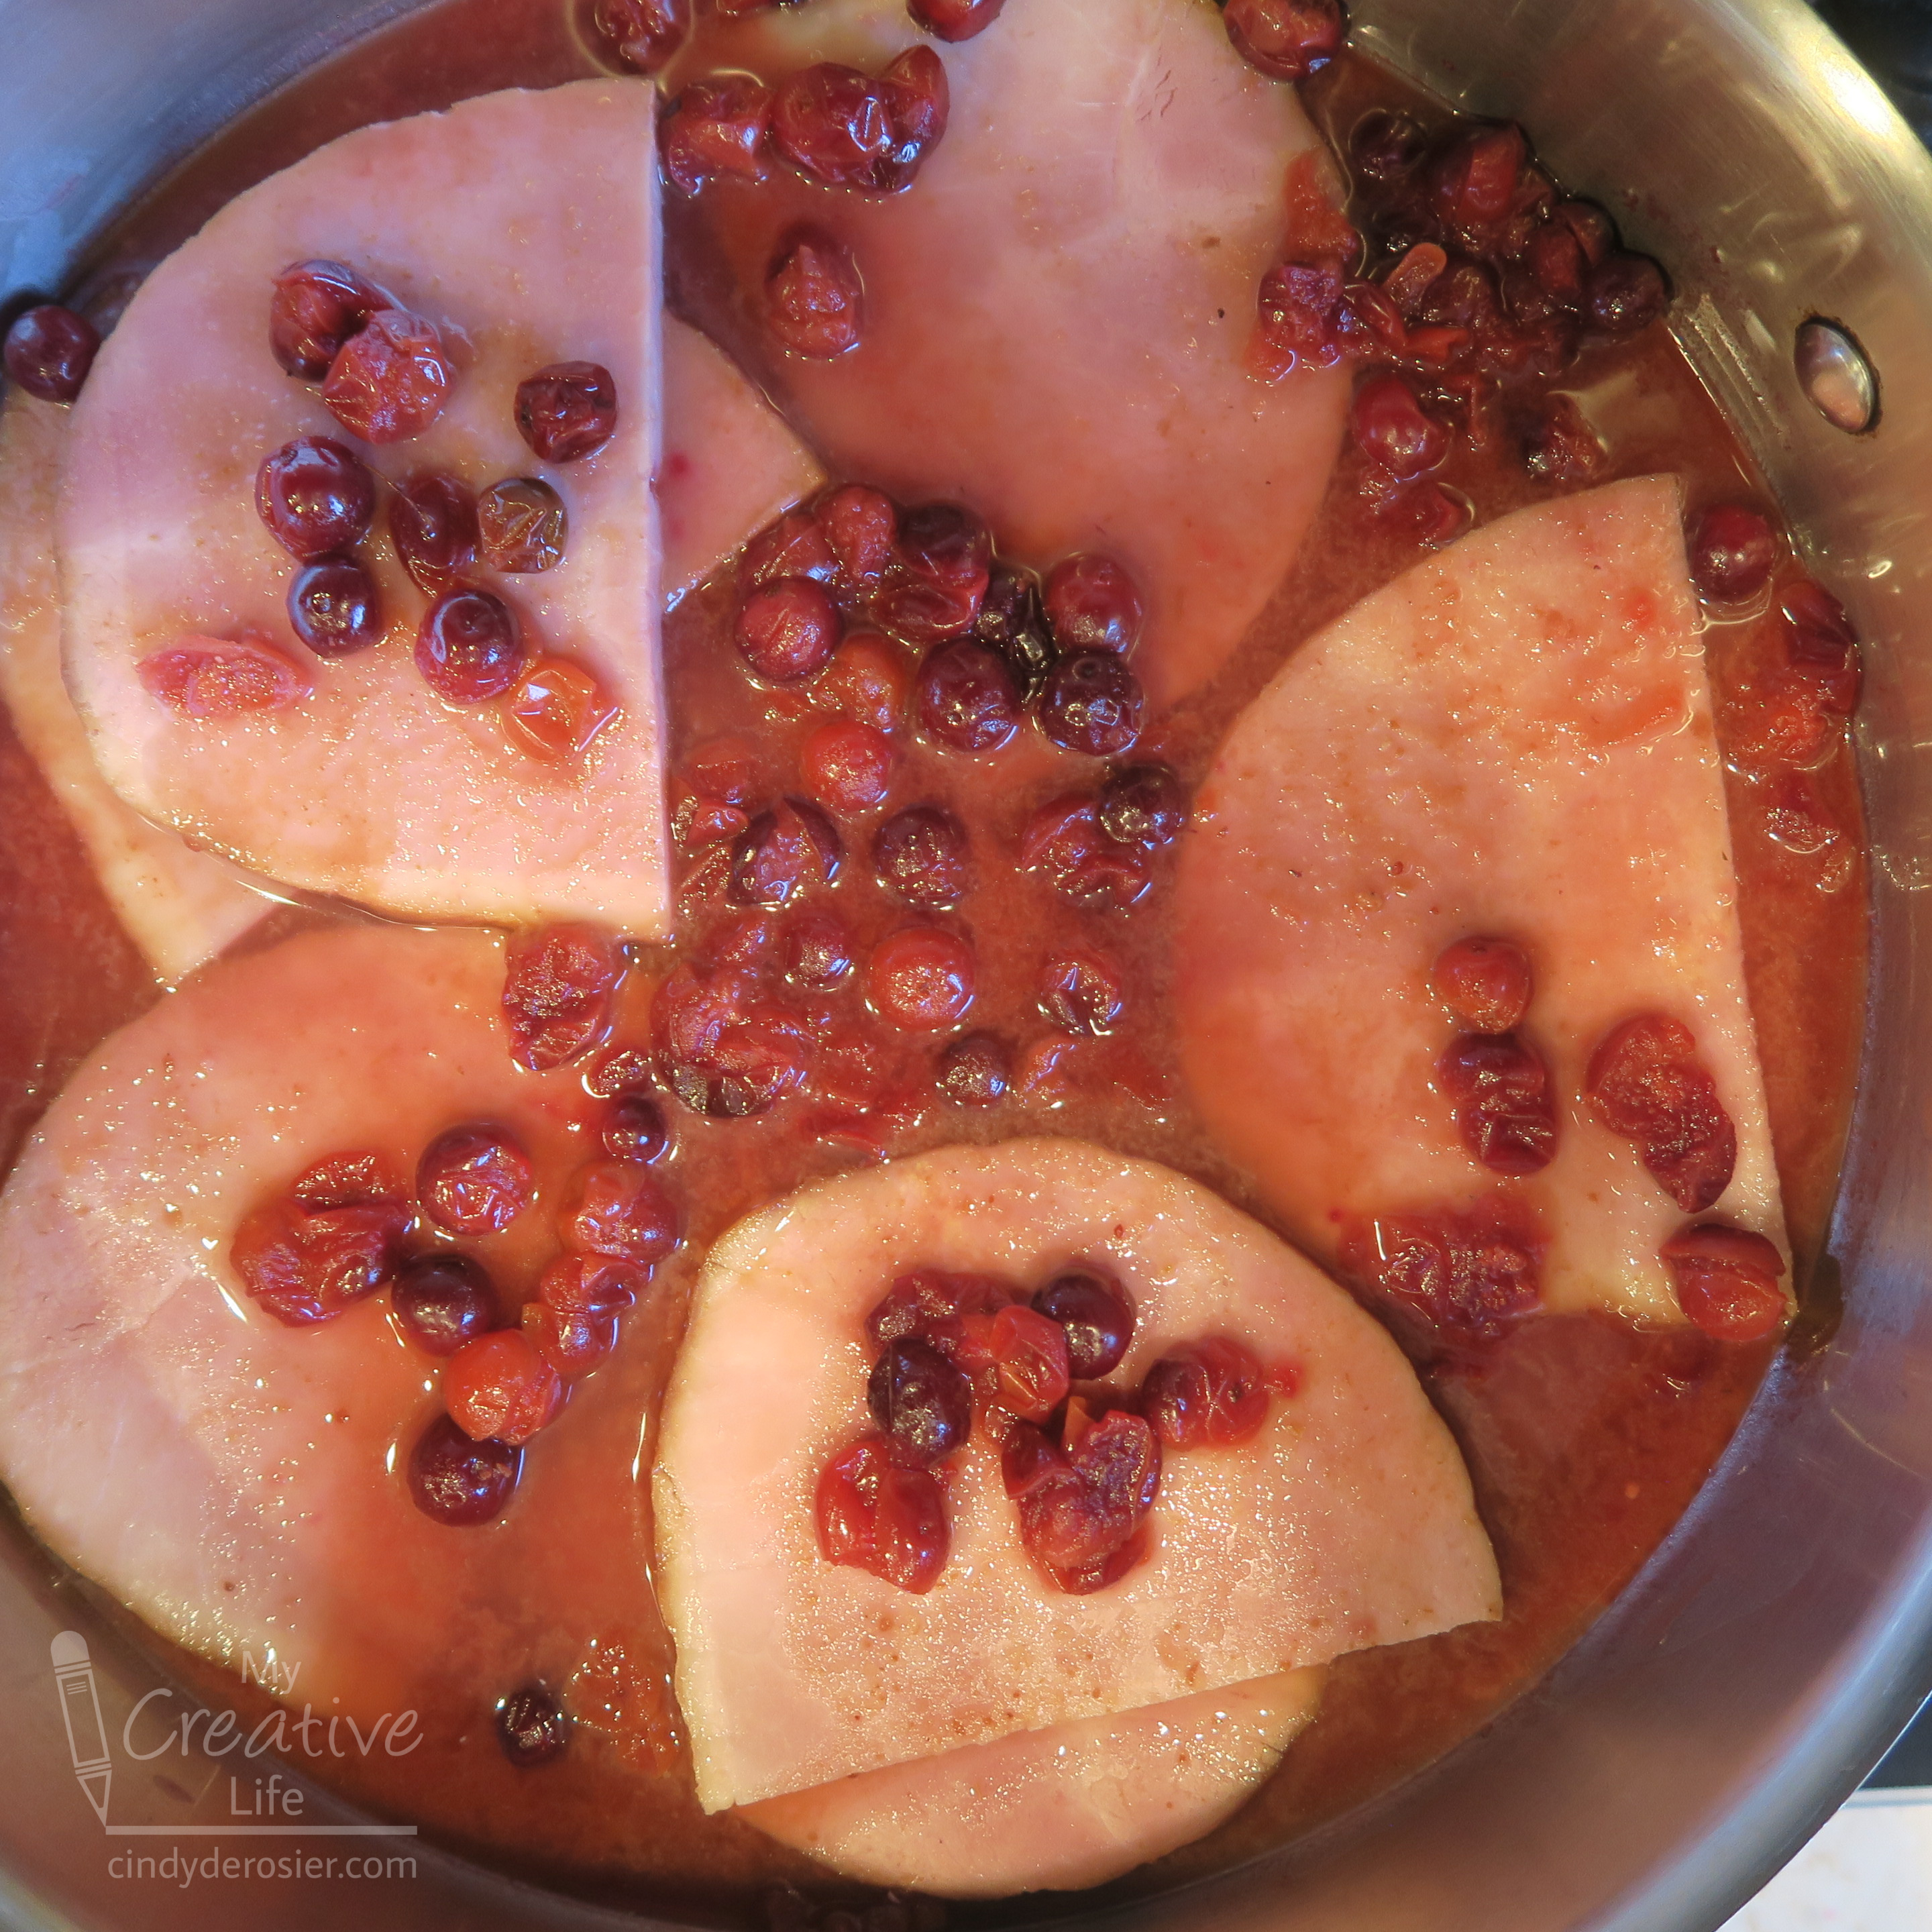
For the main course, I served ham with Cranberry Maple Pan Sauce. The original recipe uses pork chops, but I traded one form of pork for another. It was delicious - a perfect balance of sweet and savory, with the right amount of tang. More than one person spooned the pan sauce over their baked potatoes and steamed broccoli, the two non-cranberry sides that I served!


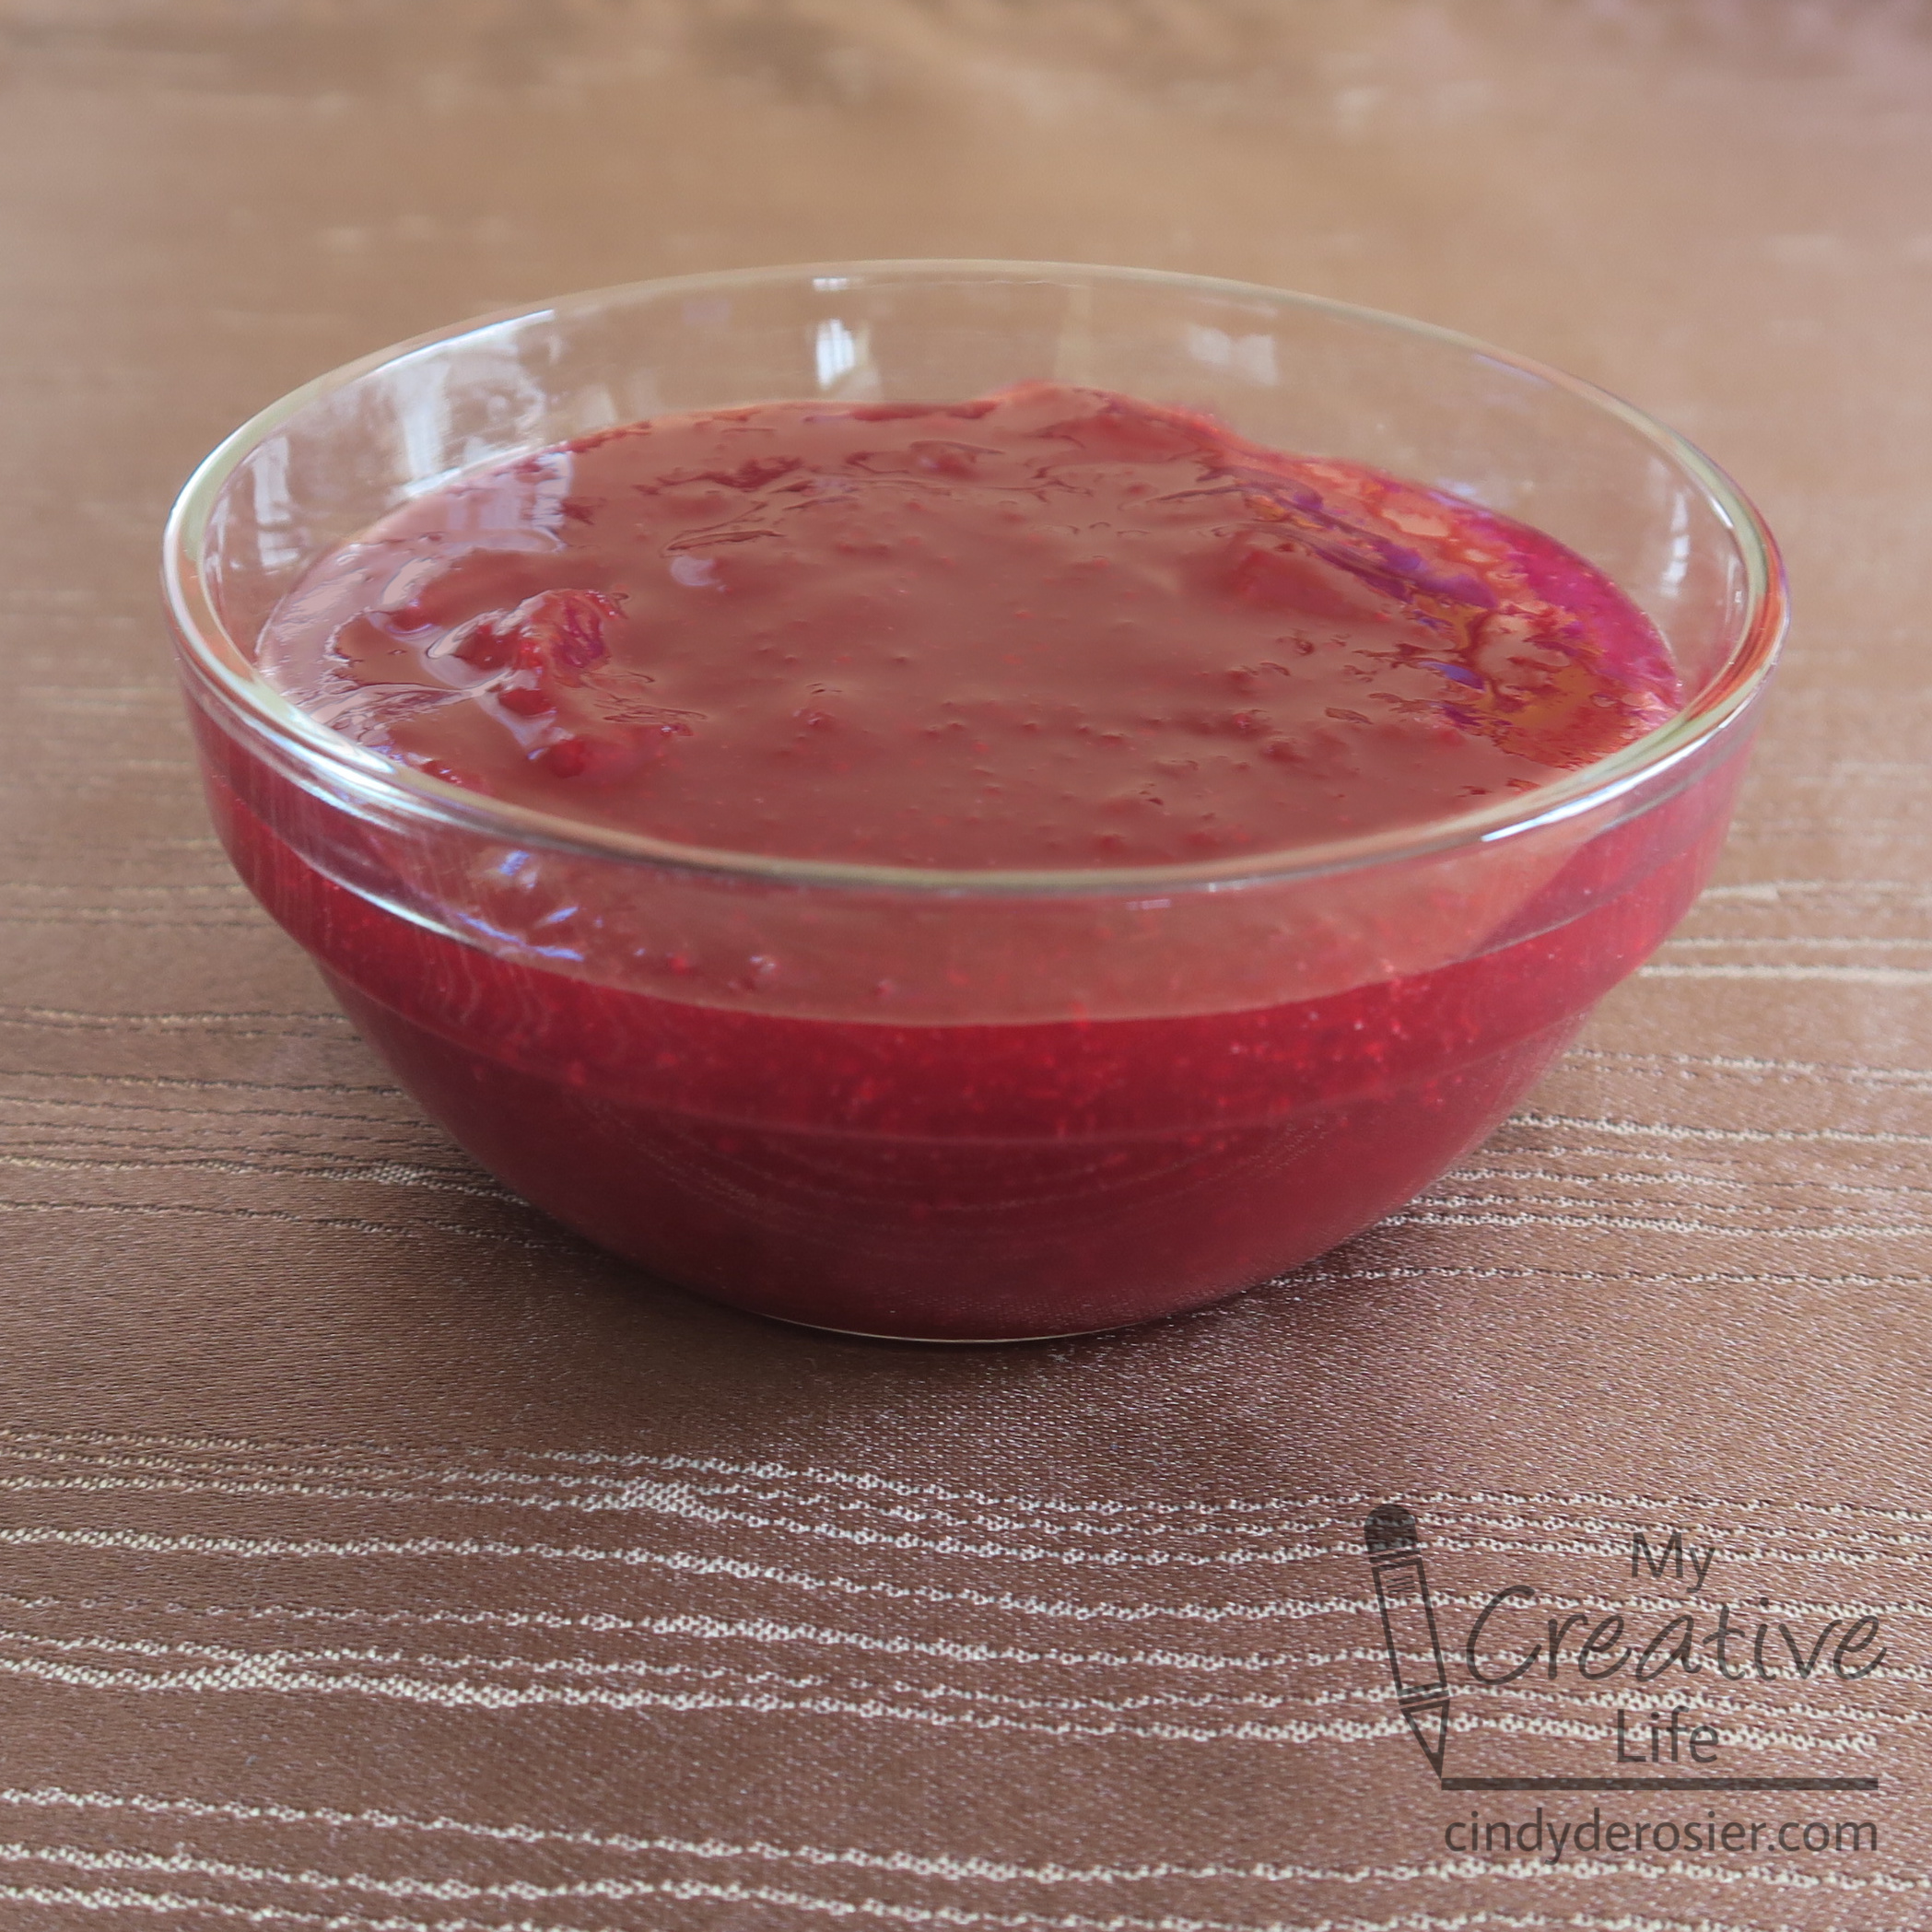
This 5-Minute Cranberry Sauce couldn't be easier and is so good. I've never put lemon juice in my cranberry sauce before and now I'm never going to do it any other way. 


These Cranberry Rangoons are listed as an appetizer, but I served them with the rest of the meal. The filling is delicious and very unexpected. I didn't love the way the wonton wrappers dried out in the oven, so next time I'll be frying them so that they're golden and crispy. 


Dessert was Chocolate Chip Cranberry Oatmeal Cookies. Yum!! They have walnuts as well, which provide such a great crunch and a contrast to the chewy cranberries. Both pair so well with chocolate. 


The inspiration for our drinks came from the Cranberry Mojitos recipe. I removed the alcohol to make it kid-friendly, tweaked the recipe a bit, and renamed the drink. 


Cranberry Faux-Mo


To make a Cranberry Faux-Mo, put a sprig of fresh mint and a scant teaspoon of sugar into a glass. Muddle them together to release the mint flavor. Remove the mint. Add equal parts of cranberry juice and limeade. Garnish with fresh cranberries and another mint sprig. 

-------


Our dinner was fantastic and it was so much fun to try out all the recipes. But I didn't stop there. I had more fresh cranberries to use and more recipes I wanted to try. So far, I've made Cranberry Sorbet...


..... and Cranberry Mousse. Soooo good!


There are a lot more recipes at cranberry.org that I am eager to try. I'm out of fresh cranberries, so I'll have to stick with the recipes that use dried cranberries or cranberry juice for now. But as soon as I get my hands on more fresh cranberries, I'll have to decide which of the recipes to try next!

If you live in a place where cranberries grow, shop local! You can find a list of growers in and around Massachusetts on the CCCGA website. Thanks again to the CCCGA for the delicious cranberries!


9/28/23

Dandelion Painting, Using Posca Markers

I recently learned that dandelions grow on every continent except Antarctica. They are entirely edible - the flowers, stems, leaves, and roots. The name dandelion comes from French and means "lion's tooth." And it turns out that they're really fun to draw. 


I painted a page in my sketchbook with Folk Art Midnight, let that dry, then used a white Posca marker to draw the dandelions (affiliate links). I started with the stems, then made oval blobs at the end of the stems. Then I used a flicking motion to create the florets coming from the oval. I added a tiny scribble at the end of each to mimic the fluffiness. I drew some florets randomly being carried off by the wind. The last thing I did was draw the grass. 

I've never tried to draw a dandelion before and working only in white was a great way to start. I didn't have to worry about color or shadows, which took away a whole level of difficulty. It was a fun exercise and I'm happy to have it in my sketchbook. 


9/27/23

Trevor's 50 State Album - Completed and in Chronological Order!

The physical version of Trevor's 50 State Album is alphabetical, which is the same way I've showcased it on my US Travel page. But after arranging the digital pages chronologically, I love it even more! You can literally see Trevor grow up, from his birth in California in 2006 to visiting his 50th state at age 17 in 2023. 
 

I'm still working on a way to display the album digitally as a flipbook. But for now, I'm so happy to see it this way. 


9/26/23

Butterfly Sympathy Card

I say it every time, but sympathy cards are the most difficult to make by far. 


Every time I have to make one, I tell myself I should make extras to have on hand. But then I don't. At the very least, I should stamp and emboss sentiments ahead of time. That will make it just a little bit easier to assemble sympathy cards as needed.

9/25/23

Paper Plate Apples with Peekaboo Seeds

 Tis the season for apple crafts! 


Paper plate make great apples and they're even more fun when they're hiding a surprise inside! Those are real apple seeds, arranged just the way they were in the apple they came from. Affiliate links below. 


Paper Plate Apples with Peekaboo Seeds


Materials:


Steps:

Carefully cut an apple in half horizontally and observe the star pattern that the seeds make. Remove the seeds. Rinse them and set them aside to dry. 

Choose the color(s) for the apple(s) you're making. I made a solid red, a solid green, and a solid yellow, but you can mix colors to mimic different varietals. You can see examples of that with this apple craft, which uses the same tissue paper technique. 

Tear the tissue paper into strips. Use a paintbrush to moisten the back of a paper plate (the non-eating side) with a little bit of undiluted Sta-Flo, then place a piece of tissue paper on it. Paint over the top with more starch. Repeat until the back of the plate is covered. Set it aside to dry. Glue the apple seeds to the front (eating side) of a second paper plate. 

When everything is dry, carefully trim off any excess tissue paper from the apple and then cut it in half. Arrange those pieces on top of the plate with the seeds. Use a craft pick (adults only!) to poke a hole through the bottom of each side of the apple, then use a brad to attach each piece.  


Cut apple stems from brown cardstock and glue them to the back of the apple. Fold a piece of green cardstock in half, then cut an arched shape (rainbow, hilltop, etc) along the fold. Open it up and glue the leaf to the back of the apple. 


9/22/23

Custom Diamond Art from Heartful Diamonds

I've done a lot of diamond art since I first discovered Diamond Dotz in 2017. I really enjoy it. The process is relaxing and the finished art is so sparkly and pretty. All of the early work I did with diamond art was with ready-made kits, then I started dreaming up projects to use up leftover diamonds (gems, dotz, drills... whatever you want to call them). I've customized pre-made kits more than once. The most fun I've had with diamond art was designing the projects for two diamond art books by Leisure Arts

On a whim, I decided to do something I've never done - order a custom diamond art kit. It turns out there are a zillion companies that do custom diamond art. I spent 5 minutes eliminating the sketchiest looking sites and settled on one that looked very promising, Heartful Diamonds. Without giving it any thought (or even reading through all the information on their website), I ordered a 12x12" square design with my travel logo. With shipping, it was about $30. It took about two weeks to arrive. 

At first glance, it was just what I expected. 


As I looked closer, there were a bunch of things I hadn't expected. Some were good. I love the fact that a company called Heartful Diamonds uses heart-shaped bubble wrap (affiliate link here and below).


The wax is heart-shaped too! And there are two pens in the kit, as well as multi-placer tips. I've seen those before but never tried them. Fun!


This chart is cool. It shows how many diamonds of each color there are in the kit. 


But... why are there SO many different colors? 


My logo, which I designed digitally, has seven colors. There's blue (globe), green (globe and pencil), pink (globe and pencil), tan (pencil), light grey (pencil), black (globe and pencil), and dark grey (top of globe base). 


With the white background, I should have eight sets of diamonds. Instead, there are 28. There are no shadows or color variations in the file I uploaded, so there should be no reason for 20 additional shades. 

Take a look at the text. It should be one color: black. I count 11 different colors in just the letter o. 


I know weird things happen when you try to convert certain shapes into pixels, but that much color variation for a single letter is crazy. Also crazy: this heart. It has three different shades. The bottom looks like a heart (sort of) but the top sure doesn't. I'll be tinkering with the text and the heart to make them look more like the way I want them. It should be a relatively easy fix.  


I was disappointed that the kit came with square diamonds. I prefer round for both their ease of application and their extra sparkle. But... it turns out that is 100% my fault. Remember how I said I ordered a 12x12" square design? It turns out I ordered a 12x12" design with square diamonds. It clearly says on the website that you can choose round or square diamonds. I was so focused on getting a square canvas that I didn't notice that I was actually selecting square diamonds! I love that they offer both. 

One more thing to mention is that the colors on the canvas aren't quite the same as the gems themselves. Not a big deal, since the canvas gets covered. Check out what's printed on the canvas vs. the diamonds themselves. 


Overall, I'm happy with my purchase and looking forward to getting started on my diamond art. 

Have you done a custom diamond art project? If so, what company did you use and how was the quality?

9/21/23

Trevor's 50 State Album - South Dakota and North Dakota

These are the last two pages in Trevor's 50 State Album: South Dakota and North Dakota. 


It makes me enormously happy to look through the now-completed album. It sparks so many great memories. I had the finished album on display during our 50 State Party and quite a few guests looked through it. 

I was hoping to make a GIF or a flipbook of the completed album, both as a backup to the physical album and to share here on the blog, but I've run into some technical snags. I'll eventually figure out the best way to share the album digitally, but for now you can see the thumbnail of each of the pages on my US Travel page. They're arranged alphabetically there, just like the physical album. When I make the GIF and/or flipbook, they'll be chronological. That way you can literally see Trevor grow up, from birth to age 17, as he visits each of the 50 states. 


9/20/23

Trevor's 50 State Album - Rhode Island, Connecticut, Vermont, and New Hampshire

I just realized that I never shared the pages Trevor added to his 50 State Album following our New England trip. Four of the states we visited were new, so that means four more competed pages. 


I always enjoy seeing which photo Trevor chooses for the album. Early on, we established two "rules" - the photo must be horizontal and Trevor must be in it. He's almost always posing, smiling for the camera. I can only think of one state's page where he isn't looking at the camera. But he does have a big smile. That was a fun (busy!) day

I'll share the last two pages tomorrow, and tell you about my plans for the now-finished album. 


Playhouse by Paper House