10/31/23

The Fraidy Bunch

Here's the story of a hairy lady
Who was bringing up three very witchy ghouls
All of them could scare, like their mother
The youngest one closed schools. 


It's the story of a monster trainee
Who was busy with three zombies of his own
They were former men, no longer living
Yet somehow they roamed.


Til the one day that the monsters met each other
As they looked around for humans they could munch
Soon this group would always scare together
And that's the way they became The Fraidy Bunch. 


Happy Halloween!


10/30/23

Potholders and Dishtowel Hidden Money Gift

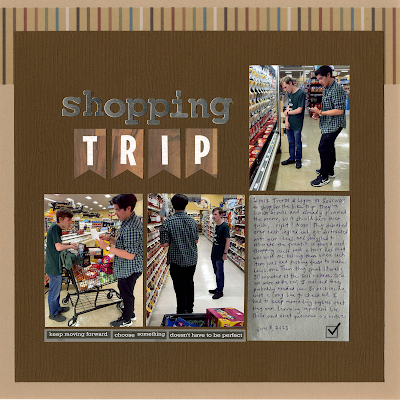
My nephew turned 23 yesterday. I have been giving Timothy hidden money for every gift-giving occasion since he was 13. Almost all of the 37 money gift tutorials I have on my blog were for him. It is getting increasingly difficult to come up with an idea that is both new and able to be mailed out of state, but I enjoy the challenge. 

For his 23rd birthday, I gave him two homemade potholders and a dishtowel. 


Making the potholders was a major blast from the past. I was obsessed with my potholder maker as a kid in the 1970's. Getting a fresh bag of loops was the best! I still have my red metal 1970's potholder maker (affiliate links here and below); at some point I got a plastic one (which they sell in a variety of sizes). Some have instructions to make other things, like this awesome pineapple. Seven-year-old Cindy would have circled that in the Sears catalog for sure! Fifty-one-year-old Cindy *might* buy some yellow and green loops and do some experimenting. 

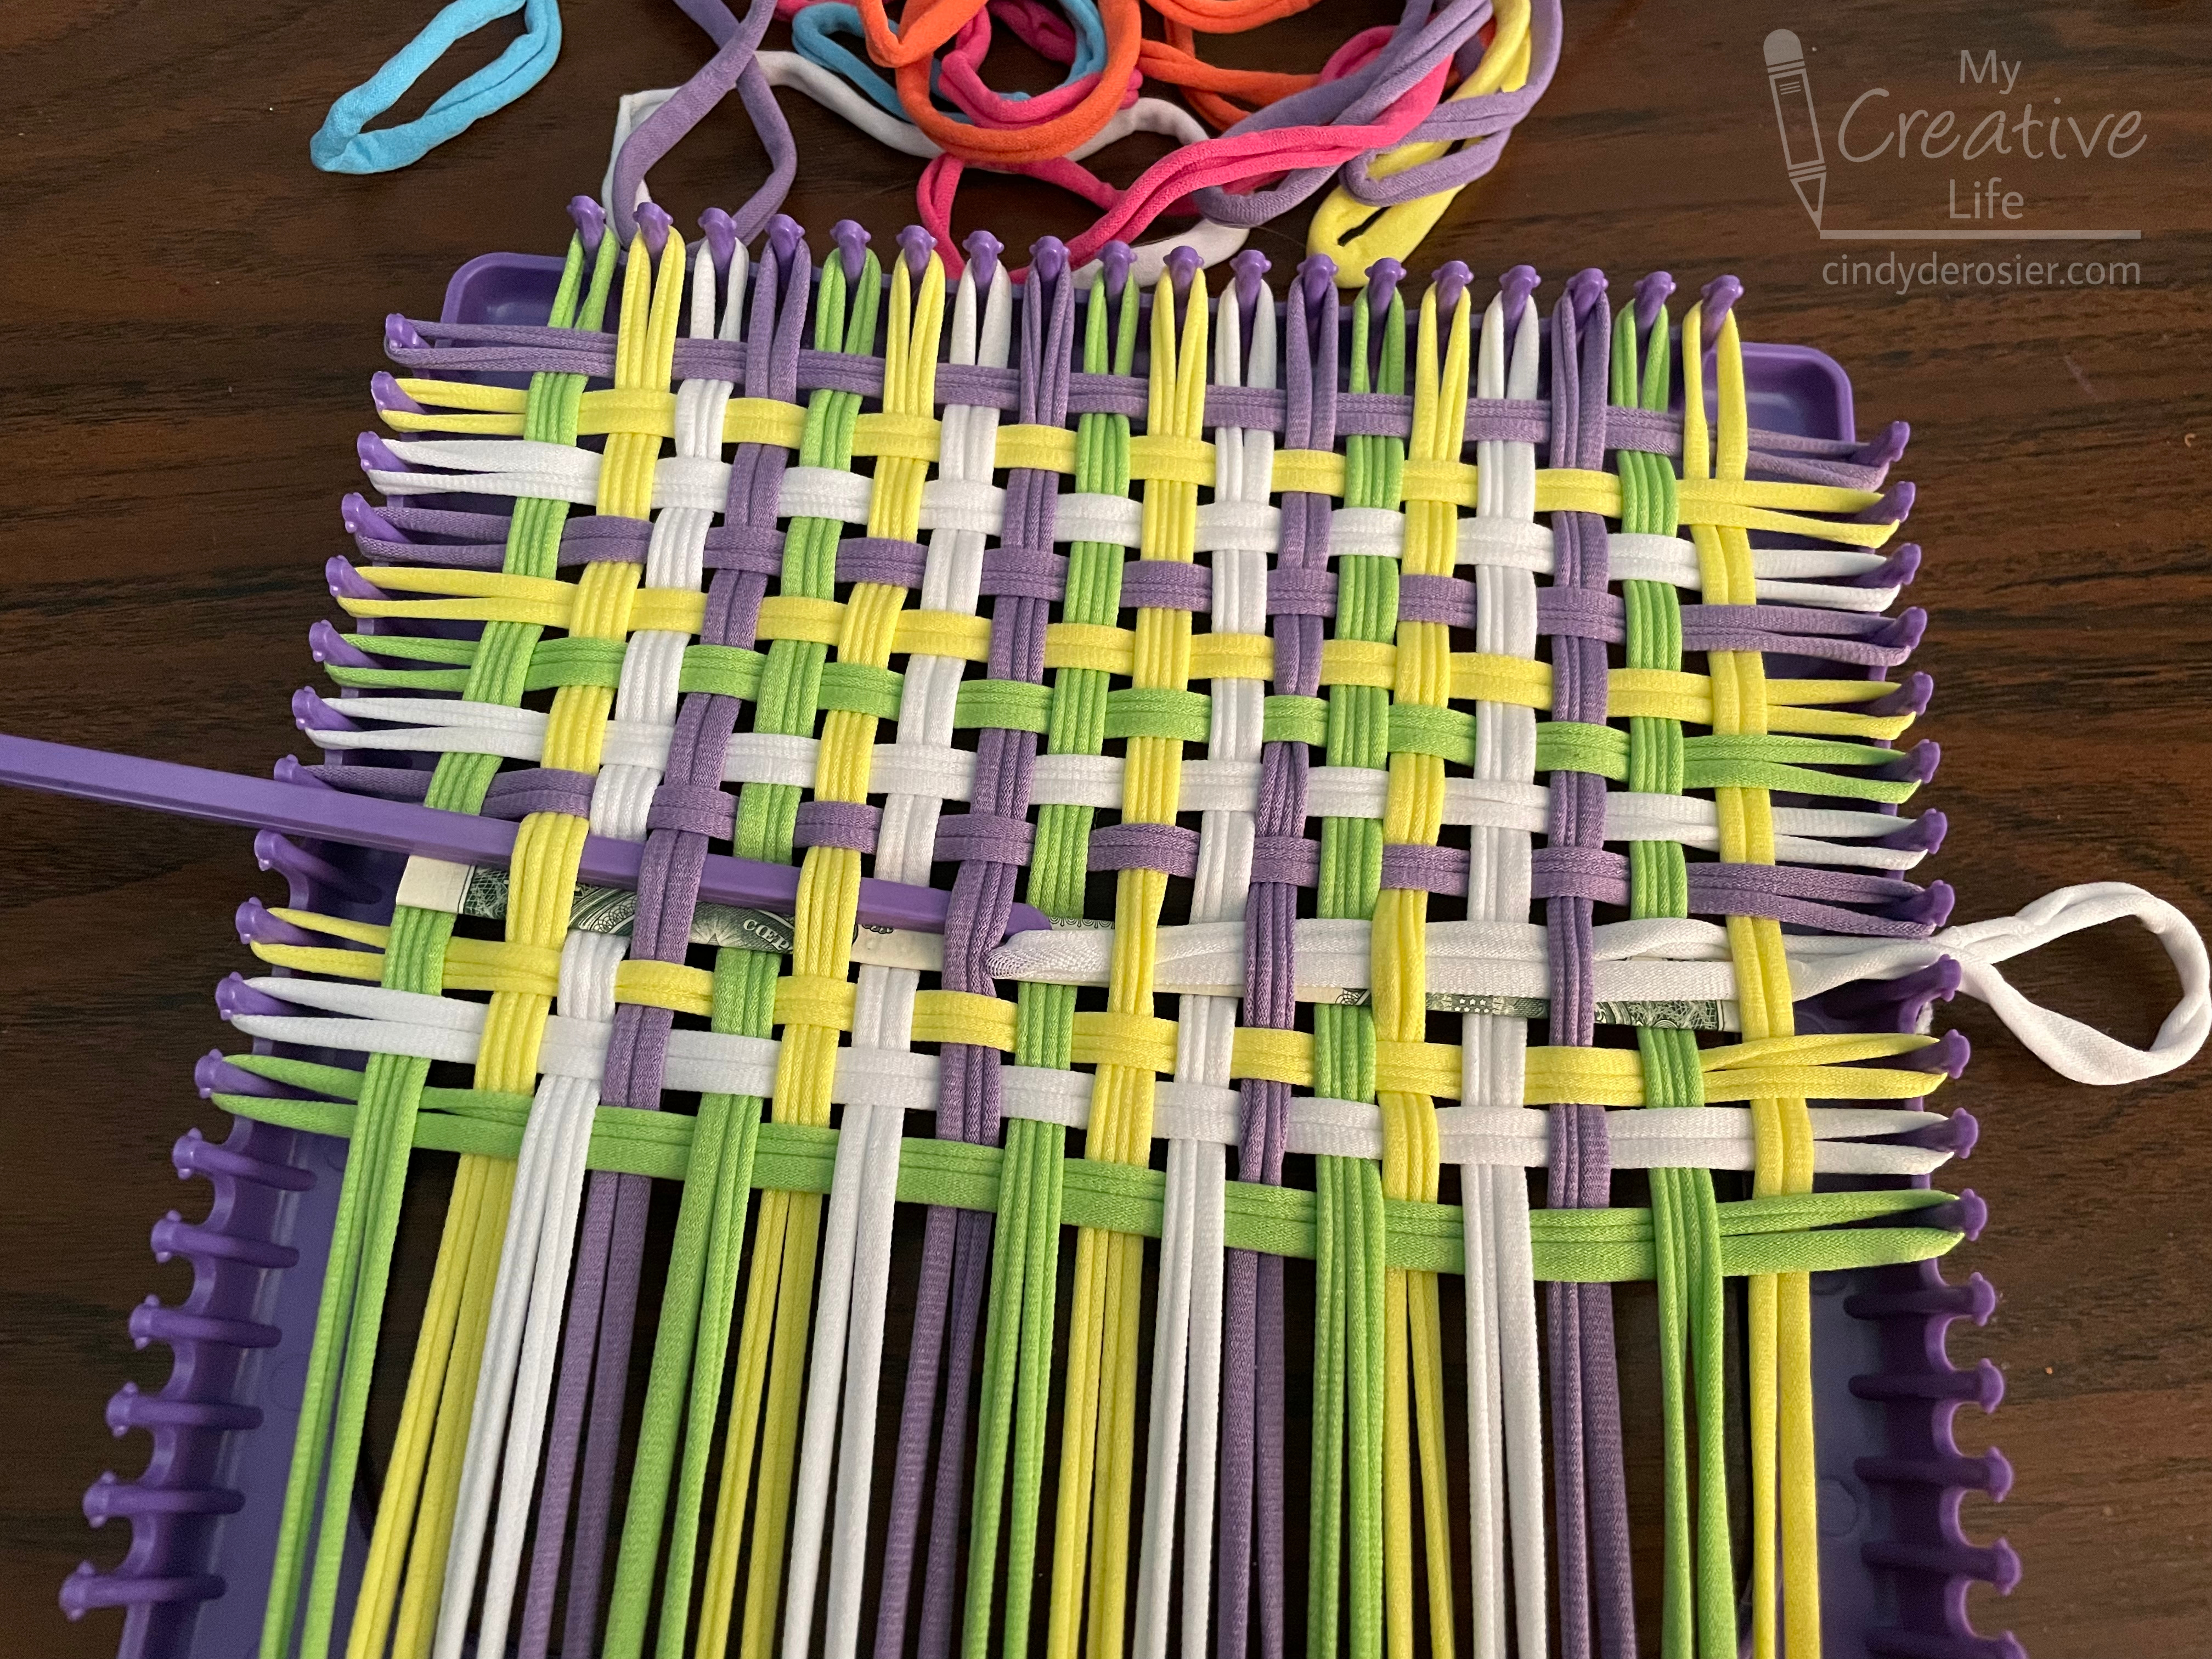
Speaking of experimenting, I had no idea if hiding money in a homemade potholder was even possible. 
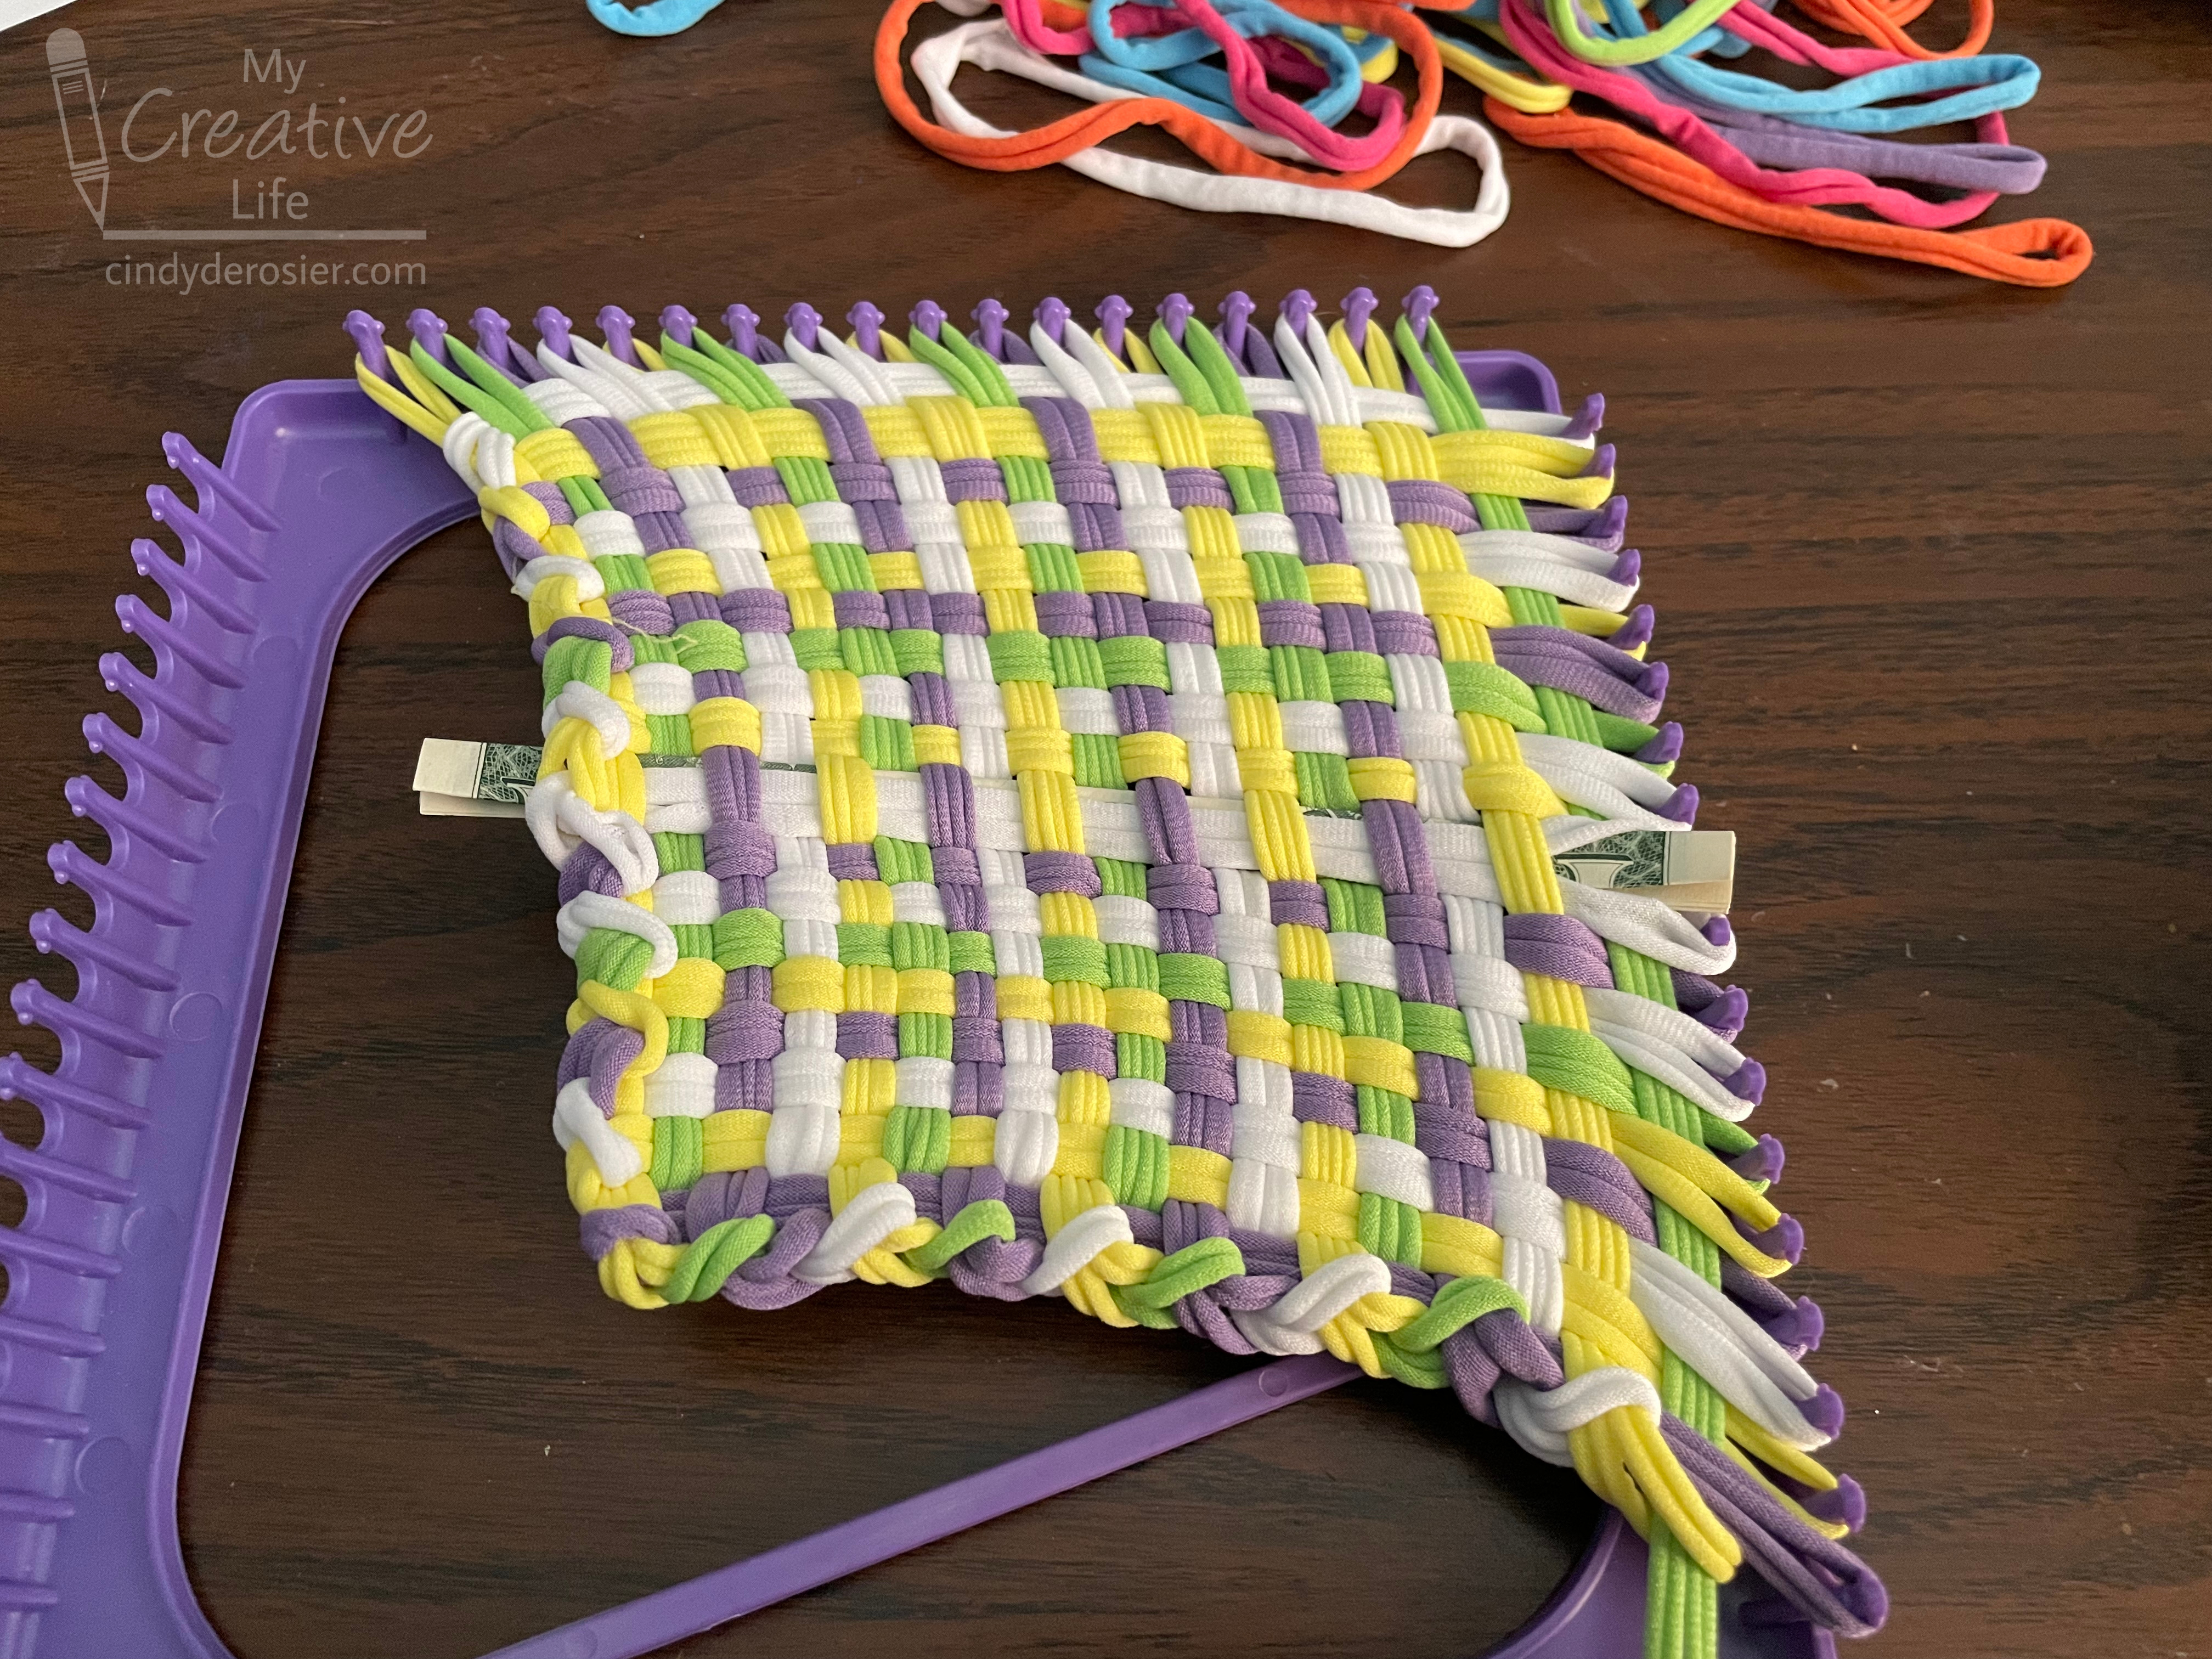
I added loops in one direction, folded a dollar bill so it was really skinny, and wove it into the potholder. So far, so good.  


I wove in more loops, then realized I needed a loop where the money was or I wouldn't be able to bind off properly. So I added a white loop over the dollar bill. 


I was pleased with how hidden the money was when I finished. You can see it, but barely. It was more visible on the backside, but not bad. Time to bind off!


Uh oh. 


Darn it. I forgot how much smaller the finished potholders are than the loom. 


Fortunately, I was able to fold the ends over and weave them back in. This is the back (worse) side.... which isn't bad at all. You can see the money, but wouldn't necessarily notice it at first glance. 


For the second potholder, I started by folding the money smaller, plus I folded it so that the green portion was hidden and only the plain edge of the bill (this one's a $5) showed. 


The results were even better than the first one. Time for the dishtowel! I started with a purchased cotton dishtowel, then carefully opened up 1/2" of one of the hems. I folded the $10 and $20 bills up and slid them through the hole, one at a time, in opposite directions. 


Once I re-sewed the hem, you had to look really carefully to see that it was ever opened. The money was not visible at all (but you could feel it). If Timothy didn't know that I always hide money in his gifts, I don't think he would have even noticed it there. Even with the arrows pointing to the four hidden bills, it's pretty well disguised. 


Happy birthday to Timothy! Now I have about six weeks to figure out another money gift to give him for Christmas.

10/27/23

New Hampshire 2023

When I have a lot of travel pages to do, I pick out the easiest ones first and do those. Because we only spent 24 hours in New Hampshire, I had hundreds of photos to choose from instead of thousands. I ended up using nine photos on my layout. 

New Hampshire 2023 (affiliate link)

I didn't include any photos from our brief time at Dartmouth. Instead, I focused on Concord and Portsmouth where we did a lot more. By the way, the flag in the grid is a photo; the lighthouse under the title is a sticker by Paper House Productions


I like that the lighthouse sticker and the lighthouse photo we took provide a sort of bookends for the layout. 

Speaking of bookends, I've been debating what to do when I eventually scrapbook our time in Massachusetts. Ordinarily, I'd do a single page for multiple cities in the same state, but in this case we visited Plymouth and Cape Cod at the beginning of our trip and Salem, Lexington, Concord, Cambridge, and Boston at the end of the trip, with four states in between. I've decided to do two pages for Massachusetts so that they will be in the album in chronological order. I've done this once before, when we visited Annapolis at the beginning of a multi-state trip and Baltimore at the end of the trip. I may change my mind before I actually get around to scrapping Massachusetts, but for now that's the plan. 

10/26/23

Serendipity Witch Drawings

First zombies, then monsters, now witches! 


I used the same materials and followed the same basic steps, but with two exceptions. First, I started out with random shapes that were relatively symmetric, since witches are living humans (unlike zombies and monsters).


When I added facial features and hats, I made each different. No two mouths, noses, or sets of eyes are the same. And I intentionally avoided the the offensive, stereotypical witch nose


I varied the hairstyles, length, and color. And I used a variety of skintones, leaning heavily on greys like I did with the zombies.  

As I was drawing my witches, I was imagining their different personalities. As my mind wandered, I thought how ridiculous (and fun) it would be to choose four of my witches and design a sitcom around them living together in the Golden Girls' Miami house. Speaking of which, have you ever noticed how much Golden Girls merch there is on Amazon (affiliate link)?! It's surprising, yet awesome. Anyway... witches. I had a lot of fun drawing them. I encourage you to give it a go! Like before, it's a great project for someone who "can't" draw. 

10/25/23

Puzzle Piece Art Two Ways

I've always loved jigsaw puzzles, but until recently I had no idea that competitive speed puzzling was a thing. Like many other puzzle fans, I learned about speed puzzling through the fabulous Karen Puzzles. I recently watched the live broadcast of the World Jigsaw Puzzle Championships in Spain, sponsored by Ravensburger (my fave!). I would have loved to have been there in person. As a spectator, that is. I'm not a particularly fast puzzler. On the other hand, I've never timed myself or even tried to puzzle quickly. Maybe I'm a fast puzzler and I just don't know it! (I'm not.)

While watching Worlds, I played with puzzle pieces in my sketchbook and ended up with this spread.


I started with the page on the right (because I'm left-handed). I used puzzle pieces from this fiasco, a single sponge, and Folk Art paint in red, blue, and yellow (affiliate links here and below). I laid out some puzzle pieces on the paper, dipped my sponge in yellow, and pounced over some of the pieces. I repeated the process with red on the other side of the sponge, and blue in the middle. 


My hope is that I would end up with some green and some purple by just using the one sponge. I did get some green, but no purple. When the paint was dry, I outlined the puzzle pieces with a black Apple Barrel paint pen. They aren't perfect, but oh well. 


For the left side, I used red, blue, and yellow paint pens to dot around the now-painted puzzle pieces. 


Once I'd dotted around all of the puzzle pieces, I started extending the dots outward from each. I varied the size of the dots and allowed them to intermingle when two colors met. 

It wasn't until I took this picture that I realized the sun had gone down and I was crafting in the dark. 


I kept adding dots until the page was full. I thought about outlining the puzzle pieces but decided against it. 


The finished spread is not particularly attractive, but that's the beauty of a sketchbook. It's a place to try stuff and experiment. Both pages were fun, but I particularly liked dotting with the Apple Barrel paint pens. I'm really enjoying figuring out different ways to use them. 


10/23/23

BYSS World Series 2023: "Hello Again" Cards

It was tight, but I managed to complete two cards using all the requirements and enter them before the end of the BYSS World Series, Game 3

Hello Again cards (affiliate link)


As you can see, each card has a tag, ribbon, washi tape, a critter (butterfly), and a doodled border. That's another grand slam for the Banshees!

I used the Hello Again collection by Doodlebug Design, which I recently won by commenting on the Doodlebug blog. The collection has small tags that fit perfectly on cards and plenty of critters (butterflies), so it was a great choice for this challenge. 

I love the colors and motifs in this collection, but I don't see myself using it for scrapbooking. A few pieces, maybe. I know I'll be using it to make a bunch more cards!

Game 3 was a solid win for the Banshees, giving us the Series win!


I'm already looking forward to the next BYSS event. 

BYSS World Series 2023: Rhode Island

Our opponents took Game 2 of the BYSS World Series by just a few points, so the series is all tied up. It's a 3-game series, so whoever wins this week takes it all. Go, Banshees!

This is my contribution for Game 3: 

Rhode Island '23 (affiliate link)


And here are the elements we had to include: 


I honestly thought I wouldn't be able to make a layout with the photos I had on hand that included all of the Grand Slam elements. But I did! Putting 4 of the elements in one place (a title tag with washi tape, ribbon, and a critter) left space for me to include 8 photos on my page. Then I doodled the border under my journaling. 

Do I love the page? No, but I don't hate it. It bugs me that the margins aren't all the same and that the ribbon on the tag goes beyond the edge of the layout. I'm going to put it in the album as is, but I may go back and chop off the top of the tag so that I can center everything properly. Then there's the chicken. We didn't actually see Rhode Island Reds while were were in Rhode Island. But they did appear on stuff in various gift shops, so I didn't feel too weird about putting a random chicken on my layout. If "critter" wasn't a challenge requirement, I would have put the flag or the anchor sticker there instead. 


Game 3 doesn't close until tonight, so I'm hoping to whip out another project before time is up and earn extra points for the Banshees. You can substitute two cards for one layout, so that's my plan. Critter and washi and tag cards, oh my!   

10/20/23

Witchy Halloween Frame

Halloween crafts are some of my absolute favorites. This time I made what I'm calling a witchy frame. Witchy because it is green with warts and embellished with a broom. Affiliate links below. 

Steps: 


Paint the frame lime green. Let the paint dry completely, then add dots of glue randomly on the frame. They will dry flatter and larger than the original drop. 


Let the glue dry completely. This could take a full day or more. When the glue is dry, use a blending brush to apply a small amount of grey or black ink over the dried spots of glue. Add some ink to the edges of the frame as well. 


This is how mine looked when I was done with the ink. That's the top of the frame facing the camera. 


Use Supertite to glue a broom and a spider to the frame. When the glue is dry, add a Halloween photo or message to the frame. 


I don't think I've mentioned it on the blog, but Trevor got braces early last week. I'm eating braces-friendly food in solidarity with him (because it would be super rude for me to expect him to avoid popcorn, caramel, and other favorites while I eat them in front of him), so I'm going to need to think what Halloween candy looks like this year. My favorites and Trevor's favorites are a no-go. Any suggestions for braces-friendly Halloween candy?

10/19/23

Serendipity Monster Drawings

I had so much fun with my zombie drawings that I made a monster version. Once again, monsters are great for people who "can't" draw, because there is literally no right or wrong about how a monster looks!


I used exactly the same supplies and same steps as with the zombies. I drew some quick shapes with a flair pen....


... added details...


... and then colored them in with Ohuhu markers. 


This is a great activity on its own, but is also a fantastic warm-up to a creative writing assignment. Draw your monsters, then use one or more of them in a story. Or cut them out, glue them to craft sticks, and have a puppet show! Or design a product label that one of these monsters is endorsing. The possibilities are endless... and so much fun!


10/18/23

BYSS World Series 2023: Shopping Trip

I'm happy to report that my team, the Scrappin' Banshees, won Game 1 of the BYSS World Series 2023! This is my contribution for Game 2:

Shopping Trip (affiliate link)

This page tells the story of a shopping trip with Trevor and his friend and fellow Scout, Logan. As a bit of background: In our Scout troop, each patrol (6-8 kids) typically plans their own menus for each campout based on a budget of $5/person/meal. A designated Scout does the shopping, then everyone in the patrol helps with meal preparation and cleanup during the trip. I've taken Trevor shopping for campouts many times over the years. The first time, when Trevor was 11, was rough. I had to show him where everything was located, teach him about unit pricing, demonstrate how to keep a running total of his expenses, help him estimate the quantities needed for his patrol, teach him how to judge produce quality, coach him through his interaction with the cashier.... and a million other skills that I take for granted when I go shopping alone. Supervising Trevor's Scout shopping is still an exercise in patience for me, but he gets faster every time. 

Once in a while, the whole troop shares meals. This happens when the total group size is relatively small, or when the logistics of the camping location make it tough for 5 separate cooking stations (4 patrols of Scouts, plus 1 adult patrol). For the June 50-mile bike ride, all the Scouts ate together. Trevor and Logan agreed to do the shopping. Which meant I agreed to take them. It would have taken me about 40 minutes to go to the store, get everything on the list, load it up, and get back home. I figured it would take Trevor and Logan double that. It actually took two hours, and that was with me telling them where to find everything and gently pushing them to make decisions and move on. I had to keep reminding myself that they were learning important life skills, and that their friendly bickering and ongoing negotiations were good practice for when Trevor will potentially be shopping with/for college roommates. 

As I said, this layout was for the BYSS World Series. Here are the requirements for Game 2:


I'd actually printed four photos of Trevor and Logan shopping, but it was easy enough to drop one of them to meet the three-photo requirement. For the connected word, I snipped sentiment stickers to change them from uplifting phrases to the more blunt ones I needed. For specialty paper, I used vellum across the top and a metallic paper for my journaling. Speaking of metal, I groaned when I saw it on the requirement list. It showed up last year too. I really wish we could use metallic items rather than actual metal, but that's against the rules. Metal letters to the rescue! Last time, I colored them black with a Sharpie. This time, I left them plain. To get the grand slam, I distressed the brown edges. Grand slam for the Banshees!

10/17/23

Brayden Update

Brayden, our foster rabbit, has been in our house for just over two weeks now. I've loved every minute. He is such a good boy and he's come so far in such a short amount of time. 


When Brayden first arrived, he wasn't fully hopping. Instead, he was doing a half-hop / half-scoot to turn around. That might have been because of pain from his neuter surgery, but my guess is that he was kept in a very small cage for his early life and hadn't had space to fully hop. Either way, once he felt confident to move beyond the walls of the x-pen, his hopping went from cautious to confident in the course of hours. It was amazing to watch. 

In those first few days, he wouldn't put more than a single paw on the hardwood floor. 


I put out a carpet runway for him so that he could run farther distances, and boy did he! In minutes, he was zooming back and forth, binkying the whole way. Proud Foster Mom moment, for sure!

He loves his runway. 


Once he was fully comfortable with the new territory, I added another rug, leading to a box. Brayden was curious but nervous. He slinked down the carpet to check things out. 


After careful inspection with lots of sniffing, he added the box to the list of places where he felt safe and comfortable. 


The next day, I scooted the box back and added a tunnel. Brayden sniffed it, cautiously entered, and now runs through it multiple times a day. He even naps inside occasionally. 


One week after he arrived, Brayden learned how to balance on the hardwood floor. 


Soon after, he discovered the stairs. He made it up to the landing on his first try, but was scared to go back down the stairs. 


He took it slowly, one at a time, hugging the wall. He went back up and repeated his slow and careful descent. Up again, then he was able to bound down the stairs in the middle. It is so fun seeing him learning new skills so quickly. Now he's a master on the stairs, running up and down them like a rocket many times a day. 

He likes to stop on the landing and survey his territory.  


As you can see, the baby gate at the top of the stairs now stays closed. Trouble earned upstairs privileges eventually, and Brayden might as well, but it will be awhile. He has plenty of space downstairs, as well as plenty of company. 


Interestingly, Brayden still hasn't gone into the family room, nor down the hall toward Steve's office, the laundry room, and the bathroom. He's only gone a step or two into the kitchen, usually stopping to climb on top of the bag of newspapers. 


Brayden spends plenty of time in the x-pen as well. He feels safe and comfortable there. He loves to climb up on his igloo or on the carrier to say hi when we're sitting on the couch. He often curls up in his carrier for a nap. 


For the past three days, we have only been locking him in the x-pen at night. The rest of the time, he is allowed to roam freely (with the gate at the top of the stairs closed). He frequently chooses to relax in the x-pen, even though the door is open. 


Brayden often lounges with his feet straight out behind him (the superman pose), which lets us know that he feels safe and happy. 


You're probably wondering about Brayden's litterbox habits, since we are allowing him to free roam. The first two days, when he wasn't leaving his x-pen, it was clear he didn't know what a litterbox was. I moved all his poop to the box and he caught on quickly. Sort of. He understood what the litterbox was for, but didn't seem to get that his hind end had to be in the litterbox when he went. About half the time, he'd hop in with only his front half, leaving a puddle just outside the litterbox. I added washable puppy pads and they've been great. 

Once Brayden started spending time out of the x-pen, I added a second litterbox behind his cage and put poop there. He understood quickly. He uses both boxes regularly now. All of the urine is in the litterboxes, 100% of the time. 75% of the poop is in the litterbox; 25% is right next to it on a puppy pad. He has not left a single poop anywhere else in the past week.    

Brayden is such a good boy, so smart and sweet. I've loved seeing his personality emerge. 


If you have room in your house and your heart, there are hundreds of rabbits just like Brayden in desperate need of a loving home. You can make a commitment to foster a rabbit for as short as 3 months. Or, you can make a 10+ year commitment and adopt a bunny. We're fostering with Contra Costa Rabbit Rescue, but if you're not local, there are many rescues that you can find on the House Rabbit Society website or by googling. 

Have any questions about house rabbits in general or Brayden in particular? Let me know in the comments and I'll answer them there or in a future post.