2/28/20

Mess

Take a look at any of my scrapbook layouts and tell me whether I'm a person who likes things messy and free, or neat and constrained. Got your answer?

Now that we've established that I like things to be clean, organized, lined up, and placed just so, you can better understand how much I resisted, yet how much I NEEDED, this book:

(affiliate link here and below)

I received Mess, by Keri Smith, as a gift six or seven years ago. I loved the concept - it's a place to break the rules, explore textures and colors, let loose, and banish perfectionism, and thus grow as an artist. But the idea of trashing a book was so difficult for me that it literally took all this time for me to finally use it as intended. I FINALLY gave myself permission to do things I'd never dreamed of doing... like crumpling book pages and adding color to the creases with chalk-covered fingers. 


Or dribbling paint into a book, then swiping the paint with a scrap of cardboard to smear the colors. 


Or coloring in a book... and dripping water onto the page.  


Or shaving crayons into a book and ironing the pages. 


I'm about 1/3 of the way through Mess. I've torn, folded, smeared, dribbled, and scribbled. I've traced, splattered, doodled, glued, and sprinkled. 


I have not created any masterpieces along the way. Far from it. But I've experimented and stretched and had a ton of fun doing so! Mess is the gift that the creative people in your life need, particularly the ones who need to let loose once in a while. Better yet, get them the boxed set of Keri Smith's most popular books. I can't wait to try them all. 

2/27/20

Tissue Paper Cardinal

Did you know that of the 50 states, seven have named the cardinal as the state bird? Clearly, cardinals are doing something right for seven states to honor them this way! The seven are: Illinois, Indiana, Kentucky, North Carolina, Ohio, Virginia, and West Virginia. Follow the simple steps to make this cardinal craft with tissue paper and chipboard. Affiliate links below. 


Tissue Paper Cardinal


Materials:


Steps: 


Draw a cardinal shape on chipboard. The easiest way is to draw a semicircle, then add the crest, the tail, and a wing tip. You will also need a jelly-bean shaped piece for the face and a triangle for the beak. Fit the pieces together to make sure they look good and are the right proportion. After I took the step-out photos, I ended up rounding the base of the beak a bit.   


Paint the body of the cardinal red, the face part black, and the beak orange. While you are waiting for the paint to dry, tear about 20 strips of red tissue paper. 


Layer the red tissue paper horizontally on top of the body to mimic feathers, making sure to cover the surface completely. The last piece you place should point at a 45° angle downward like the closest wing would do.

Wrap black tissue paper around the face piece, gluing it in the back. Glue the face to the cardinal's body. Wrap orange tissue paper around the beak. Glue the beak to the face. Add an enamel dot eye. 


---------


I think cardinals are one of the most beautiful birds. I was thrilled each and every time I saw a cardinal during our December 2019 trip to Louisiana and Mississippi. We don't have cardinals where I live. This is Audobon's map of the cardinal's range. As you can see, cardinals are wide-spread throughout the east (indicated by the dark purple) and are rarely seen in the areas colored with light purple. Southern California has one tiny pocket of light purple, but nothing in northern California. 


At least there's a cardinal on display in the craft room now!

2/26/20

Holiday Crafts - New and Improved

When I first started indexing my kids crafts by theme, I made a graphic for each season and major holiday using PicMonkey images. 


I like them, but not nearly as much as I like the graphics I made for my Animal Crafts. I made them using PicMonkey, too. 


The main difference? I used my own artwork for the Animal Crafts vs. the stock images on PicMonkey. The ones with my projects are so much more personal and they scream Cindy. And that's what I want my website to do. 

Fortunately, I saved all of my old graphics in the PicMonkey Hub. To update them, I kept some of the existing colors and text, removed the images, added photos of my own crafts, then made some tweaks. I am SO much happier with my new graphics. Check them out and let me know what you think!

2/25/20

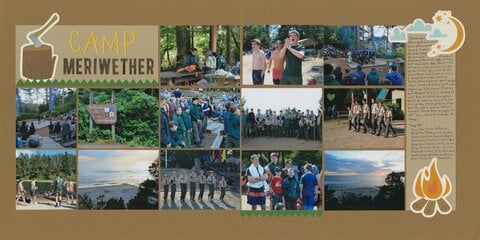
Camp Meriwether

I've mentioned before how hard it is for me to scrap events that I didn't attend, and for the most part, I don't... except for Trevor's Scout trips. Scouting is a huge part of his life and it's important to me that his major outings are in the albums. When he gets home from a trip, I write down the stories he tells me and pay attention to which photos he's most excited to show me. Then, when I finally get around to scrapping the trip (in this case, 8 months later), I know what pictures to use and my journaling is basically ready to go. 

Camp Meriwether (affiliate link)

This layout came together quickly and easily. Some of the smaller details (the green borders and heart) are perhaps too subtle when combined with the bold camping-themed die cuts, but I like that they form a secondary visual triangle that links my favorite pictures of Trevor. 

2/24/20

Crayon Resist Winter Hat Craft

We've been having gorgeous weather here in northern California, with clear blue skies and temperatures in the 70's. The trees have blossomed and the bulbs are up. Despite the way it's been around here, we technically have another month before spring actually starts. Which means it isn't weird for me to share a winter hat craft, right? I had the crayons out for a different project and decided it was time to do another resist project. I love the 'magic' of painting on a seemingly blank surface and having a pattern appear. Affiliate links below. 


Crayon Resist Winter Hat Craft


Materials:


Steps:


Use the scissors to cut the watercolor paper into a hat shape. With the white crayon, decorate the hat as desired. I made narrow vertical stripes on the band and an alternating pattern of cross-hatches and dots on the top of the hat. You won't be able to see what you've drawn very easily, which is part of the fun. 

Water down acrylic paint until it is thin like ink. Use vertical strokes to brush it on the hat, revealing the design. 


When the paint has dried completely, glue the cotton ball to the top of the hat. 

---------

I often end up down the proverbial rabbit hole when I'm getting Amazon links for posts. I find all sorts of fun things. This time, I searched for "fun winter hat" and got some beauts. I'd totally wear this cute cupcake hat. And I like this non-traditional Santa hat, though I don't think I'd have many occasions to wear it. This Dracula hat is awesome, but it seems more fall than winter to me. This octopus hat seems toasty warm, particularly if you're considering some wintertime bank robbing, which I am not.

2/21/20

Happy Birthday, Allison!

My niece, Allison, turns 7 today! Now that she lives out of state, we don't get to see her very often. As far as I know, her favorite colors are still pink and purple. Anyone recognize where I got the inspiration for this card?


To make it, I punched three sizes of circles from five different shades of pink and purple cardstock scraps using my Fiskars 1" Circle Punch, EK Success 0.5" Circle Punch, and Fiskars 0.25" Circle Punch (affiliate links here and throughout the post). I added letter stickers to the largest circles spell out Allison, then glued them onto a piece of white cardstock, cut just smaller than my white card base. Next, I glued on the 0.5" circles and filled in with the 0.25" circles. I made the border with the Fiskars Apron Lace border punch. I'm really happy with this card and hope Allison likes it.

Happy birthday, Allison!

2/20/20

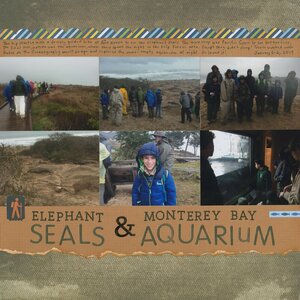
Elephant Seals and the Monterey Bay Aquarium

I love where we live. No matter what you want to see or do, it's at most a few hours away. Trevor's Scout troop does a great job of planning trips that take them to all sorts of interesting local places.

Elephant Seals and Monterey Bay Aquarium (affiliate link)

This layout is about a trip to Año Nuevo to see the elephant seals, a stop in Pacific Grove to see the monarchs, and an overnight at the Monterey Bay Aquarium. Trevor loved it all. Northern California is the best.

2/19/20

USA Philatelic

I've loved postage stamps since I was very young. My mom got me started with a stamp collection when I was five or six and I joined a stamp collecting club around 3rd grade. I loved everything about stamps. I found it fascinating to see what various countries would feature on their stamps. Some countries had a mostly monochromatic collection of their rulers' faces in profile. I didn't like those at all. I was drawn to stamps that were colorful and told a story about what that country valued or revered (besides their ruler). Some of my favorite stamps were from Hungary (Magyar), Grenada, and of course, the United States. 

I haven't actively collected stamps since I was in high school, but I still love them. (Remember how excited I was to visit the World's Largest Stamp Ball?) I follow the new releases of US stamps fairly closely, mostly through USA Philatelic


While technically a catalog, I think of it as a magazine. I absolutely love the articles about how the stamps are designed, or what inspired the artist, or why a particular topic was chosen to commemorate. 

The latest issue of Philatelic features the most recent Chinese New Year stamp. This is the Year of the Rat (woo hoo- it's my year!). I was completely fascinated to learn that this is not a digital design, but rather a photograph of a dimensional mask! Amazing!


Here are some of the other new releases:


I find the artwork so inspiring. Don't be surprised to see projects of mine in the future inspired by these stamps!

Someday, I hope to attend the release of a US stamp. I came THIS CLOSE to the chance in January 2018, when the Love Stamp was unveiled during a First-Day-of-Issue ceremony at Creativation.

     
(affiliate link)

Unfortunately, I didn't find out about the ceremony until after my flight had been booked and I wasn't able to change it. My plane was nearing Phoenix when the ceremony took place on that Thursday morning. So close. Someday.

I've linked some of the most interesting US stamps below, including the pressure-sensitive Total Eclipse of the Sun stamp, the scratch-and-sniff Frozen Treats, Bioluminescent Life, and the first US holographic Space Achievement stamps. And for your further reading pleasure, I highly recommend this fascinating article about the most controversial US stamps in history. Enjoy!

2/18/20

Foil Baseball Player Sculpture

Today's craft, a baseball player made entirely of foil, takes only 15 minutes to make. How do I know? I set a timer for 15 minutes and stopped with seconds to spare. 


Literally all you need is a rectangle of foil. Scissors are helpful, but not necessary. Cut (or tear) the foil in five places, as shown on the template below. Don't measure, just cut. 


Gently crumple the head, arms, and legs sections to form the basic shape. 


Continue to shape and bend the foil into a person. Think about what pose you want to give it. I made a left-handed pitcher, so I bent the right knee and raised the left arm. You can use extra foil to add accessories. I made a ball, a glove, a hat, and a pitcher's mound. My baseball player actually balances fairly well, but it was hard to get the ball to stay in his hand, so I added a tiny dab of Supertite. 


There are so many possibilities with this project. Not only is it fun to do on your own, but it is a great activity for a group. It would be so much fun to make an entire baseball team, a bunch of circus performers, or kids on a playground. If you're looking for inspiration, check out Danya B's sculptures (affiliate link). 

Happy creating!

2/17/20

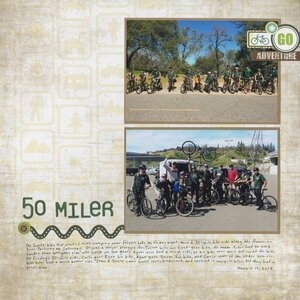
50 Miler

Last spring, Trevor's Scout troop did a 50 mile bike ride. Impressive enough, but more so knowing Trevor did the first 30 miles on a fixed-gear bike. Another boy (Ryan) was riding on a bike that was too small for him, so at Mile 30 Ryan took the bike his dad (Carlo) was riding, gave his bike to Trevor, and Carlo rode along in the chase vehicle.  

50 Miler (affiliate link)

The top photo is from the start of the ride and the lower photo is at the end. I resisted the temptation to add some of the other photos and left lots of white space as well as plenty of room for journaling. The tiny embellishment cluster in the upper right is my favorite part. 

2/14/20

Festive Holiday Sweater Cookies

My grocery store has a small alcove where they put clearance items. Most people walk right by it, as it looks like an employee-only area. It's the best place to find all sorts of amazing bargains, particularly after holidays. My latest find? This!


The Best Before date was still four months away. The kit wasn't damaged. There was literally nothing wrong with it except for that people don't decorate cookies to look like sweaters after December. But why not? It's still sweater weather, there are holidays coming up, and decorating cookies is always fun! Besides, it cost something like $2, which would be worth it even if I threw everything else out and kept the sprinkles for next Christmas. Of course I bought it!

The kit had six large cookies (3 bags of 2 cookies each, about the size of my hand), three tubes of fine-tip icing (red, white, and green), a package of white icing, and two bags of Christmas sprinkles. Definitely worth $2!


I put away the Christmas sprinkles and got out the giant collection of sprinkles I keep on hand. (You never know when a sprinkle emergency will arise. Plus, I get a lot of sprinkle samples as a blogger.) I tested the various icings on the first two cookies and discovered that the bag of frosting was a bit too thick for much other than eating, but that the fine-tipped icings were awesome. Once I got the hang of them, I decorated the remaining cookies with four upcoming (potentially) sweater-weather holidays: Valentine's Day, Mardi Gras, Pi Day, and St. Patrick's Day. I thought it would be really limiting only having green, red, and white icing with a very fine tip, but that just forced me to be creative. Check out my festive sweater cookies!


Happily, the cookies are delicious and surprisingly fresh-tasting. The icing is yummy, too. And I had a lot of fun decorating them.

I've linked some of my favorite cookie decorating supplies below, along with the exact same Ugly Sweater Cookie Kit as mine, but branded differently. I hope I've inspired you to extend your cookie decorating beyond Christmas and throughout the year!

2/13/20

My Version of the Stitched Bucilla Camper

Recently, the Plaid Ambassadors received something exciting in the mail. We're calling it a BORC (pronounced bork), which stands for 'Box of Random Challenge.' Each ambassador's BORC was specially curated to contain Plaid items that the recipient doesn't normally use, with the goal of challenging us to see what we can create. My box held all sorts of interesting items, including this camper-themed Bucilla embroidery kit (affiliate link here and throughout the post). 

I didn't want to just complete the kit as is. In the spirit of the BORC, I used Fabric Creations fabric inks for the first time. I used brush to paint the inks onto the unstitched canvas, let it dry, and was delighted to find that the inks covered perfectly in a single coat and the fabric remained soft and flexible. 


On to the stitching! Because the design is printed on the canvas, I opted not to use the directions to determine which stitch to use where and instead did whatever stitch I felt like using. 


I did my stitching in the evening. Thank goodness for my Brightech lamp! It makes stitching so much easier, not to mention the fact that I can thread a needle in a single attempt when I use the magnifying lamp. It's almost like being young again, LOL!

The kit comes with a wood frame, but again, I didn't want to just use it as is. I dug around through my ever-increasing stash of Plaid products and found Folk Art Transparent Soft Gel Paint in sepia. I used a cotton ball to rub the gel into the wood, then let it dry before framing my stitching. Here is my completed project:


And for comparison, here is the picture on the front of the package next to what I made. 


I had a lot of fun with this quick and easy project. I particularly love that it gave me the chance to try two types of colorants that were totally new to me. I'm looking forward to my next BORC project!

2/12/20

Football Diamond Art

I'm not a sports fan, but Steve and all of my inlaws are rabid 49ers fans. They were thrilled that the 49ers were in the Super Bowl, but obviously not particularly happy about the outcome. Maybe next year! 

If you or someone in your life is a football fan, you're definitely going to want to check out the NFL series by Leisure Arts (affiliate link here and throughout the post). I used the 49ers kit, then framed it with a wood panel and poured paints by Plaid. 


I started by completing the Diamond Art kit, which was straightforward and relatively quick. The kit includes everything you need. Next, I cut out away the background fabric with my microtip scissors. I LOVE them. 


My goal in cutting away the background fabric was two-fold. First, I wanted to be able to fit the design in the square panel, and second, I wanted to have a less busy background. Cutting out the basic shapes was quick and easy. 


Cutting out the inner parts was not. It took a really, REALLY long time to carefully cut away all of the inner fabric using a sharp craft knife and a self-healing mat


Once everything was cut, I turned my attention to the frame. I mixed the pouring medium into Folk Art acrylics (yellow, red, and black) and drizzled them over the frame until I was happy with the marbling. Once the paint was dry, I added the cardstock and the Diamond Art pieces with Supertite.


Now that this is done, I'm looking forward to starting my next Diamond Art project. What to make though? I have a few kits I could start (including this one that I love), or I could do a freestyle design. So many options!

2/11/20

Christmas 2018

Christmas 2018 is in the album!

Christmas 2018


For this page, I really wanted to use the newsprint patterned paper as my background, but I only had a single sheet. With some careful cutting, I used it across the top of both pages, then did the same thing with the red paper at the bottom. I'd originally had the photo blocks flipped (intending to put a title in the top left and the journaling would be in the bottom right), but by inverting them and using the patterned paper as a title, the little bird at the top of the tree is looking directly at the title. The snowflakes form a visual triangle along with the title and bird, which also highlights the gift my inlaws had just opened (a slightly modified version of this, which they'd requested). I'm happy with how this turned out.

Incidentally, you may have noticed that I added a Scrapbooking tab to my website. I've posted a (very) small sample of the layouts I've made that represent my style, as well as links to my favorite basic scrapbook supplies.

2/10/20

Magazine Heart Valentine Tree

Need a quick and easy valentine idea? It took me under 15 minutes to make this and I love how it turned out. 


Magazine Heart Valentine


Materials:

  • magazine
  • construction paper
  • scissors
  • heart punches (optional)
  • craft glue

Steps:


Cut a tree trunk shape from a page of magazine text. I chose mine from an article about how people met their spouses that I really liked. Glue it just left of center on a piece of construction paper. 

Punch (or cut) small hearts from a red area in the magazine. Check ads - many feature red because it is eye-catching. Glue the hearts to the tree to make leaves. 

Punch (or cut) a large heart, then search the magazine for text to spell the rest of your message. I found the letters I, O, and U plus an exclamation point in red, but I couldn't find a Y. I solved that problem by cutting part of an H off. If you can't find the letters you want, just cut what you need from a solid block of color, or handwrite your message!


2/7/20

Family Faves, Fruit Edition

For a long time, I've wanted to make a layout comparing the foods that everyone in our family likes and dislikes. (Yes, of course Trouble is a member of the family.) When my friends at Paper House Productions sent me sheets of fruit stickers, I made this. 

Family Faves (affiliate link)

I started by digging through the bin of printed photos that I never scrapped to find a picture of each of us that I could cut into a square. Then I arranged the fruits in the proper places below the little thumbs up and thumbs down stickers. As you can see, all four of us are fans of apples, pears, and strawberries. (And pineapple, but that wasn't on the sticker sheet.)

I think this might be the first layout I've ever made that has 'journaling' in the form of stickers. I didn't write a single word on this page, yet there's a lot of information there. I'm really happy with how it turned out. 

2/6/20

Splatter Painted Galaxy

The beautiful photography in Astronomy Fluxx inspired me to make my own galaxy painting. Give it a try! Affiliate links below.


---------

Splatter Painted Galaxy


Materials:


Steps:


First, a warning. This craft can get messy. Cover your workspace. 

Tape your black paper to your work surface. Dip the stencil brush in white paint, then pounce it on the paper, a bit off-center. Continue to pounce around this area without adding more paint to the brush. This will be the brightest spot in the painting. 

Now, make two oval stencils/masks from a piece of chipboard that is roughly the size of your black paper. To make mine, I cut the chipboard in half along the diagonal, cut out a large oval from the center, and then taped the original pieces back together. Then I cut the large oval in half lengthwise, cut a smaller oval from the center of it, and then taped the remaining parts of the large oval back together. Put both stencils on top of the black paper.


Dip the brush in paint and use your thumb to pull back on the bristles, sending the paint spattering onto the paper. You should get a very fine mist of paint. Pull back on the bristles again and again until no more paint is spraying. Re-dip and splatter again. Do this until you are satisfied with the coverage. I dipped in fresh paint 8 times. I used white for the first few, then did a yellow, another white, a light blue, and then more white.

Remove the inner stencil and do more splattering. Do about half the amount you did with the center stencil in place. 


Remove the outer stencil and do a few more splatters. 


I ended up with harsh edges on the right side of my galaxy. To make that side look more like the left, I dipped the stencil brush in black paint and pounced to soften the harsh line. Finally, I barely dipped the tip of the handle in paint, then barely touched the paper here and there to add a few closer stars to my galaxy. 


I love how it turned out!