6/30/21

30 Days of Drawing Food

One of my creative goals for the year was to do a 30-day craft challenge. I chose to do 30 days of drawing food. While focusing on a single subject or using one medium for 30 days would have been better in terms of improving my skills in those particular areas, that didn't appeal to me. I wanted to draw something different each day and I wanted the freedom to use paints, pens, colored pencils, chalks, or whatever else struck my fancy that particular day. 

I've already shared four of my drawings, which I made into tutorials: the donuts, popsicle, Chicago Dog, and the hamburger. I'm not going to share all of the remaining 26, but I did want to share some that I either really enjoyed making or that taught me something. First, this blueberry muffin. This was the first food painting I did without sketching the shape in pencil before going in with paint. This gave me a certain freedom that I didn't expect and really liked. It also gave me a great chance to work on blending and shadows.  


Drawing this ketchup bottle was a good challenge. I used only a #2 pencil, so all of the shading comes from the pressure I used rather than from different lead hardness. 


My method for choosing each day's item was to either pick a food that crossed my path, or dig around in the kitchen until I found something I wanted to draw. This is the first tomato from our garden....


... and this was my fortune cookie from take-out Chinese. 


My most common subject, by far, was fruit. With this strawberry, I tried to replicate it exactly...


.... while I went for a more exaggerated, graphic style for this banana. 


Some items were fairly easy for me to draw, while others were far more challenging than I'd expected. One of my most difficult subjects was a waffle.


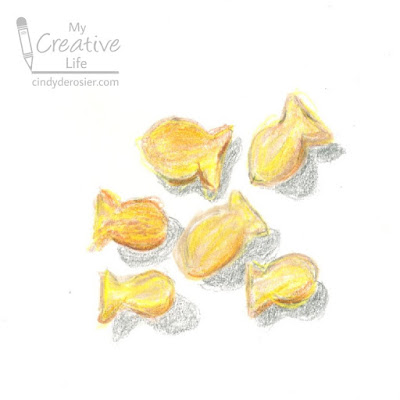
I ended up using watercolors for the majority of my 30-day challenge, which I hadn't expected. I would have guessed that colored pencils would have been #1, but I only used them for four of my 30 drawings. They worked well for this quick sketch of goldfish crackers. 


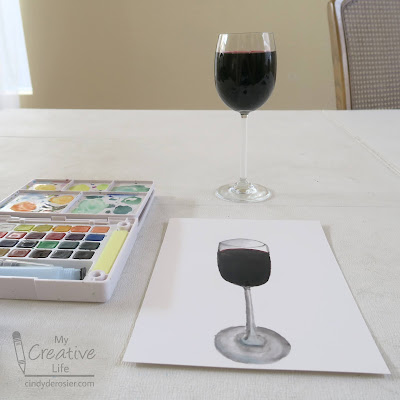
One of the most valuable lessons I learned from this challenge was the importance of posture. I relaxed way back in the chair while painting this wine glass. I was satisfied with the perspective until I sat up and realized my painting was really distorted!


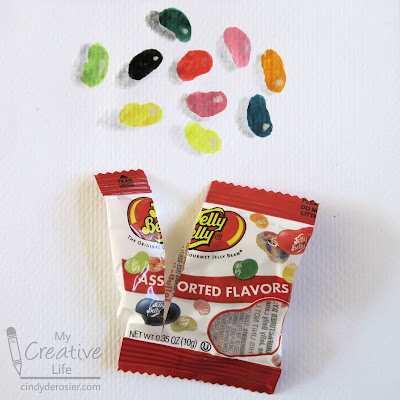
I typically spent 10-15 minutes on each day's project. I only spent 5 minutes painting these Jelly Bellies. I photographed them with the packaging still there because I loved the way the painted Jelly Bellies looked as if they'd spilled out of the actual packaging. 


There were a few days when this 30-day challenge felt like a chore, but overall I enjoyed the project. I gave myself permission to try new things (and not feel obligated to share them here) and definitely learned a lot. 

6/29/21

Traffic Light Craft

At the risk of sounding a little crazy, I have to share something that bothers me - traffic light crafts. You may not have given traffic light crafts much thought since your own days in preschool or kindergarten, but I come across them fairly regularly in my job and they bother me every time I see them. I have three main objections:

1) Many of the crafts are designed to teach kids that red means stop, green means go, and yellow means slow. Yellow does not mean slow! Yellow is a warning to drivers that the light will soon be turning red. Young children are not drivers. They are pedestrians. Teaching young children that yellow means slow down seems ridiculously dangerous to me. The last thing you want when children are in a crosswalk is for them to slow down if the light turns yellow before they make it fully across. 

2) 99.9% of traffic light crafts show the red, yellow, and green lights lit simultaneously. In my 33 years as a driver and 48 years as a pedestrian, I have never once seen a traffic light with all three colors showing at once. Since the point of a traffic light craft is to teach vital safety skills to kids, why do we use a visual model of something that doesn't ever happen?

3) While the vast majority of traffic light crafts show the lights in their proper order with red on top and green on the bottom, I could show you a surprising number of tutorials that don't have the order correct. Again, this strikes me as really dangerous. We should be teaching children about the color AND the position of the lights.  Red/green color blindness affects approximately 8% of boys, or an average of one in every kindergarten classroom. 


Here's my version of a traffic light craft. 


Traffic Light Craft


Materials:

  • construction paper (black, light blue, red, yellow, green)
  • circle punch
  • white crayon
  • glue

Steps:


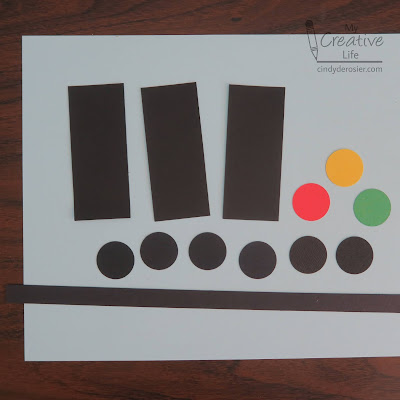
Cut a sheet of black construction paper in half lengthwise. Save one half for the writing. Cut a long, thin strip off the other piece. Then cut three rectangles and punch six circles.

Punch one circle each from red, yellow, and green construction paper.


On the half sheet of black construction paper, use a white crayon to write the message (Red means STOP! Yellow means RED SOON. Green means GO!). I chose "red soon" because it's easier for young children to read and remember than "caution."

Glue the circles to the rectangles to make the traffic lights. Then glue all of the pieces to a piece of light blue construction paper, as shown below. Make sure the traffic lights positioned in the correct location. 


Kids are never too young to learn about traffic safety. Below I've linked some ideas for toys and books that would be great to pair with this craft. 

6/28/21

Celebrating 49

Today's layout features seven photos from my 49th birthday. We celebrated with a quick shopping trip, a daylight visit to Bancroft Gardens, and a picnic and walk at the park where Steve and I got married. It was a beautiful day and we had a really nice time. 

49 (affiliate link)

I'm happy with how the layout came together. I love the colors, particularly the striped paper, the flowers, and the sparkly number stickers. I also love the faux-panoramic photos at the bottom. Instead of making a collage with two 2x3s printed as a 4x6, I arranged the photos as two 2x6s before printing. I'm definitely going to use that technique again. 

6/25/21

Rainbow Doodle

I find doodling very relaxing and a good way to loosen up and be creative without having to concentrate. For today's project, I created a large doodle featuring rainbow colors. The 9" square project took me almost 4 hours to complete, so I recommend either making a smaller design or planning to work on it over multiple sessions. Affiliate links below. 


Rainbow Doodle


Materials:


Steps:


Use the rubber-banded pencils to draw a ribbon that twists and turns across your paper. Please note that I used black Sharpies for the photo so that it would show up. You should use pencil and draw lightly.


Erase the pencil lines anywhere that the ribbon crosses itself. Which direction you choose to erase the lines will determine whether the ribbon appears to cross over or under itself at that particular location. 

Trace the ribbon with black Sharpie and erase any stray pencil marks. 

Visually divide the background into sixths. Starting with the top left, doodle tiny designs in red. You can use dots, lines, crosshatches, squiggles, swirls, or any other shapes you want. Be sure not to cross in front of the ribbon. 

Fill in the remaining sections in rainbow order. When you're done, you'll have this:


For fun, I colored in one side of the ribbon black to see how that would change the look. I like the way it pops.  


There are a lot of possible variations with this project. I'm sure I'll play around with different options in the near future. 

6/24/21

Photoplay Paper 'Thinking of You' Cards

I don't share all the cards I make here on the blog. I'd say that for every 10 cards I make, I share an average of 5. Some cards are repetitive, or variations on a card I've shared before. Others have a technique I was experimenting with that either didn't work or I didn't like. Sometimes, I just don't have anything to say about a particular card. 

Today I thought I'd show you all the cards I made in a single session using one paper collection.    

Thinking of You (affiliate link)

Ordinarily, I would have picked a sampling of my favorite cards to share rather than all of them. For example, I would never have posted all three cards featuring the same striped paper and border with white space. The two butterfly cards are way too similar for me to bother showing them both, as are the two 'With Sympathy' floral cards. I suppose there's a case to be made by sharing everything, but I'm probably going to continue sharing only a portion of the cards I create.

6/23/21

Cranberry Walnut Bread Pudding

When the pandemic began, our family started stockpiling food. We've always kept a very well-stocked pantry, fridge, and freezer, but when COVID hit, we ramped things up. We were worried about supply chain issues and wanted to limit our trips to stores. Some of the things we bought more of than usual (rice, beans, pasta, cereal, canned soup) made sense. Others, not so much. I hadn't even realized it, but apparently I'd been stockpiling cranberries. In addition to a large bag of Craisins and multiple containers of cranberry juice, I have a quite a few bags of frozen cranberries on hand. 

I love cranberries. Trevor likes them well enough. Steve hates them. I usually prepare cranberry dishes for holidays, when there will be more cranberry-lovers than just me on hand to enjoy. But we've now spent 15 months' worth of holidays with just the three of us, so I haven't been using up cranberries at my normal rate. So I made myself Cranberry Walnut Bread Pudding. 
 
June isn't exactly the time of year most associated with cranberries. So if you don't have a freezer full of them to use up, pin this recipe for a more appropriate time of year. Either way, it's absolutely delicious. 


Cranberry Walnut Bread Pudding


    • 8 cups cubed bread, dried
    • 3 c. cranberries (one 12 oz. bag)
    • 1/2 c. chopped walnuts
    • 4 eggs
    • 2 c. cream
    • 1 c. brown sugar + 2 T

Lightly butter six 8-ounce ramekins (affiliate link). Divide the bread cubes evenly between the ramekins, then top with the cranberries and walnuts. In a bowl, combine the eggs, cream, 1 c. brown sugar, and cream. Pour the mixture evenly over the top of the individual bread puddings. Let them sit for 15 minutes to soak up the liquid. Sprinkle the remaining brown sugar evenly over the top, then bake them at 350°F for 30-35 minutes or until it is set. 

6/22/21

Watercolor Hamburger

Burgers are great year-round, but there's something about summer that makes them taste even better. They're also a really fun subject to paint. Affiliate links below. 


Watercolor Hamburger


Materials:


Steps:


Note that, as usual, I've used a pen for the step-out photos so that you can see them easily. On the actual painting, I used a pencil to sketch as lightly as possible. 

I've found that the easiest way to draw a burger is from top to bottom. If you want to do the opposite, just reverse my directions. 

Start by drawing the arc of the top bun in the middle of your paper. Rather than drawing a straight line across to make a half-circle, use a very wiggly line to draw lettuce on the left side and a smoother line to make an onion on the right side. Then draw in a layer of tomato slices. 


Beneath the tomatoes, add the corners of some cheese slices. Draw the curved ends of a nice, thick burger patty, then draw a wiggly line to make more lettuce. Finally, draw the bottom bun.   


Now it's time to paint the burger. With watercolor, you want to make sure one section is dry before adding color to an adjacent part so that the color doesn't run. I do this by skipping around. Instead of painting the bun and then the lettuce, I do the bun and then the meat, because those sections don't touch. 

Start with a golden color for the bun, adding shadowing along the top and bottom. Use the same golden color to add dots of color to the meat. Choose a medium brown and add more dots of color to the meat. Continue adding dots of color to the patty until it resembles perfectly-cooked hamburger. Paint the onion a pale purple and the tomato red. Paint the lettuce using a similar technique as with the meat, adding dots of paint in different shades of light green. Paint the cheese yellow. 

Paint a horizon line behind the bottom bun, then color beneath that line with whatever shade you've chosen to represent your plate / countertop / serving tray. Allow that to dry, then add the color of the wall / sky / backsplash above the horizon line. 

This is what my burger looked like when I put away my paints. 
 

You can stop here, but I wanted a cleaner look. I went in with my colored pencils to add definition. This is most evident on the cheese, onion, and lettuce. I also added the hint of sesame seeds to the top bun. 


It looks almost good enough to eat!

6/21/21

Hedgehog Truffles

I had leftover ganache from the donut cake, so I put it in a silicone ice cube mold and stuck it in the freezer, with hopes of popping out some adorable hedgehog truffles. Success!


I bought the silicone mold I used at Michaels a couple of years ago. Unfortunately, it doesn't seem to be for sale anymore, although Michaels does have a good selection of other silicone molds (affiliate link here and below). 


---------


Hedgehog Truffles


Materials:


Steps:


Prepare the ganache, then put it into your silicone mold. I did one sample bunny to see if it would come out without breaking (no). Avoid shapes that have very small areas barely connected to the main portion - it's pretty much a guarantee that the bunny ears (and possibly the tail) are going to break off, as will the squirrel ears, hands, and tail. 

Put the mold into the freezer until the ganache is completely solid. 


Open a packet of hot cocoa mix and spread it onto a sheet of parchment. Unmold the truffles directly onto the cocoa, then turn the truffles until they are coated on all sides. 


Arrange the truffles on a plate, then give them black sugar pearl eyeballs and use quins (round flat sprinkles) for noses. 


Rich and chocolately, these hedgehog truffles are as tasty as they are adorable!


6/18/21

What Happened When I Discovered My Initials Are an Airport Code

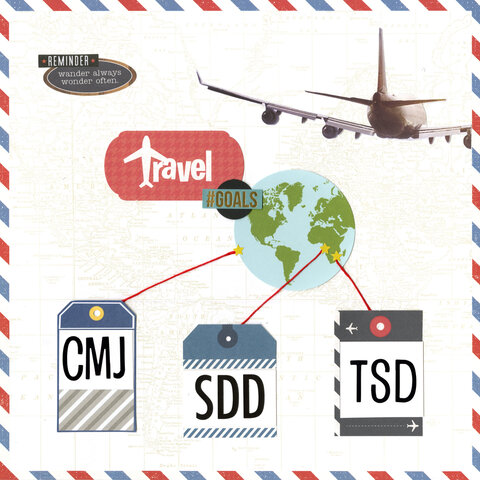
About 99.9% of the scrapbooking I do involves putting photos from special occasions, trips, or everyday life onto pretty paper, then adding detailed journaling to preserve my memories. This page falls into the 0.1% of layouts that don't. This layout has no photos, includes no journaling, and doesn't exist to document a memory. I made it solely to play with product and share something neat with you. 

Travel Goals (affiliate link)

As you know, every airport has a 3-letter code designation. Our family usually travels out of SFO (San Francisco) or SMF (Sacramento), and occasionally from OAK (Oakland). We've flown into some locations whose names were baffling at first, such as YYZ (Toronto), MSY (New Orleans), GEG (Spokane), and FCO (Rome). I recommend reading about the history and naming conventions of the AITA designators - it's interesting stuff.

On a whim, I looked up our initials to see if there is an airport matching each. Sure enough! My initials, CMJ, designate Qimei Airport in Taiwan. Steve's initials, SDD, are used for Lubango Mukanka Airport in southwestern Angola. Trevor's initials, TSD, match those of Tshipise Airport in the northernmost part of South Africa, just next to the Zimbabwean border.
To be perfectly honest, even though I titled the layout Travel Goals, none of these places are high on my travel bucket list. And if I were to visit them, I'd likely be flying into larger airports. Still, it's neat to think about visiting "our" airports some day. In the meantime, we have a much more realistic travel goal to accomplish and under 3 years to do so!

6/17/21

A Flamingo for Father's Day

I recently finished reading a book in which the main character's mom had died giving birth to him. His father raised him alone and the seahorse was a powerful symbol for them, representing what a wonderful job he'd done as a single dad. I was thinking about this as I was going through our Father's Day crafts at Fun Family Crafts. While I've put a lot of effort into making sure our collection of crafts isn't just cards featuring baseballs, fishing pools, hammers, and neckties, there are almost no animal-themed projects for Father's Day.

I thought about making a seahorse project specifically for Father's Day, but the dads that I honor on Father's Day (Steve, my dad, and Steve's dad) aren't single fathers. I thought about making a penguin project. Penguin dads famously take care of their eggs for around two months without eating or moving, while the mom spends those two months eating to replenish the nutritional reserves she used laying the egg. My post-childbirth experience would have been a lot easier if Steve had been with Trevor 24/7 for two months while I did nothing but eat, but that's not the case either. So I decided against the penguin. 

Ultimately, I chose a flamingo for my Father's Day project. Flamingoes mate for life; the pair build their nest together, take turns incubating the egg, and share parenting duties once the baby has hatched. One more reason to love flamingos! 


A Flamingo for Father's Day


Materials:

  • cardstock (blue - 2 shades, pink, and grey)
  • microtip scissors
  • colored pencils
  • heart punch
  • craft glue
  • black Sharpie

Steps:


Select one color of blue for the background and set it aside. Cut a rectangular strip from a second blue for the water. 

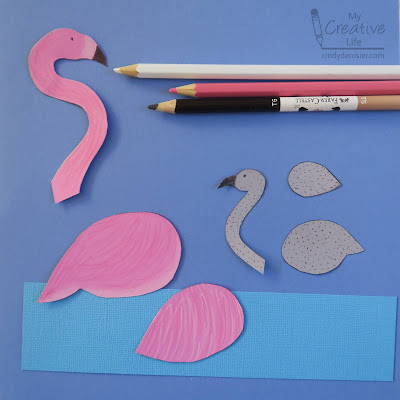
Daddy and Baby Flamingo each have three body parts: the main body, the wing, and the head/neck. I cut the bodies and wings freehand, but made myself a scratch paper pattern for the necks so that I wouldn't waste the cardstock if I didn't get it right on the first try. 


You will also need a pink leg and a grey heart, so cut those before throwing out the scraps. 

Use a pink colored pencil to draw feathers on Daddy Flamingo's body, wing, and neck. Add a band of white to the top of the beak, then black on the tip of the beak. Add a black eye. Use the black pencil to add dots to Baby Flamingo's body, wing, and head, then color in the beak and add an eye.


Glue the water to the background, then assemble Baby Flamingo and glue him to the water on the right-hand side. Glue Daddy Flamingo to the left-hand side. Glue the heart to the top and write in the I and U with a Sharpie. 


Happy Father's Day to all you Flamingo Dads out there, as well as the Seahorse (and Penguin) Dads!
 

6/16/21

How to Draw a Chicago Dog

Our family went camping recently, a quick one-night jaunt to check out the nearby state park where Trevor's Scout troop will be doing summer camp. Because it was such a short trip, we brought the bare minimum and kept meals extremely simple. We had hot dogs for dinner, but I didn't bother packing the variety of toppings I'd normally set out for hot dogs. Instead, I just grabbed a few ketchup packets. As we were eating, Steve commented that we'd be lucky if we weren't banned from Chicago for our blasphemy. The only thing we did right was use all-beef franks. 

A proper Chicago Dog is is topped with yellow mustard, chopped white onions, neon green pickle relish, tomato slices, a dill pickle spear, pickled sport peppers, and a dash of celery salt. To atone for my ketchup-on-hotdog sin, I'm sharing this tutorial to teach you how to draw a hot dog that would make Chicagoans proud. 


How to Draw a Chicago Dog


Materials:

  • drawing paper
  • colored pencils

Steps:


Begin by drawing the basic outline of the hot dog and bun. Sketch very lightly; I've used pen on these step-out photos to make them easier to see. Add the pepper (shaped like a leaf) and half a tomato. 


Add a second tomato to the foreground, then draw a wiggly line of mustard the length of the dog. 


Draw small bits of onions and relish along the mustard. Add a slightly smaller half-circle to each tomato slice. Add an oval plate beneath the hot dog.


Now it's time to color. I used the World Colors set, which gave me a good variety of browns and creams that came in handy. Don't forget to add poppyseeds to the bun!


If the Chicago dog is not your cup of tea, you may enjoy this Ultimate Hot Dog Style Guide, with varieties from across the world. I would like to try a Sonora Dog, stat! There are quite a few others I wouldn't turn down. Which ones catch your eye?

6/15/21

Church in the Red Tier

We have been to church for in-person worship exactly once over the past 15 months, for Trevor's delayed confirmation on March 28. (The rest of the time we've been attending from home via livestream.) Our county had just moved from the very restrictive Purple Tier (Widespread) to the slightly less restrictive Red Tier (Substantial), which allowed for in-person worship at up to 25% capacity. Besides the blocked off pews and mask requirement, there were dozens of other changes in place to help keep everyone safe. These included things like self-serve communion, signing in for contract tracing, closed drinking fountains and bathroom restrictions, a stationary offering basket vs. the usual passed plates, and signs reminding us to stay 'at least one polar bear apart.'

Church in the Red Tier (affiliate link)

Trevor recently had his second vaccination, which means we're closing in on the day when the family is officially considered fully vaccinated. Our county has been at the Orange Tier (Moderate) for a couple of weeks, and today California is ending the tiered system. I don't know that we'll be returning to church right away, as online worship has worked well for us. But when we do it, will be interesting to see which changes from the COVID era remain in place.  

6/14/21

State Foods Bucket List

The first foreign country I visited as a child was Canada. Canadian food is not that different from American food and most of what my family and I ate there was at least similar to what we ate at home. But I distinctly remember trying a new-to-me beverage during that visit to Canada. If Canada Dry was available in California in the 1970s, I'd never seen it or even heard of it. When I first tried that deliciously crisp and refreshing ginger ale way back when, I fell in love.

I have similar food memories from childhood travels within the United States. I have clear memories of fresh huckleberry pie in Oregon and trying Tim's Cascade Chips for the first time at my cousins' house in Washington. I distinctly remember reindeer sausage on my first trip to Alaska and deep-dish pizza the first time I went to Chicago. To me, vacation has always been a time to try new foods and drinks. 

Times have changed, in that you don't necessarily have to travel to try foods from faraway places. I am fairly sure I could get Canada Dry, huckleberry pie, Tim's Cascade Chips, reindeer sausage, and deep-dish pizza either at my local store or delivered directly to my house within 24 hours of an Internet order. But that's not nearly as fun as eating something new where it originated or is most beloved.  

With that in mind, I put together a bucket list of each state's official foods.


The goal is to eat those foods in their particular state. So while I've obviously eaten peaches many times, I've never eaten one in Georgia and thus will not mark it off until I do. Here is my progress so far, as best I can remember. As you can see, I have a lot of traveling and eating to do!


Here's a clean copy you can print.


Note that these are only the officially-designated state foods. I'm still going to seek out all the local favorites I can. Some of my best travel memories are from trying foods that aren't on this list, like Runzas in Nebraska, burgoo in Kentucky, and a Gerber sandwich, Ted Drewes, and Gooey Butter Cake in Missouri

6/11/21

S'mores Pie

The idea of a s'mores pie popped into my brain a few weeks ago and I haven't been able to shake it. So I made one to share with friends. 


I started with a graham cracker crust, filled that with a layer of whipped ganache, and then added a sort of marshmallow cheesecake layer. 


I sprinkled marshmallows on top...


.... then used my heat gun to toast the marshmallows. We've found dozens of uses for the heat gun in the year and a half since I've had it, but this was the first time I used it for food. It worked like a charm!


It was good. Not amazing, but definitely good. The tang of the cheesecake layer was a bit out of place. And that layer was definitely out of proportion - way too much compared with the chocolate and graham cracker. The next time I make this, I might skip the cream cheese entirely. Ooh, maybe replace it with a marshmallow ice cream? And I want to add more graham cracker - maybe as a crumble beneath the top marshmallow layer.  We'll see. This recipe definitely has possibility. 

Here's the recipe as I made it. If you have other ideas for improving my pie, let me know in the comments!


---------


S'mores Pie


Graham cracker crust:
 
I used a store-bought graham cracker crust. Because we were taking this to a friend's house, I wanted to use a disposable pan so I could leave them the leftovers. When I make graham cracker crust from scratch, I combine a sleeve of graham crackers (crushed into crumbs) with 3 T. brown sugar and 6 T. melted butter. 

Ganache:

Heat 1/2 c. heavy cream for 45 seconds in the microwave. Add one 4 oz. bar of Ghiradelli 70% Cacao, chopped into small chunks. Let sit for 3 minutes, then stir until it is smooth. Put it in the refrigerator for 15 minutes to chill. 

Marshmallow cheesecake layer:

Whip 1 c. heavy cream. Set it aside. In a separate bowl, combine 8 oz. of cream cheese and 2 c. of mini marshmallows. Heat for 30 seconds in the microwave, stir, then heat for 30 more seconds. Whip for 2 minutes or until smooth and glossy. Fold in the whipped cream. 


Remove the ganache from the refrigerator. Without cleaning the beaters, whip the ganache until it has doubled in volume and lightened in color. Spoon the whipped ganache into the graham cracker crust. Spread it into an even layer that covers all of the crust. Spoon the cheesecake layer on top of the ganache layer. Refrigerate at least one hour or overnight. 

Sprinkle 1.5 c. mini marshmallows on top of the pie, then use the heat gun to heat them. The marshmallows will swell and brown. When they're evenly toasted, cut the pie into slices and serve. 

6/10/21

How to Draw a Realistic Popsicle

I know it's not technically summer yet, but it definitely feels like it is. School is out, the weather is warm, and the days are long. It's the perfect time for a popsicle - eating one, drawing one, or both!

Drawing a realistic popsicle is surprisingly easy. I did my project using Prismacolor art markers (affiliate link here and below). Because they are alcohol-based instead of water-based, the colors blend easily and the shadows and highlights look very lifelike.  


How to Draw a Realistic Popsicle


Materials:


Steps:


Color the basic shape of the popsicle using Deco Blue, Brick White, and Crimson Red. Color the stick Sand. 


Add highlights to the popsicle using Cool Grey 10% to color in three long rectangles, as shown below. The colors will blend to provide highlights. Color the right side of the stick with Light Walnut. Add some Cool Grey 10% to the right side and base of the popsicle and stick to make a shadow. 


Use the Deco Blue, Brick White, and Crimson Red markers to add an additional layer of color to the areas outlined below. Add a tiny bit of additional shadowing to the right of the existing shadow using Cool Grey 30%. 


That's all there is to it! Your popsicle is done. 


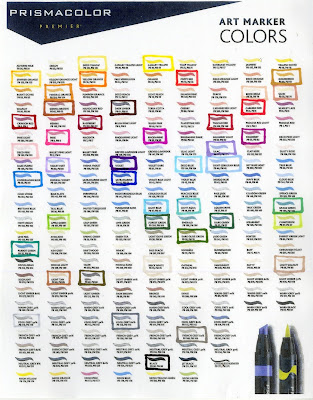
Steve and Trevor got me a dozen new Prismacolor markers for Mother's Day, so this project was a fun excuse to play with some of my new shades. I gave them a chart of the colors I already had and asked them to pick markers from Dick Blick's open stock (the best and cheapest place to get individual Prismacolors) to complement what I already had. They did a great job! These are the 42 colors I now have: 


While I would love to have all of the shades, my collection is now big enough to meet most of my coloring needs. Although now that I think about it, when I get my next dozen markers for some gift-giving occasion, I may wonder how I ever lived with *just* 42 before!