Showing posts with label CHA 2015. Show all posts

6/4/20

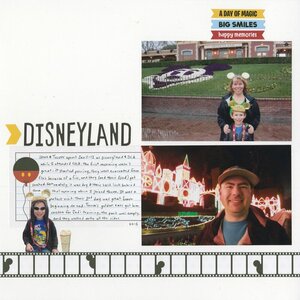
Disneyland: January 2015

I keep a chronological list of scrapbook layouts that I want to make. Since I don't scrap chronologically but want pages to appear in order in the albums, this lets me keep track of how much space to leave between layouts. (More about that in this blog post.) Today's layout was at the top of the list - the oldest trip I hadn't yet documented.  

Disneyland, January 2015 (affiliate link)

I love scrapping Disney pages and they're usually pretty easy for me. So why did this trip sit on my list for over five years? Mostly because I didn't have a clearcut idea of what I was actually documenting. We were in Anaheim for the 2015 Craft and Hobby Association Mega Show. I blogged all about my experience, but barely mentioned what Trevor and Steve were doing during the show. Should I scrap my show experience? My one evening with them at Disneyland? Just their time at the theme parks? After going back and forth on this for way too long, I made a decision: one page for their day at Legoland and one page for their two days at Disneyland. I kept the page really simple, with just three photos and plenty of journaling. I'm really happy with how it turned out. Now I just need to deal with Legoland and this trip will be (literally) in the books!

1/26/15

The Verdict Is In... We LOVE Twisteezwire!

Before leaving for the Craft and Hobby Association trade show, I looked up all of the nominees for the 2015 Hot Products Award. I was most interested in the kids' crafts category. My pick for the winner (and Trevor's pick also) was the Twisteezwire Mask Kit. It looked so fun, equally appropriate and interesting for boys and girls, with tons of room for creativity. You can see a video about it here


On Saturday night when I returned to the hotel room after opening day on the CHA show floor, the first thing Trevor said was, "Did you get to see the Twisteezwire Mask Kit? Did it win?" I reminded him that the awards would be announced Sunday night (while I'd be at Disneyland with him) and that I wouldn't find out until Monday morning. On Sunday night, there were at least ten times that Trevor said something to the effect of, "I really hope the Twisteezwire Mask Kit wins! Can you get one for me when we get home?" That really says something if a kid who is at Disneyland is thinking about a craft project he wants to do at home!

As soon as the show floor opened on Monday morning, I zipped over to find out the winners of the Hot Products Awards. The Twisteezwire Mask Kit was a runner-up, but did not win. I was surprised how disappointed I was! I'd never used it and had only first learned about it four days earlier, but I was already 100% convinced that it was one of the coolest things to hit the kids' craft market in awhile. 

I went to the Twisteezwire booth to tell the exhibitor how disappointed both my son and I were that their mask kit did not win 1st place. We chatted a bit and after a little while, she asked how old my son was. I told her he was 8. She then did something I absolutely did not expect - she handed me a Mask Kit and said it was for him if I promised to review it on my blog. 

As you've probably noticed, I don't accept a lot of free products to review here. Most of the products I review are things I bought and loved and know that my readers would love too. I would feel terrible if I accepted something for free with a promise to review it and it was awful. Obviously, I would never say nice things about a product just because someone gave it to me, so I am very careful with what I promise. I'd done my research about the Twisteezwire Mask Kit and I knew I would love it. Trevor knew he would love it. I was completely confident that there was no chance my review would be less than glowing, so I accepted it. 

I snapped a few photos of some other Twisteezwire projects before leaving. Check out these cool glasses! 


I love the birthday cake. And the snowman!


These baskets are incredible!


I got back to the hotel room on Monday night before Steve and Trevor did. I hid the Mask Kit, waiting for them to return, certain that Trevor would ask if it won. Sure enough, it was the first thing he asked when he came through the door! I told him it did not and he was so disappointed. But his disappointment turned to euphoria when I pulled out the kit and handed it to him! He wanted to play with it then and there in the hotel room, at 9:00 pm, the night before we were leaving. Um, no. He wanted to play with it in the car on the drive home. Also no. 

After we got home, out of vacation mode, and back into our routine, I invited my 8 year old goddaughter Kylinn over to try the Mask Kit with Trevor. Before school was out, I opened the kit and took photographs of the contents. It includes a detailed instruction book, fifty 30" Twisteezwires, buttons, beads, feathers, markers, and dowels. Plus, the box itself becomes one of the supplies! You supply your own coat hangers and scissors. That's all you need. 


When I picked Trevor up from school, he was so excited he could hardly stand it. He was DYING to play with the Mask Kit. As soon as Kylinn arrived, I sat them both down and explained that they had a very important job: to play with the kit and let me know their honest opinions about it. I handed them the instruction booklet, which they studied carefully. 

Kylinn's wearing the ribbon barrettes I made for her! Tutorial here.

They were so intent on studying the instruction booklet that they didn't notice me taking their photos until the second-to-last page!


I put all the supplies on the kitchen table and they got right to work. I took this one photo of them getting started before I went upstairs to leave them alone. I really wanted to see what they would make on their own and whether the kit was truly appropriate for kids as young as 8.  


I could hear the kids chatting and giggling as they worked. They worked for exactly 90 minutes before they came and got me, both wearing their masks with the biggest smiles you've ever seen. I had them go outside where the light was better so I could take their photo. Kylinn proudly showed off her zebra mask. Trevor was equally proud of his rabbit mask.  


Both kids said that the kit was AWESOME! They said it was great for 8 year olds - not too easy and not too hard. They liked the way the box was one of the supplies. They thought it was really fun and that other kids would love it too. So there you go! The verdict is in... we LOVE the Twisteezwire Mask Kit!

It's really unusual that I don't do a craft alongside Trevor. I really wanted to make a mask, but I thought it was important to see what 8 year olds would make on their own without being influenced by something an adult made. While the kids ran around out back playing Zebra and Rabbit, I went back inside to clean up. I was delighted to see that there were still a lot of supplies left. Plenty for me to make my own mask the next time Trevor wants to play with the kit! 


I highly recommend the Twisteezwire Mask Kit for the 8+ crafter in your life! You can buy bundles of Twisteezwire, as well as see lessons and their amazing gallery on the Twisteezwire website. Expect to see more Twisteezwire projects from us in the near future!

1/23/15

What to Pack (and How to Prepare) for the CHA Trade Show

This was my second time attending the Craft and Hobby Association trade show, so I should have had a pretty easy time figuring out what to bring and how to prepare. But the circumstances were so totally different that it may as well have been my first time.


2011:
     CHA was held at the Los Angeles Convention Center. I flew south alone (with one small checked bag and a rolling backpack), my friend Amanda picked me up at the airport, and we stayed 30 minutes away from the venue in Pasadena with a friend of hers. I had a buyer's badge and how I spent my time was based entirely on what the store needed/wanted me to do. I took several hands-on classes, but had almost no time for make-and-takes or much else on the show floor. I used the store's business cards and didn't even have my own. I wasn't blogging yet (but the decision to start was made during this show) and didn't even follow a lot of blogs. I didn't use (or really understand) any social media besides Facebook.

2015
     CHA was held at the Anaheim Convention Center. Steve, Trevor and I drove instead of flying. I seriously overpacked, as there was no concern about airplane limitations. We stayed at the Hilton, steps away from the Convention Center. I had a Creative Professional badge and was attending on my own qualifications. I spent my time doing exactly what I felt like doing at any given moment. I handed out hundreds of my own business card. I took only one hands-on class, but did dozens of make-and-takes on the show floor. I blogged (once) from the show floor and posted to both Instagram and Facebook.


See? Totally different. About a week before it was time to go, I started making my packing list. The basics were easy (pajamas, medicines, toiletries, paperwork, Mouse ears for an evening at Disneyland, that sort of thing) but the rest was more of a challenge. I vaguely remembered an article May Flaum had written for Scrapbook Update that I used to help prepare for 2011 and went searching. I finally found it: May's Top Tips for Making the Most of CHA. It was just as helpful earlier this year as it was in 2011.

May's tips are excellent and I expect I'll be referring to them again next year! But I do want to add a few tips of my own (or variations on hers).


*Bring a rolling bag.

You don't want to turn down make-and-takes or samples because you have no way to carry them, nor do you want to be in pain from lugging around 30 pounds of stuff from 9:00 am - 5:00 pm. This is my rolling bag:


I love it. It's just wide enough for 12" x 12" paper and has lots of pockets for snacks, a water bottle, Advil, chapstick, Kleenex, business cards, and everything else I need. I kept a folded tote in my rolling bag so that I had even more storage once I became too loaded down. I also keep a 12" x 12" plastic envelope with a piece of 12" x 12" chipboard inside so that any paper samples I get or layout make-and-takes aren't ruined.

By the way, rolling bags aren't allowed on the escalators. My bag has straps so I can wear it like a backpack and use the escalators. It also has a handle on top. A lot of times I just carried it up and down the stairs.


Speaking of stairs, you're going to be doing A LOT of walking, even if you always use the elevator or escalator. Which brings me to my next tip:


*Dress nicely on top and comfortably on the bottom.

Every day, I walked at least 5 miles and as many as 10 miles. And I was staying at the closest hotel! Comfortable shoes are not an option; they are a must. In looking at photos from 2011, I realized that there were virtually no full-body pictures of me. Almost every photo I was in was from the waist up. 

I decided that for 2015 I'd adopt a simple 'uniform' of a colorful blouse, black sweater and interesting jewelry (the "nicely on top" part of the equation) with dark jeans and super comfy black boots (the "comfortably on the bottom" part). It ended up being a great decision. I was comfortable in my boots, my jeans made it convenient to keep business cards in my back pockets (one side for cards to give and one for cards I received), and I looked relatively put-together in photos. The majority of attendees were dressed in nearly the same way. 


*Talk to everyone.

I'm an introvert. I get that "talk to everyone" is not easy for some people and is completely exhausting. But do it anyway. Say hi to people in elevators. Introduce yourself and exchange business cards with the people in the classes you take. Chat during make-and-takes or while waiting for the show floor to open in the morning.

On the first night, I went alone to the Mega Block Party. I sat down at a table and introduced myself to the lone woman sitting there. She was waiting for friends. Long story short, we had a nice chat, and she introduced me to her friends when they showed up (members of the Executive Committee of the Society of Decorative Painters)... including one who had lived in my hometown after I'd moved away and used to bowl in a church league with my dad, sister and brother-in-law!

Me, Linda Sharp


*If you have a choice between driving and flying, choose driving.

Obviously, a great many attendees have to fly to get to CHA. But for those of us for whom driving is possible, I'd recommend it. It takes us between 7 and 8 hours to drive, which is longer than it would take to fly, even counting the drives to and from the airport, security, etc. But it is well-worth it to be able to pack home as much stuff as you want. I was able to do all the make-and-takes I wanted without concern about how things would fit in my suitcase. I was able to accept all sorts of samples that were bulky, prone to leaking, or otherwise unsuitable for air travel. I took all the literature people gave me with no concern about paying extra for the weight. 


*Know your technology ahead of time.

Let's say (hypothetically speaking, of course) that you are the last person you know to get texting on your phone, in fact just two days before CHA, and your boss will be texting you to get together during CHA and you need to know not only how to get the text but how to respond. Well, if you find yourself in this situation (not that I know ANYTHING about this...) I strongly recommend figuring out how texting works before CHA, not during. And again, hypothetically, if you want to tag a friend in an Instagram post when you visit the Doodlebug booth, but you've never actually tagged anyone in Instagram and don't know for sure that it's even possible, the Doodlebug booth is not the best place to stand for 15 minutes trying to figure this out....


*Take notes about everything. Everything.

Do not fall into the trap of thinking that you'll remember everyone you met, everything you saw, and everything you did. You won't. You'll remember bits and pieces, which may or may not get jumbled into a big confusing mess and you may find yourself googling like crazy to try to figure out which manufacturer displayed that adorable bunny (again, hypothetically....) when if you'd just taken notes in the first place, you could have saved yourself a lot of time and trouble.


*Have the time of your life.

CHA is amazing. There is something magical about being surrounded by thousands of people who share your passion and who get you. Seeing the products, learning, experiencing... it's like nothing else. Enjoy it. Live in the moment, say yes to opportunities, and be open to possibilities.

1/22/15

Stuff I Want from the CHA Mega Show

The big question I keep hearing is, "What stuff do you want that you saw at CHA?" Obviously, I want it all! Wouldn't it be a dream to have a whole Convention Center full of the most amazing craft materials ever, neatly organized, and always at your disposal? And experts to teach you how to use it? Sounds like heaven.

So perhaps the better question is, "What do you actually intend to buy that you saw at CHA?" Topping the list is the Mod Podge Collage Clay that I mentioned in my Make and Take post. It was so much fun and I see so many possibilities for fun kids' crafts. I'm definitely getting some of the Tombow Xtreme Adhesive. That stuff was fantastic! I also want the rabbit brads from Eyelet Outlet that I mentioned in my Rabbits of CHA post. And the Proggy rabbit kit from the same post. Oh, and the Amazing Remelt and Hazel and Ruby's DIY Decor Tape, both from the Hot Products Nominees post

Needless to say, I saw a lot of scrapbook products that I want. Pretty much anything with tiny polka dots or tone-on-tone stripes has my name written all over it, like the gorgeous new shades of Double Dot papers by BoBunny... 


... or the Color Chaos line by Bella Blvd


I love the Skinny alphabet stickers by Doodlebug Design. 


And I'm definitely getting the Yippee collection from Chickaniddy Crafts. Aren't these three papers absolutely gorgeous together? (And totally me?!) I want their cool enamel words too...


It's not a scrapbook product, but I also fell in love with Duck Brand's new scented tape.  There are six colors with six different scents and I want them all! How fun would it be to try more projects from Amanda's book using scented duct tape?!


There are a few other must-haves on my list, which I'll be mentioning in future posts. In several cases, the exhibitors saw me drooling over their products and handed me samples. I cannot wait to share them one at a time. 

How about you? What are your must-haves from CHA 2015?

1/21/15

On the Hunt for Marsala at CHA

Ever since Pantone announced Marsala as the Color of the Year for 2015, I've been on the lookout to see if it would be as present in the crafting world as it apparently is in the fashion world. I say 'apparently' because my only connection to anything having to do with fashion is watching Project Runway once a week. (Which reminds me that we're long overdue for another deRosier Project Runway challenge...)

Anyway, when I was packing for the Craft and Hobby Association trade show, I decided that it would be great fun to wear my Marsala shirt one day and go booth-to-booth to see which manufacturers were showing Marsala products. I started at one end of the convention center and, over the course of six hours, worked my way to the opposite end, holding my shirt against products to see if I'd found a match. It was great fun (albeit exhausting) and the results were very interesting. But I'll get to that in a bit.

First, let's look at some of the products I found. There were exactly two exhibitors (out of 400+) who immediately recognized my shirt as Marsala and jumped up to show me their Marsala products. I wish I'd gotten the name of the wonderful woman from Weave Got Maille who showed me her Marsala manicure along with their Marsala jump rings!


Angela Daniels was in the Rit Dye booth and showed me that not only were they displaying Marsala prominently, they had a "recipe" card to show how to make all the colors in the Spring 2015 Color Report using Rit Dyes. Fabulous! Angela sent me home with the dyes I need to make Marsala, so I can assure you that I'll be sporting some Marsala shoes hours after I get around to buying a pair of white Keds. 


Other manufacturers didn't immediately recognize my Marsala shirt but were eager to help me find a match once I explained my project. I love this feathered fan from Feather Place! They also had gorgeous bleached and dyed peacock feathers that perfectly matched my shirt.


May Arts had more than one ribbon that was a perfect match! Wouldn't it make a much prettier badge lanyard than the one I'm wearing? (Note to self: Make attractive lanyard featuring the Color of the Year for 2016's CHA Mega Show.)


I'd love a bracelet made from these gorgeous beads from F2B Wholesale


And maybe some earrings with these beauties from Cultured Sea Glass? Yes, please! 


My friend Tami Bayer was in the Ice Resin booth when I stopped by. She gave me a demonstration using their German Glass Glitter. So pretty!


I had a funny experience at the Sulky booth. I explained to the gentleman working there that I was on a quest to find manufacturers displaying products featuring Marsala, the Color of the Year. I pointed to my shirt. He nodded and asked what I wanted to do to my shirt. I tried to clarify that I was not doing anything to my shirt except trying to find products that matched it. We went back and forth about ten times with him asking if I wanted to hem it, or embroider on it, or add a trim, etc. while I tried (unsuccessfully) to tell him that I didn't have a purpose other than to see if there was something that matched my shirt. Poor guy! I guess my request was actually pretty weird when you think about it. He ended up giving me this thread and a hibiscus print. Maybe I'll need to embroider on my shirt after all! 


The fine folks at ParaWire also gave me a souvenir to take home. Now I definitely have to make a Marsala bracelet!


Hemptique's Crafter's Cord was another perfect match! Maybe I should use the ParaWire for earrings and the hemp cord for a bracelet....


This shade of Memento Luxe is a perfect match for Marsala. It's called Rhubarb Stalk. Awesome! I'm totally obsessed with rhubarb!


So far, I've shown you jump rings, dye, feathers, ribbon, beads, sea glass, glass glitter, wire, thread, cord, and ink. Notice any similarities? Notice what's missing? 

Before you answer, I should clarify that I did visit every booth, but if there was another customer there, I did not interrupt and moved along after a brief glance on my own. I didn't take a photo if it would have been disruptive, nor did I take a business card. There were definitely other manufacturers with beads, threads, paints, markers and inks in shades similar to Marsala. 

Back to the question. What do the items I found have in common? Almost without exception, you either wear them or use them to create jewelry to wear. 

So what's missing? Paper. I didn't find a single paper manufacturer that had Marsala in their color scheme. There were some hints of burgundies and other reds, but not a true Marsala. Yes, companies like Bazzill that make every shade of hundreds of shades of cardstock did have a decent Marsala-equivalent. And yes, I found some albums that were close enough to Marsala (like these from We R Memory Keepers).


But I didn't find Marsala patterned paper. It's definitely possible that it was there and I didn't notice it. After six hours, I wasn't exactly seeing straight. It's also possible that one of the companies who didn't attend CHA has a new line with Marsala. But I can say with certainty that Marsala is not a papercrafting trend for 2015. 

Besides paper, what else is missing? Kids' craft supplies. This isn't surprising. Products for kids tend toward the colors of the rainbow, pastels, and neons. A blood-red color named after a wine doesn't exactly say 'child.' 

Huge thanks to all the exhibitors at CHA who took the time to indulge my silly hunt for Marsala, regardless of whether or not you had any represented in your booth. I appreciate all those who helped me search, took my picture, and/or gave me samples. You're the best! See you next year, when I'll be sporting a different color of shirt....

1/20/15

Make-and-Takes at CHA

One of the best things about the Craft and Hobby Association Mega Show is being able to try new craft materials or learn fresh ways to use classic craft materials. A high percentage of the exhibitors have demonstration stations set up and many offer make-and-take projects that use their products. I absolutely love being able to try out new (or new-to-me) media and learn tips and tricks from the experts.

It would be impossible to do all the make-and-takes offered at CHA, as there are literally hundreds. I did, however, do as many as I could manage in between my classes, meetings, and other commitments. Today I want to share some of my favorites. 

I'll start off with the first make-and-take I did. Marvy Uchida was showing their Easy Chalk Board Marker, Bistro Chalk Markers, and the Easy Crystal Applicator. I used the chalk board marker to color a wooden frame (couldn't get into the corners with the broad tip - my only criticism of it) and a piece of white cardstock. The coverage was amazing! I put the bling on the frame and used chalk markers on my card. They dry instantly, but can be erased with a moist paper towel! Super cool. 


Next up, Deflecto. I hadn't used their products before, but I really like them. I ended up doing three different make-and-takes with them over the three days! The first was a cupcake-shaped magnet using their Magnetic Craft Sheets. Next, a 5" x 7" frame. It unscrews so that you can slide different patterned papers or photos inside.


I thought this next one was so clever! It's a 4" x 6" clear frame, tipped to use as a desk notepad.  


My next set of make-and-takes are from Best Creation. I knew them as a patterned paper company, but they've moved away from that and into glittered specialty products. They had a huge line to make a cute bag using their iron-on glitters and rhinestones and only one working iron the first day I stopped by, so I made the quick Minnie bag without rhinestones (because that would have meant waiting for a second turn with the only iron). The next day, they had a shorter line and more irons, so I made the kiss bag, complete with iron-on rhinestones at the bottom. I'm really impressed with how well they've stayed attached!


I had a great time hanging out with the ladies from Bazaar Star Beadery! I was their very first make-and-take customer, so they had me pose for an Instagram picture to show off this cute and colorful bracelet.


Here's a cool note holder I made at the Tombow booth, trying their Xtreme Adhesive. I'm a loyal Tombow user, but I'd never tried the Xtreme products. They're a must-have!


I made this fabulous Foldover Clutch at the Beacon Adhesives booth. They had HUGE piles of ribbons, trims, blooms, leaves, gems, sequins... it was so hard to pick what to use. I kept mine minimal, true to my style. Some of the other crafters at the table must have added 2 pounds of embellishments to theirs!


This picture shows two totally separate make-and-takes. The glass jar is painted with DecoArt's Chalky Finish for Glass. I made the stretch bracelet using beads from Linpeng International.  


The last make-and-take I want to share is this adorable cupcake photo/card holder. It's made with a Smoothfoam base, covered with Mod Podge Collage Clay, and then sprinkled with glitter and decorated with sequins. I am absolutely in love with the collage clay! It comes in a piping bag with three decorative tips. I can't wait to play with it again soon! 


So there you have it! Just some of the many make-and-takes I made at the CHA Mega Show. Any favorites?

1/19/15

Classes at CHA

There is no question that attending the Craft and Hobby Association trade show is a lot of fun, but it is just as much about the education as it is playing with all the latest and greatest products. There are classes geared specifically toward retailers, bloggers or designers, as well as many that are suitable for a broad audience.


Most of the lecture-style classes are included as part of the conference fee (which, incidentally, is exactly $0 for CHA members). Hands-on classes range in cost, but are usually $35 and include a lot of product to take home. Since the classes are so affordable, there's a powerful incentive to take as many as you can squeeze into your schedule!

Here are the classes I attended and what I got out of each:


Your Perfect Social Media Fit

This one-hour class was taught by Christian Kratsas from SnapRetail. He talked about the importance of defining a target audience, establishing marketing goals, knowing the demographics, and then selecting which two social media platforms are most suitable for your business. (He recommended doing two platforms well instead of trying to be everywhere, which is pretty much impossible.) He broke down the statistics of Facebook, Pinterest, Instagram and Twitter users to help us see which fit best for our own needs.

While this class was advertised as suitable for all attendees, it did have a stronger emphasis toward store owners vs. designers or bloggers. Christian frequently referred to advertising a sale or promoting new product that's on the shelves, neither of which are applicable to me. Still, it gave me a lot to think about. There's no question that Pinterest is where I should be putting more of my efforts. A huge percentage of my blog traffic comes from Pinterest despite my barely using it. There is so much more I could (and should) be doing.

I also realized that I need to be doing a much better job with branding. I don't have a logo or use a consistent style for watermarking photos. My business cards coordinate with my original blog design, not the current one. I use different photos of myself on different social media platforms. This is all something I want to fix in the near future. 


Strategic Planning for Solopreneurs

This one-hour class was taught by Sara Naumann of Studio SN. Sara started by saying that planning means you're proactive, not reactive. A strategic business plan ensures that you maximize your time and talents and put your efforts where they will be the most productive. She emphasized how important it is to define for yourself what success as a solopreneur will look like.  

Sara walked us through a series of questions, giving us just a few seconds to write down the first thoughts or phrases that popped into our minds. We wrote about our own history as a solopreneur, then moved on to our mission statement. My scrawled notes read, "Creativity fuels me. I love to write, love to share, love to teach. My work is a way to earn money and be creative while still being a SAHM first." It's not the most eloquent mission statement ever written, but it was the first time I wrote down what my mission actually is. 

We moved on to vision. This was hard. There are a lot of directions I can take my crafting career. Do I want to teach classes, either in person or online? Do I want a regular gig as a designer? Do I see myself writing a book? Where do I want to go from here? Or, am I satisfied with the status quo? I'm not sure. Lots to think about.

Next, Sara talked about our unique selling points, customers, competition, weaknesses and strengths. Those were much easier for me than the mission and vision! We moved on to environment, resources, external opportunities, threats, and critical success factors. We defined success in our own terms, created a 12 month strategy and talked about when and how to plan. Again, so much I need to mull over. 

This was an outstanding class. Looking back at my notes, I can't believe we covered all that in an hour! I learned so much in this class, but as is often the case when faced with a new topic, I also learned that I have SO much more to learn... 


How to Monetize Your Blog through Affiliate Marketing 

This one-hour class was taught by Sarah Crosby from CJ Affiliate by Conversant

Over the past year or so, I've done quite a bit of research about affiliate marketing and, other than setting up an Amazon Affiliates account, I have never followed through with actually putting something in place. It seems very overwhelming and I have a hard time doing anything other than letting it sink to the bottom of my to-do list.

This class was very informative and made me see how affiliate marketing may indeed be a good fit for my blog. However, the class solidified for me that actually doing the legwork myself is not a good fit for me. I'm mulling over some possibilities in my brain regarding this....


Making the Most of Instagram

This one-hour class was taught by Theresa Cifali of The Altered Canvas.

My regular readers will recall that I didn't start using Instagram until last summer and I was immediately completely overwhelmed. I'm not a tech person AT ALL and didn't even know how to use the camera on my phone. I'm semi-competent now when it comes to Instagram, but I don't use it often and am certainly not making the most of it.

Theresa emphasized that Instagram is the fastest-growing social media network in the world and that it is a great fit for us creative types because our work is visual. She gave some very specific tips and hints and I learned a lot. Some of it was very basic (I didn't know you could double-tap to show "like") while other suggestions were geared toward integrating Instagram with our businesses (showing craft room behind-the-scenes or works-in-progress, for example). I left with the following items on my to-do list:

  • rewrite bio to be more complete and more informative  
  • search hashtags related to my name and business name
  • change profile photo to be consistent with other social media


Creative Blogging

There are so many great classes to take at CHA that it can be a struggle to decide which would be the most beneficial. I went back and forth on whether to attend Sarah Hurley's one-hour class on creative blogging, or if my time would be better spent at one of the other classes offered at the same time. I actually know what I'm doing when it comes to blogging; would I get more out of a class on an unfamiliar topic? As it turns out, I am so glad I attended this class.

Sarah started by asking us to reflect on our blogs - is your blog personal or impersonal? Focused on one topic or more diverse? Very organized, chaotic, or somewhere in between? What draws people to it? Who is the audience? What are your boundaries and what is off-limits? What do you have to offer that no one else can? It was very helpful to think about the answers.

Even though this was probably the class I actually needed the least, it was my favorite of all. Sarah was straight-forward and specific. She told us flat out not to apologize in blog posts ("Sorry it's been so long since I blogged, guys. But I've been sick/injured/busy/abducted by aliens....!") because no one wants to hear it. She said to avoid negativity, as no one likes a whiner or a complainer ("Unlike SOME bloggers, I ________"). She said not to feed the trolls because a mean comment says so much about them and absolutely nothing about you.

Sarah also talked a lot about SEO. I do search engine optimization for both my Fun Family Crafts and Scrapbook.com jobs, so this is a very familiar topic to me, but Sarah's tips were still helpful. I hadn't thought about renaming images to help with SEO, nor did I know that descriptive titles for posts are as important as they are.

All in all, it was a great class. As a bonus, I met a lot of fellow creative bloggers and exchanged business cards! It's been a lot of fun checking out their blogs.


EnviroTex Jewelry Resin

The one and only paid workshop I attended was this one, sponsored by Environmental Technology Inc and taught by Myléne Hillam. It was a 90 minute class. After a brief introduction to the supplies and a preview of what we'd be making, we jumped right in. We taped painted Klik Metal Complex bezels to a foam backing. Then we heated Fantasy Film and crumpled it lightly before cutting out circles and tiny bits. Then we mixed the resin.


Here I am layering resin, the circle, more resin, and the bits. Each bezel holds only one color of Fantasy Film. You'd never guess that the predominantly-blue bezel on the left has only pink film in it! 


I'd never done anything like this, so it was great to try something completely new. As a bonus, the results were beautiful!


I transported my bezels home still attached to their bases. There was a mix-up with Klik, so the bracelet that these bezels snap into is being mailed to us at home. Once it arrives, I'll remove the bezels from the foam backing and use them to complete the bracelet. I can't wait to wear it!

1/17/15

The Rabbits of CHA

I'll be back on Monday to share more from my time at the Craft and Hobby Association Mega Show, but in the meantime, let me present....


The Rabbits of CHA!

Love the flowers as cottontails!

Can't go wrong with a cute bunny sticker.

Rabbit brads that are the same color as Trouble?! Yes, please!

Another cute Perler bead rabbit!

I can't decide which rabbit I prefer.

Love the idea of using Wikki Stix to make an egg bunny! 

I really want a Proggy rabbit. But in grey.

The backside of bunnies (just like the backside of water on the Jungle Cruise...)

Everything here is made of yarn. LOVE these rabbits. 


There were many more, especially for Easter- or spring-themed papers or stamp sets. But with as many non-Easter rabbits as I saw, maybe I should have declared rabbits to be a trend!
