2/7/12

My Favorite Product of 2011

Trying to pick a favorite product from 2011 is sort of like trying to pick which child is your favorite.  (OK, that's actually easy since I only have one child.  He's definitely my favorite.)

Should I choose a paper line?  How could I ever pick between my favorites?  Was it Fancy Pants' Beach Bum?  I love the rich, vibrant colors and the awesome summery designs.


Was it October Afternoon's Campfire?  I love the earth tones and the outdoor motifs.


And I can't forget about fabulous neutrals, like BasicGrey's Basics.  I used this for a ton of projects. 


Was my favorite product an adhesive, an embellishment or a tool?  You know I love everything Fiskars makes. 

I looked back through the projects I've made this year and the choice became clear.  My favorite product from 2011 is Glimmer Mist!


In 2010, I had two bottles of Glimmer Mist.  I now own sixteen.  I have used Glimmer Mist on paper to make my One Little Word tags and my Acorn Napkin Rings.  I've used it to dye trims, like on my Gift Bag.  I've used it to color large pieces of fabric, like this Fabric Gift Bag.  I don't think there is any other product I've used so often or in so many different ways.

2/6/12

Photo Titles

When our family went to Legoland recently, Trevor and I posed in front of the entrance sign, like just about everyone else does. 


I printed 12 of our photos from the day, including this one, to use for my 2-page layout.  When I started arranging the pictures on the page, I realized that the Legoland sign in my photo was large and bold enough to serve as my title.  I grouped some colorful accents both above and to the left of the photo to draw the eye.  I added a third color grouping by my journaling.  It forms a visual triangle that leads right back to the title.  I think it works.


To contrast, let me show you a layout with a photo used as a title that doesn't work.  This is from our cruise to Hawaii three years ago.  Look closely in the middle left where I'm using a photo of a Hawaii sign as my title. 


This layout does not work for a number of reasons.  The title recedes into the background because it is not large or bold enough.  My fussy cut flower accents form a visual triangle, but that triangle doesn't center on the title.  There is nothing to lead the eye to the appropriate location.  This is a case where I knew I was creating a layout that didn't work, but I couldn't figure out how to fix it and finally just gave up.  Now in hindsight, it's so obvious to me why it didn't work!

Using a photo as a title can work well in a multi-picture layout.  Just be sure that the title is large and bold enough, then use your embellishments to lead the eye to the title.  Have you used a photo as a title?  I'd love to see what you made!

2/3/12

I Might Not Have Been Trendy Before...

We've already established that, in the past, I have not been the trendiest scrapper. I have been woefully neglectful in using washi tape and baker's twine. My projects are devoid of happy woodland creatures and there's nary a mustache in sight. I've ignored doilies and shunned paint chips. I never put a bird on it. Until now!

I present to you... the trendiest project I've ever made! 


So what do you think? Trendy, huh?? (Nodding enthusiastically.) Here's a closer look.


My project is so chock-full of trendy awesomeness that I'm entering it in a challenge. Ah, but which one? After much searching, I found the perfect one at Crafterminds.

Just in case you didn't notice exactly how trendy I am now, I've provided this:


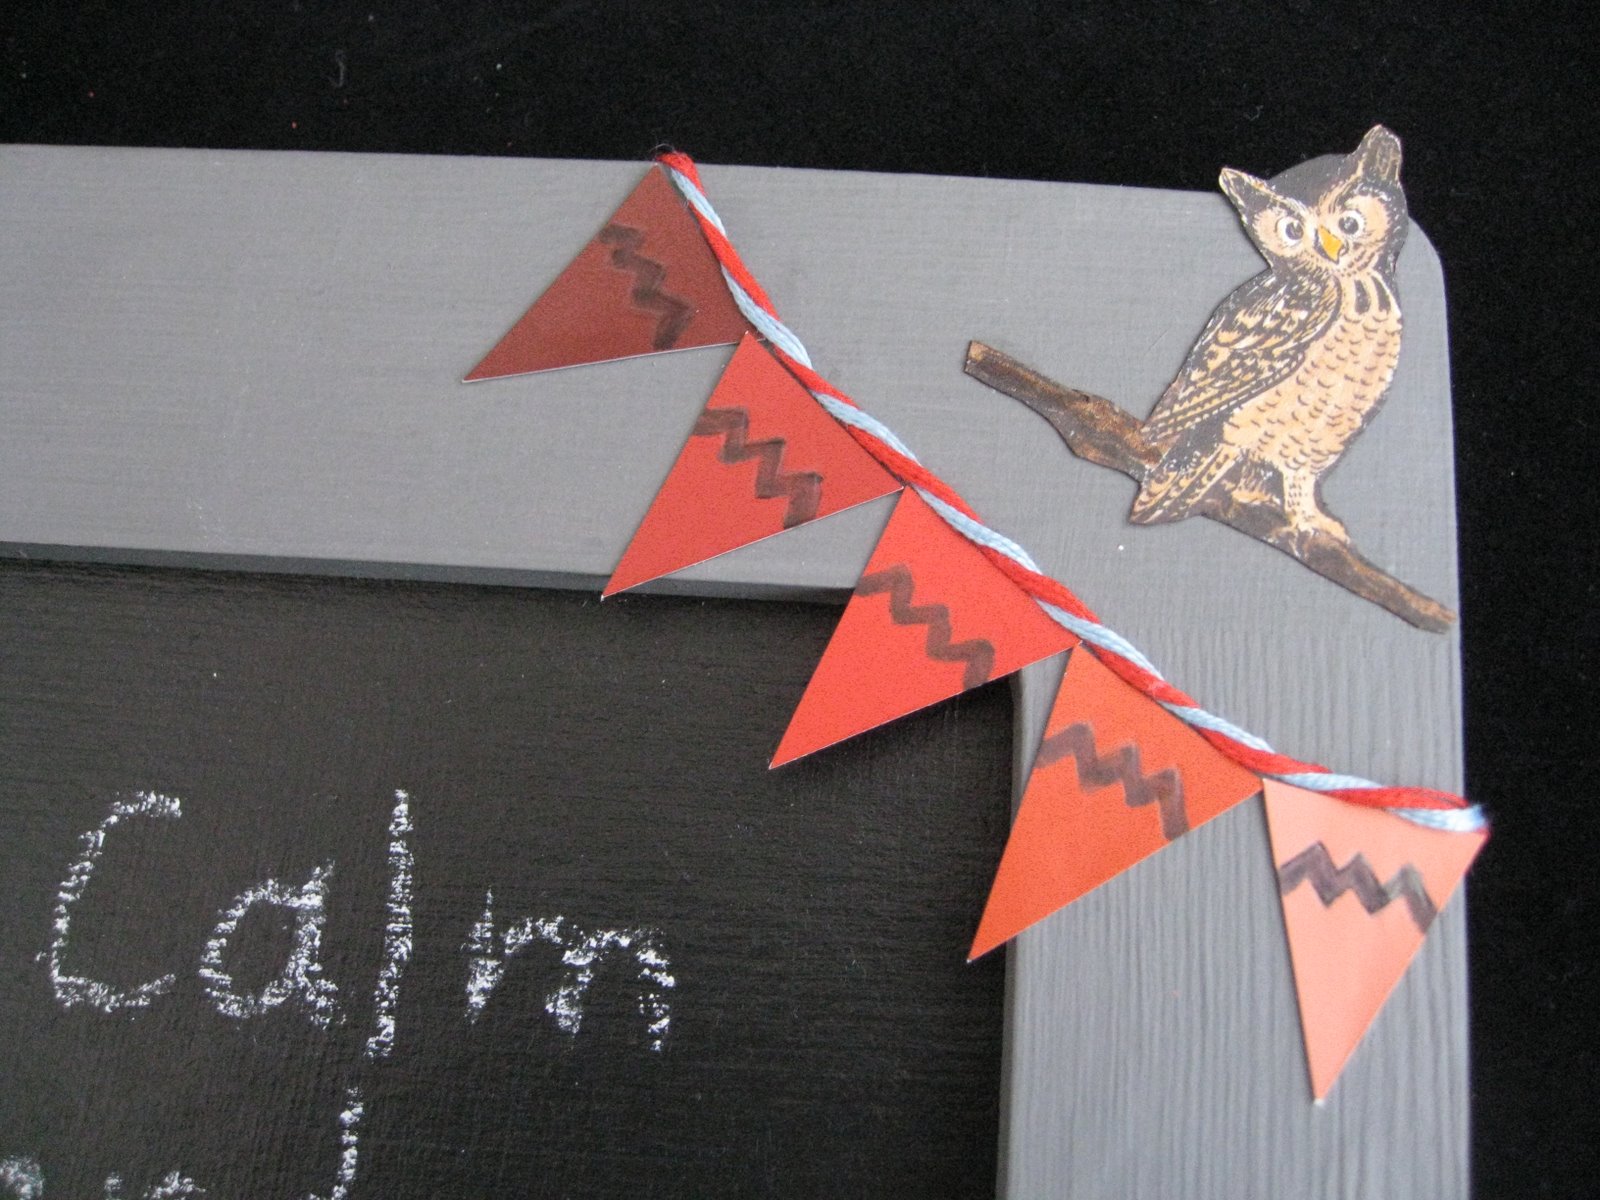
For the record, there are 20 trends on my fabulously fantastic project, including: turning a picture frame into a jewelry hanger (1), red/grey/blue (2), "Keep Calm and Carry On" (3) on chalkboard paint (4), pennant banner of paint chips with chevron patterns (5, 6, 7) strung with baker's twine (8), owl (9), washi tape (10), a doily (11), geometric and ruffled ribbon (12, 13), a book page (14), a canvas ombre bird (15, 16, 17), burlap (18), and my personal favorite- a happy woodland creature with a mustache (19, 20). Nailed it!

2/2/12

Tissue Paper Hearts

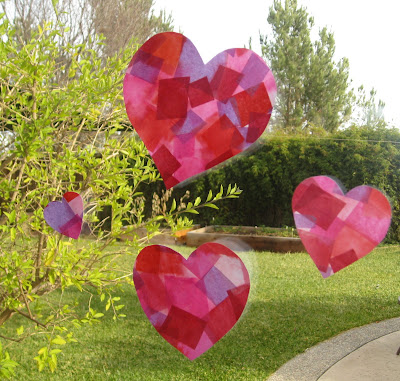
Today I'm sharing one of my all-time favorite crafts: Tissue Paper Hearts. They are so pretty and so easy to make. Affiliate links below.


Tissue Paper Hearts


Materials: 


I save all the tissue paper we receive. If it is too wrinkled or torn to be reused for gifts, I cut it into squares. I keep all the Valentine's colors in this tub. (I also have a tub for ocean colors.)


Steps:

Paint a little bit of liquid starch onto a small area of your paper. Lay a piece of tissue paper down on the moist area, then paint over the top with more liquid starch.  Do not use too much starch- it should be moist, not puddly.

Continue until you have filled the page.  


Allow the paper to dry overnight. Check the paper- all pieces of tissue paper should be sealed. If any are loose or any ends are sticking up, paint some liquid starch over that area and allow to dry thoroughly. The paper will curl a bit as it dries. This is fine. You won't notice the curling when you cut out your shapes. If it bothers you, you can turn the paper upside down and iron it on a low setting or press it beneath heavy books. 


Draw or trace hearts on the back of the paper, then cut them out. Now display your hearts! I like taping them to windows. I love the way the colors seem to glow.


I hope you enjoy making these as much as I do!

2/1/12

Book Review- "Paper Crafting with Carol Duvall" (part 2)

Last week I promised I'd show you a few more projects from "Paper Crafting with Carol Duvall."  (You can see my first projects here.)

For my third project, I tried Carol's Chalk Talk card.  It was really easy and produced cool results.  Basically, you tear a strip of paper, apply a heavy layer of chalk to it, layer that over your card, then use a cotton ball to push the chalk onto the card.  Move the strip, apply more chalk, and push the next layer of chalk.  Repeat until the card is covered.  I used different shades of blues to make a sky, then added punches and a stamp.  Unfortunately, I can't show my card yet since I ended up using it for an assignment.  Soon, I hope. 

Next, one more chalk project: Chalk Marbelized Paper.  It sounded really simple- just shave chalk into a pan of water, lay a piece of watercolor paper on top, remove and let dry.  Trevor and I tried different weights of paper and different methods of shaving the chalk.  Eventually, we learned that the most effective tool was the mini grater.  We also learned that it is important to grate and lay the paper into the water quickly.


Here is some of the paper we made.  Interestingly, no fixative is required to keep the chalk in place.  Once the paper is dry, the chalk doesn't rub off.


I couldn't complete this review without trying what I considered to be the weirdest craft in the book: Molded Tissue Cards.  You take a rubber stamp, then lay single plies of toilet paper on top of the rubber portion, using a moist stencil brush to push the toilet paper into the grooves.  Keep going until there are 8 layers, then let it dry overnight, remove and trim.  Apparently this craft is fairly common, but it was new to me.  I made a star.


I really enjoyed trying these five crafts.  I'd recommend "Paper Crafting with Carol Duvall" to paper crafters of all experience levels.