Showing posts with label Valentine's Day. Show all posts

2/19/25

Heart Art Color Chart

Check out my latest heart art! Isn't it pretty?


Each of the colors I used for the project is in its particular place for a reason. I didn't choose the colors, nor where I placed them. Why? My heart art is actually color swatches from my newest paint set, Kuretake Gansai Tambi (affiliate links here and below). The hearts are the first four rows of paints, in order. The background squares are the next four rows of paints, in order. (For this project, I didn't swatch the last row, which is white and three metallics.) 


Gansai is a type of Japanese watercolors. It comes in large pans (perfect for the large brushes used in Japanese painting) and is designed to work well with Japanese rice papers. There is a wide range of colors so that the artist doesn't need to mix their own. Although they are water-based, gansai don't behave like other watercolors. They require very little water and are designed to stay in place instead of flowing on the paper. There are different brands of gansai, just like there are different brands of western watercolors. Kuretake's brand name combines the word gansai (watercolor paint) with the word tambi (aesthetics).

I had never tried gansai before, so I thought this project would be a fun way to experiment with my new paint set. I started by using 1/4" painter's tape to create a grid on a 9" square of watercolor paper. You can eyeball it, but using a centering ruler makes it really quick and easy to get perfect squares. Be sure your painter's tape is pressed firmly to the paper so no pigment sneaks underneath and spoils your white lines. 


Now fill in the squares with the paints in rows 5-8. So pretty!


While the base is drying, use a heart squeeze punch to make 16 hearts from watercolor paper. 


Paint the hearts with the colors in rows 1-4. Beautiful!


When the paint is completely dry, glue the hearts onto the background. 


I plan to hang my project on the wall so I can both enjoy it and use it when I need paint swatches. But first, I put it onto the floor and dropped two large sequins onto it. 


Why? I'll tell you tomorrow. 

2/13/23

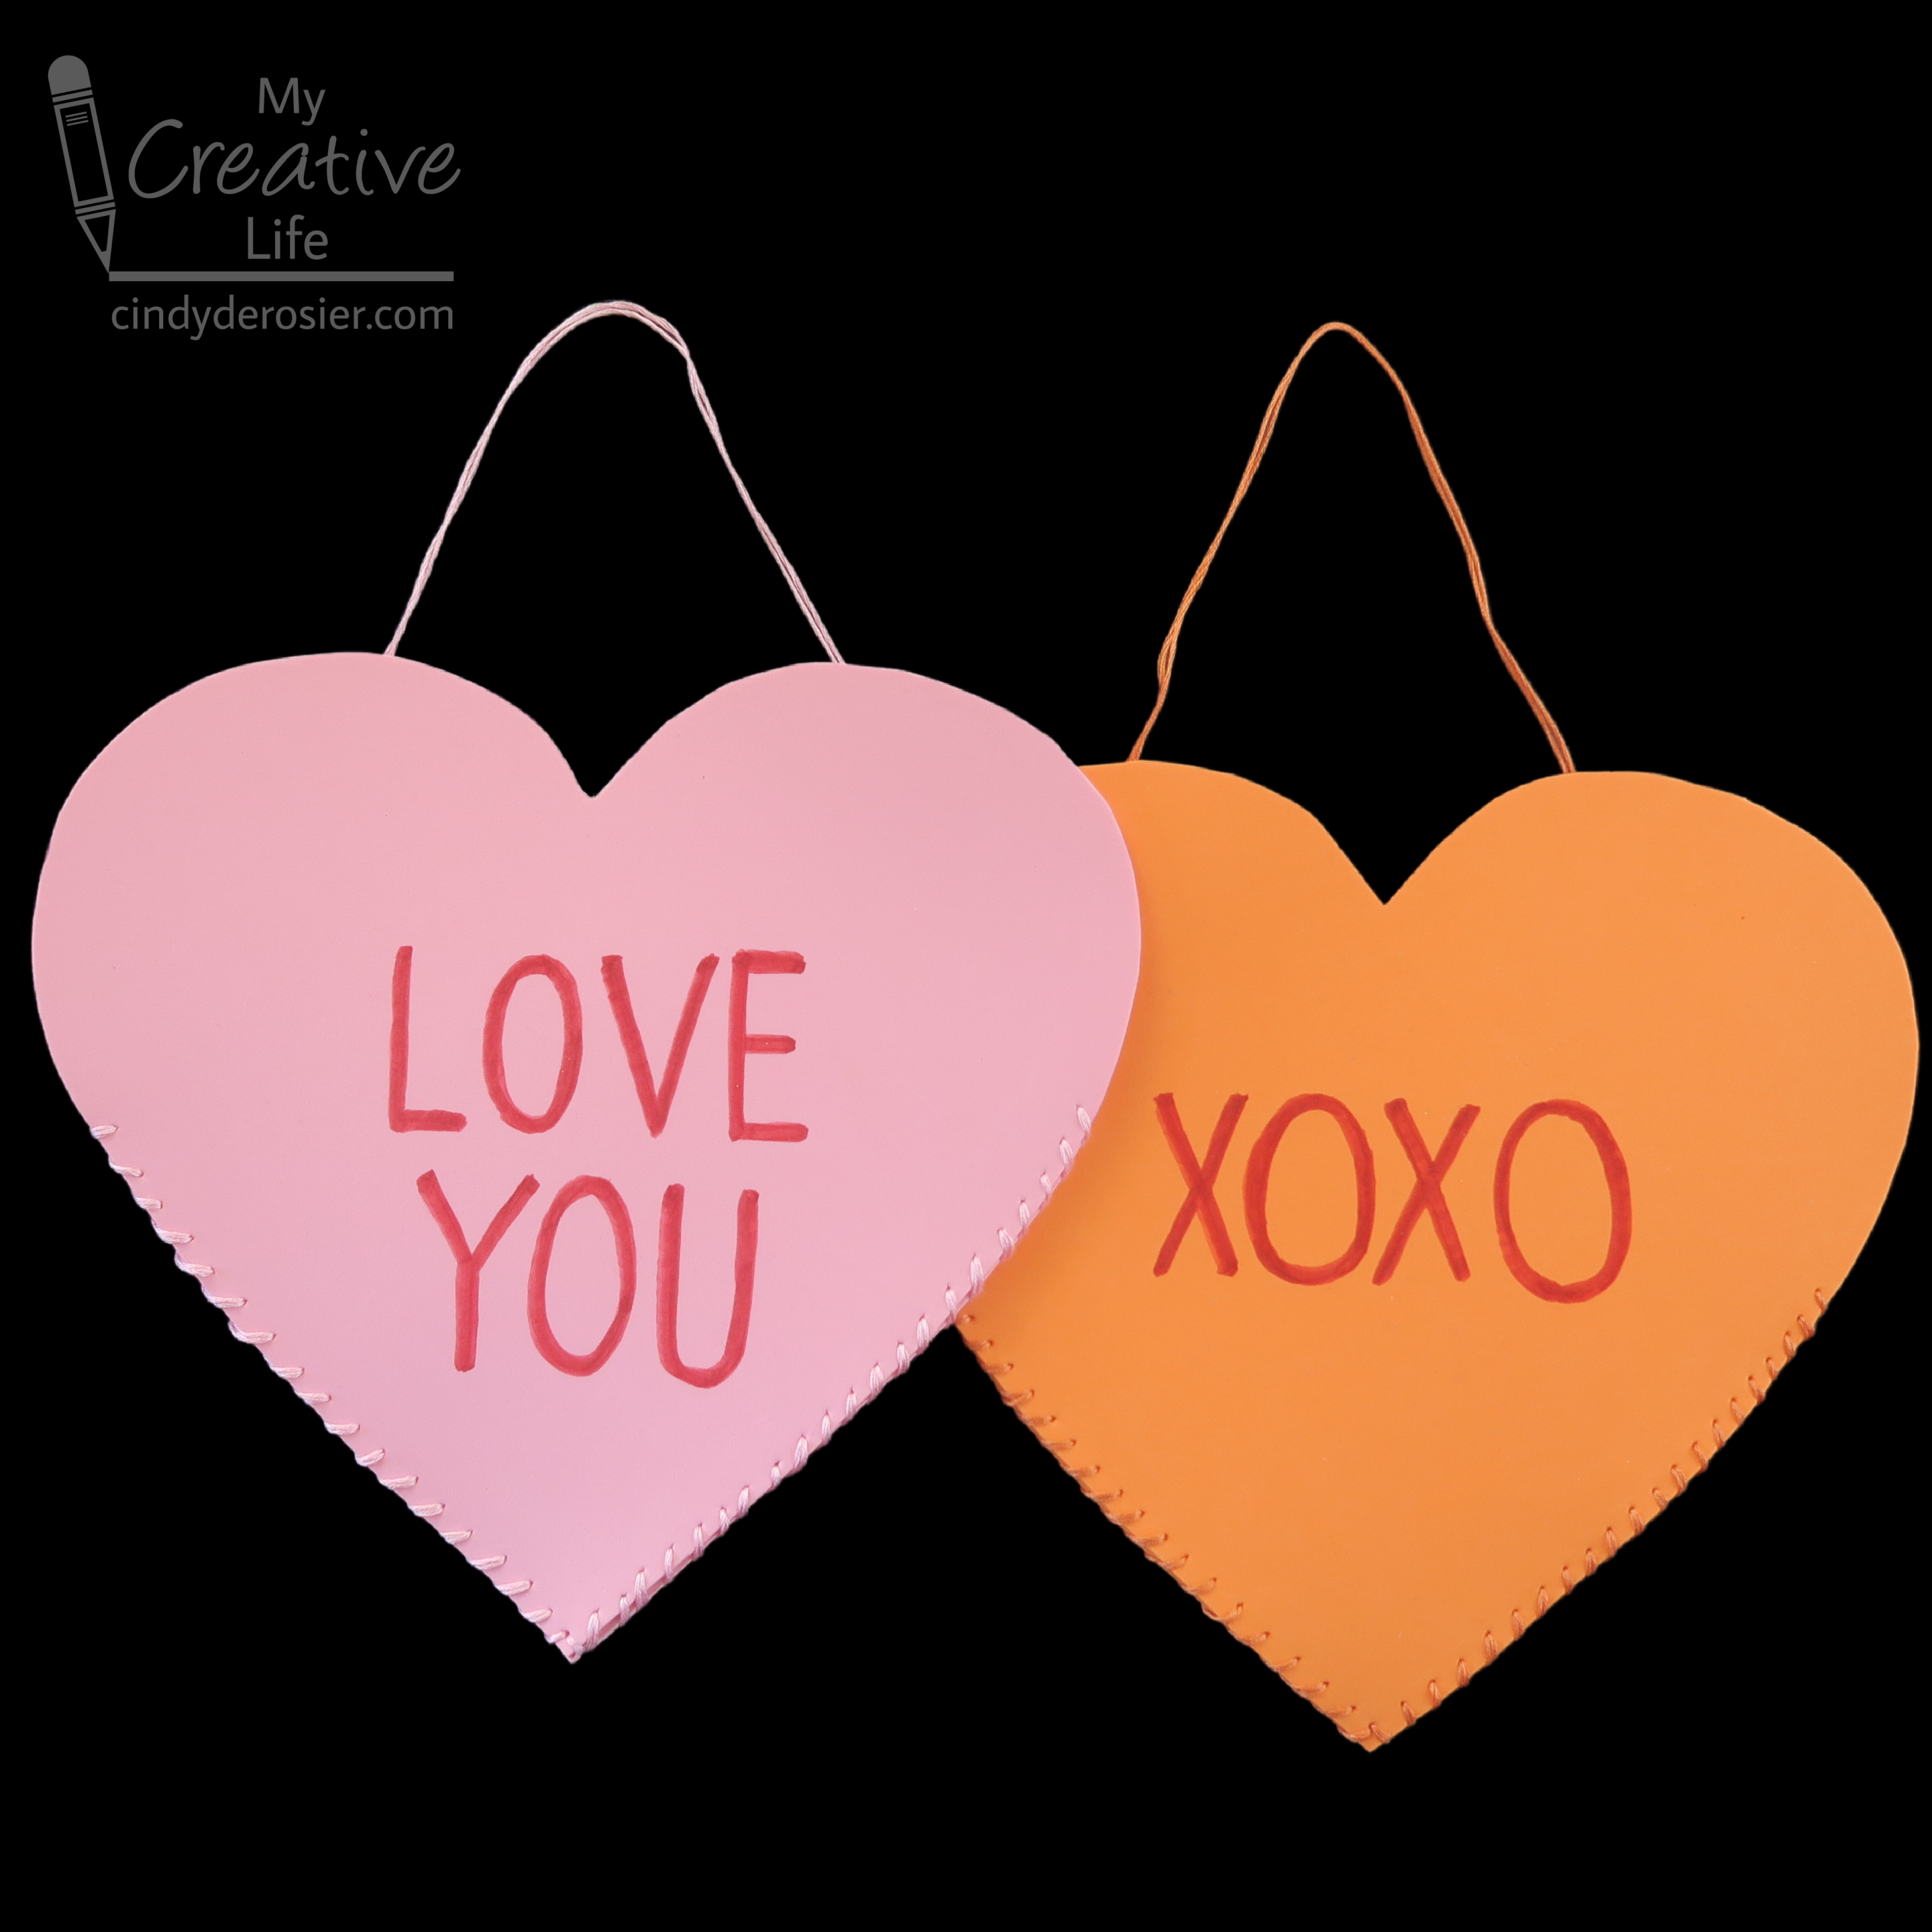
Conversation Heart Valentine Holders

I miss the elementary school version of Valentine's Day. I loved it as a kid, I loved it as a teacher, and I loved it as a parent. I loved making and receiving cards, eating lots of candy (especially conversation hearts!), and doing all sorts of valentine-themed crafting. 

As a bit of a throwback, I made these valentine holders for my two loves, Steve and Trevor. This was the first time I've ever sewn craft foam, something I will definitely be doing again. It's a great way to introduce young crafters to hand sewing. Affiliate links below. 


Conversation Heart Valentine Holders


Materials: 


Steps: 


Create a heart template using scratch paper. It should be big enough to hold cards and whatever else you'll be putting inside. Trace the template onto a sheet of craft foam, then cut out the heart. Repeat this step so that you have two hearts. 

Using conversation hearts as inspiration, think of a message for your valentine holder. You can write the message directly onto the heart with a red pen, or try this trick to make sure you get the spacing even. Write the message on a piece of binder paper, then center the paper onto the heart. Trace over the message with a pencil, pressing firmly. This will make grooves in the craft foam, which you can then trace with the red pen. 


Cut a long strand of embroidery floss. The amount you need depends on the size of your heart, how close you want your stitches to be, and how long you want the hanger to be. I used about 6 feet of floss. I sewed with it doubled up (two 6-strand pieces) but that is optional.  

Tie a knot at the end of the floss. Line up the two pieces of foam and start sewing approximately where your message starts. Don't stitch too high or you won't be able to put stuff into your valentine holder! Conversely, if you stitch too low, your stuff will fall out. Aim for the middle. 

Hide the knot inside the holder, then use a whipstitch to sew down one side toward the point. I went down the left and up the right, but you can do the opposite if you want. 


When you get to the point, do another whipstitch and re-enter the previous hole. Then continue up the other side. 


If you've never sewn craft foam before, let me tell you - it is a dream. Every beginner should learn stitches on craft foam. It's sturdy enough that you don't need to hold it taut like fabric and the needle glides through it with little pressure. 

You're finished sewing when you reach the point opposite where you started. Don't cut the floss yet! To make the hanger, stretch out the amount of floss you want. Put the needle into the very first place you started, but do not pull the floss tight. Bury a knot inside the hanger, then cut off any extra floss. 


Your valentine hanger is ready to fill with cards, candy, stickers, small toys, and other goodies!


Those Peanuts valentines peeking out are leftover from my teaching days (16+ years ago). I went poking on Amazon to see if they still make them, which led me down a path of all sorts of Peanuts-themed valentine stuff. Enjoy!

1/30/23

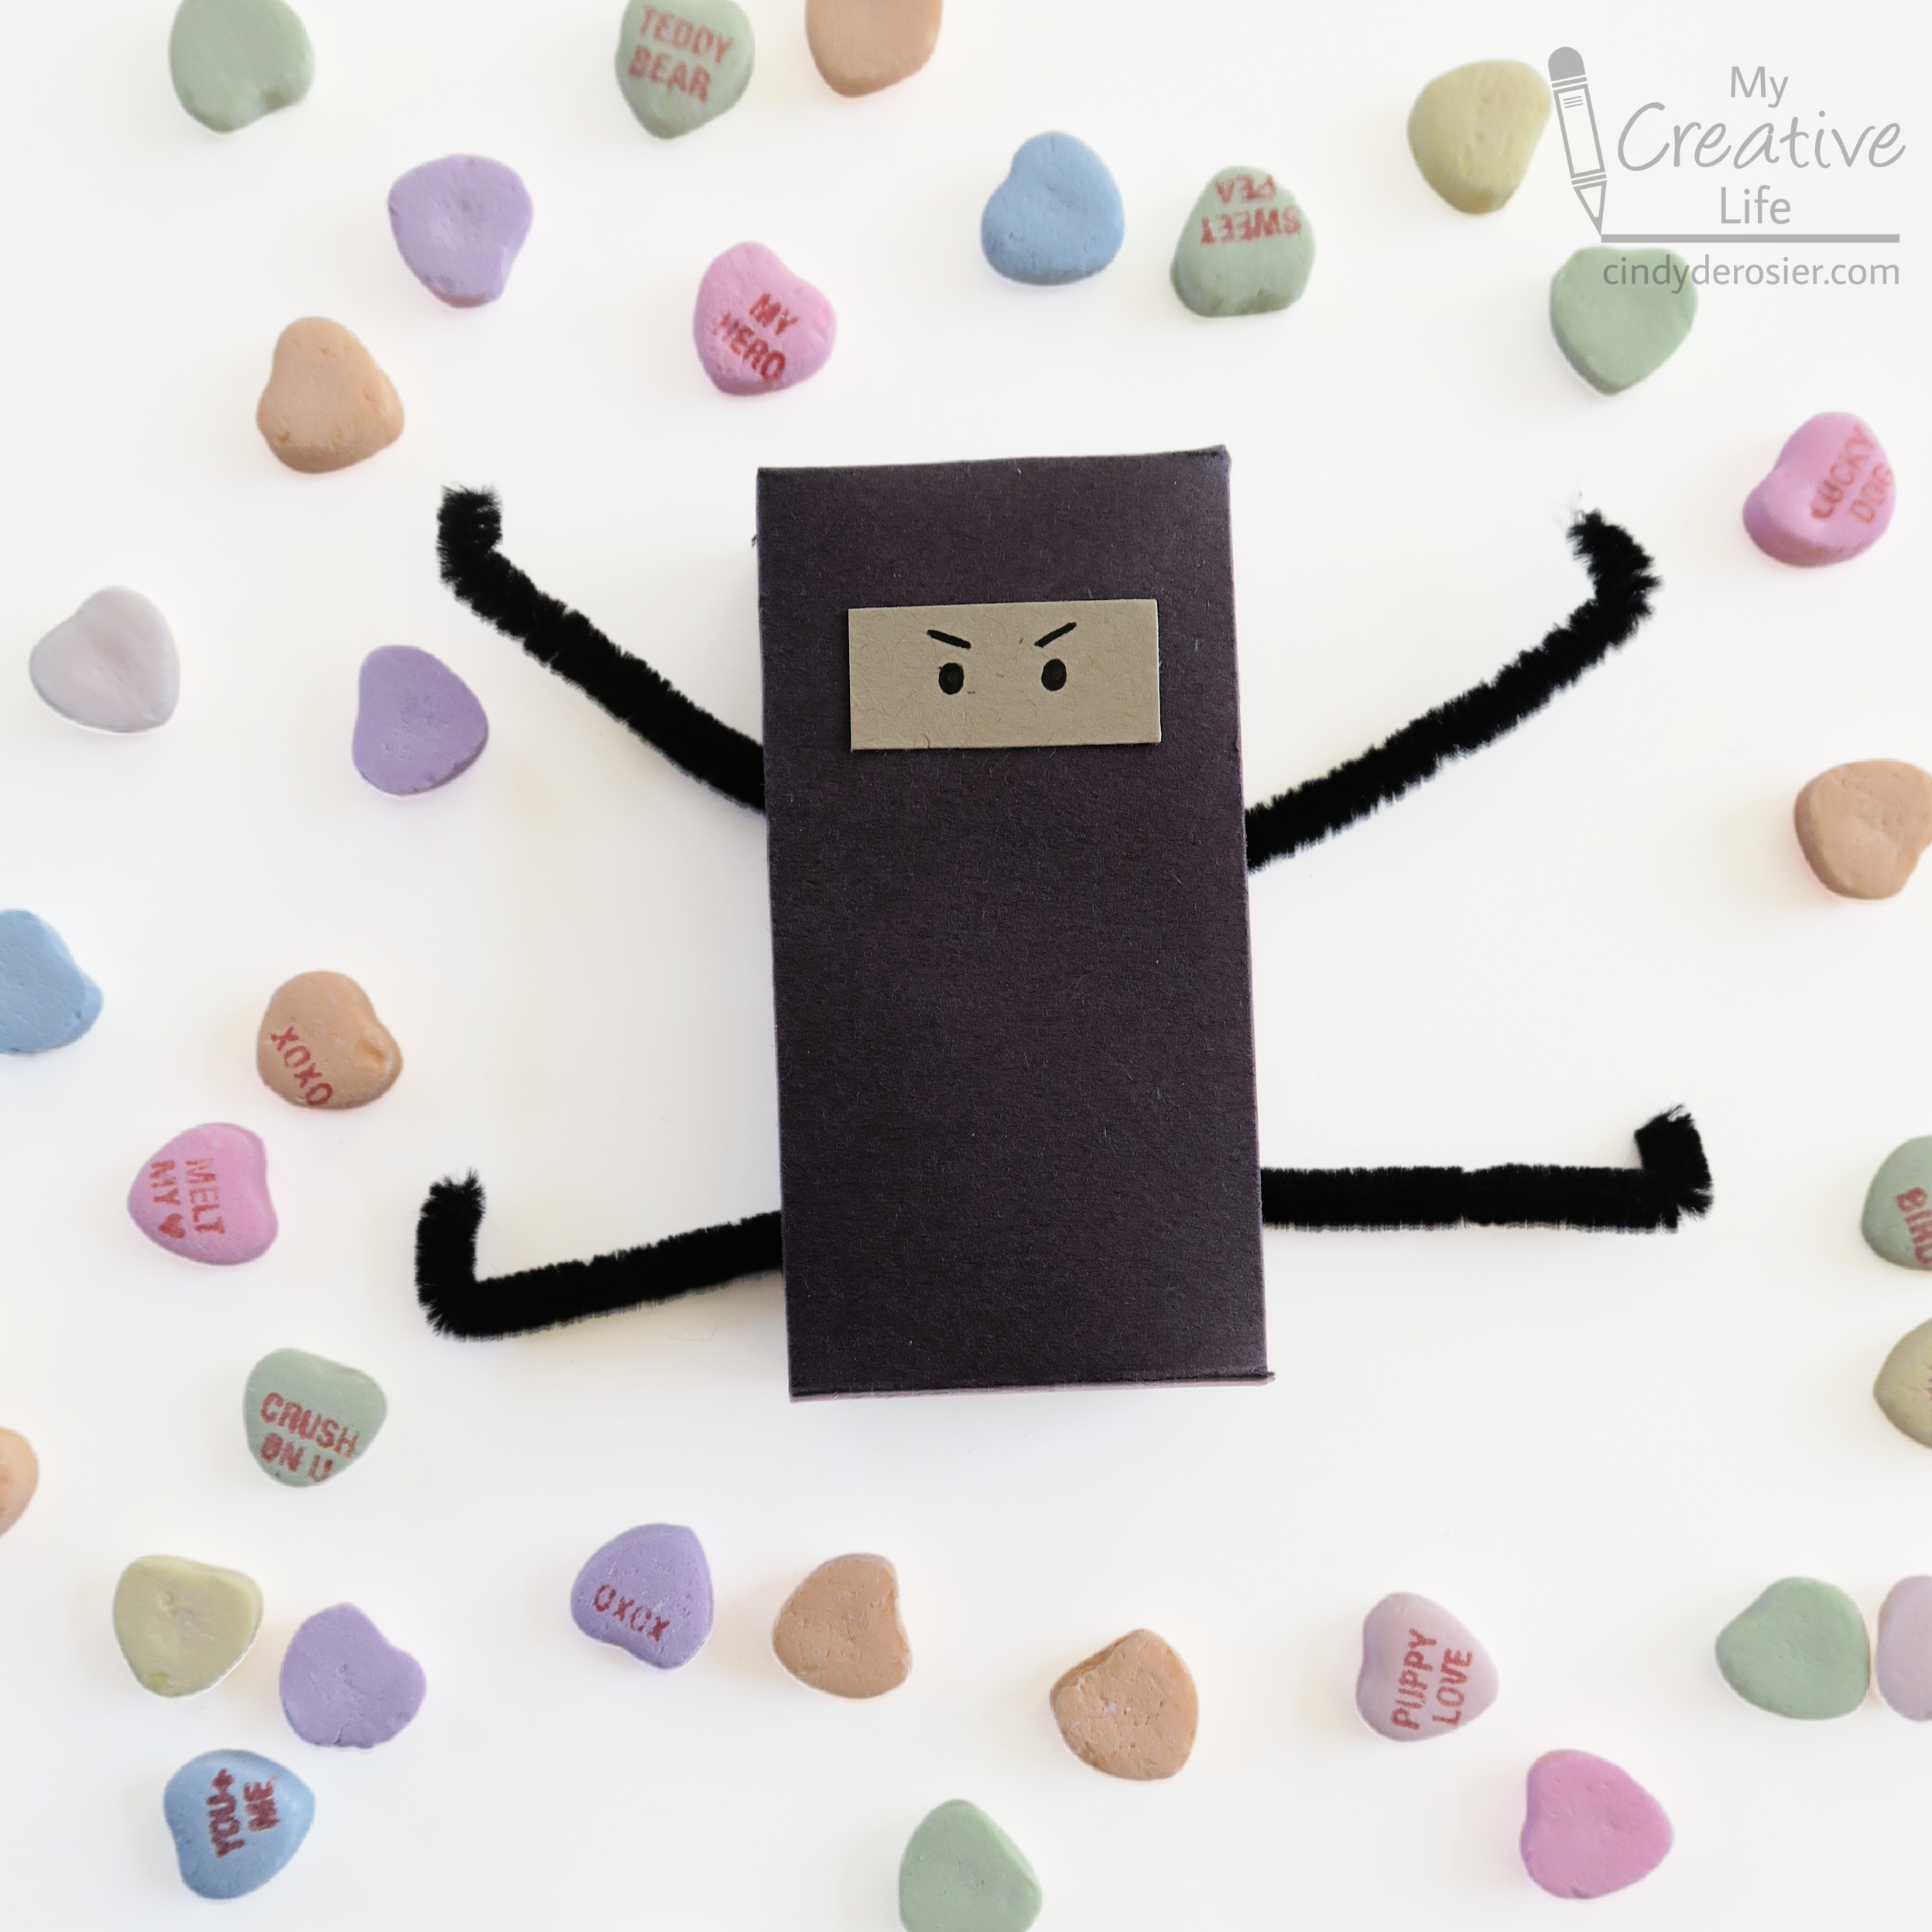
Conversation Hearts Ninja Valentines

I miss the days when Trevor would make cute homemade valentines for all of his friends. I was thinking back to the Ninjago valentines he made in first grade, which inspired me to make a new version of ninja valentines. They start with a box of conversation hearts, which gave me a great excuse to buy conversation hearts. They're one of my favorite candies. 

Hi-ya!


Ka-pow!


Not only are they cute, but posing them is ridiculously fun. Affiliate links below. 
---------


Conversation Heart Ninja Valentines


Materials: 


Steps: 


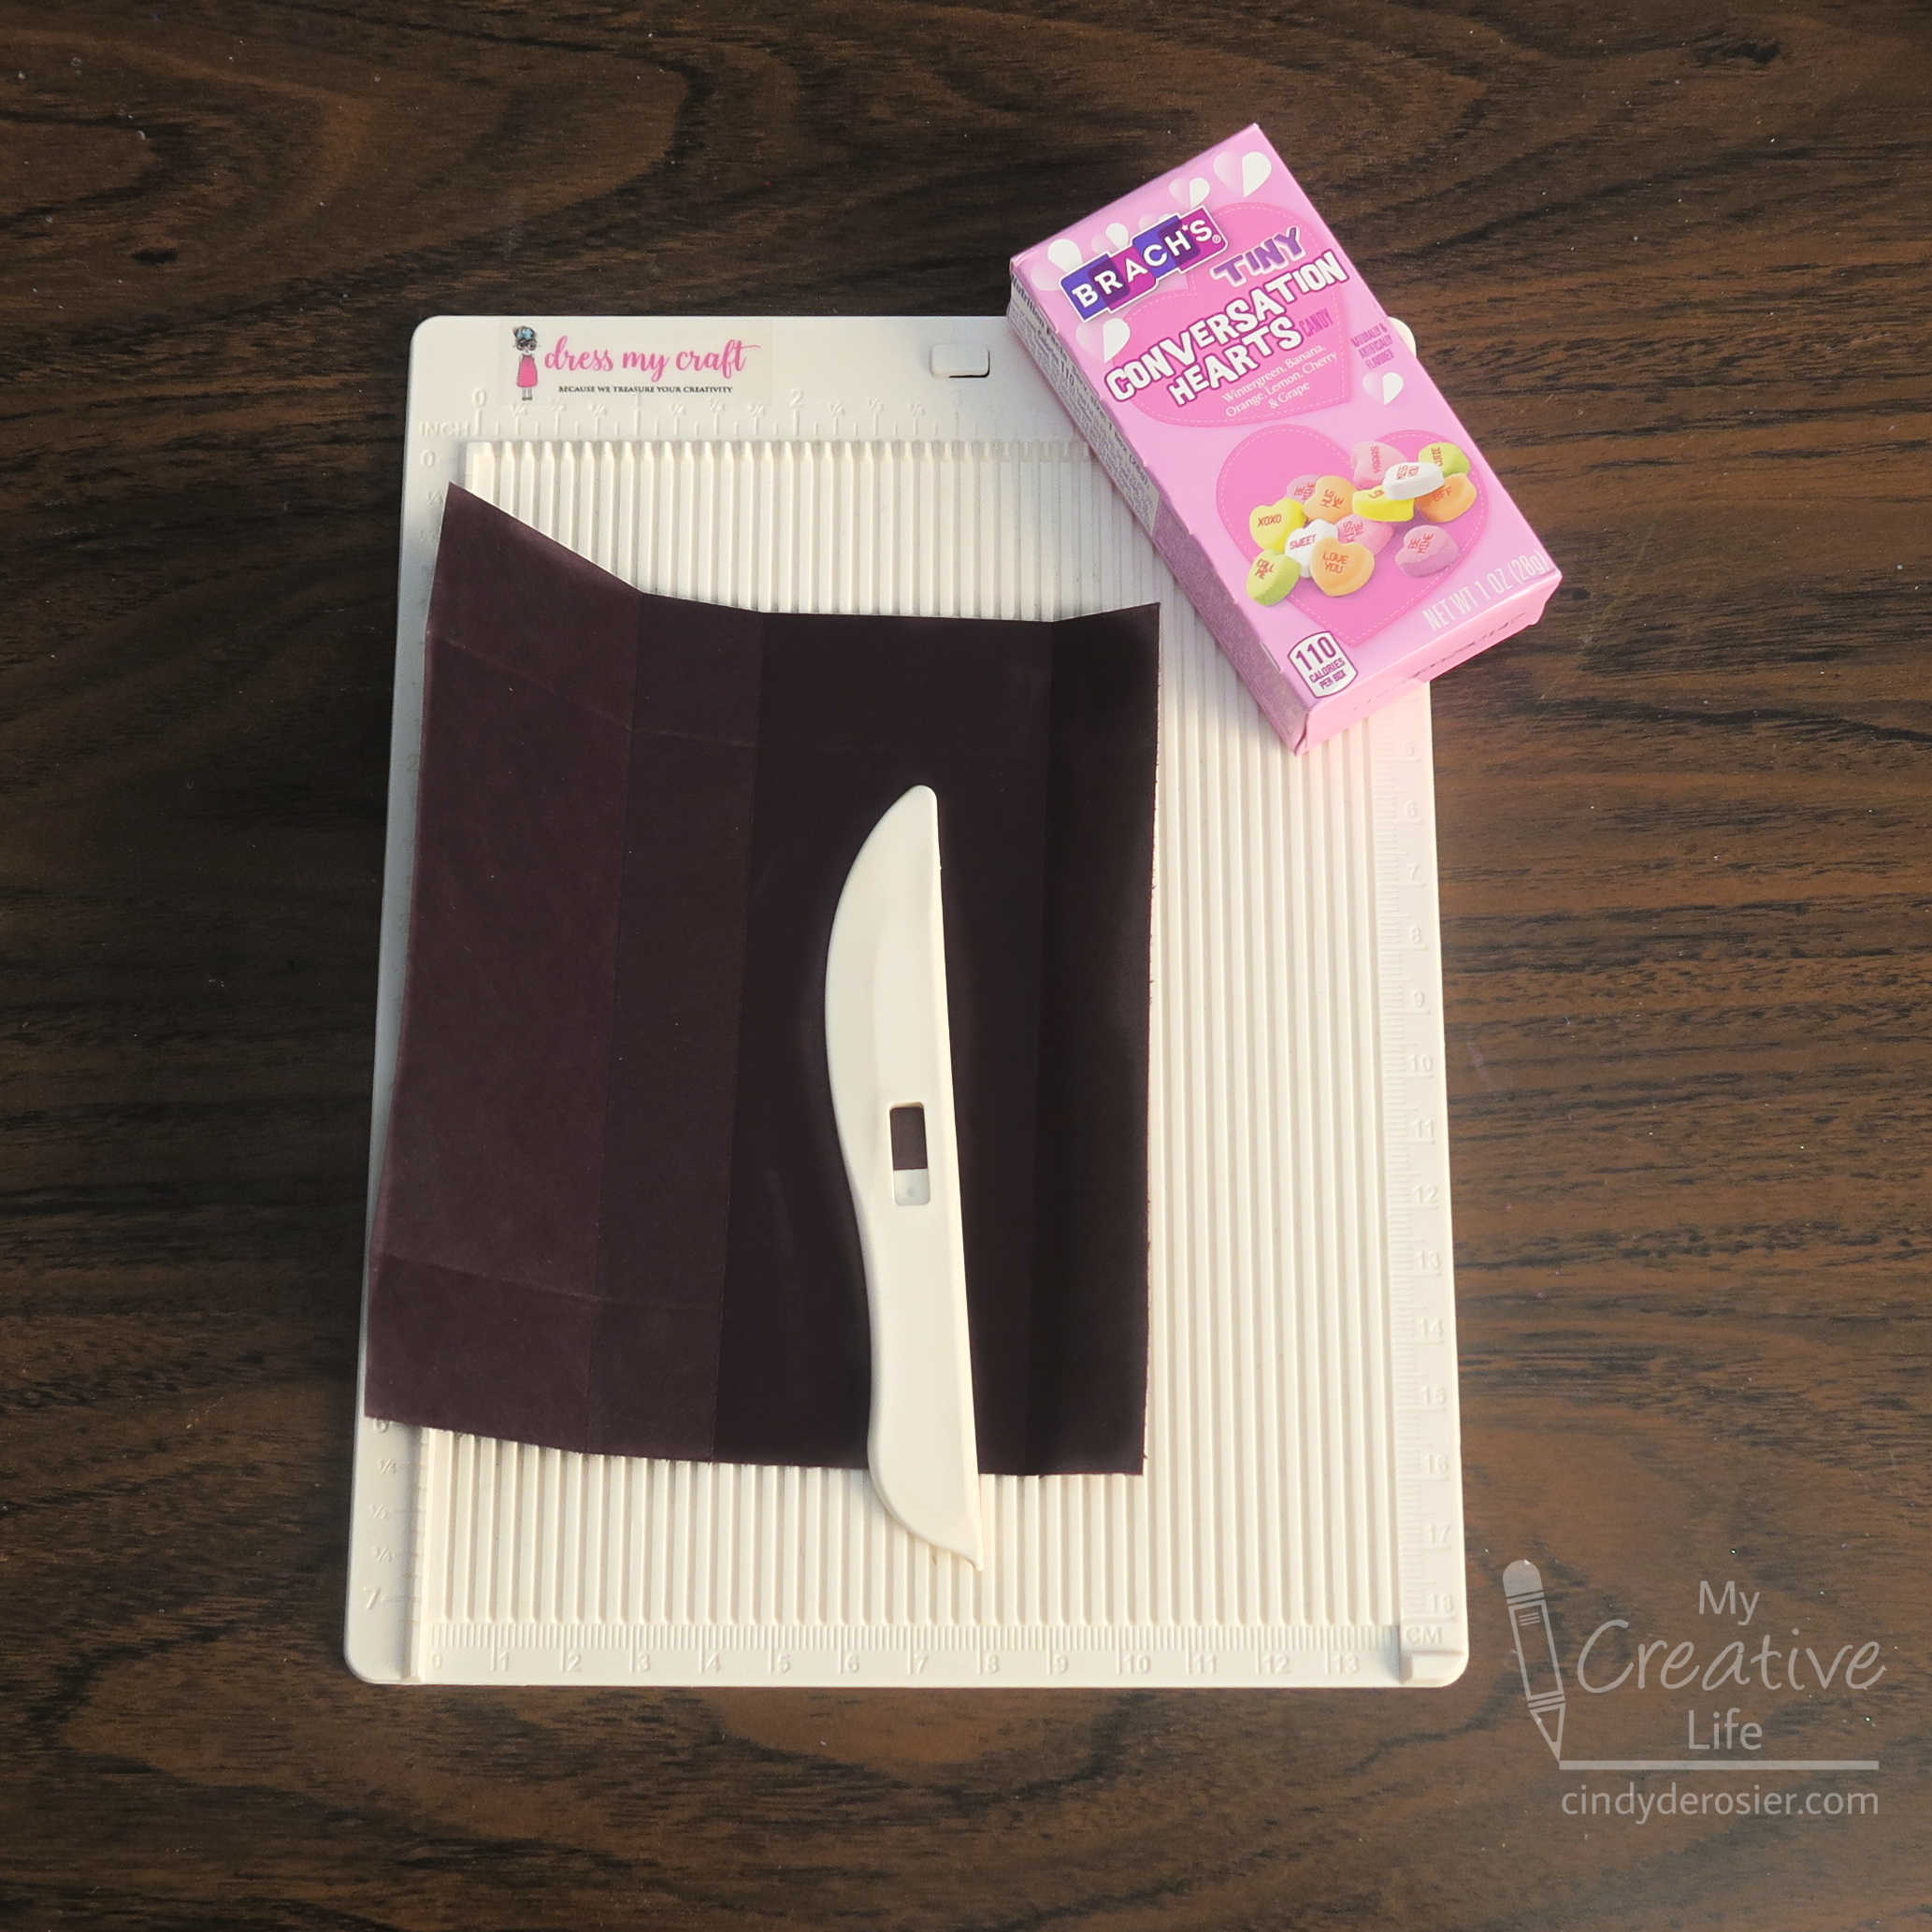
Wrap the box in black cardstock or construction paper. You can simply wrap it like you'd wrap a present, or you can measure, cut a rectangle to size, and score it along the fold lines to get crisp edges. I prefer that look, so that's what I did. 

Secure the paper with the black painters tape, or glue it directly to the box with craft glue. I used tape. Cut a rectangle from your desired skin tone cardstock, then draw on eyes and eyebrows. Glue the rectangle to the box. 

Cut a pipe cleaner in half, then bend each half in half. Bend the ends to form the hands and feet, then position the arms and legs how you want them. Use several pieces of tape to secure them to the back of the box. 

You can give your ninjas as is. But if you want to write a message and/or include to/from information, write it on a label sticker, then attach to the back of the box. This has the added benefit of further securing the arms and legs.

1/24/23

Washi Tape Valentine Heart Suncatcher

I made another project this week to add to my huge collection of Valentine's Day decorations. This is what it looks like on the wall...


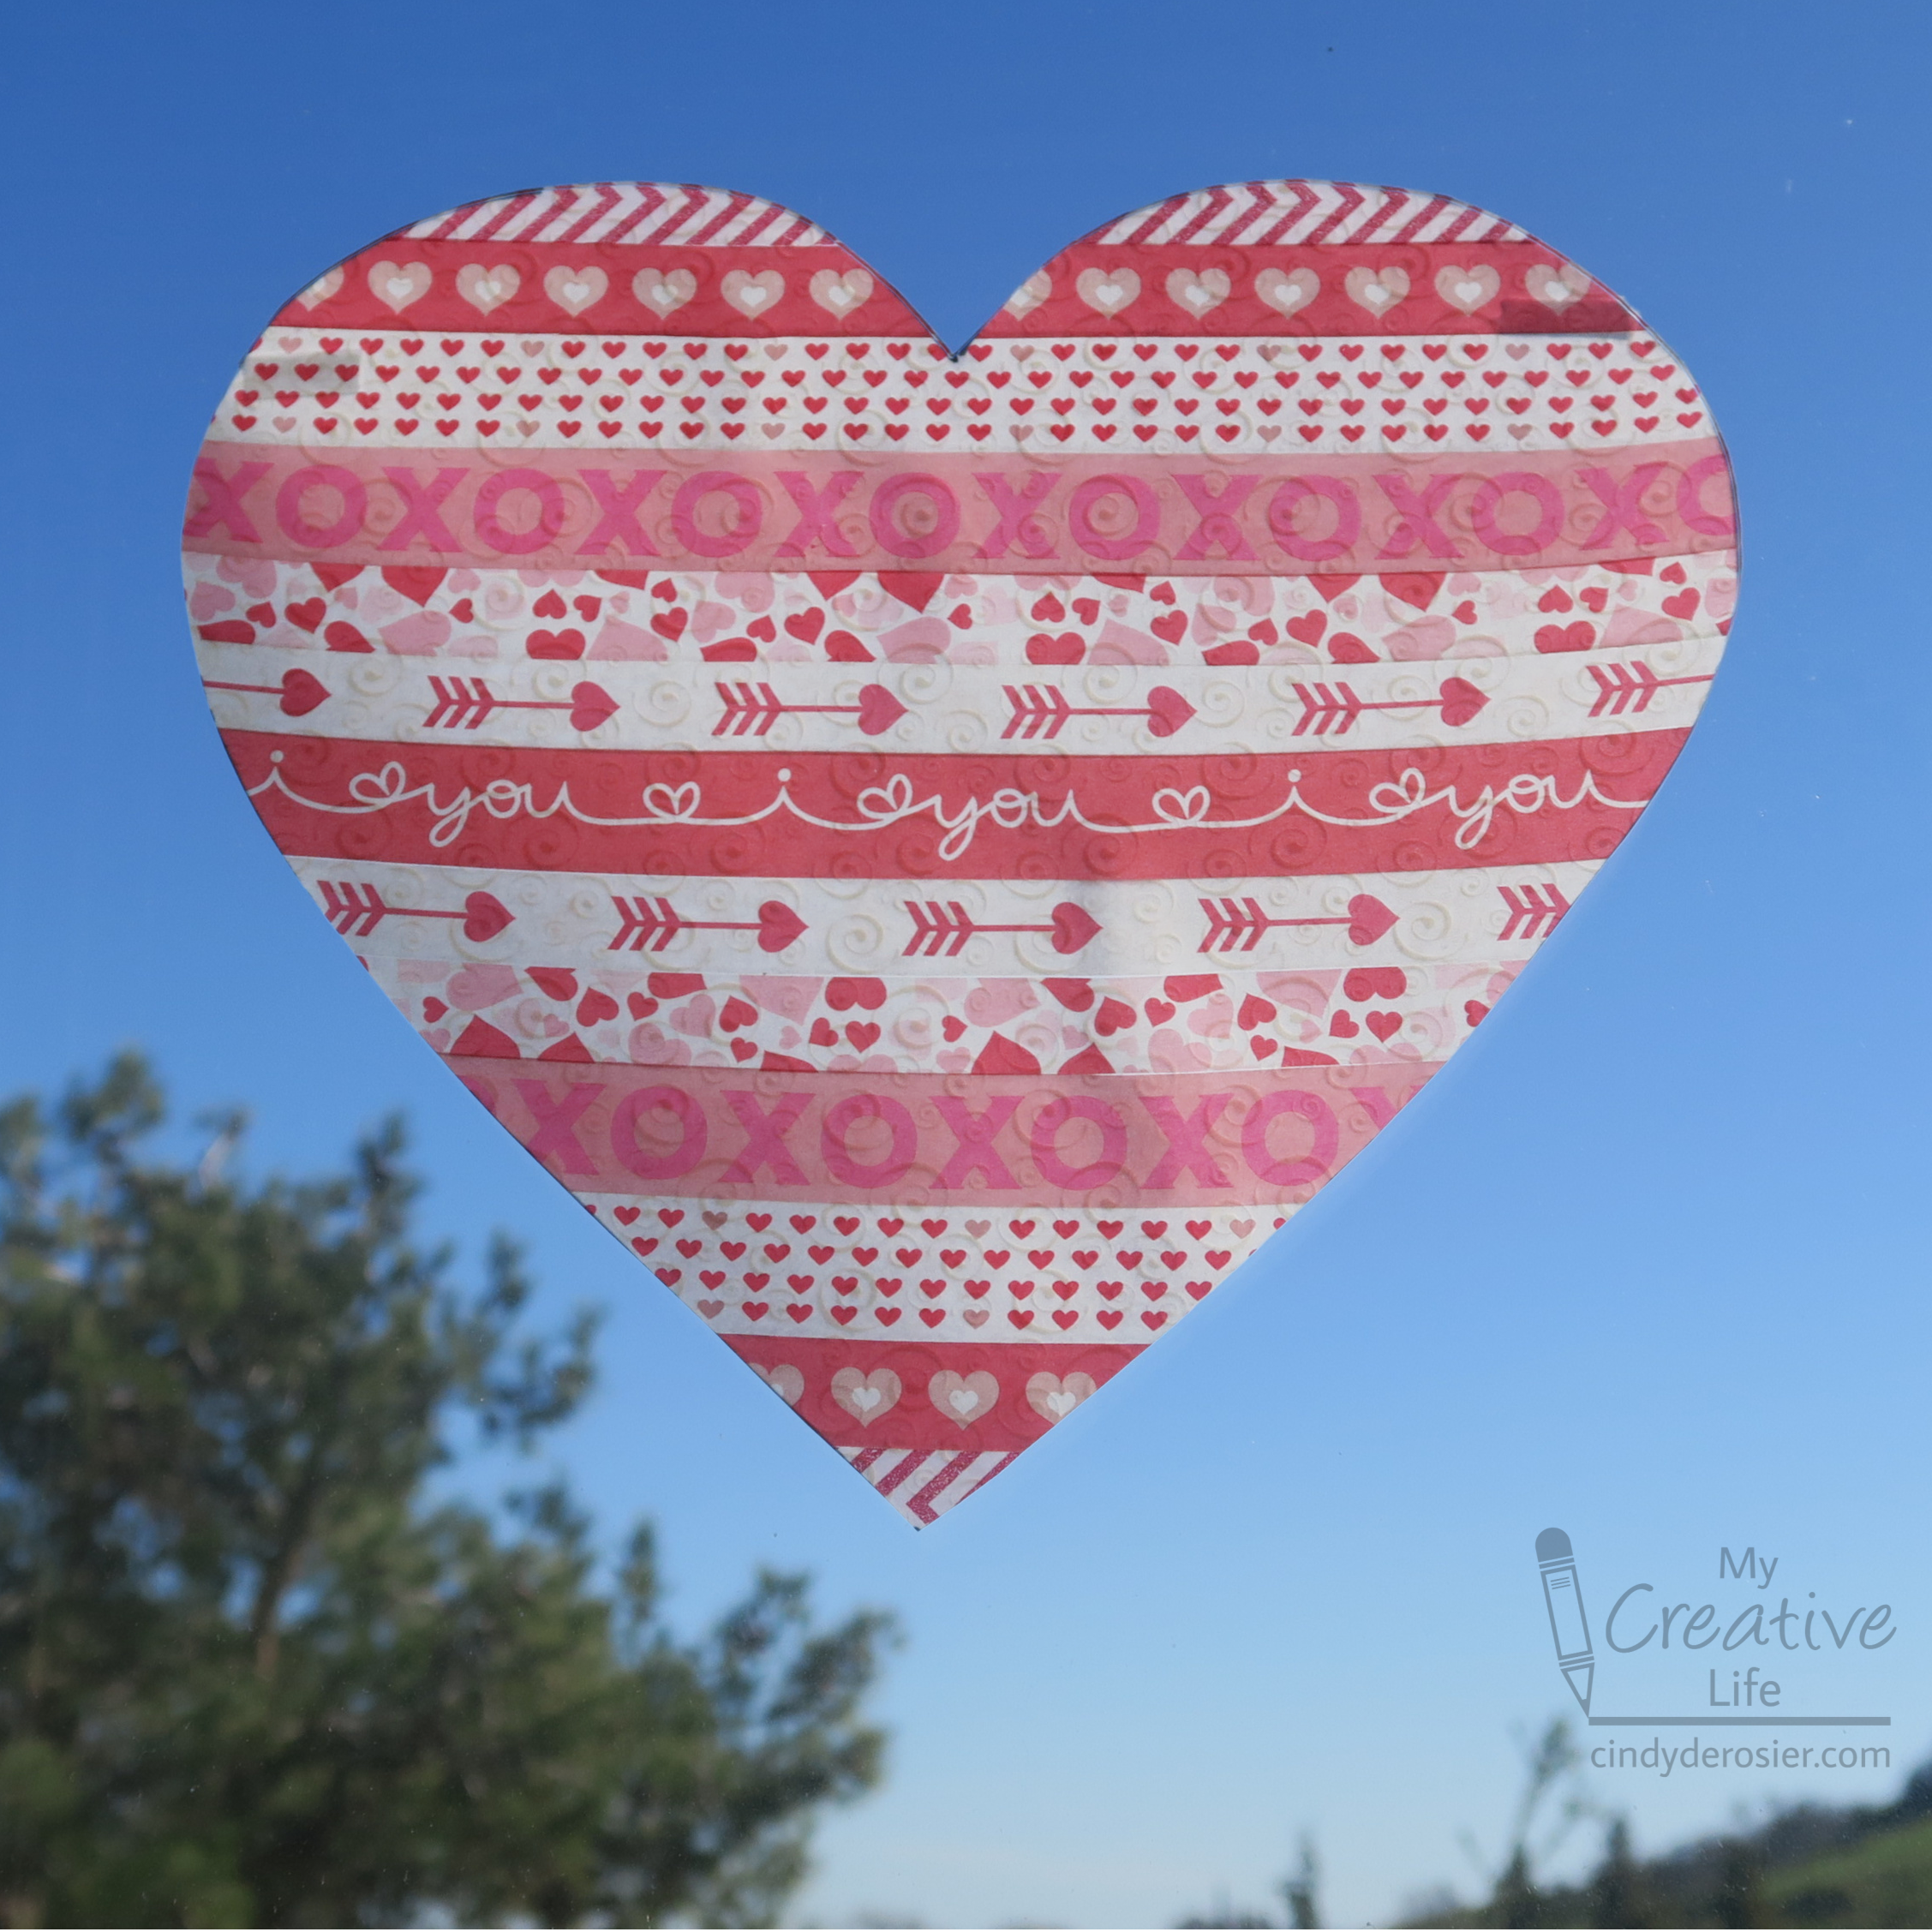
... but it's intended as a suncatcher. Look how pretty it is in our bedroom window, against the bright blue sky. 


The whole project takes about 10 minutes and the end product is so pretty. Note that I used a 20+ year old scrap of patterned vellum, which is really hard to find. It's also hard to find the same washi tapes I used. Below, you'll find affiliate links to non-patterned vellum, different Valentine's Day washi tapes, and other products you'll need to make this.

---------


Washi Tape Valentine Heart Suncatcher


Materials: 


Steps: 


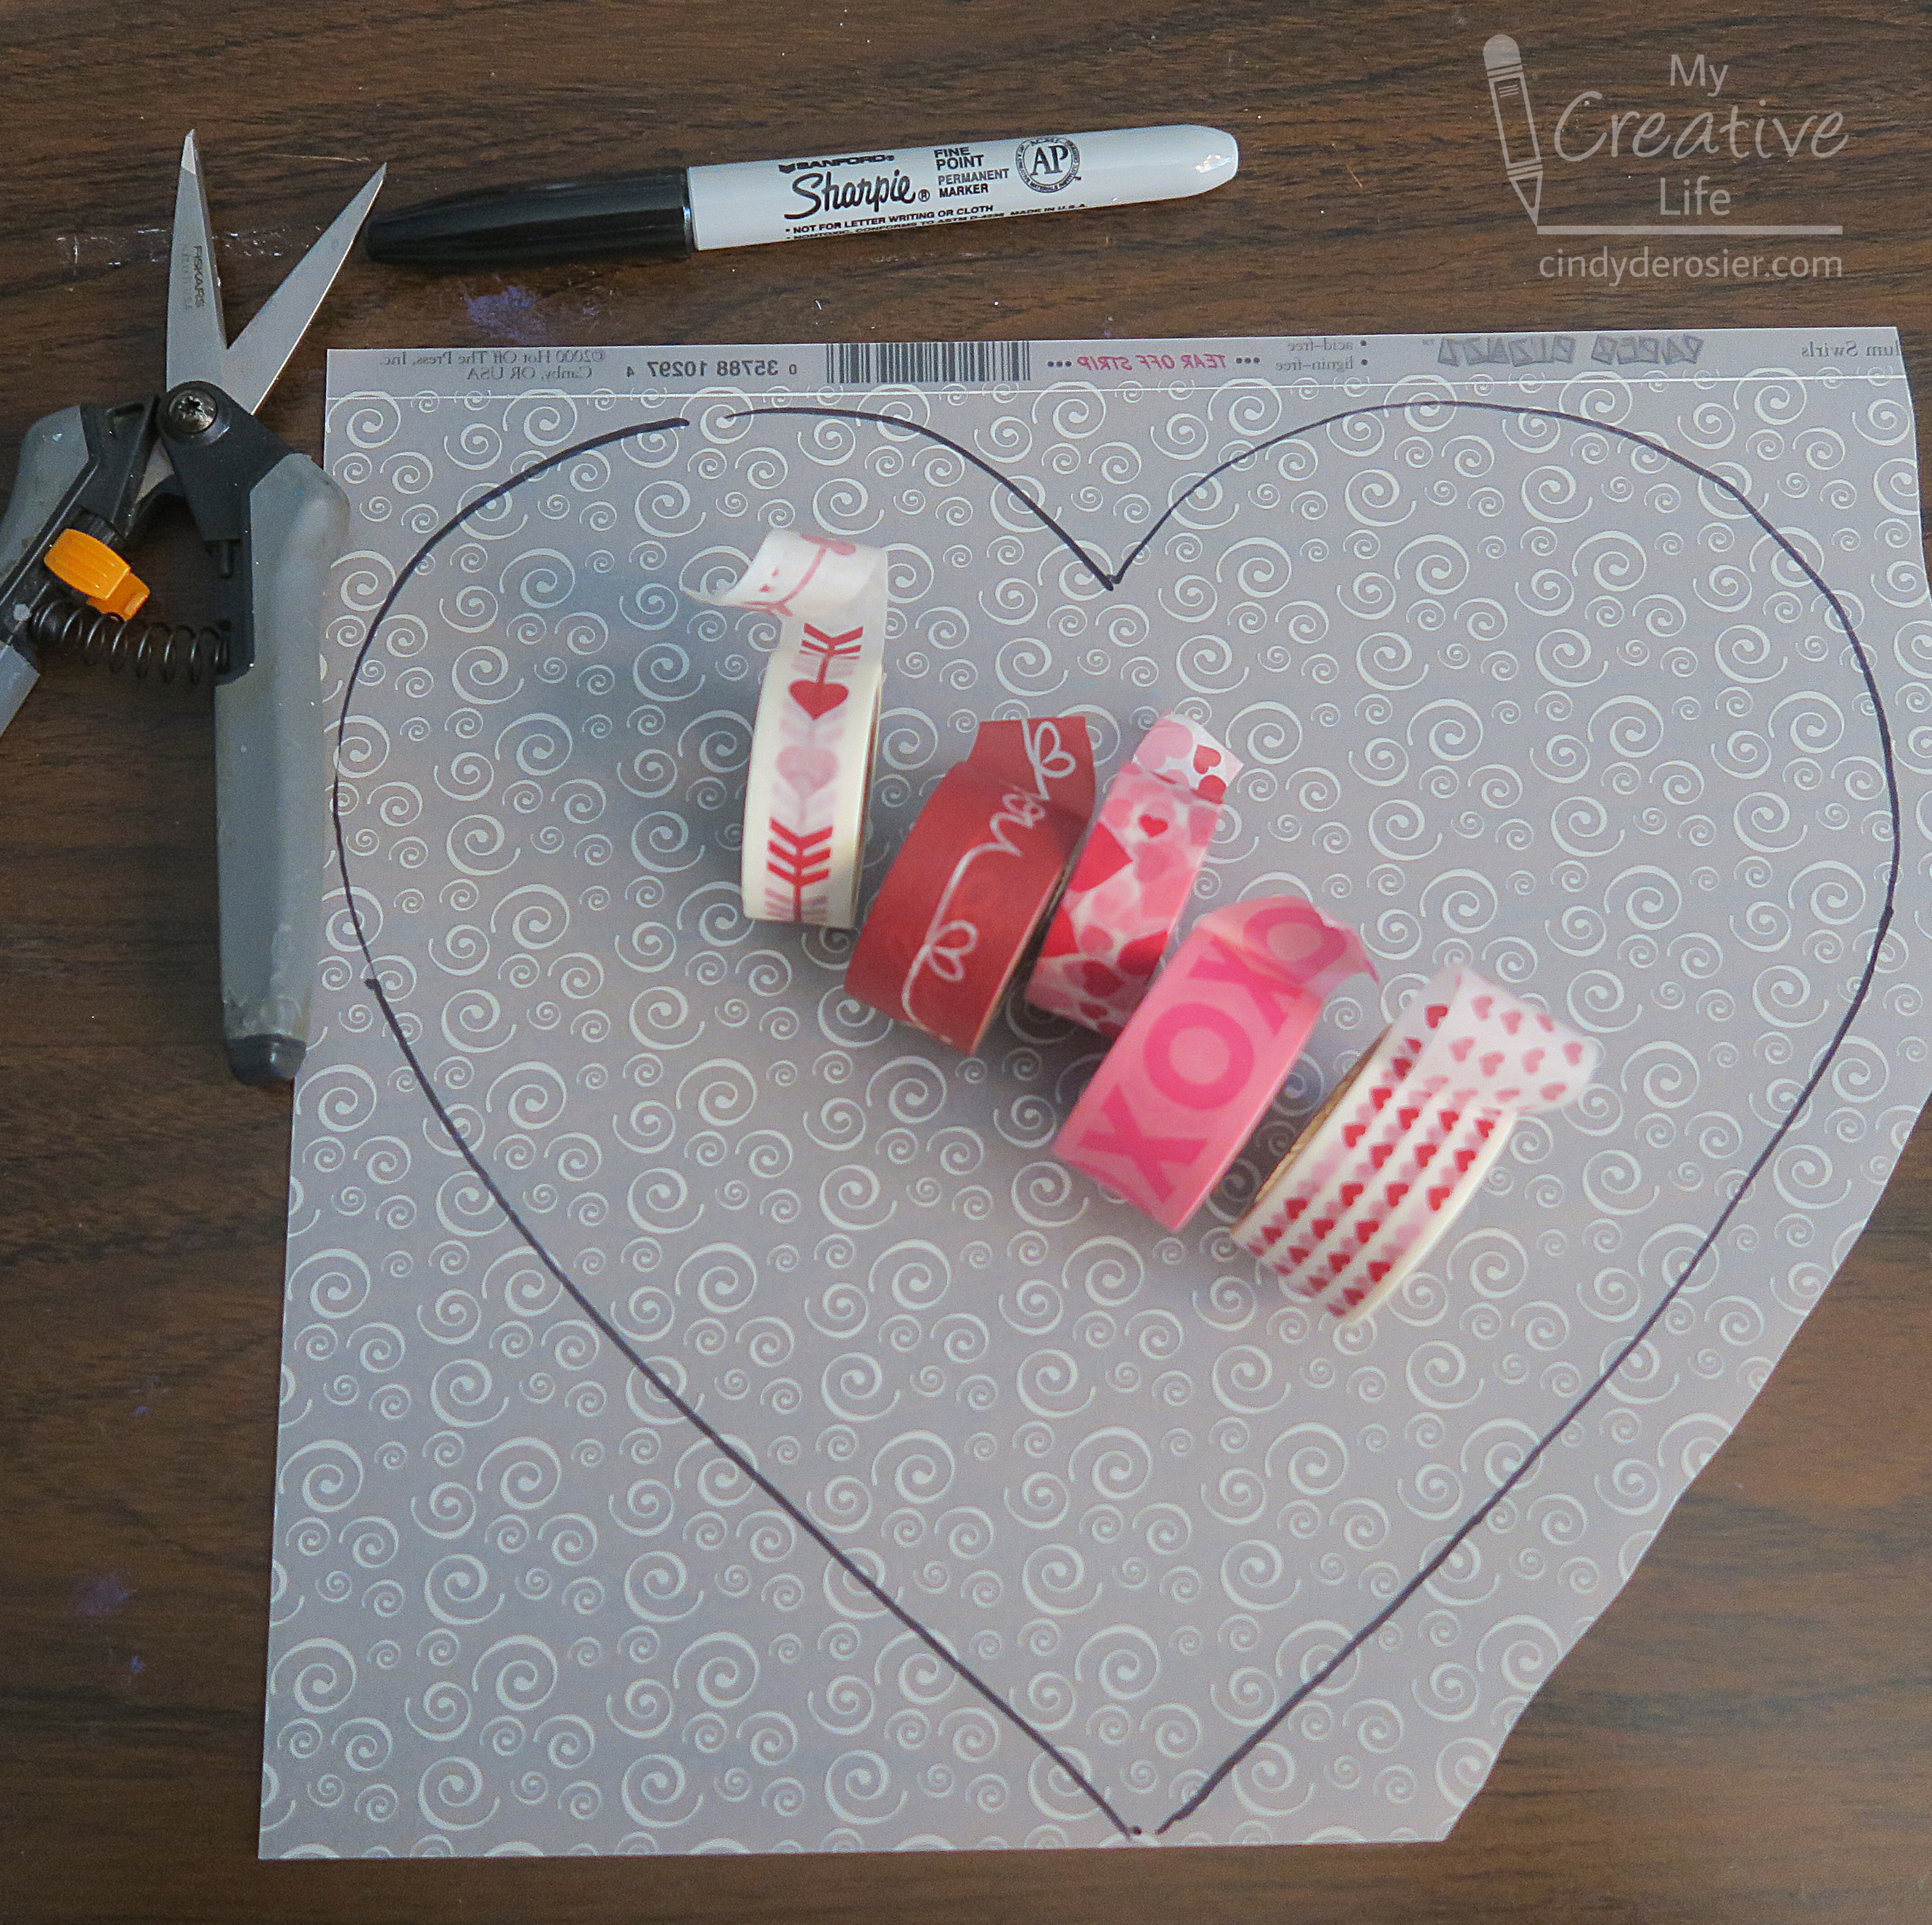
Make a heart pattern, then trace it onto the vellum with the Sharpie. 


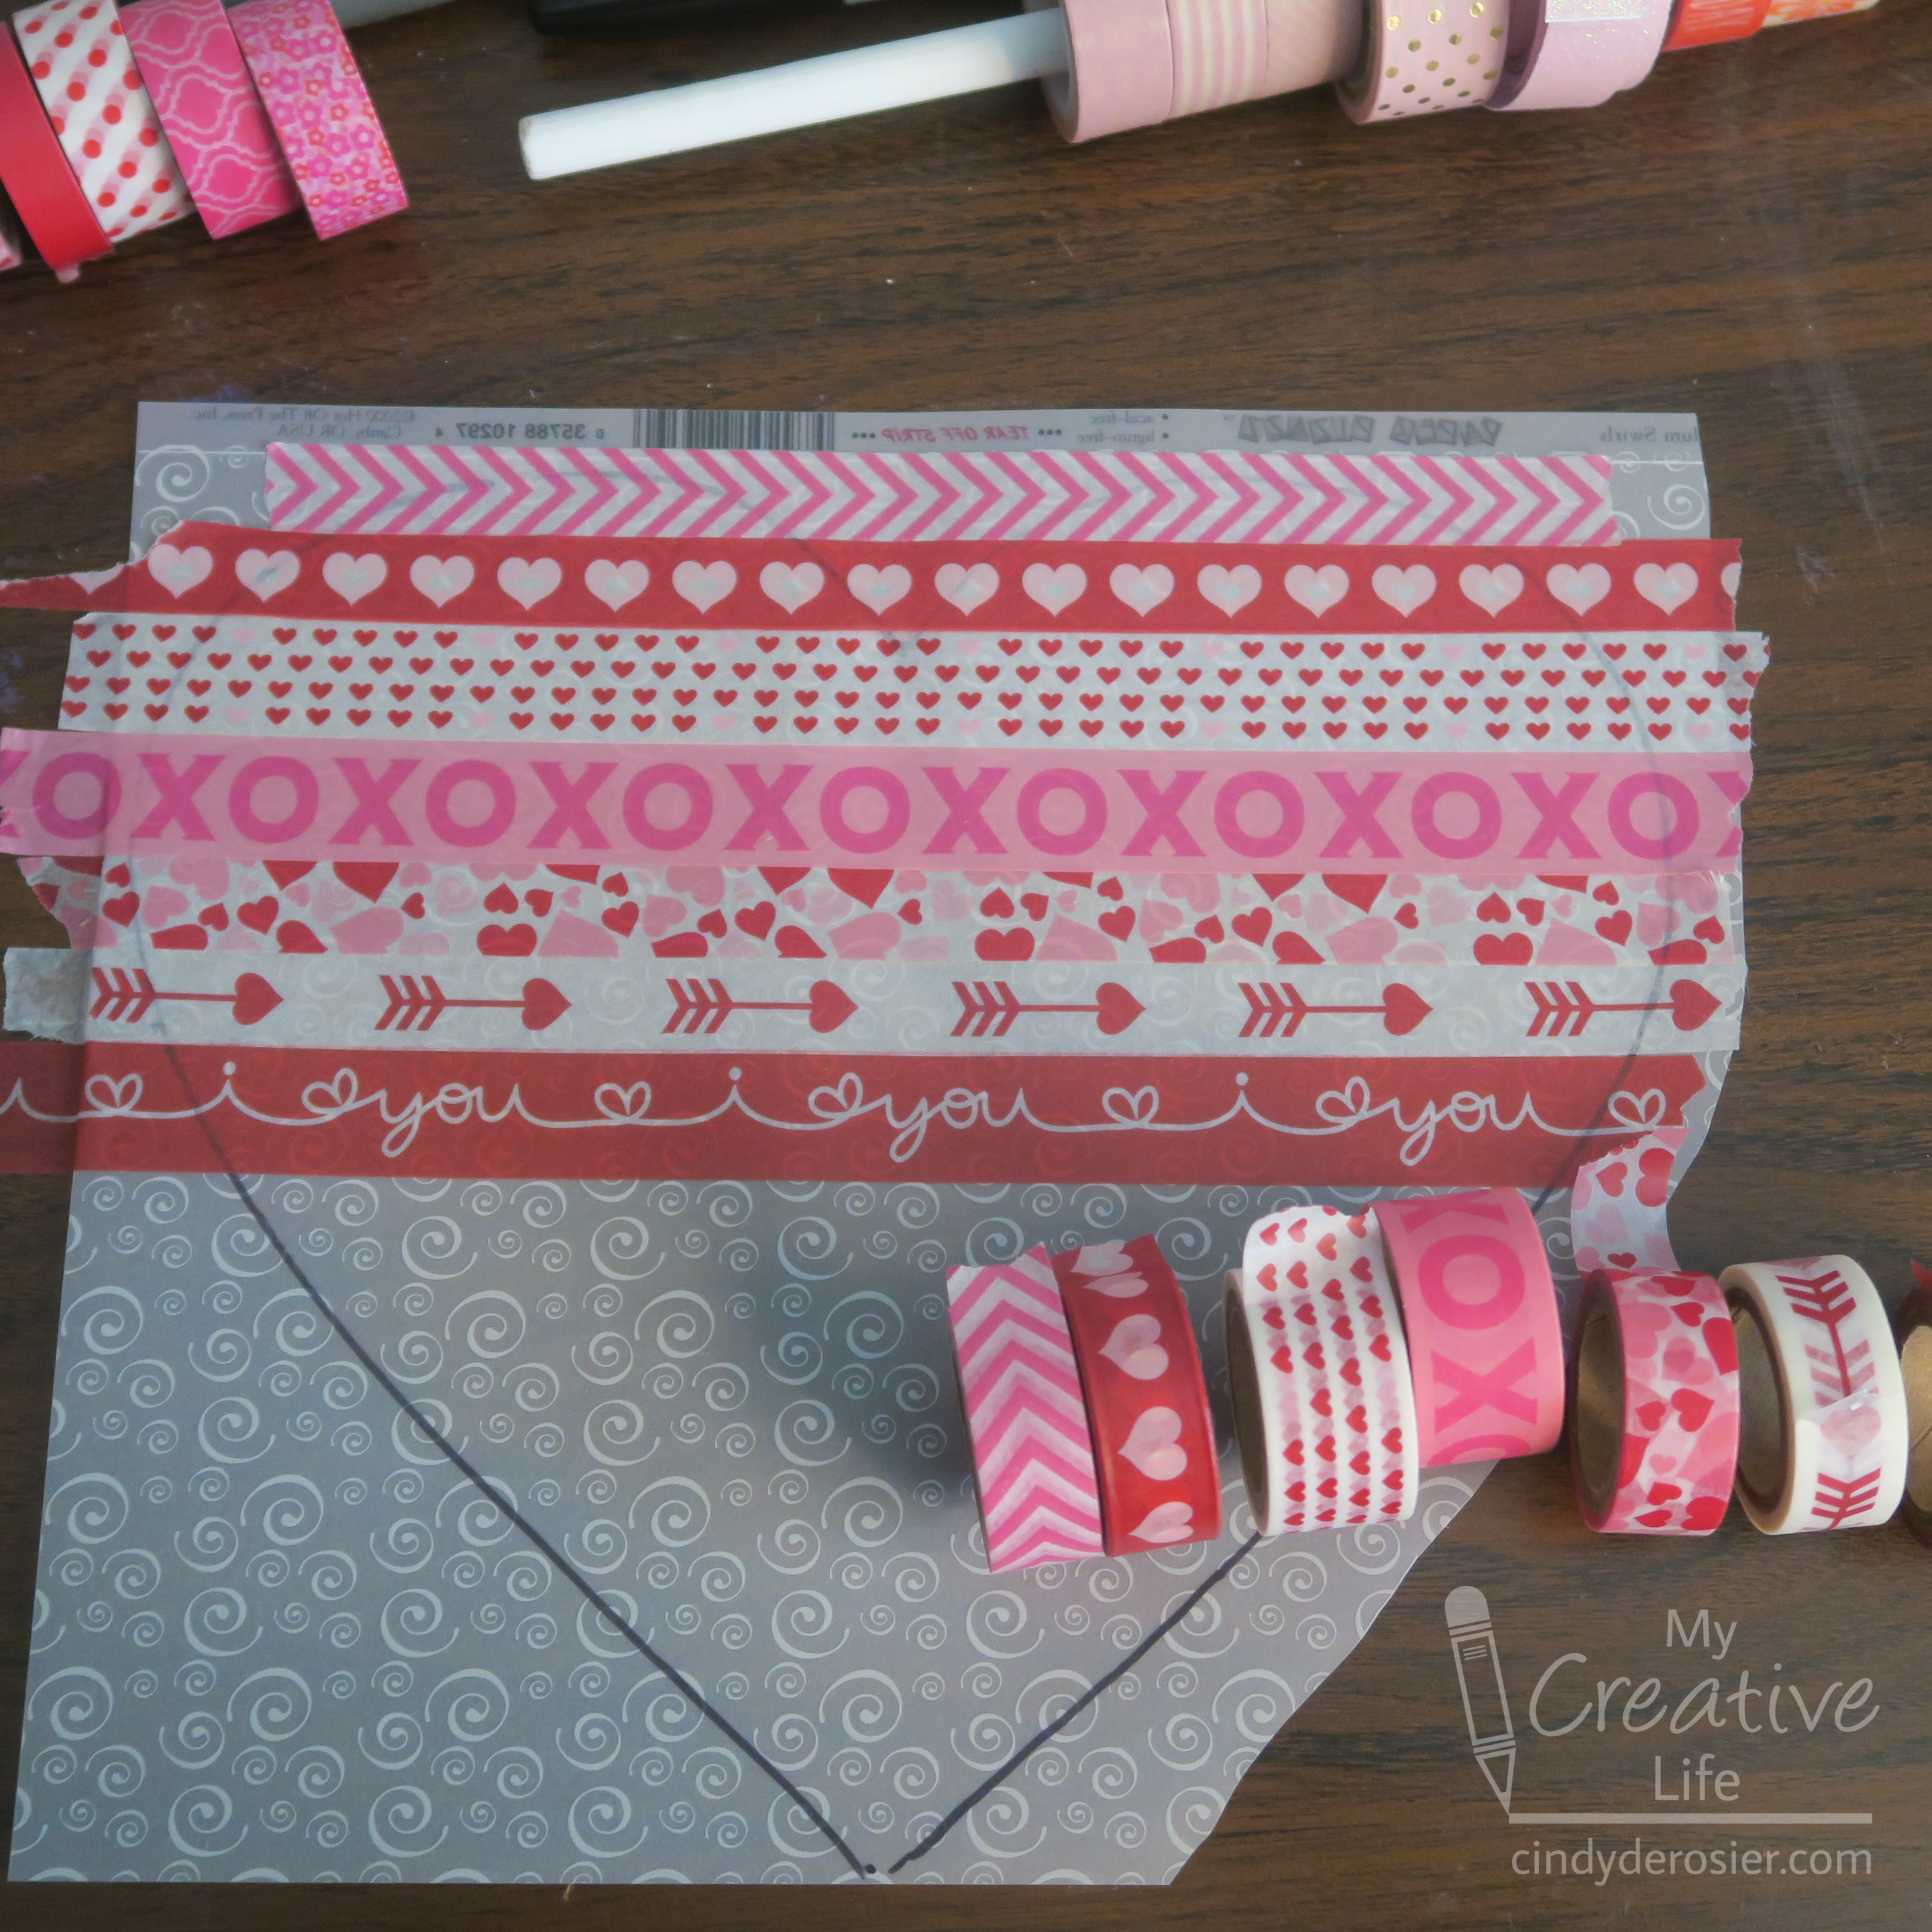
Arrange the washi tape in an order you like. Apply the first tape horizontally across the center of the heart (I started with the eye-catching "i ♡ you" tape), allowing the ends of the tape to hang over the edge of the outlined heart slightly. Add each tape above that one until you have filled the top portion of the heart. The size of your heart and the width of your washi will determine how many rows that is. 


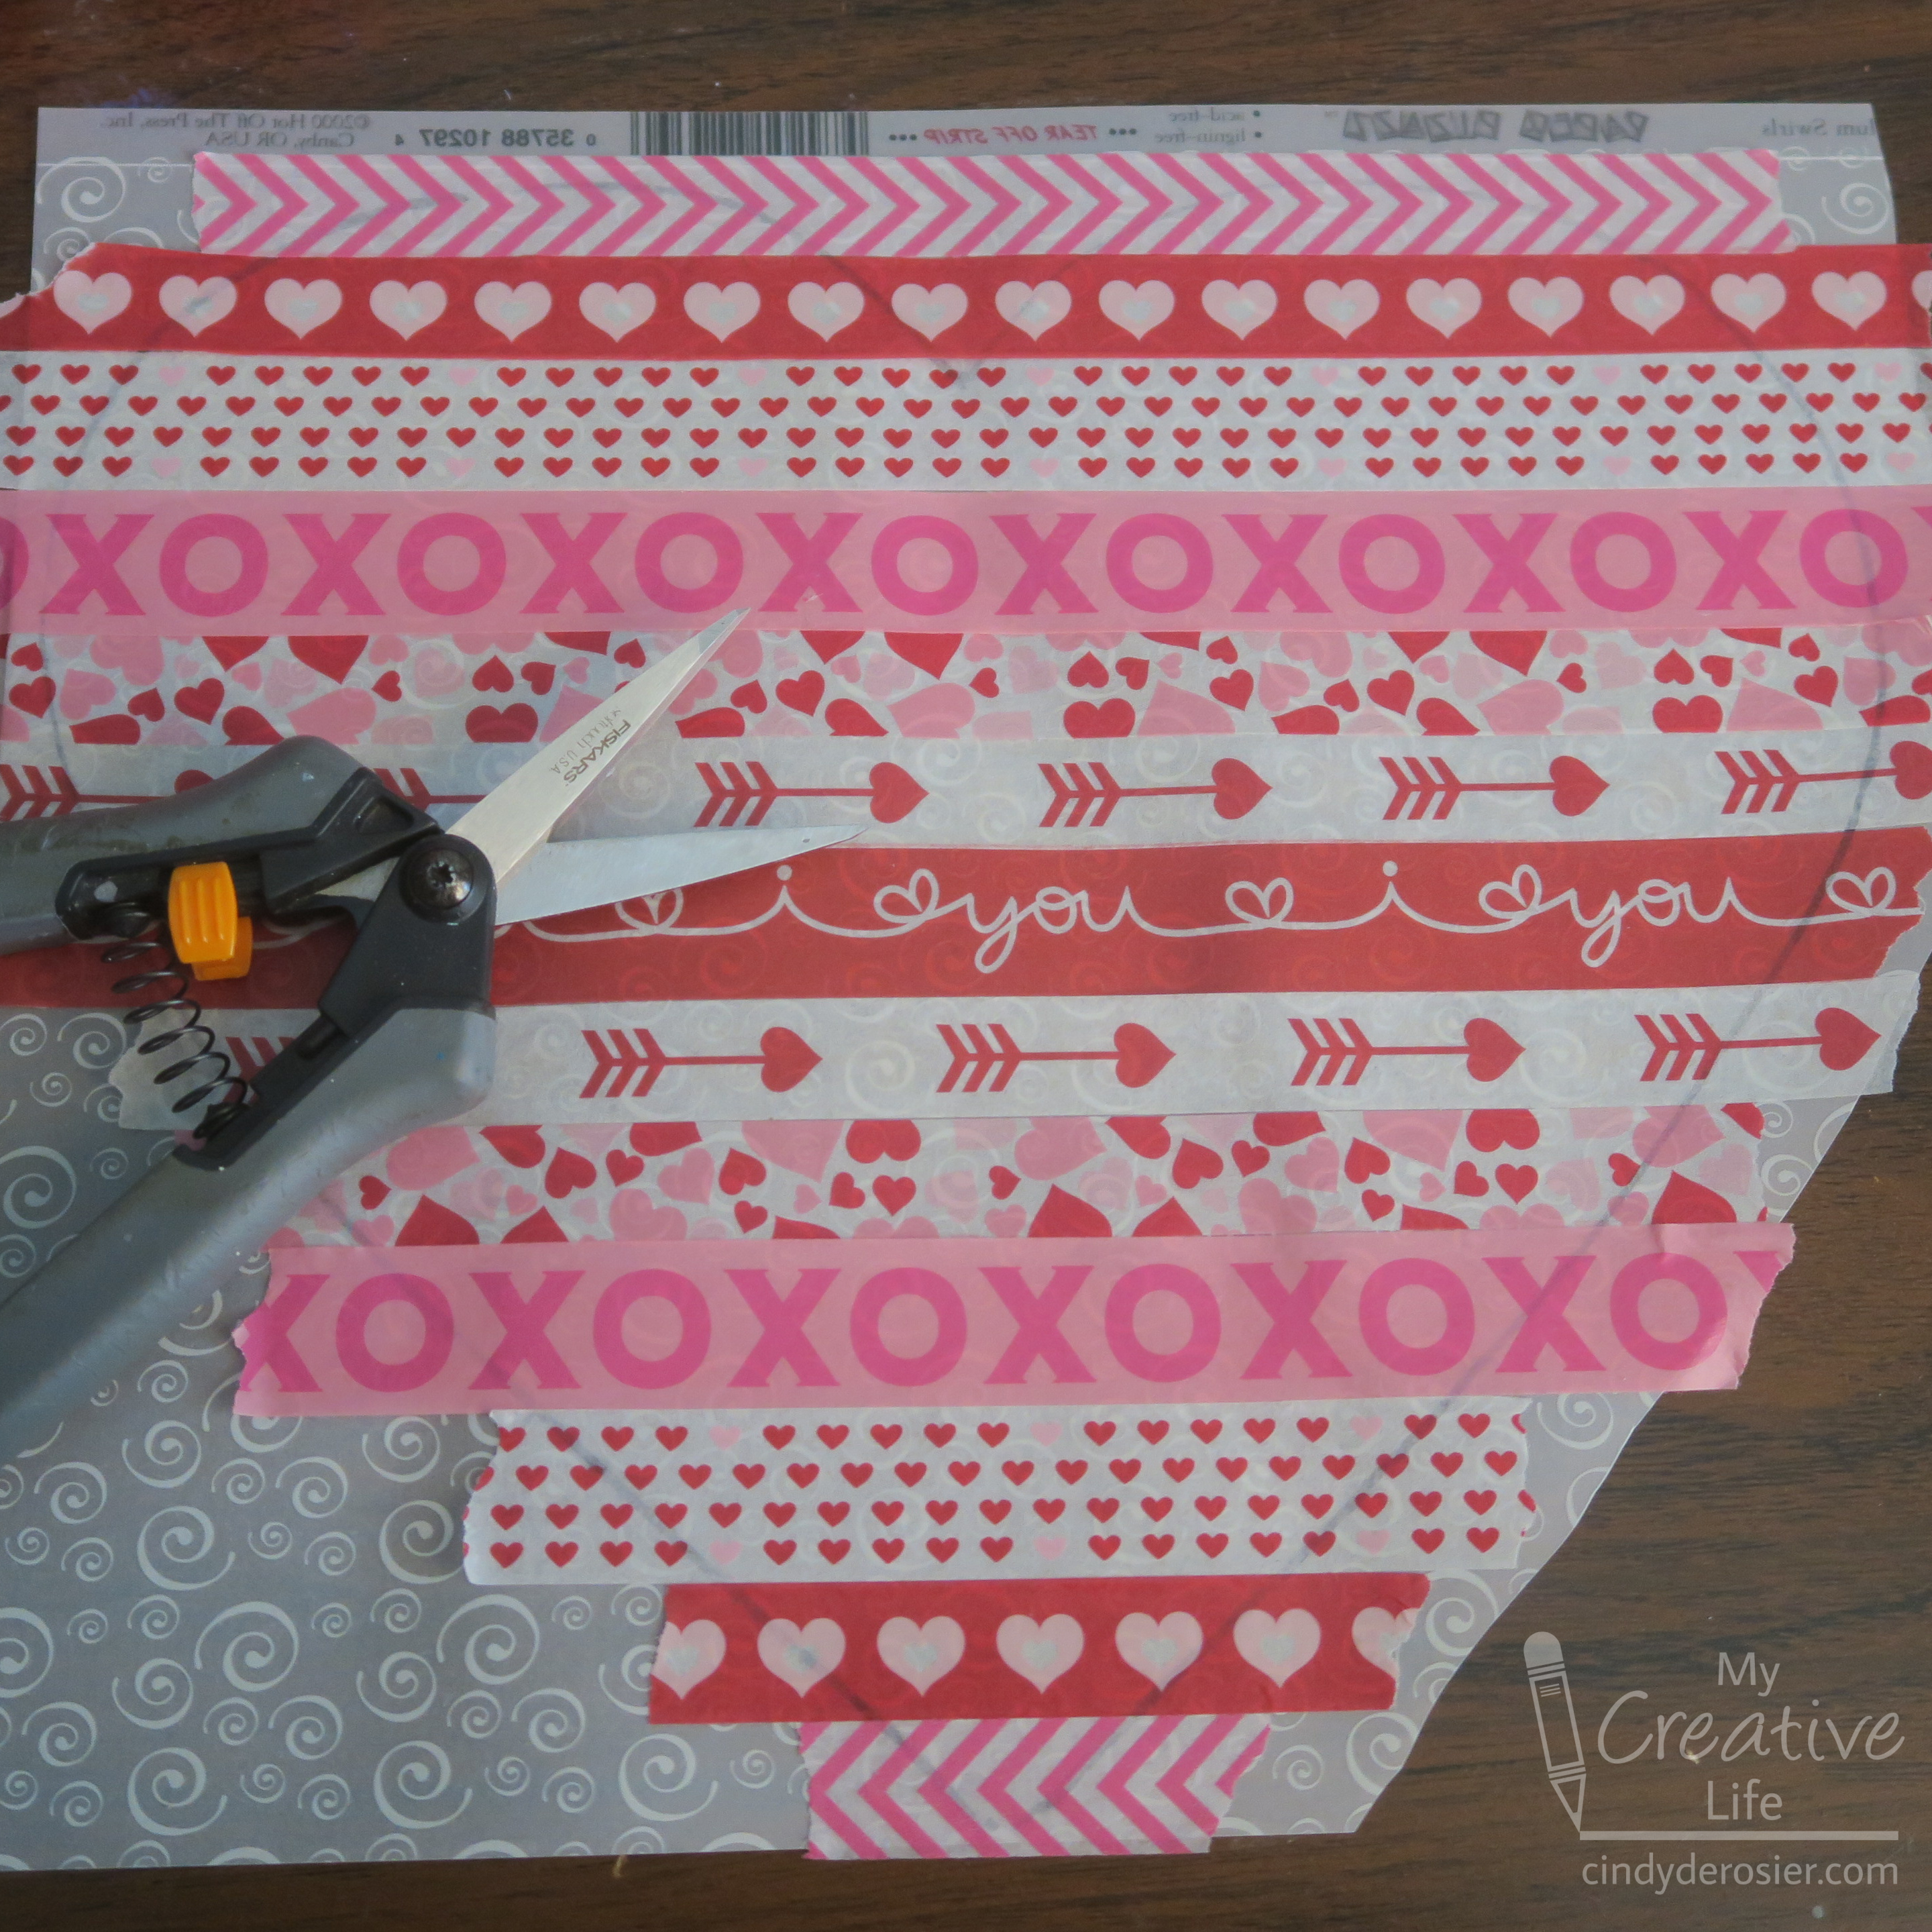
Keeping the tapes in the same order, fill in the bottom of the heart. You'll end up with the tapes mirrored across the 'equator' of the heart. Press all the tapes down firmly. 


The black Sharpie line will show through the washi. Cut just inside this line. Then tape your suncatcher to a window and enjoy!


Obviously, you can use this technique for any holiday or occasion. Just change the washi tape and the shape of the vellum. It's such a quick and easy project, one I'll definitely be doing again. 

1/19/23

Library Roulette, Class 700: Adventures in Improv Quilts

For the second craft in my Library Roulette Class 700 project, I made this paper quilt using patterned papers from a Valentine's Day collection (affiliate link here and below). 


The book I chose for 746 (Textile Arts) is Adventures in Improv Quilts. As you know, I'm not a quilter and almost never do fabric crafts, but it didn't matter. I LOVE this book. I learned so much about improv quilts and how they are made through the well-written text and plentiful photos. 

Pretty much all of the exercises, tips, and tricks that are intended for designing with fabric are applicable for designing with paper. The guided exercise I tried was called Retro Circles. 

I chose four coordinating papers and cut them each into 4" squares. 


I stacked the papers and cut three gentle curves. 


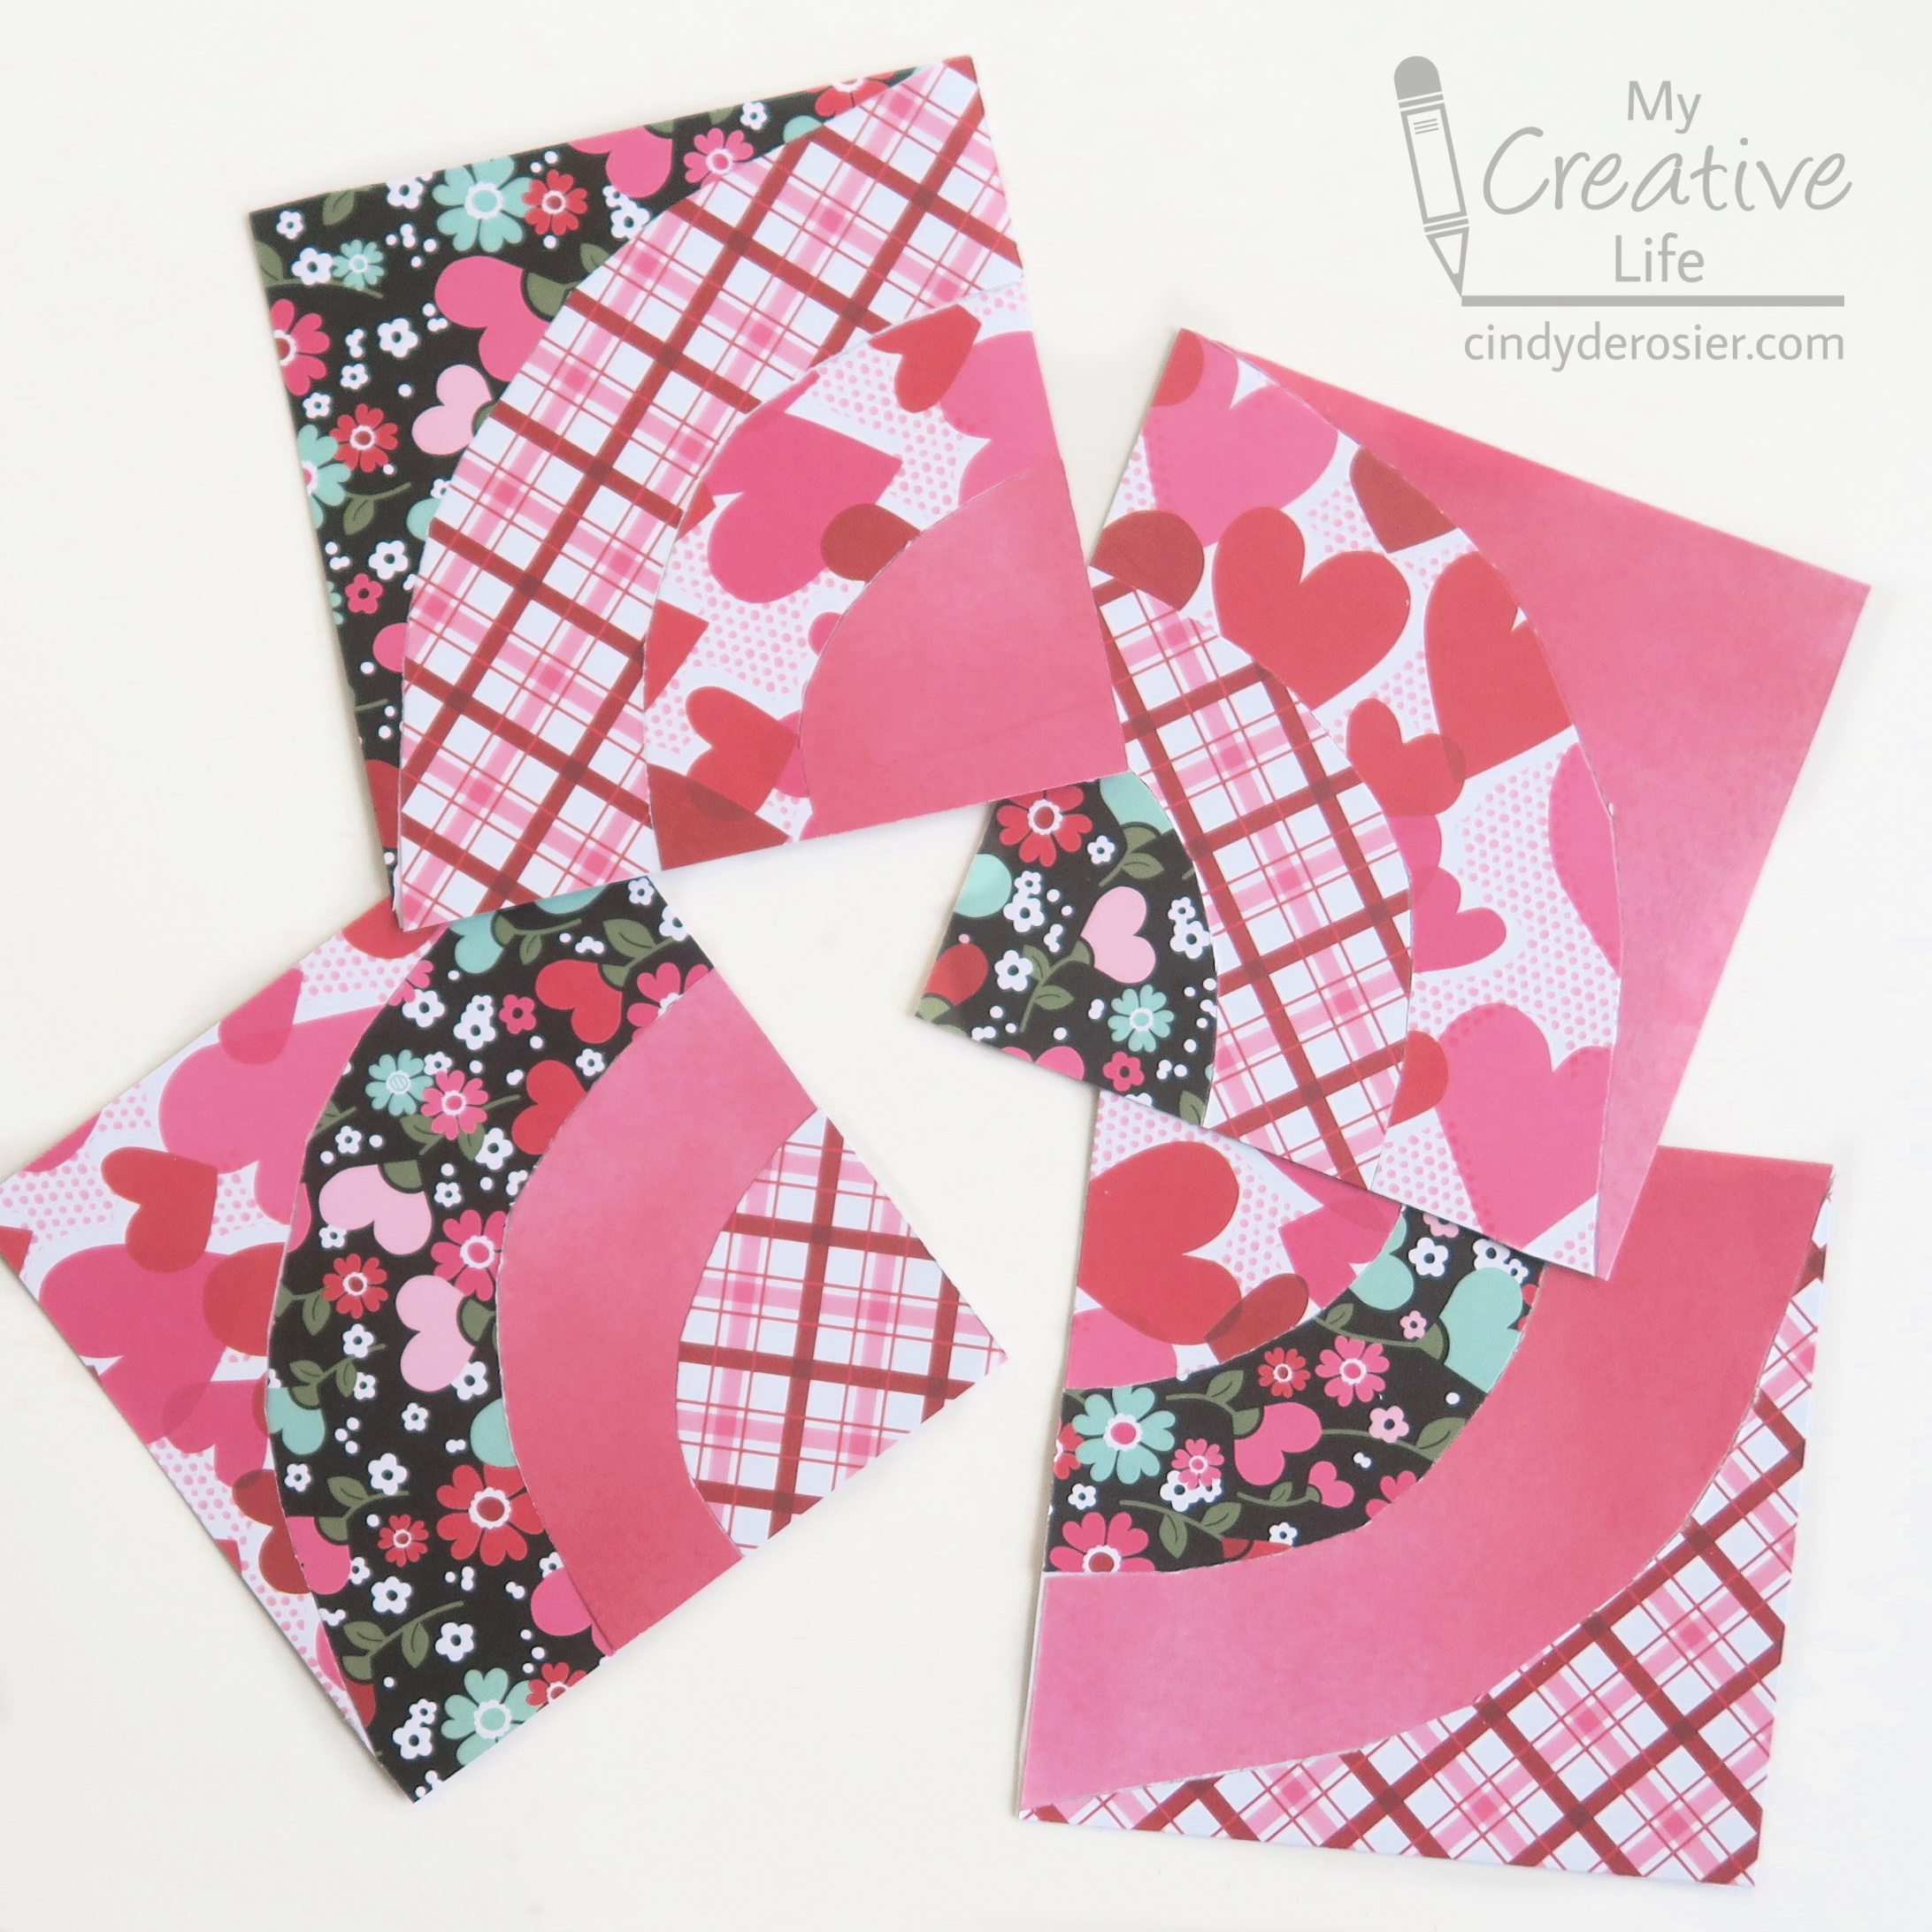
Then I shuffled the cut pieces and created four blocks, each with one of the four papers. When working with fabric, you chain piece them together. Paper is so much easier - just glue the pieces to a 4" background.


I repeated that process three more times to give me a total of 16 squares. Then it was time to arrange them. I played with a lot of different possibilities....


..... before settling on this one. Then it was just a matter of gluing the squares to a 16" background. 

Obviously, with fabric you would go on to quilt it. With paper, that isn't necessary. But it could be a lot of fun. I'm strongly considering making another paper quilt and experimenting with both real and faux stitching. 

This was such a fun project! There are so many other fun ideas in Adventures in Improv Quilts that I would like to try in paper. 

5/30/22

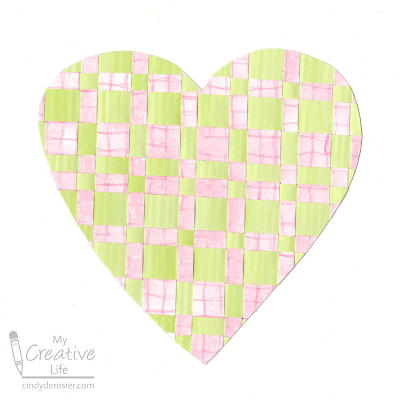
Woven Paper Heart (Happy Anniversary, Steve!)

I recently noticed two pieces of patterned paper in my stash with a copyright date of 2004. While I probably have papers that are even older, the first thing that came to mind was, "Wow. These papers are the same age as my marriage." Steve and I got married on May 30, 2004, making today our 18th anniversary. In honor of our special day, I made this woven heart. I like the symbolism. While we were both fine separately, our lives are better woven together and complementing each other.  


I recently shared paper weaving that I did for a scrapbook layout, but turning woven paper into a shape like a heart requires an extra step. Read on for how to make your own. 


Woven Paper Heart


Materials:

  • two different papers
  • paper trimmer or scissors
  • washi tape
  • contact paper (affiliate link)
  • scissors
  • Sharpie
  • craft glue

Steps: 


Cut your papers into strips. I made some 1/2" strips and some 1/4" strips, each 6" long. I lined up the pink strips next to each other and used washi tape to secure them to my desk. Then I started weaving in the green strips. I alternated the 1/2" and the 1/4" pink strips, but used the two different widths of green randomly. It all works. 


Continue until you've woven in enough strips for the size you want your finished piece to be. Cut a piece of contact paper slightly larger than your finished weaving. Remove the liner, then gently lift up your weaving (keeping the washi tape in place) and slide the contact paper underneath, sticky side up. Press the weaving onto the contact paper, making sure it is firmly adhered. This will ensure your weaving doesn't fall apart when you cut it.  


Turn your weaving upside down and use a Sharpie to draw or trace a heart. 


Cut along the lines. Turn the heart right side up and put a tiny dab of glue under the end of each strip that doesn't touch the contact paper. 


Happy anniversary, Steve! I'm so glad my life is woven with yours. 

2/9/22

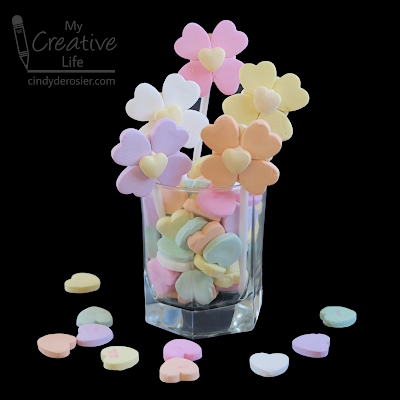
Conversation Hearts Bouquet of Flowers

This bouquet of flowers takes yesterday's flower cupcakes one step further. They're so festive and would be just as fun for a springtime party as they are for Valentine's Day. Affiliate links below. 


Conversation Hearts Bouquet of Flowers


Materials:


Steps: 


Prepare your materials. For each flower, you will need four large hearts of the same color, plus one yellow Sweet Tart Heart. You will also need one lollipop stick. 

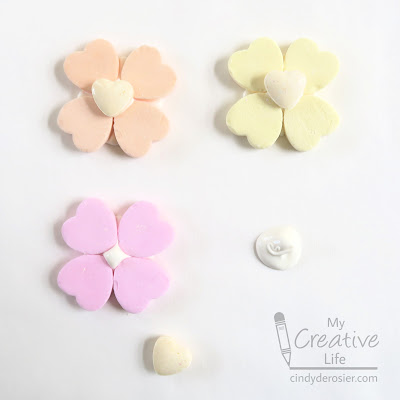
Prepare 4-5 Candy Melts, following the package instructions. Put a dollop of melted candy onto the parchment paper, then immediately press the four large hearts into it. They should be message-side down, with their points facing in. Place the Sweet Tart Heart on top. 

It took me awhile to figure out the right amount of melted candy. If you look closely at the orange flower, there is some candy showing between the petals. There's less on the yellow flower, but it's still an issue. The pink flower has the right amount - none is showing, but there's still enough at the top for the center candy to stick. The dollop on the right is the correct size. It should be close in size to the Sweet Tart Heart. 


Let the candy harden (approximately 15 minutes), then gently peel it off the parchment paper. Place the flowers upside down on the parchment paper. Re-melt the candy, then add a generous dollop on top of the existing candy. Press the lollipop stick in the candy, then let it set completely. 


Fill a vase (or a drinking glass) with candy hearts, then nestle the flowers into them. You can make your bouquet as full as you'd like. 


In addition to looking great on a buffet table or as a centerpiece, his bouquet makes a wonderful Valentine's Day gift for someone special. 

2/8/22

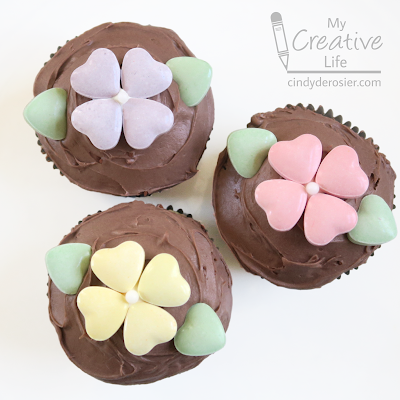
Sweet Tarts Conversation Hearts Flower Cupcakes

I am a conversation heart connoisseur, if such a thing exists. Some people hunt for Girl Scout cookies this time of year, but those don't tempt me nearly as much as conversation hearts. While my absolute favorites are these classics (affiliate link here and throughout the post), I really like these as well. They're Steve and Trevor's favorites, so I used them to make these cupcakes. I love the way the pastel colors look against the chocolate frosting. 


Sweet Tarts Conversation Hearts Flower Cupcakes


Materials: 


Steps: 


For each cupcake, you need four Sweet Tart hearts of the same color, plus two that are green. You also need one white pearl. Have these ready to go. 

Follow the package directions to prepare 2 Candy Melts. Put a dollop of melted candy (about the size of a large pea) onto parchment paper, then arrange the four hearts upside down on the melted candy, with the points facing in. Put the pearl in the tiny hole at the center. Repeat until you have the desired number of flowers. Let the flowers sit 15 minutes to harden.

Gently peel the flowers off the parchment paper and place them onto the frosted cupcakes. Place the leaves on either sides of the flowers. 

2/7/22

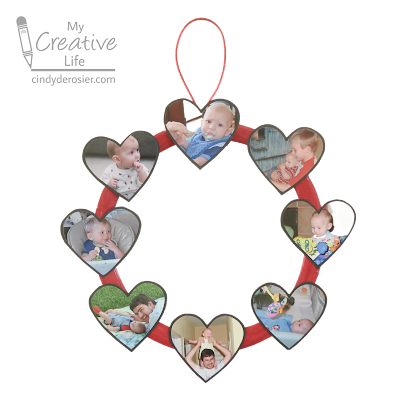
Family Photo Paper Plate Wreath

When Trevor was a baby, I printed pretty much all the photos I took, then picked among them to scrap my favorites. The ones I didn't use went into a box. By the time he was 4 or 5, I started planning my layouts before ordering photos. Now I rarely end up with a printed picture I don't use. 

Last week, I picked a photo out of the box to make my conversation heart photo frame ornament. While I had the box open, I chose another 8 photos from Trevor's first year to make a paper plate wreath. Starting at the top, that's the first time Trevor had solid food (rice cereal) and he gave me such a confused expression. Going clockwise, you see cousin Timothy reading to baby Trevor, Trevor playing in his exersaucer, Trevor in his crib looking at his mobile, Steve parading Trevor around the house on his shoulders, Steve and Trevor hanging out on a blanket in the backyard, Trevor trying to feed himself, and Trevor chewing on the ribbon on a gift. The wreath is now hanging with the Valentine's Day decorations and it makes me smile every time I see it. Affiliate links below. 


Family Photo Paper Plate Wreath


Materials: 


Steps: 


Cut out the center of the paper plate, leaving just the rim. Add a coat of Extreme Glitter.   

Place the heart template on a photo and move it around until you are happy with how the photo will look when cut into a heart. Trace the stencil with the Sharpie, then cut just inside the line. Repeat for the remaining photos.

Glue the cut-out photos to the cardstock, leaving 1/2" between each photo. Carefully cut around the photos so that they have narrow black mat around them.  

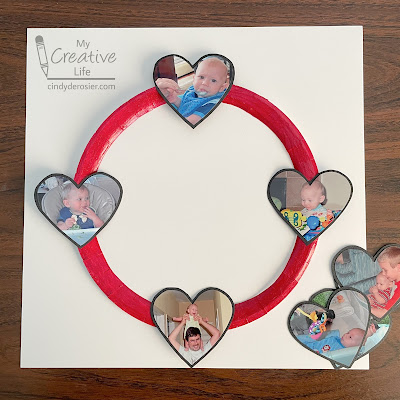
Thinking about the wreath like a clock, place photos at 12:00, 3:00, 6:00, and 9:00. For the 3:00 and 6:00 positions, try to have the faces looking inward.  


Place the remaining hearts evenly between the hearts you've already placed. Again, try to position the faces looking in. Glue all of the photos in place. When the glue is completely dry, turn the wreath over and glue the hanger in place. 


If I were doing this with a group, I'd glue the photos and the hanger with hot glue since it dries much faster. Plus, it has a stronger hold. Mine is holding up just fine with the craft glue; we'll see how it holds up over time. I may end up reinforcing it with hot glue.

2/3/22

Pile of Hearts Doodle

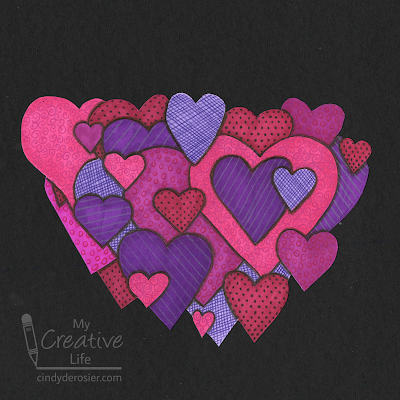
I do a lot of random doodling, but it's rare that I take a doodle and keep going with it until it's a finished piece of artwork. I'm really happy with how this doodled pile of hearts turned out. Plus, it gave me the chance to try out one of the new art supplies I got for Christmas. Affiliate links below.  


Pile of Hearts Doodle


Materials:


Steps: 


Use a pencil to LIGHTLY sketch hearts of various sizes on the paper. They should overlap each other. Continue until you are happy with the number of hearts. Erase some pencil lines to bring certain hearts visually to the front. 

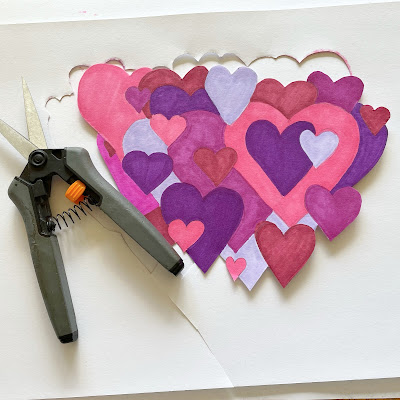
Select 5-6 markers (I used all the shades of pinks and purples that I have) and color in the hearts. Make sure no adjacent hearts are the same color. Use the scissors to cut out the pile of hearts. 


Select a color pencil that coordinates with each marker color. Add a different texture to each color of hearts. As you can see, I did black polka dots on the red, violet stripes on the purple, purple crosshatch on the violet, hot pink open circles on the pink, and red swirls on the rose. 

Use a grey pencil to add a shadow everywhere that one heart overlaps another. Finally, glue the finished doodle to a background. I like the way black makes the colors pop. 


I used my new Pablo pencils for the first time on this and it was a great way to get a feel for them and how they work. I love how sharp a point they can hold and the detail I was able to get with them. I have a relatively small set, but I definitely see that I'll be needing more. They're a great complement to my Prismacolors, which are fabulous for blending but not as good for tiny details. 

2/2/22

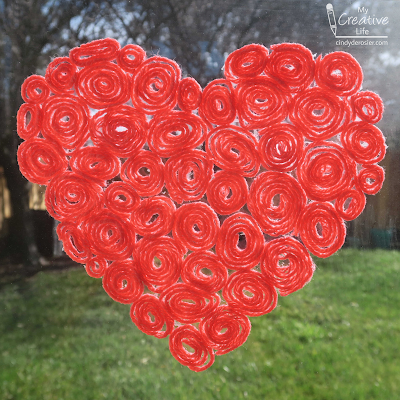
Swirly Yarn Heart for Valentine's Day

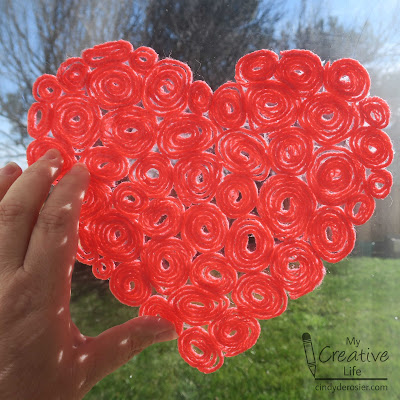
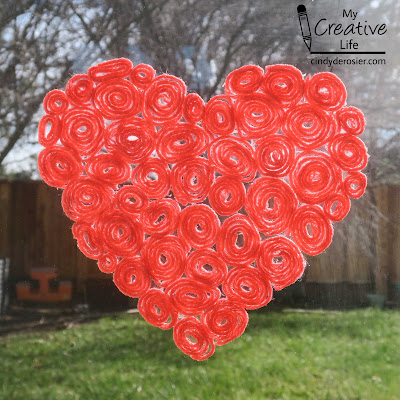
As I was making today's heart art, I wasn't sure if my idea was going to work. It was so exciting when it came out exactly how I'd hoped! I love how it looks in the window. Affiliate links below. 


Swirly Yarn Heart for Valentine's Day


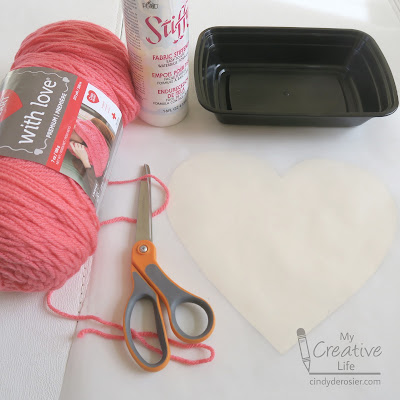
Materials:


Steps: 


Set up your workspace with a sheet of parchment paper covering the manilla heart pattern. 


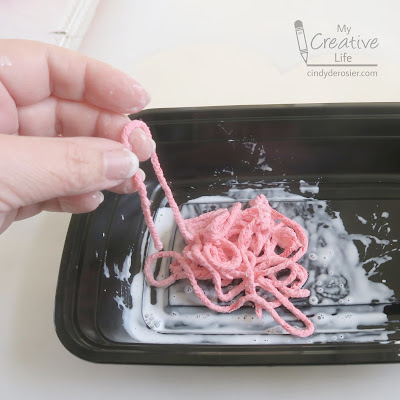
Cut about 50 lengths of yarn, ranging from about 2" to about 6". How many you need depends on the size of your pattern and how tightly you swirl the pieces. Put about 10 pieces into the empty container, then pour in fabric stiffener. You want enough so that the yarn is completely saturated, but not dripping. The contrast won't be dramatic with every color, but with Papaya the wet yarn was very pale compared to the dry yarn.  


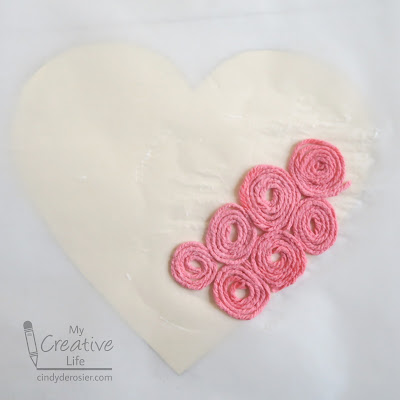
Pull out a single piece of yarn and form it into a swirl directly on the parchment paper. Continue making swirls with each piece of yarn. The swirls must be right up against each other. 

For the swirls that are along the edge of the heart, flatten that side slightly so that it follows the pattern. Fill in smaller spaces with swirls made from the shortest pieces of yarn.  


Continue the process of soaking the yarn in the stiffener and making swirls onto the pattern until it is completely filled. Carefully lift the parchment paper onto a cooling rack and let it sit undisturbed for at least 24 hours. 

After 24 hours, check to see if the heart is completely dry. If it is, the yarn will have returned to its proper color and the backside of the parchment paper will feel uniform in texture and temperature. If it's not completely dry, give it more time. You will ruin the heart if you try to remove the parchment paper too soon. 

When the yarn is completely dry, carefully invert the heart onto a flat surface, then gently peel the parchment away from the yarn. The resulting heart will be rigid. I took this picture immediately after removing the parchment paper.


To hang it, I added small rolls of tape behind three of the swirls and pressed it gently to the window. 


Your craft will stay intact as long as it remains flat (horizontally or vertically). Any sort of twisting or bending will cause the swirls to break apart from each other. Enjoy!