4/10/13

My Favorite Project of 2012

This week for the Designer Showcase over at Ideas for Scrapbookers, Pam asked each of us to send her our favorite project from 2012.  That seemingly simple task was not simple at all.  I made 64 layouts, hundreds of cards, numerous home decor items, and countless kids' crafts last year and I had to pick ONE favorite?!   

I decided just to focus on scrapbook layouts and not throw the other items into the mix.  I went through a year's worth and ended up with 6 in the running for the title of My Favorite Project of 2012.


I had so much fun with this layout.  I love the pictures, especially of our bunny pumpkin.  The layout came together so quickly and easily.  It's clean and simple, but also whimsical.  


I made this layout for a challenge on National Scrapbook Day.  It started as a plain sheet of white cardstock.  I used letter stickers to spell the title, then misted four colors, let it dry, then removed the stickers.  This was out of my comfort zone, but so fun and I love how it turned out.


This is one of the few totally cardstock-free layouts I've ever done.  I love the colors, the embellishment cluster, and the pictures, especially the one of Trouble checking out the egg dye.


I LOVE Young-Me-Now-Me layouts and this is my favorite of all the ones I've done.  I love how simple the layout is and how much journaling I was able to include.  


This is my favorite 2-pager of 2012.  I love how many photos I included and that they span all of the awesome things we did in one month.  I love the color scheme and the stitching I added.  
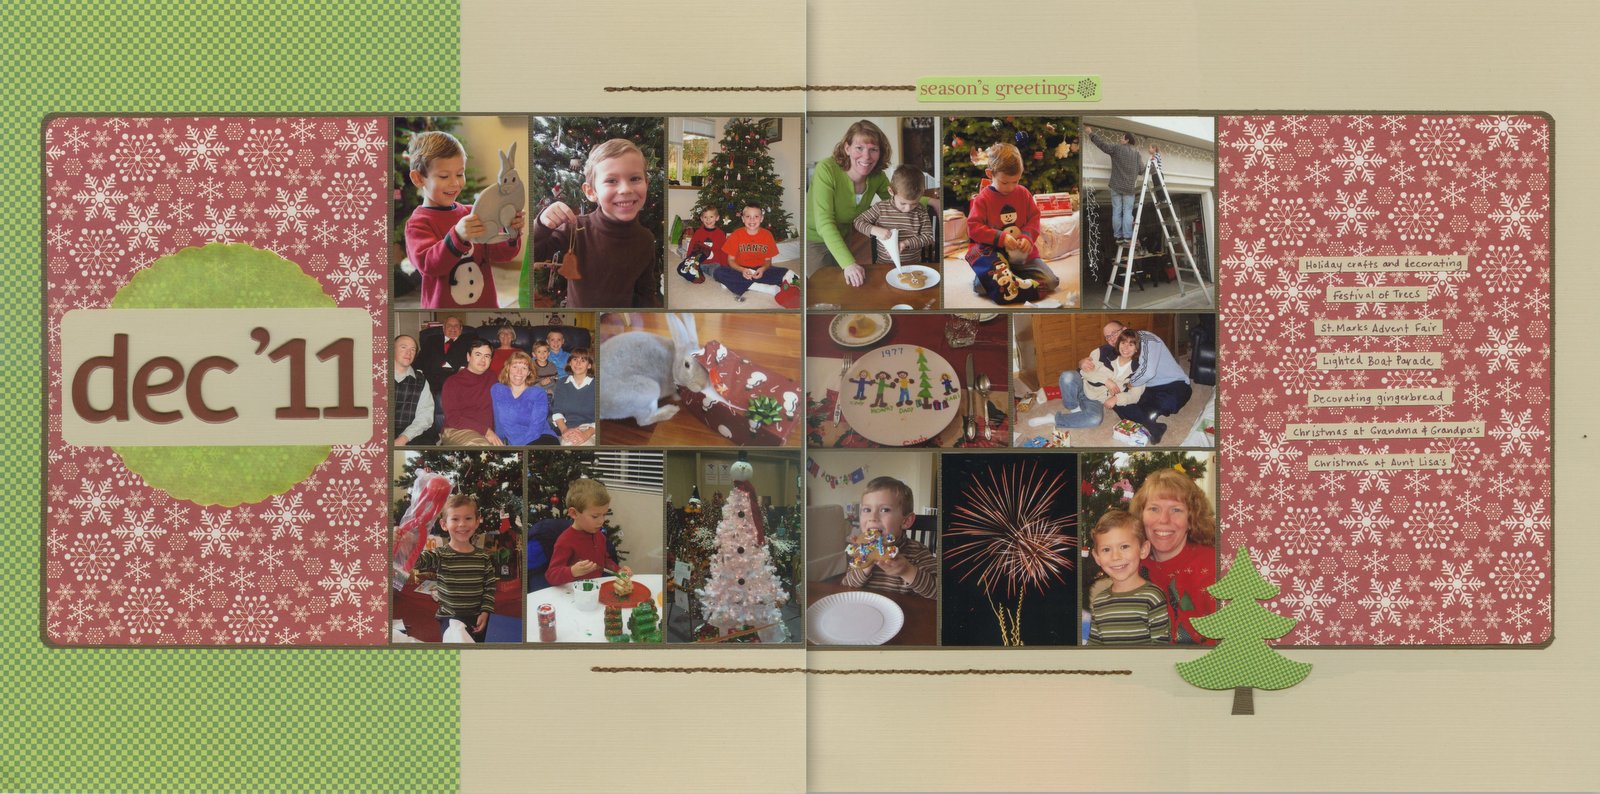


In the end, this is the layout I selected as my favorite of 2012.  I love everything about it, especially the number of photos I included, the design, the colors, and the huge amount of journaling (you can read it here) explaining why we cut our camping trip short after only 29 hours.  


Head on over to Ideas for Scrapbookers to see what the rest of the team picked as their favorite projects of 2012!

4/9/13

X is for X-ray

The other day, I randomly asked Trevor (age 6) how many bones he thought there were in his hand. He glanced at his hand for a second, then made a guess: "5." Without saying a word, I held up my hand and slowly bent my fingers. "Oh!  More than 5! Bones don't bend!" He turned his attention to his hand and started counting.

Back when I taught 5th grade, one of the topics we covered in science was the skeletal system. To start the unit, I had my students make an educated guess about how many bones there are in the human body. We felt for bones, thought about joints and movement and what they meant regarding bones, and eventually looked at x-rays to confirm our experiments. I was thinking about all of this as Trevor was counting the bones in his hand... and I realized that an x-ray craft would be perfect to help Trevor learn and to cross another letter off our A-Z list.

There's a classic preschool x-ray craft where kids use q-tips on black construction paper to make a skeleton. I decided Trevor and I would do a twist on that. We started by tracing our hands onto construction paper, then cutting them out and using temporary adhesive to attach them to black cardstock.

Then we lightly misted over the surface using Mister Huey's, which is a wonderful opaque white. I highly recommend it, but you can get a similar look by watering down white paint and putting that in a mini mister.

 
When you remove the hand template, this is what it looks like.

 
Here's Trevor's.

 
While the q-tip projects are cute, I wanted Trevor's to be more realistic, so we used the paper trimmer to cut thin strips of white cardstock. Starting with the fingers, he measured the strip against his hand and made a cut where each bone ended, then glued each piece in place. He was able to feel that there were a few bones in his wrist, but I had to show him x-rays to show that there are actually 8.  
 
Here's Trevor's finished x-ray project. One of the small wrist bones is missing, but otherwise it is quite accurate. As you can see, Trevor chose to round off the wrist and arm bones, but left the bones in his fingers with straight edges. Since this was just for fun (and he's only six), that was fine. If I were doing this assignment with 5th graders, I'd have them round off the edges to make them as realistic as possible. 


So, to answer the original question: there are 19 bones in a human hand, or 27 if you include the wrist!

4/8/13

Leaf Pile

Some people complain about scrapping the same topics, year after year.  For the most part, I am the opposite: there are quite a few topics I absolutely love scrapping every single year. As soon as I finish one year's page, I spend a full year excited about scrapping the same topic the next year.

One of those topics is "fall" leaves.  I say "fall" because, around here, the leaves rarely fall in fall.  The leaves in our backyard typically start to fall sometime around Christmas.  We usually end up going somewhere to find fall leaves rather than waiting for our own to finally drop.  This year, we found some fall leaves at Grandma and Grandpa's house in mid-November.       

 
I started with Sketch #101 by Sketches in Thyme.  The three patterned papers are from three different manufacturers - Bella Blvd, Scenic Route, and Basic Grey - and they work surprisingly well together.  I'm really happy with how this layout turned out.  And, as usual, I'm already looking forward to scrapping 2013's fall leaves.

4/5/13

N is for Nest

I have a post-it note beside my desk with the letters J, K, N, U, X, and Y on it. Those are the letters that are still missing from my list of Children's Crafts from A-Z. Trevor and I are determined to craft our way through the remaining letters as soon as possible. In the past few weeks, we've knocked Q (Quail) and V (Volcano) off the list. Once I finish this post, we'll scratch N off the list. N is for Nest! Affiliate links below. 


Paper Plate Nest

Supplies: 


We started by cutting a paper plate in half. Each of us painted our half with various shades of brown to look like a nest. (Our plate started out blue.) Here's how my nest looked when the paint was dry.


To give the nest texture, we glued on some of the paper bits that came in a gift basket we received.


We kept going until our nests were well-covered.


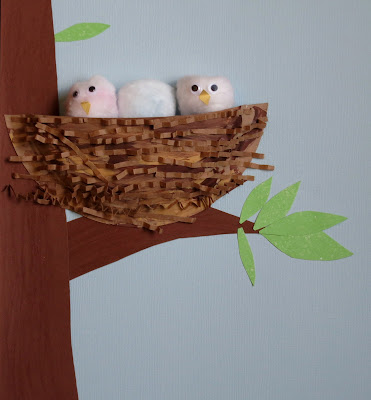
The next step was adding cotton ball birds. We rubbed some chalk on cotton balls, then added googly eyes and little paper beaks. We tucked the birds behind the nest. Here's mine:

Trevor chose to make two pink chicks and one blue egg that hadn't hatched yet.


The final step was making a background. We started with light blue for the background. We cut brown cardstock to make a tree trunk and branch, then used a crayon to give it a more realistic tree texture. We cut out green leaves to attach to the branches. Trevor left his leaves flat, while I bent mine to give them texture. Finally, we glued the nest and birds in place.

Here's Trevor's artwork. Mine is at the top of the post.

Five letters to go!

4/4/13

Two Years

Today is a special day for me, as it marks two years that I've been blogging here at My Creative Life. It's amazing to think back on how much the blog has changed (and how much it's changed me) over the past two years.

I originally started this blog for two reasons. The first was that an increasing number of Design Team gigs were requiring active blogs and I didn't want to miss out on an opportunity because I didn't have a blog. The second reason was that I had been doing a lot of blogging for others and I wanted more control over my writing. I was worried that if any of these sites shut down, the articles I had worked so hard to write would disappear forever. If you look through the archive of my blog, you'll see entries dating back to September 2010. Before this blog went live, I added copies of the articles I'd written for others here, then backdated them to when they were published elsewhere.    

On April 4, 2011, I published the very first post written solely for my blog. It was titled Craft Withdrawal and fewer than 10 people read it.


My readership has grown significantly since then! My most popular post has been Snowman Gift Tags, which has been viewed literally thousands of times.


My Giraffe Cake is a close second.


Neither of those posts account for the top search terms that lead people to my blog. Number One is now "Bunny Rolls."


I also get a lot of traffic searching for panda projects, a ribbon barrette tutorial, classroom birthday treats, id reactions, and Pinewood Derby designs.

People ask me all the time about my favorite posts. That's a tough question, since I put my heart and soul into all of them. But a few do stand out.


When I started my blog two years ago, I expected a small readership made up of family, friends, and random scrapbookers. I didn't expect so many people from around the world to follow the ins and outs of my creative adventures. To all my readers- thank you. I am incredibly grateful for your support and the enthusiasm you've shown for my blog. For the handful of you who have read all 554 posts, a special thank you!  I'm really excited about what the future holds for me and My Creative Life.