Showing posts with label spring. Show all posts

3/3/25

Painted Plastic Easter Eggs, Using Ohuhu Nahuku Acrylic Markers

The Ohuhu Nahuku Acrylic Markers perform really well on paper and a Ziploc bag. I'm happy to report that they work just as well on two more surfaces: a plastic egg and a CD. Affiliate links below. 


Painted Plastic Easter Eggs


Materials: 


I started by drawing the chick on the plastic egg. As before, the paint glided beautifully across the surface. I only had to use a single coat to get good coverage. Obviously, you can decorate the eggs with any pattern or design you want, including words and names. If you want to layer colors, let the first coat dry before putting another on top. 

Next, I decorated the CD. It is there for two reasons: first, it gave me another surface to try with the Nahukus; and second, it holds the plastic egg upright. I put a rubber band on the desktop under the CD, which lifts it just enough so that the egg nestles into the hole and doesn't topple. 

These would make really fun place cards for Easter dinner. Decorate them ahead of time and fill them with each guest's favorite candy. Or, have each person make their own when they arrive. There are lots of possibilities!

4/3/24

Butterfly Flowers Card, Featuring the Colorado Hairstreak

It's great fun discovering that one of your punches can be used for a different design that it was intended. I've used my Fiskars butterfly punch many times over the years, but this is the first time I've used it as petals. Notice that I have the butterflies facing out on the left and facing in on the right. I couldn't decide which I liked better, so I put them both on the same card!


Obviously, I could have chosen any color for the butterflies, but I wanted to use one of the most beautiful state butterflies, the Colorado hairstreak. Affiliate links below. 


---------


Butterfly Flowers Card


Materials:


Steps:


Use white cardstock to make a card in your desired size. Blend blue ink on the paper to make a sky background. 


Punch out the desired number of flower centers and color them a yellowy orange using Ohuhu markers. Punch out butterflies (5 per flower) and color them as desired. I love the purple, orange, and black (and tiny white spots) of the Colorado hairstreak, but you can model yours after another species or just use your imagination. 


Cut stems and leaves from green cardstock. Then glue everything in place. I'm still not sure whether I prefer the butterflies facing in or facing out. 


In case you were wondering, Colorado's state flower (the columbine) doesn't look like this. It would have been really cool if I could have used the state butterfly to make the state flower. If I come across a state with a coordinating butterfly and flower, I'll definitely be doing that!

3/23/23

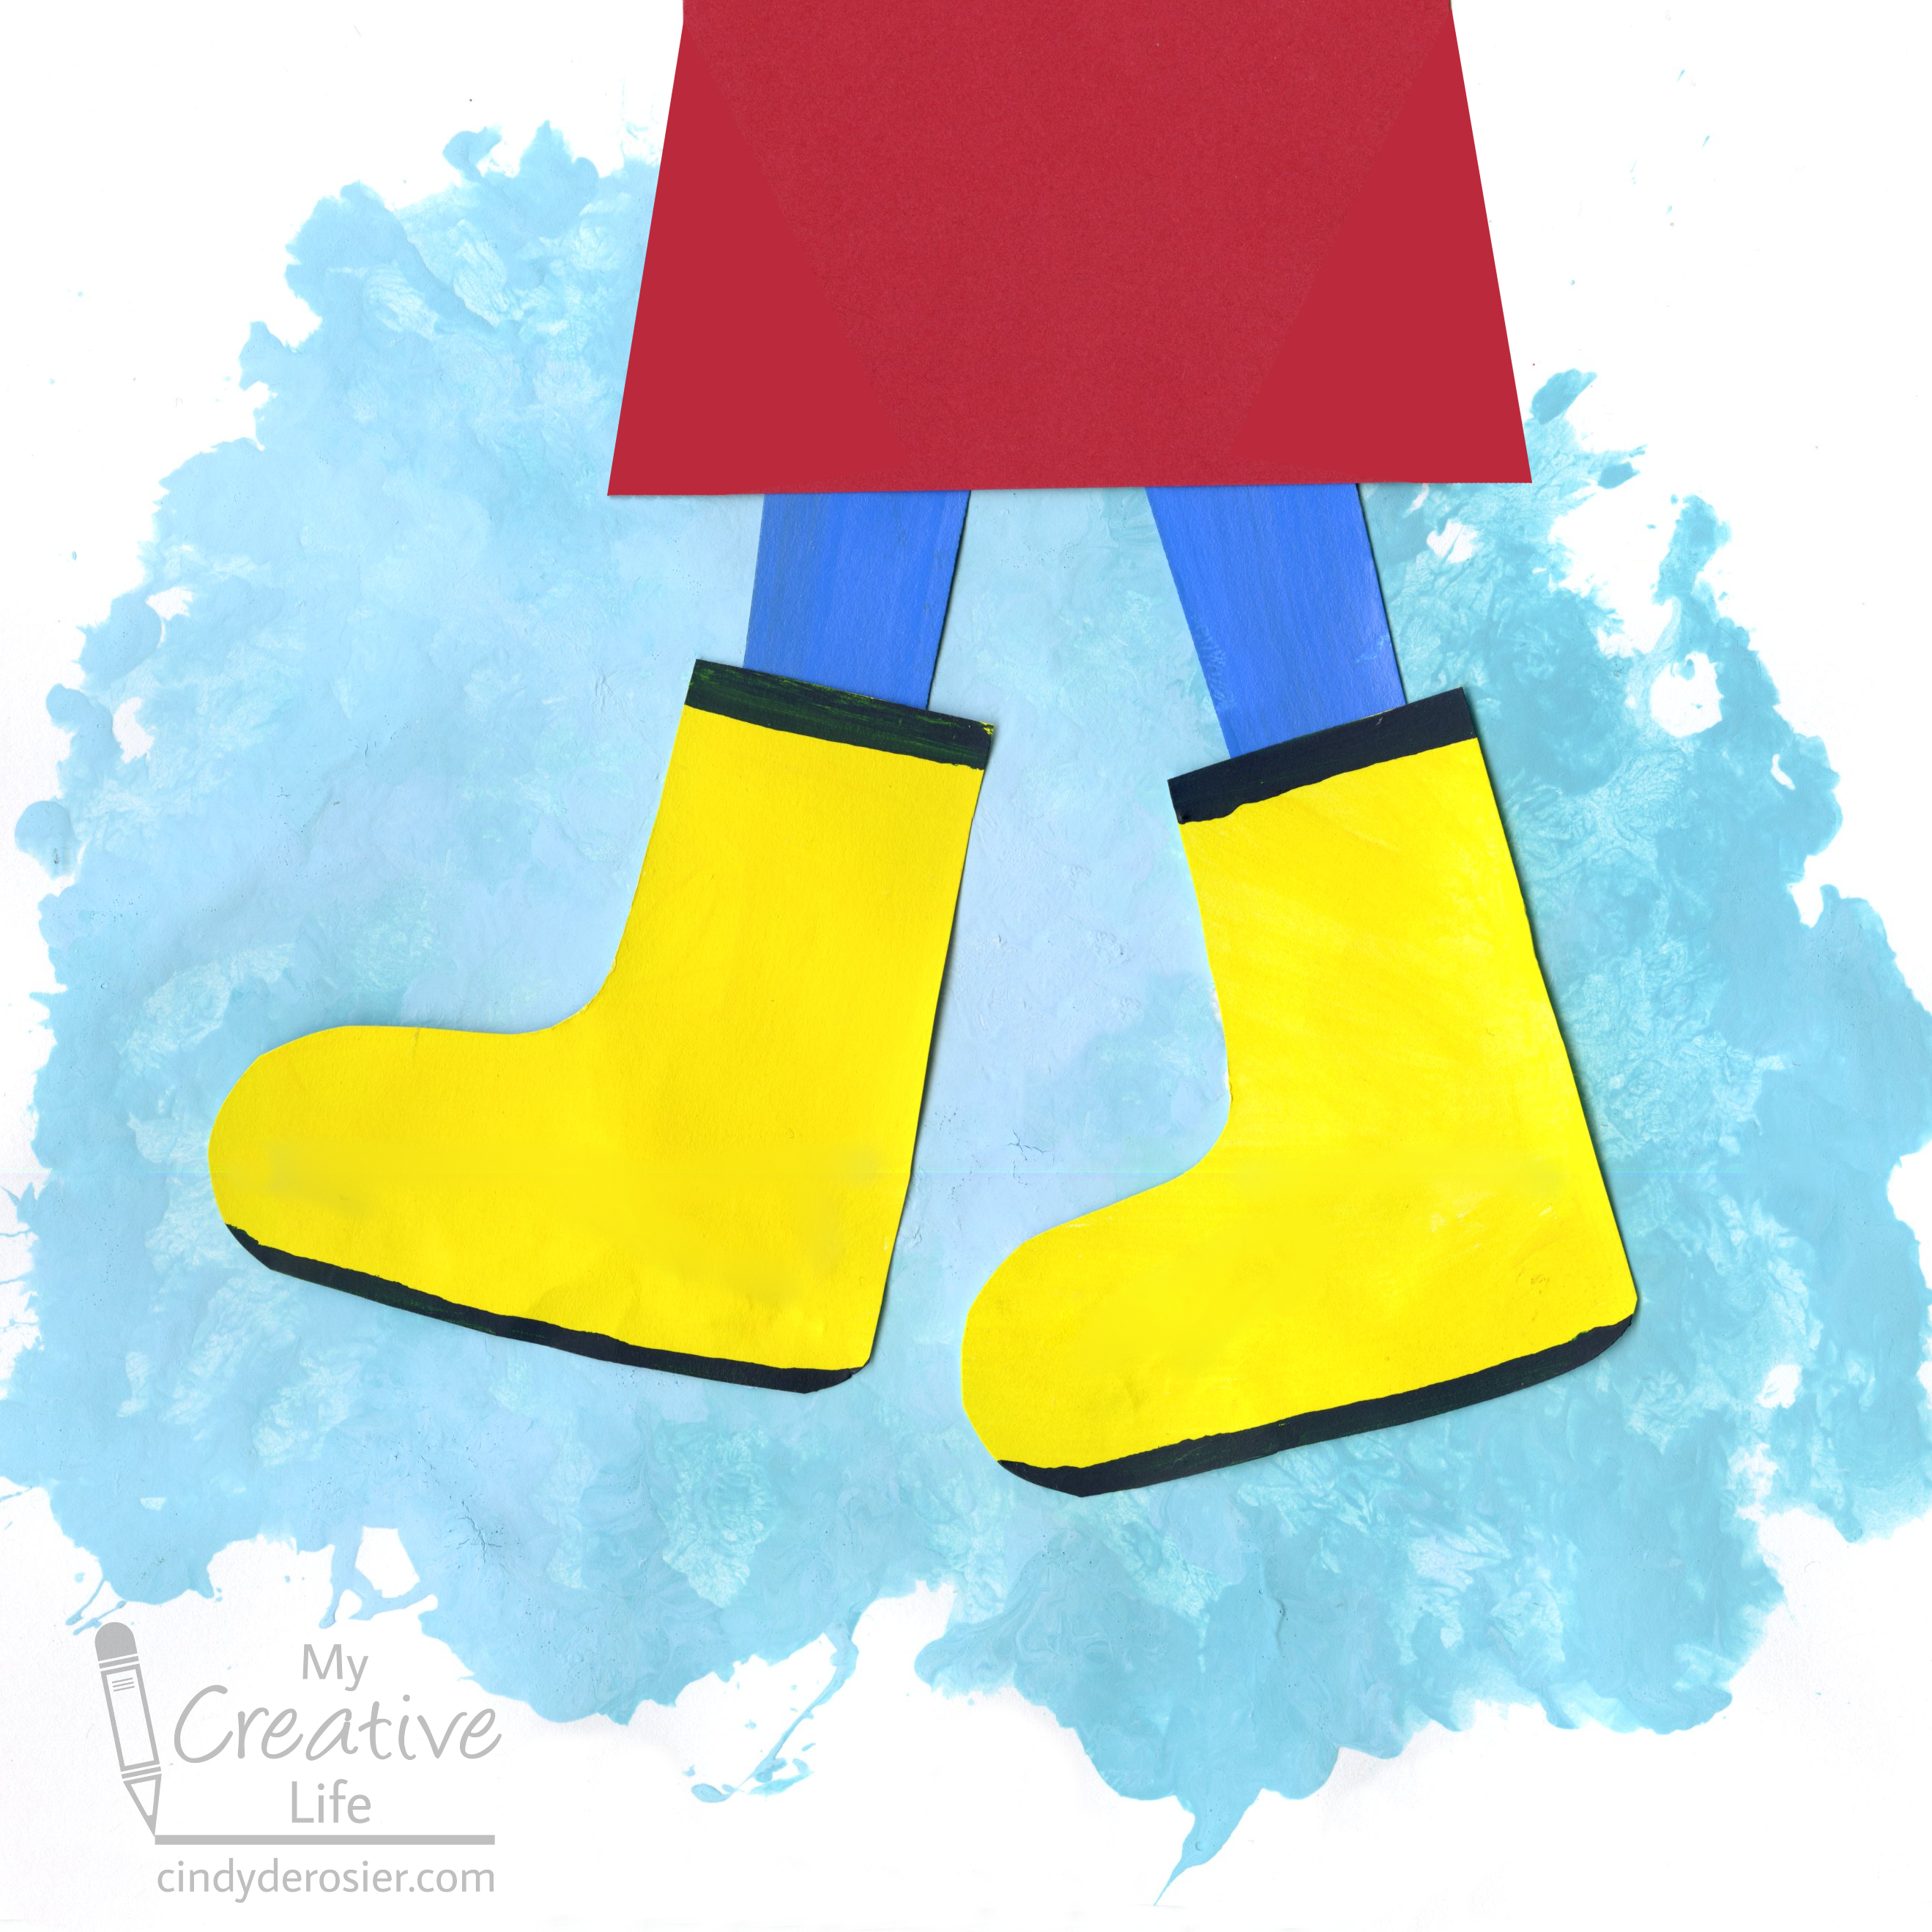
Bubble Wrap Sensory Art: Rain Boot Craft for Kids

They say art imitates life. With that said, I'll give you one guess as to what life in California has been like recently. 


I've lived in California all of my 51 years and have never seen so much rain. In a normal year, we get a few rainy days here and there during winter and early spring. Recently, "normal" has meant "drought." So all this rain, while needed, just feels so strange. 

This simple craft starts with a neat sensory experience that kids of all ages will love. (I'm a good 30+ years past "kid" and I loved it.) You can easily adapt this project for different ability levels. Pre-cut the boots for preschoolers and toddlers to glue in place; challenge older kids to decorate the boots and pants or to add a sidewalk to their artwork. 

---------


Bubble Wrap Sensory Art: Rain Boot Craft 


Materials: 

  • white paper
  • paint
  • bubble wrap, cut slightly larger than your paper
  • scissors
  • glue

Steps: 


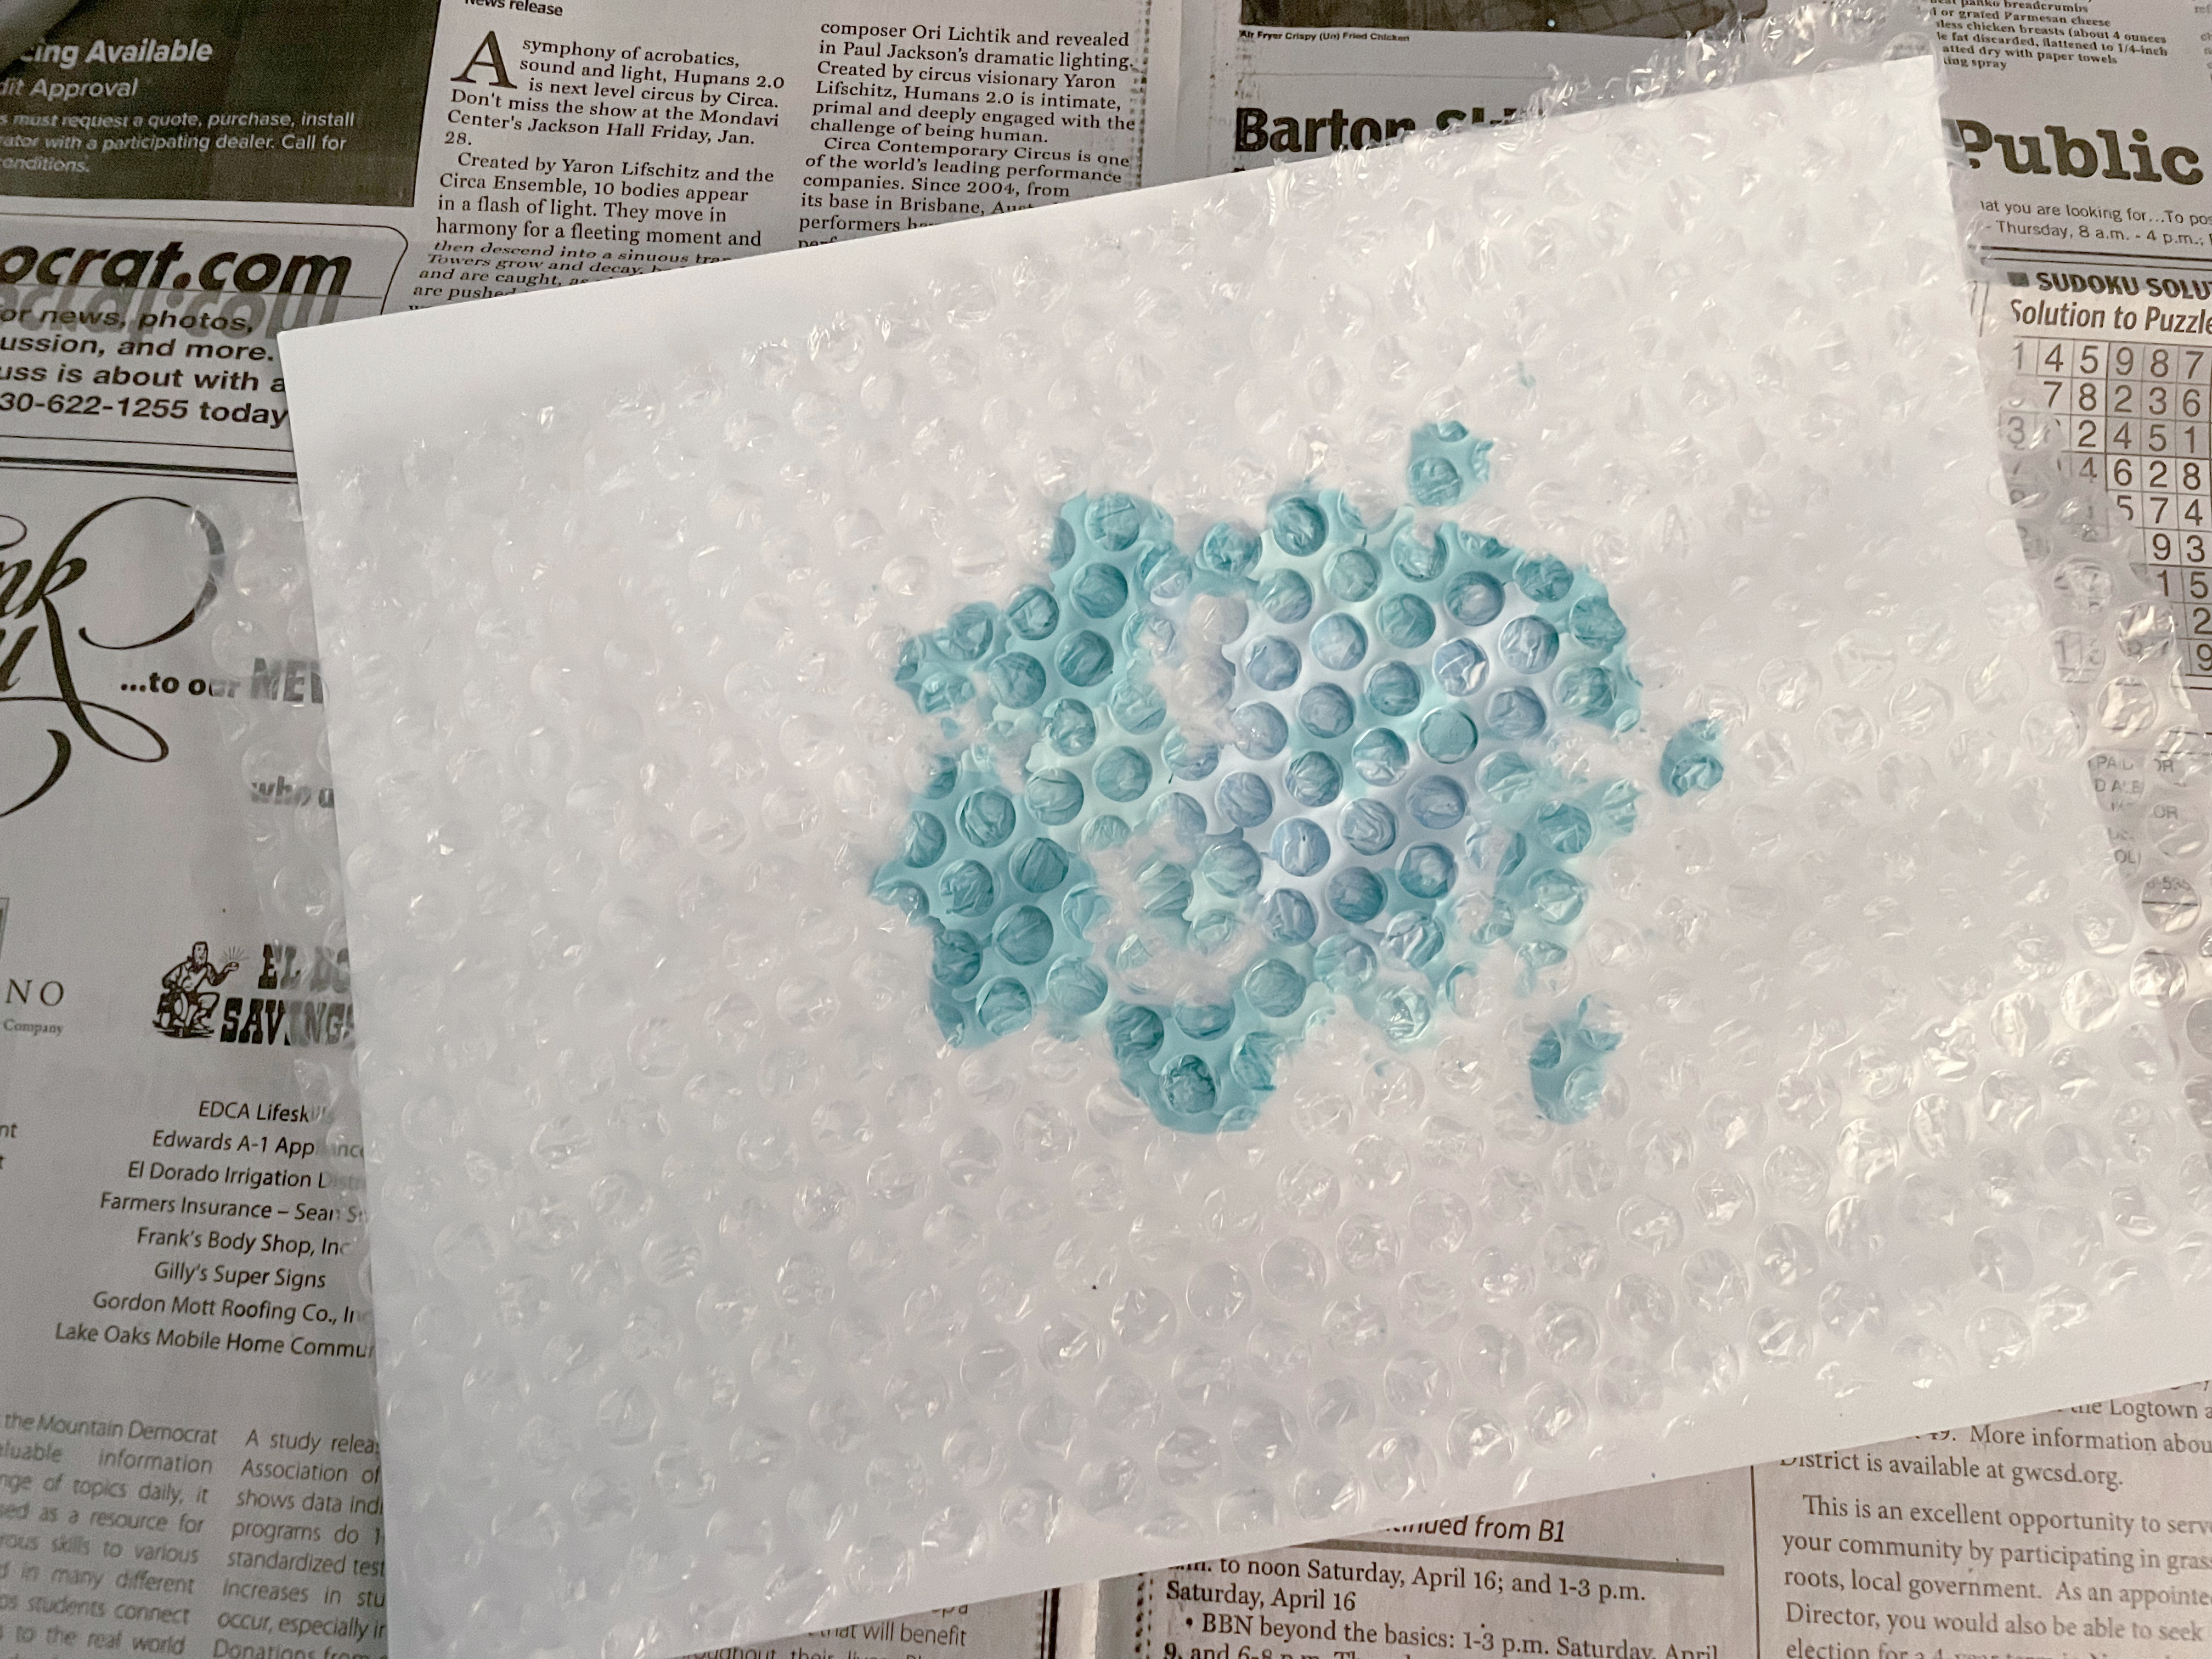
Cover your workspace with newspaper, then squirt some paint onto the center of your white paper. I used two shades of blue. 


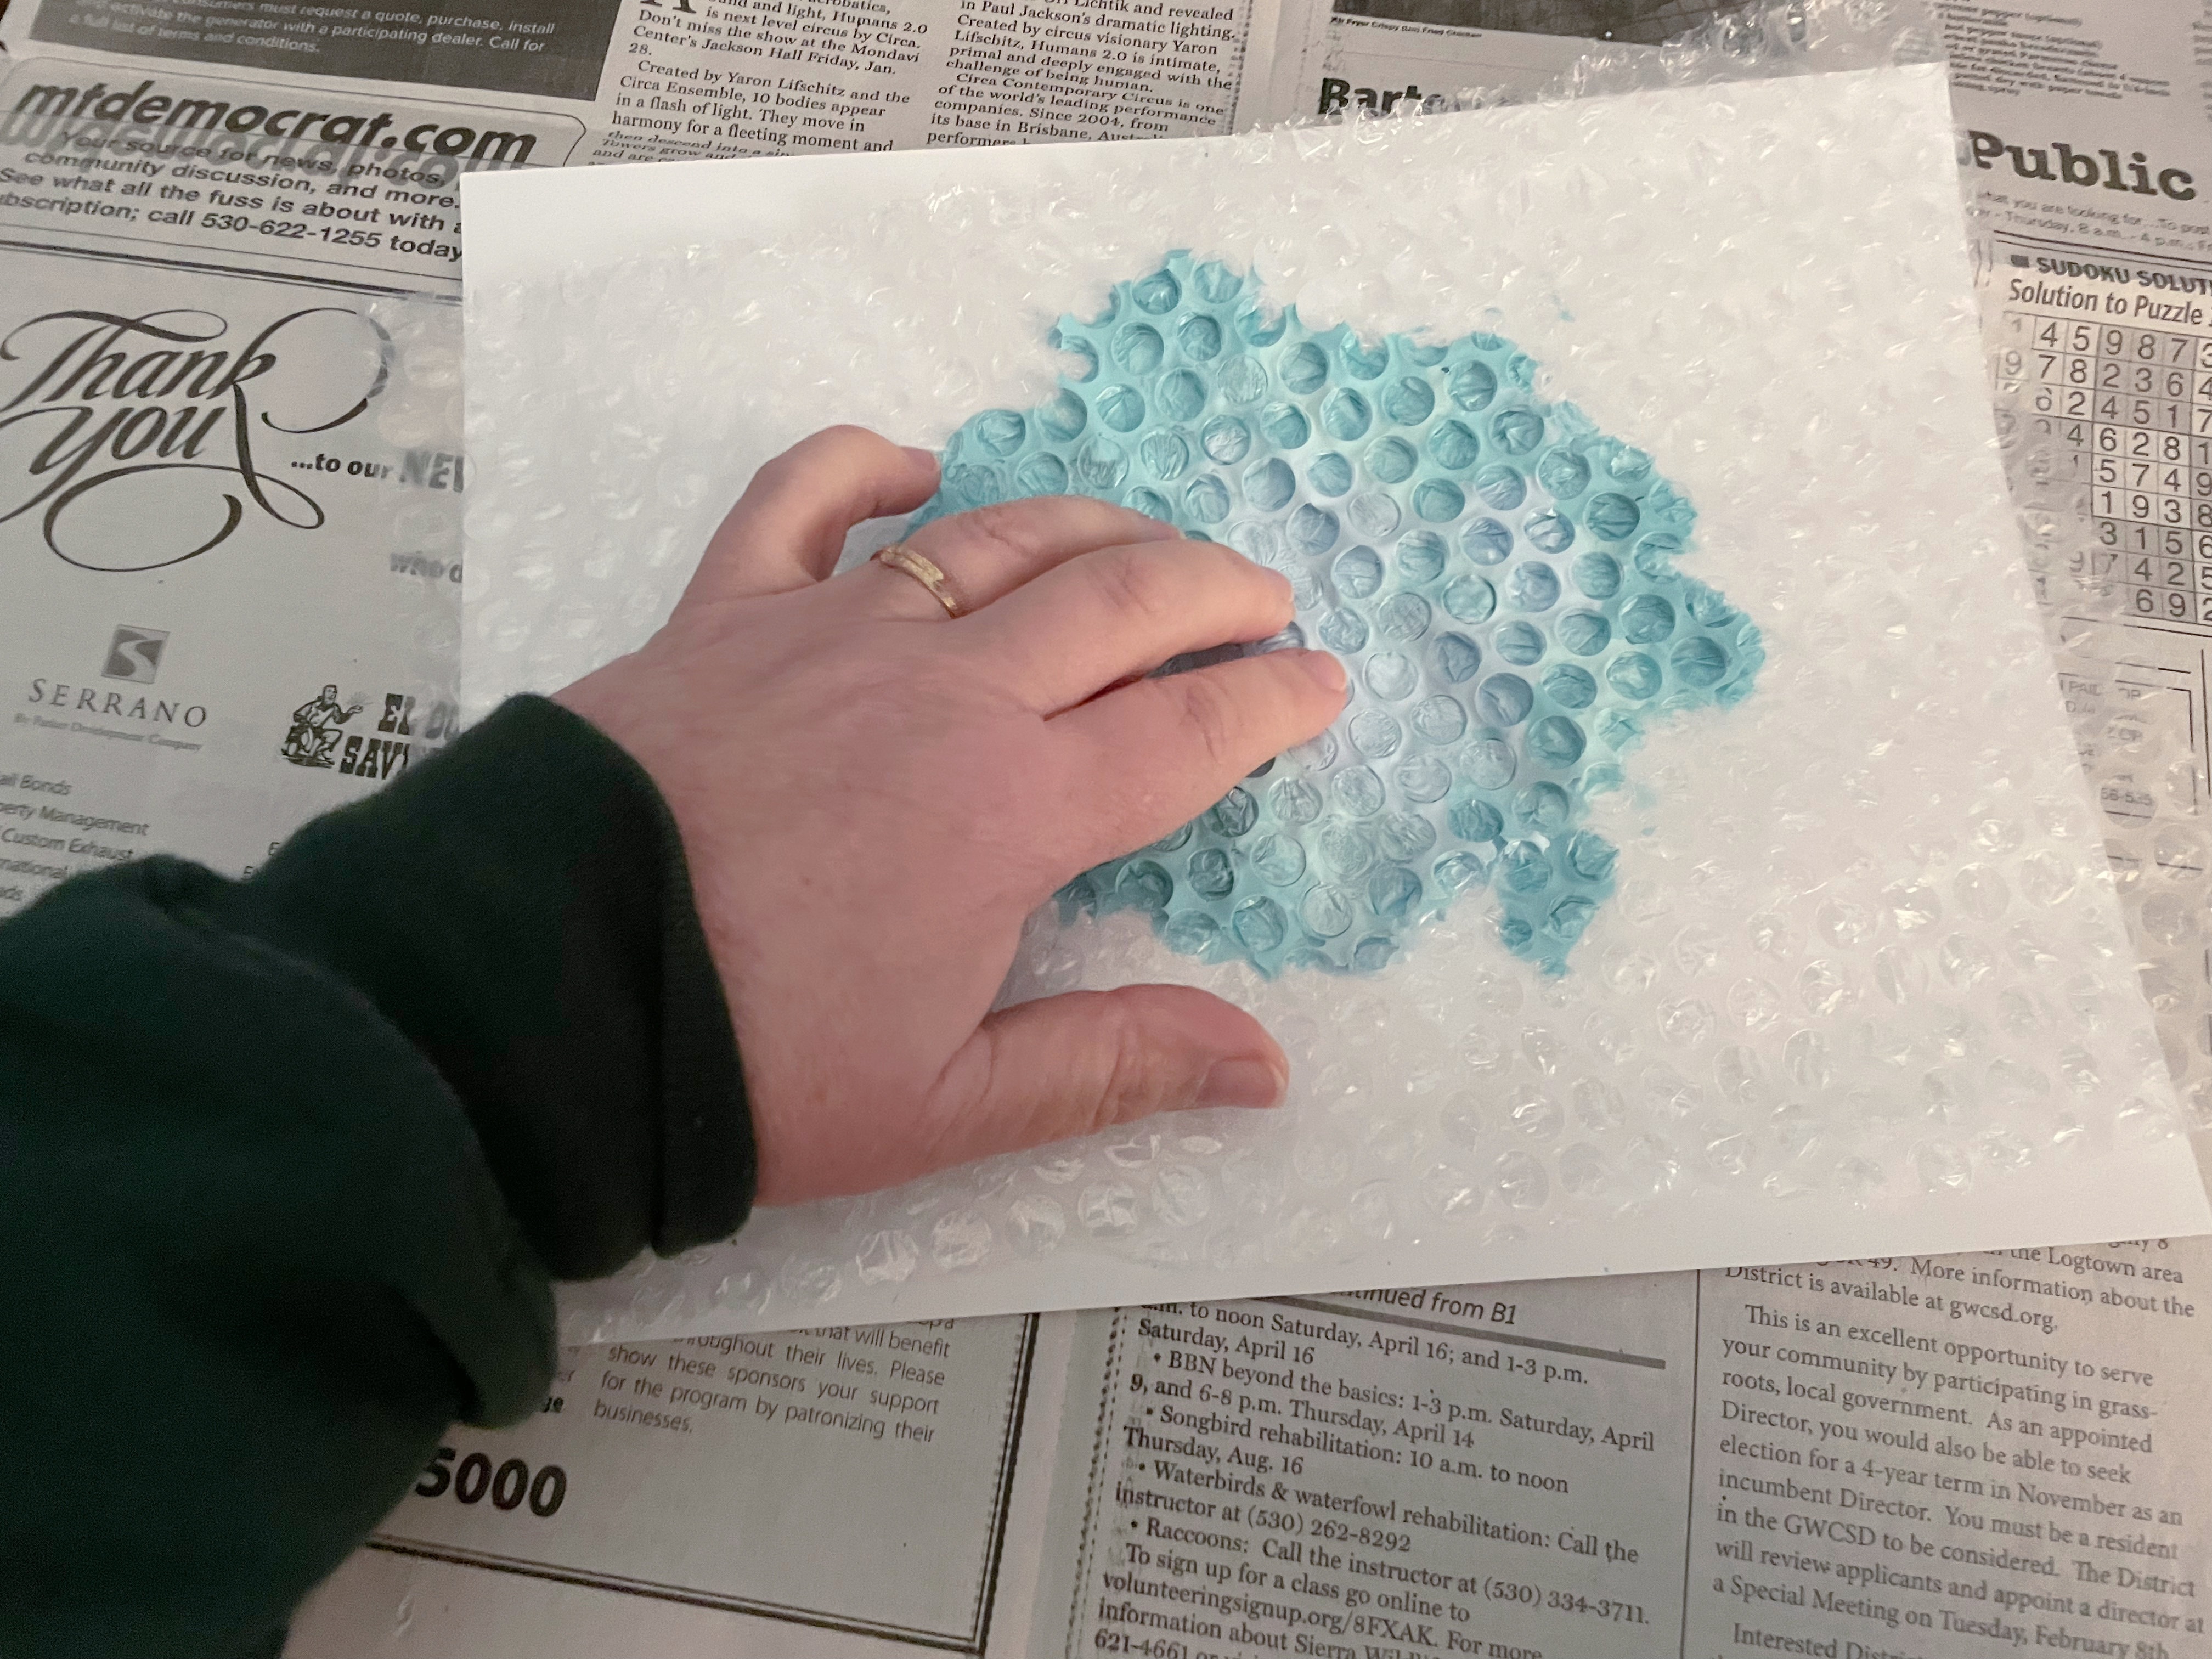
Cover the paper with the bubble wrap, bubble side touching the paint. 


Starting at the center and working outward, pop the bubbles. The paint will gently splash outward, but will be contained by the plastic wrap. There's no need to pop the bubbles that don't have paint under them, but feel free. I did. :)


Remove the bubble wrap and set the painting aside to dry. Cut out two boots and two legs from another piece of white paper. Cut a quadrilateral for a raincoat or skirt as well. 


Paint the boots, legs, and raincoat/skirt with the color/pattern of your choice. When everything is dry, glue the legs behind the boots, then glue them to the puddle. Glue the raincoat or skirt on top of that, then trim off any excess paper that sticks over the edge. 


While some say that art imitates life, others say that life imitates art. If that's the case, I'd better start making some sunshine-themed crafts!

4/28/21

Recycled Items Hot Air Balloon

I keep a jar of lids in the craft room because you never know when you'll need one. I was putting a metal lid from a cylinder of orange juice concentrate into the container when I realized the red plastic screw-on lid from a tub of mixed nuts would make an awesome hot air balloon. I dug out a few more recycled items and made this:


Every time I look at it, it makes me laugh. The idea of my parents taking their three grandkids on a hot air balloon ride is improbable enough, but the fact that I positioned the photo so that Allison would be visible makes me imagine the impossibly long legs everyone appears to have. The picture was actually taken indoors at my sister's house in December 2018, not in a hot air balloon. Everyone had just come in from the snowy backyard, which explains the jackets but not why Mom is wearing her fanny pack and Dad is clutching a cold drink protectively. 

The main supplies in today's craft all are recycled, if you can count a photo I printed but didn't end up using for the scrapbook as recycled. I'm counting it. Affiliate links below. 
 

Recycled Items Hot Air Balloon


Materials:


Steps:


Decorate the plastic lid with Sharpies and gel pens. Obviously, you can use whatever colors and patterns you want. 


Cut a piece of chipboard about the size of an index card. Use a score board to create the basket texture, first by scoring the chipboard in one direction, then rotating is 90° and scoring again. It's difficult to get precise lines when working against the existing score marks, but that actually makes the basket texture most realistic. 


Rub brown ink on the scored chipboard. The transformation is amazing!
 

Score the sides and bottom of the chipboard so that you can fold them to make a dimensional basket. Use microtip scissors to cut the photo, separating the people from the background. Glue the people to the basket.


Turn everything upside down. Assemble the basket by folding the bottom under and the sides back, then gluing them into place. Cut two lengths of single-strand embroidery floss and glue the middle of the strands to the bottom of the plastic lid. 

When that is dry, stretch the pieces of floss so they are taut. Glue two to the back of the photo and two to the basket. 


When everything is dry, add glue to the edges of the lid and the basket, then carefully turn it over and place it on the cardstock. Let it dry completely before hanging. 


Up, up, and away!

3/19/21

Spring Felt Bird Family: Finger Puppets and a Wall Hanging

Did you know that some penguins live in warm climates, one species as far north as the equator? I mention this because we've somehow decided as a society that penguins only live in very cold places (not true) and thus are a winter bird, as if they cease to exist in spring, summer, or fall (also not true). There's an unwritten law that penguin crafting must take place in December and January only. Likewise, owl crafting is for the fall. Flamingo crafts should occur in the summer. None of this makes any sense, since the birds obviously live year-round, but I don't make the rules. 

March is when we make bluebird crafts. 


Today's tutorial will teach you how to make the wall hanging above, but it you stop midway through you'll have a fun set of finger puppets. Affiliate links below. 


Felt Bird Family: Finger Puppets and a Wall Hanging


Materials:


Steps: 


Layer two pieces of light blue felt together, so that when you cut out the birds' bodies and wings, you'll get two of each piece. It's an easy shape, so I cut mine freehand but you can make a pattern on scratch paper first if you'd like. 

Next, cut out one yellow triangular beak for each bird. Cut a handful of leaves from the green felt. Wrap the brown felt around the cardboard tube and cut off any excess. 


Glue the brown felt around the cardboard tube and set it aside to dry. 

Now it's time for sewing. Use three strands of green embroidery floss and a simple backstitch to add the midrib to each leaf. Orient the seam of on the cardboard tube to the back, then glue the leaves in clusters to the front. 

There are three steps to sewing the birds together: 

  1. Separate the two blue body parts of each bird and set aside the back pieces. Use two strands of yellow embroidery floss and a running stitch to attach each beak to the front piece of each bird. 
  2. Sew the INNER portion of the wings to the front piece of each bird, using two strands of blue embroidery floss and a running stitch. The wingtips extend below the birds' bodies; continue the stitch in that area for a uniform look. 
  3. Pair the bird fronts with the backs. Sew around the perimeter, starting at one wingtip and ending at the other wingtip. Don't sew the bottom parts together!


If you stop here, you have finger puppets! To keep going and make the wall hanging, add fiber fill to each bird, then sew along the bottom, leaving the wingtips free.

Drop the cord down through the tube and tie a knot to make the hanger. Hang your newly-created branch, adjusting the hanger until it is level. Add glue to the bottoms of the birds' bodies and to their wingtips, then position them on the cardboard tube. The wall will support the birds as they dry.

You can use the same technique to make a wide variety of bird finger puppets or wall hangings. (Even penguins, owls, or other 'seasonal' birds.) Just change out the felt color and other details as needed and craft away!

2/25/21

Twinkie Bird on a Stick

You had to have guessed that after making a heart from Twinkies I wouldn't just let Steve eat the rest of the Twinkies in the box without using them for a craft first, right? You know me so well. 


I had originally planned to make blue birds, but when I went through my "still need to try" flavorings, nothing made sense with blue. So I switched to pink and used grapefruit oil to flavor it. Affiliate link here and throughout the post. 

Fun fact: When I was a teenager, we had a yellow parakeet named Twinkie. He had a ton of personality. His favorite bird-approved food was oat groats, but he would regularly help himself to all sorts of human food (including chicken) if we left our plates unguarded for two seconds. 


Twinkie Bird on a Stick


Materials: 


Steps: 

Unwrap the desired number of Twinkies (one for each adult bird and one for each pair of baby birds). Insert the lollipop sticks into the Twinkies. 


Set out a set of small eyes and a yellow TicTac for each baby bird. Use a sharp knife to cut yellow M&Ms in half, then set out sets of medium eyes and an M&M half for each adult bird. 

Next, you're going to melt the candy according to the package directions and flavor it as desired. Here's where you need to learn from my mistakes: Do not leave the Twinkies on a wire rack and pour the melted candy over them. And, do not pour the melted candy over the Twinkies and then place them on a wire rack to drain. Why? Because when you remove them, a bunch stays behind. 


Now learn from my next mistake. After the wire rack fails, do not put the melted candy into a narrow glass, thinking you can just dunk the Twinkie and then lift it out perfectly covered. Instead, the stick comes out and the Twinkie stays put. 

Instead, I had the best luck putting the Twinkies onto parchment paper and spooning the candy over them, adding the eyes and beak, and giving them a good dusting of sanding sugar. Then I lifted the bird out of the puddle, dipped the uncoated back side into the puddle, let the excess drip off, and then placed the bird in a clean spot to set up. 


There are five more Twinkies in the box. Any suggestions for what I should make next? I have a few ideas, but I'd love to hear what you think. 

4/5/13

N is for Nest

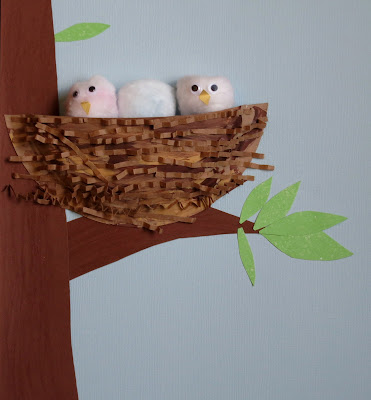
I have a post-it note beside my desk with the letters J, K, N, U, X, and Y on it. Those are the letters that are still missing from my list of Children's Crafts from A-Z. Trevor and I are determined to craft our way through the remaining letters as soon as possible. In the past few weeks, we've knocked Q (Quail) and V (Volcano) off the list. Once I finish this post, we'll scratch N off the list. N is for Nest! Affiliate links below. 


Paper Plate Nest

Supplies: 


We started by cutting a paper plate in half. Each of us painted our half with various shades of brown to look like a nest. (Our plate started out blue.) Here's how my nest looked when the paint was dry.


To give the nest texture, we glued on some of the paper bits that came in a gift basket we received.


We kept going until our nests were well-covered.


The next step was adding cotton ball birds. We rubbed some chalk on cotton balls, then added googly eyes and little paper beaks. We tucked the birds behind the nest. Here's mine:

Trevor chose to make two pink chicks and one blue egg that hadn't hatched yet.


The final step was making a background. We started with light blue for the background. We cut brown cardstock to make a tree trunk and branch, then used a crayon to give it a more realistic tree texture. We cut out green leaves to attach to the branches. Trevor left his leaves flat, while I bent mine to give them texture. Finally, we glued the nest and birds in place.

Here's Trevor's artwork. Mine is at the top of the post.

Five letters to go!

3/14/12

Edible Art: Ice Cream Flowerpots

Recently, Trevor has been spending a lot of time going through our cookbooks. One day, he announced that he wanted to mark the pages of some recipes he wants he try. I gave him a set of post-it flags and left the room to put away laundry. When I returned, I found this:

(Affiliate link here and below)

He used an entire brand-new set of blue post-it flags, plus part of a pack of yellows. Here's another view:


Trying all those recipes should keep us busy for the next few years!  We decided to start with these Ice Cream Flowerpots from Disney's Family Cookbook.


Ice Cream Flowerpots


Materials:


Let the ice cream soften slightly, then fill each cup about 2/3 full of ice cream. Insert the straw into the ice cream to form the stem of the flower. (I cut our straw in half, so we only needed one straw for the two of us.)

Twist 4 Oreos to separate their halves. Place the non-frosting sides into a ziplock bag and crush to make crumbs. Pour the crumbs on top of the ice cream to create the look of soil. Place the cups in the freezer.

Make your flower. The cookbook shows a beautiful Oreo center with gumdrops around it. This did not work for us and was incredibly frustrating. No matter how careful we were, the Oreos cracked.

After breaking a dozen Oreos, I finally got fed up and used two yellow Fruit Slices to make a center. It looks somewhat lame, but at least there was no frustrating cracking.

Attach a toothpick to your flower. Slide the toothpick into the straw. Add a green Fruit Slice to mimic a leaf. Eat and enjoy!

(Trevor's on the left and mine on the right.)

  
We had a lot of fun making our flowerpots, but it was annoying that we weren't able to make an attractive flower that wouldn't crack. We brainstormed what would make a better center and came up with Sunkist Fruit Gems. So the next day, we bought a pack.

This time, Trevor decided he wanted graham cracker dirt instead of Oreo dirt.

Success! The Sunkist Fruit Gems worked a million times better than the Oreos.

 
(Trevor's on the left, mine on the right)

(Steve's.  He was bummed to have missed our first attempts.)

I love the way the flowers look with the Sunkist Fruit Gem centers! Despite the frustrations along the way, this was a really fun project and definitely one we'll do again.