Showing posts with label bird. Show all posts

6/11/26

Common Loon Craft

The common loon is a beautiful and distinctive bird that lives primarily on lakes in the northern US and Canada. An expert diver, 80% of its diet is fish. The loon is the state bird of Minnesota (and the provincial bird of Ontario, Canada) and is also found in abundance in Wisconsin, Maine, Michigan, New Hampshire, and Alaska. Make a loon of your own by following this easy tutorial. Affiliate links below. 


Common Loon Craft


Materials: 


Steps: 


Cut out the basic shape of the loon from black cardstock. Draw your own on scratch paper first or print my shape below in the correct size to use as a template. 


Shade the loon's beak with a grey colored pencil. Use a black colored pencil to add a line to define the upper and bottom mandible. 

Color the eye orange, then add a black pupil in the center. Use an extra-fine Posca marker to add a white catchlight at the top of the eye. 

Draw a series of vertical lines along the throat and the back of the neck to make the distinctive bands. 


Use a Posca pen to make the rest of the markings on the loon: white hatch marks on its breast, curved white lines on its shoulders, and blocks of white on the wing that are bigger at the top and center than lower and on the sides. Finally, use the grey colored pencil to define the tail feathers. 

The underside of the loon is white like its chest, but I didn't bother coloring it since I knew it would be covered by the water. Also, I trimmed the loon to give it a more rounded bottom. Here's my finished loon. 


Cut three (or more) strips of cardstock to make the lake water. You want them to be a little wavy. Glue one piece to your background paper, then glue the loon on top of that. Glue the next strip so that it covers the underside of the loon, then glue the final strip over that. 


I'm glad to have made this project and learned more about this super cool bird!

9/10/25

Does Your Birth Month Bird Match Your Personality?

My sister sent me an article entitled, "Does Your Birth Month Bird Match Your Personality?" with the comment that it would make a good blog post. I had no idea there was a birth month bird (just like there's a birth month gemstone and flower), so I'm guessing some of you didn't either. As for making a good blog post, I hope it will, but I'm mostly just excited to play with the stock photos of birds on PicMonkey. 

Rather than focus on the symbolism humans have assigned each bird (i.e. owls are wise, doves are peaceful, and ravens are tricksters), I'm going to share the biological facts about each bird. See if you share any traits in common with your birth month bird!


Birth Month Birds


Owls are known for their outstanding hearing, their excellent night vision, their silent movement, and their incredibly flexible necks. They tend to be solitary except when raising young. 


Parrots are social birds who form strong bonds with one another. They are very intelligent and are excellent mimics. They are good at solving puzzles and using tools. Parrots prefer warm, humid climates. 


Robins are active during the day and tend to live in small groups. They are known for their beautiful singing voice. Robins are fiercely territorial and will aggressively defend their space. 


Canaries are most well-known for their complex and beautiful songs. They tend to be solitary and are naturally timid. Their favorite foods include seeds and grains. 


Nightingales are migratory birds that prefer warm climates and low elevations. They produce beautiful songs, both during the day and the night, that feature whistles and trills. Nightingales will raise their volume to be heard over background noises or other birds. 


Doves are known for being monogamous and mating for life. They tend to group with others for safety and can maneuver easily to avoid danger.  Doves can adapt to almost any environment. They are notoriously poor at construction, focusing on speed rather than design. 


Eagles are known for being strong and powerful. They are persistent when going after what they want. They are agile and adaptable and move with stealth. Eagles mate for life and aggressively protect their young. 


Kingfishers are solitary and territorial. They communicate mostly with shrieks, screams, and chirps. Their preferred food is fish, so they tend to live near bodies of water. They bathe frequently. 


Hawks are known for their speed, agility, and intelligence. They have excellent eyesight. Hawks are adaptable and thrive in many different habitats. 


Swans are powerful and graceful. They live in temperate freshwater and coastal environments and are strong swimmers. Swans are herbivores. They mate for life and are extremely protective of their young, aggressively defending their territory. 


Roosters are best known for being early risers. They are very assertive and territorial toward rivals, but protective of their flock. They are vigilant guardians and strong leaders. 


Ravens are exceptionally smart and are known for their use of tools and their problem-solving skills. They are talented acrobats and outstanding mimics. Ravens are high adaptable and eat a flexible diet. They typically live alone or in pairs. 

---------


Does your birth month bird match your personality? Or is there another bird that's a better fit? Let me know in the comments!

4/22/25

Toucan Easter Egg

This is my final decorated Easter egg for this year. It's a toucan. Specifically, it's a toco toucan, the largest species of toucan. Endemic to South America, toco toucans live in semi-open habitats at altitudes up to 5740 feet (in contrast to other toucans, who prefer closed-canopy forests). They feed mainly on fruit. They are a least-concern species, still plentiful in the wild. And they're really fun use as inspiration for a decorated egg. Affiliate links below. 


Toucan Easter Egg


Materials:


Steps: 

Paint the egg black, leaving a rounded cone-shaped area white. 

Cut a ring from the cardboard tube. Paint it green. 

Cut a beak from cardstock. Use the blending brushes to add orange ink to the bottom of the beak and yellow ink to the top. Without adding extra ink to the brush, color the white area of the egg, just where the eye will go. Use a Sharpie to color the end of the beak black. 

Cut leaves from green felt and glue them to the cardboard tube ring. Glue the googly eye and beak in place. When the glue is dry, place the toucan amongst the leaves. 

1/8/25

Western Meadowlark Magazine Art

Ready to see my latest bird art? I loved making it. 
 

The project starts with a coloring page of the Western Meadowlark, the state bird of Kansas, Montana, Nebraska, North Dakota, Oregon, and Wyoming. I found this coloring page at MontanaKids.com, which is run by the Montana Office of Tourism. State websites are a great source for coloring pages and other resources. Obviously, you can use the technique below for any coloring page, or even for a design you draw yourself! 

---------


Western Meadowlark Magazine Art


Materials:


Steps:


Search through the magazine and tear out blocks of color to complete your image. I found the perfect yellow throughout Visit California's Travel Guide. Tear the block of color into small pieces. For a bird, you want those pieces to mimic the shape of feathers, so aim for some longer, thin pieces (rather than squares). 


Use craft glue to adhere the torn pieces to the coloring page. I had planned to start with the bird and then do the background, but realized it would be a lot easier to do the background first and then put the bird in the foreground. So I switched. 

In the photo below, you can see that I tore out pieces for the legs but didn't glue them down. Instead, I started working on the sky. For that, tear long thin strips of sky blue. Don't worry if you cant find enough of the same color blue for such a large area. The real sky has variation. And besides, it's the background. 


After completing the sky, I worked on the fence post, then added the legs and feet on top of that. I tore the beak from the same area as the legs. I used text for the mottled color of the meadowlark's head, wings, and tail. I finished with the black bib and eye. The last step was trimming my artwork to clean up the edges. I cut mine to a square (because I like squares) but it's perfectly fine to leave it rectangular. 


It took me about 75 minutes to make this project from start to finish. It was very relaxing and I'm happy with how it turned out. 

11/26/24

State Bird Window Clings Using Gallery Glass (American Goldfinch and Northern Mockingbird)

After making diamond art ornaments featuring two of the state birds, I thought it would be fun to use a different medium to make another pair of state birds. These window clings of the American goldfinch and Northern mockingbird are made from Gallery Glass. They're currently on the window in my craft room - that's our neighbor's tree you're seeing through my window. Aren't they cute? Affiliate links below. 


Gallery Glass - Bird Window Clings


Materials: 


Steps: 


Draw a simple bird shape onto a piece of scratch paper, then position it under the workmat. Use the black leading to outline the shape. Let the leading dry completely (overnight is best). 

Use the paint to flood each section, much like you would when decorating a cookie with royal icing. I used a skewer to create a variegated color in both tails and the mockingbird's wing, but it dried a solid color so don't bother with that. 


Let the paint dry completely, again overnight. When it is dry, carefully peel the birds off of the workmat. Now you have a window cling that that will stay on the window until you peel it off. 

Here's a closer look at each bird. The mockingbird is the state bird of Arkansas, Florida, Mississippi, Tennessee, and Texas. 


The goldfinch is the state bird of Iowa, New Jersey, and Washington. 


It would be easy to adapt this project to make literally any bird. Give it a try!

11/18/24

Western Meadowlark Diamond Art Ornament

I liked my wood slice American Robin ornament so much that I made one for the Western Meadowlark. It is the state bird of Kansas, Montana, Nebraska, North Dakota, Oregon, and Wyoming and is easily recognized by the black V-shaped bib on its yellow breast. Beautiful! 

As with the robin, you can make this with leftover drills from previous diamond art projectsbuy a bunch of colors, or get just the colors that you need. I used a variety of greys to make my bird since that's what I had on hand. Affiliate links below. 


Western Meadowlark Diamond Art Ornament


Materials: 


Steps: 


Paint a thin coat of DOTZ Stick onto the wood slice, following the package directions. Don't use too much or the moisture can cause your ornament to crack. 

When the adhesive is ready, apply the drills. The stars on my pattern mark the center of each axis, so the plus sign is the center of the whole design. 


In order to center the meadowlark, put the center drill onto the center of the ornament. Then fill in the rest of the drills around that central one. 

Ordinarily, I'd suggest sealing your diamond art, but since these ornaments can crack with too much moisture, I wouldn't risk it. Instead, rub cornstarch or baby powder over the uncovered area of the wood. That will eliminate the tackiness of any extra adhesive not covered by drills. 


-------


Have you seen the Aububon Birds stuffed animals from Wild Republic that feature a realistic call? I love them! There are over 30 different birds. This is the Western Meadowlark


Interested in learning more? Read about the Western Meadowlark and hear its calls at Audubon.com

11/13/24

American Robin Diamond Art Ornament

I've been wanting to make a bird ornament using my copious supply of leftover drills from diamond art for a long time. I'm so happy with how this robin turned out! Don't have leftover diamonds in the correct colors? Not a problem! Substitute with what you have, buy a bunch of colors, or get just the colors that you need. Affiliate links below. 


American Robin Diamond Art Ornament


Materials: 


Steps: 


Paint a thin coat of DOTZ Stick onto the wood slice, following the directions on the package. If you use too much, your ornament can crack from the moisture. 

When the adhesive is ready, apply the drills. This is the pattern I made. The stars mark the center of each axis, so the plus sign is the center of the design. 


In order to center the bird on my ornament, I put the center drill onto the center of the ornament... as best I could. The wood slices I used are quite irregular. In retrospect, I could have moved my starting drill over a hair to the left to better center the design. It didn't bother me much, so I left it that way.

Fill in the rest of the drills around that central one. 

Ordinarily, I'd suggest sealing your diamond art, but not on wood like this. Instead, rub cornstarch or baby powder over the uncovered area of the wood to eliminate the tackiness of any extra adhesive not covered by drills. 

-------

The American Robin is the state bird of Connecticut, Michigan, and Wisconsin, making this a great activity for kids (or adults!) in those states. But it's equally great no matter where you live. This interesting songbird is one of the most recognized and most widespread in North America. Pair your craft project with a shaped puzzle featuring the American Robin, then check out these fun facts about this beloved bird. 

2/9/24

State Birds Puzzle and Thoughts about State Birds

Trevor and I recently finished a puzzle featuring the state birds and state flowers of all 50 states. 
 

The puzzle, which is by Galison (affiliate link), is beautiful and very high-quality. 


It is also quite challenging. I'm still not great at estimating how difficult a puzzle will be, and this one was harder than I thought. Turns out, there are a lot of brownish birds. Not to mention, there are a lot of repeated birds. Of the 50 states, 7 of them have a cardinal as their state bird. Which brings me to my main topic for today's post: I wish each state had a unique state bird. 

The California Valley Quail is ours and I think it's perfect for the job of state bird. It's native to California, found in most parts of the states, abundant, and easily recognizable. We get baby quail in our yard all the time and they are the cutest things ever. But most convincingly, the California Valley Quail has the state name in its name! The California Valley Quail is an outstanding choice for California's state bird.

The Birdist makes a case for the California Condor being California's state bird and I'd be fine with that too. (Maybe we need a state bird and a state raptor.) I would be less fine with the California Gull. While, like the Quail, it is native to California, found across the state, abundant, easily recognizable, and has the word "California" in it, it is not universally loved here. Gulls are crop pests and can be particularly detrimental to the cherry harvest. They hang out in parking lots and other urban locations (as well as landfills). They are famous for begging for food (or just blatantly stealing it) at beaches, parks, outdoor restaurants, or anywhere else people eat. Not quite the way California wants to present itself. 

And yet... the California Gull IS the state bird. Just not of California. It is the state bird of Utah. Utah holds the unique distinction of being the only state to choose a state bird named for a different state. (Rhode Island and South Carolina both have birds named for their states. Maryland's bird, the Baltimore Oriole, shares its name with a major city in the state.) Utah does have a good reason for choosing the California Gull as their state bird, but still. 

Back to The Birdist. I laughed out loud (and startled Brayden) about Florida. I'm still snickering about the state beverage. A tip of the hat to you, sir. 

For the 30 states who share their state bird with at least one other state, All About Birds used eBird to propose alternatives. I love what they've come up with. Each state deserves a unique state bird. All 50 managed to choose different state flowers; there's no reason it shouldn't be the same for other state symbols.

9/5/23

Canada Goose in Flight

My friend Brenda (of meteorite fame) was recently at my house for a marathon craft day. She's a middle school English teacher who will also be teaching one period of art this semester. She spent the day working on lesson plans and making samples. Among the materials she brought was a well-worn Canada goose craft from her days teaching elementary in the 90's. She is planning to adapt it for her middle-schoolers. I did my own adaptation.

This is mine: 


This is Brenda's original:


Her goose started with the two main body parts cut from a manila folder. She used a black marker to color the head and tail, then a brown crayon to color the top half of the body. She cut white paper to make the belly and the marking on the face. Then she tore pieces of brown construction paper and glued them to the back and wings. 

I started by using scratch paper to make a template for the two body parts. I wanted to be able to cut them from a single sheet of 12x12 black cardstock. (Affiliate links here and below). When I got them the size and shape I wanted, I traced my templates with a white colored pencil and then cut the pieces out. 


I flipped the cut pieces over (so that any stray colored pencil marks wouldn't show). Then I used Folk Art acrylic to paint the belly and part of the face white. 

While that was drying, I tore some brown packing material into strips. Gotta love free craft supplies! I used a brown ink pad to swipe ink along the left side of each strip. Then I started tearing the strips to make the individual feathers for the wing. I glued them in place with tacky glue


I finished up the wing, then added feathers to the goose's back. This is how the two pieces looked when I was done. 


All that was left was to glue the wing piece onto the body, then add a googly eye


I've shared a Canada goose project before - way back in 2014. It was Trevor's choice for G in our Cursive Project. Good memories. 

7/24/23

Felt Cardinal Pencil Topper

I think it's so weird that we talk about most animals year-round, while there are others we've assigned to a certain season. It's as if rabbits and chicks only exist in the spring, flamingoes and tropical fish disappear if it isn't summer, bats and owls are only alive in the fall, and penguins and polar bears vanish when winter ends. I get that some of that is based on climate; tropical fish live in warm water and polar bears live in cold water. But they live there year-round! 

Despite existing year-round with quite a large range, cardinals are considered part of the winter animal category. If there is an image of a cardinal on a card, the sentiment probably references Christmas or winter. You don't see cardinals on Easter greetings, even though baby cardinals start hatching then, just like baby chickens. It's weird. 

All this to say that I made a cardinal craft during the summer. And you can too. Affiliate links below. 


Felt Cardinal Pencil Topper


Materials:


Steps: 


To make the cardinal, you will need two red felt bodies, two red wings, two black faces, and one orange beak. I recommend using scratch paper to make a template for yourself, unless you want to just wing it (pun intended) like I did.


Use floral tape to wrap a stem of leaves to a pencil. I used an artificial rose I had laying around and just pulled the flower off to save for a different use. 

Glue the face and wings to the two body parts.


Add an eye to each face. If you're using self-adhesive enamel dots, proceed. If you're using Enamel Accents, let them dry completely. 

Put a line of glue around the inside of one body piece, leaving the belly area open. Put the beak in place, then add a line of glue onto the part of the beak that will be covered by the second body piece. Set that piece on top of the first, essentially making a beak sandwich. Let the glue dry completely. 

Add as much or as little stuffing as you want, then add a generous amount of glue to the opening. Place it onto the prepared pencil, clamp it closed, and let the glue dry completely.  


Perfect for any time of year! This craft is particularly great if you live in one of the seven states (Illinois, Indiana, Kentucky, North Carolina, Ohio, Virginia, and West Virginia) that have named the cardinal as their state bird, or if you're a fan of the any of the Cardinals sports teams!

6/12/23

World Migratory Bird Day

In January 1971, two oil tankers collided near the Golden Gate Bridge, resulting in an oil spill that stretched for 50 miles along the coast. Volunteers did everything they could to help the 7000 oiled birds, but ultimately only 300 were saved. This tragedy lead to the founding of the International Bird Rescue Research Center in April 1971. They became a pioneer in wildlife rehabilitation techniques and were on hand to help as many of the 250,000+ oiled seabirds as possible following the Exxon Valdez disaster in 1989. Over the years, International Bird Rescue has continued to rehabilitate birds in their two California locations, one of which is 2 miles from Trevor's school. 

While International Bird Rescue's facility is not open to the public, they hosted an event at the nearby Cordelia Slough on World Migratory Bird Day. Trevor and I went together. Trevor has always loved birds (his Eagle Scout project benefitted the California Raptor Center) and he is strongly considering a career related to wildlife conservation. UC Davis, where he hopes to attend college, has an Avian Sciences minor (and a Master of Science) that really interests him. 

We had a great time at the WMBD event and learned a lot. The best part was looking through a scope at some white dots in a distant tree. We were shocked to learn that they were nesting egrets! I did my best to take a photo through the telescope lens, which I used on this scrapbook page.

World Migratory Bird Day (affiliate link)

I put this layout together in a completely different way than I normally do. I started with the bird sticker and speech bubble and built the rest of the page under those. 99.9% of the time I start with photos, but in this case I stuck down the stickers first, then trimmed photos to fit beneath them. I added the title and the other sticker in the lower right, then made a journal card for the empty space. The last thing I did was add the sentiment, arrow, and date stickers. It felt weird, to be honest, but it was a good creative stretch for me. 

I'm counting this for the 3-photo space on my BASH-O card. Here's what it looks like so far:


I'm not sure what my next layout will be, but there's a good chance it will feature stamps or punches. 

4/14/23

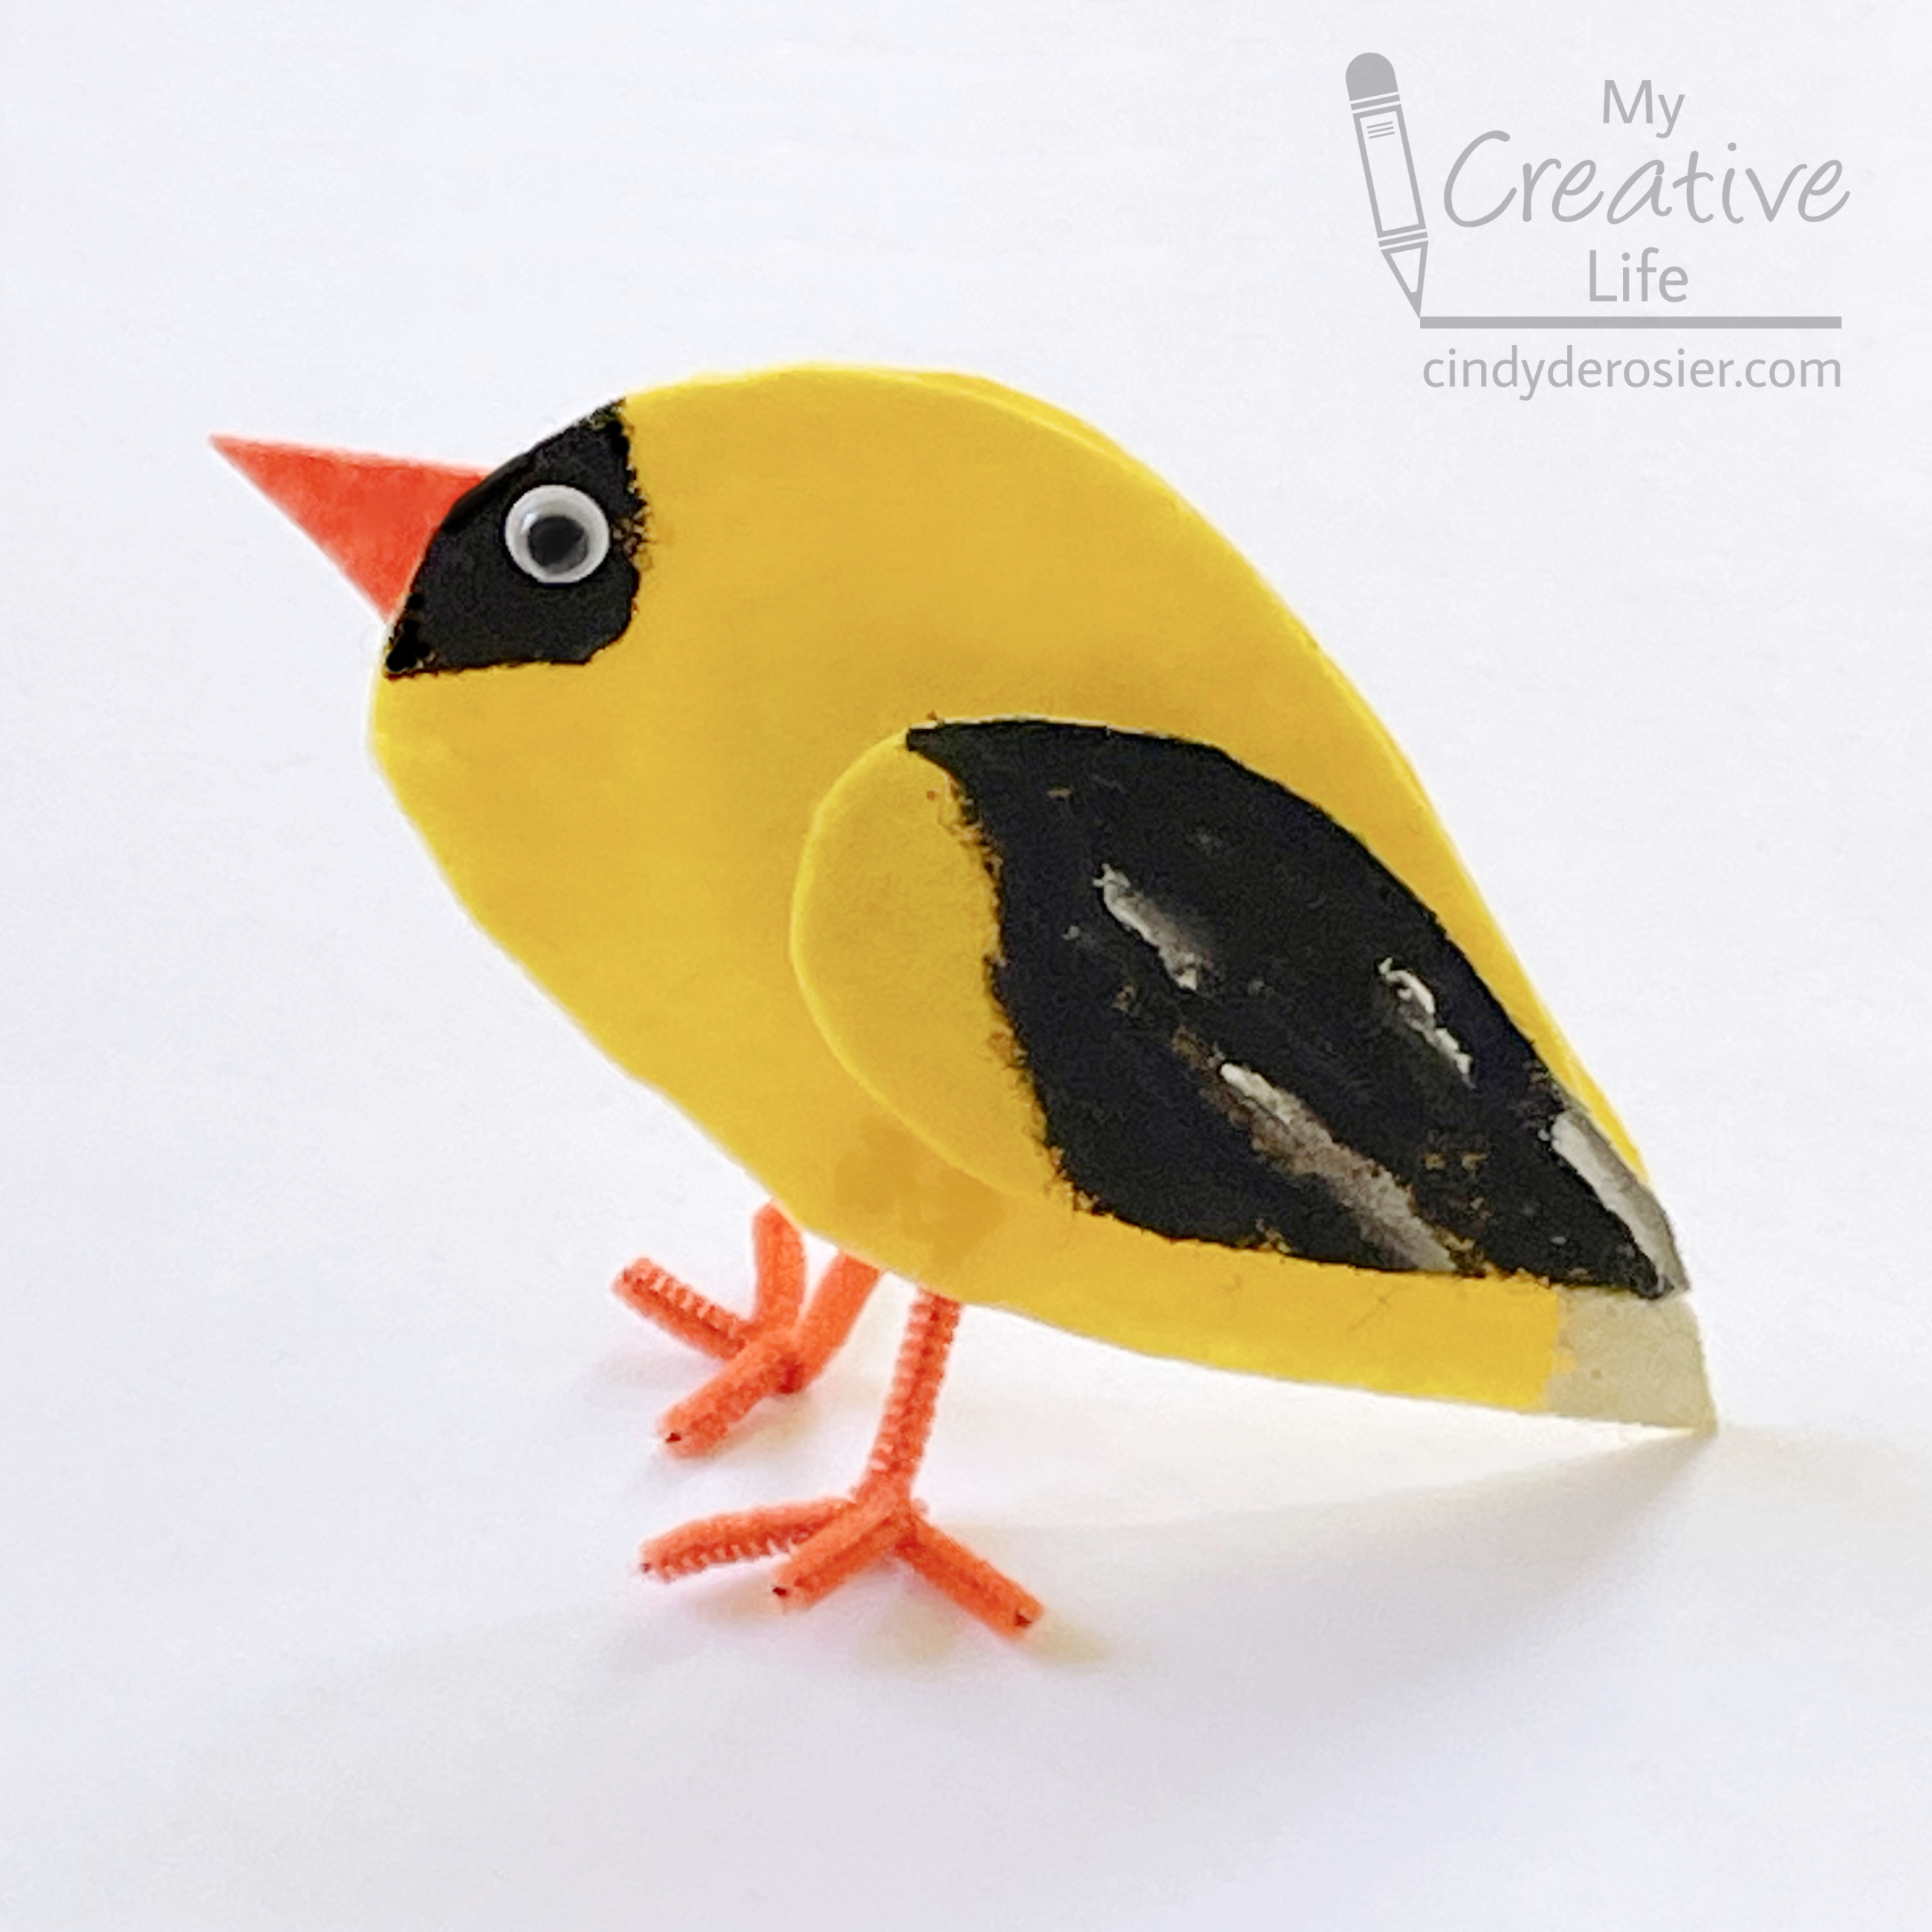
Felt American Goldfinch

My mom is very knowledgable about backyard birds. Despite years of her telling me the names of the various birds at the feeders (both at our home in California and when we visited relatives in Washington), one of the very few I was able to recognize as a kid was the American Goldfinch. Its distinctive yellow body with black forehead and wings stood out from the other various finches and whatnot that congregated at the feeders and birdbath. The goldfinch is the state bird of Iowa, New Jersey and Washington; I'd done my 5th grade State Report on Washington and had to draw a goldfinch for my report, so that helped cement it in my mind. All these years later and I'm still not much better at identifying backyard birds, but I can always spot a goldfinch. 

This felt version stands on its own and is fun project for kids to try. Obviously, you can adapt it for practically any similarly-shaped bird. Affiliate links below. 


Felt American Goldfinch 


Materials: 


Steps: 


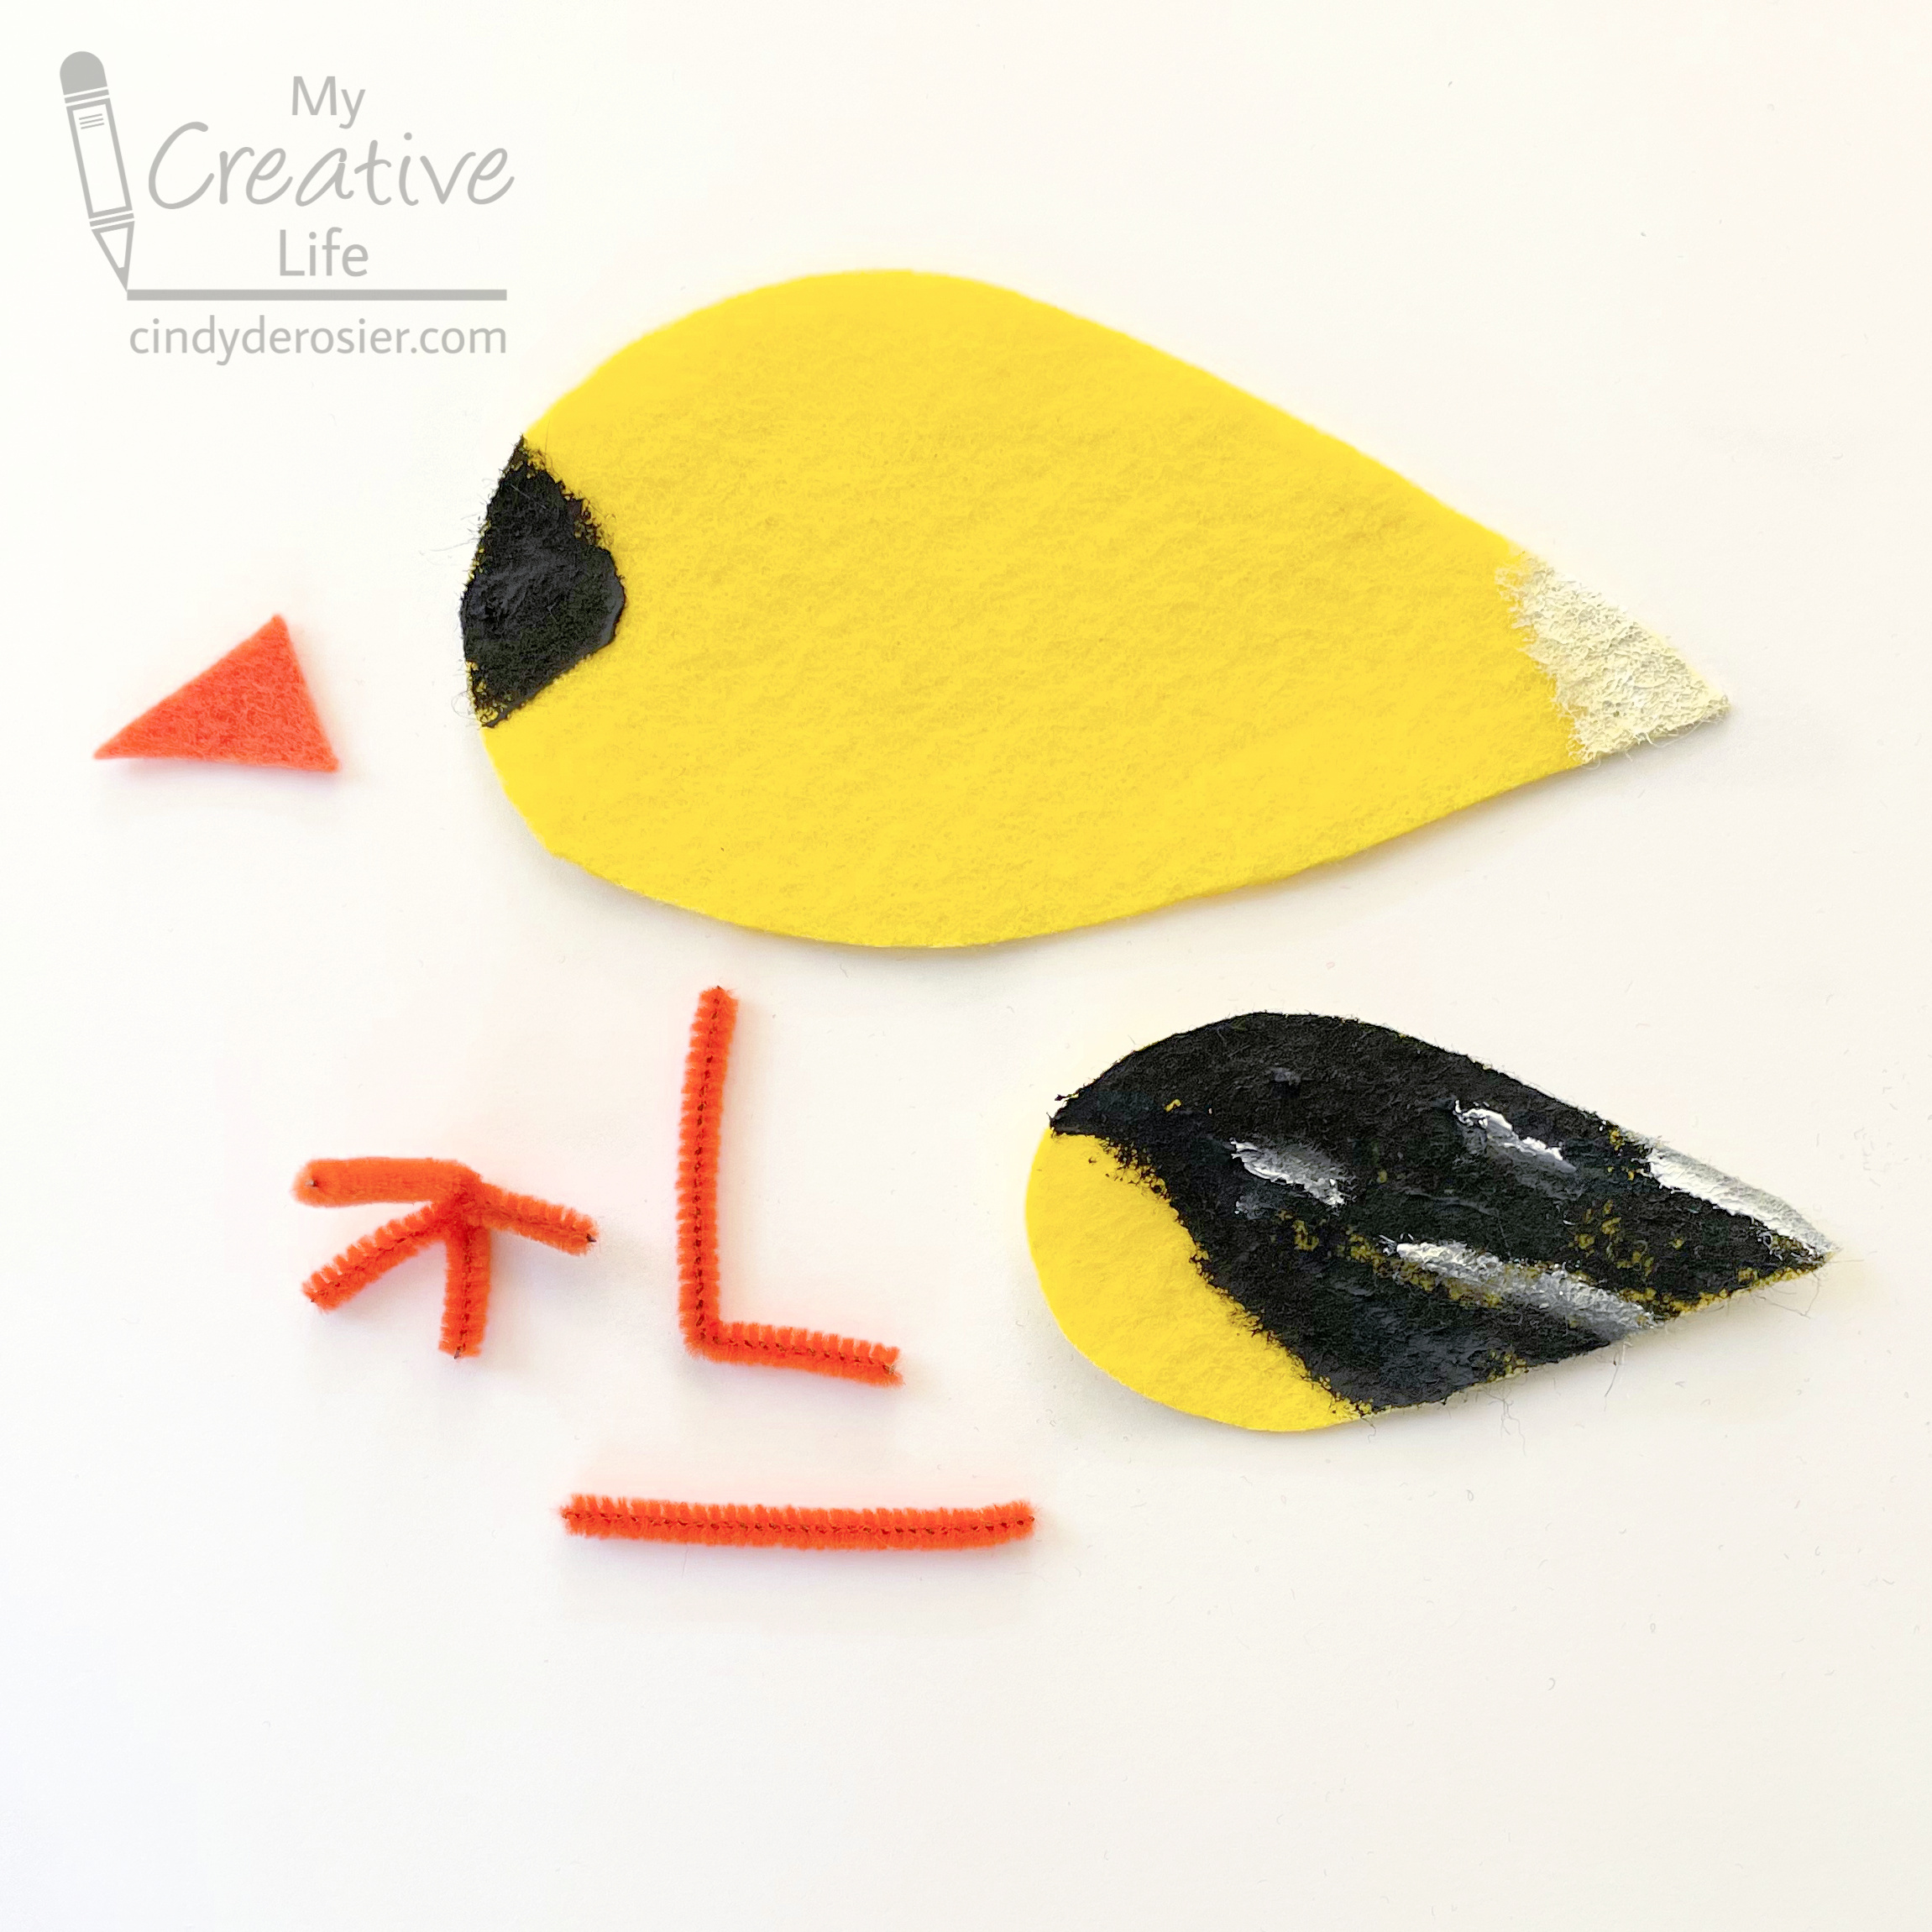
Cut out two large teardrop-shaped body pieces from yellow felt. Cut two smaller teardrop-shaped wing pieces from yellow felt. Cut a triangular beak from orange felt. 

Using a photo of a goldfinch as a reference, paint the forehead and part of the wing black on each of the two body pieces. Paint the tail white on each side, then add streaks of white to the wings. 

Cut an orange pipe cleaner into four lengths. To make each foot (shown completed below on the left), you will need one piece bent like an L and a second straight piece (shown on the right). Twist the straight piece around the L, then adjust the toes so they're evenly spaced. Trim off any excess so that the toes are the same length. 


To assemble your goldfinch, glue the wings and eyes to each side of the body. Glue the legs to the INSIDE of one of the bodies, making sure the toes face forward. Glue the beak to the inside of this body part as well. 

Add glue around the edge of this piece, leaving a gap where the legs are for stuffing. Press the two body pieces together. Push Poly-fil inside the goldfinch, then glue the opening closed. 

You may have to adjust the feet a bit, but once you do, your goldfinch will stand on its own.

1/20/23

The O'Reilly Animals Coloring Book

 Steve bought me a coloring book for Christmas and I loooove it. 


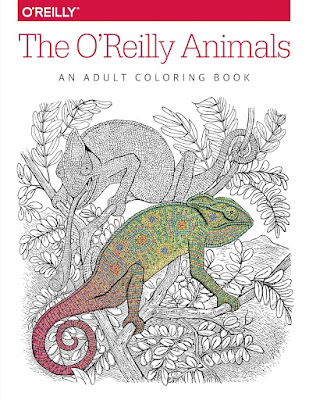
The O'Reilly Animals Coloring Book features twelve beautiful, highly-detailed animal images, each adapted from engravings that, in turn, were inspired by illustrations in natural history books from the 18th and 19th centuries. Affiliate link here and below. 


If you don't know the story of the O'Reilly animals, it's well-worth a read. I hadn't heard of them until I married my computer-scientist husband, who has a substantial collection of O'Reilly books. The covers are so distinctive and completely unlike any of his other professional materials. 

As I mentioned, the O'Reilly coloring book has only 12 pages, which is unusually few for a coloring book. I like every single design, which is pretty much NEVER the case. I am super picky about coloring books. Not only is the paper in this book high-quality, but they're printed single-sided, so you don't have to choose between designs. The images are realistic and detailed, but not overly so. 

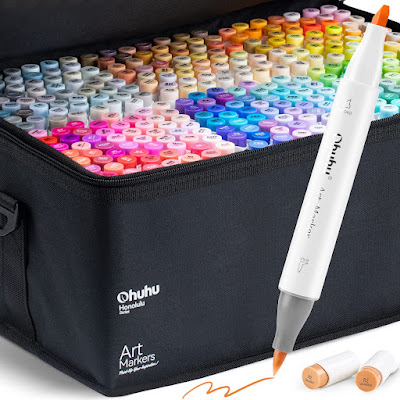
I colored the first page, Toucans, using the 320-set Honolulu series alcohol markers by Ohuhu


The folks at Ohuhu sent me this complete set to try out and I'm happy to report that they color like a dream! The range of colors is incredible and the ink flow is just right. I used both the brush and chisel ends for coloring and love the options for both precision and coverage.

I will share a complete review of the Ohuhu 320-marker Honolulu markers on Monday, so be looking for that. In the meantime, buy yourself a new coloring book. You deserve it.