Showing posts with label googly eye. Show all posts

4/22/25

Toucan Easter Egg

This is my final decorated Easter egg for this year. It's a toucan. Specifically, it's a toco toucan, the largest species of toucan. Endemic to South America, toco toucans live in semi-open habitats at altitudes up to 5740 feet (in contrast to other toucans, who prefer closed-canopy forests). They feed mainly on fruit. They are a least-concern species, still plentiful in the wild. And they're really fun use as inspiration for a decorated egg. Affiliate links below. 


Toucan Easter Egg


Materials:


Steps: 

Paint the egg black, leaving a rounded cone-shaped area white. 

Cut a ring from the cardboard tube. Paint it green. 

Cut a beak from cardstock. Use the blending brushes to add orange ink to the bottom of the beak and yellow ink to the top. Without adding extra ink to the brush, color the white area of the egg, just where the eye will go. Use a Sharpie to color the end of the beak black. 

Cut leaves from green felt and glue them to the cardboard tube ring. Glue the googly eye and beak in place. When the glue is dry, place the toucan amongst the leaves. 

9/5/23

Canada Goose in Flight

My friend Brenda (of meteorite fame) was recently at my house for a marathon craft day. She's a middle school English teacher who will also be teaching one period of art this semester. She spent the day working on lesson plans and making samples. Among the materials she brought was a well-worn Canada goose craft from her days teaching elementary in the 90's. She is planning to adapt it for her middle-schoolers. I did my own adaptation.

This is mine: 


This is Brenda's original:


Her goose started with the two main body parts cut from a manila folder. She used a black marker to color the head and tail, then a brown crayon to color the top half of the body. She cut white paper to make the belly and the marking on the face. Then she tore pieces of brown construction paper and glued them to the back and wings. 

I started by using scratch paper to make a template for the two body parts. I wanted to be able to cut them from a single sheet of 12x12 black cardstock. (Affiliate links here and below). When I got them the size and shape I wanted, I traced my templates with a white colored pencil and then cut the pieces out. 


I flipped the cut pieces over (so that any stray colored pencil marks wouldn't show). Then I used Folk Art acrylic to paint the belly and part of the face white. 

While that was drying, I tore some brown packing material into strips. Gotta love free craft supplies! I used a brown ink pad to swipe ink along the left side of each strip. Then I started tearing the strips to make the individual feathers for the wing. I glued them in place with tacky glue


I finished up the wing, then added feathers to the goose's back. This is how the two pieces looked when I was done. 


All that was left was to glue the wing piece onto the body, then add a googly eye


I've shared a Canada goose project before - way back in 2014. It was Trevor's choice for G in our Cursive Project. Good memories. 

4/14/23

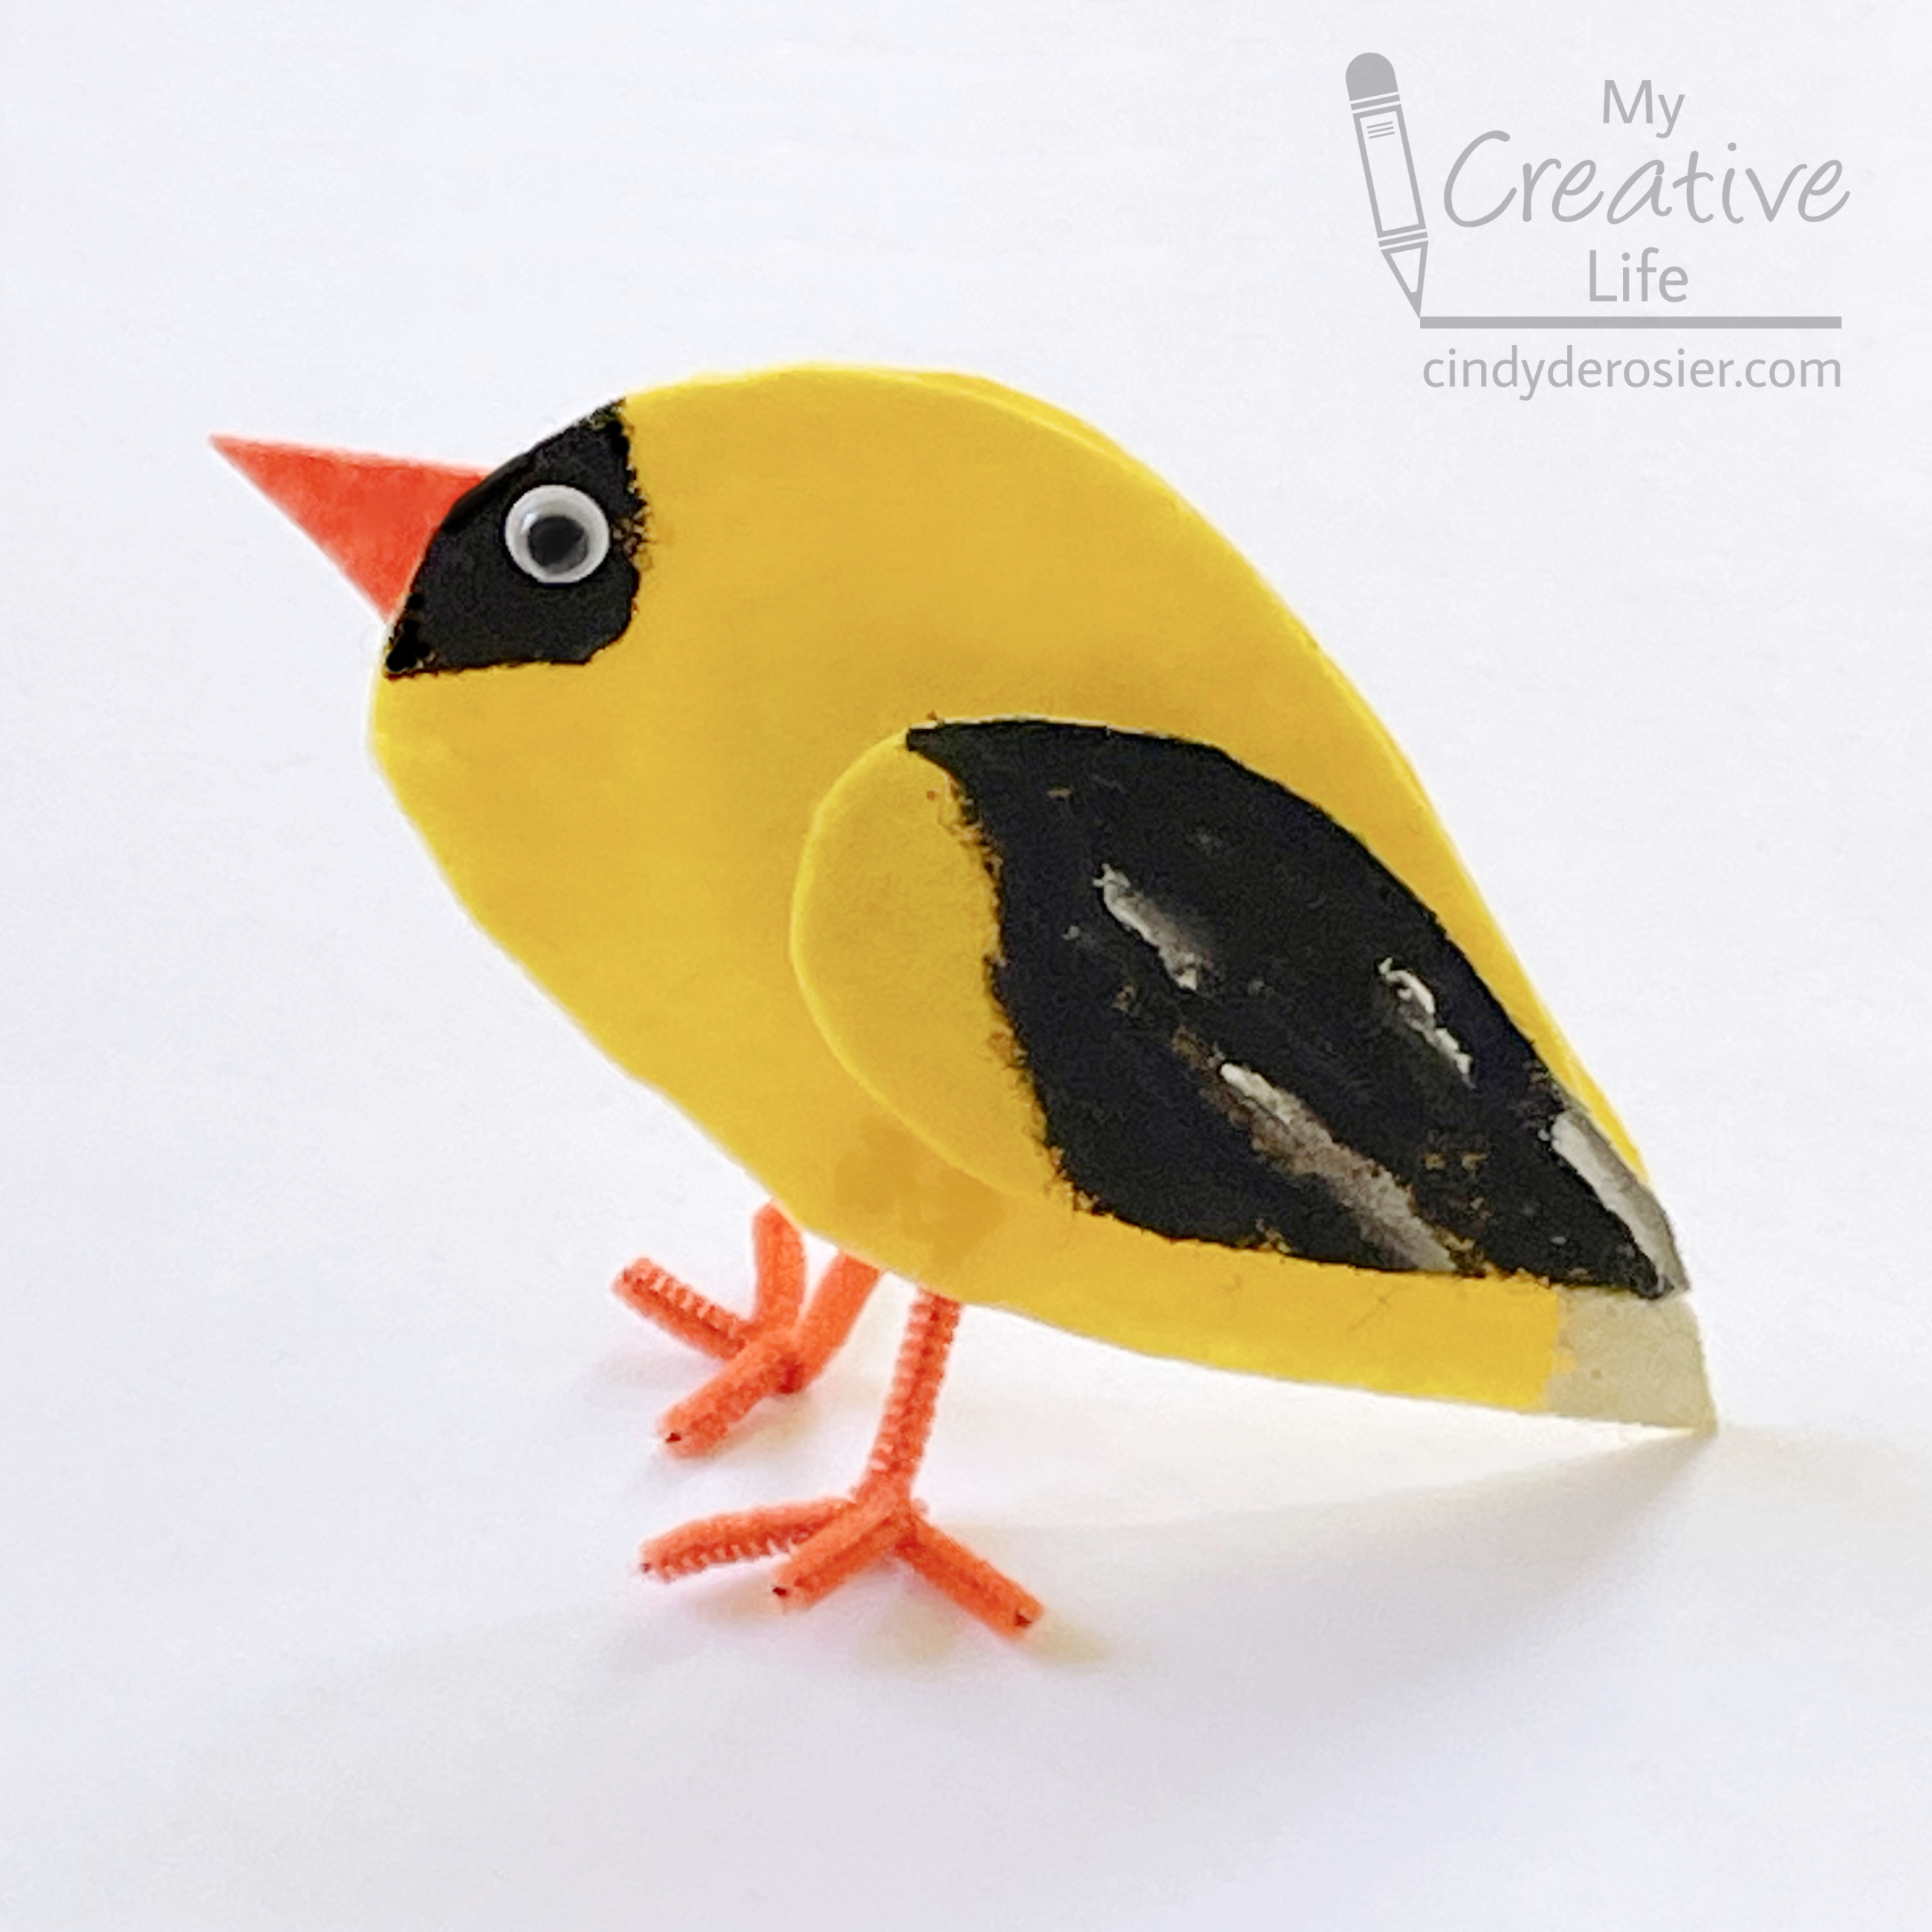
Felt American Goldfinch

My mom is very knowledgable about backyard birds. Despite years of her telling me the names of the various birds at the feeders (both at our home in California and when we visited relatives in Washington), one of the very few I was able to recognize as a kid was the American Goldfinch. Its distinctive yellow body with black forehead and wings stood out from the other various finches and whatnot that congregated at the feeders and birdbath. The goldfinch is the state bird of Iowa, New Jersey and Washington; I'd done my 5th grade State Report on Washington and had to draw a goldfinch for my report, so that helped cement it in my mind. All these years later and I'm still not much better at identifying backyard birds, but I can always spot a goldfinch. 

This felt version stands on its own and is fun project for kids to try. Obviously, you can adapt it for practically any similarly-shaped bird. Affiliate links below. 


Felt American Goldfinch 


Materials: 


Steps: 


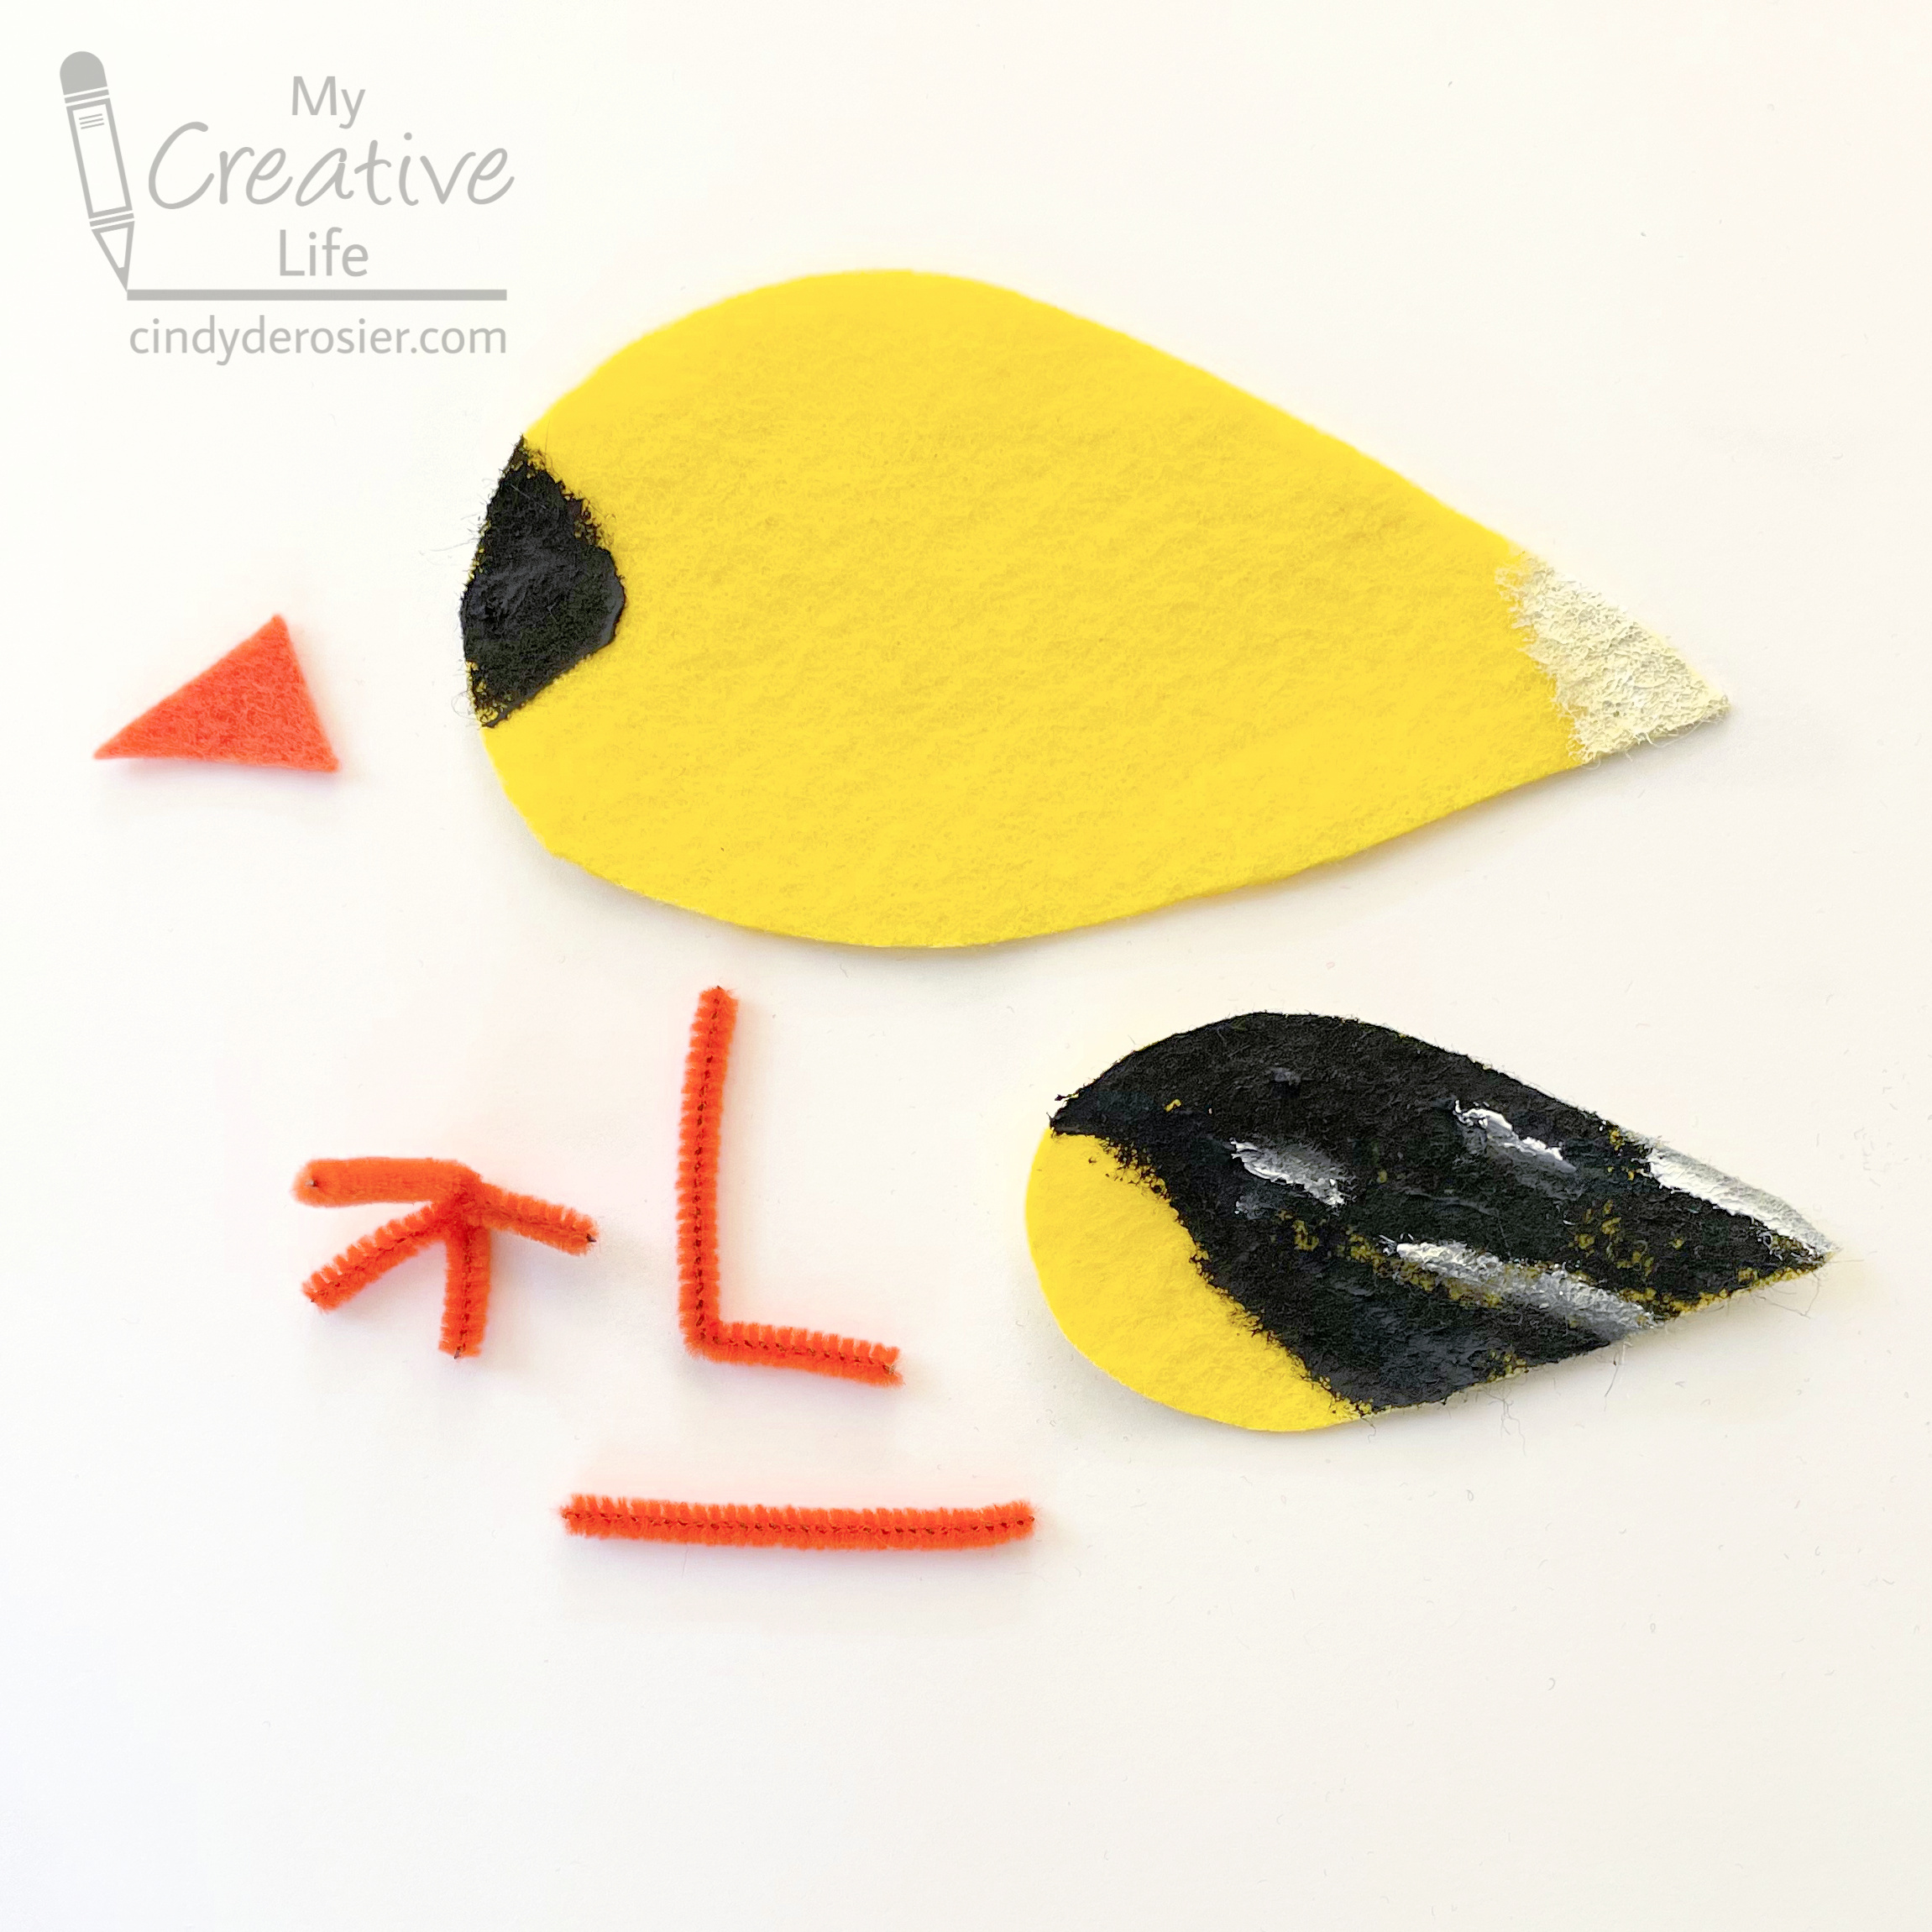
Cut out two large teardrop-shaped body pieces from yellow felt. Cut two smaller teardrop-shaped wing pieces from yellow felt. Cut a triangular beak from orange felt. 

Using a photo of a goldfinch as a reference, paint the forehead and part of the wing black on each of the two body pieces. Paint the tail white on each side, then add streaks of white to the wings. 

Cut an orange pipe cleaner into four lengths. To make each foot (shown completed below on the left), you will need one piece bent like an L and a second straight piece (shown on the right). Twist the straight piece around the L, then adjust the toes so they're evenly spaced. Trim off any excess so that the toes are the same length. 


To assemble your goldfinch, glue the wings and eyes to each side of the body. Glue the legs to the INSIDE of one of the bodies, making sure the toes face forward. Glue the beak to the inside of this body part as well. 

Add glue around the edge of this piece, leaving a gap where the legs are for stuffing. Press the two body pieces together. Push Poly-fil inside the goldfinch, then glue the opening closed. 

You may have to adjust the feet a bit, but once you do, your goldfinch will stand on its own.

3/31/23

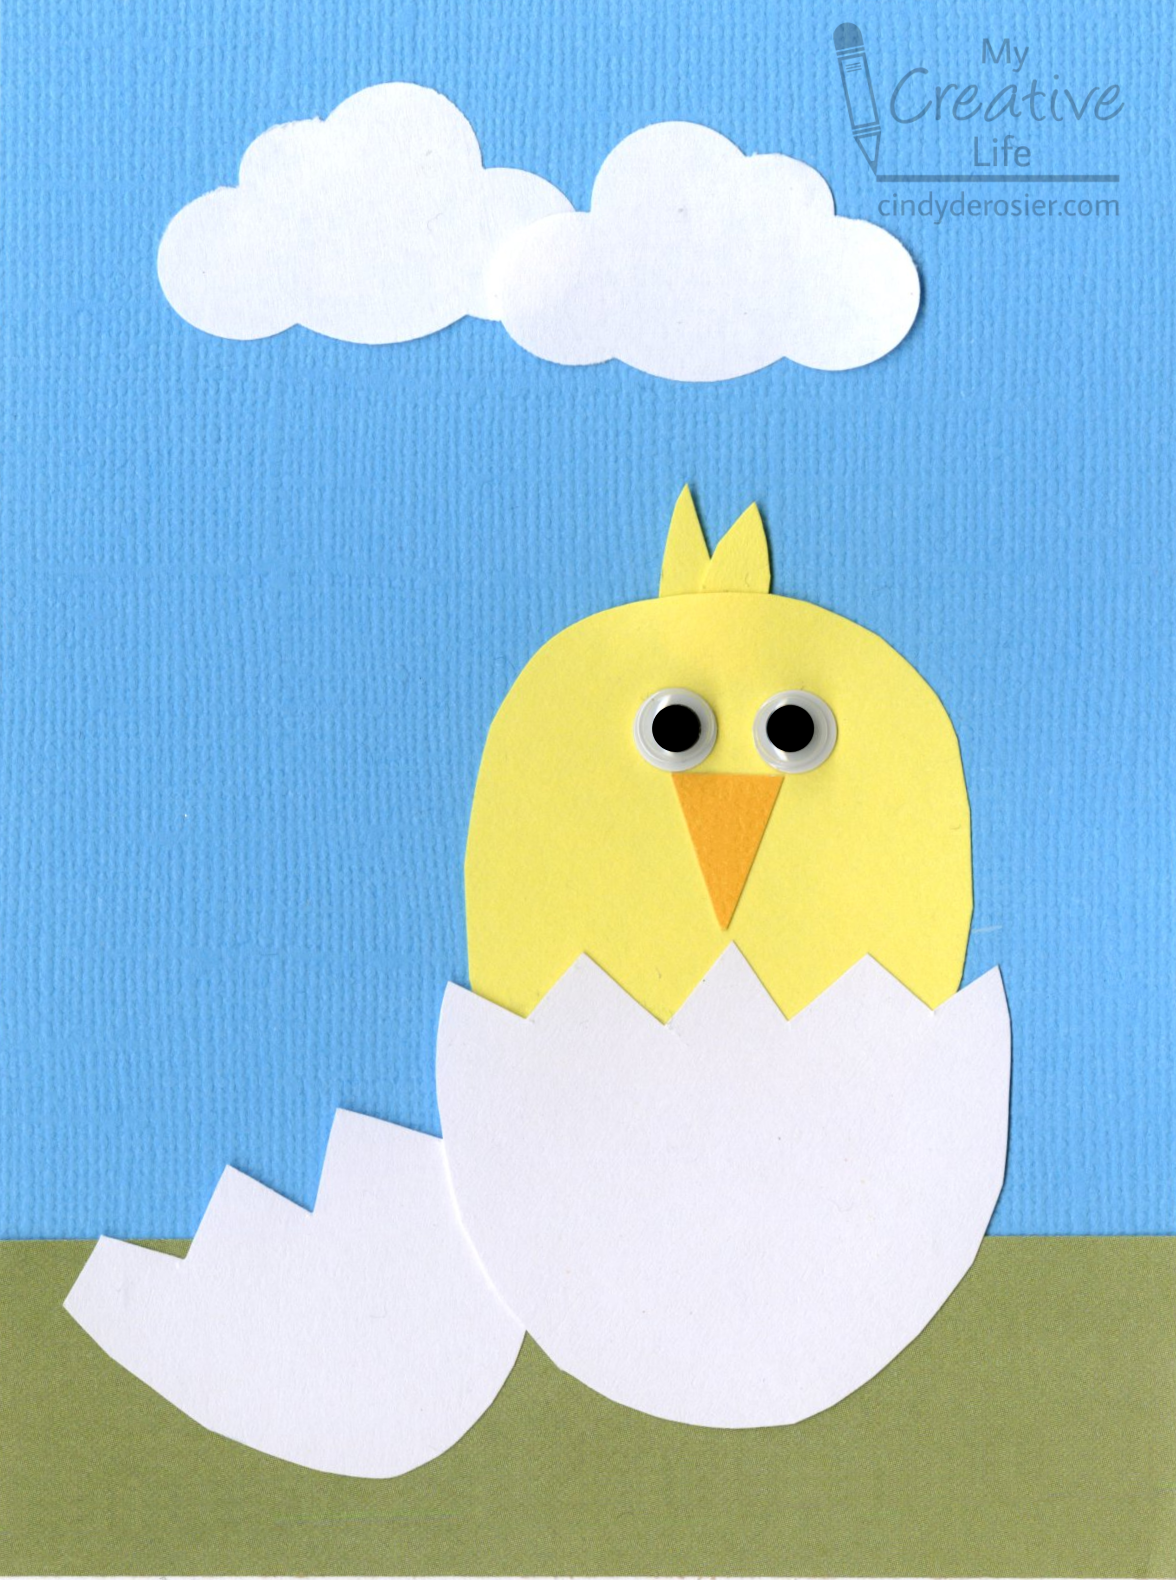
Hatching Chick Card

I've been cleaning up the craft room (see Wednesday's post). I needed a cleaning break, so I used some of the scraps in my desk to make this hatching chick card. It works as an Easter card, but it's equally fun as for sending a birthday wish, either for someone who has celebrated many hatch days or for a new addition to the family. Affiliate links below.   


Hatching Chick Card


Materials: 


Steps: 


Cut a piece of blue cardstock to fit your card blank. Cut green cardstock the same width as this base. 

Cut out an egg shape from white cardstock. Use a zigzag pattern to cut the egg into two pieces. Punch two clouds from white cardstock. Cut an oval chick from the yellow cardstock, then two tiny yellow feathers. Then cut an orange triangle beak. 

Assemble the card by gluing the green grass to the blue sky. Glue the clouds in the sky, overlapping them slightly. Glue the chick behind half of the egg, then add the yellow feathers behind the chick so they stick off the top of its head. Adhere the other half of the egg to the card, then put the half with the chick in it overlapping it slightly. Add the beak and googly eyes. 

Don't forget to add a fun sentiment on the inside!

10/31/22

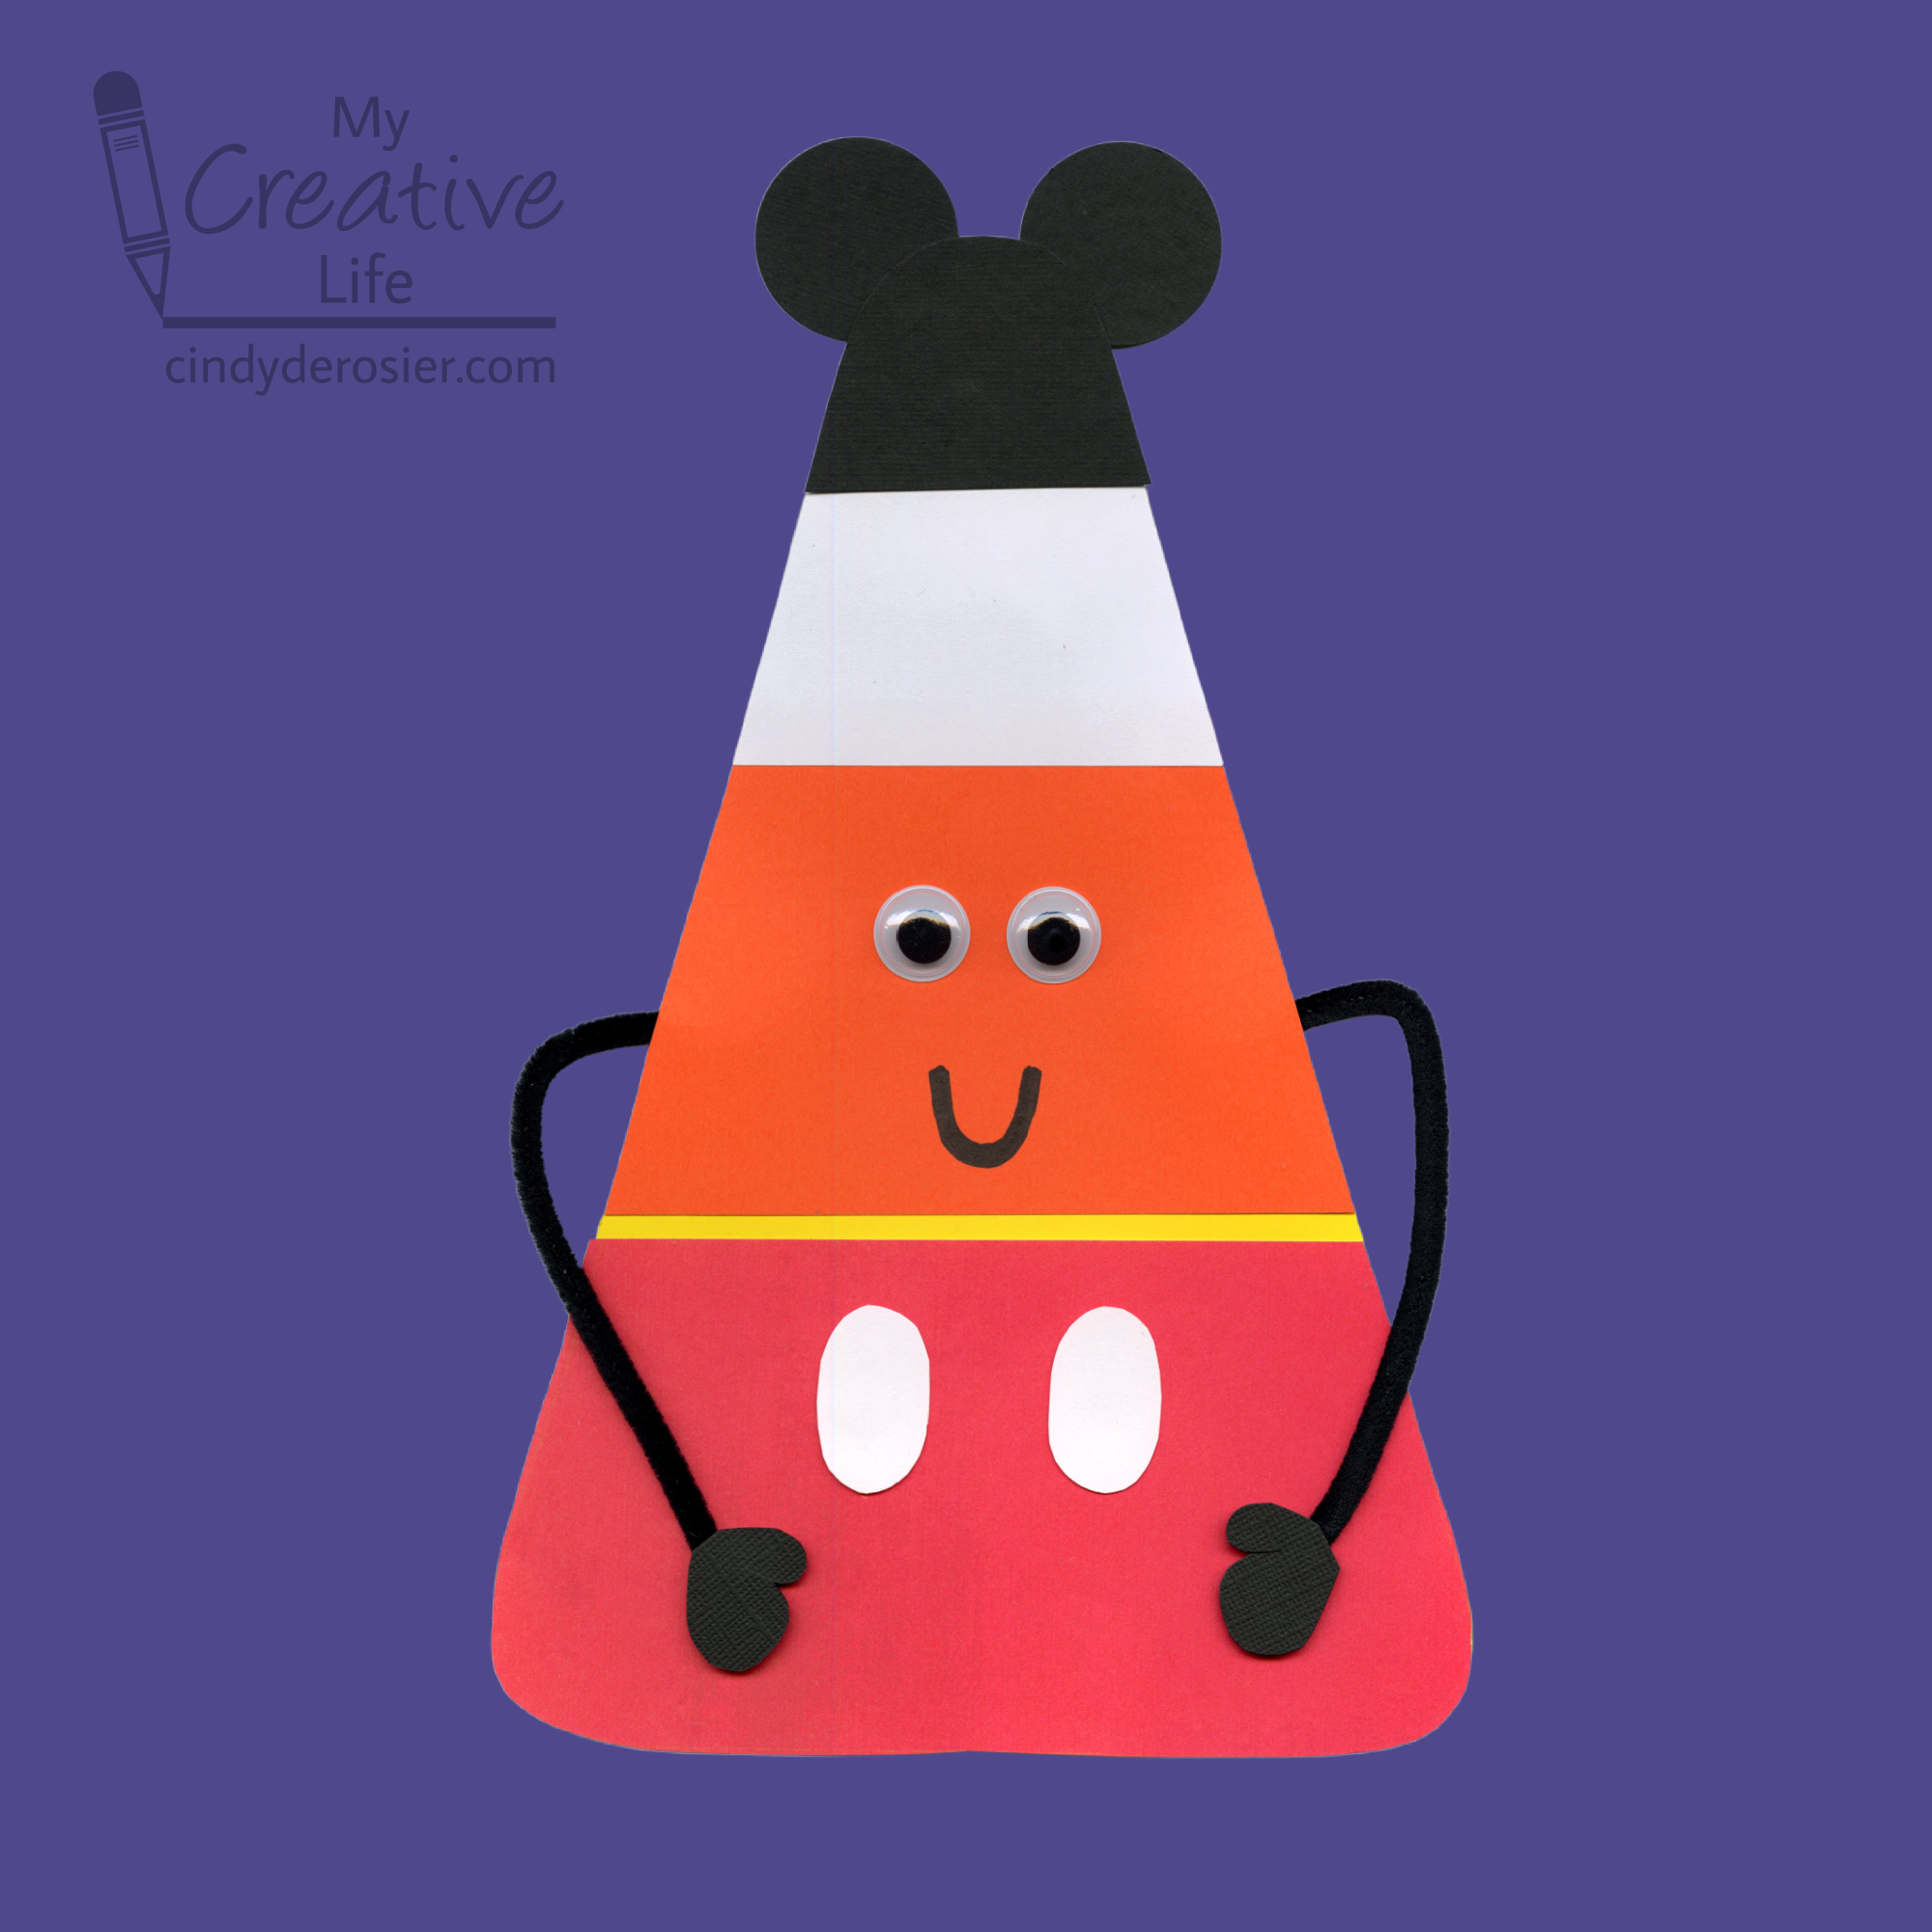
"I Am Not Candy Corn"

To understand today's craft, take a look at this homework assignment that Trevor completed 10 years ago as a first grader. It's adorable, and so is my version (if I do say so myself. And I do.) Then look at this Candy Corn Character I made last Halloween. When I dug him out of the Halloween decoration box, it got me thinking that October is to my candy corn guy as November is to that turkey. So I gave my candy corn character a disguise. He can wear it until Halloween has safely passed and then return it to the turkey.  


I don't know what all this talk about candy corn is... all I see is Mickey Mouse! 

I would love to have seen how 6-year old Trevor would have disguised his candy corn. Unfortunately, 16-year old Trevor has too much homework and too little interest in crafting with me anymore. Sigh. 

If any of you have 6-year olds with lots of creativity, I'd love to see their versions! Follow the directions to make the Candy Corn Character, then you can add whatever you need for the costume. All I used was black, white, and red cardstock, scissors, and glue. 

By the way, it would be completely inappropriate to snack on candy corn while making this project, but all other candies are on the table. Here's an affiliate link to one of my all-time favorites, which inexplicably is not universally popular. Happy Halloween!

9/29/22

Cinnamon Spice Caramel Apple Popcorn with Felt Apple Tag

Tis the season for Pumpkin Spice Everything, but personally I don't get it. Pumpkin is fine, but for me fall is all about apples. Apples are sweet, sometimes tart, crisp, and full of flavor. They are delicious on their own, as juice or cider, mashed up as applesauce, baked with savory dishes (like pork), and excellent in desserts of all sorts. I like squash (though pumpkin is not even one of the best squashes), but there's no comparison. Virtually everyone agrees that Apple > Pumpkin. Spices definitely improve pumpkin, but I firmly believe Apple Spice > Pumpkin Spice. Don't even try to argue. 

If you're tempted to argue, make some cinnamon spice caramel apple popcorn first. Then get back to me and tell me that pumpkin spice is better than apple spice. Affiliate links below. 


Cinnamon Spice Caramel Apple Popcorn

  
Ingredients:                                                           


Steps: 


There is no right or wrong when making your own flavored popcorns. It's not like baking a cake where chemical reactions mean that quantities matter. You can add more or less of any ingredient. I was hesitant to even put quantities above, as I didn't measure when I was making mine. Those are my best guesses. 

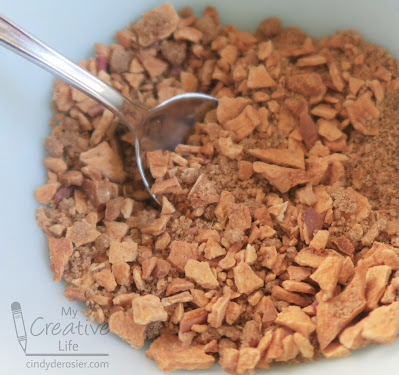
Start by crushing some crisp dried apples until about half of the apples are powder and the rest is pea-sized bits. Stir in some brown sugar and cinnamon, then add a dash of nutmeg. Mix thoroughly. 


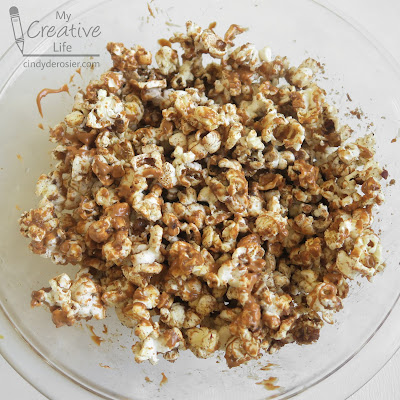
Pop and generously butter approximately 10 cups of popcorn. Immediately pour the apple mixture over the popcorn and stir well. Some of the apple mixture will remain at the bottom of the bowl instead of stuck to the popcorn, but that's not a problem. 

Follow the directions to melt the Salted Caramel Candy Melts. Drizzle half of the melted candy over the popcorn and immediately stir well. Repeat with the remaining candy. Most of the apple mixture should now be stuck to the popcorn. 


If you eat the popcorn immediately, the tiny apple bits are still crispy. If you let the popcorn sit for a while, or bag it up, the apple bits will soften, but remain equally delicious. 

I made a cute felt apple tag to label my bagged popcorn. It's a quick and easy project. 

-------


Felt Apple Tag


Materials: 


Steps: 

Cut out an apple from the red felt, using pinking sheers. Cut the leaves and stem from green felt with regular scissors. Apply green Stickles to the leaves and set them aside to dry. 

Use two strands of black embroidery floss to backstitch a smile and two eyebrows.

Cut a piece of red cardstock that is slightly smaller than the felt apple. Glue it to the back of the apple, covering the knots from your stitching. Write a message to your recipient. 

Glue the googly eyes and the leaves to the front of the apple. 

8/29/22

Pastry Brush Puppets

Our kitchen is being remodeled, which means everything that belongs in the kitchen is somewhere besides the kitchen. Our cabinets should be done soon (fingers crossed) so I've been going through the piles of kitchen stuff to organize it and weed out anything we don't need. I came across a pastry brush that was looking tired. We hadn't used it in years. I was going to throw it out, but moved it to the craft room instead. After a bit of experimentation, I turned my pastry brush into a pair of painted puppets. 

I made this gal on the concave side of the brush...


... and made this guy on the convex side. 


So I could use them to put on a puppet show... as long as they never appear in the same scene! Affiliate links below. 


--------


Pastry Brush Puppets


Materials: 


Steps: 


Mix a small amount of gesso with whatever color of paint you'd like your character's shirt to be. Paint this mix onto the handle of the brush. My brush had a white band across the top, so I opted to paint that the same color as the shirt. 

Mix gesso with pink to make the mouth and with your desired flesh tone for the nose. 


Glue the googly eyes in place, then paint on the eyebrows and any facial hair. They can match the color of the bristles, or not. 


Now it's time for a haircut. The bristles of my old pastry brush were surprisingly difficult to style. I glued two chunks of 'hair' on either side of the woman's face, then cut the rest of the hair short with some heavy-duty scissors. When you look at the man, you only see the short hair. 

These were a lot of fun to make. The next time I have paintbrushes that are no longer serving their purpose, I'm definitely turning them into more puppets. 

5/24/22

Kitten Tooth Fairy Pillow

When Trevor was a baby, a friend introduced me to the concept of a Tooth Fairy Pillow. Instead of putting a lost tooth under your sleeping pillow, you put your tooth into the little pocket of a stuffed animal, which you set beside your bed. This makes it much easier for the Tooth Fairy to get the tooth without waking the sleeping child. Genius! Affiliate links below. 


Kitten Tooth Fairy Pillow


Materials:


Steps:


Use a piece of scratch paper to make a pattern the size and shape you want your kitten to be. Fold a piece of grey felt in half and place the pattern onto the felt so that the bottom of the pattern is along the fold. Cut out the felt. Then cut a semi-circle of white felt for the cat's tummy. 


Thread your needle with two strands of white embroidery floss. Place the white felt directly onto the fold line, then open up the grey felt. Pin the white in place if necessary. Use a backstitch to sew the white felt to the grey, leaving the top open so there's space to put a tooth or money. 


Sew the googly eyes in place. Thread four strands of pink floss onto your needle. Use a single stitch to tack the pom pom nose into place, then continue with a backstitch to make the cat's mouth. Add a dot of Fabric Fuse behind each eye and the nose to secure them. 


Thread the needle with a single strand of white floss. Tie a knot in the end, then poke the needle from the back to the front to make a whisker. Snip the floss at the desired length, then repeat. I like three whiskers on each side. 


Flip the cat upside down and put a drop of Fabric Fuse on the knot of each whisker to prevent them from pulling through. Let the glue dry completely before continuing. 

Thread the needle with all six strands of grey embroidery floss. (This is where the embroidery needle makes things easier.) Refold the kitten, then whipstitch around the outside, leaving a small opening for stuffing. Add the fiber fill, pushing it into the ears and distributing it evenly. Sew the opening closed. 


You can use this same idea to create a pillow to hold a gift of jewelry, or as a place to put little notes for someone special. It can also hold a good luck charm. Lots of possibilities!

12/15/21

Paddle Spoon Reindeer Ornament

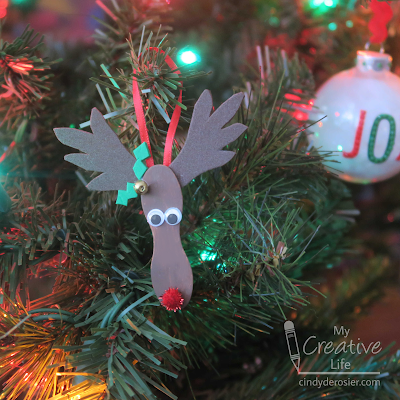
This is my latest homemade ornament, which I'm calling a Paddle Spoon Reindeer because "paddle spoon" is the search term that finally worked when I tried to figure out what to call the mini wavy craft stick that makes up the reindeer's face. It's hanging right by my Diamond Dotz Joy ornament. Slowly but surely, the homemade ornaments are crowding out the store-bought ones on the tree (as it should be). Affiliate links below.    


Paddle Spoon Reindeer Ornament


Materials:


Steps: 


Paint the paddle spoon brown and set it aside. Cut the brown craft foam to make a pair of antlers, then cut the green craft foam to make two teeny holly leaves. Cut a length of ribbon to make the hanger.

Glue the antlers behind the paddle spoon, then glue the eyes, pom pom, holly leaves, and bell in place. When those are dry, glue the ribbon hanger to the back. 

11/15/21

Handprint and Footprint Turkey

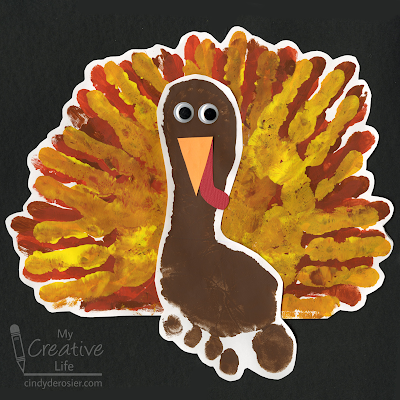
We're fifteen days into November and I haven't posted any turkey crafts yet. Time to change that! Today's project is a turkey made from handprints and a footprint. 


Handprint and Footprint Turkey


Materials:

  • construction paper or drawing paper (white, red, orange)
  • paint (brown, rust, orange, yellow)
  • foam brush
  • scissors
  • googly eyes
  • glue

Steps:


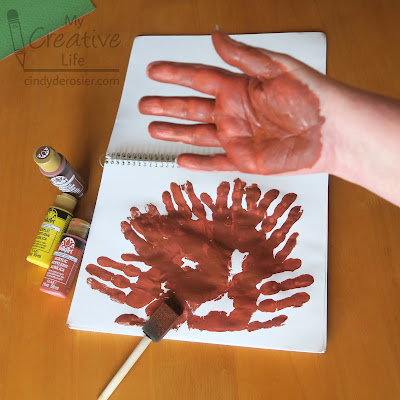
Put a sheet of white paper onto a hard floor (not carpet). Use brown paint and the foam brush to apply paint to the bottom of one foot, then step onto the paper to get a good footprint. Set the paper aside to dry, then wash your foot but not your paintbrush.
 
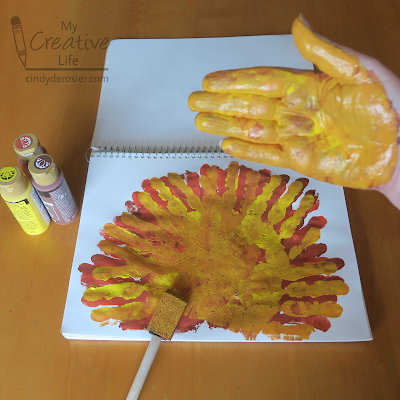
Put a second sheet of white paper onto a hard surface, like a table. Or the floor. Paint rust-colored paint onto one hand (it will mix with the brown already on the brush), then stamp it on the bottom left of the paper with your fingers pointing to the left. Add more paint to your hand and stamp five more times, rotating your hand 20°(ish) each time. You'll end up with a semi-circle of red-brown turkey feathers. Don't worry if there are gaps; they'll be filled with the next two layers. 


Without cleaning your hand or the brush, paint your hand orange. Stamp it the same way as with the rust- a total of 6 times, with each handprint rotated 20° clockwise. Do the same thing with yellow. Since all the layers are still wet, the colors will blend.  


Now you can wash your hand and the brush. Take a break; the footprint and handprints need to dry completely before you can continue. 

When the paint has dried, cut out the footprint, leaving a small border of white around the edges of the print. Do the same with the handprint feathers. Then cut out an orange triangular beak and a red wattle. Glue the footprint to the feathers, then add the googly eyes, beak, and wattle. 


Tomorrow I have a fun edible turkey craft to share. 

10/13/21

Candy Corn Character

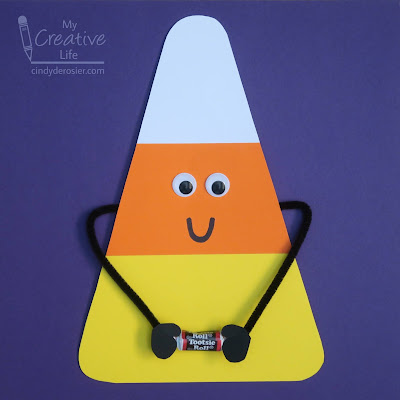
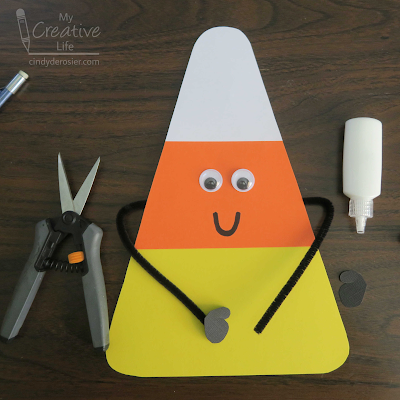
It's a proven fact that googly eyes make everything cuter. Add them to a construction paper candy corn and you have cuteness overload. Not only is this guy adorable, but he'd like to offer you some candy. Affiliate links below. 


Candy Corn Character


Materials:


Steps:


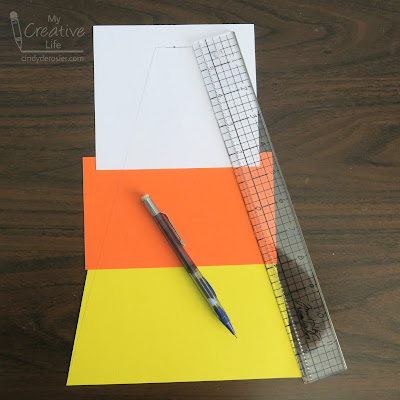
Cut the yellow cardstock into a piece approximately 6"x4", the orange 5"x4", and the white 4"x4". Layer the pieces with a slight overlap and glue them together, as shown below. 

Use a centering ruler (or eyeball it) to find the center of the white cardstock. Mark it with a dot. Extend that line an equal amount (about 1/4") in each direction and mark those points. Use a straight edge to draw lines from each corner of the yellow to the points you just drew. 


Cut along the two lines to form a triangle. Then round off the three corners to make the iconic candy corn shape. 

Glue the googly eyes in place, then draw a Sharpie mouth. Cut a pipe cleaner in half, then bend them to form arms. Glue them to the back of the candy corn. Cut two hands/gloves from black and glue them to the ends of the pipe cleaner pieces. 


When the craft glue is dry, use a Glue Dot to attach the candy to the candy corn. If you're careful, you'll be able to remove the candy in the future without damaging your character. 

Are you a fan of candy corn? For fun, I searched "weird candy corn" to see what came up and I was not disappointed. Perhaps I can interest you in these, um, unique flavors

8/25/21

Whimsical Clay Narwhal

This is not a narwhal. I'm calling it a narwhal, but it's a narwhal in the same sense that Mickey is a mouse and Bugs is a bunny. I've taken some anatomical liberties, to say the least.


A narwhal is an Arctic whale related to the beluga. The body is torpedo-shaped, not round like a ball. A narwhal is not blue; it is white, mottled with brownish-black markings on the dorsal side. Like other whales, its eyes are on the sides of its head, not toward the front. Its most distinguishing characteristic (usually only present in males) is its long, spiral left canine tooth that can grow to be 10 feet long. Since it is a tooth, it protrudes from the mouth, not from the top of the head.
 
If you are looking for a realistic craft about narwhals, this is not the tutorial for you. This whimiscal version plays on the narwhal's nickname, "the unicorn of the sea." Affiliate links below. 


Whimsical Clay Narwhal


Materials:


Steps:


Use the Model Magic to shape the rounded body of the narwhal. Its tail fin should be gently forked. Form two small triangular pectoral fins. Set all three pieces aside to air dry.  

Coat a toothpick with craft glue and twist a piece of embroidery floss around it to form the narwhal's tooth. Set it aside to dry completely. 


Paint the narwhal's tooth an off-white so that the toothpick and the embroidery floss are the same color. Let the paint dry. As you can see, I didn't paint the one end - that's the end I was holding and that would be hidden once I inserted the tooth. 


When everything is dry, assemble the narwhal by gently pushing the toothpick into the narwhal's forehead (again, we're going to "unicorn of the sea," not realism). Glue the eyes in place and give the narwhal a Sharpie smile. Glue the fins to the body. 


If you're looking for other narwhal ideas, check out my ideas for a narwhal-themed party and a Twinkie narwhal. And then look at this fabulous tea infuser - so much fun! 

8/23/21

Puzzle Piece Minions

From aliens to monarchs, puzzle pieces can be just about anything with a little paint and the proper accessories. They make adorable minions. Affiliate links below. 


Puzzle Piece Minions


Materials:


Steps:


Put a coat of white gesso onto the puzzle pieces. When it is dry, sketch the design you want for each minion, then paint the skin yellow and the overalls blue. 

When the paint is completely dry, use a black Sharpie to color their gloves and add buttons and pockets to the overalls. 


Draw a horizontal band across each face, then glue googly eyes in place (one or two per minion). Draw mouths beneath the eyes. 

Finally, snip short lengths of embroidery floss and glue them behind the heads. Vary the length of the hair from minion to minion, and separate the strands of floss on some and leave them together on others. 


Which minions are your favorites? I'm partial to the two on the top. 

7/12/21

Puzzle Piece Alien

One craft idea begets another. After making my footprint alien, I realized that a puzzle piece would make a great alien, too. Affiliate links below. 


Puzzle Piece Alien


Materials:


Steps:


Prepare the puzzle piece by painting a coat of gesso on the glossy surface. Use a stiff brush or an old toothbrush to make a starry background on black cardstock, as described in the footprint alien project.

When the gesso has dried, paint the alien. I'm a fan of green aliens, but you can obviously choose whatever you want. 

When the paint has dried, cut a piece of Twisteezwire and wrap it around the base of a tab, twisting to secure it. (Did you know they're called tabs? Check out this interesting article.) Then twist the ends of the wire around the paintbrush handle, one at a time, to create the curl. Glue a googly eye in place. Cut out a friendly mouth and glue it beneath the eye. (Or whatever. It's your alien. If there's ever a place where there's no right or wrong way to do something, it's when you're making an alien craft.)

Cut out a planet for your alien to sit on and glue it to the starry background. Then glue your alien in place. 

There are so many creative possibilities with this project. Give it a try!

7/2/21

Footprint Alien

In case you weren't aware, today is World UFO Day. At Fun Family Crafts, we celebrate all the holidays, so I made this footprint alien specifically to add to our collection of UFO and alien crafts. It was a lot of fun to do! Affiliate links below.


 Footprint Alien


Materials:


Steps:


Paint the bottom of your foot with green paint, then step onto a piece of black cardstock. Do NOT lift your foot. 

Dip the stiff paintbrush into white paint. Drag your thumb across the bristles to send flicks of paint onto the black paper, mimicking stars. You can also use an old toothbrush.  

When you are happy with the starry background, lift your foot off the paper. Wash the paint off your foot, thumb, and wherever else it may have gotten. Use the paintbrush to make a grey planet for the alien to stand on. Let the paint dry completely. 

Add googly eyes, a mouth, feet, and any other features you'd like. Be creative and have fun!

3/19/21

Spring Felt Bird Family: Finger Puppets and a Wall Hanging

Did you know that some penguins live in warm climates, one species as far north as the equator? I mention this because we've somehow decided as a society that penguins only live in very cold places (not true) and thus are a winter bird, as if they cease to exist in spring, summer, or fall (also not true). There's an unwritten law that penguin crafting must take place in December and January only. Likewise, owl crafting is for the fall. Flamingo crafts should occur in the summer. None of this makes any sense, since the birds obviously live year-round, but I don't make the rules. 

March is when we make bluebird crafts. 


Today's tutorial will teach you how to make the wall hanging above, but it you stop midway through you'll have a fun set of finger puppets. Affiliate links below. 


Felt Bird Family: Finger Puppets and a Wall Hanging


Materials:


Steps: 


Layer two pieces of light blue felt together, so that when you cut out the birds' bodies and wings, you'll get two of each piece. It's an easy shape, so I cut mine freehand but you can make a pattern on scratch paper first if you'd like. 

Next, cut out one yellow triangular beak for each bird. Cut a handful of leaves from the green felt. Wrap the brown felt around the cardboard tube and cut off any excess. 


Glue the brown felt around the cardboard tube and set it aside to dry. 

Now it's time for sewing. Use three strands of green embroidery floss and a simple backstitch to add the midrib to each leaf. Orient the seam of on the cardboard tube to the back, then glue the leaves in clusters to the front. 

There are three steps to sewing the birds together: 

  1. Separate the two blue body parts of each bird and set aside the back pieces. Use two strands of yellow embroidery floss and a running stitch to attach each beak to the front piece of each bird. 
  2. Sew the INNER portion of the wings to the front piece of each bird, using two strands of blue embroidery floss and a running stitch. The wingtips extend below the birds' bodies; continue the stitch in that area for a uniform look. 
  3. Pair the bird fronts with the backs. Sew around the perimeter, starting at one wingtip and ending at the other wingtip. Don't sew the bottom parts together!


If you stop here, you have finger puppets! To keep going and make the wall hanging, add fiber fill to each bird, then sew along the bottom, leaving the wingtips free.

Drop the cord down through the tube and tie a knot to make the hanger. Hang your newly-created branch, adjusting the hanger until it is level. Add glue to the bottoms of the birds' bodies and to their wingtips, then position them on the cardboard tube. The wall will support the birds as they dry.

You can use the same technique to make a wide variety of bird finger puppets or wall hangings. (Even penguins, owls, or other 'seasonal' birds.) Just change out the felt color and other details as needed and craft away!

1/29/21

Cardboard Tube NFL Referee (Standard and Pandemic Versions)

It's that time of year when searches for football crafts explode. Most of the crafts out there are based on the field, goal posts, stadium, and the ball itself. I went a different direction and made a referee out of a cardboard tube. 

This is the pandemic version:


His mask is removable, if you prefer the pre-COVID version. Affiliate links below. 


Cardboard Tube NFL Referee


Materials:


Steps:


Paint the cardboard tube. The top 1/3 should be your skin tone of choice (I used Camel) and the bottom 2/3 should be white. Paint a tiny scrap of cardstock with your skin tone color. You'll be cutting it out to make ears. 

While the paint dries, cut a circle of black cardstock with a diameter about 1" larger than that of the cardboard tube. Make cuts in the circle from the outside toward the center (like you're cutting pizza slices), stopping 1/2" from the center. This will be the top of the hat. Set it aside for now. 

Use a black Sharpie to draw a collar and stripes on the referee's shirt. Draw a rectangle where his pocket goes, then color the red and blue of the NFL logo with the ultra-thin Sharpies. It's really tiny, so don't expect perfection. Color around the logo with the black Sharpie.

Cut a tiny shield from white cardstock and use the red and blue Sharpies to make a second NFL logo. This will go on the hat (but not yet). 

Return to the hat circle. Cupping the circle in one hand, overlap the flaps you've cut so that each piece sits onto the one next to it. This will form the crown. Add craft glue all the way around the circumference of the crown and glue it to the top of the referee's head. You may have to hold it in place for a few minutes while the glue sets. Then cut a black visor. 

You should be here:


Glue the googly eyes in place and add a nose and a smile. Glue the logo to the crown of the hat and add the visor. You should be here:


Cut a short length of embroidery floss, then remove 4 strands (leaving 2). Put a dot of glue on his chest where the whistle will sit, then additional glue on each of his (non-existent) 'shoulders' and another dot of glue on the back of his neck. Place the center of the floss on his chest, then wrap the ends around to meet behind his neck, making sure the floss rests on his shoulders. 

Cut a silver whistle (basically the shape of a comma) and glue it on his chest. 

Cut two ears from the painted cardstock. Glue them in place. Now you're here. 


To make the mask, cut a small piece of seam binding and two short lengths of embroidery floss (use all six strands this time). Glue the ends of each piece of floss to the corners of the mask, leaving just enough slack so you can get the mask in place after it dries. If you don't care about being able to remove the mask, just glue it in place. That's easier. 


I had a lot of fun making my referee. Enjoy!