1/17/23

R is for Raincoat, Inspired by California's Unusually Wet Weather

It's been raining a lot in California. Perhaps you've heard? I understand that our weather has made not just national, but international, news. It's been relentless. We need the rain, of course; we've had so many years of drought. But the soil can't absorb this much at once. The areas with burn scars are the most vulnerable. This series of rainstorms has been devastating and they're expecting storm damage to top a billion dollars. Fortunately, our family has not been negatively impacted beyond mere inconvenience. 

I've been spending a lot of time watching the rain, driving in the rain, running errands in the rain, being woken up by the rain, checking the forecast for any breaks in the rain, receiving alerts from the city and the county about the rain, following the news about the rain, and talking about the rain. It only stands to reason that I would craft about the rain. 


I'm calling this project "R is for Raincoat." Can you tell why? 
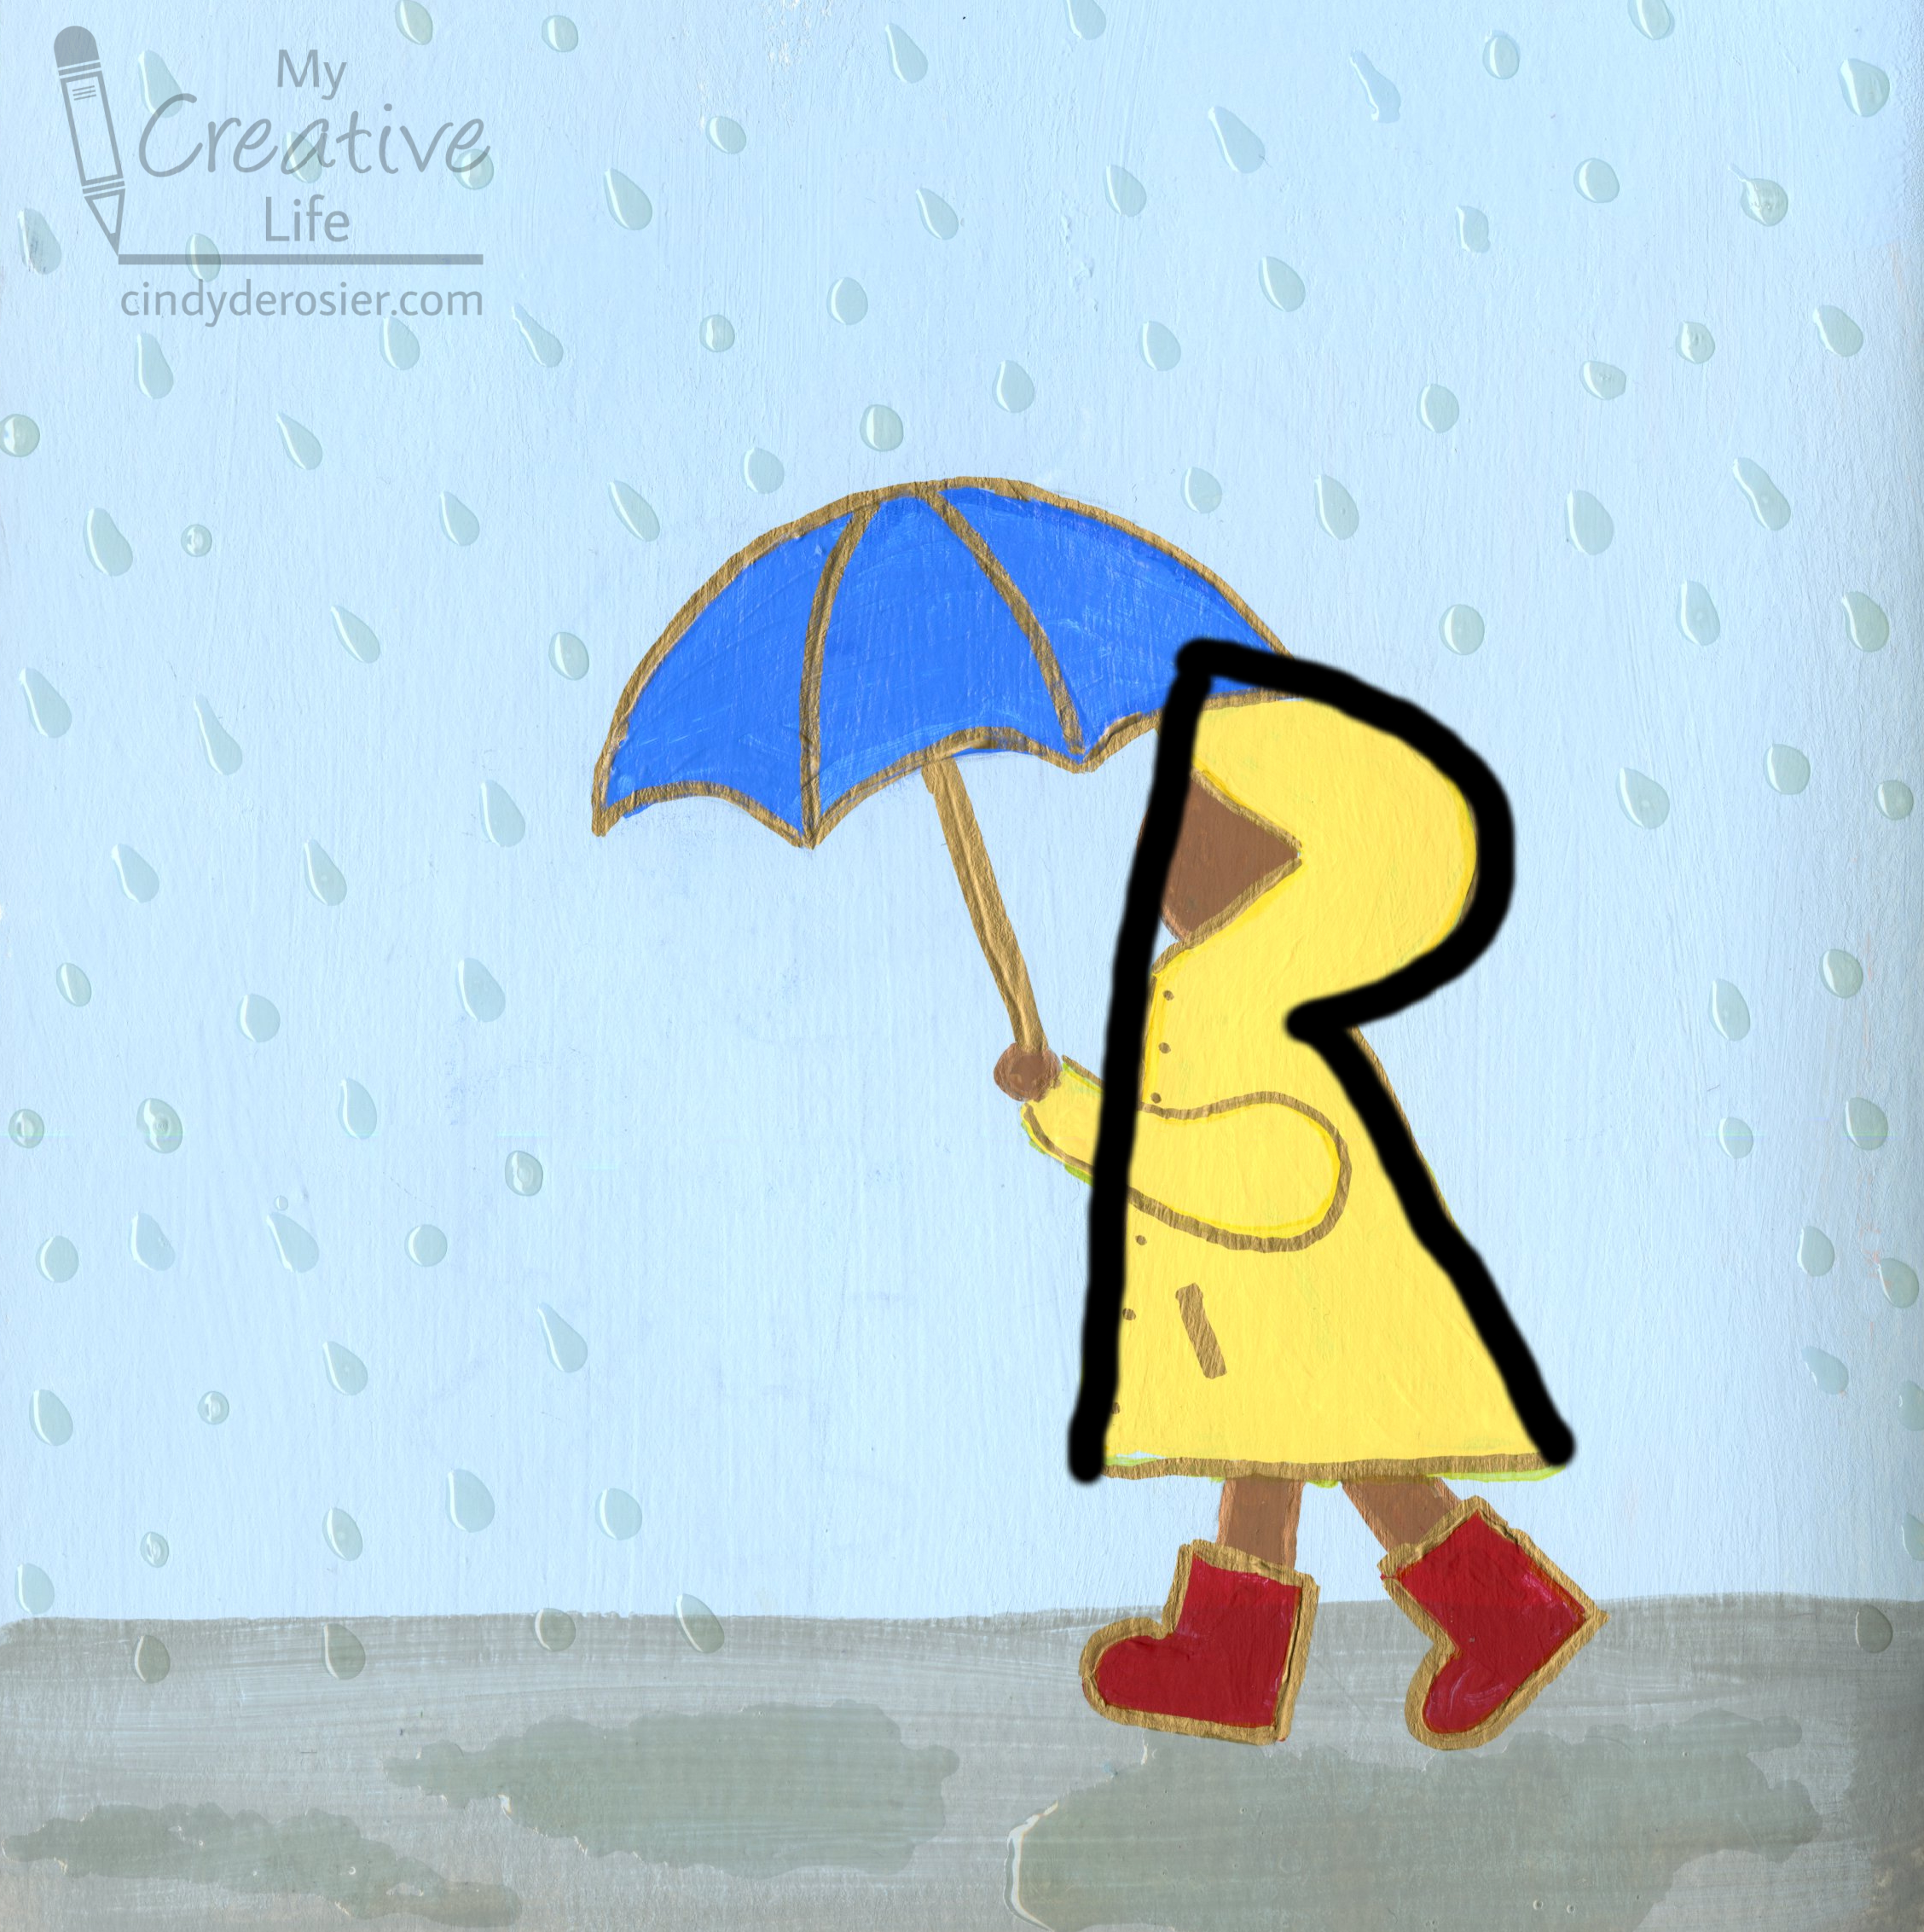

I love the shiny raindrops and puddles. They look ok in the scan, but they're in more awesome in person since they're dimensional and actually look wet. Affiliate links below.


---------


R is for Raincoat


Materials:


Steps: 


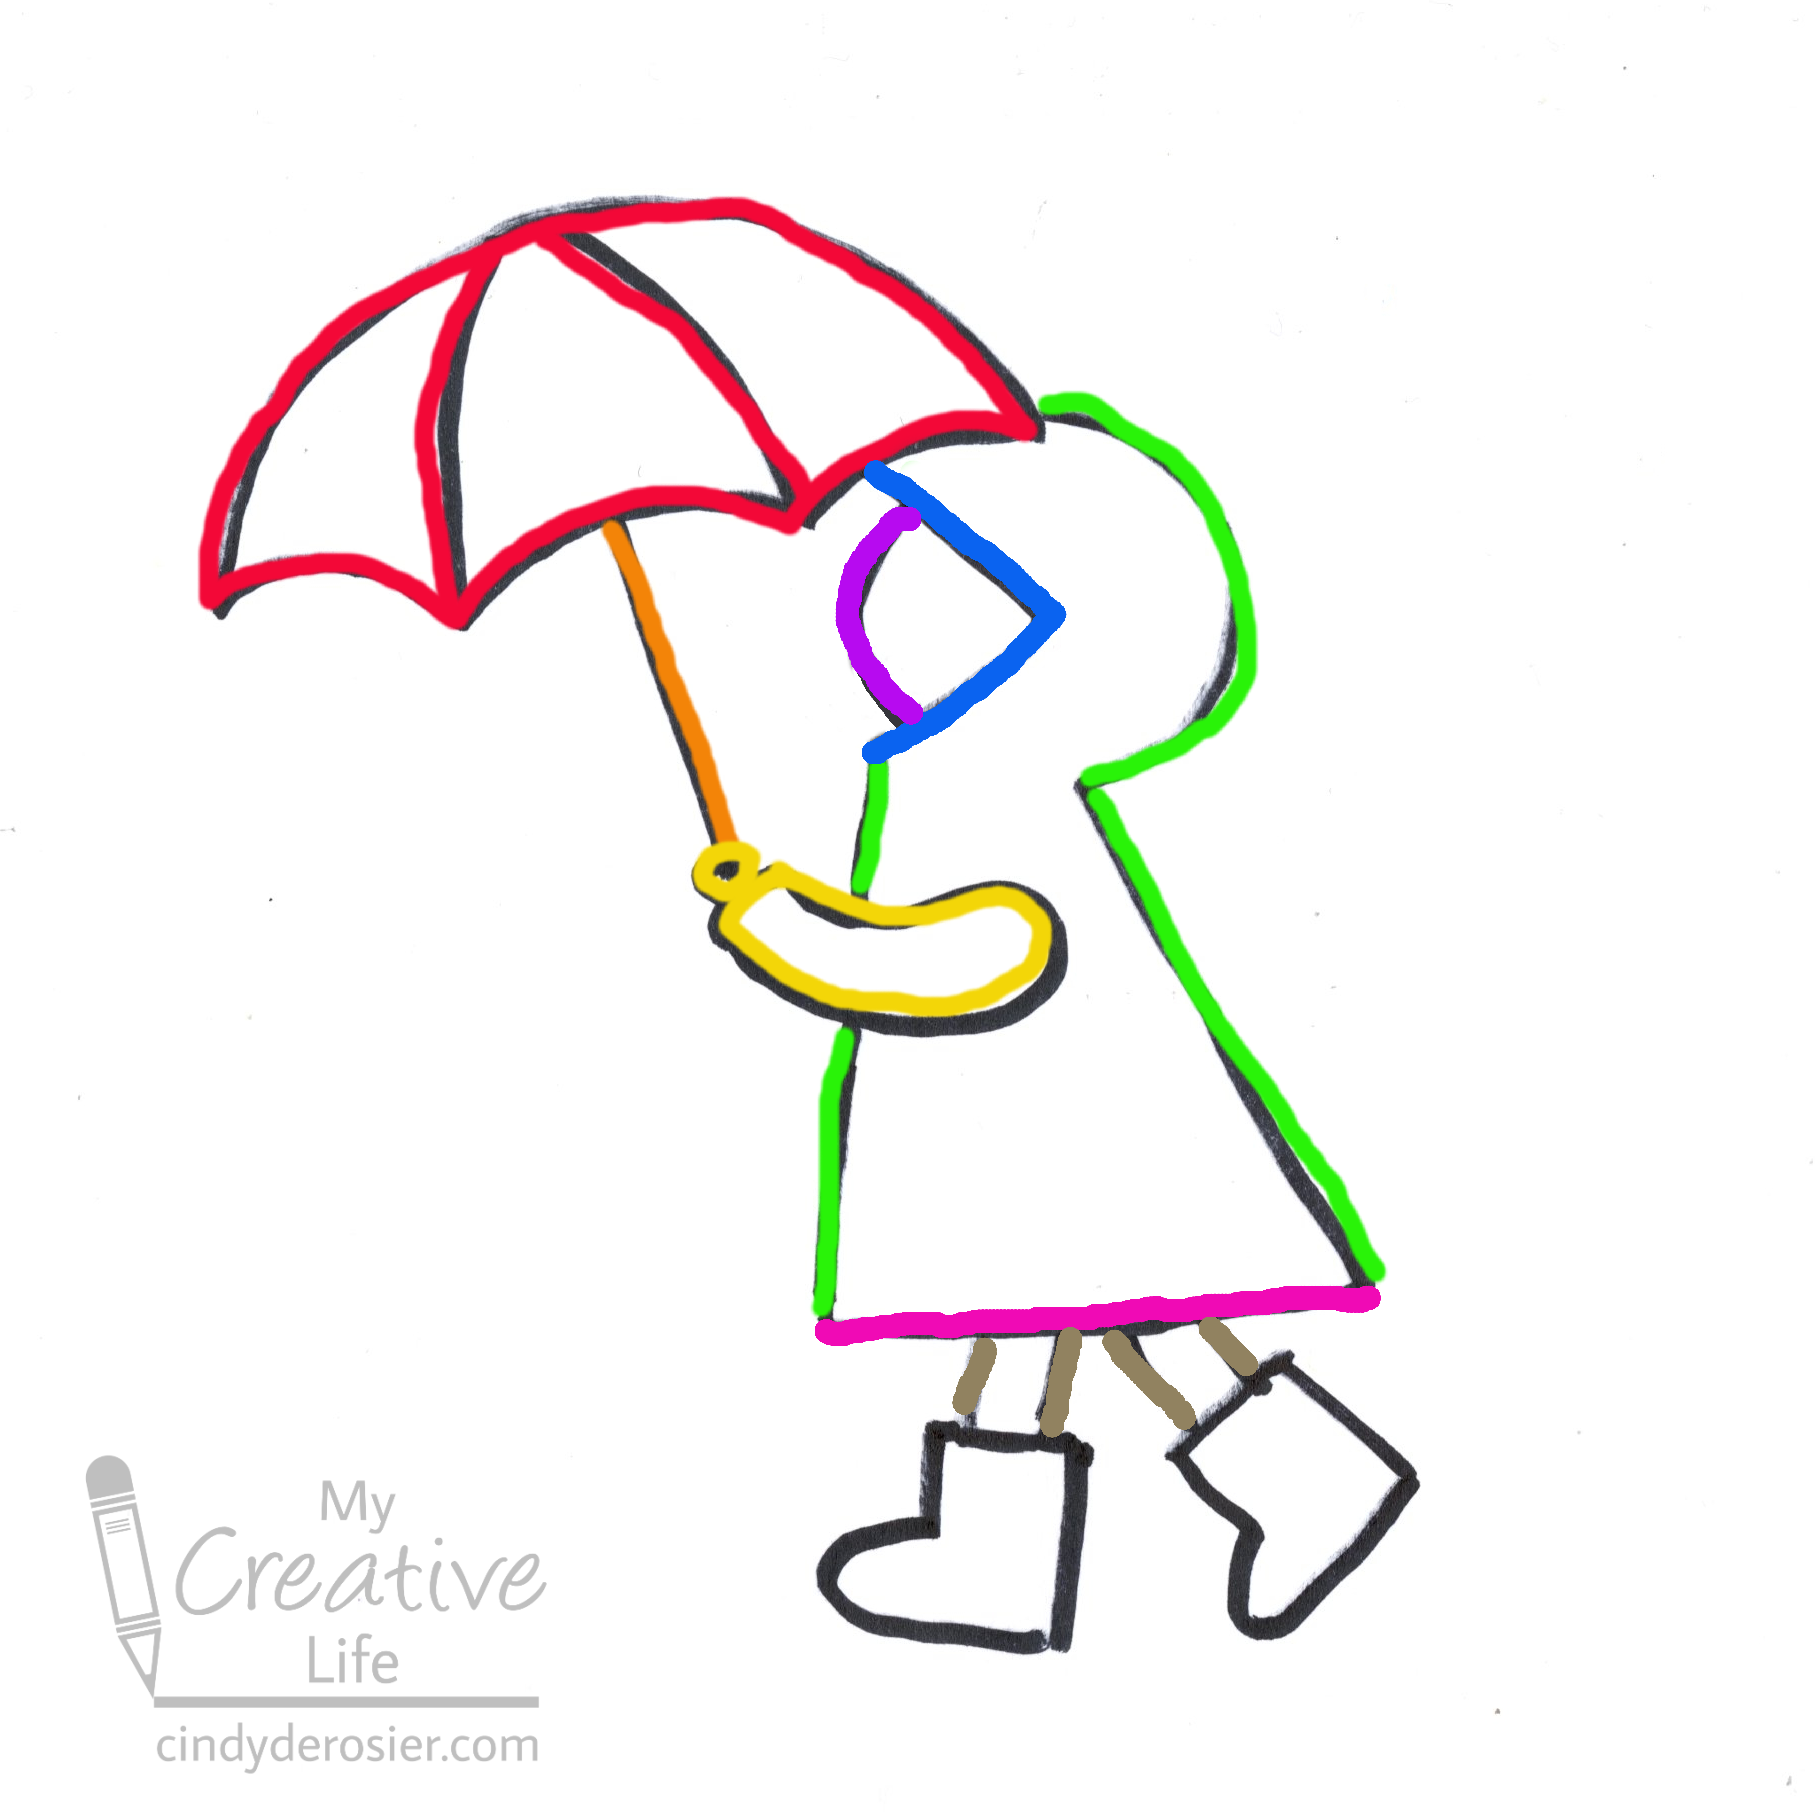
Paint the background of your paper with a pale bluish-grey sky and a grey sidewalk. While the paint dries completely, draw the image of the child in a raincoat on a piece of scratch paper. Rather than draw each step and then scan that, I decided to draw the entire thing and scan it, then digitally trace over the lines in the order I recommend making them. This is the finished drawing:


I've color-coded the steps in rainbow order: red, orange, yellow, green.

Step 1 (red): In the upper right corner, draw an arc for the top of the umbrella. Draw two lines down from the center to make the umbrella's ribs. Draw upward-curving lines between each of the ribs.

Step 2 (orange): Draw the handle of the umbrella. 

Step 3 (yellow): Draw a circle for the child's hand at the base of the umbrella handle, then add an arm. 

Step 4 (green): Draw a capital R, lifting your pencil for the face and the arm. 


Step 5 (blue): Draw a greater-than sign to define the edges of the raincoat's hood. 

Step 6 (purple): Draw an arc inside the greater-than sign for the child's face. 

Step 7 (pink): Draw the hem of the raincoat.

Step 8 (brown): Draw the child's legs.

Step 9 (black): Draw the child's boots. 

Scribble on the back of your drawing, using this technique to transfer it to your painted paper. Using the pencil lines as a guide, paint the child in the colors of your choice. When the paint is dry, use a Sharpie to outline the shapes and add the details, like the ribs of the umbrella and the buttons and pocket on the raincoat. I normally would do this in black or brown, but randomly decided to use gold just to be different. 

The last step is adding drops of Diamond Glaze to the sky and some drizzles of Diamond Glaze to the sidewalk. The sidewalk puddles will take a long time to dry; give them at least 24 hours before touching them. The long wait is worth it though - it really looks like puddles. 


What's the weather like where you are? 

1/16/23

With This Hand - My Tribute to Being a Lefty

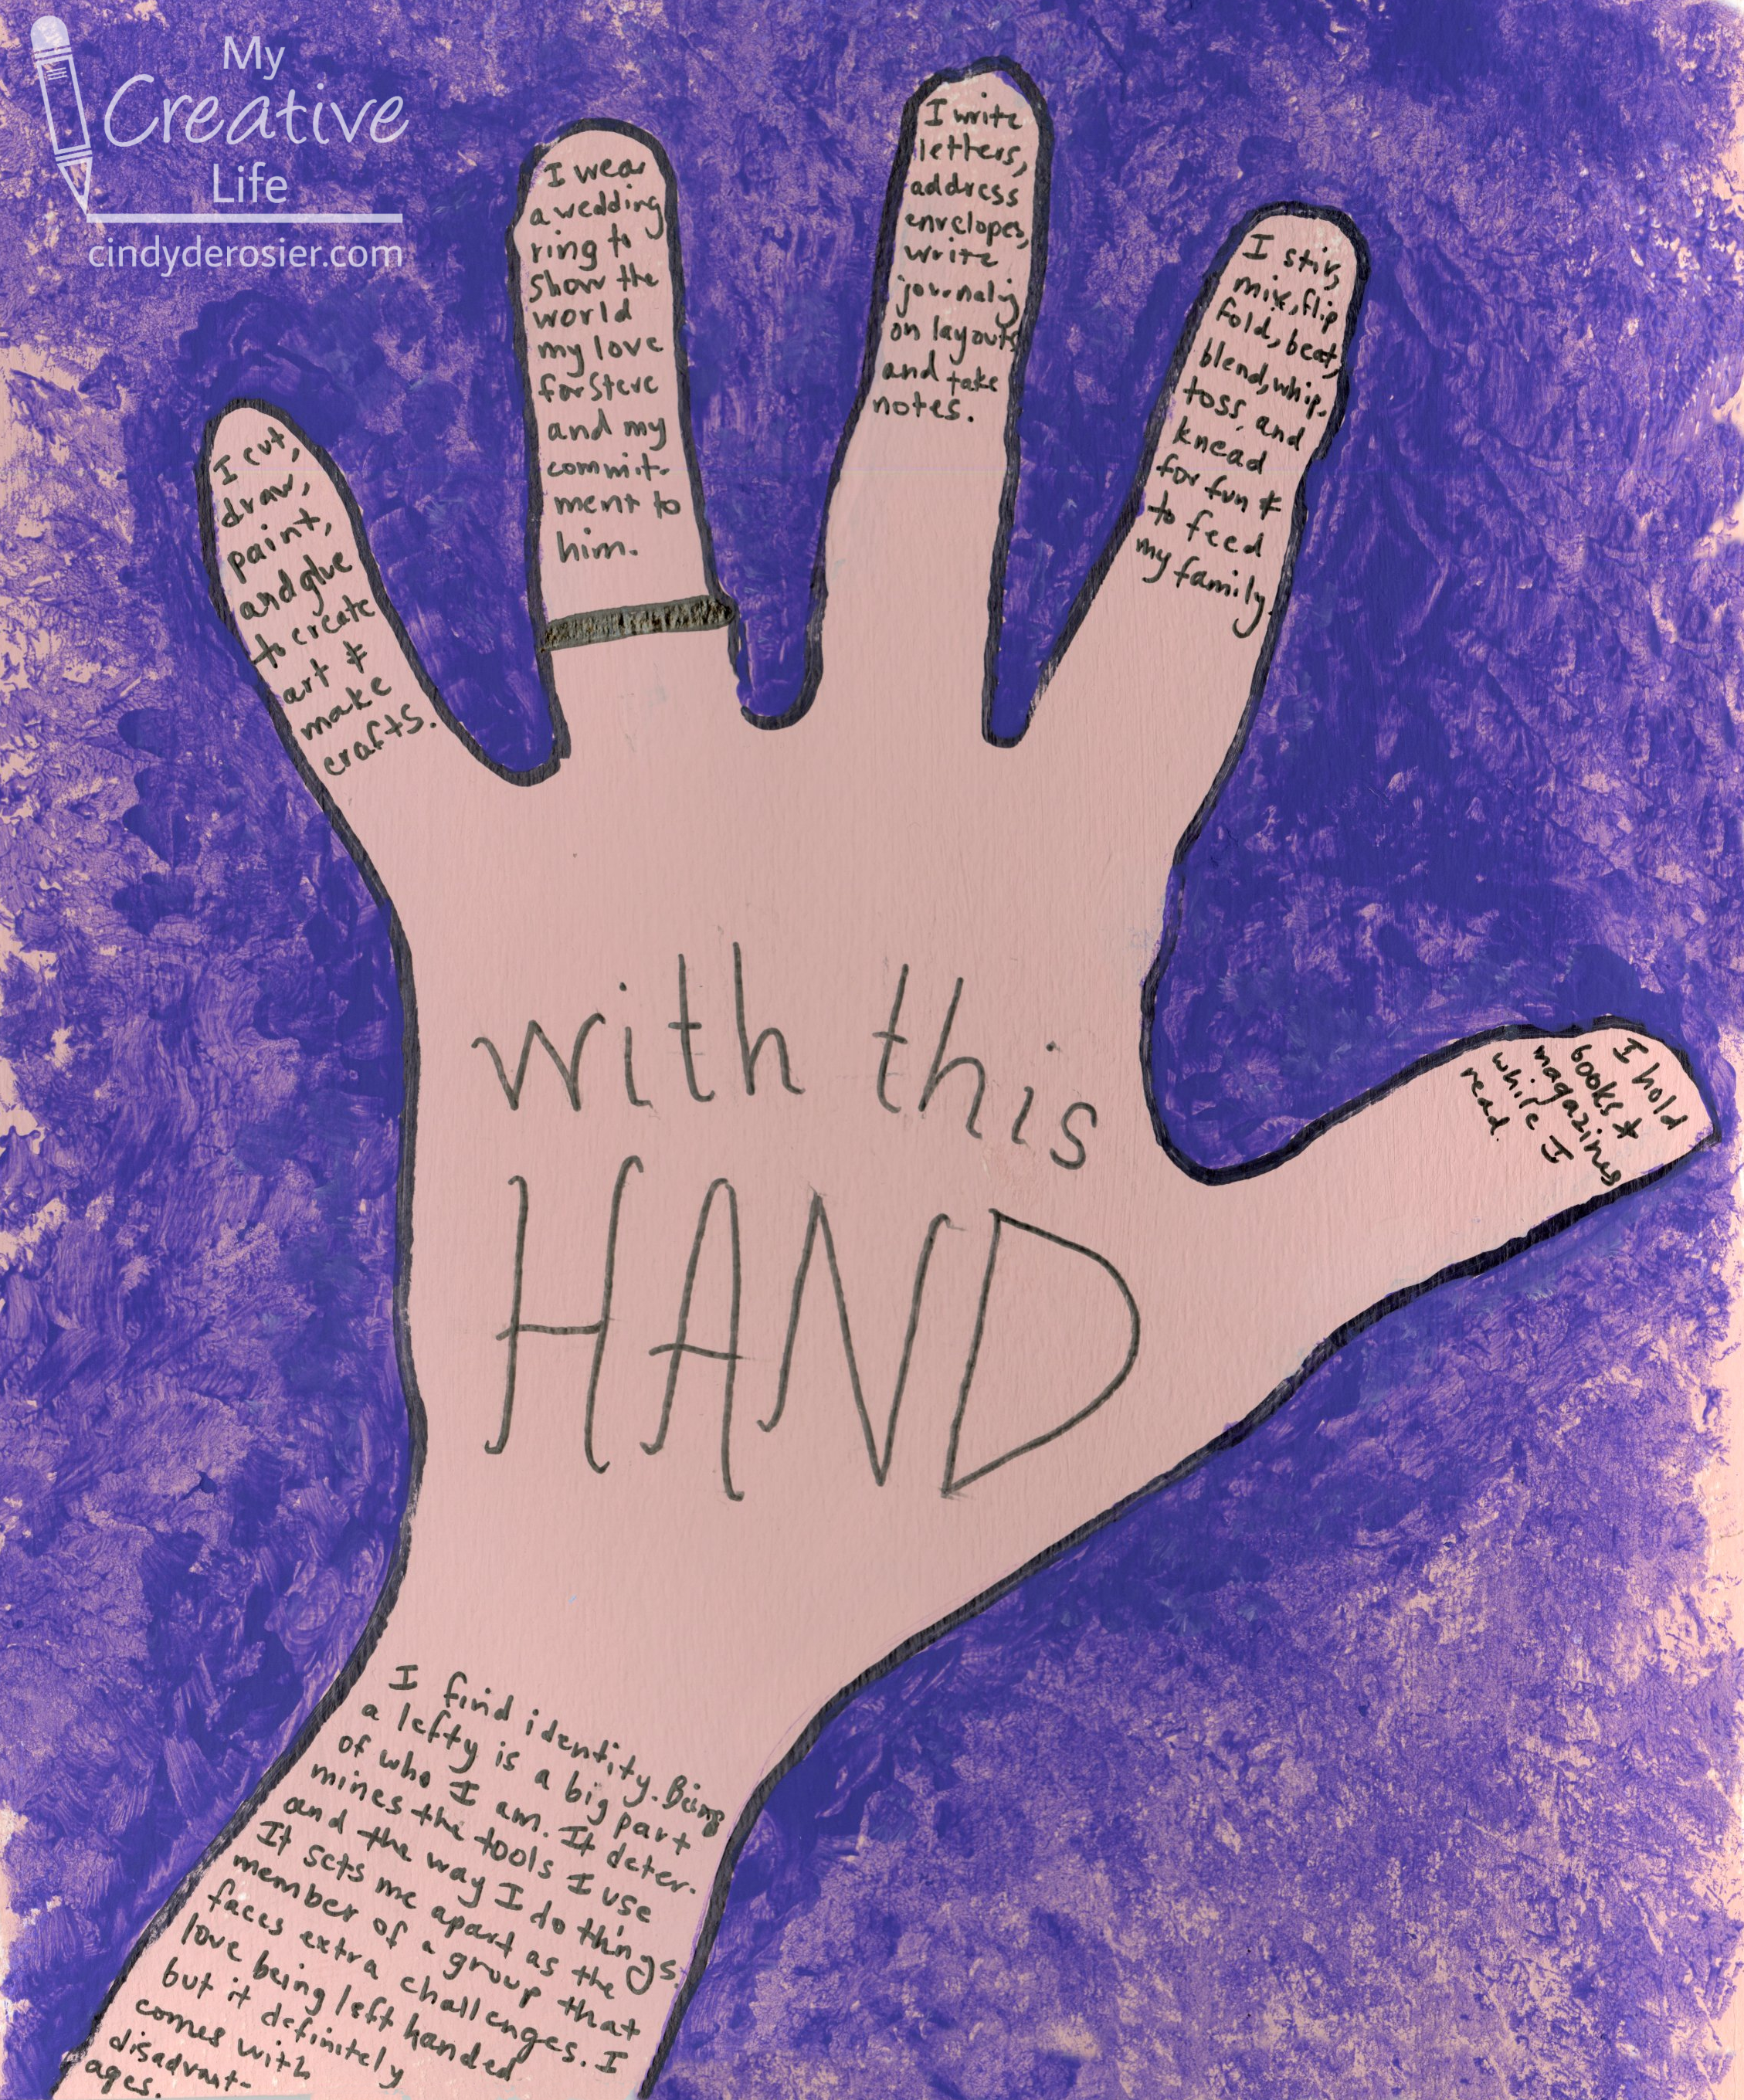
If you look back at the handprint crafts I've done over the years, the vast majority feature my right hand. Why? Because I'm left-handed, it's easier to trace around (or paint on) my right hand. Being a lefty is a big part of my identity, so I decided to make a project to celebrate my left hand specifically. Obviously, right-handers could make the same project featuring their dominant hand. Affiliate links below. 


With This Hand


Materials:


Steps: 


Paint a page in the sketchbook with the skin tone of your choice. When the paint is dry, position your dominant hand on the paper and trace around with a fine-tip Sharpie. Trace as close to your hand as possible. 

With your dominant hand still in position, use a sponge to dab a contrasting color of paint all around your hand. You will get some paint on your hand. 

Remove your hand and wash it. Then use the sponge to touch up any areas where the contrasting paint didn't quite reach the outline of your hand. As you can see, doing this makes the paint denser immediately around the hand. 

When the paint is dry, use an ultra-fine Sharpie to write WITH THIS HAND. Then write on each finger (and down the arm, if desired), focusing on things you do using that hand. On my pinky finger, I wrote about drawing, painting, and the other artsy things my left hand does. My ring finger has a wedding ring, so I talked about the important role my left hand has in showing the world my commitment to Steve. On my middle finger, I wrote about writing, a big part of my life. My pointer finger talks about the stirring and folding and mixing my left hand does as I cook and bake to feed my family. My thumb talks about the books and magazines I read as I hold them in my hand. I continued down my arm, writing about my identity as a lefty. 
 

1/13/23

A Big Step Toward Adulting

Trevor has had a savings account since he was a baby (in addition to the college savings account we have for him), but we recently switched his account over to a new one that allows him to do online banking, use an ATM, write checks, do mobile deposits, and have his own debit card. Of course, I documented this big step toward adulting. 


Trevor is very careful with his money (and with everything else) so we have no worries about that. In the three months since he's had his debit card, he has used it three times (for a total of less than $20) to buy himself treats at school. I know he's going to continue to make good choices as he crosses into legal adulthood in 18 months. 

1/12/23

Hidden Money Gift: Necklace and Earring Set

For Christmas, I made this necklace and earring set for my 22-year old nephew, Timothy. 


I haven't seen him for a couple of years, but as far as I know, he doesn't wear necklaces or earrings. In fact, I fully expected him to completely destroy this gift within 30 seconds of opening it. Why? Because he knows that every gift from me has hidden money inside. This one has 8 bills of varying denominations. Affiliate links below. 

---------


Hidden Money Gift: Necklace and Earring Set


Materials:


Steps: 

Paint the beads with acrylic paint. When the paint is dry, add Extreme Glitter. I found that putting the beads on a skewer and propping that up on paint bottles was the easiest way to paint them. 


Choose a patterned paper that coordinates with your beads. Cut 8 strips of paper, each slightly bigger than 3/4" wide by around 3" long. 

Working with one bill at a time, fold the bill lengthwise into thirds, creasing the fold well. Roll it into a tight bead. Wrap the patterned paper around it, adding glue only to the area where the paper overlaps itself. Don't get any glue on the money! Repeat for all 8 bills. 

In this picture, you can see the steps of prepping the money. The third bill is loose because I let go of it for the photo; you'll actually want it to be as tight as possible, as you can see with the finished bead on the right. 


Here's a look at a finished bead. 


To make the earrings, thread a bead onto an eye pin, then curl up the end to secure the bead in place. Use a jump ring to attach it to the earring hook. 

To make the necklace, arrange six paper beads (hidden money) and seven wooden beads in order. String them onto the necklace chain. Depending on the necklace and the beads, you may need to temporarily remove the clasp of the chain (if it's wider than the gap in the beads) and/or use a yarn needle to thread the beads. 


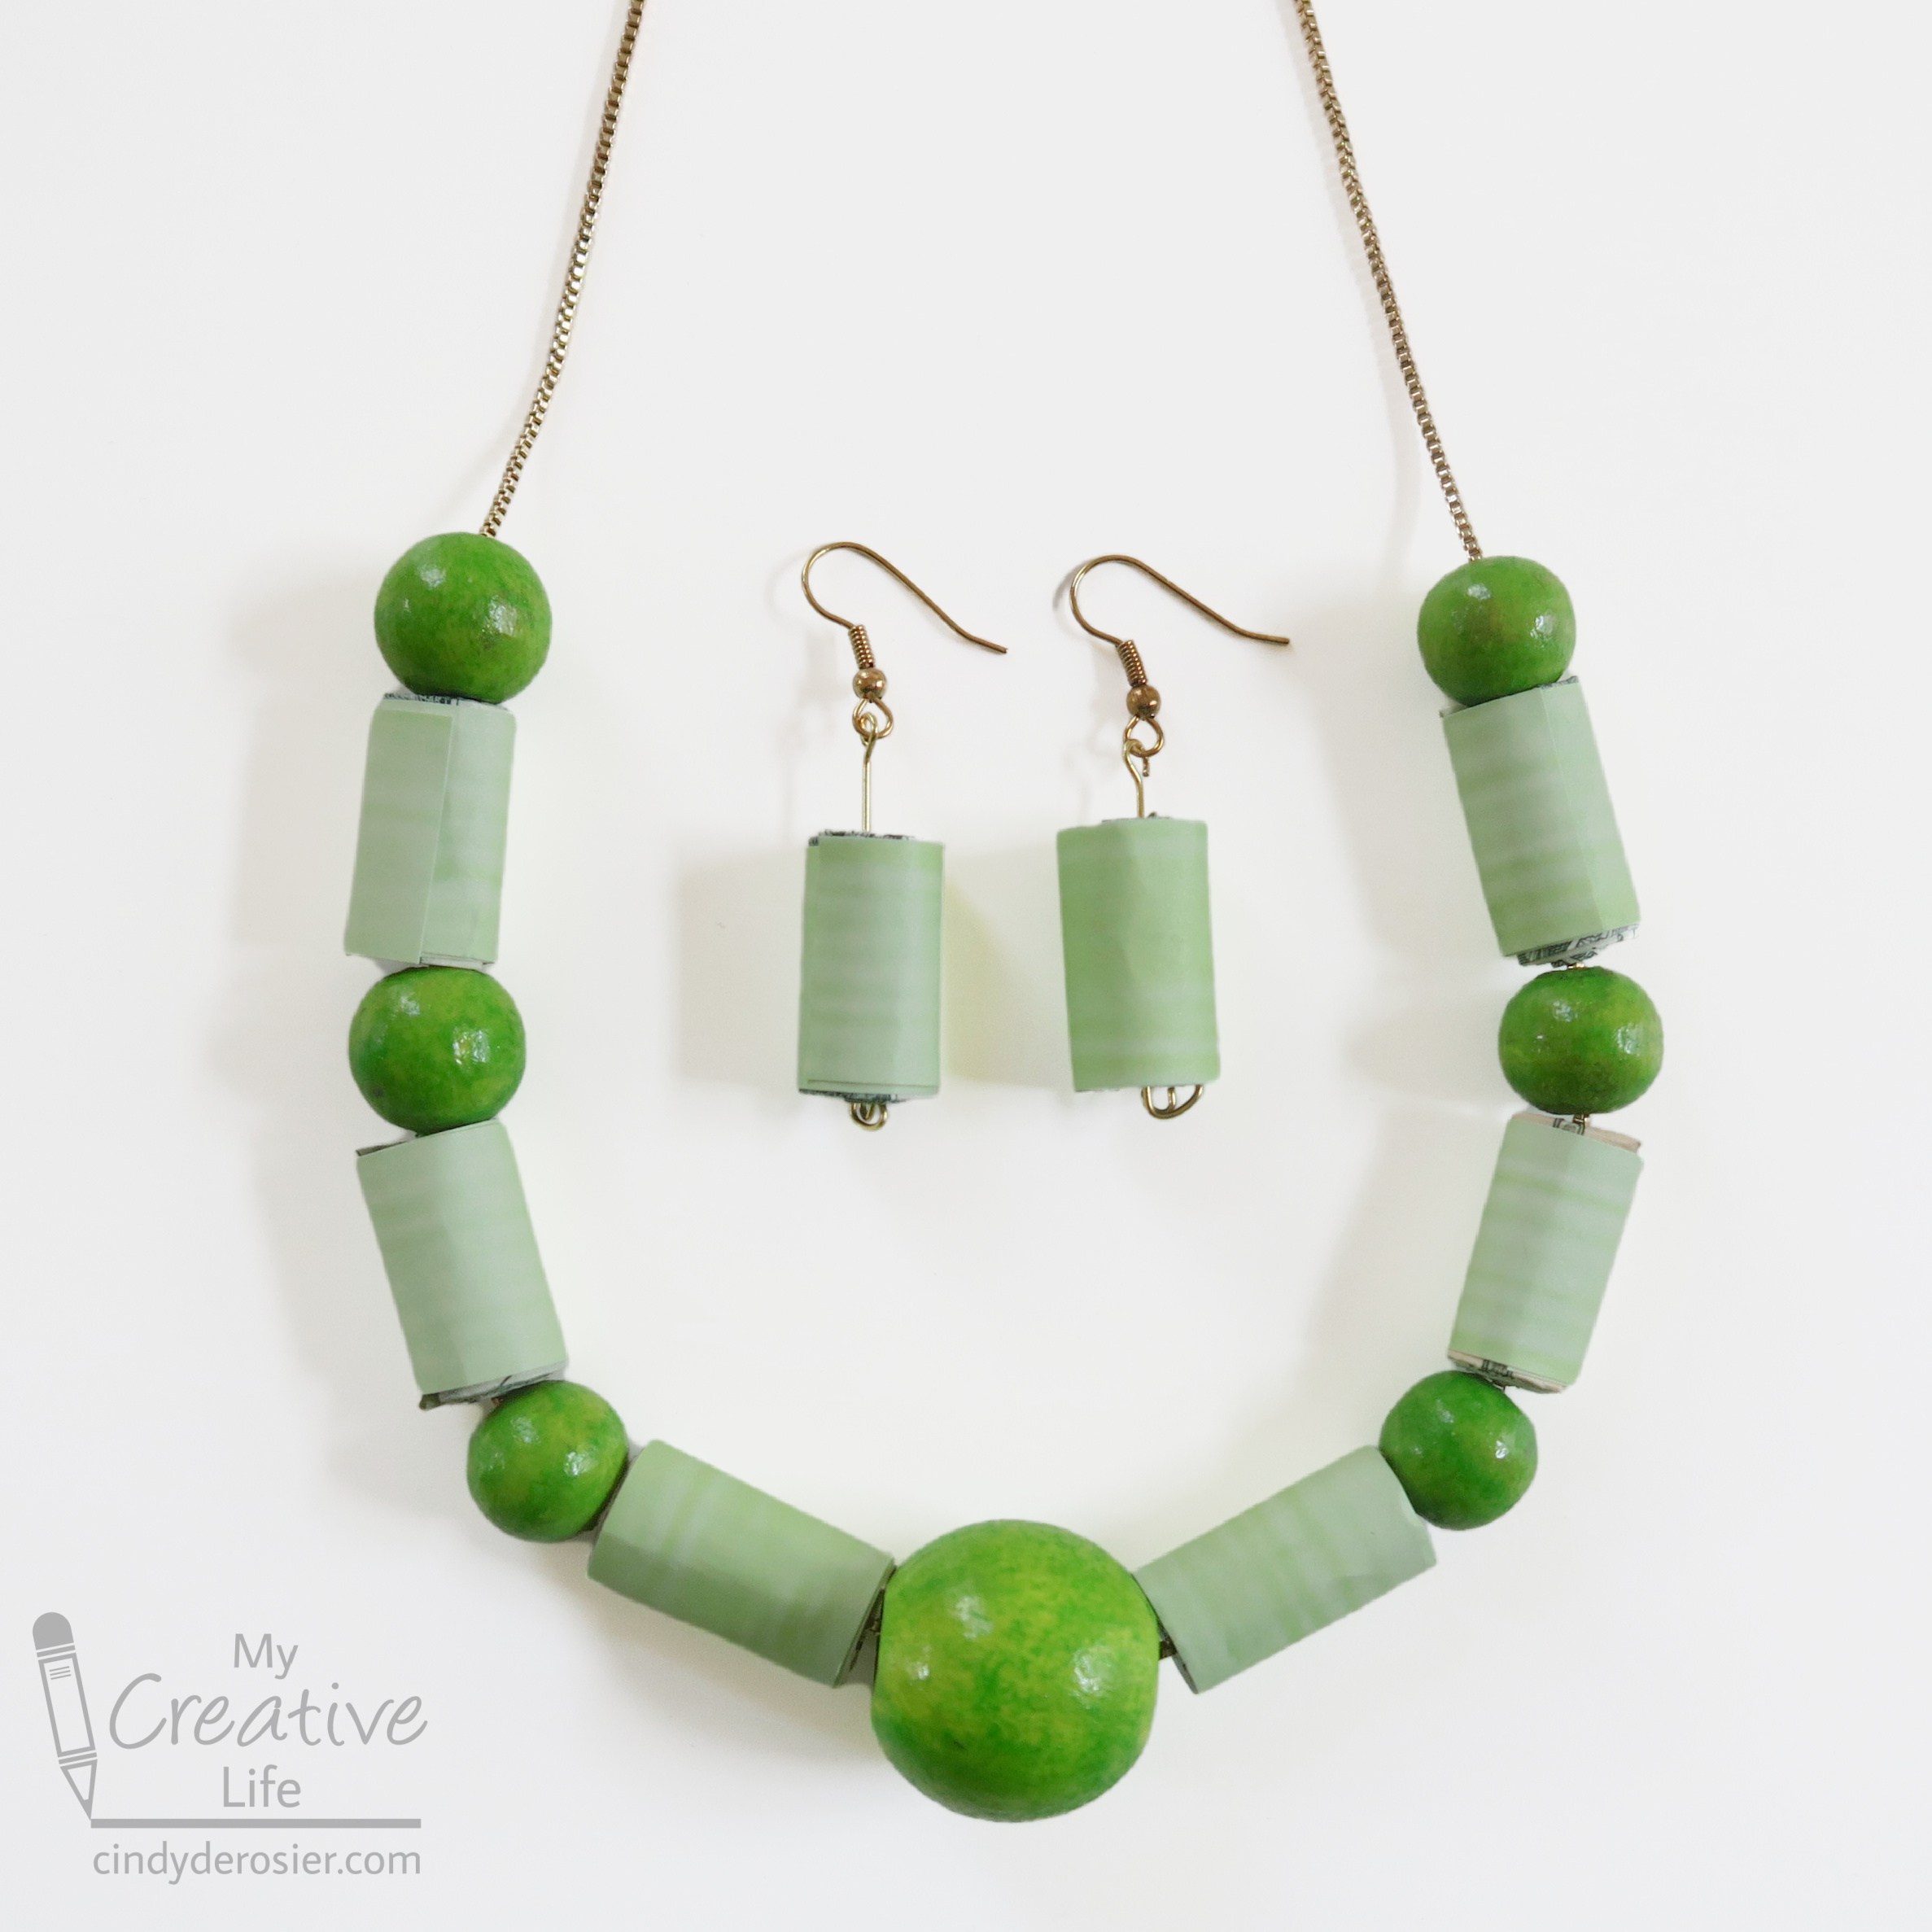
This is what the finished jewelry set looks like. 


Package your gift in an elegant jewelry gift box for an extra fun touch. Then wait and see how long it takes your recipient to notice that the necklace and earrings aren't actually the gift they think they are!

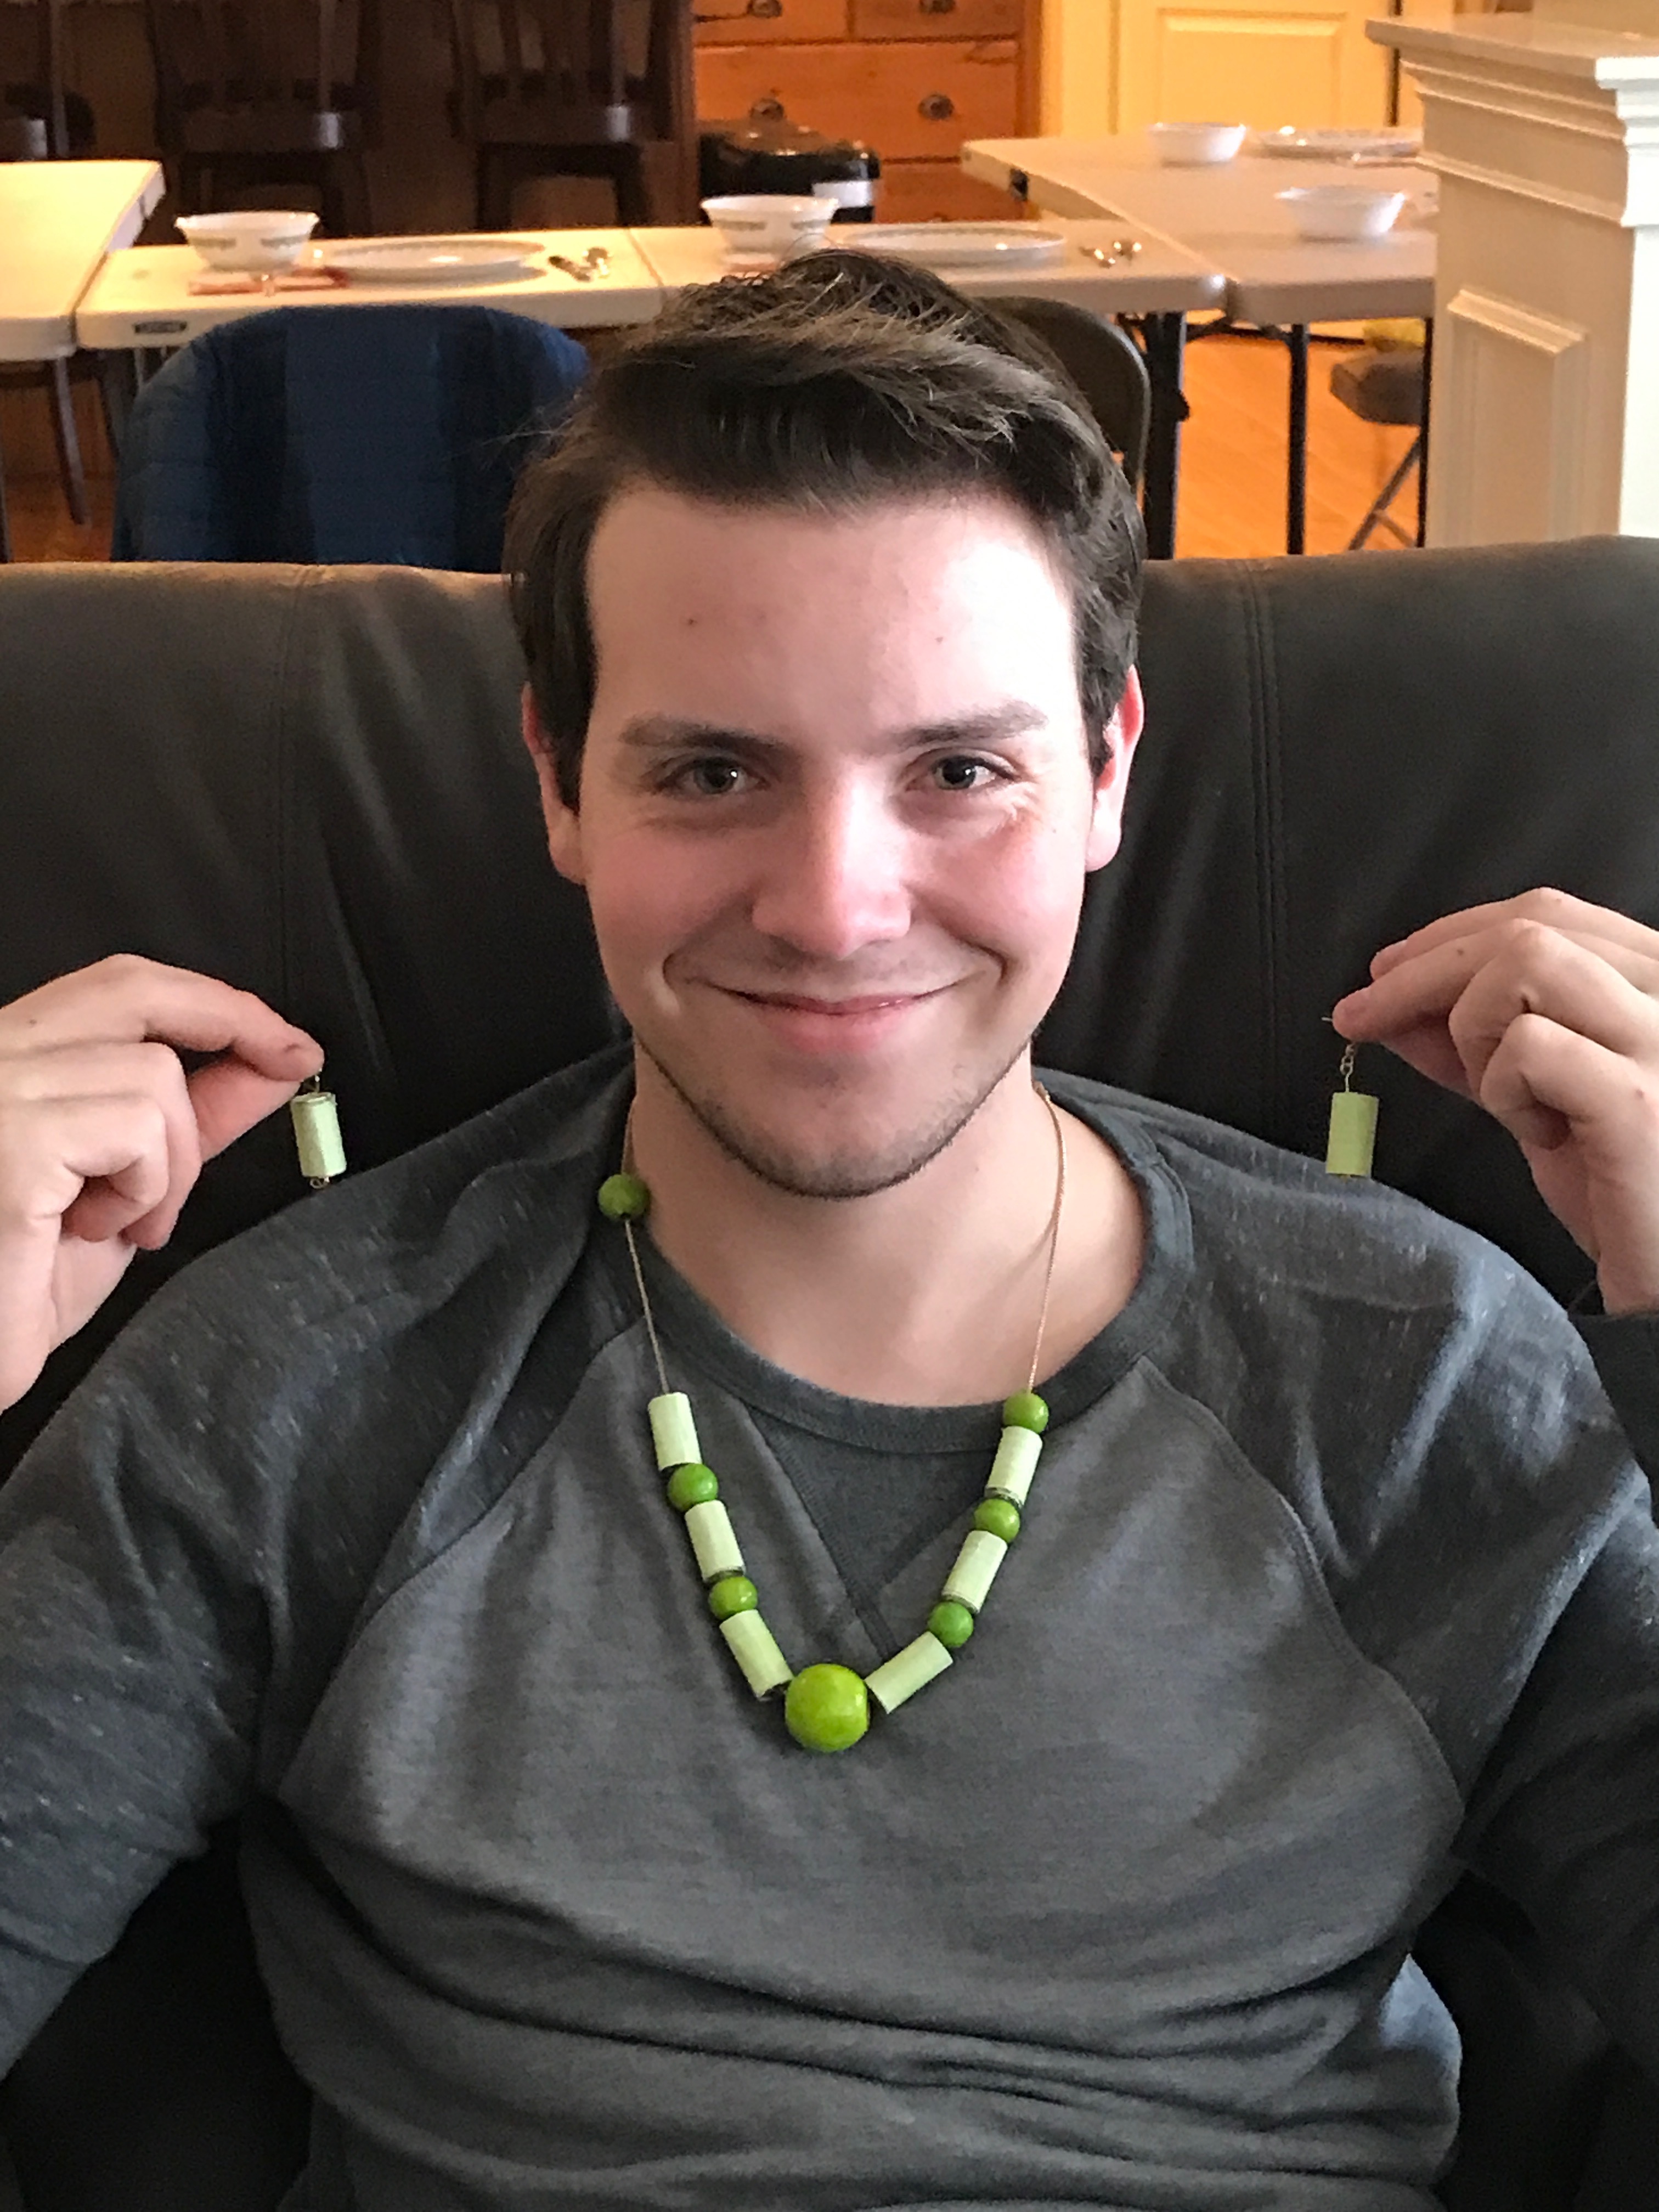
My sister sent me this photo of Timothy modeling his new jewelry (pre-destruction). I love it. 


Browse through the dozens of ideas for money gifts I've given to Timothy and others over the years. I love looking back at them. 

1/11/23

Family Fun in Sacramento: Crocker Art Museum and the California Museum

Our family visits Sacramento often, usually to meet up with family and friends, to see a show, or to attend an event. We don't tend to go to Sacramento as tourists, even though California's capital city is packed with awesome places to visit (including, of course, the Capitol). You could easily spend a full day just in Old Sacramento, the California State Railroad Museum, and doing the Urban Adventure Quest

But don't plan on just one day in Sacramento - there is so much more to see! We took advantage of one of our newly-unscheduled days to explore two of Sacramento's most popular museums. Because I blog about educational travel, we received comped admission for one of the attractions we visited. 

We started our morning at the Crocker Art Museum.  


You know how much I love art museums, but I hadn't been to the Crocker since before their massive expansion in 2010. Wow! I was blown away. It's a beautiful museum, with so much to see.


This is made from colored pencils. It's stunning and looks different from every angle. 


This piece is very interesting. The red image that is stamped on the world map is the United States minus the states that voted Democrat (blue). 


This is part of a huge piece. It's 'painted' in plastic extruded from a 3-D pen. The level of detail is stunning. 


The special exhibit currently at the Crocker is Lee Alexander McQueen and Ann Ray Rendez-vous. It is well worth a visit to the Crocker just to see it. 


If you're not familiar with those names, McQueen was a famous fashion designer and Ray was the person he trusted to photograph both his work and himself. 


We watched the outstanding film McQueen (affiliate link) a few years ago, so we were familiar with him and his story. Seeing his stunning garments on display was great. My favorite is the green dress below, made from glass beads and feathers. 


The whole exhibit was outstanding, but the icing on the top was the interactive room. Here, you could try on costumes and walk the runway...


... identify different fabrics...


... play a memory game with different patterns used in fabrics, and create your own fashions and sketch them. 


We had a wonderful time at the Crocker. What a treasure it is! I will make a point not to let so many years go by before I return. 

Our next destination was less than a mile away and we had a break during the rain, so we walked. We came across some downed limbs here and there, but overall it was a really nice walk through the R St. Historic District


The area is the location of the first southern flood levee in Sacramento. 


We were hoping to eat a late lunch at the popular Fox and Goose, but alas it was too popular. The wait time for a table was over 45 minutes. 


We ate at a nearby vegan restaurant, which was the only place open within an easy walking distance. It was... fine. Mostly. The fries, onion rings, and sodas were fantastic. The rest... less so. 

Our next stop was at the California Museum


The California Museum is home to the California Hall of Fame


Inductees include a wide variety of Californians, including Ronald Reagan, Steve Jobs, Dr. Seuss, Billie Jean King, Rita Moreno, George Lucas, Charles Schultz, and dozens of other names you'd recognize. From athletes to astronauts and tastemakers to trailblazers, the California Hall of Fame is truly a who's who of the Golden State. 


When Walt Disney was inducted into the California Hall of Fame, three Mickey Mouse statues were given to the museum. 


Permanent exhibits at the California Museum focus on the state's indigenous population, mission history, Gold Rush, and more.  


Other exhibits look at women in California. The Unity Center celebrates the incredible diversity of our state. 


In trying to see the Constitution Wall, I opened a door on the second floor labeled Emergency Exit Only, which I didn't notice until the siren started blaring throughout the museum. Oops. I've never done that before. When you view the Wall, do so from the ground floor. 

We went home for dinner, but we have a lot of favorite restaurants in Sacramento that we whole-heartedly recommend. Cafeteria 15L is on the north side of the Capitol, which is itself an easy walk from the California Museum. 

We thoroughly enjoyed our time at both the Crocker Art Museum and the California Museum. We definitely recommend a visit, whether you're local or visiting Sacramento from somewhere else. Sacramento gets short-changed as a tourist destination because of nearby San Francisco, Napa Valley, Lake Tahoe, and Yosemite, but it's a great city with lots to see and do. Our day playing tourist there made me appreciate even further how lucky we are to live nearby.