Showing posts with label money gift. Show all posts

1/8/26

Hidden Money Ornaments

It's time to share another money gift idea! This year, my nephew Timothy's Christmas gift was money hidden inside Christmas ornaments. 


I shared the steps to painting and decorating glass ornaments a few weeks ago, but I intentionally didn't mention how great they are for hiding money! 


To hide money in a glass ornament, simply remove the top of the ornament, roll up the money, and slide it in. Replace the top. Money fits perfectly inside. It's not too difficult to get out; tweezers help. 

Making the gift was the easy part. Getting it from California to Idaho took a bit more effort. Fortunately, all four ornaments survived the plane trip. Once I got to Idaho, I attached a tag (1 of 4) to the green ornament. I wrapped it for Timothy to open and kept the other three to hide. 


I'd expected we'd be opening gifts at my mom's house, where I could hide the ornaments amongst the many on her tree. Instead, we opened gifts at my sister's house. They don't have a traditional Christmas tree up anymore. 


Needless to say, a cat tree would not be a great place to hide glass ornaments (for many reasons), so I had to resort to tucking them anywhere I could find that would not be too obvious (to the humans) or enticing (to the cats). Success! No one noticed the ornaments until Timothy opened the first one and started looking for the rest. 

Believe it or not (I barely do), this is the 42nd money gift tutorial I've shared. You can see them all here: Creative Ways to Give Money. Fingers crossed that I can dream up something for #43!

11/4/25

Hidden Money Birthday Card

Each year for his birthday and for Christmas, I give my nephew Timothy a money-themed gift. I started doing that when he was 13. He turned 25 last week (!!) and I'm seriously running out of ideas, particularly since I have to mail his gifts now instead of giving them in person. (No more money trees or Air Force One style gifts). I've given Timothy a hidden money birthday card before, but I hid the money in different ways this time. For this project, I started with the idea of making George Washington the focal point, then built the rest of the card around that. Affiliate links below. 


Hidden Money Birthday Card


Materials:


Steps:


Cut a base from black cardstock. Then cut the layers: a piece of patterned paper that is slightly smaller than the base; a strip of black cardstock that is the same width as the base; and a piece of white cardstock that is slightly smaller than the base. 

Use scotch tape to secure two bills to the black base. 


Use the tape runner to add adhesive JUST to the outside edges of the back of the patterned paper, then adhere it to the base, sandwiching the money in between the layers. 

Tape a bill to the back of the black strip, then use the tape runner to put adhesive onto the exposed black areas. Position the strip in place so that the money is hidden. 


Fold another bill so that just the face is exposed. Use the tape runner to put a tiny bit of adhesive on the back of the bill. Stick it to the center of the card. The bill will want to pop up a bit, but we'll fix that next. 


Select a quote sticker. Dust the back with baby powder, then add a foam dot to the back. Adhere it to the card so that a small part of the sticker holds the focal bill in place. Do the same with a second sticker on the other side. (I used a present.) Fill in the empty spaces with more stickers, as desired. 

Write your message on the white cardstock, tape another bill or two to the back, then adhere it to the back of the card. 

Here are all the places money is hiding:


Happy birthday, Timothy! 

1/3/25

100 Grand Hidden Money Gift

For Christmas 2024, I decided to make a hidden money gift inspired by the money-themed 100 Grand Bars.  


Ordinarily when you open a fun-size 100 Grand wrapper, you get a tasty treat of caramel, crispy rice, and chocolate. If you are very careful, you can open the wrapper without tearing it, remove the candy bar, replace it with rolled-up money, and then seal it back together again using the glue that's already on the wrapper. It's surprisingly easy. If you hide the money-filled 100 Grands in a jar with regular ones your recipient won't suspect a thing until they pull out bar and it weighs less than it should! Affiliate links below. 


-----


100 Grand Hidden Money Gift


Materials:


Steps:


Carefully open a 100 Grand Bar by pulling the wrapper apart, the way you'd open a bag of chips. I was able to open three different bars without tearing the wrapper or compromising the adhesive. Remove the candy and replace it with rolled-up cash. Press the wrapper back together to adhere it. 

Fill the mason jar with a mixture of candy bars and money-filled wrappers. Pack them tightly. You won't be able to tell by looking which have candy inside and which are filled with hidden money!

10/29/24

Trivia-Themed Money Gift Using Printable Gift Card

Today is my nephew Timothy's 24th birthday (!) so that means it's time to share my latest money gift idea. It is essentially a trivia challenge that starts with a printable gift card. It took me about 40 minutes to make, but you can spend more or less time depending on how much you want to challenge your recipient. It's a great option for someone who lives far away, as there are no shipping costs and no mailing time required. 

This is what Timothy received via email: 


He has already solved it and redeemed his gift card, so if you feel like figuring out the answer, go for it. The answer is below, so if you do want to solve it, do it before reading on. The full answer is at the bottom of the post. 


---------


Trivia-Themed Money Gift Using Printable Gift Card


Start by buying a printable gift card, sent to your own email address. I used Amazon, but any gift card that you can redeem online will work. Do not buy an eGift card. Those come with a link, not a code. 


Within a few minutes, you'll receive your card. You don't need to print it. Just pay attention to the code. For Amazon, the format is XXXX-XXXXXX-XXXX. 

Now it's time to get started. Open up a new document. Take a screenshot of the printable gift card so that your recipient knows where to redeem it (see the Amazon smile below the 'Happy Birthday' graphic?) and put the image at the top of the document. Then type the instructions, then spaces and hyphens to match the format of the gift code. Now you're ready to write the questions. 

The first 2 digits of Timothy's code were G8, so I typed "What is G8" into Google to see what came up. First was a Wikipedia article about the Group of 8 (G8) and next was an article about the Pontiac G8. Timothy is very interested in geography, so the first topic was a great choice for him. I read the article and carefully constructed a question that could only be answered with the letter-number combination of G8. 


You don't need to give clues in 2-digit sections like I did, nor do your clues need to be so challenging. For a young child, I might give the following clues to generate the same answer, G8:

                    1. What is the 7th letter of the alphabet?
                    2. How many sides does an octagon have?

You could use math equations, state abbreviations, sports players' jersey numbers, or literally anything else when designing your questions. Just be sure that there is only one possible answer. I had to be very careful how I wrote question 5-6 since there are multiple events in the Olympics with a letter-number name.  

Speaking of K4, I was really frustrated that the code had K4 twice. It was hard enough writing one question for that particular combination! But the next pair, KM, couldn't be easier. If you have two letters in a row, that's the perfect chance to ask a question about a famous person with those initials. 

I was hoping that UM or AW were chemical symbols that I'd forgotten about since that would have been a fun clue, but alas, no. I think my question for UM is the weakest of the bunch. I do like the one I came up with for AW though, since it fits in with Timothy's interest in geography and travel. 

Happy birthday, Timothy! Two more months to figure out a money gift for Christmas. Yikes. 

--------


Answer: G8C3-K4K4KM-UMAW


9/23/24

Homemade Envelope for a Cash Gift

Steve and I recently attended the wedding of one of his coworkers. The bride incorporated many aspects of her Chinese heritage into their ceremony and reception, so I did the same for our gift. Rather than just put money in a card, I thought it would be more meaningful to give it in a red envelope. 


You can use these same steps to make an envelope for any occasion where you want to give cash. Use school colors for a graduation gift, or red and green for Christmas. For a wedding gift, take color clues from the invitation or, like I did, the couple's culture. Affiliate links below. 

---------


Homemade Envelope for a Cash Gift


Materials: 


Steps: 


Put a REMOVABLE Glue Dot on each corner of the cash, then adhere it to a sheet of cardstock. Trim away the excess cardstock, leaving a small border around the edge. On the opposite side, write your message. 

Cut a separate piece of cardstock so that it will wrap around your card, with extra room to make the flaps that will hold the envelope together. Currency differs in size depending on your country, so measure if you're using anything besides US bills (which are 6.14 x 2.61"). I cut mine to approximately 13.5" x 6" (nope - I didn't measure). If you want larger flaps than mine, start with a larger piece of cardstock. 

Score the paper as shown below. You need a thin border on the top, left, and bottom, plus another score line in the center. (Again, I didn't measure.) Fold along each line. 


Trim away the tiny rectangles on the top left and bottom left corners, as well as the thin strip on the right-hand side of the top border. Then use the corner rounder on what remains of the top flap. Glue the bottom and long side of the envelope closed. 

Now decorate the envelope with a piece of washi tape. Use a heart sticker to hide where the ends come together. 


When the glue is dry, slide the cash into the envelope, then glue the flap shut. It's a nice way to make cash a little more special. 

Speaking of special... the wedding venue was spectacular. This is Crystal Springs, in Burlingame, CA. 


It's not my place to show pictures of the actual event, but here we are before it began. 


Everything about the wedding was wonderful. Huge congrats to the bride and groom! Thank you so much for allowing us to be part of your special day. 

1/9/24

Rebus Treasure Hunt Money Gift

As you know, I've been thinking up creative ways to give money as a gift to my nephew Timothy for the last decade or so. He got potholders and a dishtowel (with hidden money inside) for his birthday in October; for his Christmas gift, I took advantage of the fact that I'd be seeing him in person and sent him on a treasure hunt using rebuses. 

At home, I designed and printed the rebuses. I set the first one aside, then put the rest into envelopes with increasing amounts of cash. When we got to my sister's house, Trevor and I snuck around hiding the envelopes in their appropriate places. Then we presented Timothy with the first clue:


He solved it fairly quickly and headed to the kitchen, where he found this: 


It took a bit longer for him to find this one. He had no idea we'd snuck outside to hide the next envelope!


He got help from my mom and sister for this one. It cracked us up hearing them all say, "Ove-chicken" repeatedly. 


After solving that clue, he found the final envelope, which just held cash. The gift was a hit!


-------


Need the answers? 

  • To get your money open microwave.
  • Look under doormat.
  • Go to oven.
  • Check near holiday tree.

-------


Creative gifts are great, but if you don't have the time or energy to make your own, there are some fun hidden money gift ideas for sale on Amazon. This is an affiliate link; thank you for supporting My Creative Life!

10/30/23

Potholders and Dishtowel Hidden Money Gift

My nephew turned 23 yesterday. I have been giving Timothy hidden money for every gift-giving occasion since he was 13. Almost all of the 37 money gift tutorials I have on my blog were for him. It is getting increasingly difficult to come up with an idea that is both new and able to be mailed out of state, but I enjoy the challenge. 

For his 23rd birthday, I gave him two homemade potholders and a dishtowel. 


Making the potholders was a major blast from the past. I was obsessed with my potholder maker as a kid in the 1970's. Getting a fresh bag of loops was the best! I still have my red metal 1970's potholder maker (affiliate links here and below); at some point I got a plastic one (which they sell in a variety of sizes). Some have instructions to make other things, like this awesome pineapple. Seven-year-old Cindy would have circled that in the Sears catalog for sure! Fifty-one-year-old Cindy *might* buy some yellow and green loops and do some experimenting. 

Speaking of experimenting, I had no idea if hiding money in a homemade potholder was even possible. 
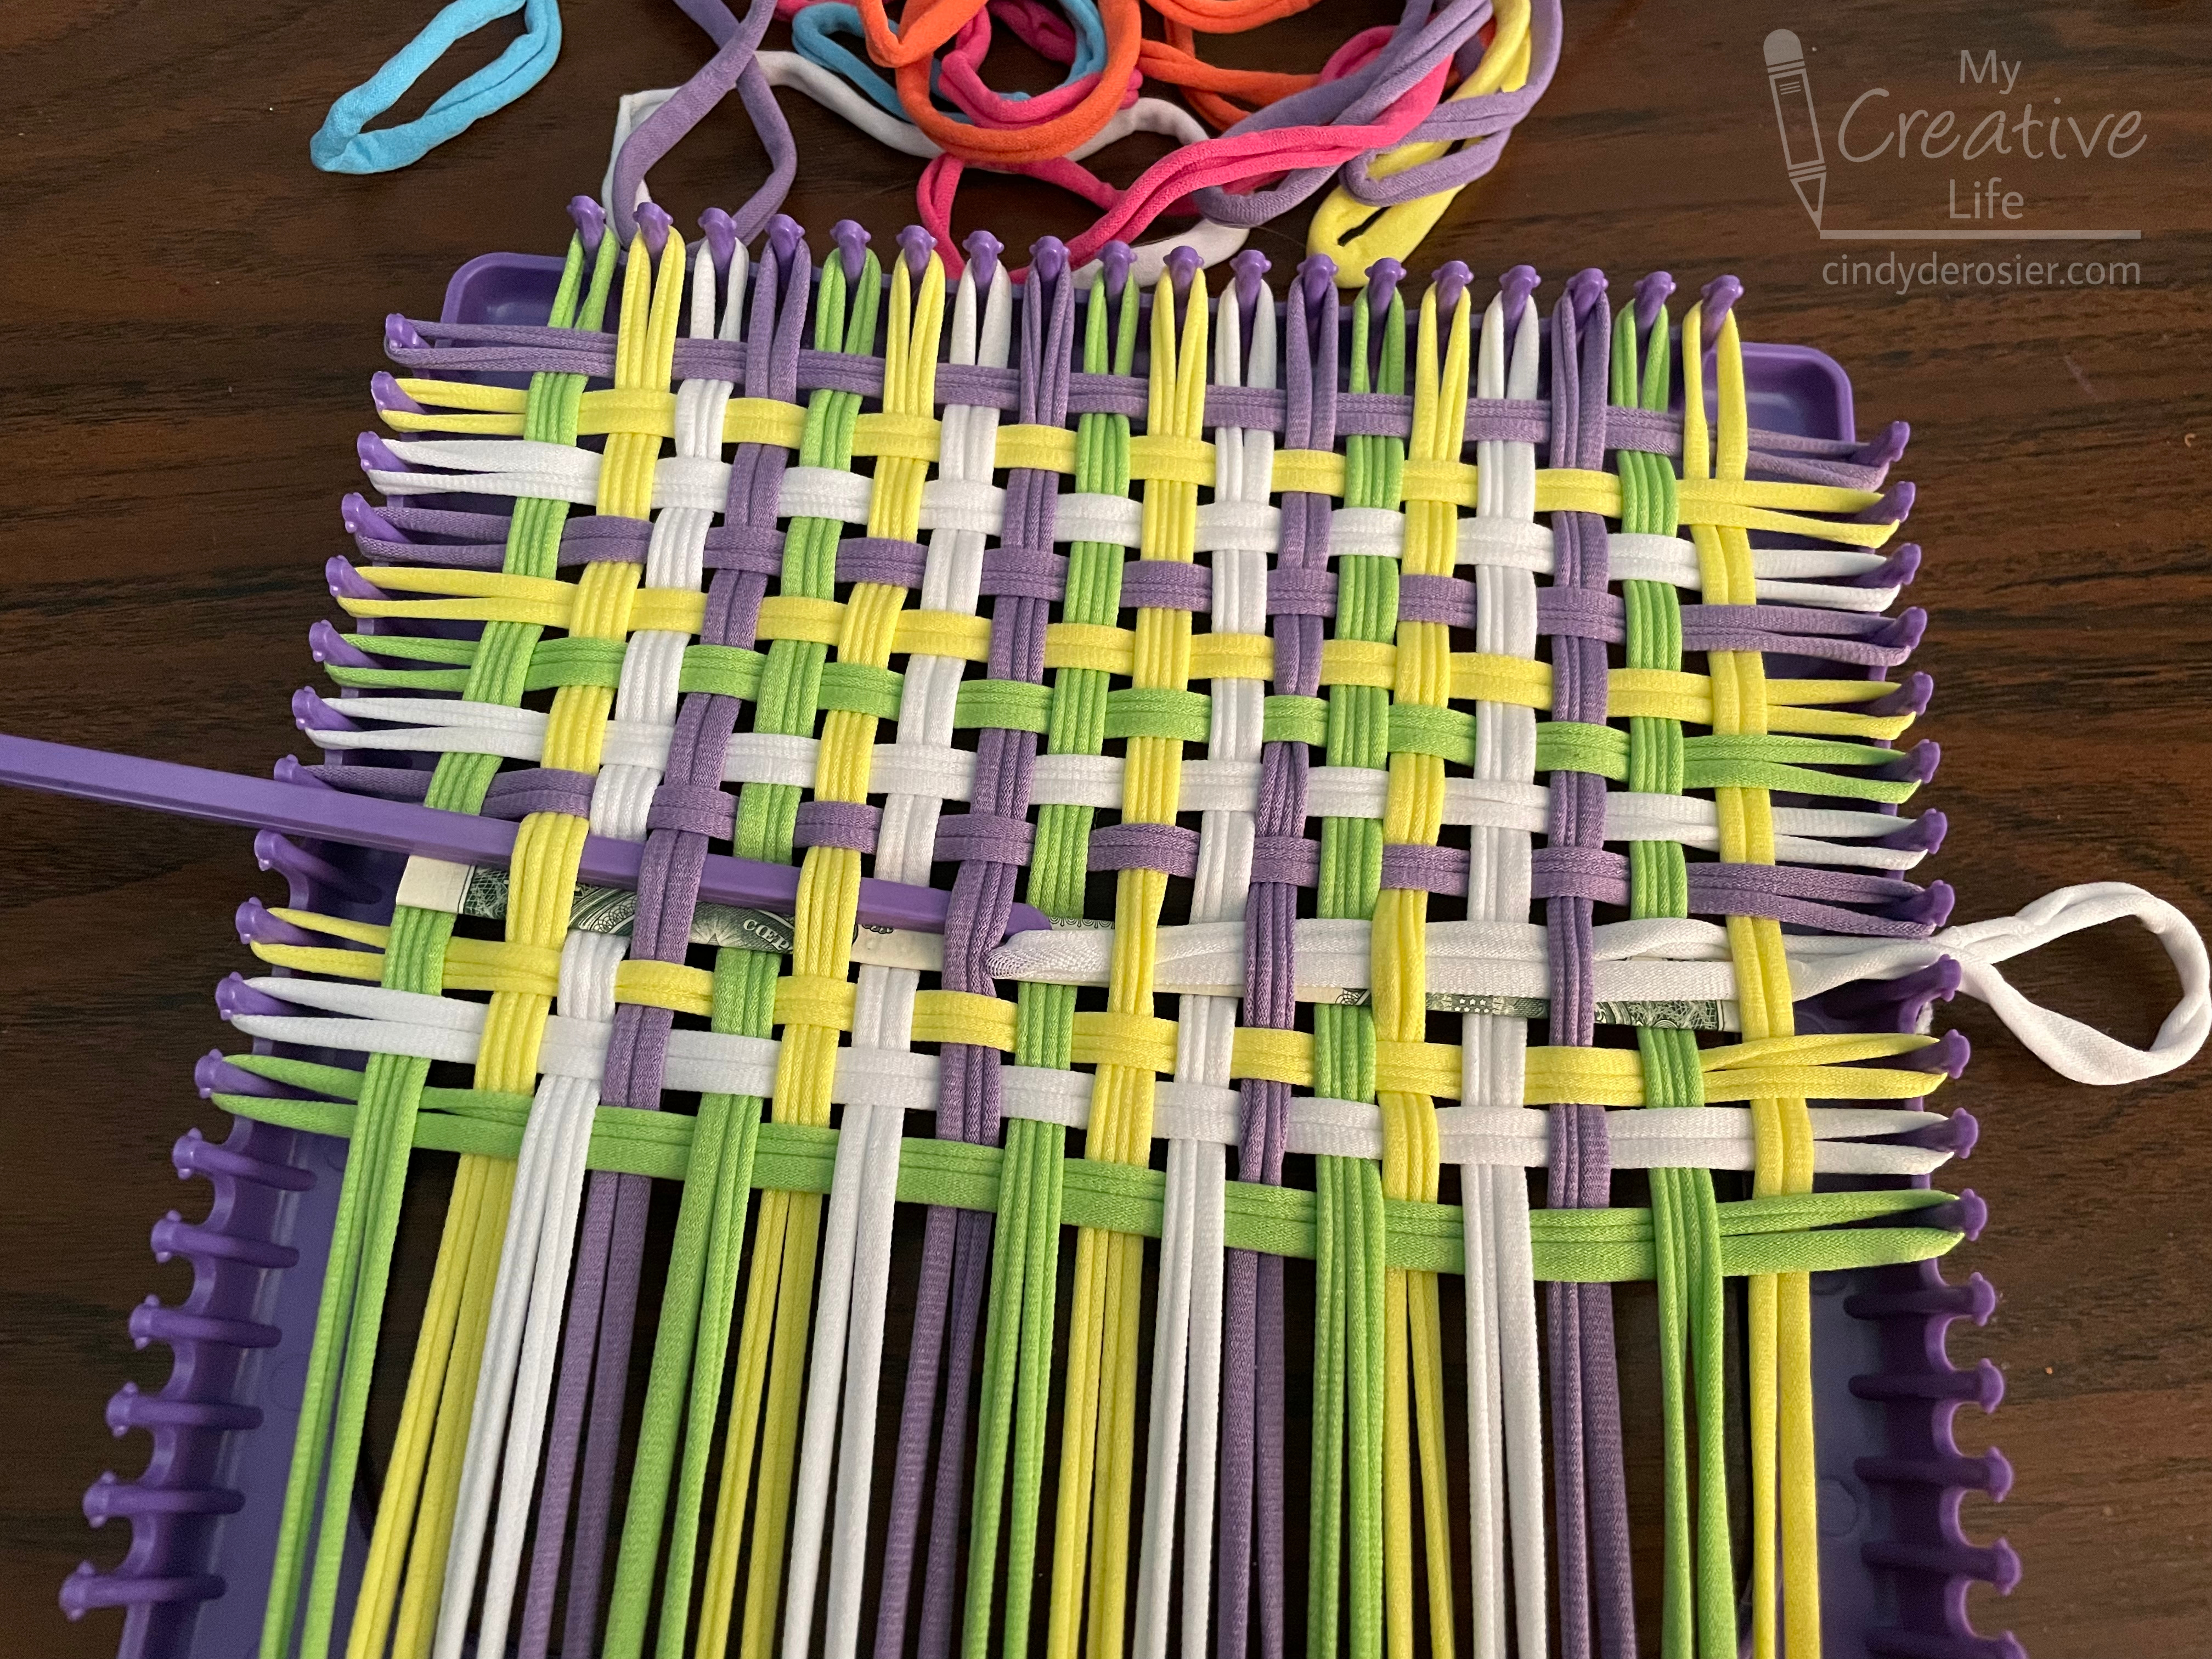
I added loops in one direction, folded a dollar bill so it was really skinny, and wove it into the potholder. So far, so good.  


I wove in more loops, then realized I needed a loop where the money was or I wouldn't be able to bind off properly. So I added a white loop over the dollar bill. 


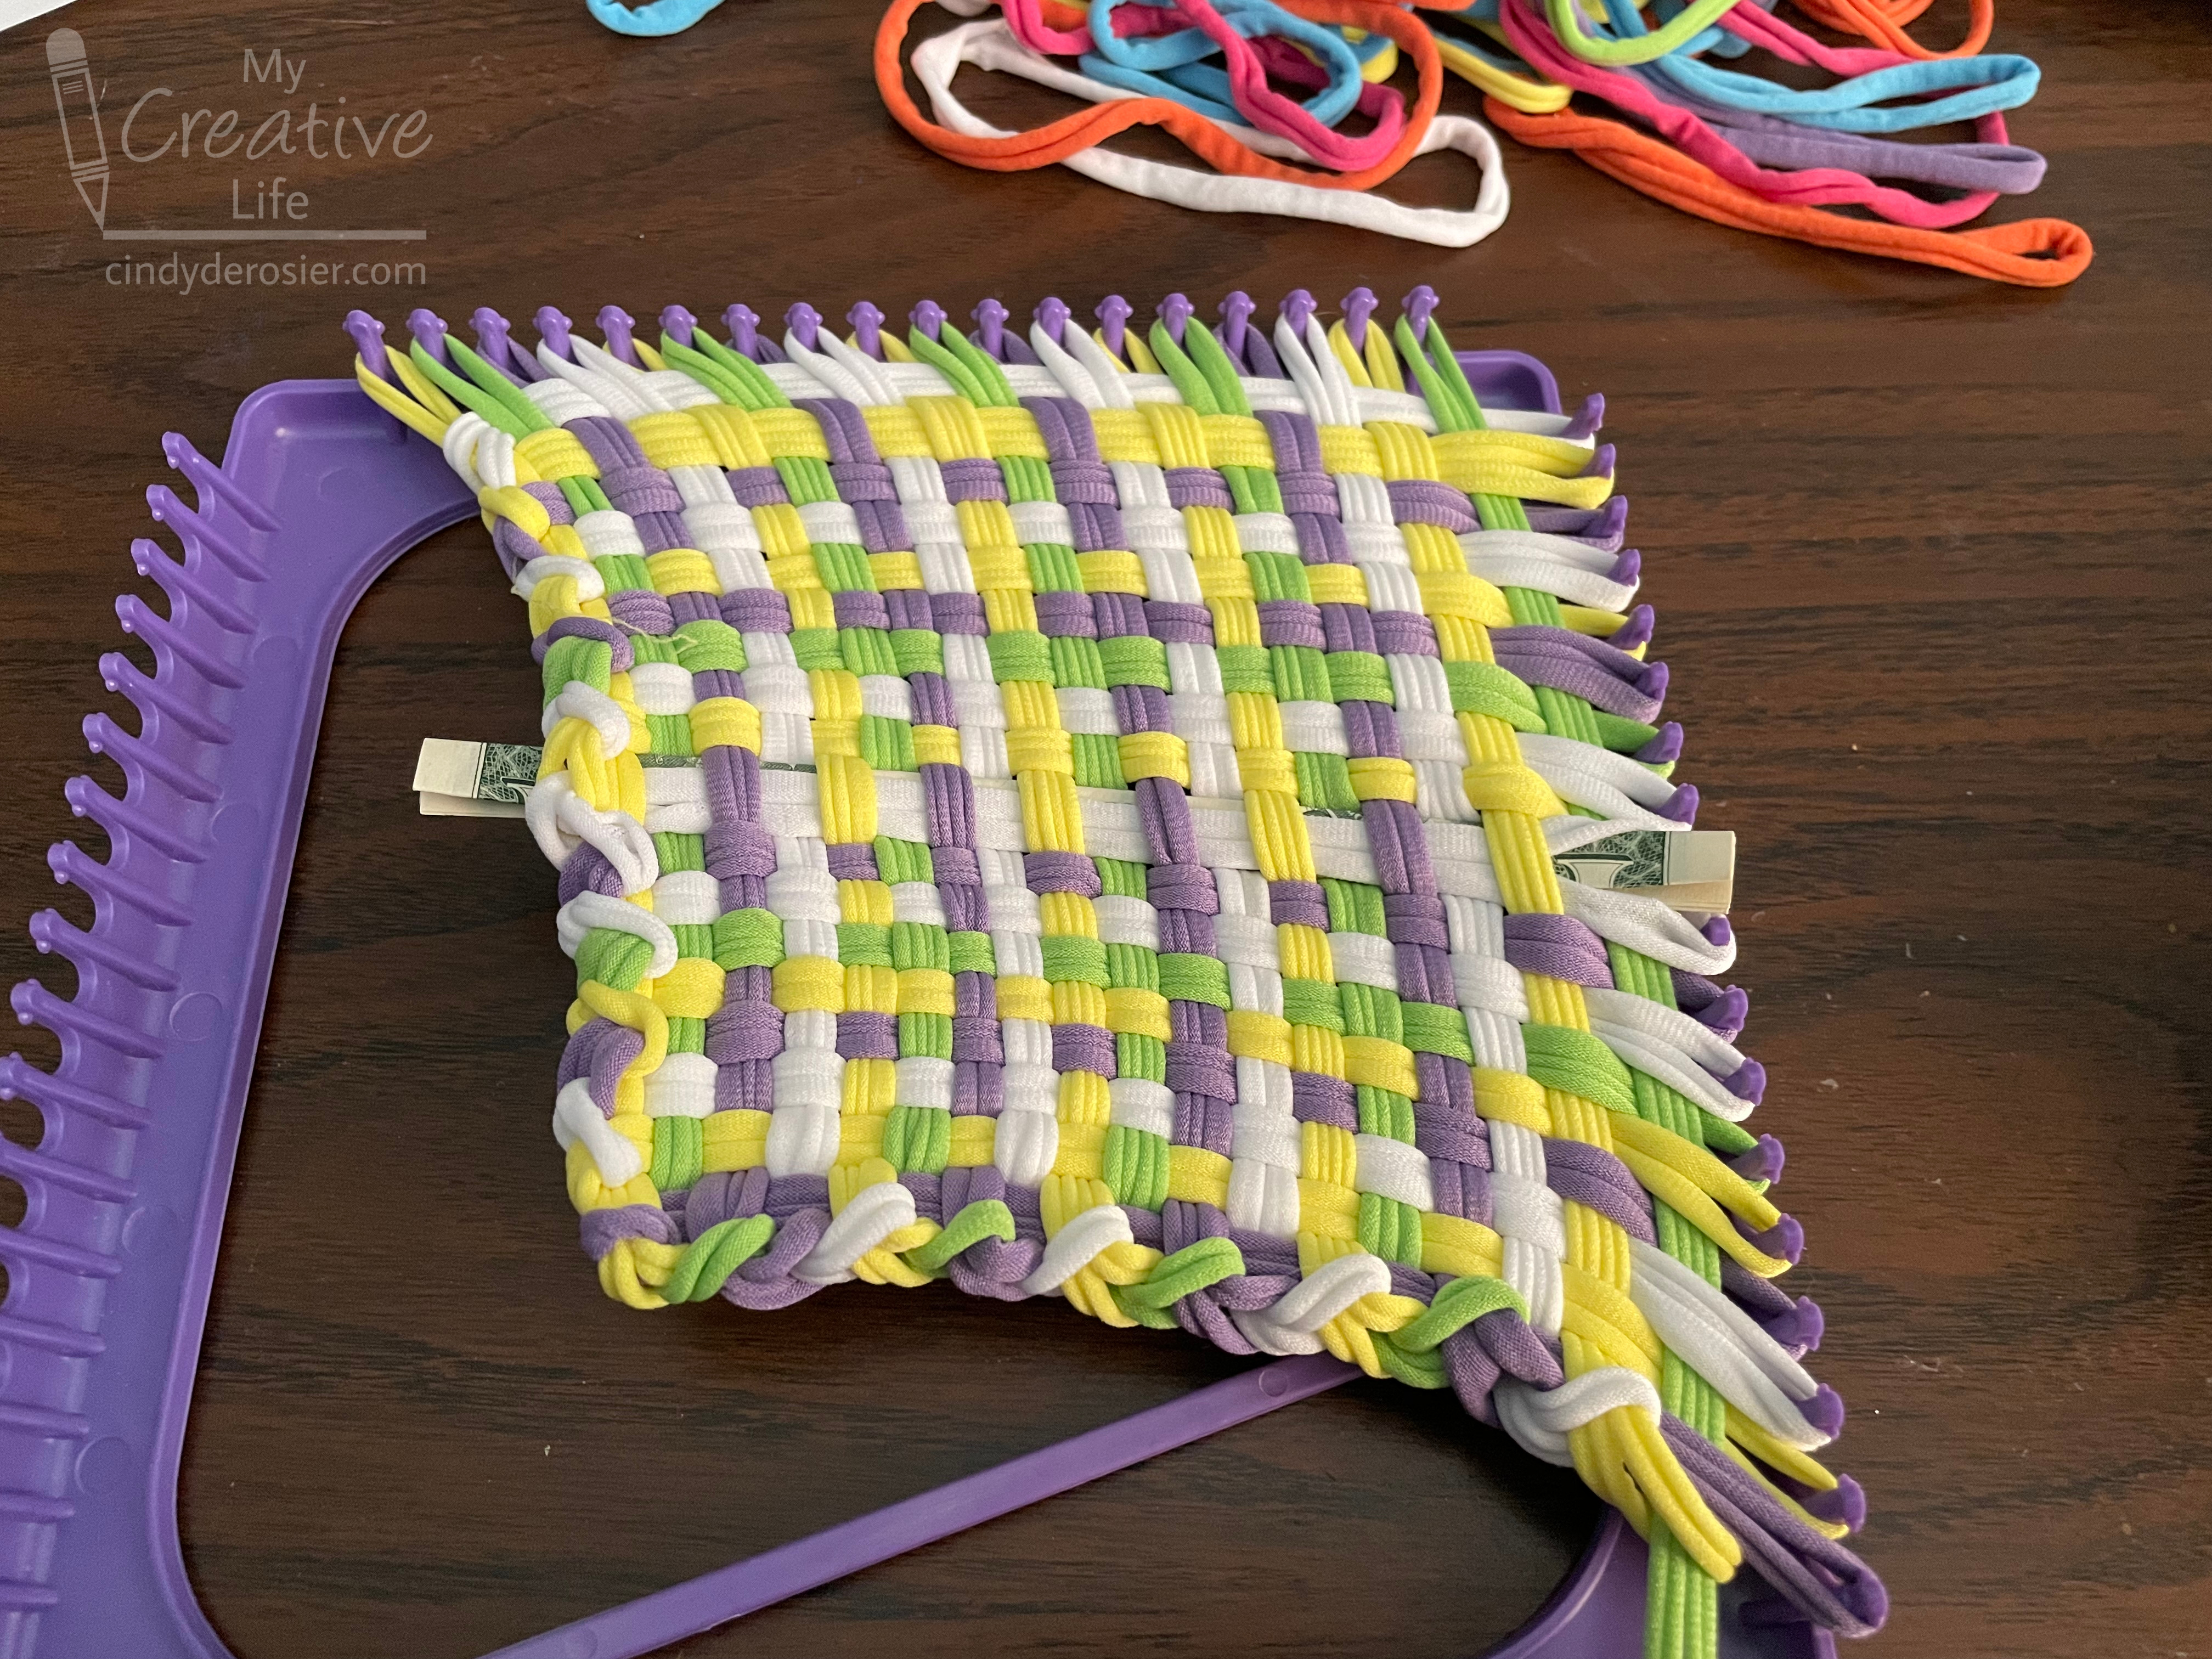
I was pleased with how hidden the money was when I finished. You can see it, but barely. It was more visible on the backside, but not bad. Time to bind off!


Uh oh. 


Darn it. I forgot how much smaller the finished potholders are than the loom. 


Fortunately, I was able to fold the ends over and weave them back in. This is the back (worse) side.... which isn't bad at all. You can see the money, but wouldn't necessarily notice it at first glance. 


For the second potholder, I started by folding the money smaller, plus I folded it so that the green portion was hidden and only the plain edge of the bill (this one's a $5) showed. 


The results were even better than the first one. Time for the dishtowel! I started with a purchased cotton dishtowel, then carefully opened up 1/2" of one of the hems. I folded the $10 and $20 bills up and slid them through the hole, one at a time, in opposite directions. 


Once I re-sewed the hem, you had to look really carefully to see that it was ever opened. The money was not visible at all (but you could feel it). If Timothy didn't know that I always hide money in his gifts, I don't think he would have even noticed it there. Even with the arrows pointing to the four hidden bills, it's pretty well disguised. 


Happy birthday to Timothy! Now I have about six weeks to figure out another money gift to give him for Christmas.

1/12/23

Hidden Money Gift: Necklace and Earring Set

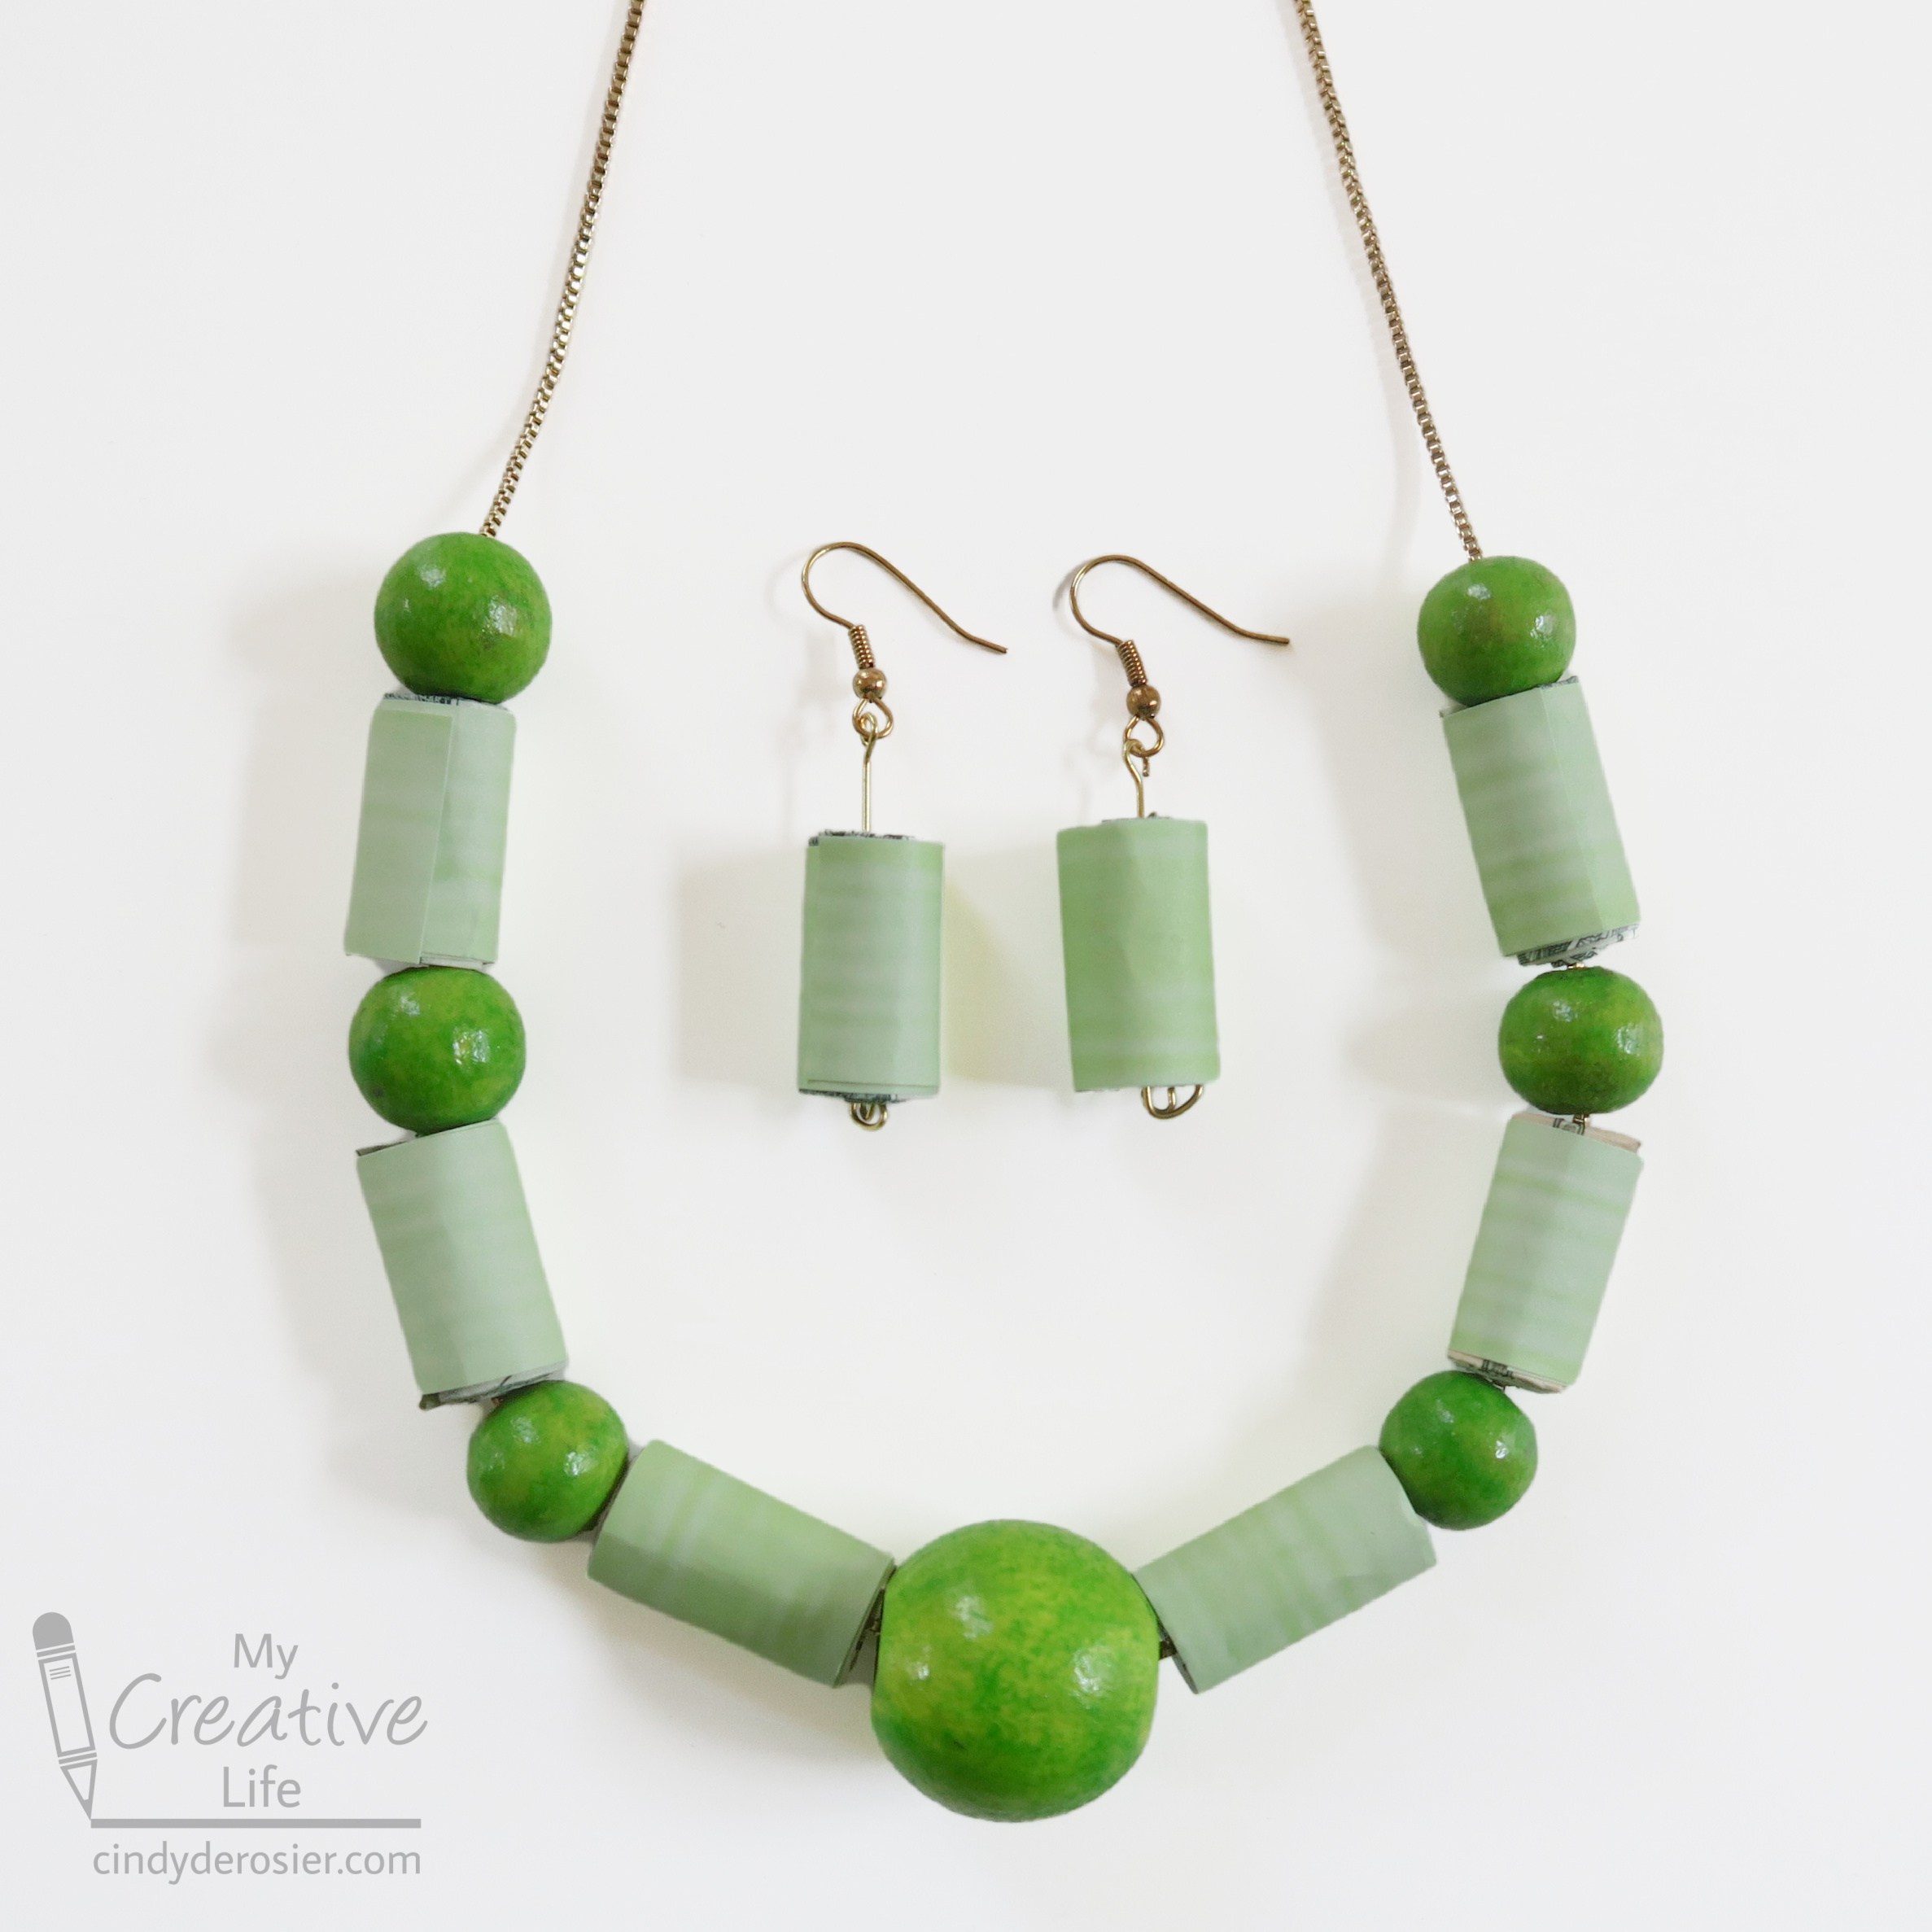
For Christmas, I made this necklace and earring set for my 22-year old nephew, Timothy. 


I haven't seen him for a couple of years, but as far as I know, he doesn't wear necklaces or earrings. In fact, I fully expected him to completely destroy this gift within 30 seconds of opening it. Why? Because he knows that every gift from me has hidden money inside. This one has 8 bills of varying denominations. Affiliate links below. 

---------


Hidden Money Gift: Necklace and Earring Set


Materials:


Steps: 

Paint the beads with acrylic paint. When the paint is dry, add Extreme Glitter. I found that putting the beads on a skewer and propping that up on paint bottles was the easiest way to paint them. 


Choose a patterned paper that coordinates with your beads. Cut 8 strips of paper, each slightly bigger than 3/4" wide by around 3" long. 

Working with one bill at a time, fold the bill lengthwise into thirds, creasing the fold well. Roll it into a tight bead. Wrap the patterned paper around it, adding glue only to the area where the paper overlaps itself. Don't get any glue on the money! Repeat for all 8 bills. 

In this picture, you can see the steps of prepping the money. The third bill is loose because I let go of it for the photo; you'll actually want it to be as tight as possible, as you can see with the finished bead on the right. 


Here's a look at a finished bead. 


To make the earrings, thread a bead onto an eye pin, then curl up the end to secure the bead in place. Use a jump ring to attach it to the earring hook. 

To make the necklace, arrange six paper beads (hidden money) and seven wooden beads in order. String them onto the necklace chain. Depending on the necklace and the beads, you may need to temporarily remove the clasp of the chain (if it's wider than the gap in the beads) and/or use a yarn needle to thread the beads. 


This is what the finished jewelry set looks like. 


Package your gift in an elegant jewelry gift box for an extra fun touch. Then wait and see how long it takes your recipient to notice that the necklace and earrings aren't actually the gift they think they are!

My sister sent me this photo of Timothy modeling his new jewelry (pre-destruction). I love it. 


Browse through the dozens of ideas for money gifts I've given to Timothy and others over the years. I love looking back at them. 

11/7/22

Wanted Poster Hidden Money Gift

My nephew, Timothy, just turned 22 (!). As always, I came up with a creative money gift for him. This year's is based on a wanted poster. It offers a $36 reward for finding 'The DC Gang.' 


I started by taking the same portraits I used for last year's Presidential Trading Cards and converting them to sepia. I arranged them on a blank document and added the text above and below. I printed the poster onto cream copy paper (affiliate link here and below). 

The next step was hiding the four members of The DC Gang. I took the two most recent issues of Scout Life magazine and looked for places where I could attach a bill and have it look like the portrait connected to the body in the magazine. I attached each bill with Micro Glue Dots, then gave the magazines a good shake to make sure they were firmly attached. 


Then I wrote a note with information about where the gang members were last spotted. They corresponded to the places in the magazine where the bill was hidden. For example, this photo of Andrew Jackson shows him rock climbing in Palo Duro Canyon. George Washington (above) is playing football in Los Angeles.


Happy birthday, Timothy! 

6/13/22

Money Gift Inspired by Guy's Grocery Games

You might remember a post from a few years ago in which our family played a version of Guy's Grocery Games that we called Trevor's Tasty Tournament. In it, we recreated three of the wacky games that the contestants on the show face. It was a really fun challenge and we had a delicious 3-course meal. We did not include the money round at the end, where the winning contestant races around Flavortown Market finding five grocery items based on clues. But that's exactly what I used to give Trevor money for his 16th birthday. 

On the show, players compete for up to $20,000 in cash by shopping Flavortown Market. Obviously, we weren't giving Trevor that much money and we don't have access to the market. Instead, Trevor unwrapped this: 


I explained that there were 5 clues on the dining room table, each worth 4000 cents (aka, $40). His job was to read a clue out loud, then race into the kitchen and bring back the correct item. 


Here is each card, in case you'd like to test yourself before I give the answers away. 


Trevor read the first clue and was back with the Cheerios within seconds. He read the next and returned quickly with the mustard. 


It took him a bit longer to find the cinnamon and he struggled trying to figure out the baking soda. He didn't know the answer to the Mac n Cheese, so he just brought back every blue box he could find. In the end, he earned his 20,000 cents. 


This was so much more fun than just handing him money would have been, and it only took me about 20 minutes of work to design the the clue on PicMonkey and print them out. It was well worth it. It was a lot of fun watching him race around the kitchen in a panic, playing a game he'd watched so many times on TV. 

If you're looking for more creative ways to give cash, check out my Money Gifts page. You'll find over 30 fun ideas.