Showing posts with label handprint. Show all posts

1/16/23

With This Hand - My Tribute to Being a Lefty

If you look back at the handprint crafts I've done over the years, the vast majority feature my right hand. Why? Because I'm left-handed, it's easier to trace around (or paint on) my right hand. Being a lefty is a big part of my identity, so I decided to make a project to celebrate my left hand specifically. Obviously, right-handers could make the same project featuring their dominant hand. Affiliate links below. 

With This Hand


Materials:


Steps: 


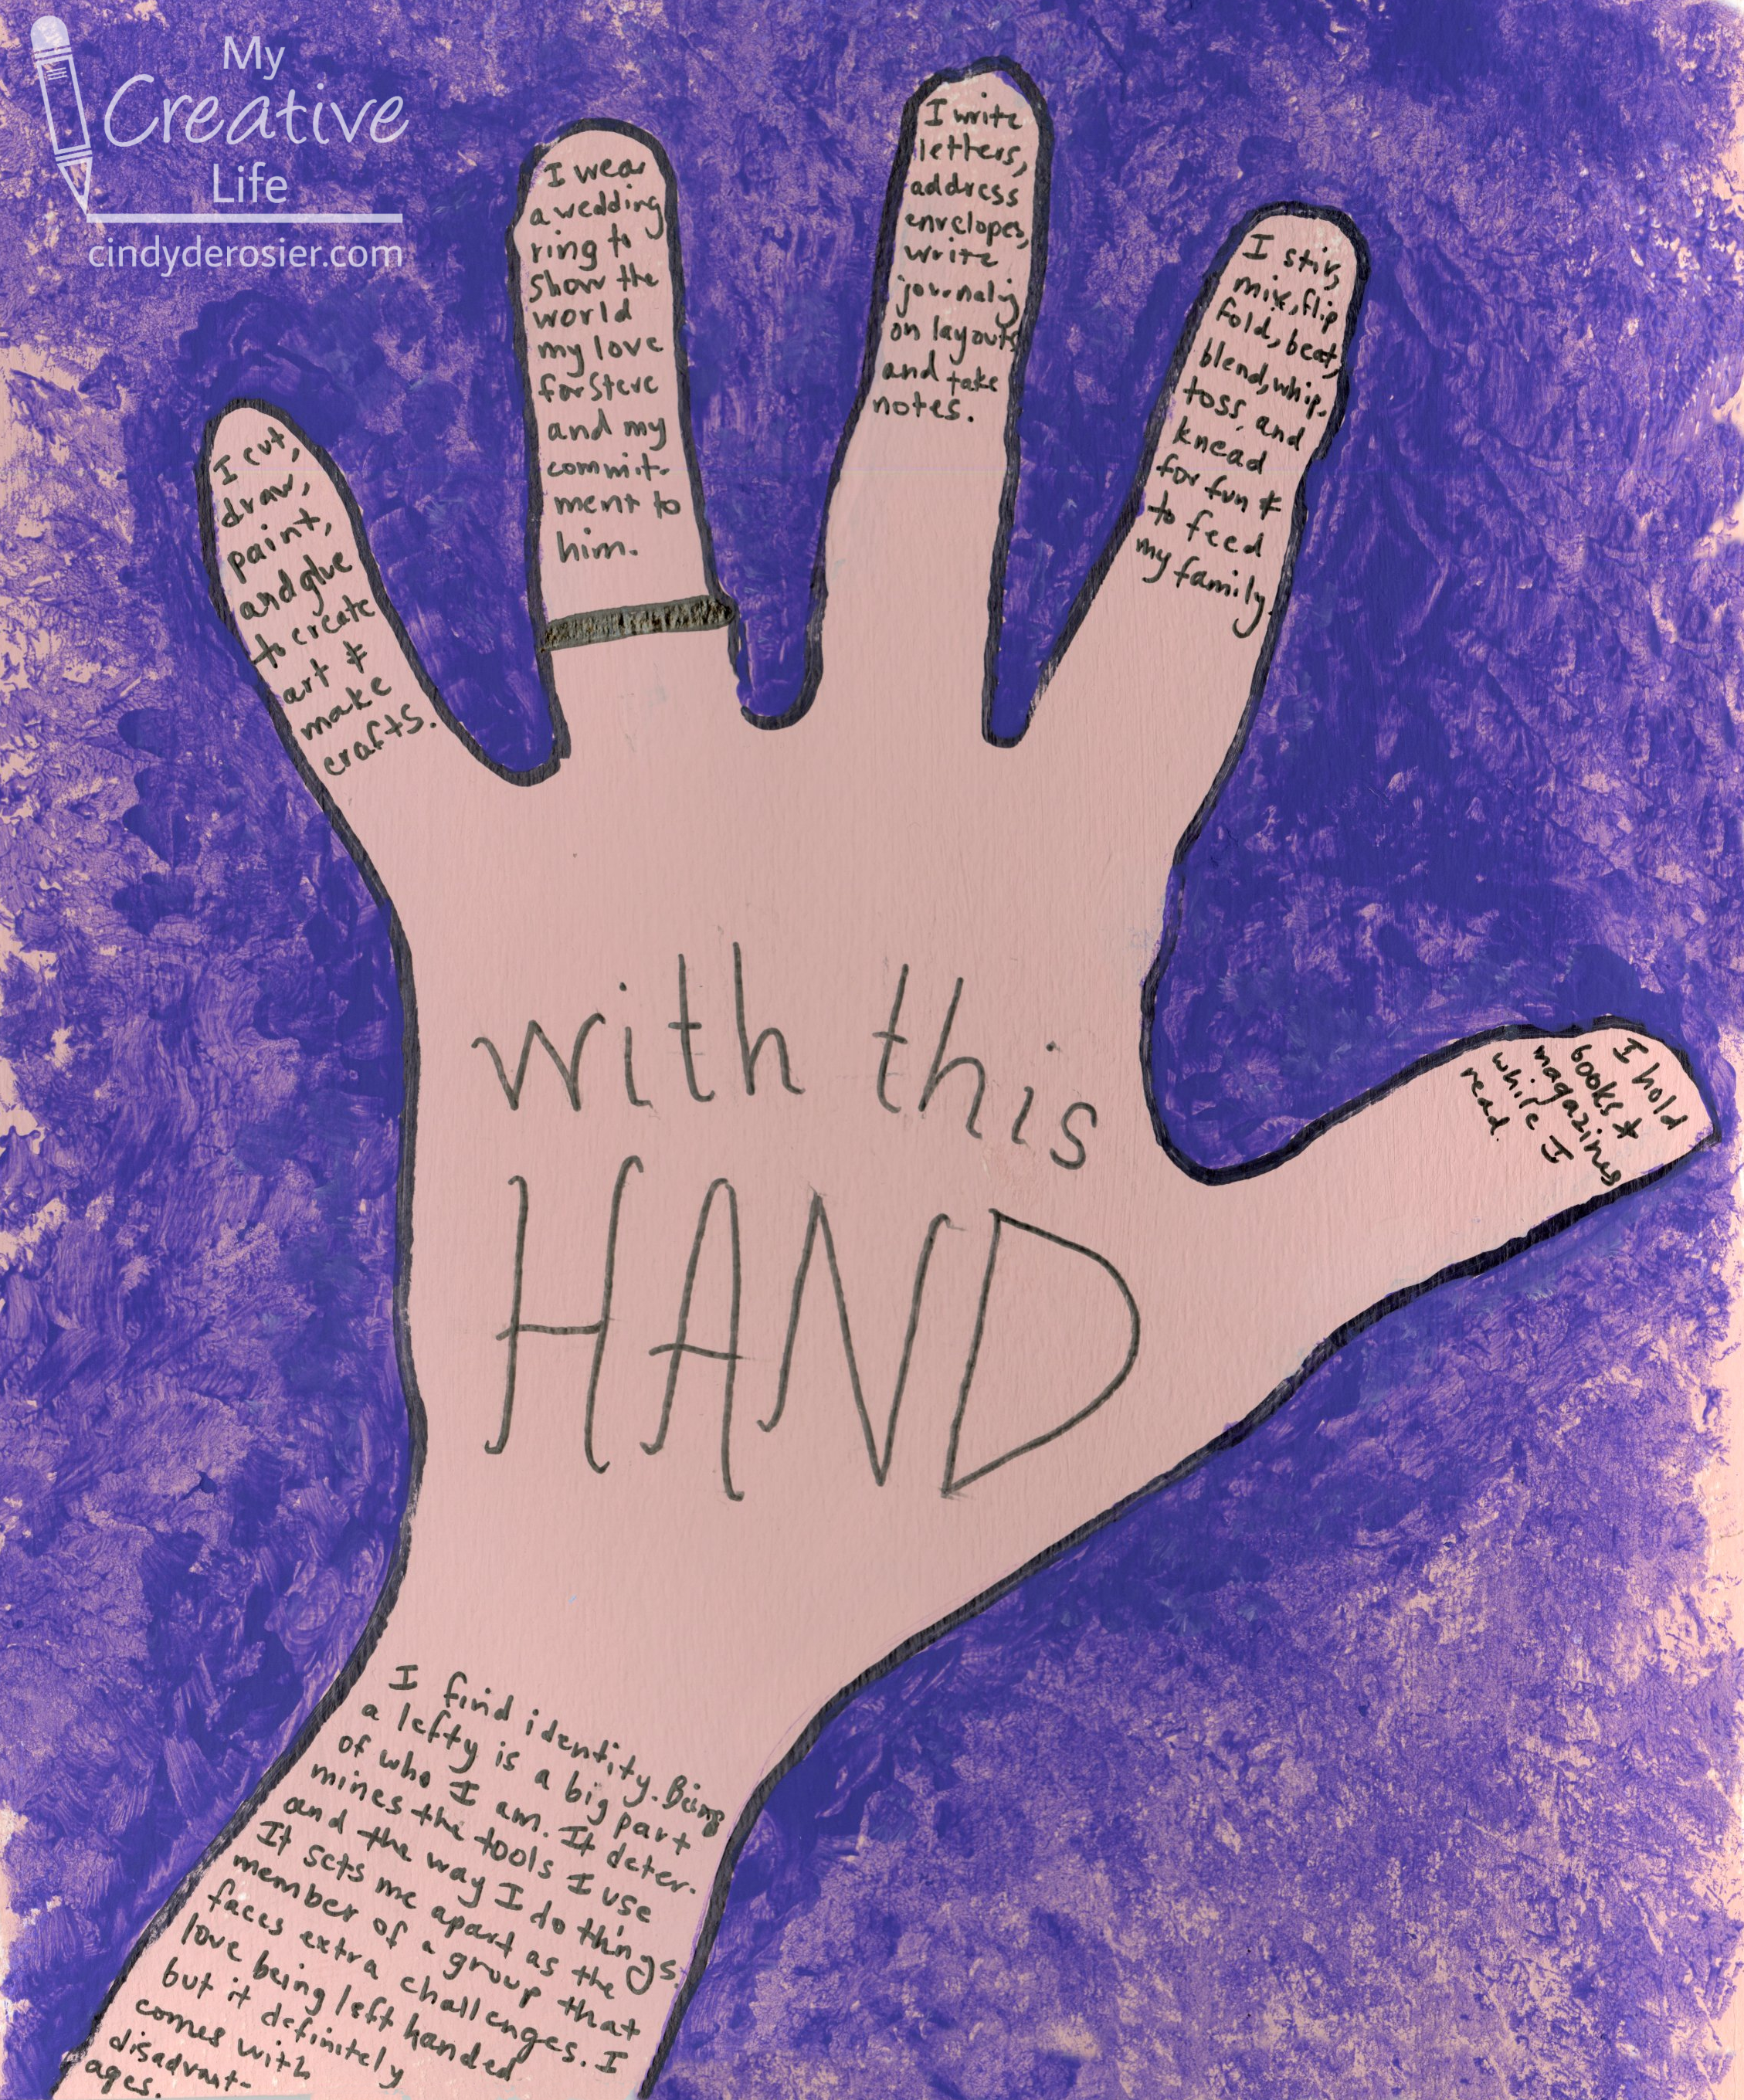
Paint a page in the sketchbook with the skin tone of your choice. When the paint is dry, position your dominant hand on the paper and trace around with a fine-tip Sharpie. Trace as close to your hand as possible. 

With your dominant hand still in position, use a sponge to dab a contrasting color of paint all around your hand. You will get some paint on your hand. 

Remove your hand and wash it. Then use the sponge to touch up any areas where the contrasting paint didn't quite reach the outline of your hand. As you can see, doing this makes the paint denser immediately around the hand. 

When the paint is dry, use an ultra-fine Sharpie to write WITH THIS HAND. Then write on each finger (and down the arm, if desired), focusing on things you do using that hand. On my pinky finger, I wrote about drawing, painting, and the other artsy things my left hand does. My ring finger has a wedding ring, so I talked about the important role my left hand has in showing the world my commitment to Steve. On my middle finger, I wrote about writing, a big part of my life. My pointer finger talks about the stirring and folding and mixing my left hand does as I cook and bake to feed my family. My thumb talks about the books and magazines I read as I hold them in my hand. I continued down my arm, writing about my identity as a lefty. 

 

2/23/22

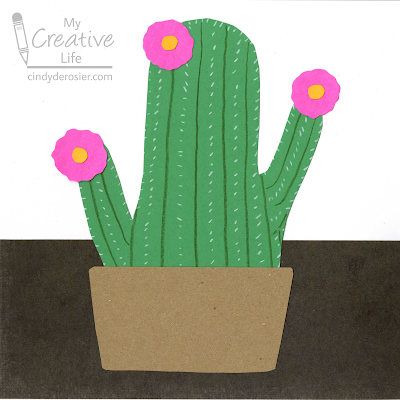
Handprint Saguaro Cactus

It's been awhile since I've shared a handprint craft. Did you recognize that the cactus is a handprint? 


Handprint Saguaro Cactus


Materials:

  • construction paper
  • scissors
  • colored pencils
  • craft glue

Steps: 


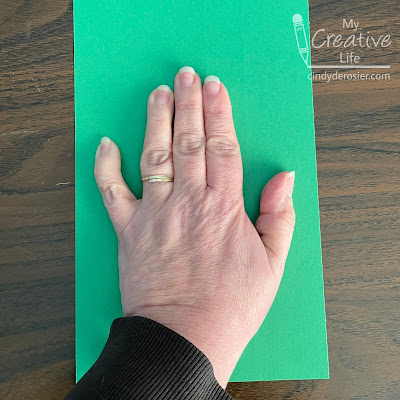
Position your hand on a piece of green construction paper with your three middle fingers together and your thumb and pinkie separate. Bend your thumb and pinkie slightly so they point upward like the arms of a cactus. Trace around your hand. 


With a pencil, lightly round off the top of your handprint so that you have one barrel-shaped cactus instead of three distinct fingers. Cut out the handprint. 

Use a green colored pencil to draw the ribs of the cactus. Then use a white colored pencil to draw little tick marks between the ribs for the needles. 

Cut a piece of tan construction paper into a pot that is slightly wider than your handprint. Then cut three wavy circles from bright pink and three small circles from yellow to make the flowers. 

Glue a strip of brown construction paper to white to make the background. Then glue the cactus into place. Add the pot and the flowers. 


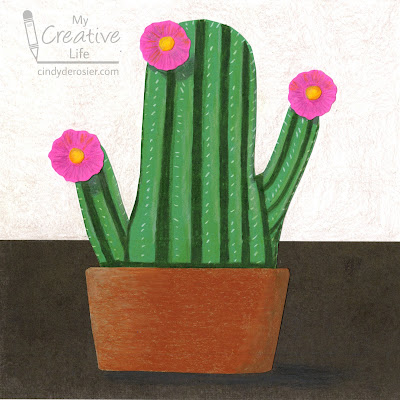
You can stop there, but I wanted to see what I could do to turn this simple preschool craft into something more challenging for older kids. Here's what it looked like after I thickened the ribs, added shadows to the flowers, colored the pot to look more like terra cotta, and added a little bit of color to the background to mimic a textured wall.  


If you're going to enhance the craft with colored pencils, do so before you glue everything together. I felt limited in what I could do since everything was already glued down. Still, it was a fun challenge for me. 

11/15/21

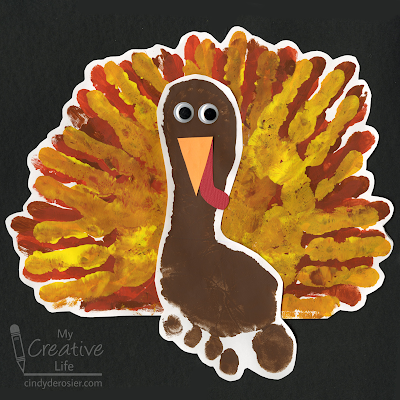
Handprint and Footprint Turkey

We're fifteen days into November and I haven't posted any turkey crafts yet. Time to change that! Today's project is a turkey made from handprints and a footprint. 


Handprint and Footprint Turkey


Materials:

  • construction paper or drawing paper (white, red, orange)
  • paint (brown, rust, orange, yellow)
  • foam brush
  • scissors
  • googly eyes
  • glue

Steps:


Put a sheet of white paper onto a hard floor (not carpet). Use brown paint and the foam brush to apply paint to the bottom of one foot, then step onto the paper to get a good footprint. Set the paper aside to dry, then wash your foot but not your paintbrush.
 
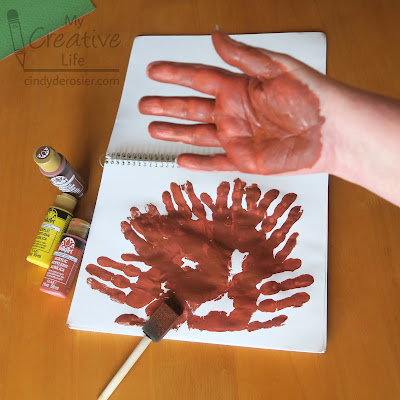
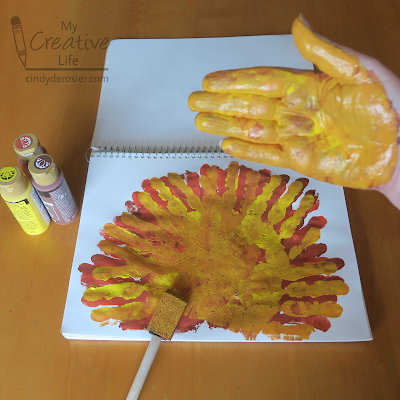
Put a second sheet of white paper onto a hard surface, like a table. Or the floor. Paint rust-colored paint onto one hand (it will mix with the brown already on the brush), then stamp it on the bottom left of the paper with your fingers pointing to the left. Add more paint to your hand and stamp five more times, rotating your hand 20°(ish) each time. You'll end up with a semi-circle of red-brown turkey feathers. Don't worry if there are gaps; they'll be filled with the next two layers. 


Without cleaning your hand or the brush, paint your hand orange. Stamp it the same way as with the rust- a total of 6 times, with each handprint rotated 20° clockwise. Do the same thing with yellow. Since all the layers are still wet, the colors will blend.  


Now you can wash your hand and the brush. Take a break; the footprint and handprints need to dry completely before you can continue. 

When the paint has dried, cut out the footprint, leaving a small border of white around the edges of the print. Do the same with the handprint feathers. Then cut out an orange triangular beak and a red wattle. Glue the footprint to the feathers, then add the googly eyes, beak, and wattle. 


Tomorrow I have a fun edible turkey craft to share. 

10/28/21

Halloween Handprints: Witch, Frankenstein, Mummy, Skeleton, and.... Zombie!

Did you guess that the fifth and final Halloween handprint craft would be a zombie? This was really fun to make, but the most difficult of the five. I don't know anything about zombies, having never watched nor read a zombie show, movie, or book. In fact, my entire knowledge of zombies comes from the 2013 Mythbusters Zombie Special. Which, I suppose, isn't nothing. But I wasn't paying much attention to the extras' hands, unfortunately.

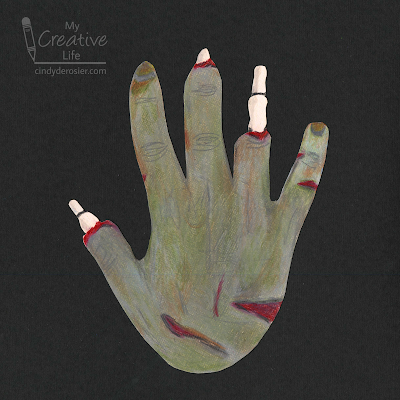
In retrospect, I think my hand looks a little too fresh. I'm pretty sure this is the first time I've ever looked at one of my crafts and thought, "You know what this needs? More decay."


Zombie Handprint


Materials:

  • off-white cardstock
  • scissors
  • colored pencils

Steps: 


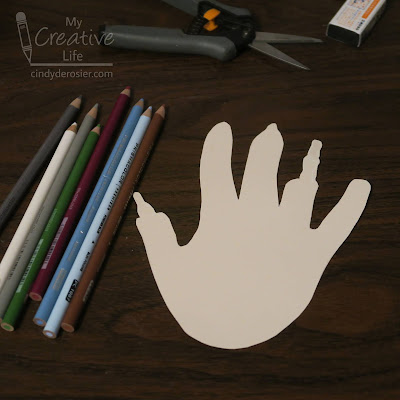
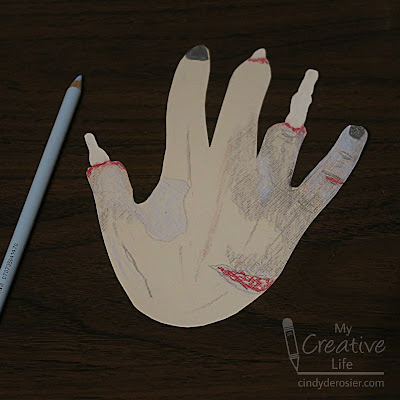
Trace your hand onto a piece of cardstock. Trim away the flesh portion of a few fingers so that the bones show. I eliminated two joints' worth of flesh on my ring finger, one on my thumb, and just a little bit on my middle finger. 


I started by roughing in the areas of bloody and peeling skin, then added dark fingernails. 


I gave the whole hand coats of greys, blues, greens, and browns. After blending the colors, I added back some lines in the skin. 

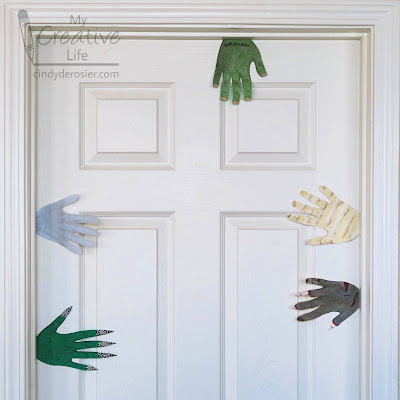
Here's how all five hands look together:


I'd originally thought I'd hang them together as a banner, then I toyed with the idea of making a handprint wreath. For now, they are taped on the closet door. 


These were a lot of fun to make, but it's time to set them aside and start working on our Halloween costumes. (Yes, start. And it involves my nemesis, the sewing machine. Wish me luck!)

10/25/21

Mummy Hand

The third in my series of "turn my handprint into a Halloween-inspired hand" is this mummy. It was the quickest and easiest of the three to make. The key is applying the tape before cutting out the handprint so that you don't have to navigate all the fingers. 


Mummy Hand


Materials: 

  • cardstock
  • masking tape
  • scissors
  • chalk

Steps: 


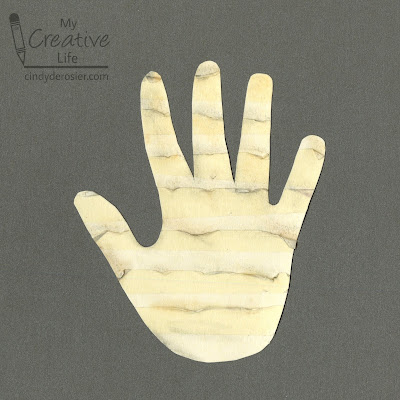
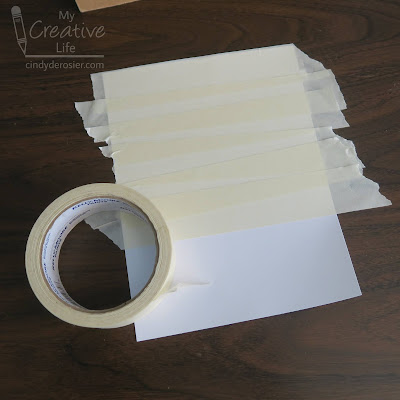
Start with a rectangular piece of cardstock that is slightly larger than your hand. Cover it with overlapping strips of masking tape. Don't line everything up - it looks better the more carelessly the tape is placed. 


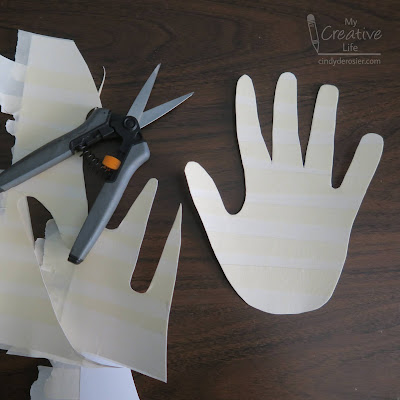
Trace your hand onto the taped cardstock and cut it out. 


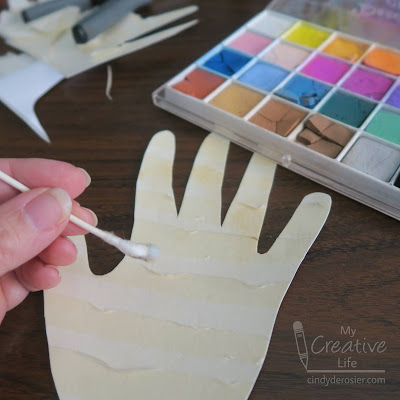
Use your fingernails or the blades of the scissors to rough up the edges of the masking tape. Peel it back in some places. Then add brown, grey, and black chalk to the roughed-up parts where dirt would naturally collect. 


Add some 'dirt' in other areas also. When it is suitably grungy, you're done!


I'm running out of time to add more hands my collection before Halloween gets here. How is it already late October?!

10/19/21

Frankenstein Hand

I loved my witch hand so much that I thought about making enough to link them together for a banner. Later, I realized it would be more fun to have a banner with a bunch of different Halloween hands. I'm not sure how many I'll eventually do, but for now I have one more: Frankenstein! (Technically, Frankenstein's monster, but whatever.) 


Frankenstein Hand


Materials:

  • cardstock (light green, cream)
  • microtip scissors
  • colored pencils
  • craft glue


Steps:


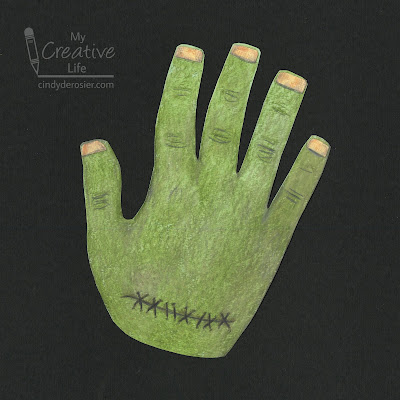
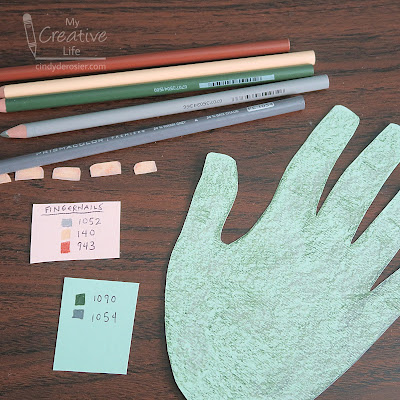
Trace your hand onto the light green cardstock. Cut out the hand, then snip off the last 1/4" of each fingertip. Round just the corners of the snipped-off fingers. Use green and grey colored pencils to add knuckle lines and shadows, then shade in the hand.  

Cut five tiny rectangles from cream cardstock. Each should be the width of one of your fingernails, but much shorter. Shade them with grey, cream, and brown to look like old, diseased fingernails. 


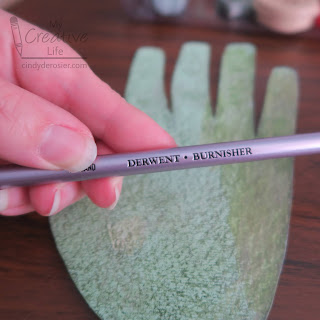
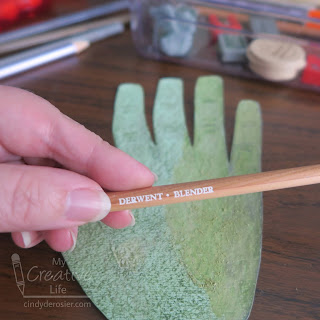
As an aside, if you've been following my colored pencil journey, you know that I'm eager to try out what I've been learning. When I was cleaning up after finishing my pencil inventory, I found an unopened package with a Derwent burnisher and blender (affiliate link) in with my pastels and charcoal pencils. I have no idea when I got them. I tried both on the Frankenstein hand to get a feel for them. 


You don't need to do this for your Frankenstein hand. But you can. 

Use a dark grey to draw knuckle lines and a row of stitches. I have no idea if Frankenstein's (monster's) hands are stitched on versus already attached to 'donor' arms, but I like the look. It makes it more Frankenstein ('s monster) than random ogre.

Finally, glue the fingernails in place. 


I'm excited to start working on my next Halloween hand. So many ideas... I'm not sure which to do next. 


10/15/21

Witch Hand with a Spiderweb Manicure

I love handprint crafts. It's so much fun thinking of clever ways to transform a handprint into something entirely different. This time, I turned my handprint into....  a hand.  


A witch hand, to be specific. So it's not the most clever transformation of all time, but it was really fun to make. Affiliate links below. 


---------

Witch Hand with a Spiderweb Manicure


Materials:


Steps: 


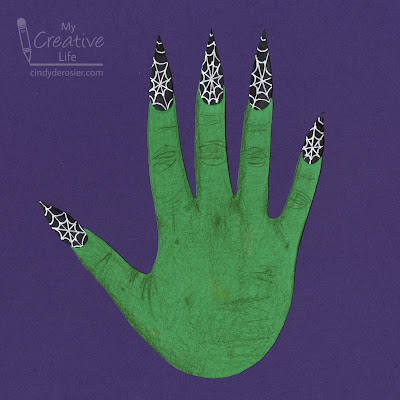
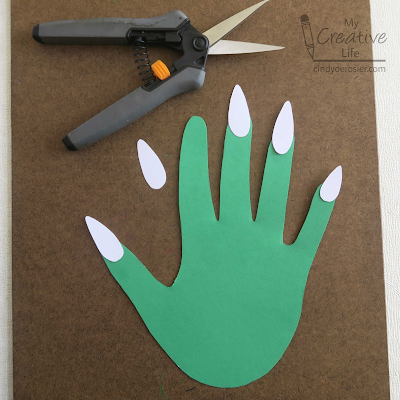
Trace your hand on green construction paper and cut it out with microtip scissors. Cut a pointy nail for each finger from black cardstock. (I used white and ended up coloring the fingernails black with a Sharpie. Save an unnecessary step and start with black cardstock.)


Use the back of your hand as a guide to draw knuckles, lines, and shadows on the witch's hand. Add texture to the skin by lightly coloring in small circles over the lines you've drawn. Add moles/blemishes as desired. Draw a spiderweb pattern on the fingernails using the white pen, then glue the fingernails to the hand. 

I love the way it turned out. I'm tempted to make enough for a banner, which is exactly how I'd display them if I had a classroom's worth of witch hands. 

12/7/20

Sledding Dog Handprint Craft

Have you seen the video of Secret, the dog who takes herself sledding? It's adorable. It was filmed in 2018 but is making the rounds again as we approach winter. If you haven't seen the video, go watch it now. 

Today's craft is inspired by Secret, although I chose to change her from her black-and-white self to brown. Her proportions are a little different as well, because I used my handprint to make her. Affiliate links below. 


Sledding Dog Handprint Craft


Steps: 


Trace your handprint onto brown cardstock. Carefully cut it out, then use the scraps to cut ears, a fluffy tail, and tree trunks. Glue the googly eye, the ears, and the tail to the handprint, then color the tip of the nose black. 

Cut two slopes from white cardstock, then cut the snow for the tops of the trees from the scraps. Cut out a blue sled and some green trees. Assemble the trees by gluing the trunks and the snowy tops to the trees. 

Glue the slopes to the background paper. Glue the dog in place, then glue the sled over the fingertips so it looks like the dog is standing in the sled. Finally, glue the trees in place.

3/8/19

Basketball Handprint Painting

A second basketball craft in one week?! It's like I don't even know me! 


Before I get to the tutorial, let me give you a glimpse into how this basketball craft came to be. I sat down on Wednesday morning to work on Fun Family Crafts:
(opens Fun Family Crafts Pinterest account)
Let's see... good traffic on St. Patrick's Day. Spring is picking up. Oh wow - basketball is doing really well. We should do something with that. I wonder if we have enough good basketball crafts to do a roundup.
(opens Fun Family Crafts and searches the basketball tag)
Scroll, scroll... OK, we have some good stuff, a lot of it edible. Some simple, some more difficult, good. I could do a roundup, but I should probably see if I can find one more solid craft. Something unique.
(googles "basketball craft")
Scroll, scroll... hm. Cool idea, terrible photo. Ugh, seen that one a million times. Nice, but that's more generic sports than basketball. Cute referee craft. Are those basketball referees though? What to basketball referees wear? Are they even called referees, or do they have a special name? 
(googles "basketball referees")
OK, standard stripes. I don't think that referee craft screams basketball though. 
(returns to "basketball craft")
Let's see... scroll, scroll... wait, that's cool! Love the texture on that basketball. How did she do that?
(opens blog with cool textured basketball craft)
Oh wow. That's so clever! I'm going to feature this!
(returns to Fun Family Crafts, writes and schedules post)
OK, we're pretty good for a basketball roundup now. I should get started on it before.... You know, we don't have a handprint basketball craft... 
(drops everything and makes basketball craft)

And I still haven't done the basketball roundup. But now I have a basketball handprint craft that I can add to it when I do!

---------


Basketball Handprint Painting


Materials:


  • large white drawing paper 
  • pencil
  • black Sharpie
  • Folk Art paint (I used Dark Hydrangea, Winter White, Medium Gray, Lipstick Red, and Pure Orange)
  • Delta Creamcoat Paint (I used Soft Peach)


Steps:

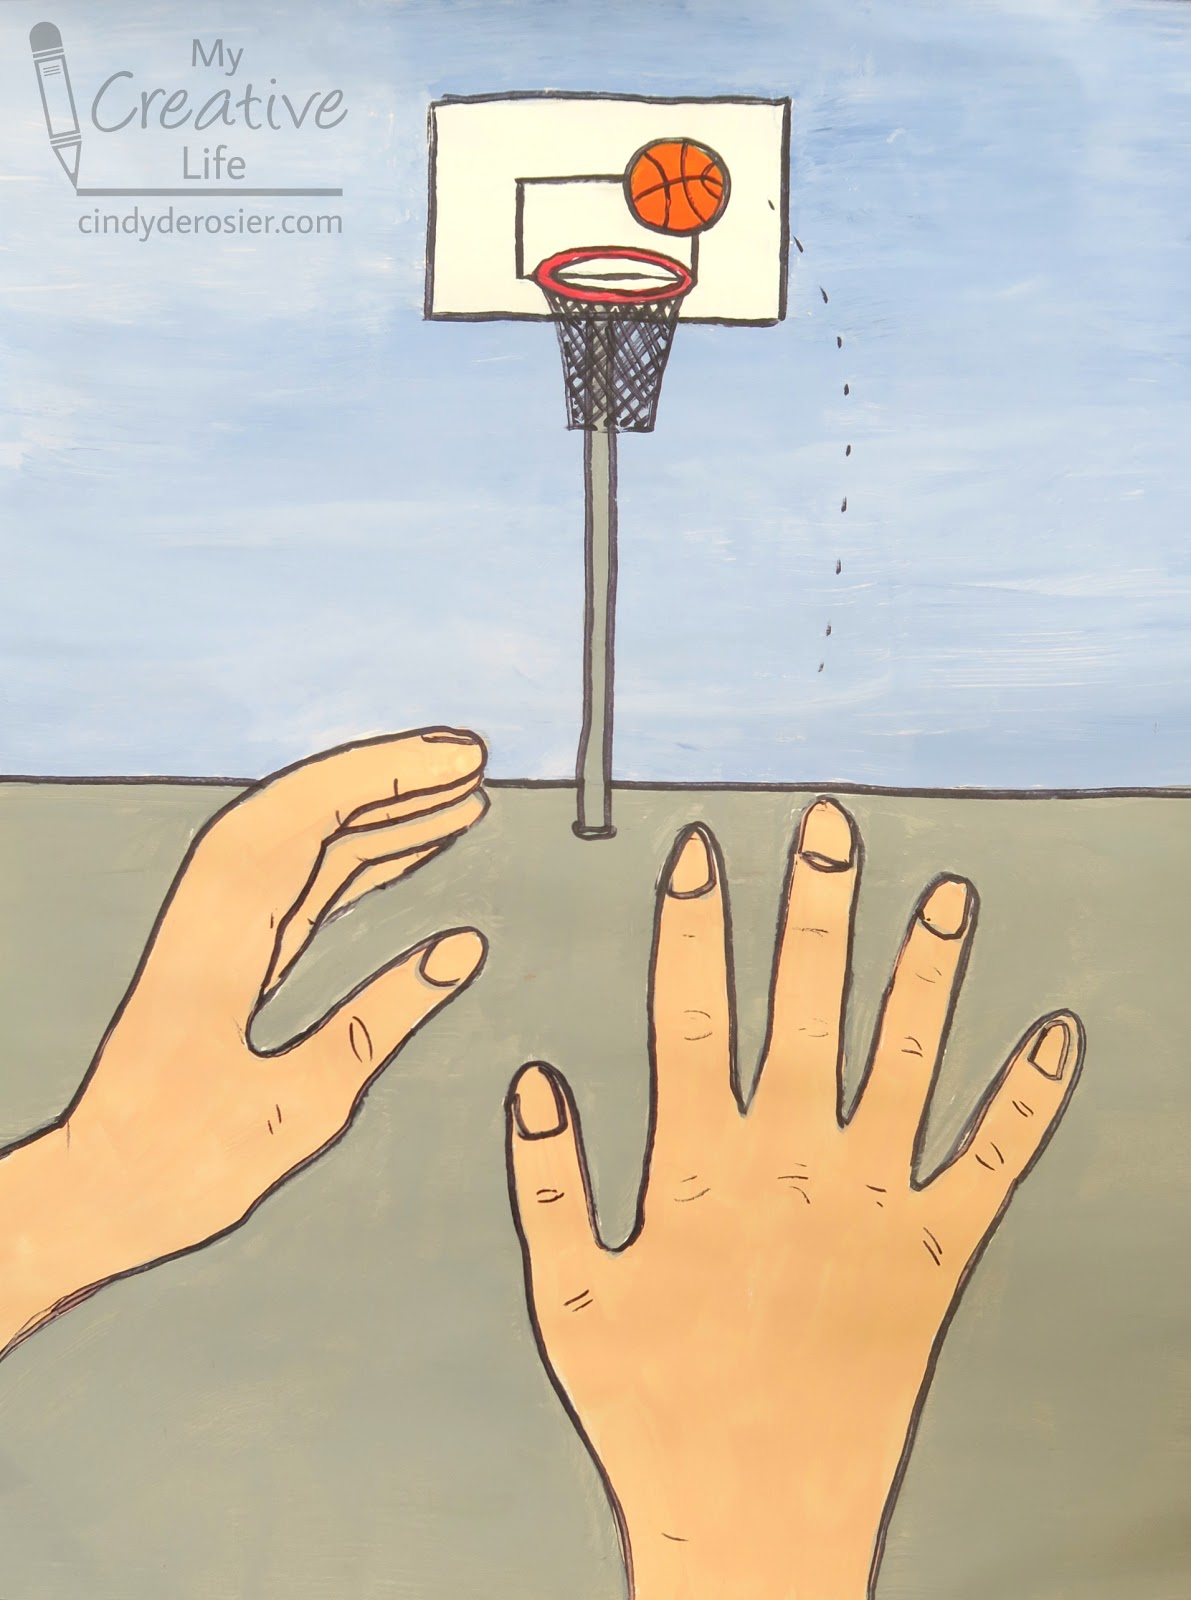
Orient the paper vertically. Using the pencil, lightly trace your dominant hand in the lower center of the paper. (I used Trevor's hands - he's home sick from school- because mine didn't fit as well on the paper, which is why my art project is right-dominant instead of my usual left). Draw the non-dominant hand to the side, where it would be after shooting a basketball.

Draw a horizon line near the middle of the paper. Trace all lines with the Sharpie.


With the pencil, draw a rectangular backstop near the top of the paper. Draw the inner rectangle lightly, then add a circle for the basketball. Add two vertical lines to make the pole, then a skinny oval for the hoop. Add the net. Trace your lines with Sharpie, being careful not to draw the line of the backstop through the basketball. 


Put some Dark Hydrangea and Winter White on a palette. Mix them together, leaving streaks. Use a large brush and horizontal strokes to paint the sky. 

Rinse the brush, then paint the pavement and the pole with Medium Gray. 


Switch to a smaller brush. The sky should be dry, so paint the backstop Winter White, the basketball Pure Orange, and the rim Lipstick Red. 

Fill in the hands with your choice of skin tone. The last time I tried to match skin tone, I failed miserably, but using Soft Peach directly out of the bottle without mixing was actually a pretty close match to Trevor's hands. Good enough, anyway!  


Let the paint dry completely, then retrace all of the lines with the Sharpie. Add lines to the basketball, plus small lines to the hands for the knuckles.


I don't suppose any of you can relate to having dozens of tabs open on the computer while you work, interrupting your own thoughts to Google something, or dropping everything to make a craft? Yeah, that's what I thought!

1/15/18

Olympic Torch Craft

Today's craft is inspired by Mr. Giannetto's Olympic torch craft, my MLK Day peace craft, and my core belief that people around the world are valuable, important, and deserving of basic human rights. I love that the Olympics focuses on the best of what each country has to offer athletically, where all who compete, regardless of their place of origin, have overcome obstacles and demonstrated determination, commitment, and dedication. The Olympics is so much more than sports. It's about our global community coming together and celebrating talent and hard work.  

Mr. Giannetto's craft features hands holding up the Olympic torch. Mine is about the passing of the torch, the connection of one person to the next. That together, we make up one human race. Affiliate links below. 


---------


Olympic Torch Craft


Materials:


Steps:

Cut the paper towel tube so that it is about 6" long. This will be the main part of the torch. Use the scrap to cut a piece that is about 1" long. It will form the top of the torch. Discard the rest of the tube.

Paint the cardboard tube pieces silver. Set them aside to dry. 

Trace your hand on construction paper that matches your skin tone and cut it out. Trace a friend's hand on construction paper matching his or her skin tone and cut it out. 

Tear pieces of tissue paper to make the flame. Tape the bottom of the tissue paper together to form a bundle. 

Assemble the torch by cutting vertically through the 1" piece to open it up. Flatten it slightly, then glue it to the top of the main portion of the torch. Glue the tissue paper bundle in place. Wrap the fingers and thumb of one cut-out hand around the torch and glue it in place. 

Glue the torch to the background paper. Fold the extra portion of the arm that extends beyond the edge of the background paper and tape it securely to the back. 

Glue the receiving hand to the background paper. Again, wrap the extra portion of the arm around the back and secure it in place. If you want to add dimension, use foam dots or built-up construction paper scraps to pop the hand off the page instead of gluing it flat. 

1/11/18

MLK Day Peace Craft

The neighborhood I grew up in was fairly diverse for a middle class town in the 1970's. While the majority of people in my life were white, the next door neighbor was Chinese, Mexican immigrants lived across the street, and Vietnamese refugees lived next to them. Our family hosted Japanese exchange students. I grew up eating the foods and experiencing the traditions of these four cultures.

Despite this early introduction to multiculturalism, I didn't experience what true diversity looks like until I became a teacher. My first class of students (and subsequent classes as well) had no majority. There was a healthy mix of kids with backgrounds in every part of the world. Some were first or second generation Americans, others traced their ancestry to slavery, and many were mixed race. They spoke many languages in addition to English and had religious practices different than my own. It was awesome because they all had so much to teach me about their lives and their experiences. And best of all, the kids accepted this diversity as normal. Trevor's experience has been similar. His school, Scout troop, church, etc. include people from a wide variety of backgrounds. I'm very grateful for this.

I'm not naive. I know racism is alive and well, even in the most diverse of communities. But I love the fact that my child has chosen friends based on the content of their character and not the color of their skin.


MLK Day Peace Craft


Materials:

  • Construction paper 
  • Pencil
  • Scissors
  • Letters to spell 'Peace' (or a white crayon to write it)
  • Glue

Steps:


1. Trace your hand and arm on a sheet of construction paper that matches your skin tone. Cut it out and set it aside.

2. Trace a friend's hand and arm on construction paper, matching his or her skin tone. Cut it out.

3. Interlock the fingers of the two hands, then glue them to a colorful background.

4. Trim any excess 'arm' that extends over the edges of the background construction paper.

5. Use chipboard letters, stickers, and a white crayon to spell out 'Peace' above the interlocking hands.


3/15/17

Handprint Placemat Gift for Grandma and Grandpa

Need a gift idea for Grandma and Grandpa? How about a set of personalized placemats and some new dishtowels and dishcloths? Affiliate links below. 


Handprint Placemat Gift for Grandma and Grandpa


Materials: 

Steps:


Spread newspaper on your work surface, then spread one placemat on top of it. Use the paintbrush to coat your right hand evenly with white fabric paint. Press your hand firmly on the bottom right hand corner. 


Repeat the steps for the second placemat. Let the paint dry completely. 


Use a Sharpie to write Grandma on one handprint and Grandpa on the other. Bundle them up with coordinating dishcloths and dishtowels for a gift they're sure to love. 


This is also a wonderful idea for parents and godparents!

3/13/17

'We Are All God's Children' Rainbow Handprint

Why do just one rainbow handprint craft when you can do two? Affiliate links below. 


'We Are All God's Children' Rainbow Handprint Craft


Materials: 


Steps:


Squirt craft paint onto your hand in rainbow order, starting with red at your fingertips and ending with purple on your thumb and lower palm. Use a foam brush to spread the paint evenly, taking care not to mix the colors too much. 

Stamp your hand onto the center of a piece of white cardstock. Wash your hands and let the paint dry completely.


When the paint is dry, trim the white cardstock so that it has an even margin around the handprint. Use the blue cardstock to make a mat. 


Punch a heart from the scraps of white cardstock and write your message on it. You can use the same message I wrote or something else.

8/10/15

Project CAT - Challenge #6: Handprint Campfire

Hello! This is Trevor again! Welcome to Week 2 of Project CAT! Today is National S'mores Day! So we decided to make a handprint campfire with a roasting marshmallow.

This was our inspiration. We saw it at the fair. It was a preschooler who made it. We decided to make our own version. 


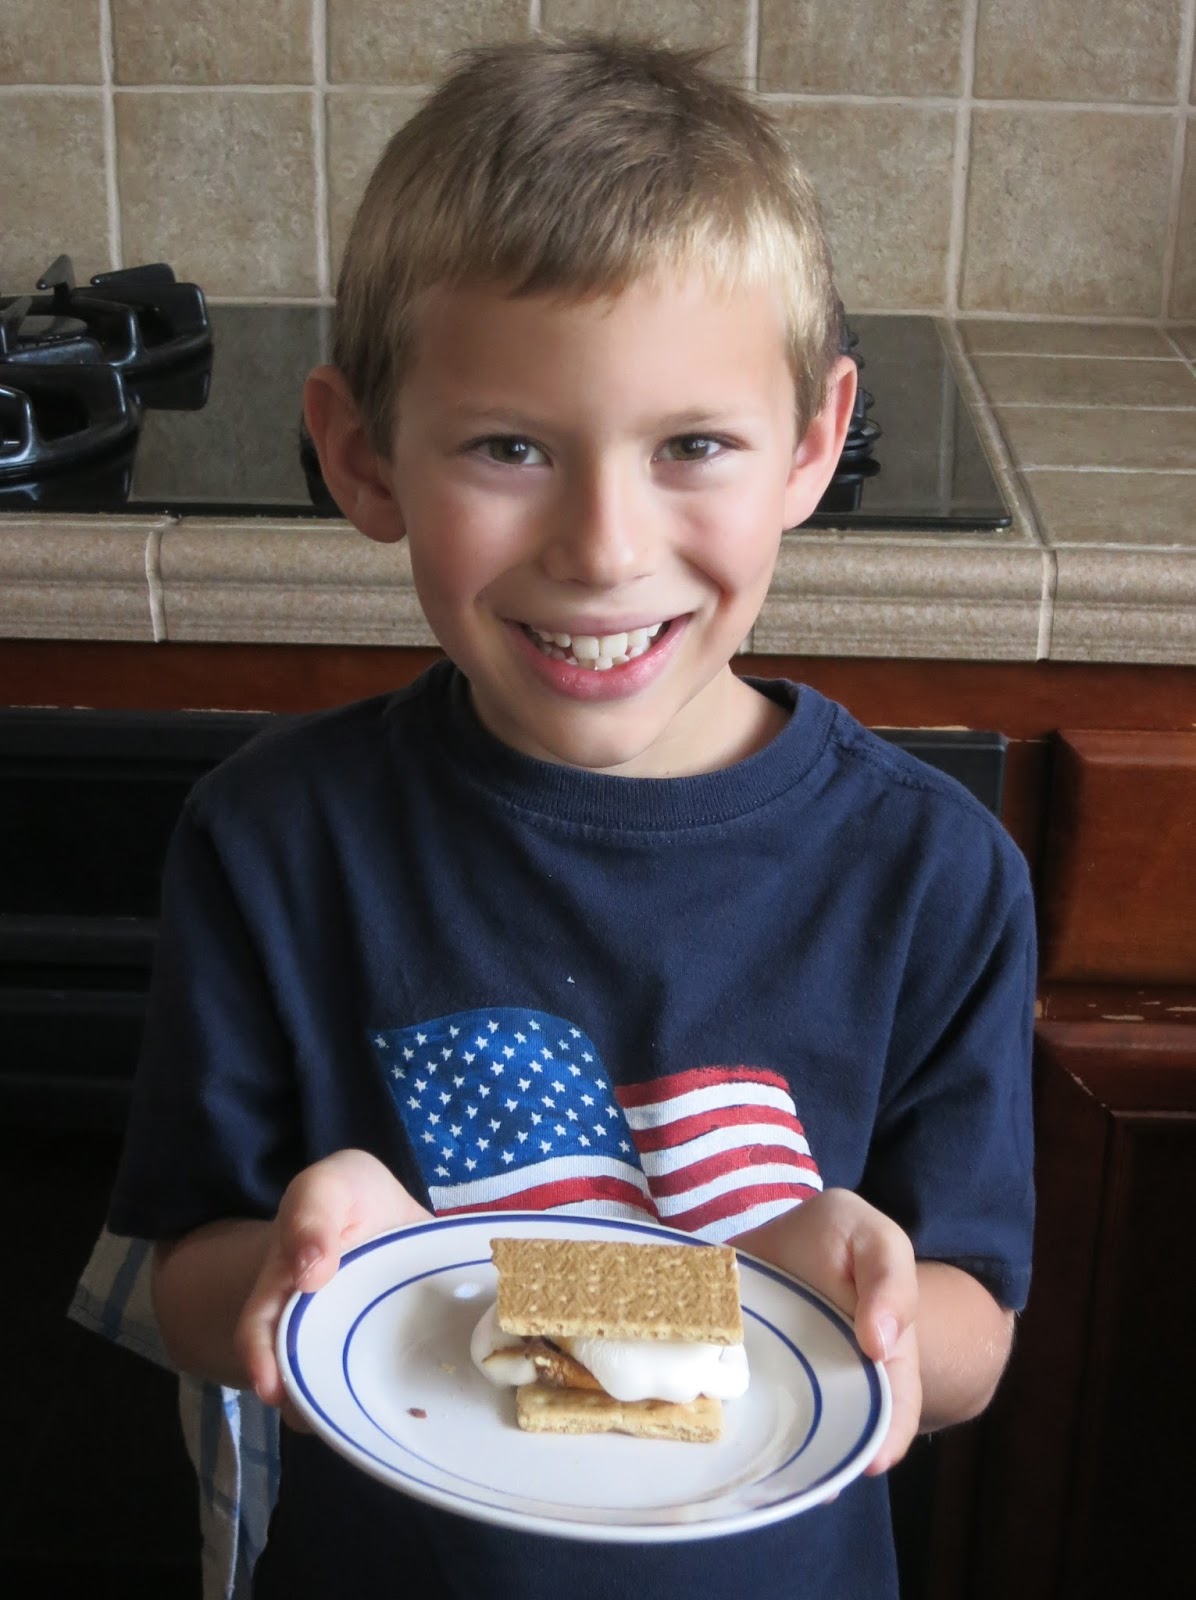
But before we got started, we ate s'mores. Did you know you can make them indoors? Just put a marshmallow on a skewer and put it over the stove! This is great for me because I cannot cook outside on a campfire because I am allergic to wood smoke and get really, really bad hives.


Yummy! Delicious! 


Now, it's time for the craft! This is what our version looks like:


Materials: white paper, craft sticks, brown color pencil, cotton ball, wooden skewer, glue, brown chalk, paint (yellow, orange and red), a foam brush and wire cutters. 

Step 1: Start by making your marshmallow. Using the chalk, color the marshmallow to make it look toasted. Then poke the skewer through the cotton ball. This might be a little bit hard. Add glue to the inside of the cotton ball so that the skewer stays in place. Set it aside.

Step 2: Color the craft sticks to make them look like logs. Add lines and circles to look like wood grain and knots.


Step 3: Paint your hand with yellow, orange and red paint. 


Step 4: Press your hand onto paper. If you want to, wiggle your fingers around to make it look more like a flame. (I did this.)


Step 5: Trim the skewer to make it even with the paper. We used wire cutters.

Step 6: Glue the skewer with the marshmallow on it and the craft sticks in place. You have a completed campfire!


Now it's your turn! Make a handprint campfire or something inspired by this handprint campfire. And have some s'mores, since it's National S'mores Day! Here are some recipes you might want to try: