Showing posts with label drawing. Show all posts

12/16/25

Santa's Closet - A Printable Drawing Challenge for Kids

We all know what Santa wears during the winter, but what does he wear the rest of the year? This printable challenges kids to use their imagination to draw what they think Santa wears during each season of the year. 


Of course I tried my own challenge! But before you scroll down and look at my sketches, take a minute to decide how you think Santa dresses in spring, summer, and fall. 

-------


It was great fun thinking about what Santa does in the off-season and how he would dress. I decided that Santa's spring wardrobe includes a red polo shirt, khaki convertible cargo pants, a yellow and green ball cap, and tennis shoes. In the summer, he wears a red tank top, yellow and green floral board shorts, a green visor, and red flip flops. In the fall, he wears a black and red knitted sweater, brown corduroy pants, a yellow knitted beanie, and brown hiking boots. I colored my designs with my Ohuhu Kaala markers, which are always so much fun to use. 


If any of you take the challenge and draw what's in Santa's closet, I'd love to see it! You can email photos to cindy.mycreativelife@gmail.com. Enjoy!

12/11/23

Christmas Stocking Drawing

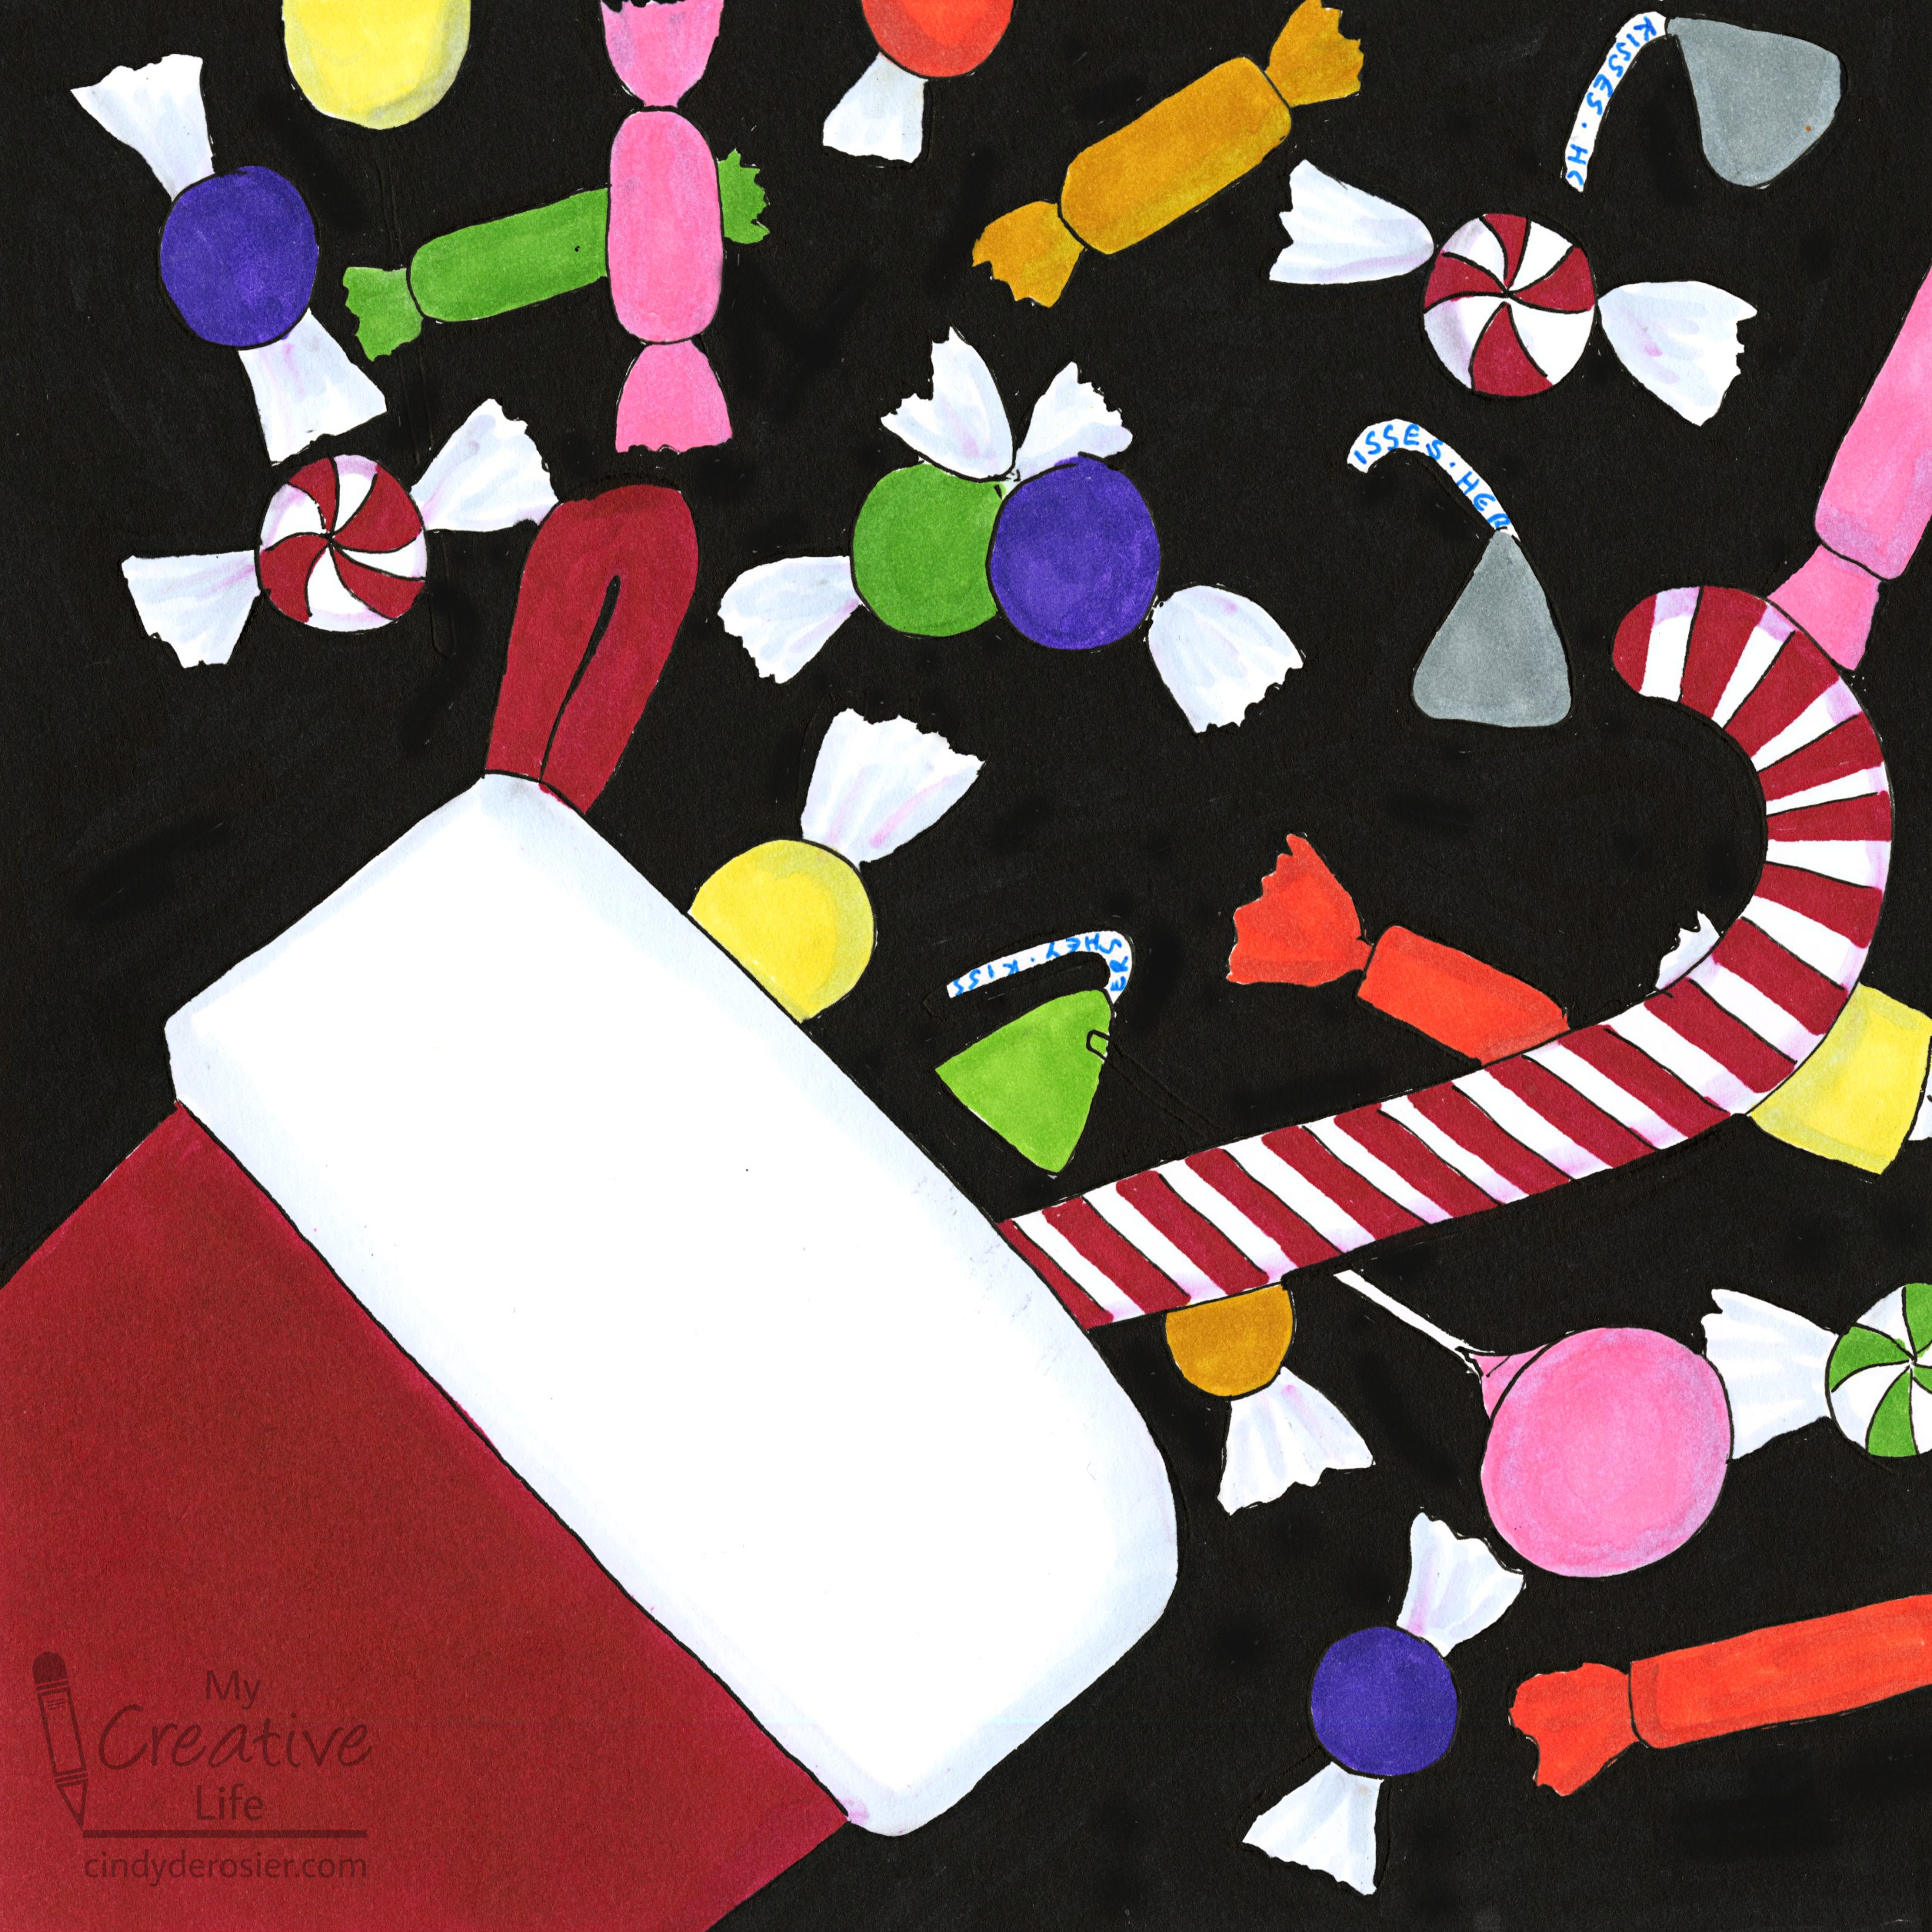
I prefer Christmas cookies over Christmas candy, but it was still fun to do a quick drawing of candies tumbling out of a classic red stocking with white trim. 


Start by drawing a stocking in the lower left corner. 


Then start drawing candies. Overlap them and turn them every which way. 


Then color it in. I used Ohuhu markers for everything except the writing on the plumes. I used a light blue fineliner for that. 


Two weeks until Christmas! 

12/6/23

How to Draw a Sleigh Filled with Presents

Christmas is just around the corner. Celebrate by drawing a sleigh packed full of beautifully wrapped presents. I drew my sleigh with a Micron pen on Bristol Vellum and colored it with Ohuhus (affiliate links), but you can use whatever you have on hand. 


Start by drawing the body of the sleigh toward the bottom center of your paper. It's basically a smile with a hook on one end. 


Use a straight edge to draw parallel lines below the body of the sled to make the runners. 


Curve the ends of the runners upward on one side, then draw the pieces that connect the runners to the sleigh body. 


Now load up your sleigh with presents! Start by drawing three rectangles just inside the sleigh, then work your way backwards adding rectangles. 


Now add the details. Add wrapping paper patterns, ribbons, and bows to the gifts. Add some dimension to the runners by turning each line into a cane. 


Add some color and you're done!


Still have Christmas shopping to do? If you're looking for ideas, check out my Gift Guides! You'll find ideas for almost everyone on your list. And when you do buy, I appreciate you using my affiliate links. Happy shopping!

10/26/23

Serendipity Witch Drawings

First zombies, then monsters, now witches! 


I used the same materials and followed the same basic steps, but with two exceptions. First, I started out with random shapes that were relatively symmetric, since witches are living humans (unlike zombies and monsters).


When I added facial features and hats, I made each different. No two mouths, noses, or sets of eyes are the same. And I intentionally avoided the the offensive, stereotypical witch nose


I varied the hairstyles, length, and color. And I used a variety of skintones, leaning heavily on greys like I did with the zombies.  

As I was drawing my witches, I was imagining their different personalities. As my mind wandered, I thought how ridiculous (and fun) it would be to choose four of my witches and design a sitcom around them living together in the Golden Girls' Miami house. Speaking of which, have you ever noticed how much Golden Girls merch there is on Amazon (affiliate link)?! It's surprising, yet awesome. Anyway... witches. I had a lot of fun drawing them. I encourage you to give it a go! Like before, it's a great project for someone who "can't" draw. 

2/9/23

Library Roulette, Class 700: How to Draw Kawaii Vegetables

For the fifth (and final) craft in my Library Roulette Class 700 project, I drew vegetables. Cute vegetables, that is. 


This time, my random number was 745, the category for Decorative Arts. I chose the book Crafting Cute: Polymer Clay the Kawaii Way by Dani Banani. (Affiliate link here and throughout the post.) The book begins with an introduction and an explanation of kawaii ("cute" in Japanese) and chibi (an exaggerated, minimalist drawing style). Next is an excellent explanation about working with polymer clay. The rest of the book has detailed instructions to make 50 adorable anthropomorphized projects using polymer clay. The writing is excellent and the many step-out photos make this a great book for beginners. 

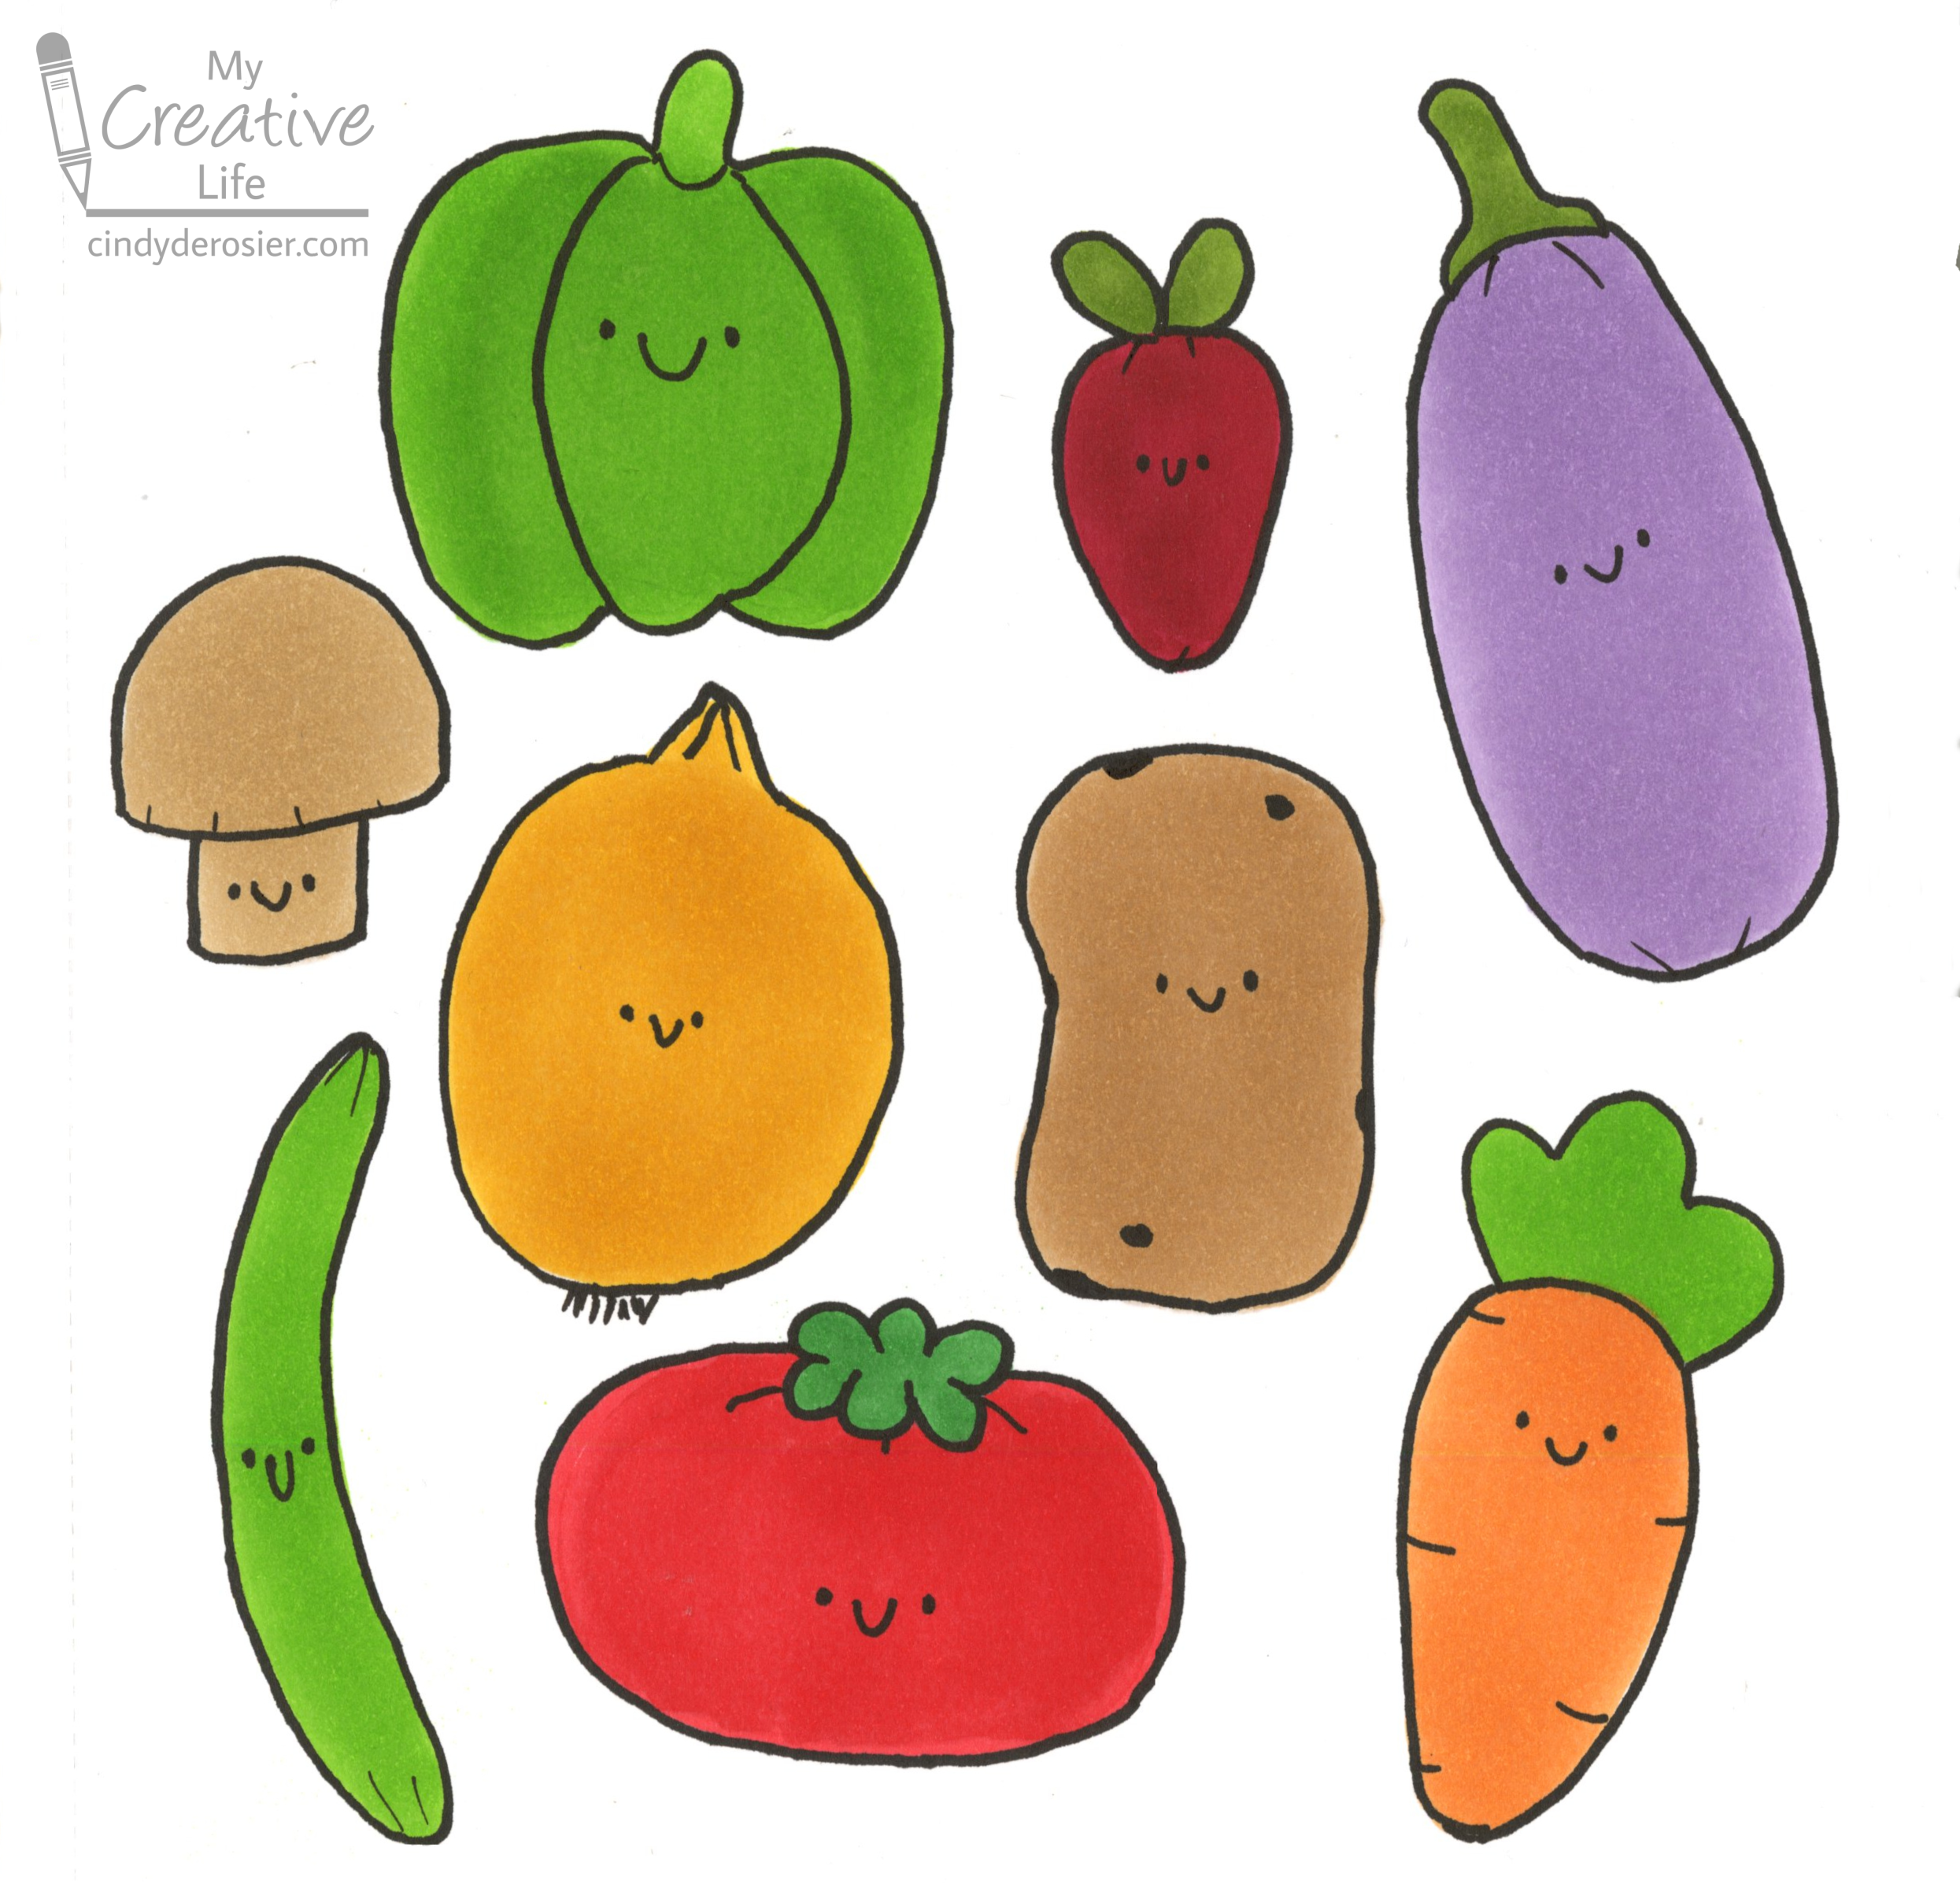
Rather than work with polymer clay, I opted to take inspiration from the Pickle Charm project to draw kawaii vegetables. 


Looking at this project and the others in the book (the finished clay pieces, not the illustrations), I identified characteristics of Banani's work that I wanted to include. 
  • projects are done in a solid color, in a lighter shade than the real item would be
  • the proportions are shorter and squatter than in reality
  • all edges are rounded
  • details are minimal or non-existent
  • the faces consist of a tiny smile and two dots, done in black, and lined up with each other

This project gave me the perfect opportunity to test out the Marker Sketchbook I received from Ohuhu. The smooth, heavyweight paper is designed specifically to use with Ohuhu markers and they colored like a dream in this sketchbook. 

I started by putting vegetable-shaped blobs of color onto my paper, trying to keep them short, squat, and rounded. I started with the carrot and eggplant (since I'm left-handed). I didn't plan ahead with overall placement; the next vegetable I drew was whatever fit nicely into the remaining space I had, both in terms of space and not repeating a color. The mushroom and the bean were last, since I hadn't left myself much room in the left-hand side!


Then I used a Black Honolulu to add faces. I outlined each vegetable, then added tiny lines to imply dimension to the carrot, eggplant, radish, tomato, mushroom, and bean. I made full lines on the bell pepper - in retrospect, I wish I hadn't. I added small lines to both the top of the onion and the root end. Finally, I added a few small spots on the potato. 


I've really enjoyed trying to mimic different artists' styles in the past and this was no exception. I've never drawn anything with a kawaii and/or chibi style, so it was fun to try something new. The happy vegetables make a great first page in my new marker sketchbook. Every time I work in it, I'll have these smiling faces greeting me!

1/17/23

R is for Raincoat, Inspired by California's Unusually Wet Weather

It's been raining a lot in California. Perhaps you've heard? I understand that our weather has made not just national, but international, news. It's been relentless. We need the rain, of course; we've had so many years of drought. But the soil can't absorb this much at once. The areas with burn scars are the most vulnerable. This series of rainstorms has been devastating and they're expecting storm damage to top a billion dollars. Fortunately, our family has not been negatively impacted beyond mere inconvenience. 

I've been spending a lot of time watching the rain, driving in the rain, running errands in the rain, being woken up by the rain, checking the forecast for any breaks in the rain, receiving alerts from the city and the county about the rain, following the news about the rain, and talking about the rain. It only stands to reason that I would craft about the rain. 


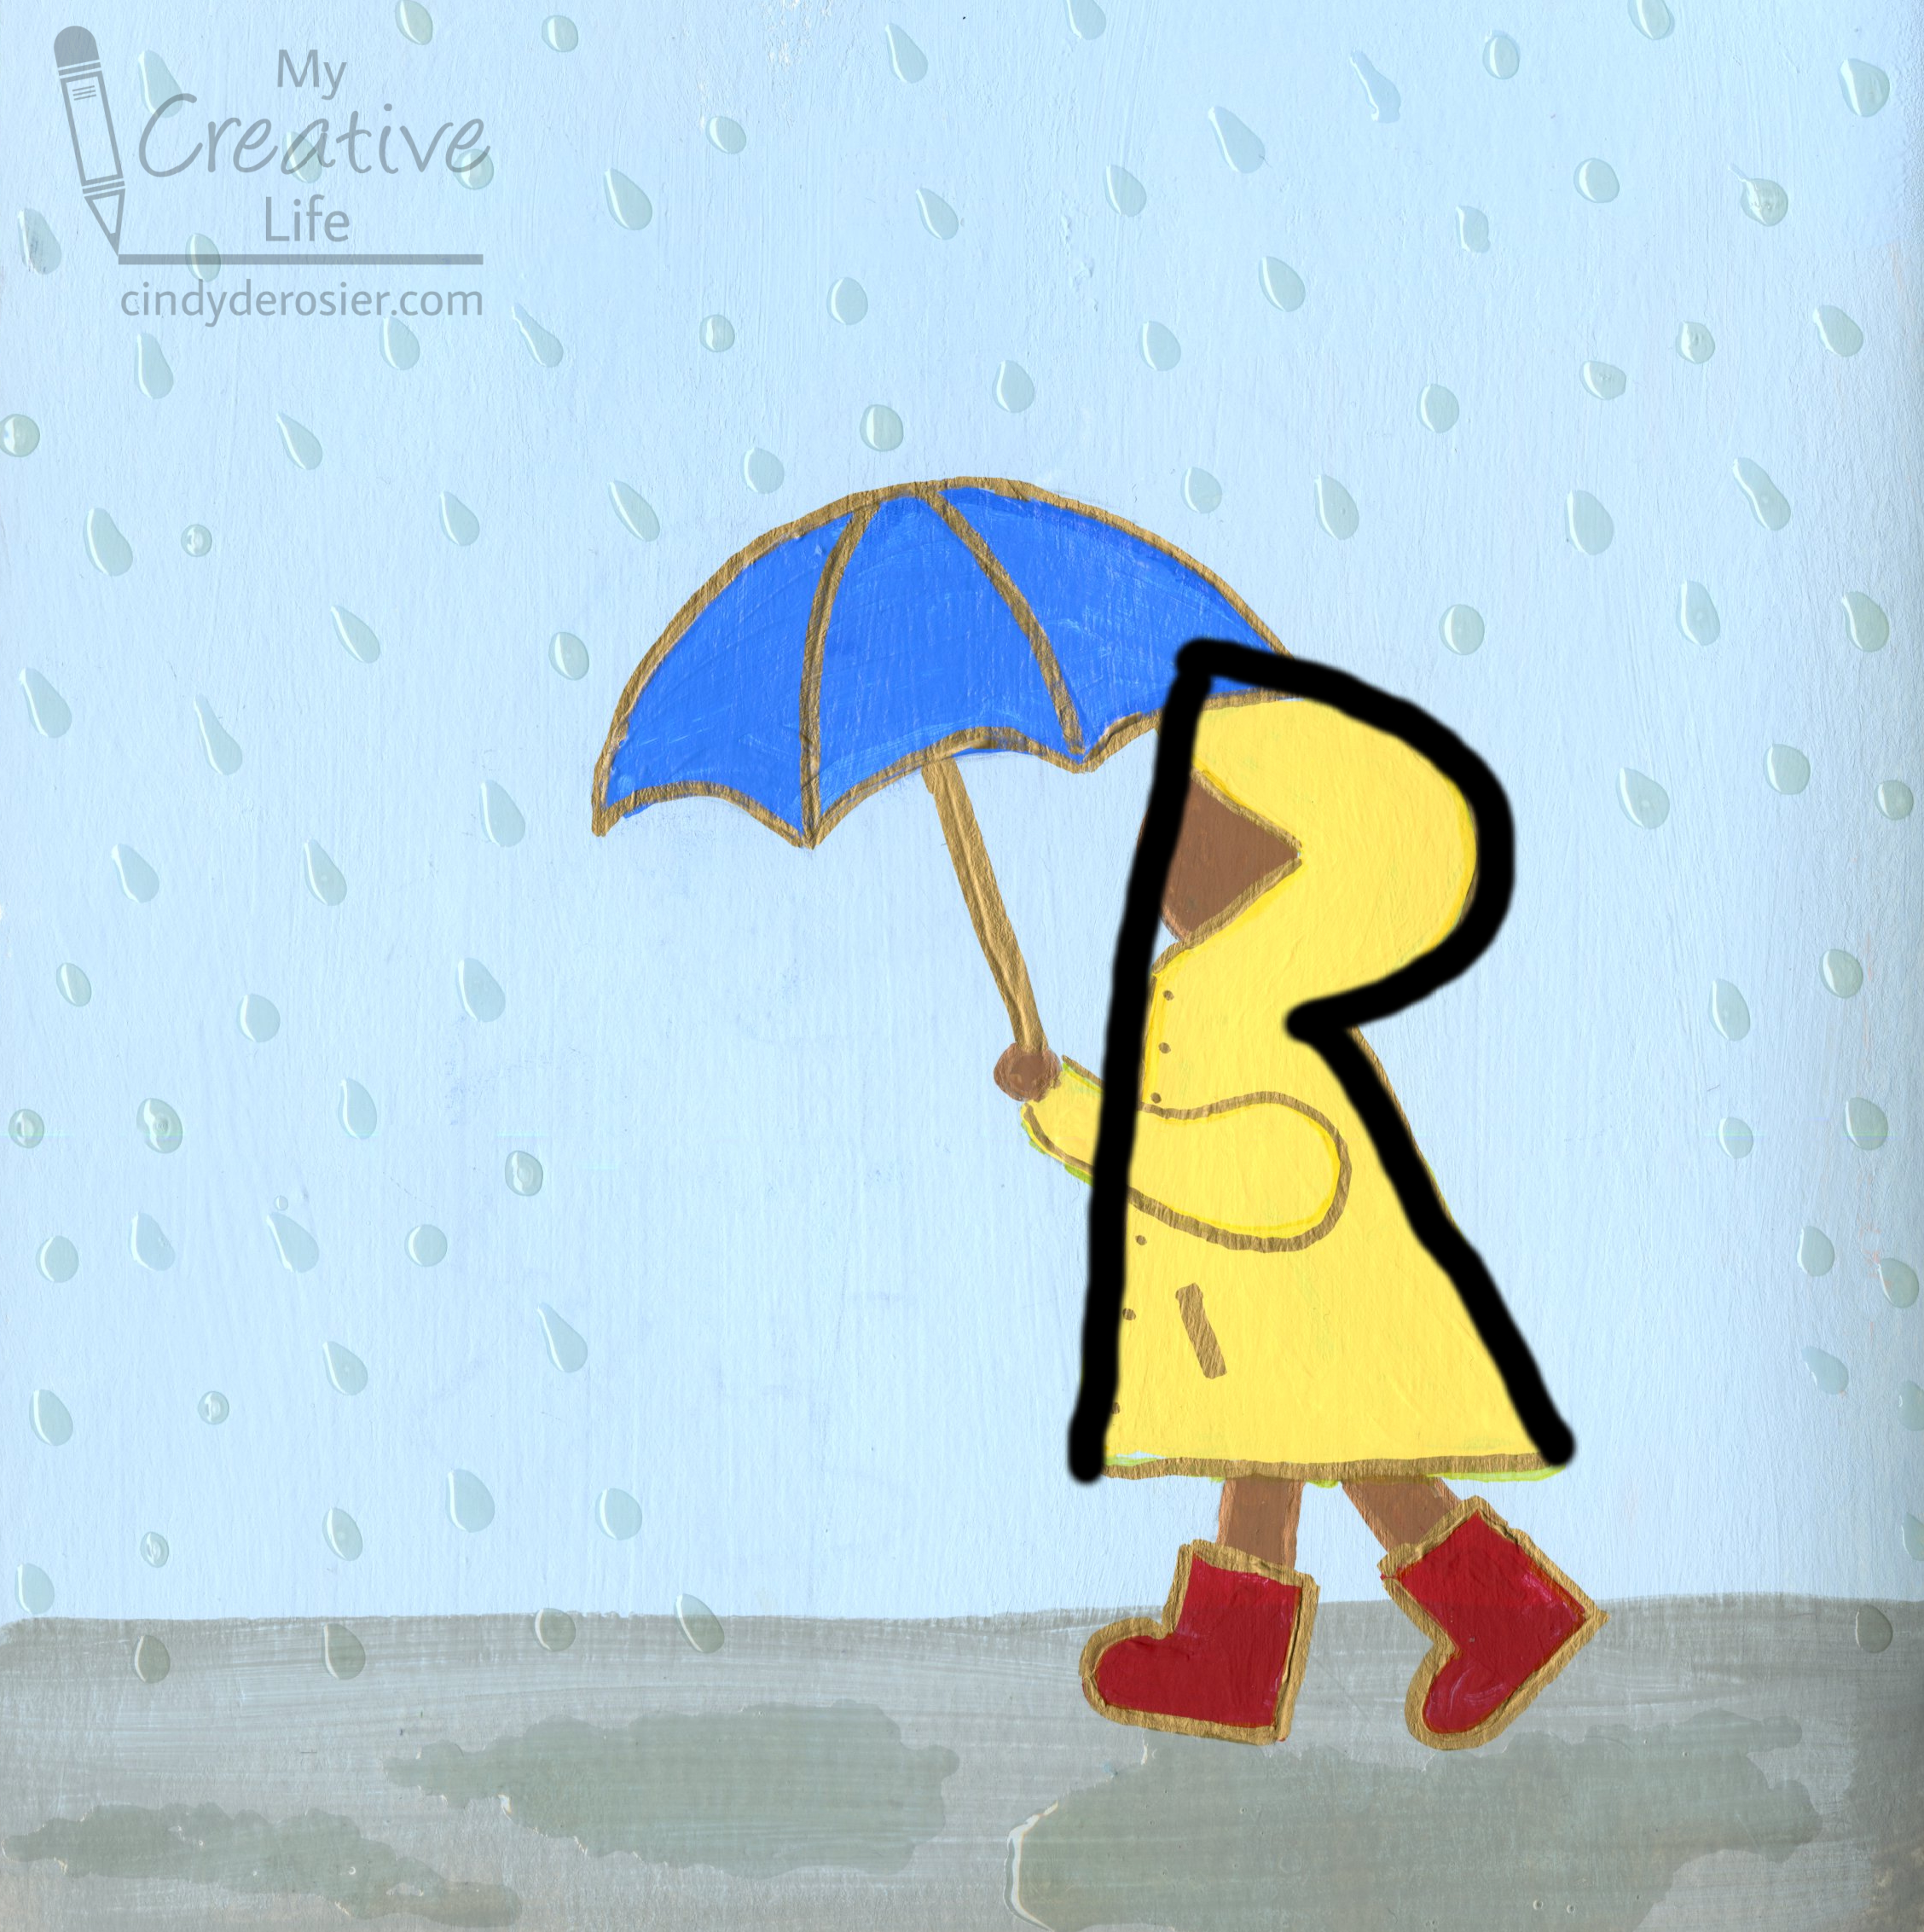
I'm calling this project "R is for Raincoat." Can you tell why? 


I love the shiny raindrops and puddles. They look ok in the scan, but they're in more awesome in person since they're dimensional and actually look wet. Affiliate links below.


---------


R is for Raincoat


Materials:


Steps: 


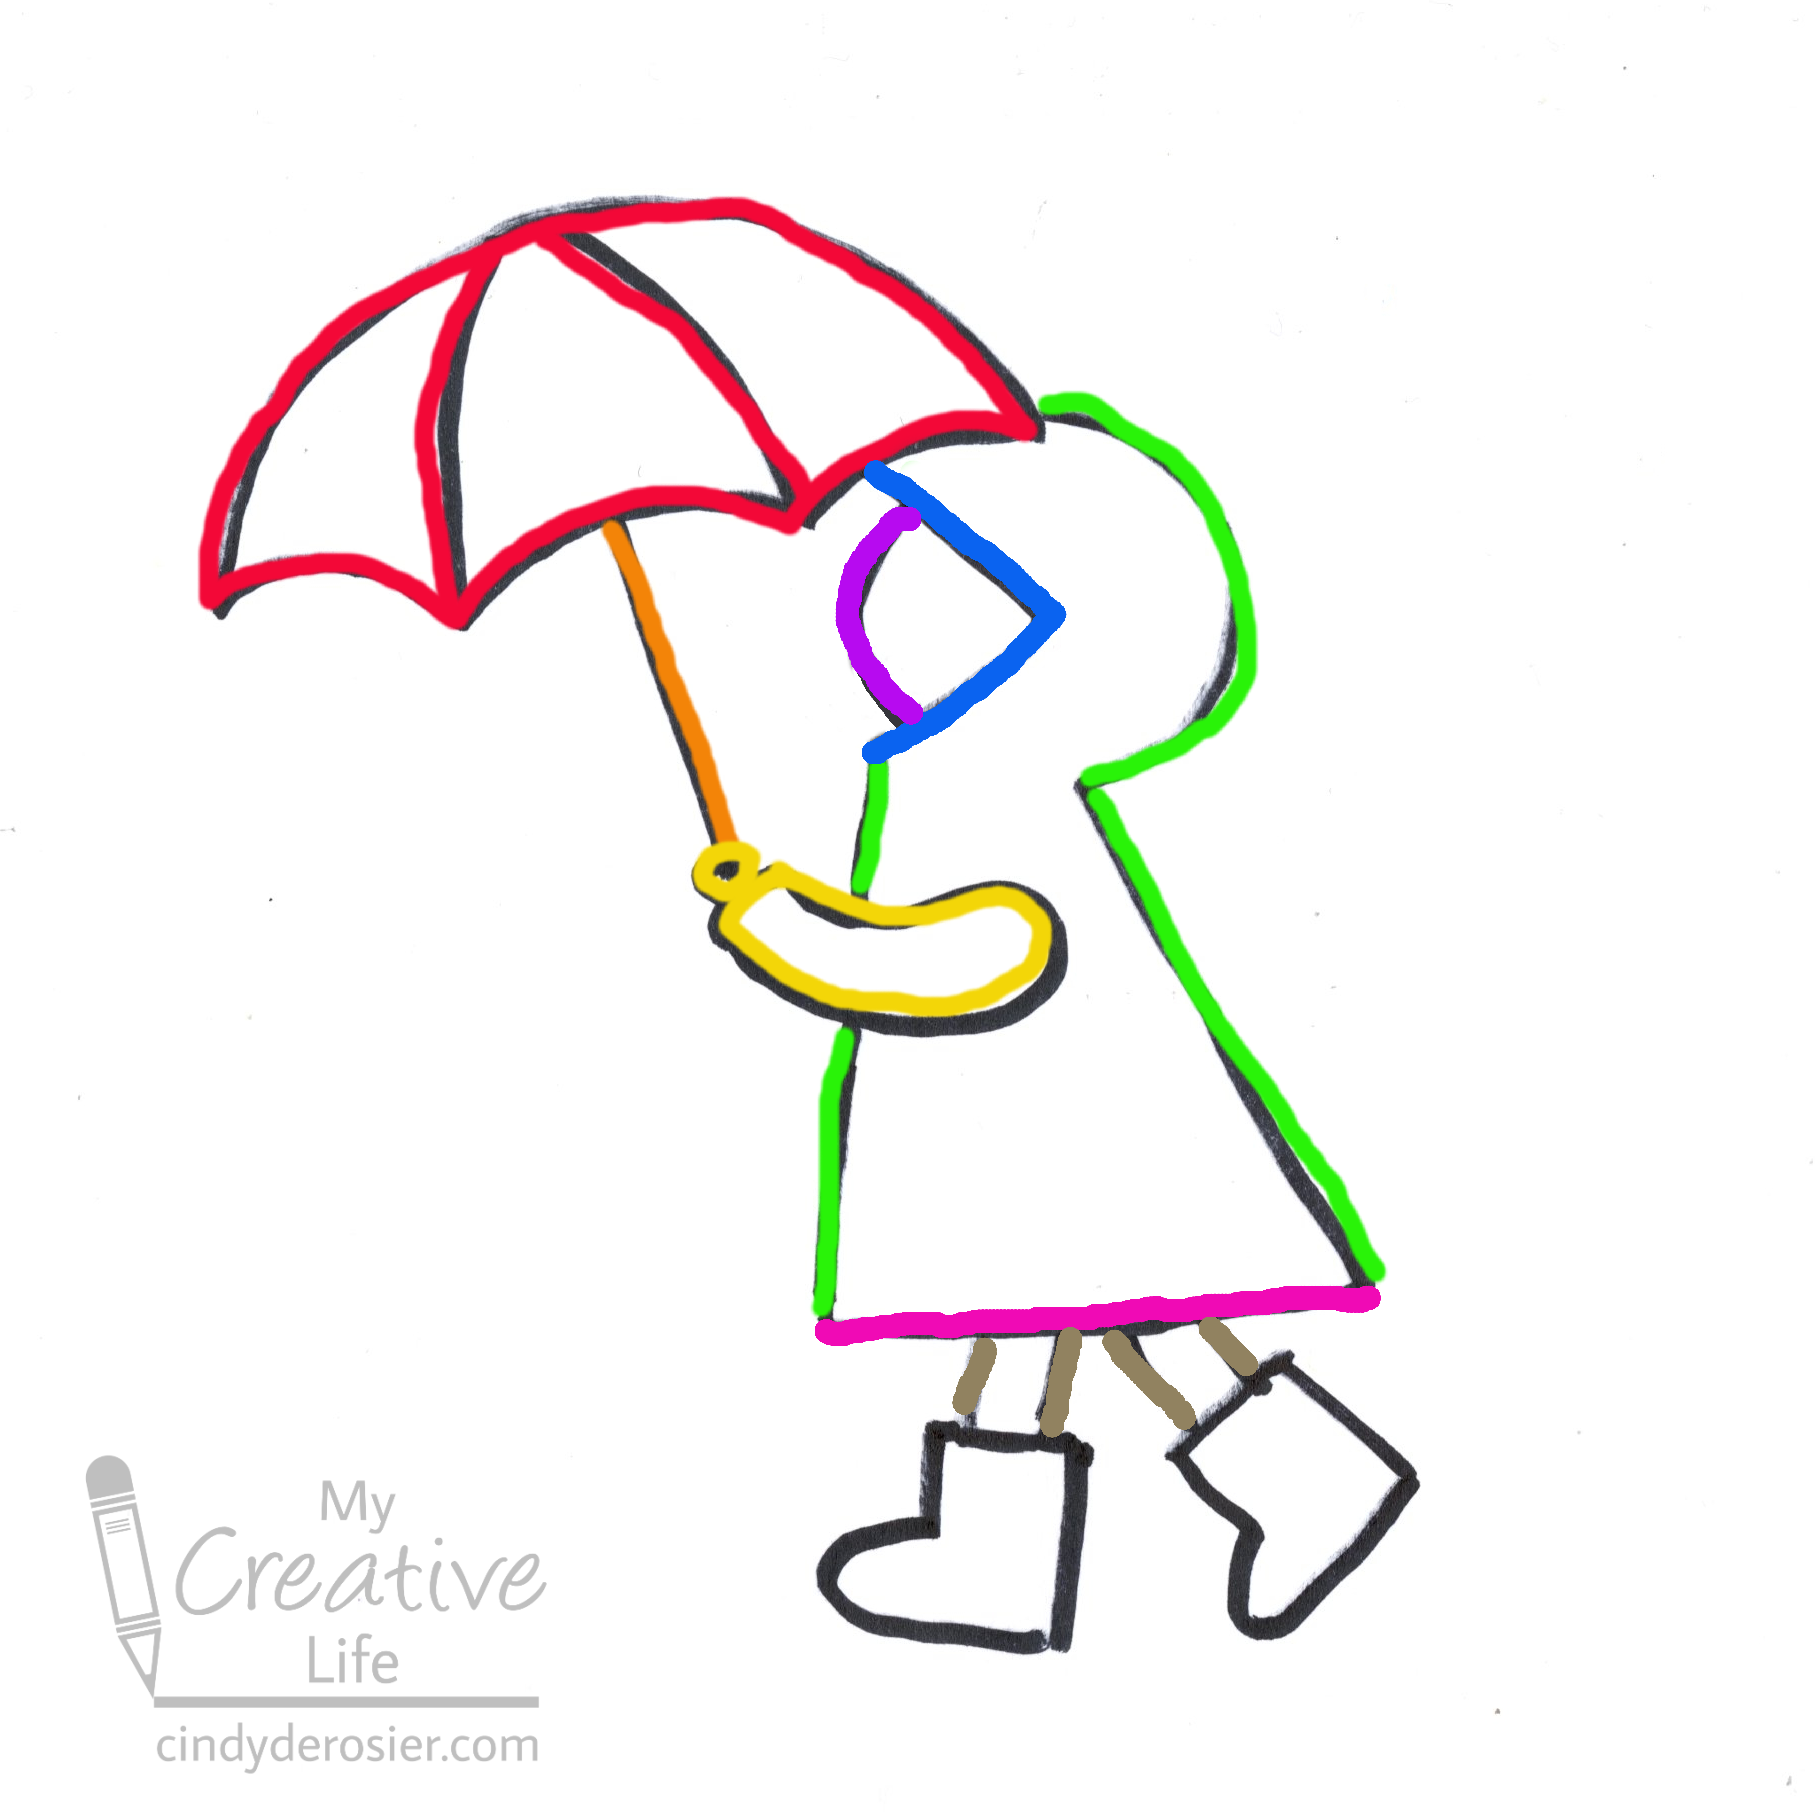
Paint the background of your paper with a pale bluish-grey sky and a grey sidewalk. While the paint dries completely, draw the image of the child in a raincoat on a piece of scratch paper. Rather than draw each step and then scan that, I decided to draw the entire thing and scan it, then digitally trace over the lines in the order I recommend making them. This is the finished drawing:


I've color-coded the steps in rainbow order: red, orange, yellow, green.

Step 1 (red): In the upper right corner, draw an arc for the top of the umbrella. Draw two lines down from the center to make the umbrella's ribs. Draw upward-curving lines between each of the ribs.

Step 2 (orange): Draw the handle of the umbrella. 

Step 3 (yellow): Draw a circle for the child's hand at the base of the umbrella handle, then add an arm. 

Step 4 (green): Draw a capital R, lifting your pencil for the face and the arm. 


Step 5 (blue): Draw a greater-than sign to define the edges of the raincoat's hood. 

Step 6 (purple): Draw an arc inside the greater-than sign for the child's face. 

Step 7 (pink): Draw the hem of the raincoat.

Step 8 (brown): Draw the child's legs.

Step 9 (black): Draw the child's boots. 


Scribble on the back of your drawing, using this technique to transfer it to your painted paper. Using the pencil lines as a guide, paint the child in the colors of your choice. When the paint is dry, use a Sharpie to outline the shapes and add the details, like the ribs of the umbrella and the buttons and pocket on the raincoat. I normally would do this in black or brown, but randomly decided to use gold just to be different. 

The last step is adding drops of Diamond Glaze to the sky and some drizzles of Diamond Glaze to the sidewalk. The sidewalk puddles will take a long time to dry; give them at least 24 hours before touching them. The long wait is worth it though - it really looks like puddles. 


What's the weather like where you are? 

11/18/21

Scratch and Sniff Drawings

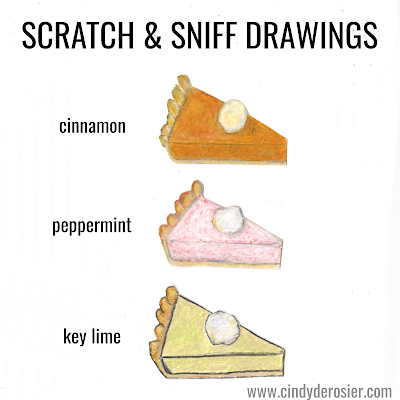
Remember at the end of the post about drawing pumpkin pie that I said I had an idea I was excited to test? I wanted to test whether or not I could make scratch and sniff drawings. I successfully drew scented versions of pumpkin pie, peppermint pie, and key lime pie. Read on to learn how! Affiliate links below. 


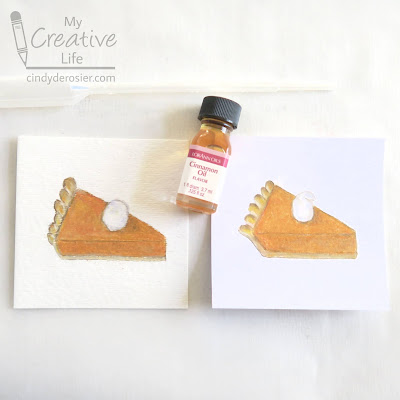
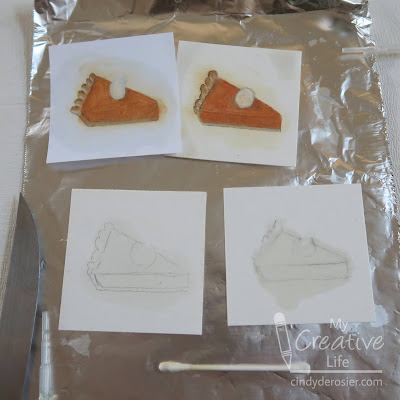
I started by testing two different papers to see if either one would be better for holding scent. I was guessing that a paper designed for wet media would do a better job than one only intended for drawing. I cut small squares of Strathmore Cold-Press Watercolor Paper and Neenah Vellum Bristol and drew a slice of pumpkin pie on each, using Prismacolor Premier colored pencils. Then I got out my LorAnn Cinnamon Oil


After receiving an awesome variety pack of LorAnn Oils last Christmas, I've been using them for all sorts of edible craft projects. But I've never used them for non-edible crafting. I put a drop of cinnamon oil onto a Q-tip and gently rubbed it into the drawing. 


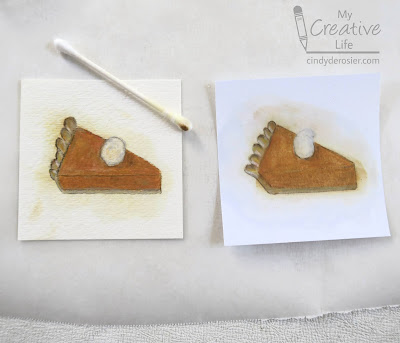
Oops. Apparently cinnamon oil makes a good solvent for colored pencils. 

I took a good look at the two pie slices. The bristol paper looked and felt greasy, but the watercolor paper didn't. So I proceeded with the watercolor paper.

For my next experiment, I wanted to test whether putting the scent down first and coloring over it would work better than applying scent to a completed drawing. I sketched some pie in pencil (in retrospect, I wish I hadn't), then put drops of LorAnn Peppermint Oil and LorAnn Key Lime onto separate squares of watercolor paper. Peppermint is an 'oil' (left below) and Key Lime is a 'flavor' (right below) and I was curious to see if one would work better than the other. 


I let each dry completely, then used the same colored pencils to color in the images. It worked! I used microtip scissors to cut out each pie slice, then recycled the scraps. (Our pantry has smelled cinnamony-delicious ever since. Guess where we keep the recycle bin!) 


There are a zillion more variables to test before conclusively announcing that this is THE way to make scratch and sniff drawings. How would alcohol markers perform? Pastels? Crayons? What about other paper types? I'm not sure. I may come back to this someday.

As for now, it's been a week and my drawings still have a nice scent. I'm not sure how long it will last if I keep scratching and sniffing, but as far as I'm concerned, it's already a success.

11/12/21

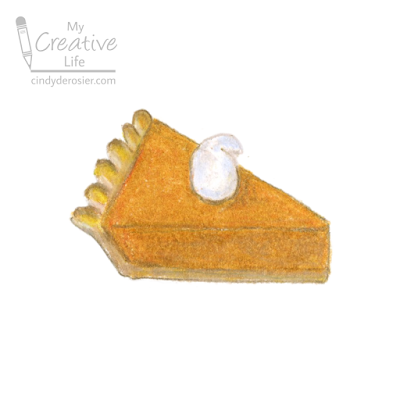
How to Draw Pumpkin Pie

I'm a huge fan of integrated curriculum. Art pairs well with literally every other subject area, and I'm particularly fond of using art projects to reinforce math vocabulary. Many teachers draw pie as a way to teach students about pi, but there's no reason to stop there. Back in my teaching days, I enjoyed giving my students drawing instructions using geometry terms they'd recently learned. This slice of pumpkin pie provides an excellent example of a scalene triangle. 


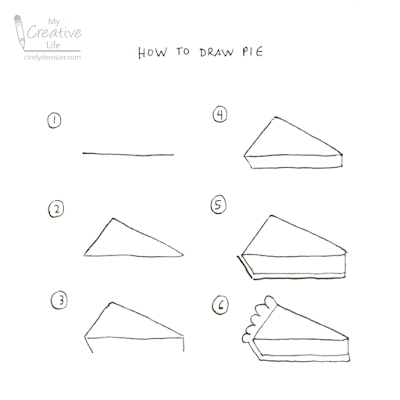
How to Draw Pumpkin Pie


  1. Draw a horizontal line segment in the center of the paper. 
  2. Use that line segment as the base of a scalene triangle. The base should be the longest side of the triangle. This is the top of your pie. 
  3. Add two short line segments onto the base of the triangle. The one on the left should angle down and to the right. The one on the right should be vertical. 
  4. Draw a horizontal line connecting the two new line segments. It should be parallel to the original line segment. Now you've finished the pie filling. 
  5. To draw the bottom of the crust, find the obtuse angle you made in the previous step. Draw the same angle slightly below the other one, extending the line segments the same length as the others. 
  6. Finish the crust by drawing a series of scallops along the shortest side of the scalene triangle.  


This drawing gave me an idea I'm excited to test. If it works, I'll share the results with you next week. If it doesn't, forget I said anything. 


6/22/21

Watercolor Hamburger

Burgers are great year-round, but there's something about summer that makes them taste even better. They're also a really fun subject to paint. Affiliate links below. 


Watercolor Hamburger


Materials:


Steps:


Note that, as usual, I've used a pen for the step-out photos so that you can see them easily. On the actual painting, I used a pencil to sketch as lightly as possible. 

I've found that the easiest way to draw a burger is from top to bottom. If you want to do the opposite, just reverse my directions. 

Start by drawing the arc of the top bun in the middle of your paper. Rather than drawing a straight line across to make a half-circle, use a very wiggly line to draw lettuce on the left side and a smoother line to make an onion on the right side. Then draw in a layer of tomato slices. 


Beneath the tomatoes, add the corners of some cheese slices. Draw the curved ends of a nice, thick burger patty, then draw a wiggly line to make more lettuce. Finally, draw the bottom bun.   


Now it's time to paint the burger. With watercolor, you want to make sure one section is dry before adding color to an adjacent part so that the color doesn't run. I do this by skipping around. Instead of painting the bun and then the lettuce, I do the bun and then the meat, because those sections don't touch. 

Start with a golden color for the bun, adding shadowing along the top and bottom. Use the same golden color to add dots of color to the meat. Choose a medium brown and add more dots of color to the meat. Continue adding dots of color to the patty until it resembles perfectly-cooked hamburger. Paint the onion a pale purple and the tomato red. Paint the lettuce using a similar technique as with the meat, adding dots of paint in different shades of light green. Paint the cheese yellow. 

Paint a horizon line behind the bottom bun, then color beneath that line with whatever shade you've chosen to represent your plate / countertop / serving tray. Allow that to dry, then add the color of the wall / sky / backsplash above the horizon line. 

This is what my burger looked like when I put away my paints. 
 

You can stop here, but I wanted a cleaner look. I went in with my colored pencils to add definition. This is most evident on the cheese, onion, and lettuce. I also added the hint of sesame seeds to the top bun. 


It looks almost good enough to eat!

6/16/21

How to Draw a Chicago Dog

Our family went camping recently, a quick one-night jaunt to check out the nearby state park where Trevor's Scout troop will be doing summer camp. Because it was such a short trip, we brought the bare minimum and kept meals extremely simple. We had hot dogs for dinner, but I didn't bother packing the variety of toppings I'd normally set out for hot dogs. Instead, I just grabbed a few ketchup packets. As we were eating, Steve commented that we'd be lucky if we weren't banned from Chicago for our blasphemy. The only thing we did right was use all-beef franks. 

A proper Chicago Dog is is topped with yellow mustard, chopped white onions, neon green pickle relish, tomato slices, a dill pickle spear, pickled sport peppers, and a dash of celery salt. To atone for my ketchup-on-hotdog sin, I'm sharing this tutorial to teach you how to draw a hot dog that would make Chicagoans proud. 


How to Draw a Chicago Dog


Materials:

  • drawing paper
  • colored pencils

Steps:


Begin by drawing the basic outline of the hot dog and bun. Sketch very lightly; I've used pen on these step-out photos to make them easier to see. Add the pepper (shaped like a leaf) and half a tomato. 


Add a second tomato to the foreground, then draw a wiggly line of mustard the length of the dog. 


Draw small bits of onions and relish along the mustard. Add a slightly smaller half-circle to each tomato slice. Add an oval plate beneath the hot dog.


Now it's time to color. I used the World Colors set, which gave me a good variety of browns and creams that came in handy. Don't forget to add poppyseeds to the bun!


If the Chicago dog is not your cup of tea, you may enjoy this Ultimate Hot Dog Style Guide, with varieties from across the world. I would like to try a Sonora Dog, stat! There are quite a few others I wouldn't turn down. Which ones catch your eye?

6/3/21

Drawing Donuts for National Donut Day

National Donut Day is tomorrow. There are many appropriate ways to celebrate beyond what is obviously the most important component of the day: eating donuts. You can dress up, learn donut historybrowse through recipesrelieve stress, decorate your room, hand out stickerstake a nap, do a puzzle, and enjoy a silly story. You can also draw some donuts. My inspiration came from the Doodlewash book I shared with you about six weeks ago. Affiliate links here and throughout the post. 


Watercolor Donuts


Materials:


Steps:


Start by drawing a rough oval in the lower middle of the paper. This will be the icing of the donut in the foreground. Donuts are usually fairly irregular, so don't worry about perfectly smooth curves. Add the cake portion of the donut below by extending short lines down from the sides of the donut, then connecting them with a curve. Then draw the small oval hole in the center of the icing. 

Use the same technique to add a donut on either side of Donut #1. No lines from Donut #2 or #3 should cross Donut #1.

Working toward the top of the paper, continue adding donuts. I added a maple bar (one of my favorites) in addition to a fourth round donut. There really is no right or wrong, as long as the lines of the donuts in the background never cross a donut in the foreground. 

When you're happy with the number of donuts, add toppings. I put sprinkles on one, a drizzle on another, and nuts on my maple bar. 


I ended up adding chocolate chips to the mint chip donut. It's ok to add the details later. 

Now start painting! I painted the icing on all of the donuts (in the same order that I drew them) before painting any of the cake portion. To make them as realistic as possible, I decided where my light source would be (around 11:00) and left lighter areas where they would naturally reflect. I darkened the edges and the areas around the holes. 

Next, I painted the cake portion. I used watery yellow and browns to mimic the way donuts are cooked. The darkest color is closest to the icing, with the next darkest near the base, and a lighter section between those. I also painted the holes where the cake portion shows through. 

With the icing dry, I painted in the toppings. The sprinkles were the easiest and most fun to do. I think the drizzle should have been thicker and more irregular in retrospect. 

Finally, I used a very watery grey to add shadows below the donuts, in the holes, and anywhere one donut would shadow another. 
 

Happy National Donut Day tomorrow, however you celebrate!