Showing posts with label poinsettia. Show all posts

12/1/21

Poinsettia Gift Tags

Homemade gift tags add an extra-special touch to Christmas gifts. They take only a few minutes to make and are an excellent excuse for pulling out the colored pencils for a little bit of relaxing during a busy time of year. (Or, if your kids are younger than mine, an excellent task to keep them busy while you get something done!) Obviously, you could use any image for any occasion. I wanted to use this poinsettia stamp so that I could experiment with the texture of the basket, shading the greenery, and adding cast shadows. 

You can simplify the tags by not backing them with colored cardstock. You can make things even easier on yourself by starting with pre-made tag blanks. Affiliate link here and below. 
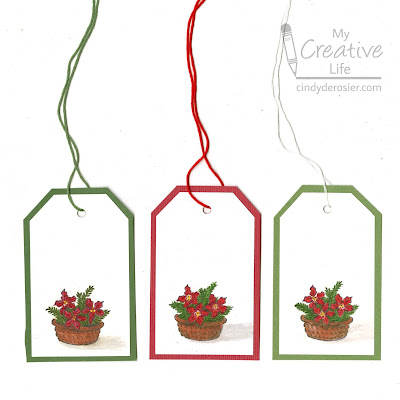


Poinsettia Gift Tags


Materials:


Steps: 


Cut the white cardstock to the size and shape of tag you want. (I'm not a fan of measuring unnecessarily, so I eyeballed mine. I don't care if the tags aren't all precisely the same). Stamp the poinsettia image on each tag, then use colored pencils to color them in. 

To back your tags, you could measure and cut. That's not what I do (see above). I cut a piece of colored cardstock to the rough size and shape as the tag. Then I adhere the tag to the back, and use the trimmer to cut the backing so that there is an equal amount along each side of the tag. 

Punch a hole through the backed tag with the Crop-a-Dile, then add a coordinating piece of embroidery floss to hang your tag. (Surprise! I don't measure that either!)

12/10/19

Quilled Poinsettia Card ... and a Winner!

I had the quilling supplies out the other day, so I whipped up a quilled poinsettia card. It's a really easy beginner project with only three shapes you need to learn. 

If you've never done quilling before, you need to know that when it comes to quilling there is an easy way and there is a thrifty way. If it's just going to be yourself or a small group, spend a little money and go the easy route. If you're going to make this in a classroom or other large group, you'll probably have no choice but to go thrifty. In the materials list below, the first item is the easy option and the second item is the thrifty option. These are affiliate links. 


Quilled Poinsettia Card


Materials:


Steps:


Start by cutting red cardstock or construction paper into the size of card you want. Cut a piece of white cardstock or construction paper that is slightly smaller in both directions. 

If you have quilling paper, you're ready to go. Otherwise, you need to use a paper trimmer to cut the copy paper into long, narrow strips. I like 3 mm. strips, but you can do 5 mm. or other sizes. Warning: this is tedious if you're making enough for a class of 32+ students. Make plenty of extras and do your best to make sure the strips are uniform. 

Use the quilling tool or the toothpick to make the following shapes: 6 green teardrops, 8 red teardrops, 1 yellow loose circle, and 7 yellow tight circles. 

Glue the loose circle to the center of the white paper. Arrange the green teardrops around the circle with the points facing out. Lift them one by one and glue them in place. (This is much easier to do with reverse tweezers and precision-tip glue. Otherwise, use a toothpick to apply glue to the shape as you hold it with ordinary tweezers or your fingers.) Arrange the tight circles close to one another on top of the loose circle. Glue them in place. Place the red teardrops around the yellow center, then glue them down. 

Adhere the white paper to the red card blank. 


---------


Time to announce the winner of the Orange Art Box giveaway! Congrats to:


Barbara, please send your mailing address to cindy.mycreativelife at gmail.com and the December Orange Art Box will be on its way!