Showing posts with label flower. Show all posts

4/17/26

State Symbols That Have Changed

Recently, I've been working on a lot of crafts inspired by state symbols. That got me to thinking - has any state ever changed one of their symbols? Obviously, states have changed their flags and their seals, but has any state decided that their state bird no longer represents them? Or that there's a better choice for a state tree or flower? Let's dive in and find out!


State Birds


Here is the current list of state birds, along with their scientific name, picture, and the year they were designated. There have been quite a few additions in the form of state game birds, waterfowl, raptors, etc. but I only found three examples of states that changed the actual state bird. Florida just tried to change theirs, but it stopped in the Senate. 


  • North Carolina had originally chosen the Carolina Chickadee as its state bird in 1933. Due to concerns about its unpopular nickname, they repealed the designation after less than a week. Ten years later, NC selected he Northern Cardinal as its state bird. 
  • South Carolina changed its official state bird from the Northern Mockingbird to the Carolina Wren in 1948. They felt the Carolina Wren was a better choice because it is found in all areas of South Carolina and doesn't migrate away from the state. 
  • New Hampshire changed their state bird from the New Hampshire Hen to the Purple Finch in 1957. While there are no plans replace it, reports suggest climate change could push the species out of the state, potentially affecting its status.


State Trees


Here is the current list of state trees, with their scientific names, photos, and years they were adopted. I was only able to find one instance of a state changing their state tree. Kentucky had a bit of a kerfluffle with theirs, but ultimately it was not a change. Florida updated the cocoa tree on the state seal to the Sabal palm when they adopted it as the state tree in 1953, but that wasn't a change of state tree either. 


  • Utah changed its state tree from the Colorado blue spruce to the quaking aspen in 2014. The aspen is much more widespread in Utah than the blue spruce, which is the state tree of Colorado. 


State Flowers


Here is the list of state flowers, their scientific names, images, and dates of adoption. Like the state birds, there have not been many changes, but there have been additions as states have designated state wildflowers and floral emblems. I was able to find two states that changed their state flowers. Tennessee had a bit of a crazy history with their state flower(s) but I'm not counting it as a change. Georgia has legislation in progress to replace their state flower, but it hasn't happened yet. 


  • Kentucky is the Bluegrass State, but they changed their state flower from bluegrass (which is not a flower) to the goldenrod in 1926. 
  • Indiana has changed its state flower from the carnation (1913) to the tulip tree blossom (1923) to the zinnia (1931) to the peony (1957). There is a vocal minority that wants to change the peony to a native flower, but for now the state flower is the peony. 

3/20/26

Puzzle Piece Flower Bouquet

Puzzle pieces make beautiful flowers. This is a fun craft for your guests to make during a puzzle themed party, or you can make them ahead of time as decoration. Affiliate links below. 

Paint a coat of gesso on to the puzzle pieces. When it is dry, add a coat of acrylic paint. Use a colored pencil to add lines that mimic the veins and ridges of petals. Then glue a pom pom in the center of the flower. 


Twist the pipe cleaners to form leaves. I made two leaves with stems and two without. I recommend making all the leaves with stems, as you can always cut them off later. Add a coat of glue to each leaf and lay it on top of tissue paper. 


When the glue is dry, cut around each leaf. Twist the stems of the flowers together. 


Twist the stems of the leaves around the flower stems. (I did that with the two I had, then glued a third leaf in place. I didn't use the fourth leaf.) Arrange the flowers in the vase. 


I love how my puzzle piece bouquet turned out! It's going on display next to my Lego flowers

3/13/26

Tissue Paper Flower Bouquet

I've shared dozens (and dozens) of flower crafts over the years and I never get tired of making them. I've made so many flower crafts that I actually had enough to put together a round-up of just my favorite edible flower crafts! Today's project isn't edible, but I'm happy to add it to my collection of flower crafts. It's so pretty. (And did you notice the colors I used?) Affiliate links below. 


Decoupage Tissue Paper Flower Bouquet 


Materials:


Steps: 


Choose the colors of tissue paper you want to use for your bouquet. Tear the tissue paper you're using for the vase into irregular pieces. Pour some Mod Podge into a cup and dilute it with a little bit of water (about 3 parts Mod Podge to 1 part water). Working on one area at a time, paint some of the Mod Podge onto the paper, then place a piece of tissue paper onto the moist area. Paint over the top to seal it. Repeat the process, overlapping the pieces as much (or as little) as you want. 


Cut or tear the remaining colors of tissue paper so that they are slightly larger than the paper they'll be covering. Working with one color at a time, spread a coat of the watered-down Mod Podge onto the paper. Carefully lay tissue paper onto the moist paper. Load the brush with more Mod Podge and paint a coat over the top of the tissue paper. Use the brush to smooth any wrinkles as best you can. Don't worry about any overhanging tissue paper. Repeat the process until you have prepped the papers for the three flowers, the leaves, and the flower centers. 

When everything is completely dry, cut out a vase, two flowers from each color (total of six), three flower centers, and three leaves. It is easiest to draw the shapes you want on the back of the paper before cutting. 


Arrange the two layers of flowers so the petals are off-set and glue them together. Glue the flower centers in place. Adhere the flowers to the vase, starting with the one in the center back. Finally, add the leaves. 


You might have noticed that my purple flower is sparkly. I experimented with Sparkle Mod Podge, which gives the flowers some extra dazzle. The choice is totally up to you and the look that you want!

8/7/25

Summer Creative Retreat: Funky Floral Watercolor

The third project I completed during Summer Creative Retreat was this Funky Floral Watercolor. I had so much fun painting it and I absolutely love how it turned out!


This class was taught by Julie Malizia of Harp + Crow. I loved her teaching style and the pacing of the class. Everything about it was so much fun! Here is the project she made during the class: 


The basic idea was to take the normal shape of a vase of flowers and stretch or compress the components so that they reach the edges of the paper. Where the vase or a flower touches the edge, that should be a flat line. It's a completely unique way of drawing and so much fun! 

I used my favorite watercolors to paint my project. I love the color palette. Those bright flowers would have fit right in at my wedding.

8/5/25

Summer Creative Retreat: Pebbles and Petals

Back in 2022, I participated in an online art workshop called Sketchbook Party, hosted by The Pigeon Letters. I took 16 classes and had a fantastic time. Most of the classes were WAY outside my comfort zone (that's a good thing!) and I learned so much. 

The Pigeon Letters is currently hosting Summer Creative Retreat, a week packed with 60 live art workshops. I'm far too busy to take 60 classes in one week, or even 16, like I did last time. Instead, I started with just one class that looked fun and was as far outside my comfort zone as possible. This is what I made: 


The class was "Pebbles & Petals" by Esté MacLeod. MacLeod is a textile and surface pattern designer whose paintings appear on wallpaper, fabrics, homeware, puzzles, stationery, and much more. Her class focused on the idea of using pebbles and water soluble pencils to create a colorful flower. 

Here is the project MacLeod created during the session. 


We started by picking out a narrow palette of colors. I chose four of my Stabilo pencils: pink, purple, orange, and yellow. Then we placed a pebble on a piece of watercolor paper and used one of the pencils to push it around. (MacLeod used real rocks; I used glass ones.) By holding the pencil overhand, I was pushing instead of doing controlled drawing. We repeated the process with each of the colors, using a different size and shape pebble for each. 


Then we went in with a paintbrush to activate the colors.


I didn't get photos of my next steps because I ran out of daylight, but it's pretty easy to explain. I used my darkest color to trace large shapes around the pebbles in order to form petals. Then we used black to define the edges and add depth. We added more of the original colors to the petals and then accented them with dots and other interesting marks. 

I don't love my finished project, but I sure had fun making it! I'm calling that a win. 

6/3/25

Edible Flower Crafts for Kids

I love flower crafts. I've made a lot of kid-friendly flower crafts over the years, including quite a few that are edible. I've gathered them all here in one place. Below that, you'll find affiliate links for some fun flower-themed picture books. Enjoy!


Edible Flower Crafts for Kids


  • Black-Eyed Susan Candies - Create eye-catching candies that look like black-eyed Susans. Kids will love making (and eating!) these treats. 
  • Ice Cream Flowerpots - These fabulous flowers are a lot of fun to make. Pre-freeze the ice cream and have kids make their own flowers for a fun summertime party activity. 
  • Fondant Daisies and Roses - Making beautiful daisies and roses from fondant is surprisingly easy and very kid-friendly. Use them to decorate cakes, cupcakes, or other homemade goodies. 
  • Conversation Hearts Bouquet of Flowers - This edible bouquet makes a wonderful gift or a unique centerpiece. 
  • Candy Roses - These beautiful roses are made freehand - no mold required. And I promise it is ridiculously easy! They make a wonderful topper for ice cream. 
  • Glazed Flower Rolls - There are a lot of possibilities with this recipe. Make plain flower rolls to serve with dinner, or add a flavored glaze for a sweet breakfast treat. 
  • Jelly Bean Bouquet - This miniature bouquet is one of the most popular crafts on my blog. It's really easy and is absolutely adorable. 
  • Pineapple Sunflowers - Dark chocolate and pineapple is a fantastic flavor combination. They come together to make stunning edible sunflowers. 
  • Sweet Tarts Flower Cupcakes - Decorate cupcakes with delicious Sweet Tarts Hearts for a fun springtime dessert. It's a great choice for Mother's Day! 
  • Sunflower Seed Brownies - Whether you make sinful brownies or a healthier version, decorate them with cute little sunflower seed flowers. 


Flower Books for Kids


  • The Tiny Seed - Kids love this classic book by Eric Carle that comes with seed-embedded paper you can plant. 
  • Mrs. Peanuckle's Flower Alphabet - Read about 26 types of flowers, from asters to zinnias, in this colorful book.  
  • Planting a Rainbow - Featuring the paper collage artwork of Lois Ehlert, this classic book follows a mother and child who plant a beautiful garden with all the colors of the rainbow. 
  • The Big Book of Blooms - Learn fun and amazing facts about some of the most interesting flowers on the planet. 

9/18/24

Dandelions and Fortune Cookie Messages in the Sketchbook

One of the many things uncovered when Trevor was packing to move into the dorms was a collection of fortune cookie messages. Neither of us remember when he was collecting them. I went through the stack, picked out four that I thought offered the best advice as he's headed off to college, and added them to this dandelion page in my sketchbook. 
 

The right side was already in the sketchbook (here's the tutorial for the dandelions). I didn't like what was on the left side, so I painted over it, glued the fortunes in place, then added the dandelion fluffs and the grass. 

Trevor, please do your best to remember each of these as you navigate through college and beyond: 

  • Do not hide your feelings. Let others know where you stand. 
  • You will obtain your goal if you maintain your course. 
  • The strengths in your character will bring you serenity. 
  • People enjoy having you around. Appreciate this. 

Sometimes, there's a lot of wisdom hiding inside a fortune cookie. 

7/3/24

State Flowers Made from Perler Beads

When Jonna finished making her Perler bead anchor, I was less than a quarter of the way done with my Michigan logo. So she started making state flowers. Aren't they pretty?!?


These small designs work up quickly. They would make a great project for students learning more about their home states, or fifth graders working on state reports.  

This is a forget-me-not, the state flower of Alaska


This is a Black-Eyed Susan, the state flower of Maryland. 


This is an Indian blanket, the state wildflower of Oklahoma


And this is a violet, the state flower of Illinois, New Jersey, Rhode Island, and Wisconsin


You can find Perler beads and boards on Amazon and at Michaels (affiliate links). Happy beading!

5/30/24

Stamped Floral Card

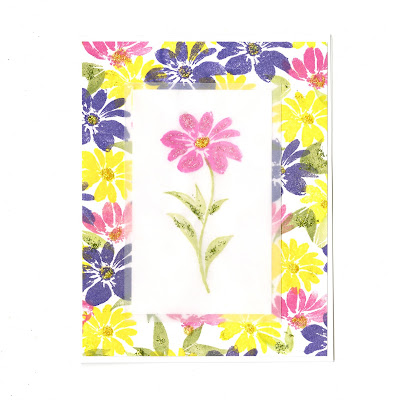
For the Patterned Paper with a Twist challenge on National Scrapbook Day, we had to make a project using homemade patterned paper. This is my card:

Stamped Floral Card (affiliate link)

I used a Gina K. stamp set (three flowers and two leaves) and five colors of ink to create my own patterned paper. I stamped an extra flower (plus stem) onto vellum, then added Stickles to give my stamped images some sparkle. I really enjoyed making my own stamped patterned paper. This is definitely something I'd like to do again. 

While I like the color combination of yellow, pink, and purple, I wish I'd used my wedding colors. I hadn't realized I'd be running this post on my 20th anniversary! Happy anniversary, Steve. I can't wait to see what the next 20 years have in store for us. Whatever it is, we'll do it together. I love you!

5/3/24

Fingerprint Flower Magnet for Mother's Day

Every mom I know loves gifts that are handmade by their children. This heart-shaped refrigerator magnet features a child's fingerprints, turned into roses. Affiliate links below. 


Fingerprint Flower Magnet for Mother's Day


Materials:


Steps: 


Paint the background of the heart with your desired colors. I made a blue wall and a white tabletop, but you can choose whatever colors you want. Then add a vase toward the right side of the heart. Mine is yellow.

When that is dry, add fingerprint flowers in the space above the vase. If a young child is doing this, they can use their pointer finger. If the child is older with fingers that are less petite, you might want to use the pinky finger. Then use a brush to paint a heart onto the vase.


When the fingerprints are dry, paint medium green leaf shapes in and around the flowers. Don't fill in all the spaces at first. Leave room to add dark green shapes. While I was waiting for the green paint to dry, I added a grey shadow and some texture to the tabletop. This is optional. 

When all the paint is dry, write "Happy Mother's Day!" on the left side using a Sharpie. I added a dashed border around the edges as a final touch. Then turn the heart over and add a strip of magnet tape.


This project is easily adapted for many other holidays and occasions. Birthdays, Valentine's Day, and even graduation come to mind. Just change out the message!

4/3/24

Butterfly Flowers Card, Featuring the Colorado Hairstreak

It's great fun discovering that one of your punches can be used for a different design that it was intended. I've used my Fiskars butterfly punch many times over the years, but this is the first time I've used it as petals. Notice that I have the butterflies facing out on the left and facing in on the right. I couldn't decide which I liked better, so I put them both on the same card!


Obviously, I could have chosen any color for the butterflies, but I wanted to use one of the most beautiful state butterflies, the Colorado hairstreak. Affiliate links below. 


---------


Butterfly Flowers Card


Materials:


Steps:


Use white cardstock to make a card in your desired size. Blend blue ink on the paper to make a sky background. 


Punch out the desired number of flower centers and color them a yellowy orange using Ohuhu markers. Punch out butterflies (5 per flower) and color them as desired. I love the purple, orange, and black (and tiny white spots) of the Colorado hairstreak, but you can model yours after another species or just use your imagination. 


Cut stems and leaves from green cardstock. Then glue everything in place. I'm still not sure whether I prefer the butterflies facing in or facing out. 


In case you were wondering, Colorado's state flower (the columbine) doesn't look like this. It would have been really cool if I could have used the state butterfly to make the state flower. If I come across a state with a coordinating butterfly and flower, I'll definitely be doing that!

2/19/24

Bread Rose Wreath

Remember the rose wreath that I made out of air-dry clay? I made an edible version (bread dough instead of clay). 


The shaping process was somewhat similar, but the bread dough was much more difficult to manipulate than the clay. Still, it was a fun experiment with delicious results. I used the same basic recipe as for the Sixty-Minute Cloverleaf Rolls, then veered off in a different direction for the shaping and baking. 


---------


Bread Rose Wreath


                                                    3.5 to 4.5 cups flour                            1 cup milk
                                                    3 tablespoons sugar                            1/2 cup water
                                                    1 teaspoon salt                                    1/4 cup butter
                                                    2 packages Fleishmann's yeast


In a large bowl, mix 1.5 cups flour with the sugar, salt, and yeast. Set it aside. Combine milk, water, and butter in a saucepan (or microwavable bowl) and heat until liquids are 120-130°F. Add the liquid ingredients to the dry ingredients and beat at medium speed for two minutes, scraping bowl occasionally. Add 0.5 cup flour and beat at high speed for two minutes. Stir in enough additional flour to make a soft dough. Turn out onto a floured board and knead until soft and elastic, approximately 5 minutes. Place in a greased bowl, turning to grease top. Cover, then place in a warm place (approximately 98°F) for 15 minutes. 

Turn the dough out onto the floured baking mat. Divide dough in quarters, then divide each quarter into three equal pieces. You should have 12 balls of dough, each the same size. Roll 9 of the balls into long ropes, approximately 18" long. Braid three ropes together. 


Curl the braid into a wreath and place it on a Silpat-lined baking sheet. Repeat with the other 6 ropes to make three wreaths in all. 

Divide each remaining dough ball into 9 pieces. Roll the pieces into balls, then smoosh them with the ball of your hand to make petals. 


Pick up one petal, then roll it up to form the inside of the rose. Pick up the next petal and roll it around the center of the rose. Continue the process with the rest of the petals. Place the finished rose on the baking sheet.  

Loosely cover the dough and let rise in a warm place, for approximately 15 minutes. Meanwhile, preheat the oven to 425°F. Bake for 15, then check the roses for doneness. Remove them from the oven and bake the wreaths for another 10 minutes or until done. While the wreaths are still hot, nestle the roses into the wreaths. Let the bread cool on a wire rack for at least 10 minutes. 


Shop my affiliate links! 

                                  Silpat                                            Sili Bake                                         Fleischmann's Yeast

10/6/23

Bold Bloom and Grow Flowers in the Sketchbook

I played with bright colors for this bold two-page spread in my sketchbook. It was a lot of fun to do and I'm really happy with how it turned out. Obviously, you don't need to do this project in a sketchbook. A bunch of these grouped together on a classroom bulletin board would look amazing! Affiliate links below. 


Bold Bloom and Grow Flowers


Materials:


Steps: 


Lightly sketch a circle on your page. It can be in the center or off-center. Paint the circle yellow. Paint petals coming out from the center and extending to the edge of the page in the color(s) of your choice. I did the orange flower first and didn't wash my brush before doing the pink one, which is why it has some color variation. Don't worry if your petals aren't straight or if you get paint between them. It will get covered.  


When the paint is completely dry, outline all of the petals with a black paint pen. You can fill in any white spaces with that pen, or you can use black paint. 


When the black paint is dry, place a piece of scratch paper on the center of the flower and write the word of your choice (Bloom, Grow, Love, Enjoy... whatever) so that it stretches from one side to the other. Then turn that piece of paper upside down and scribble on it with pencil. Turn it right side up, position it where you want it, then trace over the lines.


Trace the pencil guidelines with the black paint pen. Obviously, you could do this freehand if you want. 


I love how my two pages look together. 


If any of you do this with a group and fill a bulletin board, please send me a photo! I'd love to see them. 


8/28/23

Plastic Lid Flower, Made with Apple Barrel Paint Pens

 I've been playing with the new Apple Barrel paint pens!


I'm a Plaid Ambassador, which means I get to try out all sorts of new goodies from one of my favorite companies ever! Affiliate links here and throughout the post. 

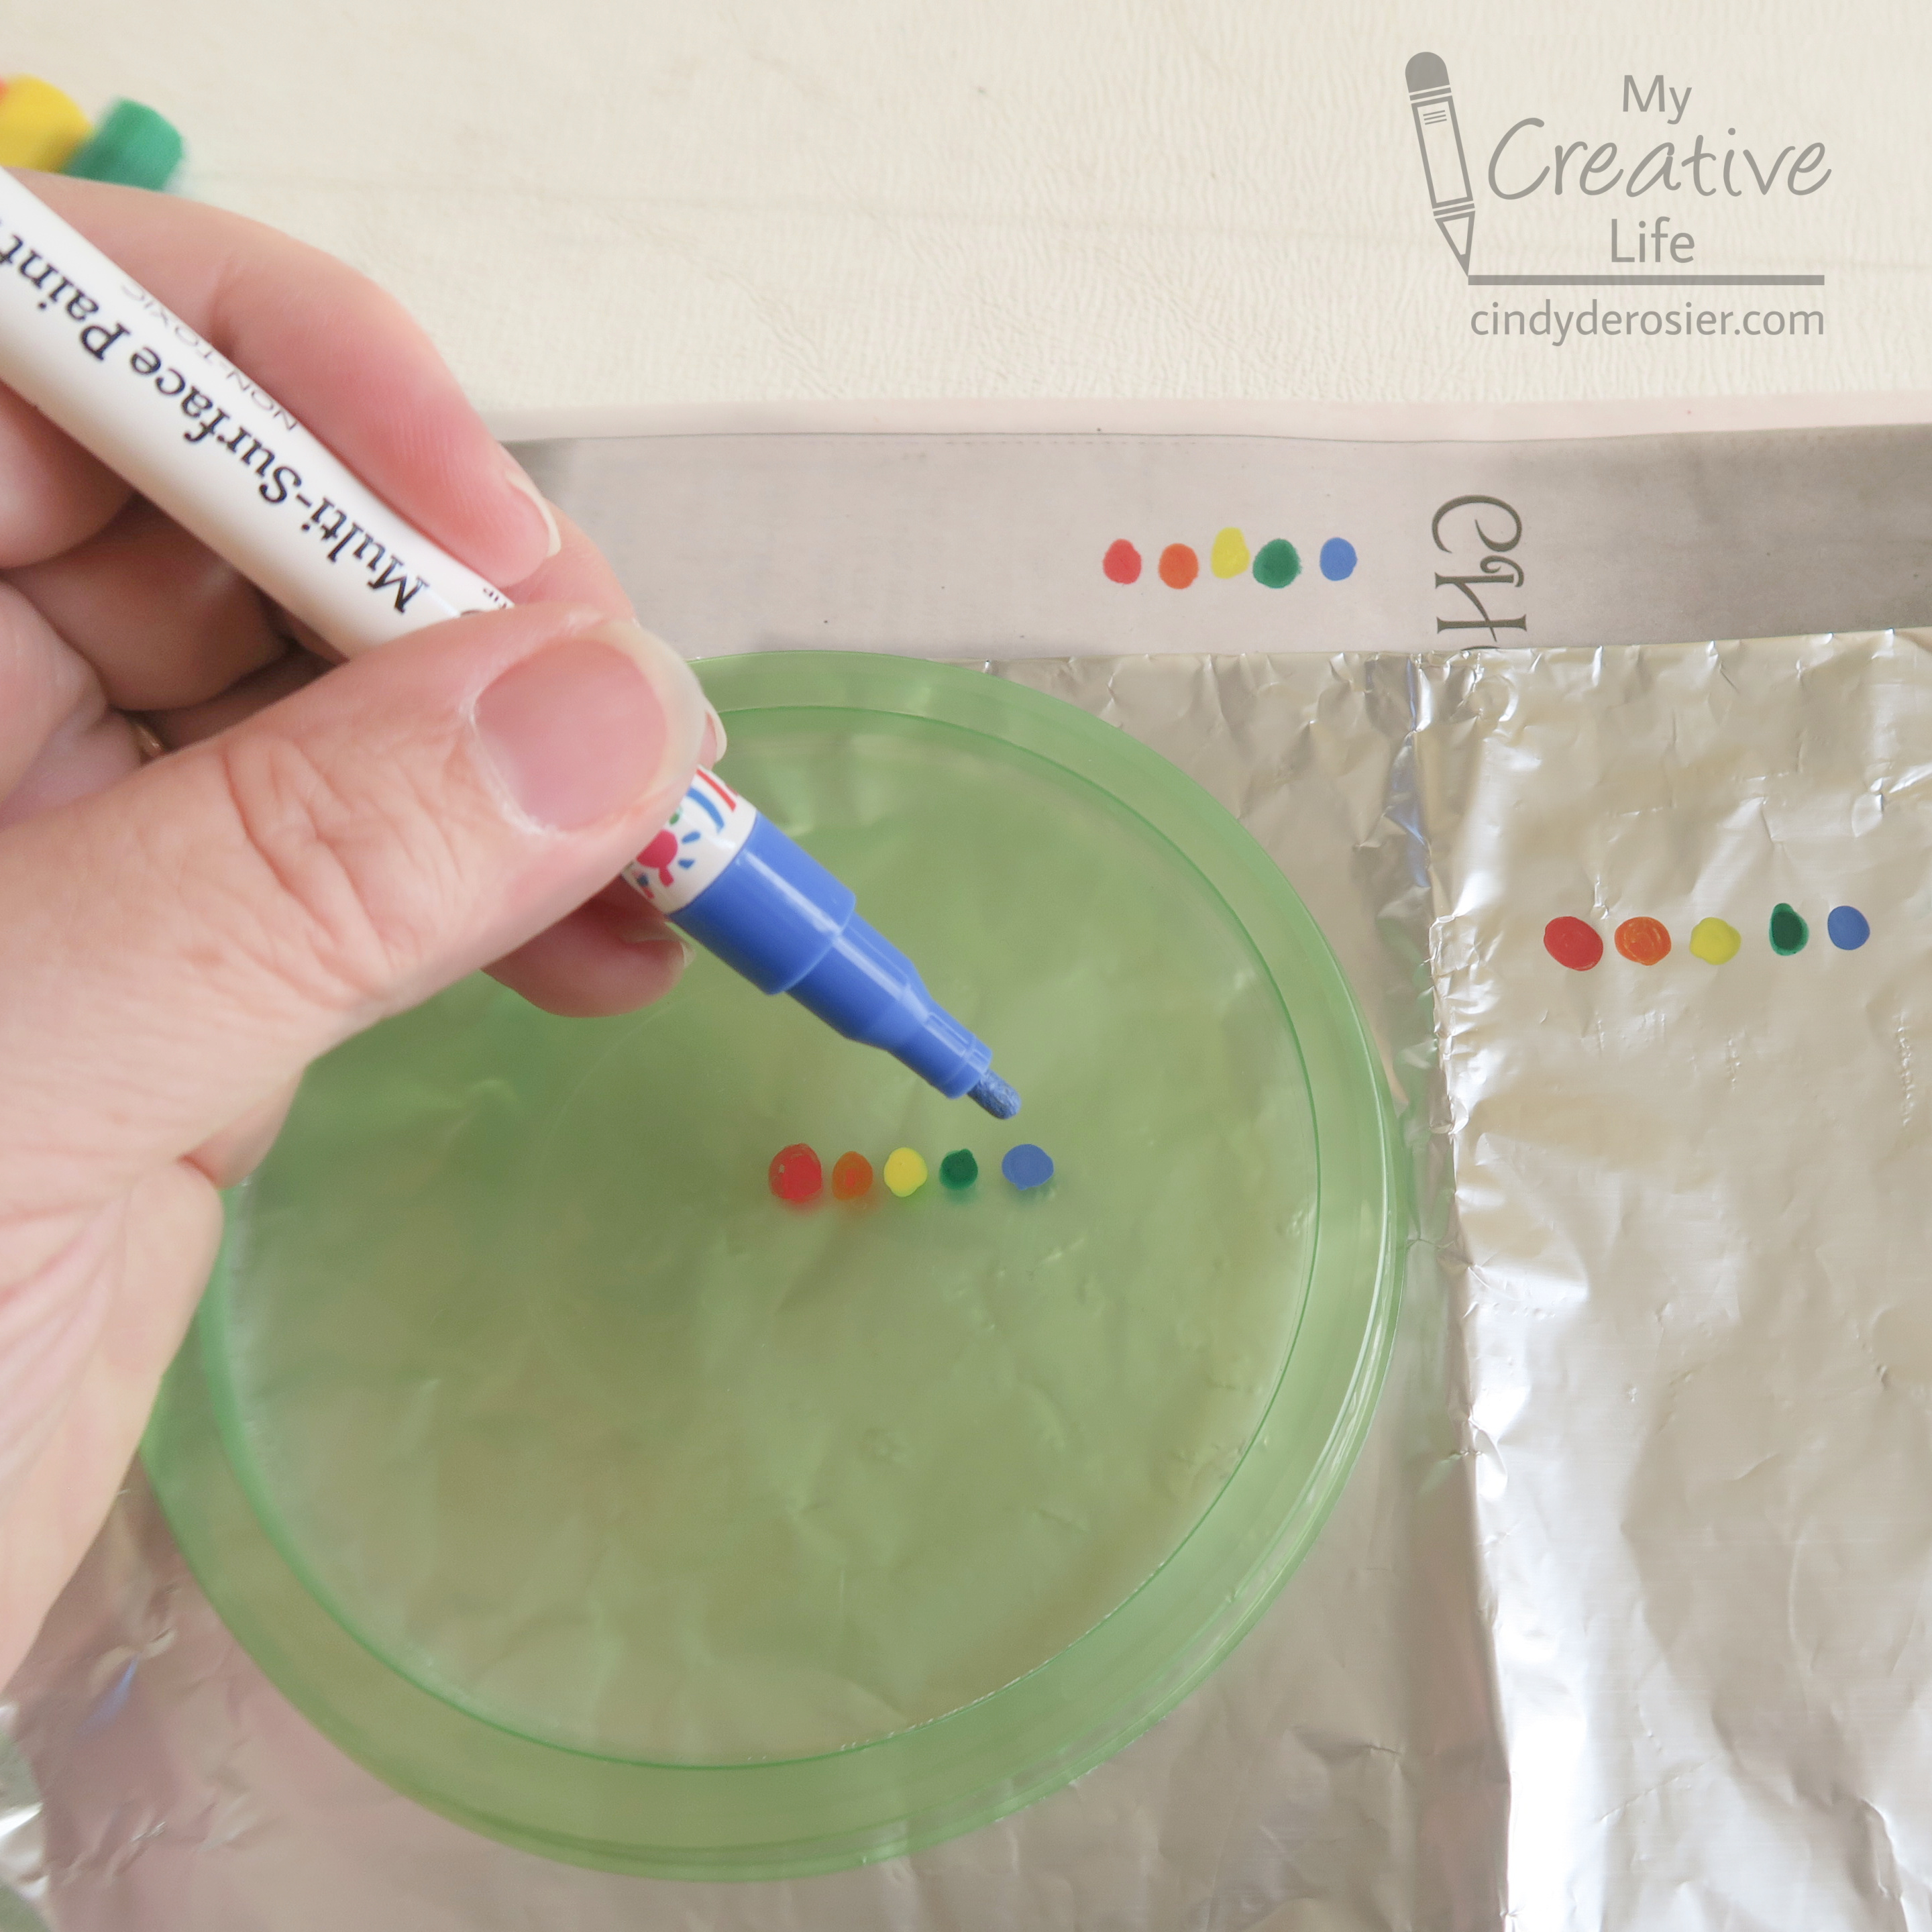
I received two sets of Apple Barrel fine-tip paint pens (the Basic colors and the Neon set). According to the package, they're intended for use on fabric, wood, paper, glass, rock, metal, and much more. I decided to swatch my colors on three surfaces: newspaper, a plastic lid, and aluminum foil. The colors were beautiful on all the surfaces and the coverage was excellent. 


Here are some swatches with the neon colors. Fabulous!


After I took that photo, I ran my finger across all of the swatches to see how well they dried on each surface. I'm happy to report that they were all perfect! No smearing, nothing. 

But that was with a few minutes of drying time. What would happen if I made dots in quick succession, allowed no drying time, and then rubbed my finger through them? This: 


By the time I made the 8th dot (purple), the first five dots were completely dry and did not smear when I rubbed them. Impressive! Green, which was the 6th dot, was dry on the outside but not in the inside in just the time it took for me to make blue and purple dots. Not bad at all! I didn't expect the paint to set as quickly as it did. 

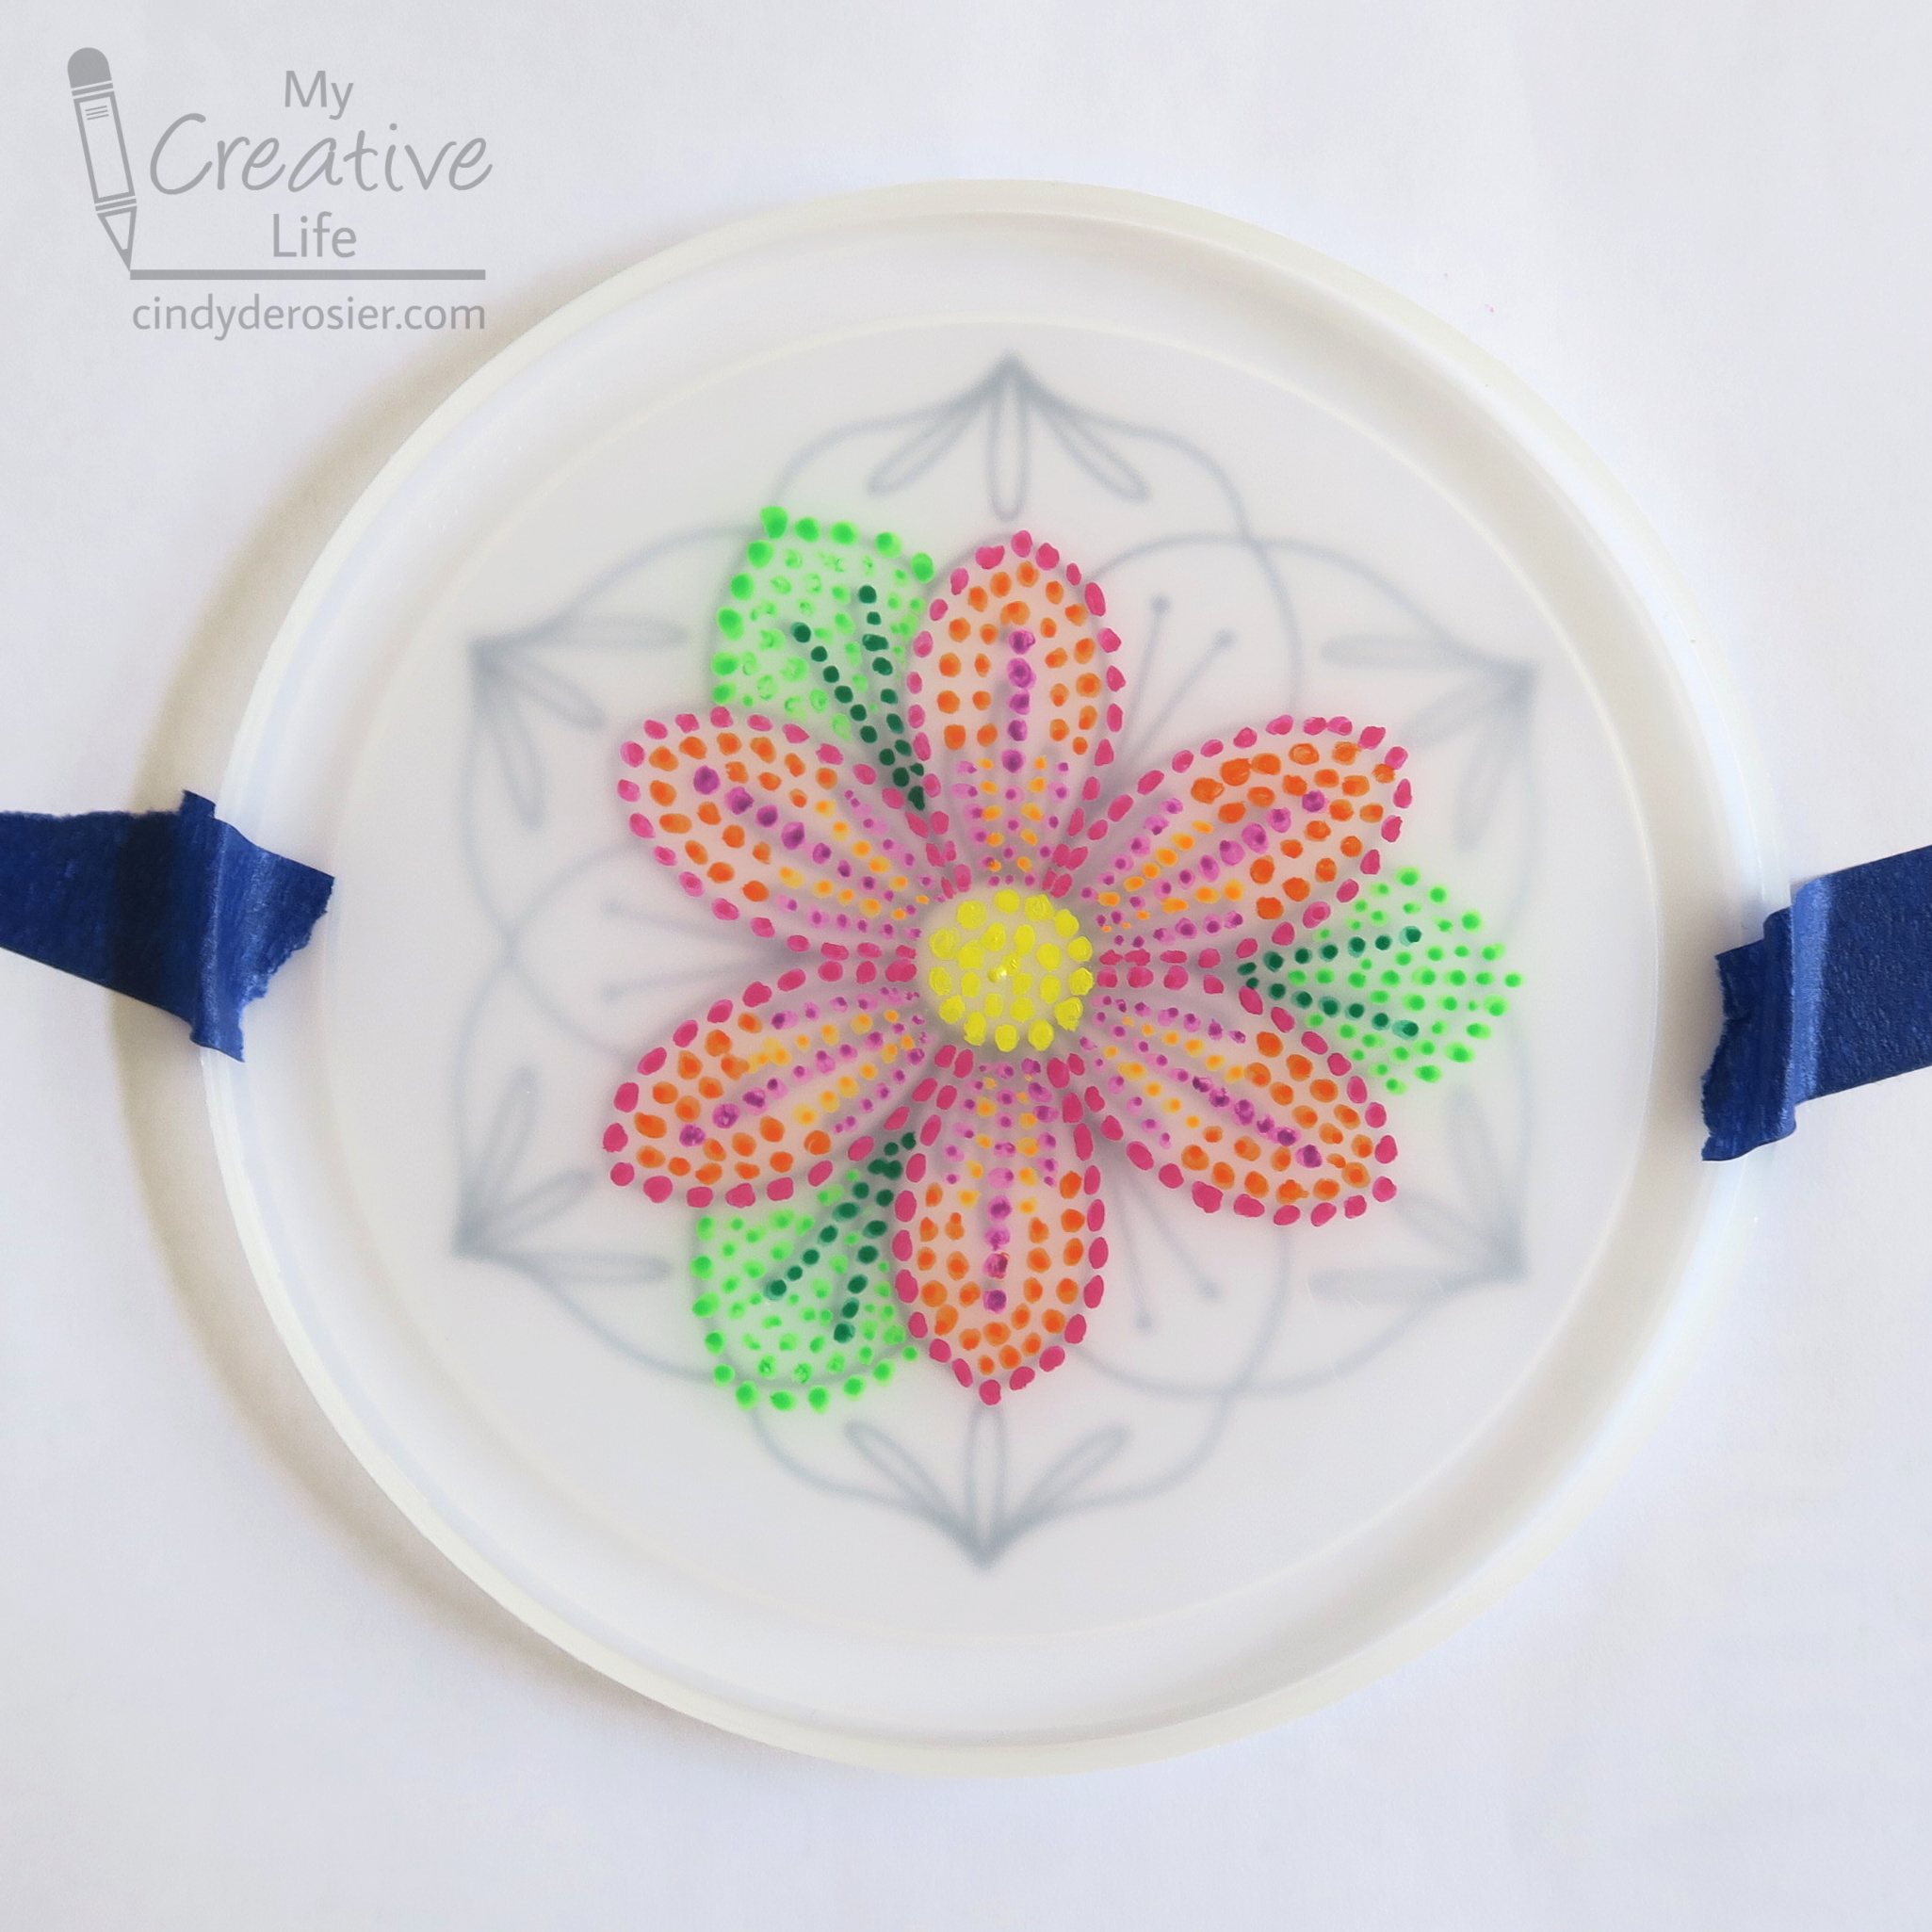
Time to move on to my project. I grabbed a random plastic lid (because craft bloggers hoard plastic lids in their craft rooms) and taped the lid over this pattern by Bella Savoy. And then I started dotting. 


Dot, dot, dot, dot... I had intended to fill in the whole design, but changed my mind and stopped at this point. Such a cute flower!


I flipped the lid over and colored the back of the flower and leaves with a white paint pen. This really helped the colors pop. Then I colored around the outline with sky blue. I used microtip scissors to cut out the shape, leaving me with this: 


Not bad for a plastic lid! I love trash-to-treasure projects like this. And I love the Apple Barrel Paint Pens. I used them for a second project right away; I'll share that tomorrow.