Showing posts with label embroidery floss. Show all posts

8/19/26

Summer Creative Retreat: Pumpkin Embroidery on Watercolor

The second project I completed during Summer Creative Retreat was this embroidered pumpkin. 


I made it during a workshop called "Embroidery on Watercolor" which was taught by Jessica Mack of Brown Paper Bunny Studios


As you can see on the graphic, Jessica taught us how to make different kinds of flowers. I went my own direction and made a pumpkin, which is the official state fruit of New Hampshire. She used a loop start to begin her embroidery, which is something I've never done before. I love taking classes, not only for the inspiration but for those little tips that I otherwise wouldn't have known. Affiliate links below. 


Pumpkin Embroidery on Watercolor


Materials:


Steps: 


Cut your watercolor paper down to the desired size. Mine is 5" square. Add multiple bands of color to the paper. I used green, yellow, and orange and blended them a bit. 

When the paint is dry, use a pencil to draw the design you want as lightly as possible. Poke holes along the pencil lines (always poking from the front) with the paper piercer. Then use embroidery floss to backstitch the design. 


Then fill in the pumpkin and stem with watercolor. 


This is a fun and easy project that can easily be adapted to practically any design. It's a great way to introduce kids to embroidery. Give it a try!

4/15/26

Fabric Applique Wall Hanging

After making the stuffed cross ornament, I tried another idea using the same fabric. This basic applique project is a great introduction to hand sewing and makes a cute wall hanging. Obviously, you can use a cut-out design from any fabric; it doesn't need to be a cross. The link in the materials list goes to some adorable forest animals. Affiliate links below. 


Fabric Applique Wall Hanging


Materials: 


Steps: 


Cut out the image you're going to applique, leaving a 1/2" border around the edges. Fuse the interfacing to the fabric, then cut out the image precisely. Cut the background fabric about 2" larger than the diameter of the embroidery hoop. Put the background fabric into the hoop, then position the applique piece where you want it. 

Cut a length of embroidery floss in a matching or contrasting color. Choose a hand stitch for your project. I debated blanket stitch but decided to go for the simpler whip stitch. Sew all the way around your shape. 

If your applique is not perfectly centered in the hoop, loosen the embroidery hoop slightly to adjust the background fabric until it looks good. Tighten the hoop, then trim the excess background fabric, leaving 1/4". Glue that to the back of the hoop. 

3/25/26

Tennis Racket Craft

If you've never been, I highly recommend a visit to the International Tennis Hall of Fame in Newport, Rhode Island. Tennis fans will love it, obviously, but even if you know nothing about tennis I guarantee that you will love it too. I learned so much about the sport. Tennis wasn't represented amongst the many Sports Crafts for Kids I've made over the years, so it was time to change that. 

I first played tennis in high school PE. Or maybe middle school PE. Either way, I enjoyed it, relatively speaking. In college, one of my roommates was on the tennis team. After I bought a racket, a third roommate and I would play against her, 2 against 1, and she would beat us every time. Easily. A few years later, I took tennis lessons through the city for a few months. It was fun, but I didn't end up playing again for about 15 years when 8-year old Trevor was interested in learning. He and I played a couple dozen times until he was about 10 and I haven't played since. I still have my racket though; it has the same colors as today’s craft. Affiliate links below. 


Tennis Racket Craft


Materials: 


Steps: 


Sketch a tennis racket onto a piece of chipboard. As you can see, I drew loose ovals until I found a shape I liked, then added the handle at the bottom. If you prefer, make a pattern on a piece of scratch paper or print out a picture and use that as a pattern. 


Cut out the tennis racket. To make mine symmetrical, I cut one side, then used that scrap to cut the other side. That allowed me to fix any imperfections. 


Trace the head of the tennis racket onto a piece of scratch paper, then paint the racket with your preferred color. While you are waiting for the paint to dry, plan out where you want the strings to go. I started with a line in the center, then approximately every 1/2" outward from there, giving me a total of 7 vertical strings. 

When the paint is dry, wrap pieces of colored (or plain) masking tape along the handle to make the grip. 


I had planned to poke holes in the chipboard and sew fishing line through them to make the strings. This failed. I had to use a needle with a fairly large eye in order to fit the fishing line, which threatened to tear the chipboard. I tried a couple of other ideas but eventually abandoned the ideas of holes altogether and switched to embroidery floss and glue. Do yourself a favor and go directly to the floss/glue. 


After a bunch of experimentation, I decided this is the easiest method: Use the craft pick to poke holes into your scratch paper pattern. Clip the pattern to the racket and color in each hole to mark where the strings will go. Remove the scratch paper and put a dollop of glue in that spot. Add a piece of embroidery floss, slightly longer than needed. Let the glue dry completely. 


Tape the racket to the table. Add dollops of glue along the bottom marks and stretch the floss into position. Tape the excess to the table to keep it stretched while the glue dries. Then snip off the extras. 

Repeat the same process with the horizontal strings. I thought about weaving them, but decided I didn't want to test the strength of the glue. It probably would have held. But it looks fine with the strings not woven. If you prefer accuracy, go for it! 


The finished racket!


Speaking of "racket"... as I was writing this post, I spelled it "racquet" about half the time. The more I thought about it, the less confident I was about which was correct. I looked it up. Based on what I learned, I changed my racquets to rackets. For purposes of SEO, I should probably write "tennis racquet craft" at least once in this post. There. Whether you're looking for a racket craft or a racquet craft, I hope my project inspired you to give it a try!

1/16/26

Standing Horse Craft for Kids

Did you know that there are 17 states which have named a horse as one of their state symbols? Thirteen states have an official state horse, including: Alabama (Racking Horse); Florida (Florida Cracker Horse); Idaho (Appaloosa); Kentucky (Thoroughbred); Maryland (Thoroughbred): Massachusetts (Morgan); Mississippi (American Quarter Horse); Missouri (Missouri Fox Trotter); North Carolina (Colonial Spanish Mustang), Oklahoma (American Quarter Horse); South Carolina (Carolina Marshy Tacky); Tennessee (Tennessee Walking Horse); and Texas (American Quarter Horse). Two more states have named a horse as their state animal, including: New Jersey (Horse) and Vermont (Morgan). Virginia has a state pony (Chincoteague). North Dakota has an honorary equine (Nokota). With so many state honoring this animal, it was the obvious choice for my next craft. 

In order to represent multiple breeds of horses for this blog post, I made my craft two sided. You can opt to make yours the same on both sides (like a normal horse) or different (like mine). Affiliate links below. 


Standing Horse Craft


Materials: 


Steps: 


Create a pattern for your horse. You can draw a horse or find a photograph you like and cut that out. Trace the pattern twice onto chipboard. Cut out both horses. Paint each horse with a base coat of paint. (Remember, I made my horse two different colors intentionally.) Let the paint dry. 


Finish painting the horses. For my brown horse, that meant giving it a second coat and adding dark brown for the hooves. For the spotted horse, I added the spots and the striped hooves that are characteristic of an Appaloosa. 

Wrap embroidery floss around the four fingers of your non-dominant hand, going around 12 times. 


Use the scissors to snip below your pinkie to make 24 strands that form a tail. Glue the hair in place on ONE of the two horse pieces. 

Wrap embroidery floss around two fingers, going around 12 times. Snip that to make the mane. You'll be gluing it along the back, then folding it over toward the front. Start by putting a line of glue on the back of the horse, then lay the mane in place. Repeat as necessary until the mane and forelock are as full as you want. Let the glue dry. At this point, the mane will be sticking up. To make it lay flat, spread glue along the front side and press the mane into it. Trim as needed. Repeat the process for the second side of the horse, as desired.  


To make the horse stand, spread glue on the back side of the body, neck, and head of one horse. Do not put glue on the legs. Press the two sides together, then secure them with binder clips. (I took the picture before adding the rest of the clips. You'll want one by the throat and one over the tail. 


When the glue is dry, remove the clips and you'll have a horse that stands. I opted not to add facial features, but that's a personal choice. 

4/2/24

State Flag Embroidery for Kids

Back in my teaching days, I always did at least one (and usually) two stitching projects with my fifth grade students. In December, we sewed felt stockings. Later in the year, we made colonial samplers or a similar project that supported what we were studying in history. 

The vast majority of my students had absolutely no needlework experience. There was always some frustration with threading needles, dealing with tangles, and accidentally pulling the thread out of the needle two seconds after finally getting the darn thing threaded, but overall, almost everyone enjoyed learning how to sew by hand. I had to establish a lot of ground rules regarding needle use and safety, but in 11 years, I literally never had to take a needle away from anyone for using it inappropriately. And nobody ever lost a needle. A few were dropped, but when that happened everyone did exactly what I'd told them to do: freeze until the person who dropped it has picked it back up. (Or else. See: Miss Jones means what she says.)

As a teacher, it can be really hard to squeeze in projects like these. The schedule is already packed with curricula you have to cover - a year's worth of material in Math, English/Language Arts, Social Studies, Science, PE, Music, and whatever else your state or district may require. When you add in the extra effort (and money) it takes to get 32 sets of supplies and then deal with safety protocols before you even teach the skill... well, it can be daunting. But projects like these are SO important for so many reasons. 

With all that said, today's project is for you teachers (and homeschool moms) out there. Specifically, I'm thinking of those of you in Alabama and New Mexico, because your state flags make fantastic beginning embroidery projects. Affiliate links below. 


---------


State Flag Embroidery for Kids


Materials:


Steps: 


Cut felt into 3x5" squares. I photographed the threaded needle on the fabric to remind myself to tell you to use all 6 strands of the floss. That's why the large-eye needles are important. 


Use a ruler and a Sharpie to draw the design you'll be stitching. It's just corner-to-corner for Alabama; for New Mexico, it's a set of 16 lines. You can pre-draw these for students, or better yet, lead them through a lesson that reinforces measuring skills and/or geometry terms. 


Once you've drawn your guidelines, start stitching! I recommend kids start with no more than 18" of floss or there will be major tangles. Teach them not to knot (ha!) the needle; the only knot should be at the end of the floss. Use backstitch for New Mexico and satin stitch (equidistant across the diagonal lines) for Alabama. 

This is a case of "do as I say and not as I do" because I actually made my sample with a couching stitch. It started out fine...


... but it was extremely difficult to keep the main thread straight. About halfway through, I'd wished I'd just drawn the lines with the Sharpie. 

The Alabama flag takes a lot more floss than New Mexico; plan on 4 kids sharing a skein if you make your stripes narrow like I did. If you make the stripes more true to size, you'll need a lot more floss.  

You can hang your finished flags vertically to make a cool classroom banner, or attach them to dowels and flag bases, then display them on students' desks.  


It would be so neat to see a classroom full of these!

2/13/23

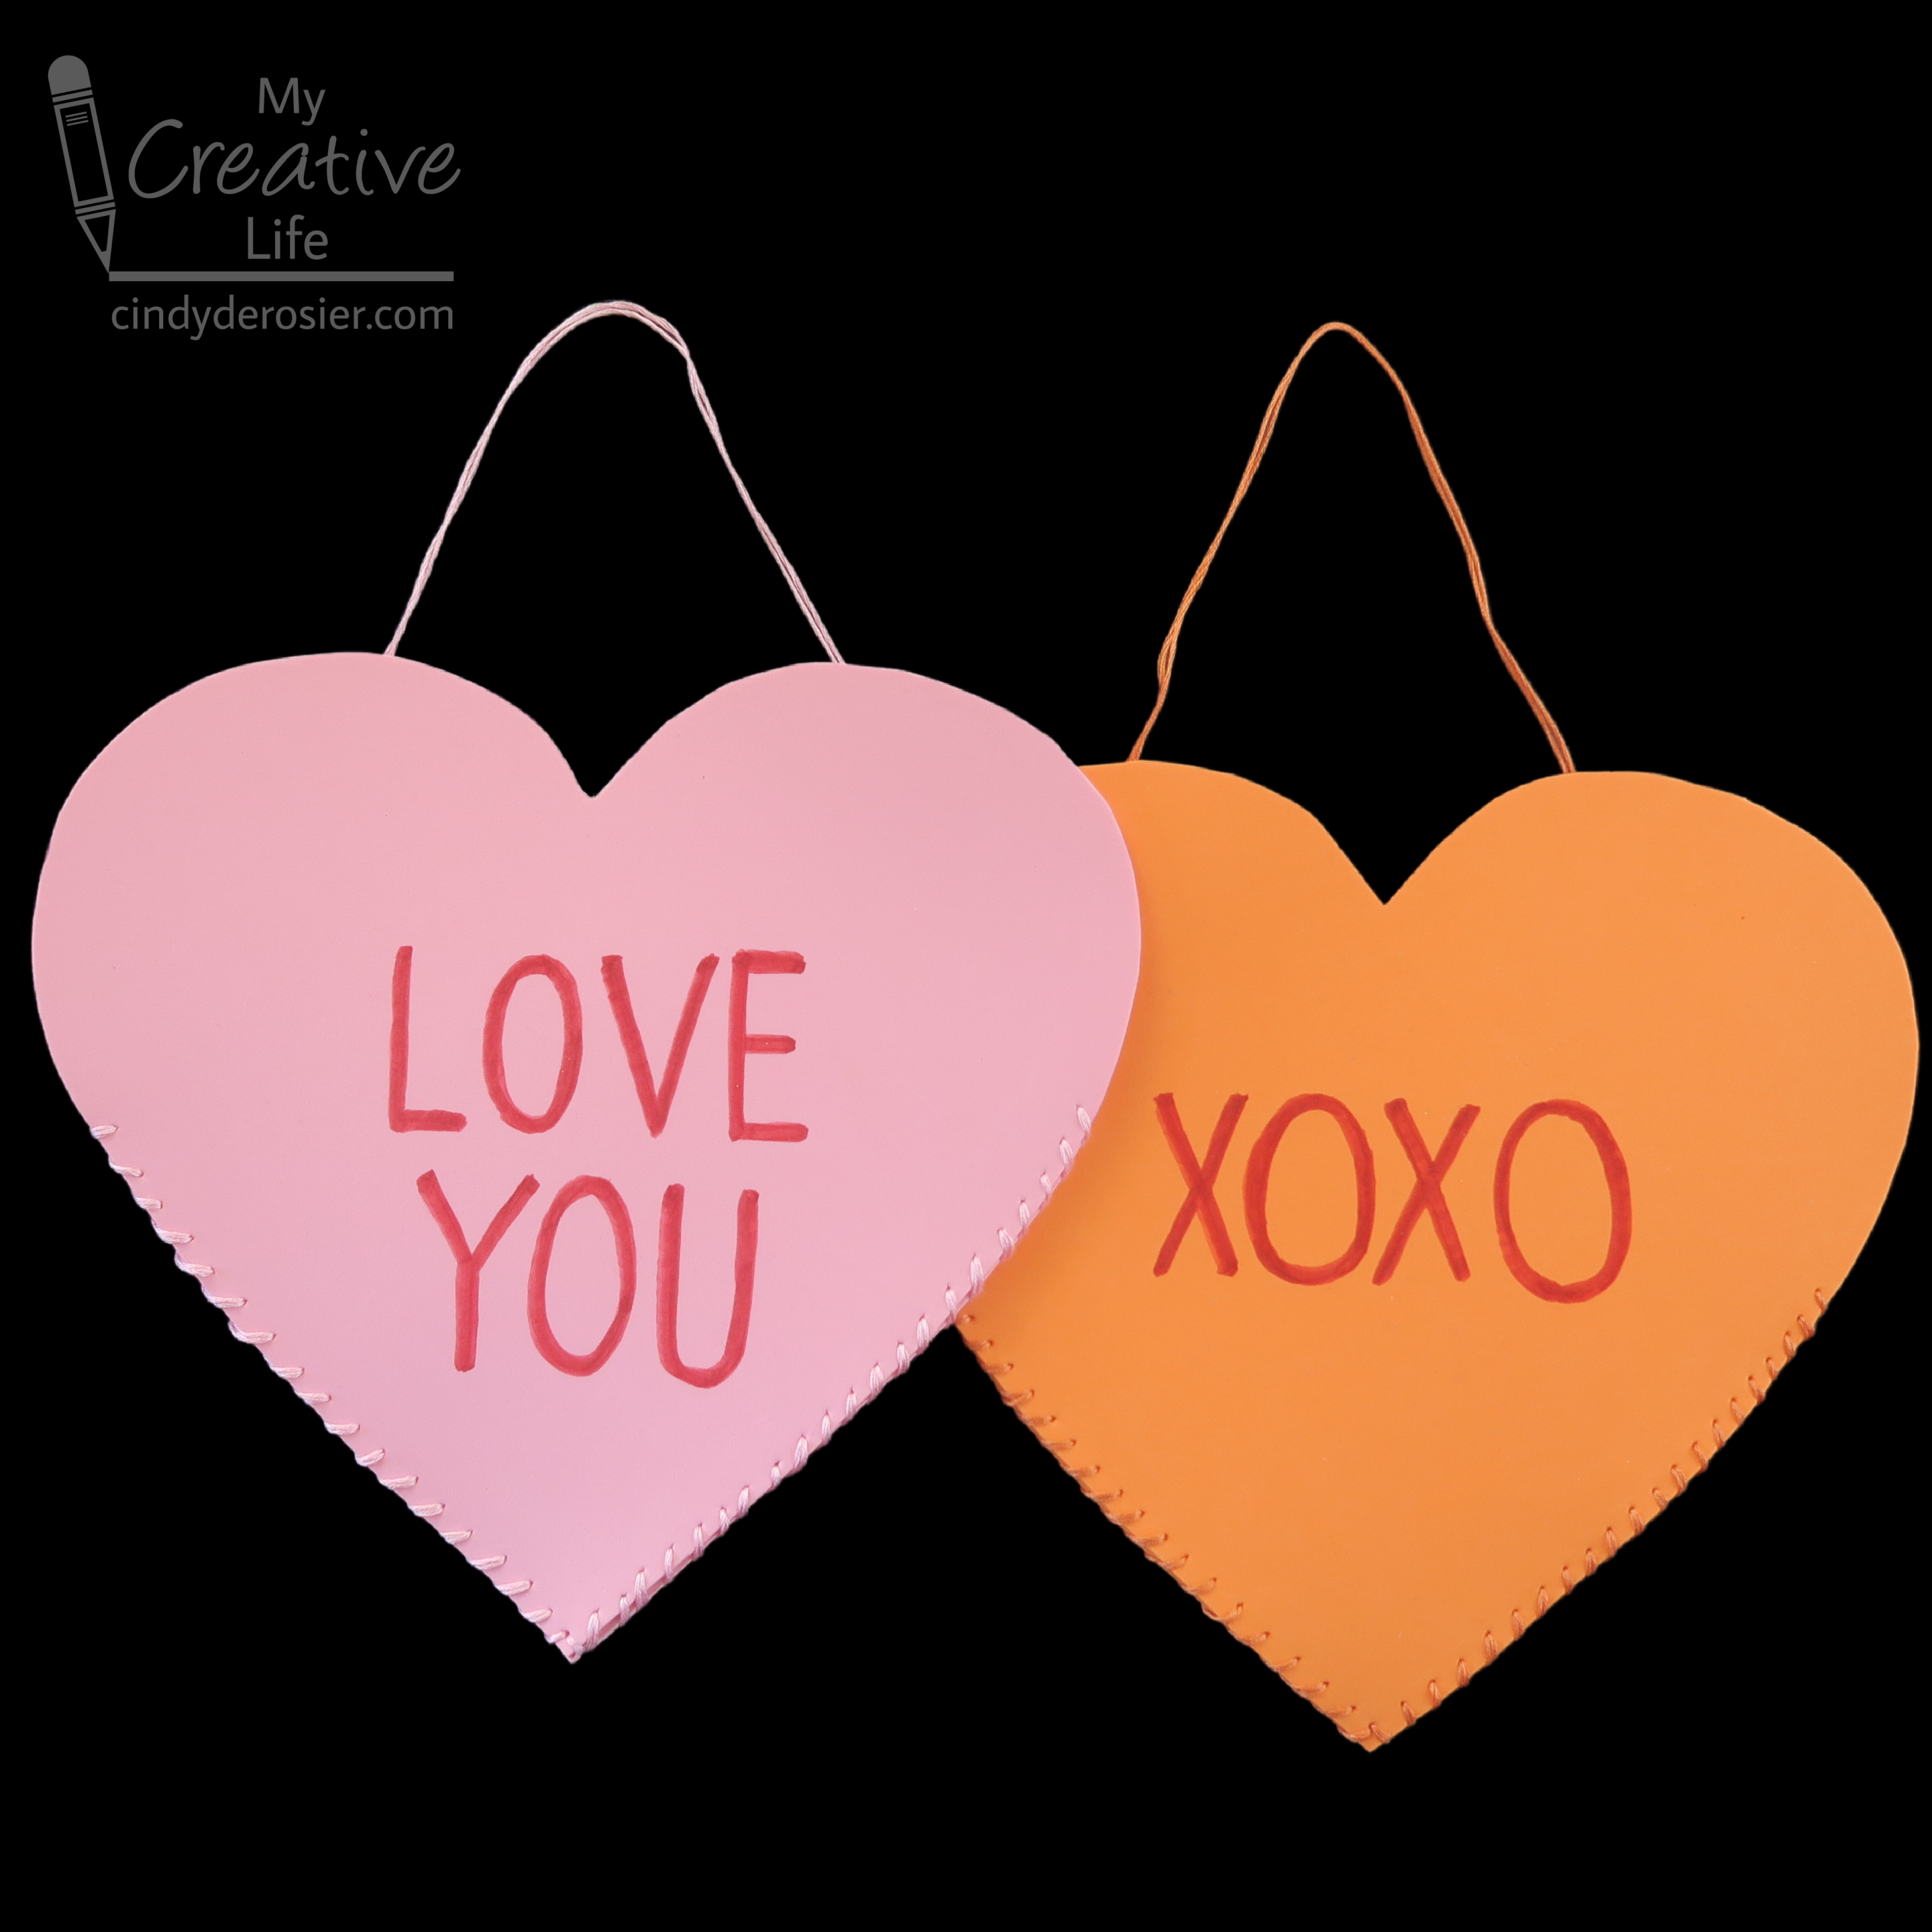
Conversation Heart Valentine Holders

I miss the elementary school version of Valentine's Day. I loved it as a kid, I loved it as a teacher, and I loved it as a parent. I loved making and receiving cards, eating lots of candy (especially conversation hearts!), and doing all sorts of valentine-themed crafting. 

As a bit of a throwback, I made these valentine holders for my two loves, Steve and Trevor. This was the first time I've ever sewn craft foam, something I will definitely be doing again. It's a great way to introduce young crafters to hand sewing. Affiliate links below. 


Conversation Heart Valentine Holders


Materials: 


Steps: 


Create a heart template using scratch paper. It should be big enough to hold cards and whatever else you'll be putting inside. Trace the template onto a sheet of craft foam, then cut out the heart. Repeat this step so that you have two hearts. 

Using conversation hearts as inspiration, think of a message for your valentine holder. You can write the message directly onto the heart with a red pen, or try this trick to make sure you get the spacing even. Write the message on a piece of binder paper, then center the paper onto the heart. Trace over the message with a pencil, pressing firmly. This will make grooves in the craft foam, which you can then trace with the red pen. 


Cut a long strand of embroidery floss. The amount you need depends on the size of your heart, how close you want your stitches to be, and how long you want the hanger to be. I used about 6 feet of floss. I sewed with it doubled up (two 6-strand pieces) but that is optional.  

Tie a knot at the end of the floss. Line up the two pieces of foam and start sewing approximately where your message starts. Don't stitch too high or you won't be able to put stuff into your valentine holder! Conversely, if you stitch too low, your stuff will fall out. Aim for the middle. 

Hide the knot inside the holder, then use a whipstitch to sew down one side toward the point. I went down the left and up the right, but you can do the opposite if you want. 


When you get to the point, do another whipstitch and re-enter the previous hole. Then continue up the other side. 


If you've never sewn craft foam before, let me tell you - it is a dream. Every beginner should learn stitches on craft foam. It's sturdy enough that you don't need to hold it taut like fabric and the needle glides through it with little pressure. 

You're finished sewing when you reach the point opposite where you started. Don't cut the floss yet! To make the hanger, stretch out the amount of floss you want. Put the needle into the very first place you started, but do not pull the floss tight. Bury a knot inside the hanger, then cut off any extra floss. 


Your valentine hanger is ready to fill with cards, candy, stickers, small toys, and other goodies!


Those Peanuts valentines peeking out are leftover from my teaching days (16+ years ago). I went poking on Amazon to see if they still make them, which led me down a path of all sorts of Peanuts-themed valentine stuff. Enjoy!

11/9/22

Paper Plate Constellations

Ready to see what I made for the "Something Beautiful" prompt? I took the suggestion of stars and used it to make a cool paper plate constellation craft. 


While you could certainly do this alone or as a family, I'm imagining this as a craft for a group. Back in my teaching days, I took my students camping each year (3 different camping experiences over the 11 years). Our school also had an annual Space Week. It would have been so cool to assign each kid one constellation to make, then they could work in groups to try to find their constellations in the night sky. Affiliate links below. 

Paper Plate Constellations


Materials:


Steps: 

Paint the paper plate dark blue and let it dry. Use an old toothbrush or stiff brush to flick gold paint over the blue. 

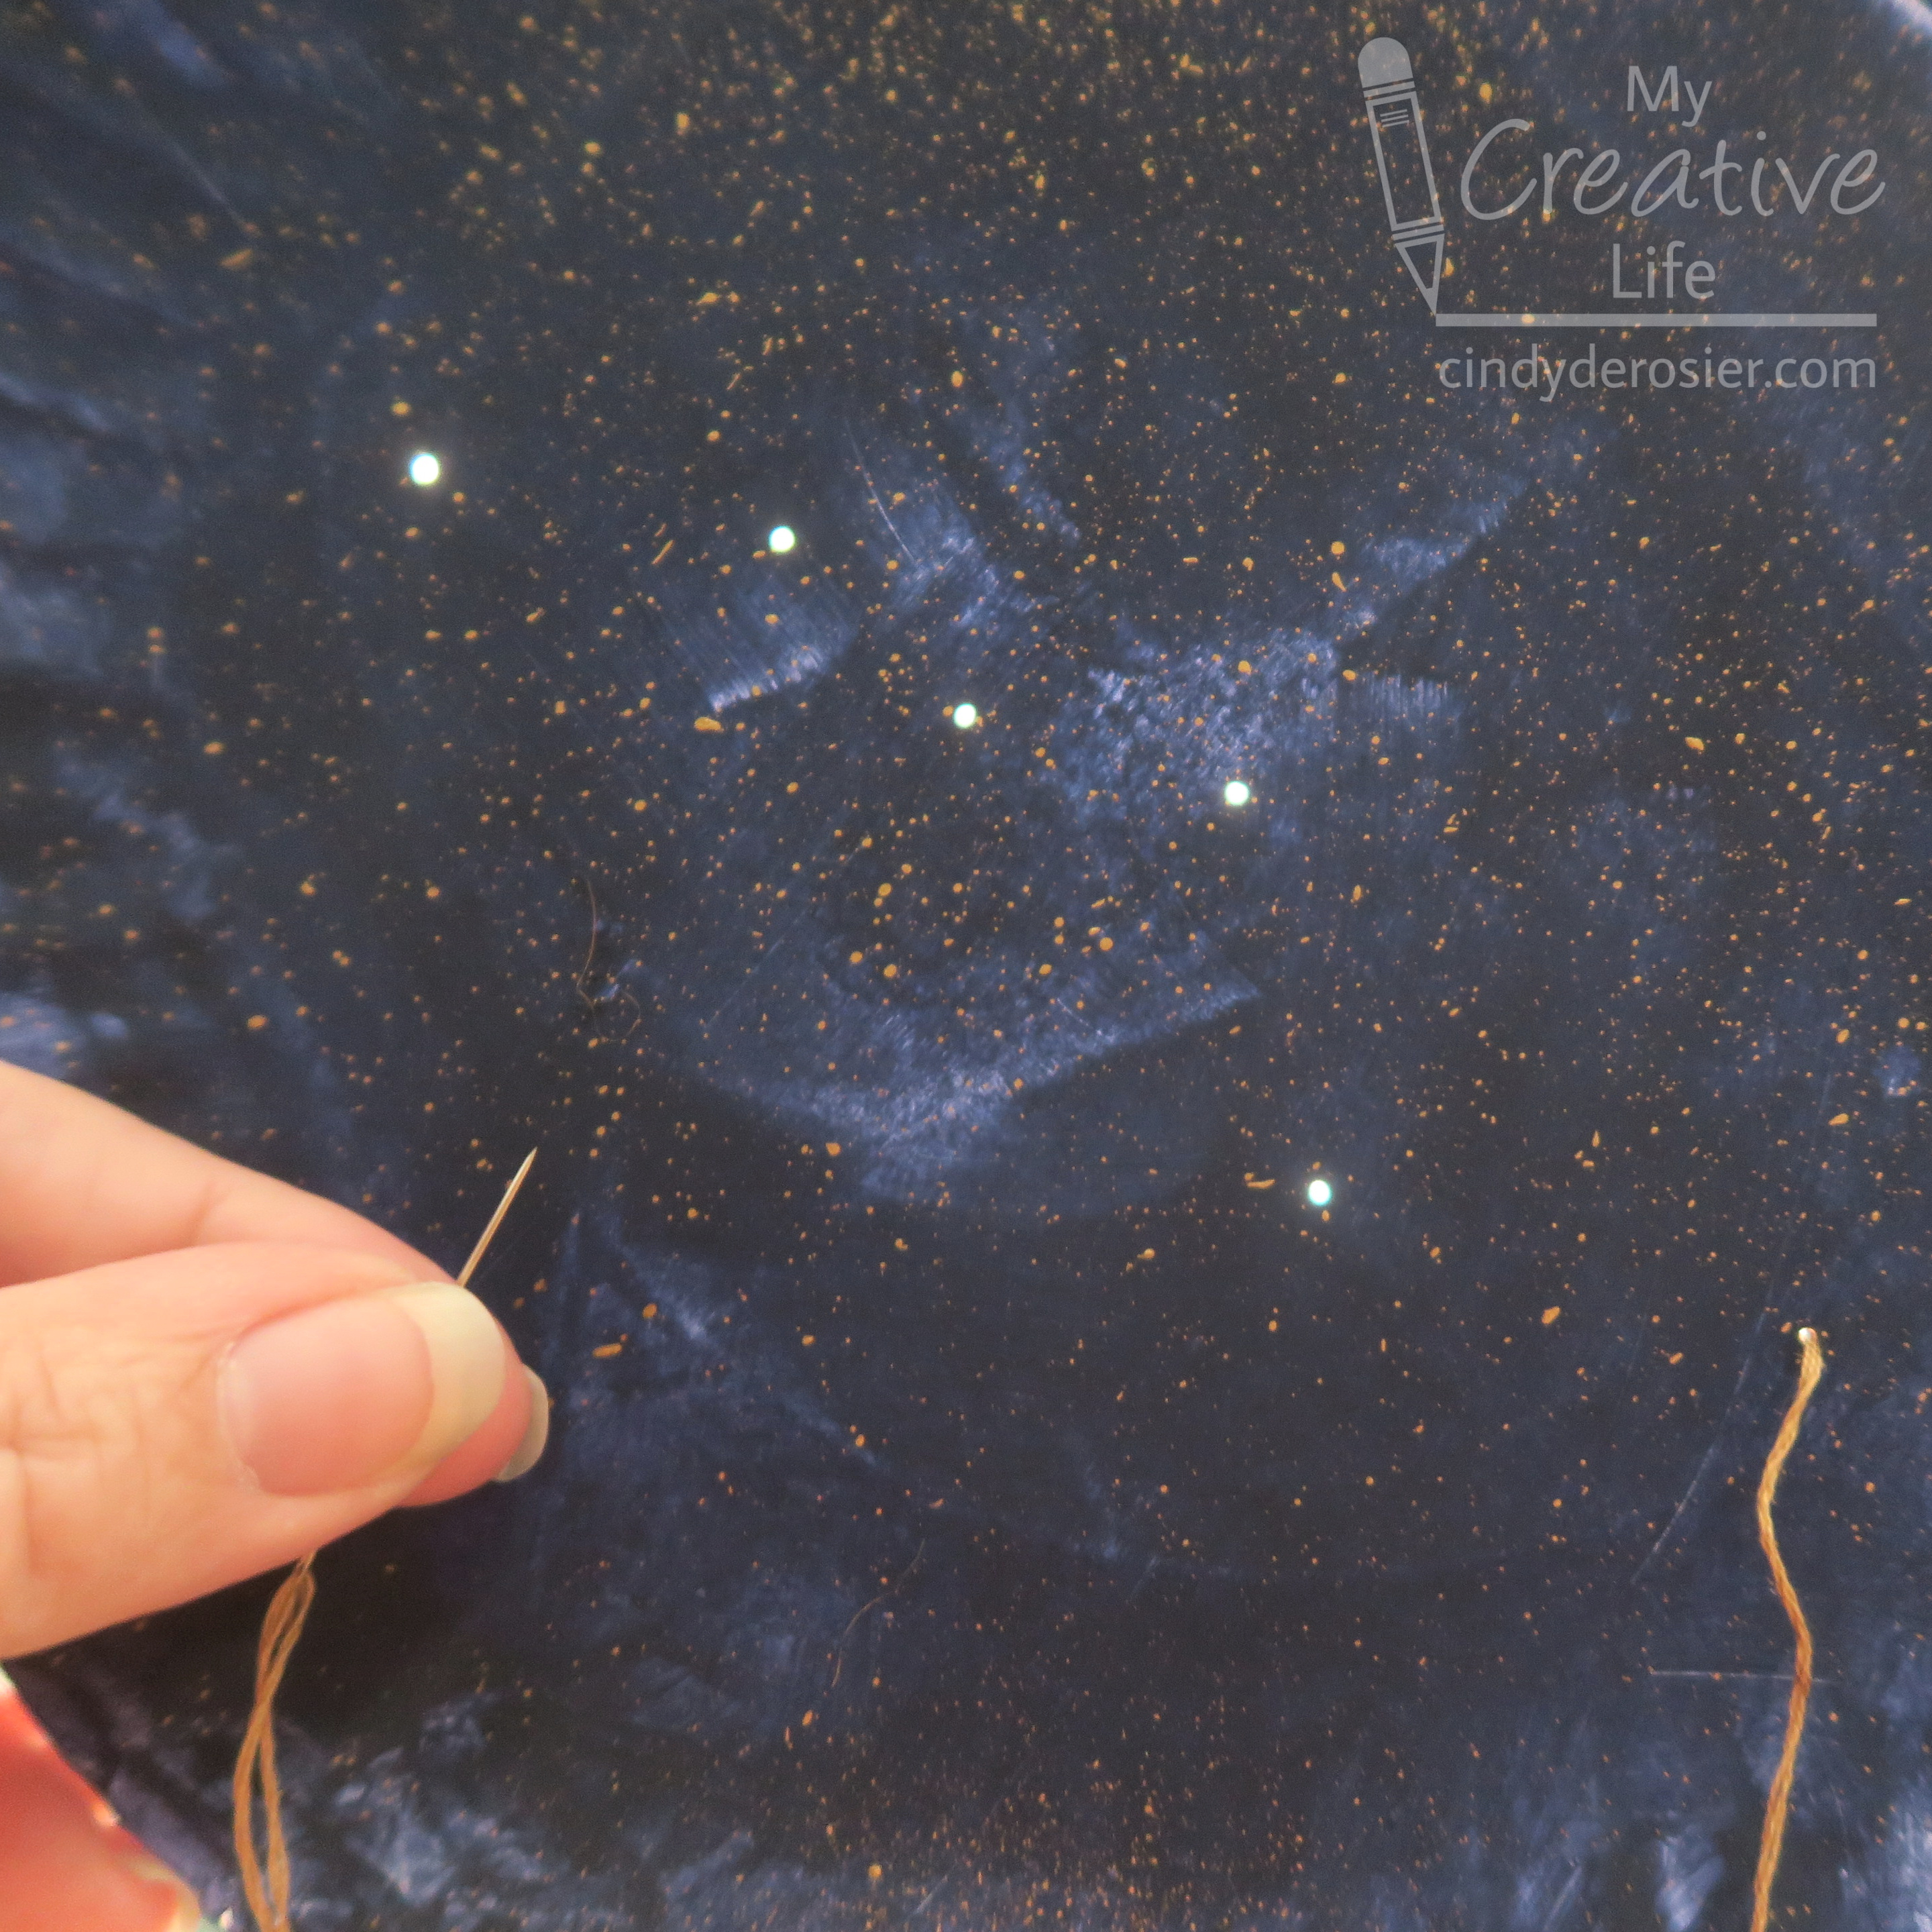
Meanwhile, draw your constellation on a piece of scrap paper. I did the Big Dipper (*not technically a constellation), but you can choose whatever you want. When the paint is dry, place the scrap paper on the paper plate and use a pushpin to poke through each star in the constellation. 


Thread a needle with 3 strands of gold embroidery floss. Stitch the lines of the constellation. The easiest way to do this is to orient yourself toward a window or lamp and hold the plate vertically in front of you as you sew. This makes it easy to see the holes. 


Put a star-shaped brad into each hole. 


*As I noted above, the Big Dipper is technically not one of the 88 recognized constellations. It is actually an asterism that is part of Ursa Major

9/29/22

Cinnamon Spice Caramel Apple Popcorn with Felt Apple Tag

Tis the season for Pumpkin Spice Everything, but personally I don't get it. Pumpkin is fine, but for me fall is all about apples. Apples are sweet, sometimes tart, crisp, and full of flavor. They are delicious on their own, as juice or cider, mashed up as applesauce, baked with savory dishes (like pork), and excellent in desserts of all sorts. I like squash (though pumpkin is not even one of the best squashes), but there's no comparison. Virtually everyone agrees that Apple > Pumpkin. Spices definitely improve pumpkin, but I firmly believe Apple Spice > Pumpkin Spice. Don't even try to argue. 

If you're tempted to argue, make some cinnamon spice caramel apple popcorn first. Then get back to me and tell me that pumpkin spice is better than apple spice. Affiliate links below. 


Cinnamon Spice Caramel Apple Popcorn

  
Ingredients:                                                           


Steps: 


There is no right or wrong when making your own flavored popcorns. It's not like baking a cake where chemical reactions mean that quantities matter. You can add more or less of any ingredient. I was hesitant to even put quantities above, as I didn't measure when I was making mine. Those are my best guesses. 

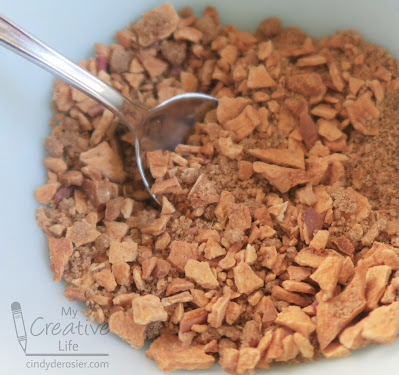
Start by crushing some crisp dried apples until about half of the apples are powder and the rest is pea-sized bits. Stir in some brown sugar and cinnamon, then add a dash of nutmeg. Mix thoroughly. 


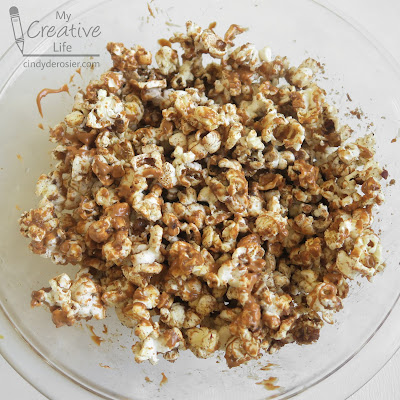
Pop and generously butter approximately 10 cups of popcorn. Immediately pour the apple mixture over the popcorn and stir well. Some of the apple mixture will remain at the bottom of the bowl instead of stuck to the popcorn, but that's not a problem. 

Follow the directions to melt the Salted Caramel Candy Melts. Drizzle half of the melted candy over the popcorn and immediately stir well. Repeat with the remaining candy. Most of the apple mixture should now be stuck to the popcorn. 


If you eat the popcorn immediately, the tiny apple bits are still crispy. If you let the popcorn sit for a while, or bag it up, the apple bits will soften, but remain equally delicious. 

I made a cute felt apple tag to label my bagged popcorn. It's a quick and easy project. 

-------


Felt Apple Tag


Materials: 


Steps: 

Cut out an apple from the red felt, using pinking sheers. Cut the leaves and stem from green felt with regular scissors. Apply green Stickles to the leaves and set them aside to dry. 

Use two strands of black embroidery floss to backstitch a smile and two eyebrows.

Cut a piece of red cardstock that is slightly smaller than the felt apple. Glue it to the back of the apple, covering the knots from your stitching. Write a message to your recipient. 

Glue the googly eyes and the leaves to the front of the apple. 

6/6/22

Patriotic Denim Heart

When I get a hole in the knee of my jeans, I move them from my Wear-in-Public pile to my Only-While-Gardening pile. When I get a hole anywhere north of the knee, I see what I can salvage for a craft. Today's project, a flag-inspired stuffed heart, uses a leg. 


I worked on this for a few minutes here and there over about a week, never spending more than 10 minutes at a time. While it's not my usual style, I like the rustic, handmade look for this project. Embrace imperfection, right?! Affiliate links below. 


Patriotic Denim Heart


Materials:


Steps: 


Make a heart pattern on scratch paper. When you are happy with your pattern, pin it directly to a pant leg, making sure the side seam is out of the way. Cut out the heart. You will have two identical pieces with their right sides already facing out. Do not separate the pieces. Add Wonder Clips around the outside so that they don't shift. 

Cut the hem off the denim pant leg and set it aside. 

Thread a needle with all six strands of red embroidery floss. Remove the clips closest to the point of the heart, leaving the ones nearer the top in place. Flip the back piece of denim backward so it is out of the way. Starting at the point of the heart, use a backstitch to sew a horizontal stripe through ONE piece of denim. Leave a tiny seam allowance on each side of the stripe. Continue moving up the heart until you have red stripes that go from one side to the other on the bottom half of the heart. I have four stripes, but the number you have will depend on the size of your heart and how close together you sew them. If you want it to be flag-accurate, make three stripes. I was winging it; if you want to plan ahead or don't trust that you can sew in a straight-ish line, you can use tailor's chalk pencils to draw guidelines.  

 Here, I'm finishing up my final full-length red stripe. 


Start the next red stripe in the middle of the heart and continue to the right edge. Do the same for the remaining red stripes. As you can see, I left clips on the upper left. You can also see the hem that I cut to length. I eventually pulled out the gold thread since it didn't go with my project. 


Next, using all six strands of white embroidery floss, sew a white stripe between each pair of red stripes. 


Move the clips to the right side. Still using all six strands of the white embroidery floss, sew French knots in the blue field. I ended up with 18 instead of the actual 50 on the flag. (Fun fact: The 18th state is Louisiana, which we visited in 2019.) 


Move the clips back to the left. Fold the hanger (hem) in half and place it at the top between the layers. Thread the needle with blue, then backstitch through all the layers to secure it in place. When the hanger is secure, switch to a whip stitch and sew clockwise around the edge of the heart. Stop at the top row of white stars. Stuff the heart with fiber fill, pushing it into the point.  


Sew the opening closed by continuing the whip stitch until you reach the hanger. Switch back to the backstitch and sew across the hanger once more to reinforce it. 


The edges of the heart will naturally fray. If it's unevenly frayed, you can trim the too-frayed areas or scratch at the not-frayed-enough areas. Have fun sewing!

5/24/22

Kitten Tooth Fairy Pillow

When Trevor was a baby, a friend introduced me to the concept of a Tooth Fairy Pillow. Instead of putting a lost tooth under your sleeping pillow, you put your tooth into the little pocket of a stuffed animal, which you set beside your bed. This makes it much easier for the Tooth Fairy to get the tooth without waking the sleeping child. Genius! Affiliate links below. 


Kitten Tooth Fairy Pillow


Materials:


Steps:


Use a piece of scratch paper to make a pattern the size and shape you want your kitten to be. Fold a piece of grey felt in half and place the pattern onto the felt so that the bottom of the pattern is along the fold. Cut out the felt. Then cut a semi-circle of white felt for the cat's tummy. 


Thread your needle with two strands of white embroidery floss. Place the white felt directly onto the fold line, then open up the grey felt. Pin the white in place if necessary. Use a backstitch to sew the white felt to the grey, leaving the top open so there's space to put a tooth or money. 


Sew the googly eyes in place. Thread four strands of pink floss onto your needle. Use a single stitch to tack the pom pom nose into place, then continue with a backstitch to make the cat's mouth. Add a dot of Fabric Fuse behind each eye and the nose to secure them. 


Thread the needle with a single strand of white floss. Tie a knot in the end, then poke the needle from the back to the front to make a whisker. Snip the floss at the desired length, then repeat. I like three whiskers on each side. 


Flip the cat upside down and put a drop of Fabric Fuse on the knot of each whisker to prevent them from pulling through. Let the glue dry completely before continuing. 

Thread the needle with all six strands of grey embroidery floss. (This is where the embroidery needle makes things easier.) Refold the kitten, then whipstitch around the outside, leaving a small opening for stuffing. Add the fiber fill, pushing it into the ears and distributing it evenly. Sew the opening closed. 


You can use this same idea to create a pillow to hold a gift of jewelry, or as a place to put little notes for someone special. It can also hold a good luck charm. Lots of possibilities!