Showing posts with label faux food. Show all posts

7/14/26

Root Beer Float Craft

I can only remember a single time in my life when I wasn't happy to see a root beer float. Every other time, I've been excited to receive this creamy and delicious treat. The root beer float dates back many years, although exactly how many is unknown. We do know that the ice cream soda was invented in Pennsylvania in 1874 by Robert Green. But did he specifically make a root beer float? Legend has it that Frank Wisner of Colorado made the first root beer float in 1893. Whether you're in Pennsylvania, Colorado, or anywhere else, this is a great time to make a root beer float craft and follow it up with the real thing. Affiliate links below. 


Root Beer Float Craft


Materials: 


Steps: 


Cut out the pieces you will need from watercolor paper: a rectangle with rounded corners at the bottom for the mug, a C-shape for the handle, a cloud shape for the ice cream, and a bent (or straight) piece for the straw. 

I should have arranged these the better way for this photo. See above.

Put the mug piece onto the scoring board. With the white pencil, score the center line. Then score more lines an equal distance apart. You can do this step with a ruler, but the scoring board is easier and more fun. 


Color the very bottom of the mug shape with the white pencil. Paint over the mug shape with brown watercolors. The white pencil will resist the paint. 


I chose to add a really pale wash of brown to the handle so that it didn't look so stark white when the rest of the mug had a brown tint. Paint the straw the color of your choice. I experimented with painting the ice cream a slightly yellow, but it looked weird (to me) against the pure white cotton balls. So I left the ice cream white. 

When all the pieces are dry, choose cardstock for the background. Add a contrasting strip along the bottom for the table the where the mug is sitting. Glue the pieces in place. Tear the cotton ball into a dozen or so pieces. Add glue along the bottom of the ice cream and the top of the mug, then place the cotton ball pieces into the glue. 

6/18/26

Corn Dog Craft for Kids

What do Oregon and Indiana have in common? Corn dogs! This beloved fried food is popular in every state that has a fair, ballpark, or frozen food section in the grocery store, but Oregon and Indiana have special corn dog claims-to-fame. Corn dogs were invented in Rockaway Beach, Oregon in 1939. Follow this link to learn more about the birth of corn dogs. Make sure you scroll down far enough to see the mechanical corn dog. Indiana is not the birthplace of corn dogs, but the small town of Bristol (population 1600) is called the Corn Dog Capital of the World. They produce 80% of the world's corn dogs. Bristol is also home to the annual Corndog Festival. (Note: Both corn dog and corndog are acceptable spellings.) 

Celebrate the corn dog with a fun and easy craft. Affiliate links below. 


Corn Dog Craft


Materials: 


Steps: 


Use yellow, orange, and brown watercolors to paint a piece of watercolor paper the color of a corn dog. When you are happy with the color, let the paint dry completely. 


Cut the paper into the shape of a corn dog, approximately 6.5" x 1.75". Obviously, exact size doesn't matter. Glue the corn dog to a craft stick. Add a squiggle of glue down the length of the corn dog, then yarn on the glue. Trim the excess yarn, then let the glue dry completely. 


Steve likes his corn dogs with mustard. I prefer mine plain, or occasionally with ketchup. 


I had a lot of fun with this corn dog craft. Give it a try!

11/14/25

Blueberry Pie Painted Rock

Does this look like a blueberry pie? I hope so. It definitely doesn't taste like a blueberry pie. Not that I've tasted it. If I did, it would taste like a rock. And paint.  


When I first saw this disc-shaped rock, I thought it looked like a pie. So I painted it to be a blueberry pie, which happens to be the state dessert of Maine. Affiliate links below. 


Blueberry Pie Painted Rock


Materials:


Steps:


Use a light blue paint pen to make dots randomly across the entire front of the rock. Use a dark blue paint pen to draw smaller dots on top of those dots. You should mostly fill the space, but leave tiny bits of rock showing through. I colored the sides of my rock black, but in retrospect, that was completely unnecessary, so skip that. 


Paint the sides of the rock with yellow ochre (yes, completely covering the black that doesn't need to be there.) When it is dry, brush it with brown ink to give it some varigation. Then paint vertical lines to form the first part of the lattice. 


Add horizontal lines to complete the lattice. When the paint is dry, use the ink and a mini blending brush to darken every other intersection. This will help give the illusion that the lattice work is woven. 


When the ink dries, use the colored pencil to draw tiny lines around the outside edge to mimic the crimp marks made by a fork. Then you'll have a blueberry pie that looks good enough to eat! But don't. It's still a paint-covered rock. 


I will be taking the next two weeks off as I spend time with both sides of the family. I'll be back with more posts on December 1. 

7/26/23

The Mystery of the "Maple Syrup on Pancakes" Preschool Craft

Not long ago, I became aware of an unsolved mystery in the world of preschool crafts. It involves a pancake craft. This project looks great for preschoolers. Glue some brown circles to a paper plate, add a small square of yellow for the butter, and drizzle on the faux maple syrup. Cute, easy, and fun!


The mystery is what was used to make the maple syrup. There are no instructions of how to make it or what materials to use. Since I've had maple on my mind ever since our visit to the maple museum and maple farm in Vermont, I put on my detective hat, grabbed my magnifying glass, and took a closer look at the original image to see what clues I could find. (Affiliate links here and throughout the post.)

I decided that the pancakes and butter were made from craft foam. The paper plate was, obviously, a paper plate. But then there's the syrup. Surely it's not real maple syrup? Not only would that be a waste of food, it wouldn't dry and would be covered in ants within the hour. That can't be what it is. 

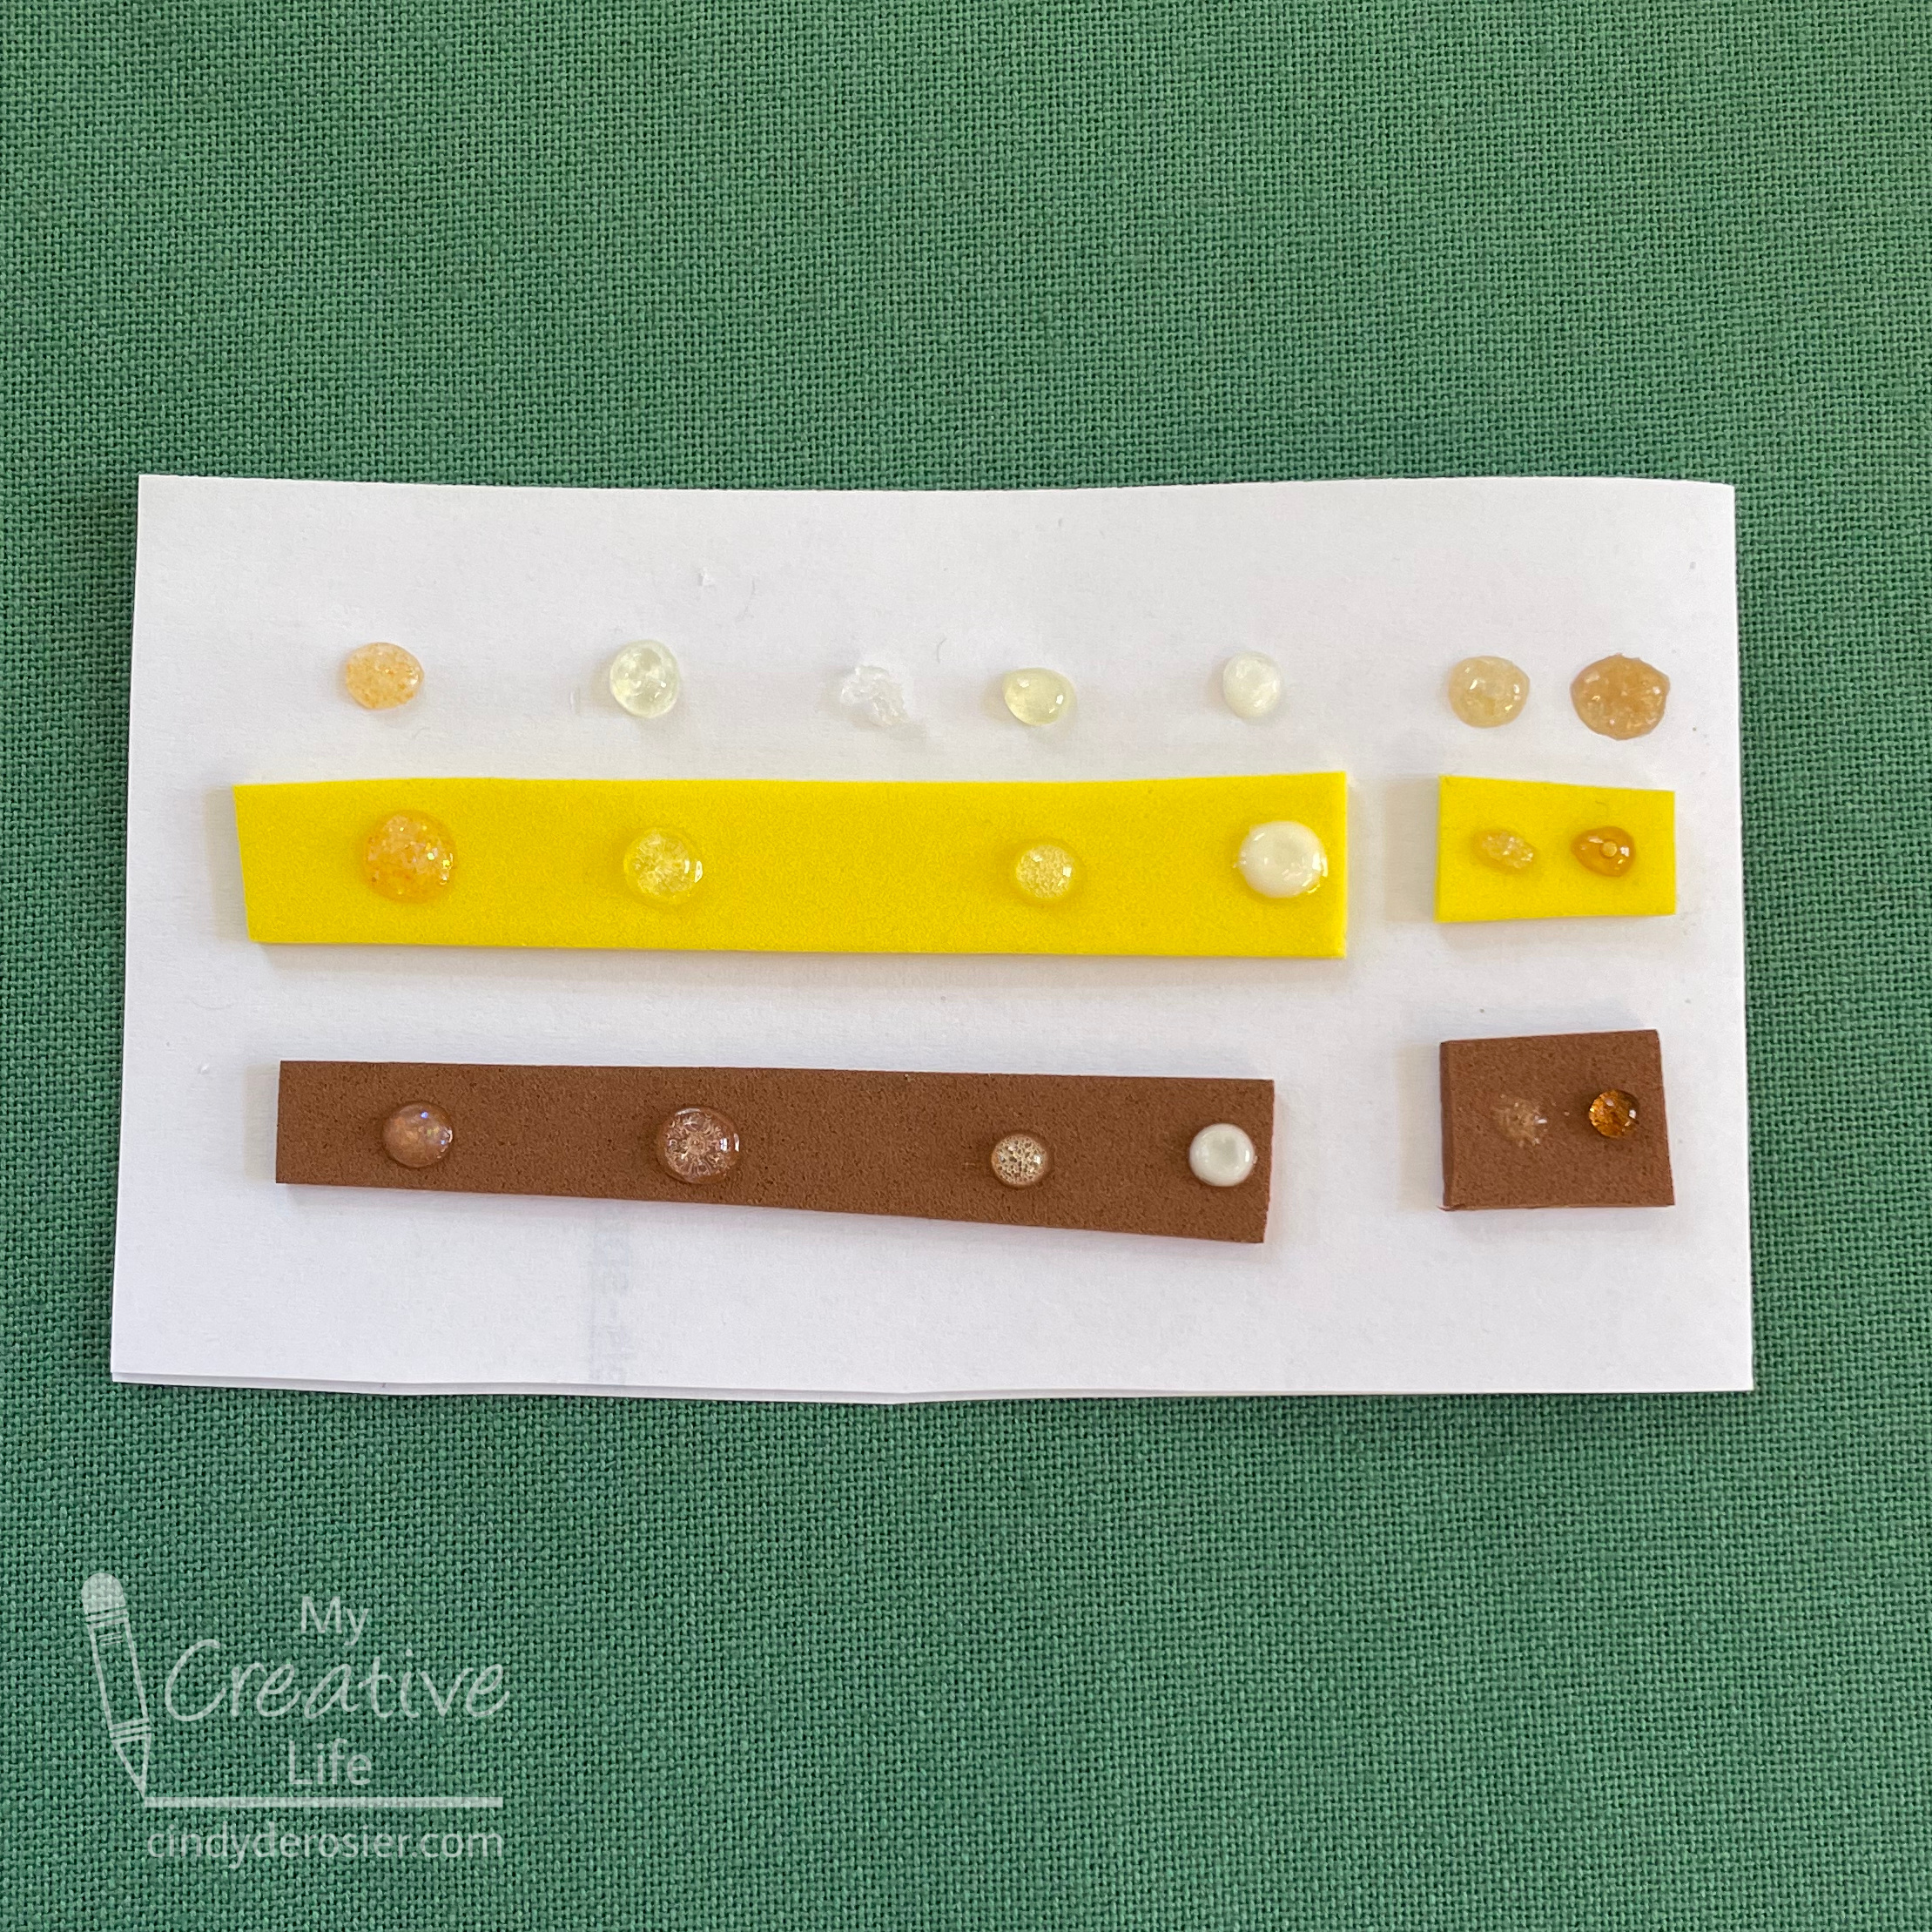
It was time for an experiment, so I removed my detective hat and put on my lab coat. I hoped one of the dimensional adhesives I had on hand might be the maple syrup substitute.


However, after putting a dot of each onto white paper, yellow craft foam, and brown craft foam, I learned that none of them were the answer to the mystery. Just to be certain, I used a pipette to add drops of real maple syrup (two different grades) onto more paper and foam for comparison. None of the adhesives matched the amber color of the syrups. The closest is the Mod Podge.
 

I had one more idea: Gorilla Glue. I ran my test and it was successful! Gorilla Glue looked just like what was used in the photo and was a perfect match for the darker of the two real maple syrups! I drizzled a generous amount onto the faux pancakes I'd prepared and snapped a quick photo. 


It was so satisfying to have solved the mystery. 

But wait! There's a twist... and you won't like it. Because THIS is what the craft looks like after the Gorilla Glue dries. 


As you can see, the Gorilla Glue puffed up significantly and lightened in color. What a disappointment. 

The mystery remains. Did the original crafter use Gorilla Glue and only shared a photo when it was wet? Or was a different product used? Perhaps we'll never know. 

If you make this craft, use Mod Podge Dimensional Magic. It won't look quite as good as the Gorilla Glue while it's wet, but it will look much better after it's dried. If you have another adhesive idea and want me to check it out, let me know in the comments. 

9/14/20

Salt Dough Breakfast (Fried Egg and English Muffin)

I love breakfast foods, at any time of day. When I debuted my page of Faux Food Crafts, I noticed that there weren't any breakfast foods, despite how much I love eating them. Time to change that! I whipped up a batch of my favorite salt dough and started creating. 


Salt Dough Fried Egg


Materials: 

  • salt dough
  • Folk Art paint

Steps:


Start with two balls of salt dough, one a bit larger than a golf ball and the other the size of a gumball. Use the palm of your hand to flatten the larger ball, then press slightly and as you drag your hand outward from the center. This will thin the edges a little. If it looks like the white of a fried egg, set it on wax paper or parchment paper to dry. If not, try again! You can work salt dough over and over. 

Use your palm to flatten the smaller ball, again pressing just a little bit to thin the edges. This will make it slightly domed like an egg yolk would be. Rub a drop of water on top of the egg white and set the yolk in place. Leave it alone for at least two days until the top is completely dry. Then flip it over and allow the bottom of the egg to dry completely. 

When the egg is dry, paint the yolk yellow and egg white white. 


---------

Salt Dough English Muffin with Butter


Materials: 

  • salt dough
  • fork
  • plastic knife
  • Folk Art paint

Steps:


Start with two balls of salt dough, one about the size of a billiard ball and the other the size of a gumball. Gently flatten the larger ball until it is the size of an English muffin and about 1/2" thick. Use your finger to gently rub water across the top, then gently press the fork into the dough and lift. The dough will stick to the fork and create the beginnings of the distinctive nooks and crannies. Repeat this a bunch of times with the fork at different angles until you are happy with the surface.  

Use your thumb to begin to flatten the smaller ball, stopping when it is as thick as a pat of butter. Use the plastic knife to trim each side. 

Place the English muffin and the pat of butter on wax paper and leave them alone for at least two days until the top is completely dry. Then flip it both over and allow the bottom sides to dry completely. 

Turn on the broiler and set the English muffin underneath it. Watch it VERY CLOSELY, as it will brown (and then burn) very quickly once it starts getting color. Remove it when it is a toasty brown color. Let it cool. 

If you are happy with the color of the English muffin, leave it alone. I touched mine up by dry brushing a tiny bit of brown paint onto the tips. 

Paint the butter yellow, then put it on top of the English muffin. You can glue it in place, but I didn't.  


1/28/20

King Cake Mardi Gras Necklace

The inspiration for today's craft is no mystery! I loved our time in New Orleans and couldn't wait to design something inspired by the colors and glitz of Mardi Gras. I'm really happy with my new necklace. It's super lightweight and comfy to wear. Can you tell what I used to make it? Affiliate links below. 


-------


King Cake Mardi Gras Necklace


Materials:


Steps:


Create three ropes of white Model Magic and place them side by side. 


Twist the bundle of ropes several times, then join the ends together to form a rough circle. If you're not happy with it, try again! Don't aim for perfection though - the irregularities make it look more authentic. 

Set your King Cake aside and let it dry for at least 24 hours. Flip it upside down and let it dry another 24 hours. 

Paint the King Cake with the Camel paint, then add highlights of Harvest Gold in the twists and on top to mimic the look of baked goods. When the paint is dry, use a Q-tip to glob white gesso on the top. Be sure to leave plenty of the 'cake' exposed beneath the 'frosting.'


When the gesso is dry, add Stickles. Alternate between green, yellow, and purple. Make the sections  different sizes like they’d be if you were dropping colored sugar on a real King Cake. 


Let the Stickles dry overnight. Glue the bail onto the back of the King Cake. When it is dry, add a chain and your King Cake is ready to wear!


If you want the real thing, you can make it yourself from scratch. Or, use a handy box mix that comes with everything you need, including the filling, frosting, and baby. This year, Mardi Gras falls on February 25, so you have plenty of time to prepare!