Showing posts with label clay. Show all posts

4/9/25

Crown of Thorns Craft

I wish I could remember all the clever crafts I did in Sunday School during the 70's and early 80's. I had some really creative teachers. I vaguely remember a Play-Doh crown of thorns. My version is made with Model Magic. Affiliate links below. 


Crown of Thorns Craft


Materials: 


Steps: 


Begin by making a 'stain' for the toothpicks. Place a small amount of brown paint into an empty container. Add a few drops of water and stir until it is well-mixed. It should be thin, but heavily pigmented. Cut the toothpicks in half with the wire cutters and drop them into the stain. Swish them around so they're all covered. Set them aside. 

Knead the Model Magic. When it is soft, use about 1/8 to make a thin rope. Lay it in a circle on your work surface. Make another similarly-sized rope and wrap it around the first one. Continue to make ropes and add them to the previous ones. You're not going for a neat braid - you're aiming for a messy crown of thorns. 

When you are happy with the crown, remove the toothpicks from the paint and dry them with a paper towel. Insert them into the crown at different angles. 

I chose to display my finished crown with a Bible verse that references it: 

Matthew 27:29 ... and after twisting some thorns into a crown, they put it on his head. They put a reed in his right hand and knelt before him and mocked him, saying, “Hail, King of the Jews!”

4/11/22

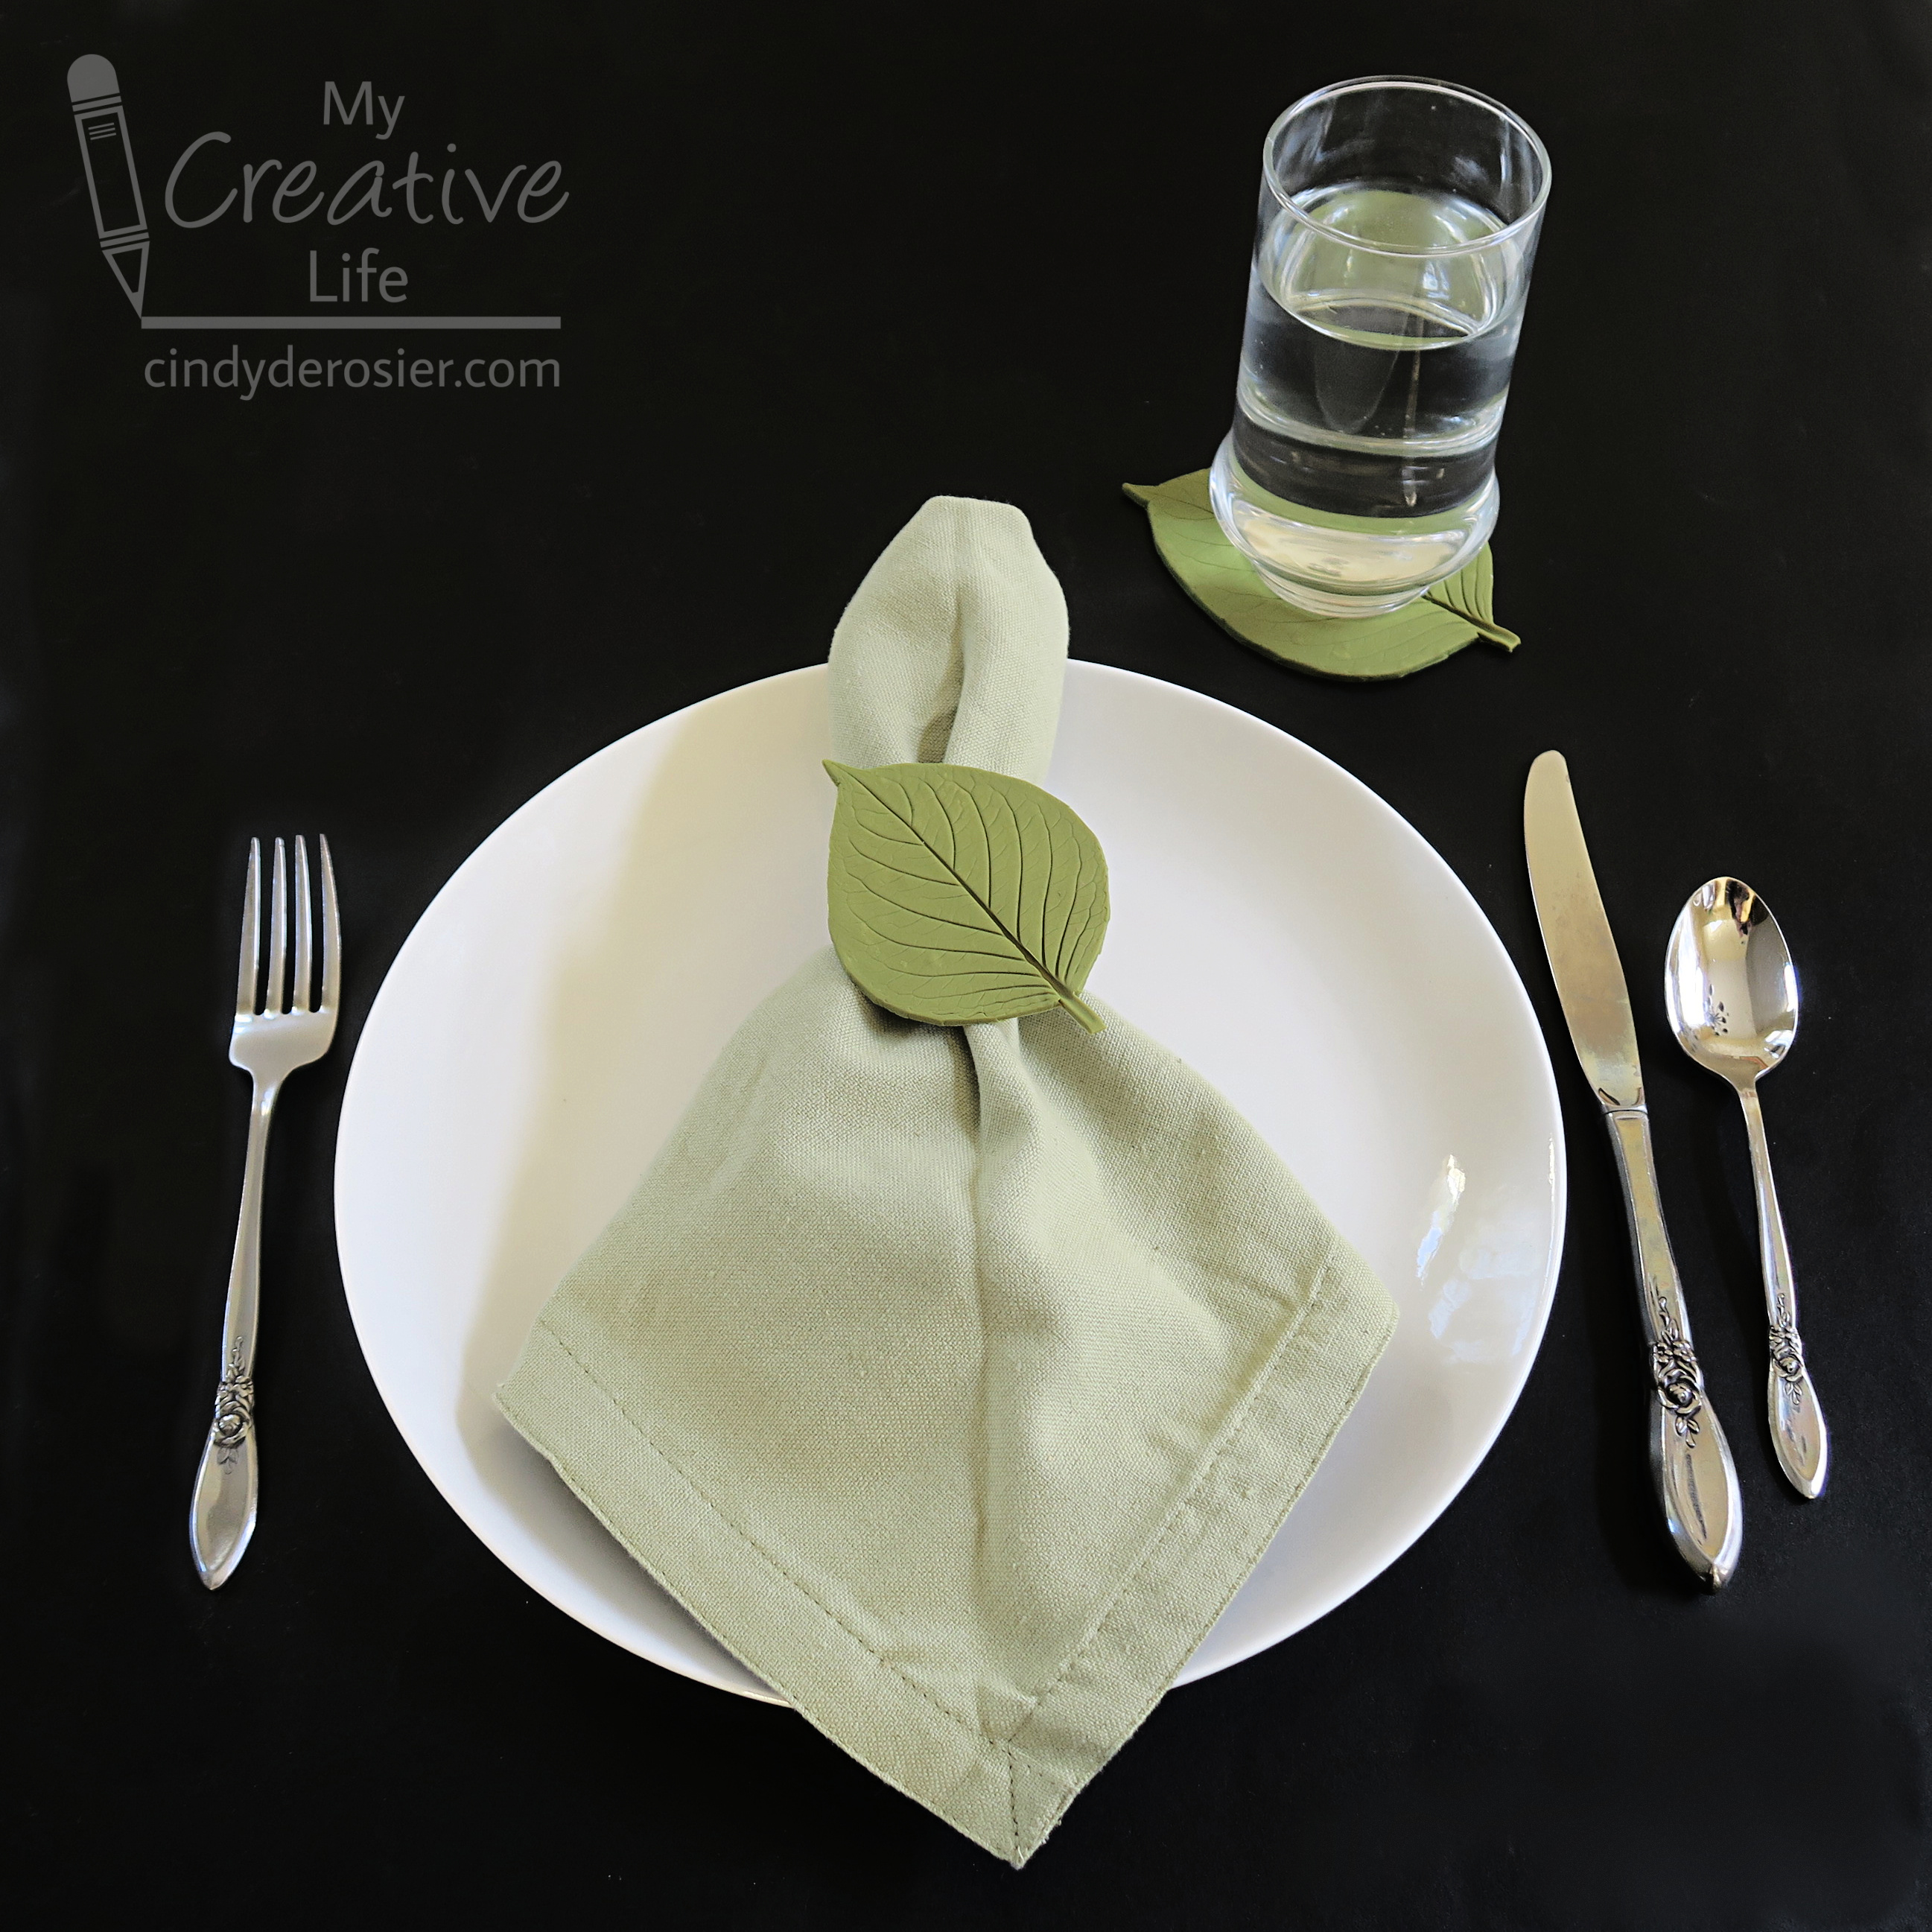
Clay Leaf Print Napkin Rings and Coasters

We have beautiful hydrangeas along our side yard that are determined to grow enough to completely block the walkway beside our house. I've explained that they are welcome to grow as high as they'd like and can spread out against the fence, but to please allow us to have the path. I frequently need to do a bit of light pruning to remind them that the flower bed is their territory, but the concrete is our territory. 

I took a few of the pruned hydrangea leaves inside and used them to make leaf prints from oven-bake clay. I LOVE how they turned out!


When I made my clay leaf prints, I hadn't thought about what purpose they could serve, besides just sitting on a table being decorative. And then I realized that they are perfect to use as napkin ring and coasters! Affiliate links below. 


Clay Leaf Print Napkin Rings and Coasters


Materials:


Steps:


Mix a small amount of Red and a generous amount of Granny Smith together to make your desired color. Roll out the clay 1/4" thick, then place the leaf on top. Gently roll the leaf into the clay, then carefully remove the leaf. 

This was my first attempt. After placing the leaf, I rolled too hard, which made the clay uneven and pushed the stem too deep. Sculpey is infinitely reusable until you bake it, so if your first attempt is not perfect, just re-roll the clay and try again! 


When you have a print you like, use the clay tools to remove the excess clay around the edges. Hydrangea leaves are serrated, but I wanted a smooth edge, so that's how I trimmed it. 


Roll out the excess and make more leaves. I used a large leaf for the coasters and a smaller leaf for the napkin rings. 


Put the leaves on a sheet pan and bake at 275°F for 15 minutes. If you see any bubbles in your baked leaves when you take them out of the oven, immediately press a second sheet pan on top of the hot leaves to flatten them. Let the leaves cool completely. 

Use Supertite to glue the smaller leaves to the napkin rings. 

Note that while Sculpey clay is non-toxic, it has not been tested for food use. So while your coaster is a great place to rest a drinking glass, don't use it as as bread plate or serve any other food directly on it.

7/27/21

Playdough Texture Tools

I was a big fan of Play-Doh when I was a kid. Specifically, I liked the play sets. My favorites were the barbershop, the ice cream maker, and the barbecue set. (These affiliate links go to the modern versions of the 1970's toys I loved.) I still like playing with doughs and clays, but it's been years since we've had any Play-Doh in the house. (Trevor played with it occasionally when he was little, but it just wasn't his thing.) Now I use Model Magic, Sculpey, or homemade salt dough when I am in the mood to play with clay.

The last time I had my clay out, I made myself a set of texture tools using random items from the craft room. I'm really happy with how they turned out. 
 

The first step was gathering craft sticks and a bunch of random stuff. I wasn't sure what would print well on clay, so I tried a wide variety of things. 


Next, I attached each item (pony beads, buttons, a wooden swan, a rubber band, yarn, a chipboard tree, pipe cleaner, a shiny trim, Twisteezwire, pennies, and a feather) to craft sticks. I used hot glue for everything except the rubber band, pipe cleaner, and Twisteezwire, which I just wrapped around their craft sticks. 


I pressed each into the clay....


.... lifted them up to see the results. Most of them printed very well! The only total failure is the feather. The clay stuck to it and it didn't print well. The thin trim isn't great, but it was better than expected. 

I am most happy with the pony beads and the buttons. They give great texture to the clay. My second favorites are rubber band, pipe cleaner, and Twisteezwire. 


Make your own set of texture tools for playdough! Kids will love every step, from searching the house for items to use, to pressing their tools into dough to create textures. If you try anything that works particularly well (or particularly poorly!) let me know in the comments. 

5/21/21

World Peace in Clay

The World Colors line by Faber-Castell includes more than the fabulous color pencils with blendable skin tones I shared at the beginning of the week. They also sent me their World Colors Modeling Clay. (Affiliate link here and throughout the post.) This fun set has fifteen colors of clay, including six skin tones, seven rainbow colors, and black and white. The package also includes three double-ended tools. 

I played with the clay during a two-hour long meeting (one of the best things about meeting via Zoom is the opportunity for crafty multitasking) and eventually made this:

 
I say 'eventually' because I did a lot of experimental blending and mixing first. The actual project took around 15 minutes. The first thing I did was to create a bunch of different skin tones, which you can see on the bottom right of my work tray. (Which, in a previous life, held something edible from Costco.) Then I did some marbling with the other colors and started what resembles a patchwork quilt. It was so much fun to just play with the colors. It's been a long time since I've used modeling clay.


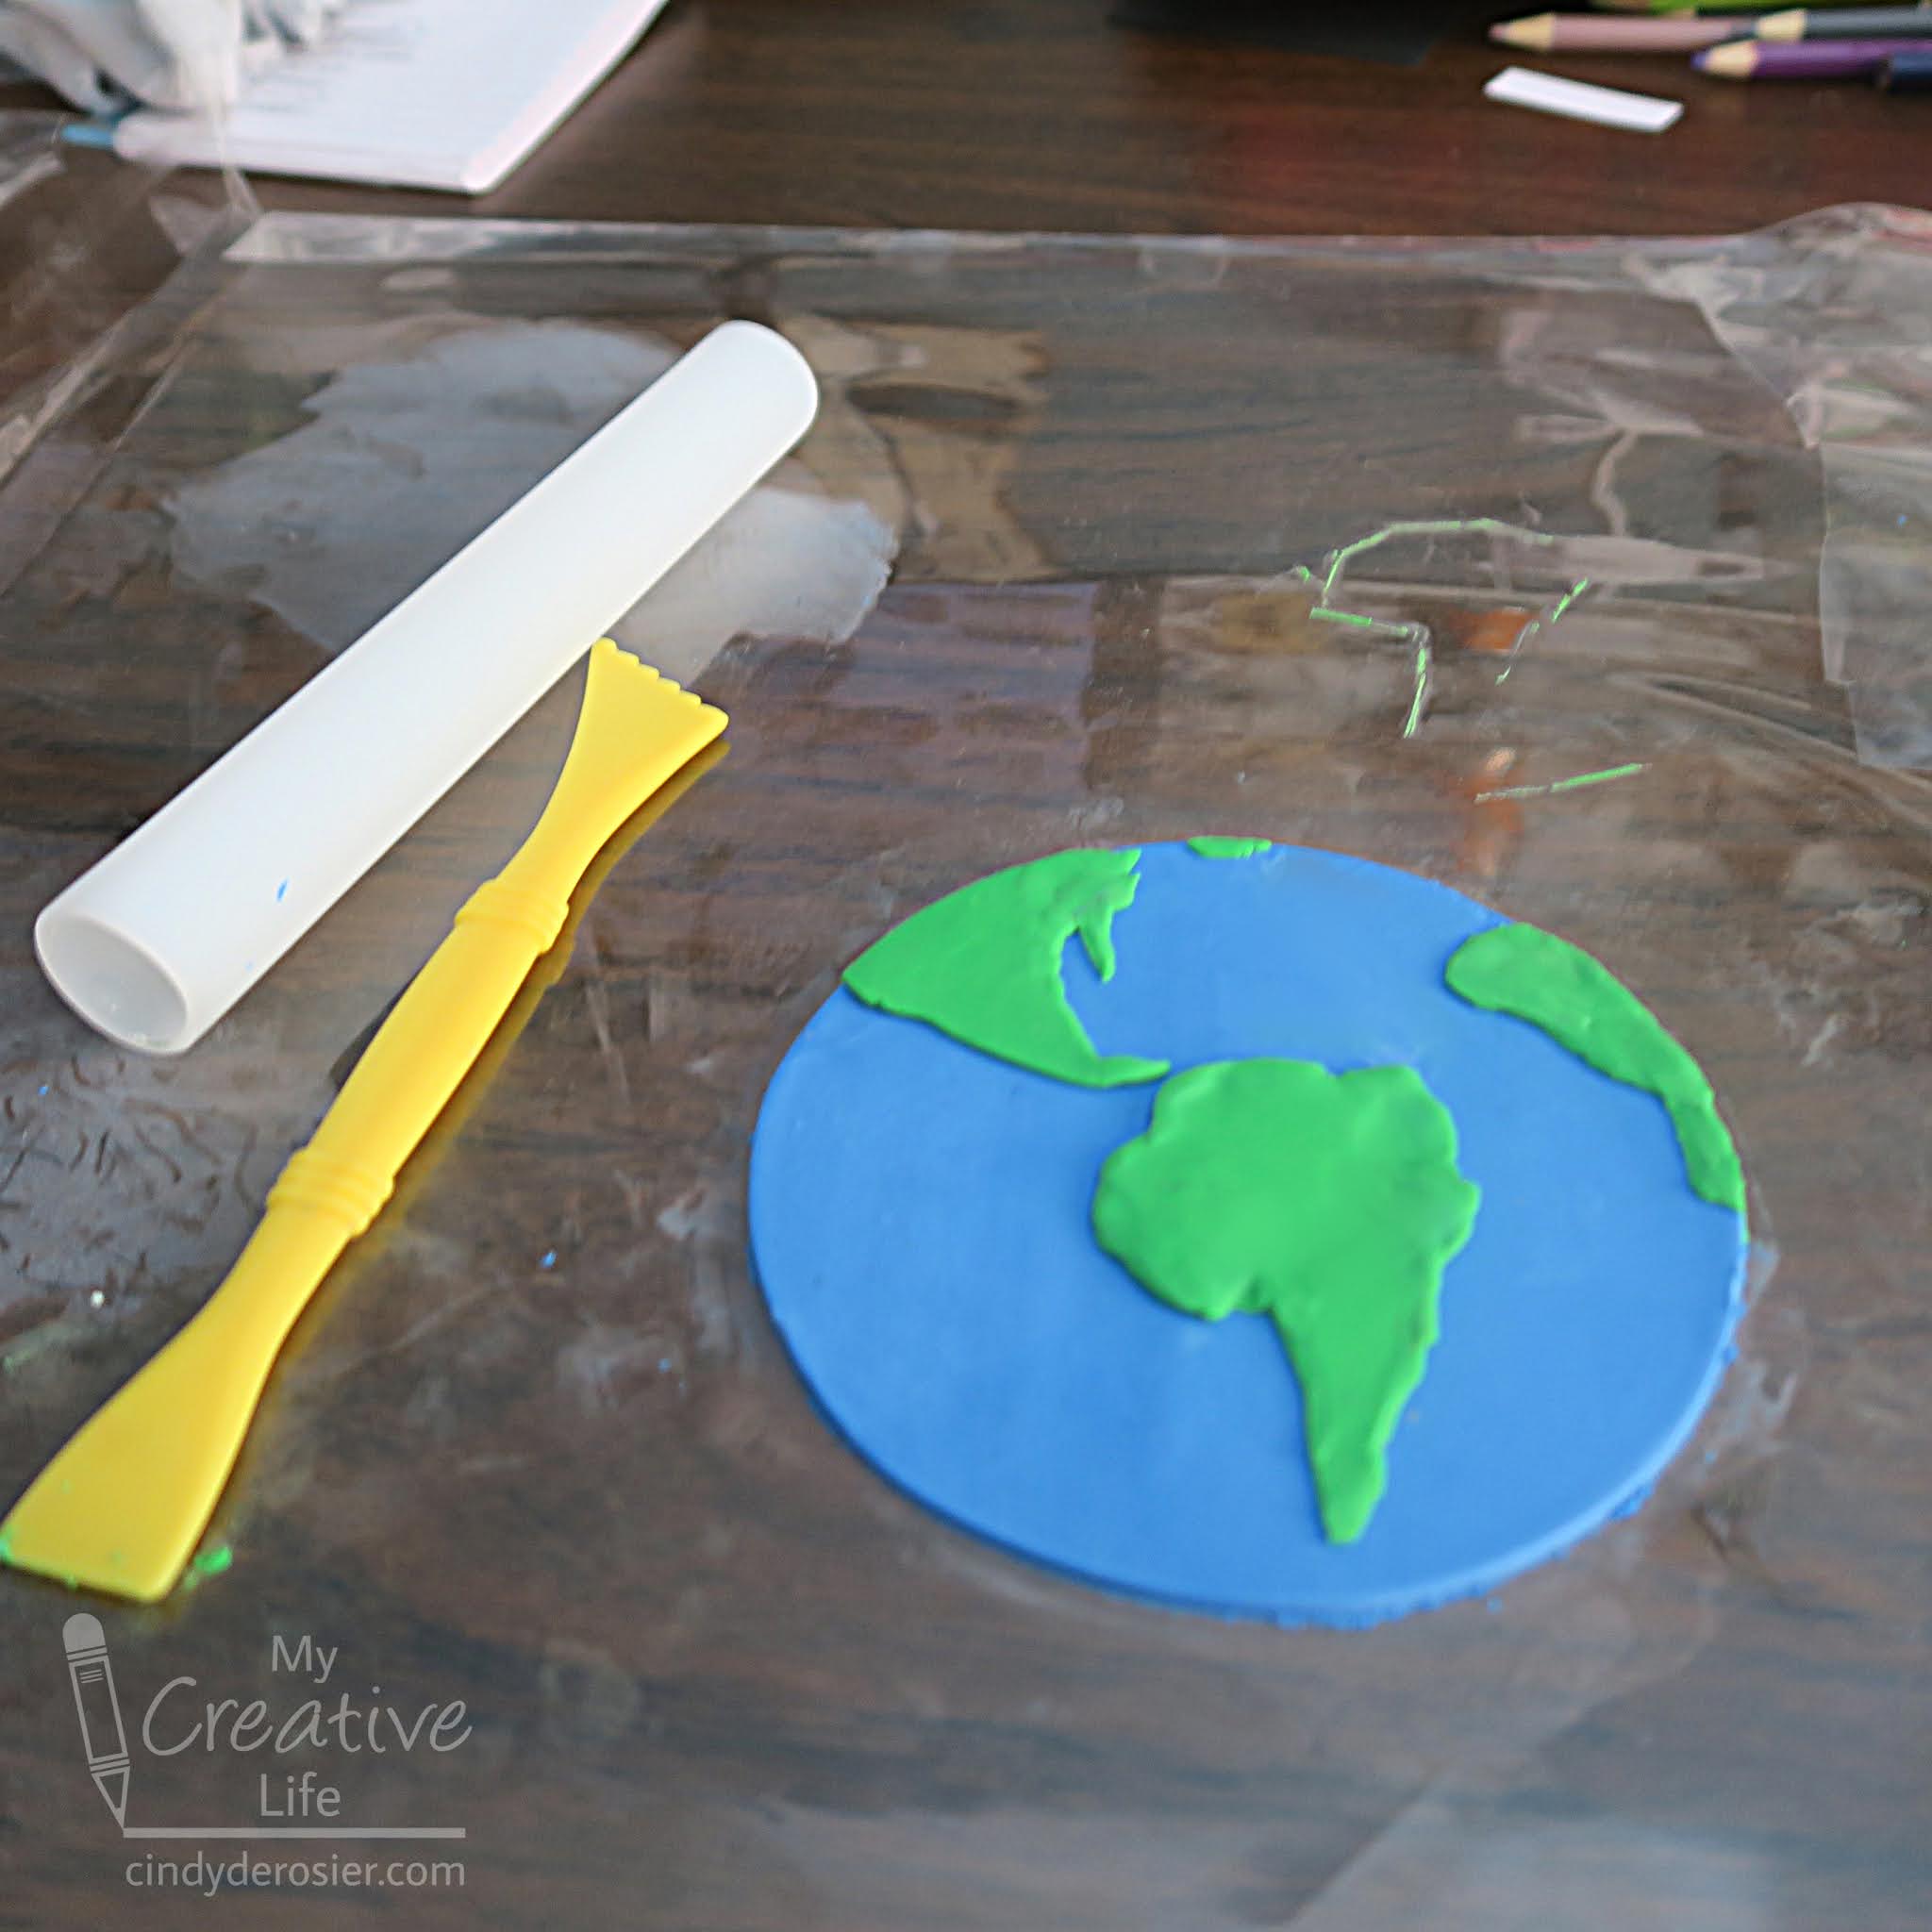
I put some thought into how to make use of the skin tones I'd created and came up with the idea of the connected hearts encircling the globe, which I'm calling World Peace in Clay. Note that modeling clay does not harden and is intended to be used again and again, which is perfect for kids. If you want to make something permanent, use an oven-bake clay like Sculpey


---------


World Peace in Clay


Materials:


Steps:


Mix white and blue clay to make the perfect shade for your globe. Roll it out, then find something round that's the size you want the globe to be, and press it into the clay to mark the circle (I used a tupperware bowl). Use the provided tool to cut away the excess clay. 
 
Roll out green clay, then use the tools to shape pieces to look like the continents. No need to be precise - just the approximate shapes. Layer them on the blue circle. 


Roll out each of the skin tones and press the heart cutter into them, one at a time. Then place the hearts onto the globe where the Equator is. 


I love how this turned out. Thank you to Faber-Castell, both for letting me play with this clay and for making the product in the first place. What a wonderful thing that we can now so easily depict all skin tones in our crafts. 

5/12/21

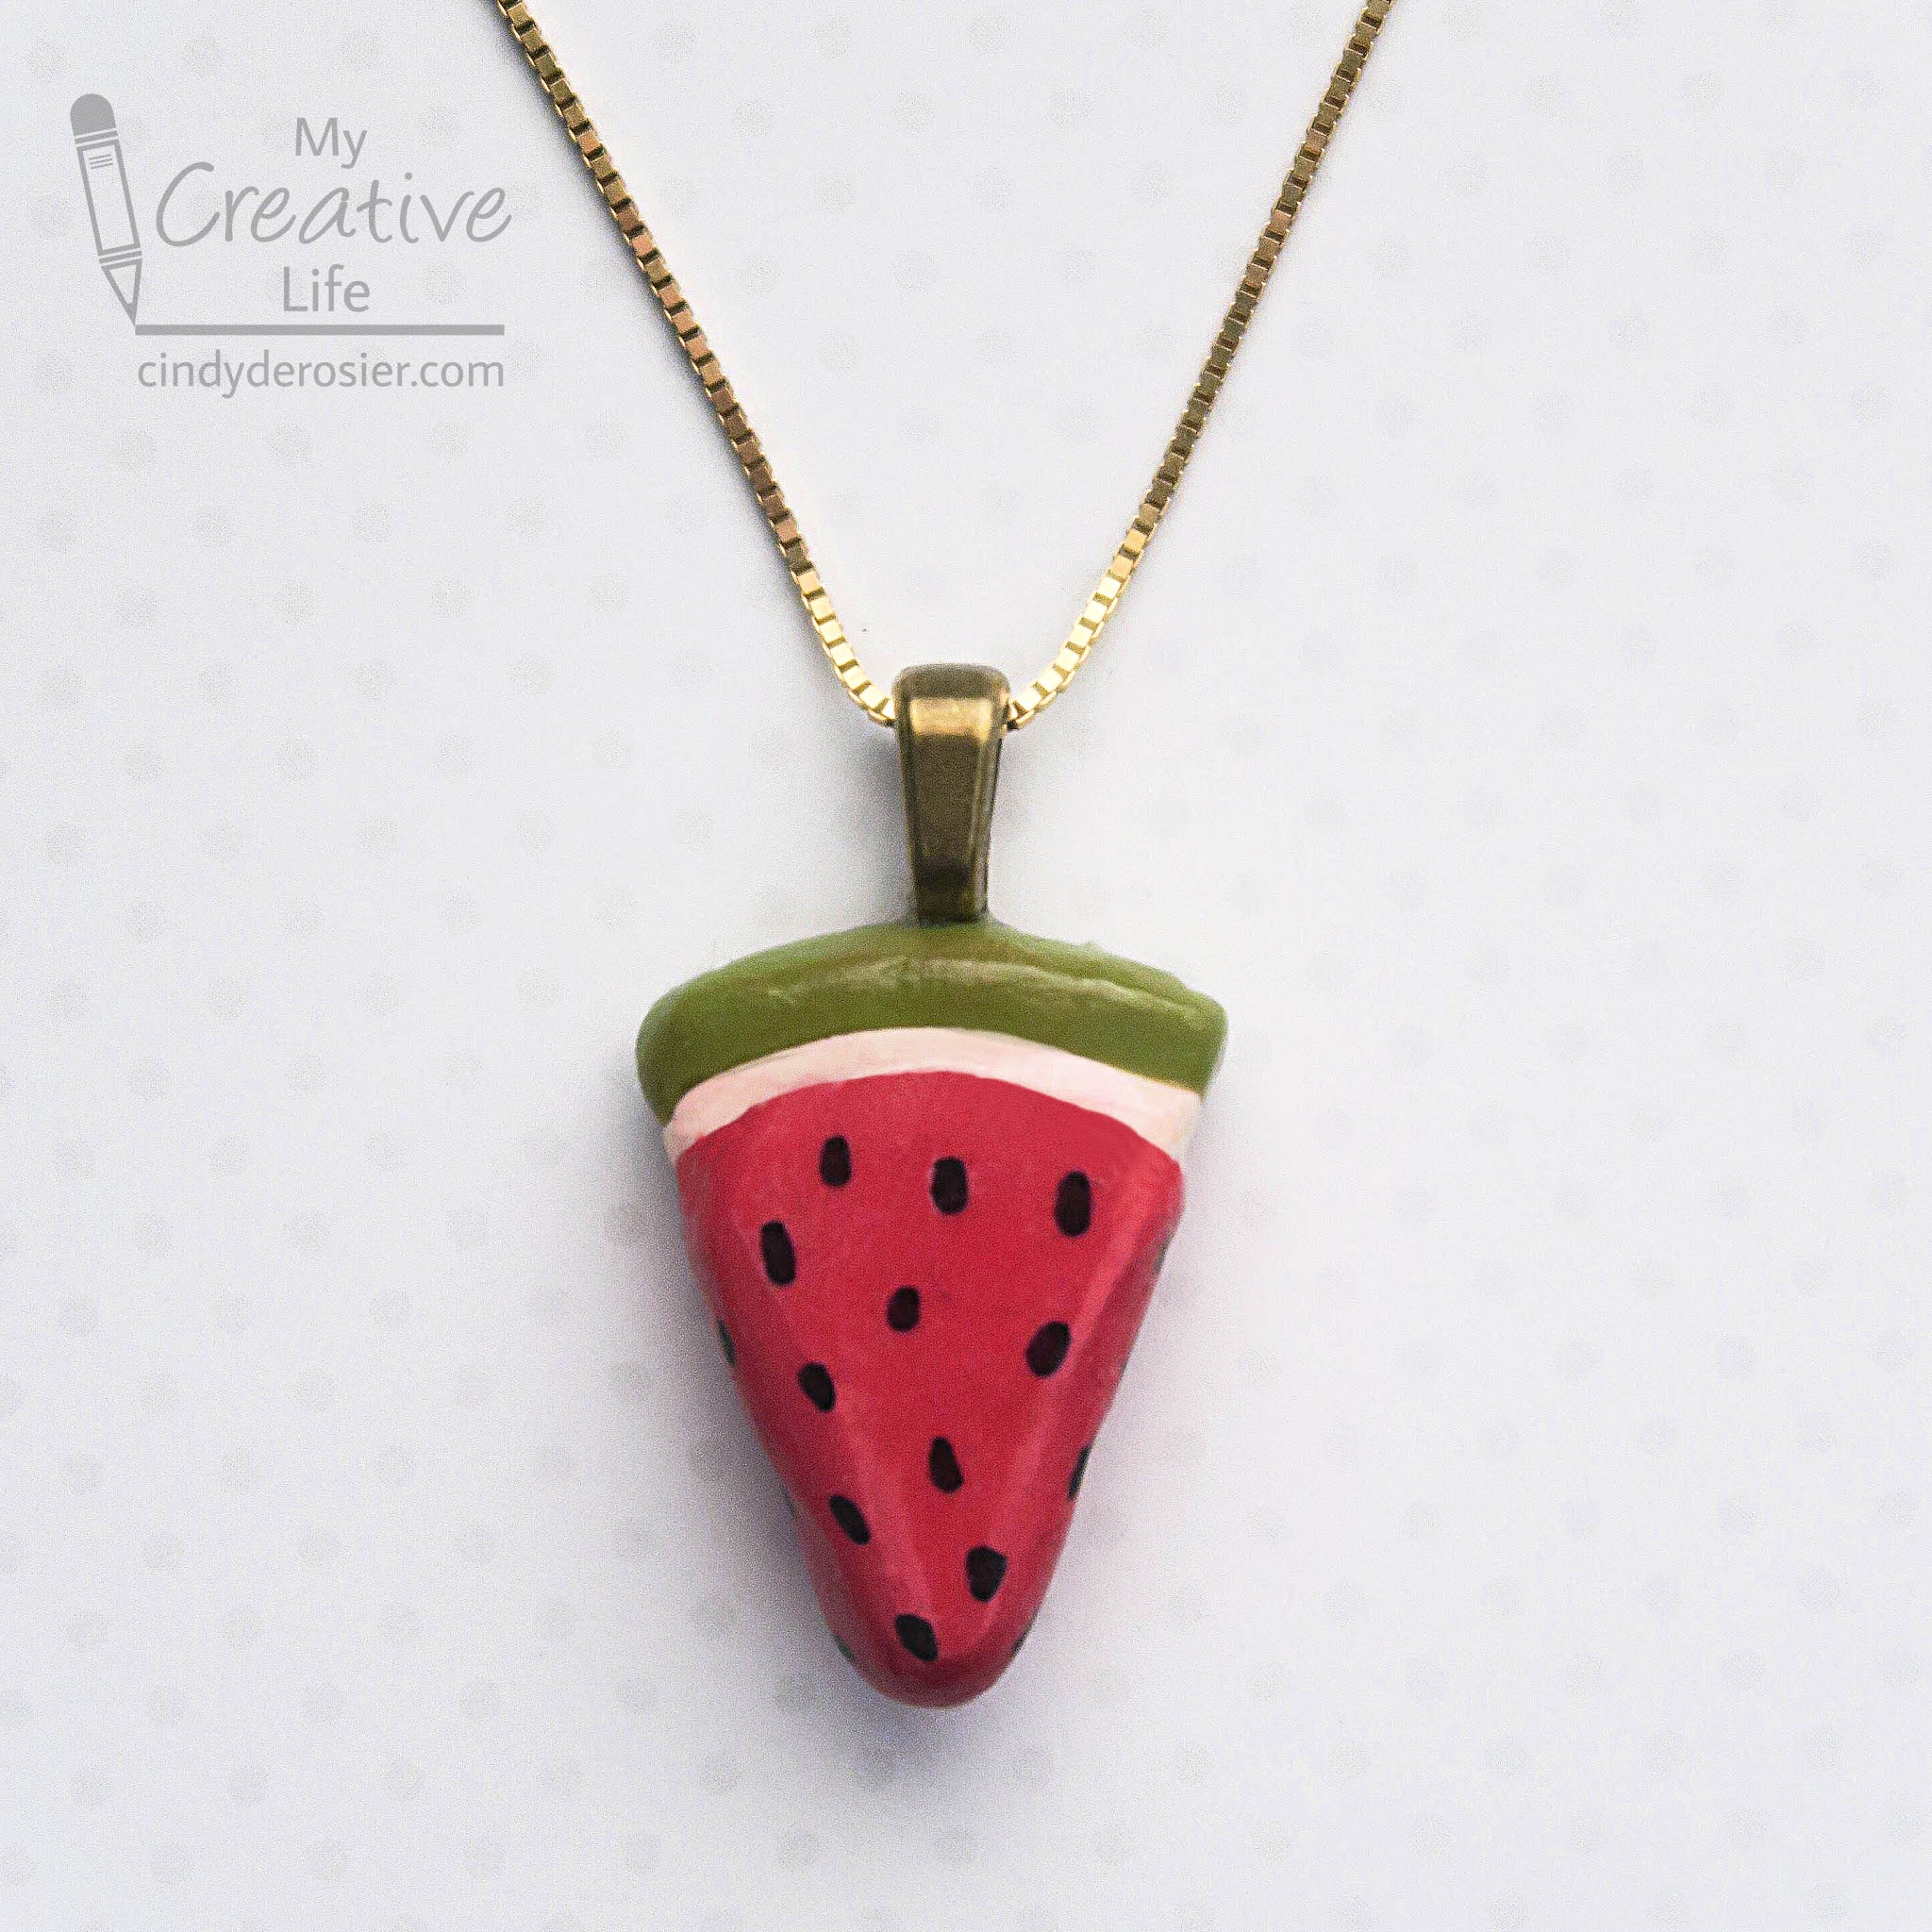
Clay Watermelon Necklace

Check out my new necklace! It's easy enough for a child to do, which I know because that is about where my jewelry-making skills are. 


Watermelon Necklace


Materials:


Steps:


Condition the clay by working it until it is soft. Form the red clay into a wedge the size and shape of a slice of watermelon. Add a thin band of white clay across the top. 


Add a thicker band of green clay above the white. Smooth everything until you are satisfied, then bake the clay according to the package instructions. 

When the clay has cooled, use the Sharpie to draw seeds onto the red portion. Baked Sculpey does not need to be sealed, but I chose to add a coat of Mod Podge so that my watermelon would be glossy. Your choice. 

Adhere the bail to the back of the pendant. When the glue is dry, hang the pendant on the cord or chain of your choice.

2/4/20

Sparkly Valentine Heart Note Holder

Marbled Model Magic hearts + clothespins + a jumbo craft stick + glittery paint = a sparkly Valentine note holder for February! Affiliate links below.


---------


Sparkly Valentine Heart Note Holder


Materials:


Steps: 


Paint the craft stick and the clothespins black. When they are dry, add a coat of Extreme Glitter for sparkle. When that is dry, use Supertite glue to attach one heart to each clothespin. 

Use the centering ruler to determine where to put your clothespins so they are evenly spaced. I used three because there are three of us in the family, but you can add more or fewer so that each family member has their own. 


Lift one clothespin at a time, add glue, and carefully replace it. Let the glue dry completely. 


Glue a length of cord to the back to act as a holder. The centering ruler is helpful for this, too. Honestly, I use my centering ruler all the time. It's so handy.

If hearts aren't your thing, you can easily switch them out for any other shapes. You can use different shapes, or different colors, for different people. There are so many possibilities.

1/31/20

Bunny Love Wall Art

Although we only have the one rabbit, there's no question that I'm a Crazy Bunny Lady. (That's an affiliate link for a shirt I NEED. There are more links throughout this post. That means I get a commission if you make a purchase through a link, at no extra cost to you.) This was the first thing I made with the Model Magic shapes I cut with cookie cutters. You did know that you can paint Model Magic, right? 


---------

Bunny Love Wall Art


Materials:


Steps:


Paint the embroidery hoop, the letter I, and the bunny gray. When the paint is dry, put the fabric in the hoop. 


Trim away the excess fabric, then use the Supertite to glue the edges down against the hoop. 


Glue the Model Magic pieces to the front of the fabric. 


Gather a bundle of hay and tie it with ribbon. Glue it to the top of the embroidery hoop, then add a second piece of ribbon as a hanger. 


I really do love bunnies. So much personality in such a small package!

1/30/20

Model Magic + Cookie Cutters = So Many Possibilities

When I made my King Cake necklace, I had some extra white Model Magic left. While opened Model Magic will stay soft if carefully wrapped properly, I'm not a 'carefully wrapped properly' type of person. I'd much rather play with the extra clay to see what I can make now than risk coming back to it later and finding that it wasn't wrapped as well as I'd thought.

First, I made bunnies.


I got a new bunny cookie cutter for Christmas (affiliate link here and throughout the post) and this was the perfect chance to give it a test run. I rolled out the leftover Model Magic on a sheet of wax paper, then started cutting out rabbit after rabbit. 


When I had a fluffle of bunnies, I set them aside on a piece of wax paper to dry overnight. Then I made hearts. 


I combined bits of white and red Model Magic, kneading until they were marbled. Then I rolled out each piece and cut out hearts. Obviously, you could use any shape you want. I did a quick search and discovered that there so many adorable cookie cutters out there! Check out these dinosaurs! This woodland set is awesome. Look, California! And tools! Oooh, llamas and cacti! And fruit! I hear lemons are trending

(I can't stop looking at cookie cutters. Send help.)


ANYWAY, I mixed all the scraps together with the last bits of red and used them to make a rose. It's really easy. 


Start by rolling a bunch of little balls. Flatten them with your thumb. They don't need to be the same size; in fact, your rose is more realistic if they aren't. 


Take one petal and roll it to make the center of the rose. Then wrap another petal around the outside. Keep adding petals on opposite sides until the rose is the size you want. Rest the finished rose on loosely balled foil. This will allow it to keep its shape as it dries. If you just set it down on the table, it will slump. 


I'm not sure yet what I'm going to do with my rose, but I have plans for the bunnies and hearts. I'll show you those soon.

1/28/20

King Cake Mardi Gras Necklace

The inspiration for today's craft is no mystery! I loved our time in New Orleans and couldn't wait to design something inspired by the colors and glitz of Mardi Gras. I'm really happy with my new necklace. It's super lightweight and comfy to wear. Can you tell what I used to make it? Affiliate links below. 


-------


King Cake Mardi Gras Necklace


Materials:


Steps:


Create three ropes of white Model Magic and place them side by side. 


Twist the bundle of ropes several times, then join the ends together to form a rough circle. If you're not happy with it, try again! Don't aim for perfection though - the irregularities make it look more authentic. 

Set your King Cake aside and let it dry for at least 24 hours. Flip it upside down and let it dry another 24 hours. 

Paint the King Cake with the Camel paint, then add highlights of Harvest Gold in the twists and on top to mimic the look of baked goods. When the paint is dry, use a Q-tip to glob white gesso on the top. Be sure to leave plenty of the 'cake' exposed beneath the 'frosting.'


When the gesso is dry, add Stickles. Alternate between green, yellow, and purple. Make the sections  different sizes like they’d be if you were dropping colored sugar on a real King Cake. 


Let the Stickles dry overnight. Glue the bail onto the back of the King Cake. When it is dry, add a chain and your King Cake is ready to wear!


If you want the real thing, you can make it yourself from scratch. Or, use a handy box mix that comes with everything you need, including the filling, frosting, and baby. This year, Mardi Gras falls on February 25, so you have plenty of time to prepare!

3/31/17

Bunny Week: Clay Bunny Figurine

I'm wrapping up Bunny Week with a wee little bun. Affiliate links below. 


Clay Bunny Figurine


Materials: 


Steps: 


Start by mixing a small bit of black into a pack of white Model Magic.


When you have a grey you like, form an oval body, oval head, and two cylindrical ears. (Yes, this bunny is brown, not grey. I made a brown version first to test some things and photographed as I went. Apparently I did not photograph the same steps with the grey bunny.)


Use the toothpick to flatten and elongate the ears slightly by pressing it flat against each ear. It will form an indentation. You can choose to leave the ears flat, or prop them up a bit. Rabbit ears go all sorts of directions. 

Add a small, oval tail. Rabbit tails aren't spheres

With the tip of the toothpick, poke a tiny hole for each eye. Then poke three little holes on each side of the nose for the whiskers. 


Cut the fishing line into itty bitty pieces and insert a piece in each of the whisker holes. (Poof! Back to grey!) Let the Model Magic air dry for at least two days.


To wrap up Bunny Week, I wanted to share some of my favorite posts about owning a bunny as a pet. Rabbits are wonderful pets, but they are a big responsibility and a long-term commitment. Like a dog or cat, rabbits should have freedom to move around the house and be near people and not be confined to a cage for the majority of the time. They need to be fed the correct foods, taken to the vet for checkups, and given plenty of love and attention. Do not get a rabbit unless you are educated and prepared to give it a good home for many years. To read more about our life with a house rabbit, click on the photos and/or links.

  
                Day in the Life- Trouble deRosier           Owning a House Rabbit                     Rabbits are Great Pets