Showing posts with label gingerbread. Show all posts

12/9/25

Decorated Cinnamon Ornaments, Three Ways

Have you ever made the classic cinnamon ornaments? They are fun and easy to make and they smell absolutely amazing. I've made cinnamon ornaments a handful of times, but this time I wanted to experiment with decorating them in three different ways. The results were really interesting! Affiliate links below. 


Cinnamon Ornaments


Materials: 


Steps: 


Mix the cinnamon and 5 tablespoons of applesauce in a bowl. Add the remaining applesauce if needed to make a smooth ball of dough. (Note: Some people add a tablespoon or two of Elmer's Glue to the dough, allegedly to help the ornaments last longer. I don't find this necessary, but go ahead and try it if you want.)

Roll out dough between two sheets of plastic wrap, to approximately 1/4" thick. Peel off the top sheet of plastic wrap, then cut ornaments from the dough. Use a straw to poke a hole in the top of each. Transfer your ornaments to a baking sheet. Ball up the scrap dough and repeat the steps until the dough is gone. Bake the ornaments at 200°F for about 2 hours. (Alternately, you can air dry them on a wire rack. It will take a day or two.)

Use a needle file to smooth any rough edges. You can see that the tree ornament below has some extra material (especially on the bottom branches) that needs to be removed. This task only takes a minute or two and it smells amazing. 


This is what all of my ornaments looked like after filing. See how much cleaner the tree looks? (Bottom left). 


On to decorating! I used three different products by Plaid to decorate my ornaments. I used Dots for the gingerbread man, star, and dotted tree; the paint pen for the snowman and holly leaf; and the paint for the bell and the other tree. 


As I was decorating, I was comparing the merits of each method. I found the Dots most difficult to control, but you can't beat the vibrancy and coverage. With practice, I could probably do better than the uneven dots and lines I made. The paint pen was the easiest to control, perfect for little details, but I had to let the first coat dry and do a second coat in order to get full coverage. The paint had good opacity and it was relatively easy to make simple lines and designs with a liner brush. 

I let everything dry overnight and ended up with this: 


The ones done with the paint pen are slightly less vibrant, but look at those tiny details. Now that I've tried them all, I'd recommend the paint pen for children, the paint or a paint pen for teens, and the Dots for cake decorators and other people who have spent a lot of time practicing squeezing with uniform pressure. 

The final step is adding hangers to your ornaments. I like the look of twine with these, but you can use ribbon, cording, or whatever else you want. 


The ornaments will last indefinitely, but their scent will fade over time. There are two ways to keep them smelling just as good as when you made them. The first is to gently file the edges and back each year before hanging them on the tree. This will, of course, make the ornaments smaller over time and will eventually cause them to break. Alternately, you can add a tiny drop of cinnamon oil to the back of the ornaments. 

12/4/25

Gingerbread-Inspired Joy Christmas Ornament

I love making Christmas ornaments. This one is inspired by two of the best scents of the Christmas season: gingerbread and pine. The ornament took very little time to make, other than the drying time for the paint. I'm really happy with how it turned out. Affiliate links below. 


Gingerbread-Inspired Joy Christmas Ornament


Materials: 


Steps: 


Paint the letters brown. When the paint has dried completely, use the paint pen to add the frosting details to the letters. Cut a piece of twine to make a hanger. Snip the pine branch to the desired length. 

Assemble the ornament by first gluing the letters to one another. Glue the connected word to the pine branch, then add the twine. Finish the project by adding pearls in clusters of three. 

12/3/25

Christmas Name Art

Turn on the holiday music and challenge the kids to turn the letters in their names into Christmas icons. Like all good name art projects, this works with any name and is a fun and creative activity. Affiliate links below. 


Christmas Name Art


Materials:


Steps: 


Use a pencil to lightly write your name in block letters on a piece of bristol vellum. Sketch in details to turn each letter into something associated with Christmas. I made my C into a candy cane, the I into a snowman, the N into gingerbread, the D into a gift, and the Y into an oddly skinny Santa. Other ideas include: an elf, snow on a chimney top, an angel, a reindeer, a sugar cookie, or tree lights. Certain letters are perfect for specific shapes, like a stocking for J or a Christmas tree for A. Feel free to mix upper- and lowercase letters to get the shapes you want. Anything goes!

Once you are happy with your design, color it in. Erase any stray pencil marks, then outline your design with a fineliner. 

12/8/21

Gingerbread Tags for Baked Goods

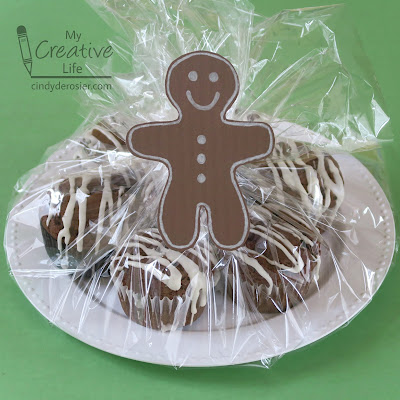
While I wouldn't blame you one bit if you kept an entire batch of gingerbread muffins for yourself, they do make really nice gifts. Bundle up a half-dozen and give them to friends and neighbors instead of (or in addition to!) a plate of cookies. The smiling gingerbread tag lets them know what's inside. 


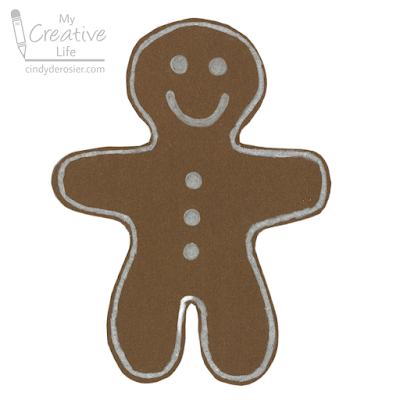
To make your own, draw a gingerbread man on brown cardstock and then cut it out with microtip scissors. I actually cut the ears off the template I made for the torn paper bear and used that for my gingerbread man. Then I used a white colored pencil to draw the frosting onto the gingerbread man. I tested my various colored pencil sets to see which white was the most opaque and ended up using my Prismacolor Premier.  


I have another idea for using the same template that will let me test the opacity of more colors than just the white. Stay tuned! In the meantime, check out some...

12/7/21

Gingerbread Muffins

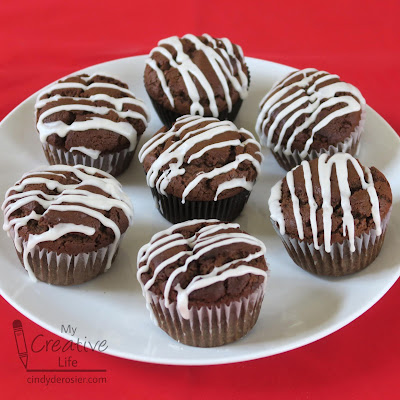
I love making up my own recipes, and I particularly love when they turn out exactly as I'd hoped on the first try! These gingerbread muffins have a pronounced ginger flavor, enhanced by a mix of spices and molasses. They're delicious right out of the oven and even better with the vanilla glaze. 


Gingerbread Muffins


Muffins:

   
                ½ c butter                                                     ½ tsp salt
                    ¾ c molasses                                               1tsp baking powder
                    ½ c milk                                                       ½ tsp baking soda
                    1 egg                                                            ½ tsp ground cinnamon
                    1 tsp freshly grated ginger                        ¼ tsp ground allspice
                    ½ c brown sugar                                         ½ tsp ground cloves
                    2 ½ c flour


Glaze:

                    1 c powdered sugar
                    2 T milk
                    ½ tsp vanilla extract


Preheat oven to 400°F. Melt the butter in a microwave-safe bowl. Add molasses, stirring until the two are completely combined. Add milk and egg. Mix in grated ginger, then add in brown sugar. Stir until the mixture is completely smooth and uniform.

Combine the flour, salt, baking powder, baking soda, cinnamon, allspice, and cloves in a separate bowl. Add the dry ingredients to the liquid ingredients, stirring just until you can no longer see flour. Spoon the batter into 12 greased or lined muffin cups.

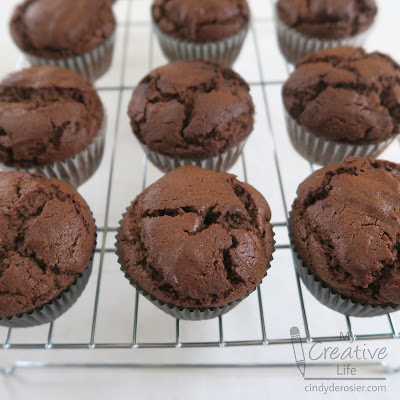
Bake 18-21 minutes. Remove to a cooling rack. Eat them warm as is, or let them cool for 30 minutes before glazing.


To make the glaze, combine the powdered sugar, milk, and vanilla in a small bowl. Whisk together until completely smooth. If the glaze is too thick to drizzle, add milk to thin. If it is too thin, add powdered sugar. Drizzle the glaze over the top of the muffins. The glaze will harden in about 30 minutes.