Showing posts with label suncatcher. Show all posts

1/24/23

Washi Tape Valentine Heart Suncatcher

I made another project this week to add to my huge collection of Valentine's Day decorations. This is what it looks like on the wall...


... but it's intended as a suncatcher. Look how pretty it is in our bedroom window, against the bright blue sky. 
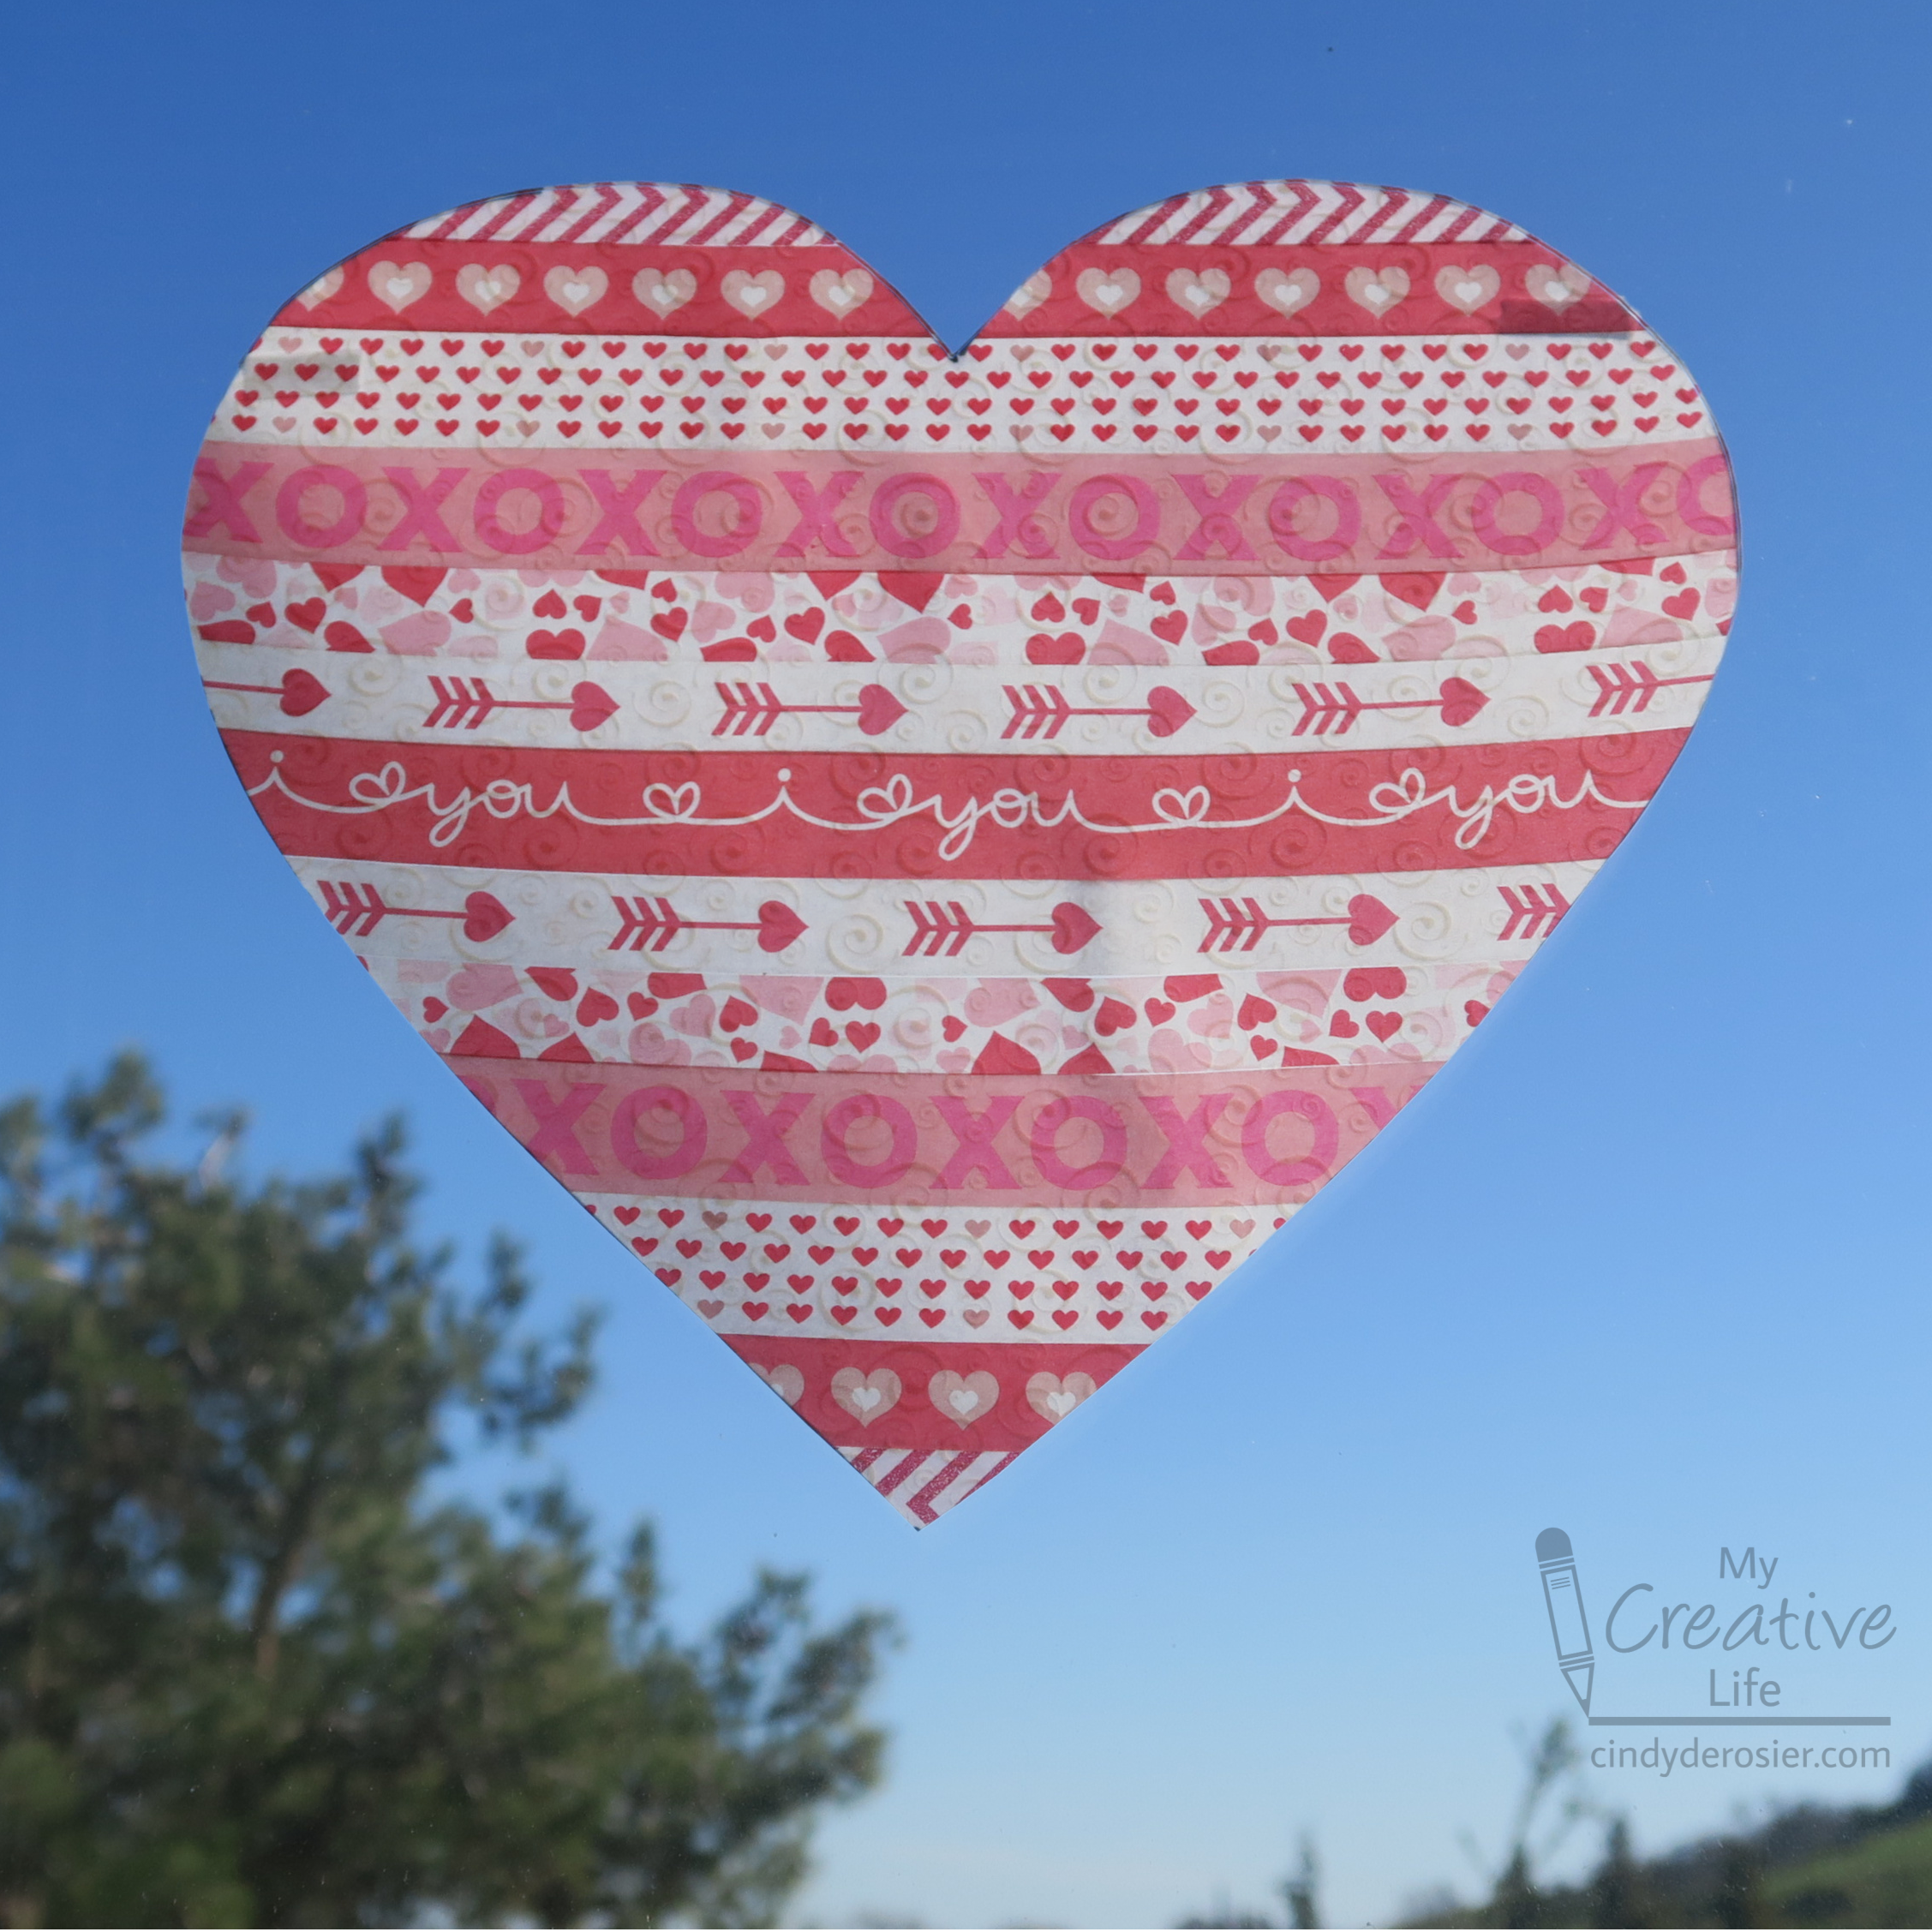

The whole project takes about 10 minutes and the end product is so pretty. Note that I used a 20+ year old scrap of patterned vellum, which is really hard to find. It's also hard to find the same washi tapes I used. Below, you'll find affiliate links to non-patterned vellum, different Valentine's Day washi tapes, and other products you'll need to make this.

---------


Washi Tape Valentine Heart Suncatcher


Materials: 


Steps: 


Make a heart pattern, then trace it onto the vellum with the Sharpie. 
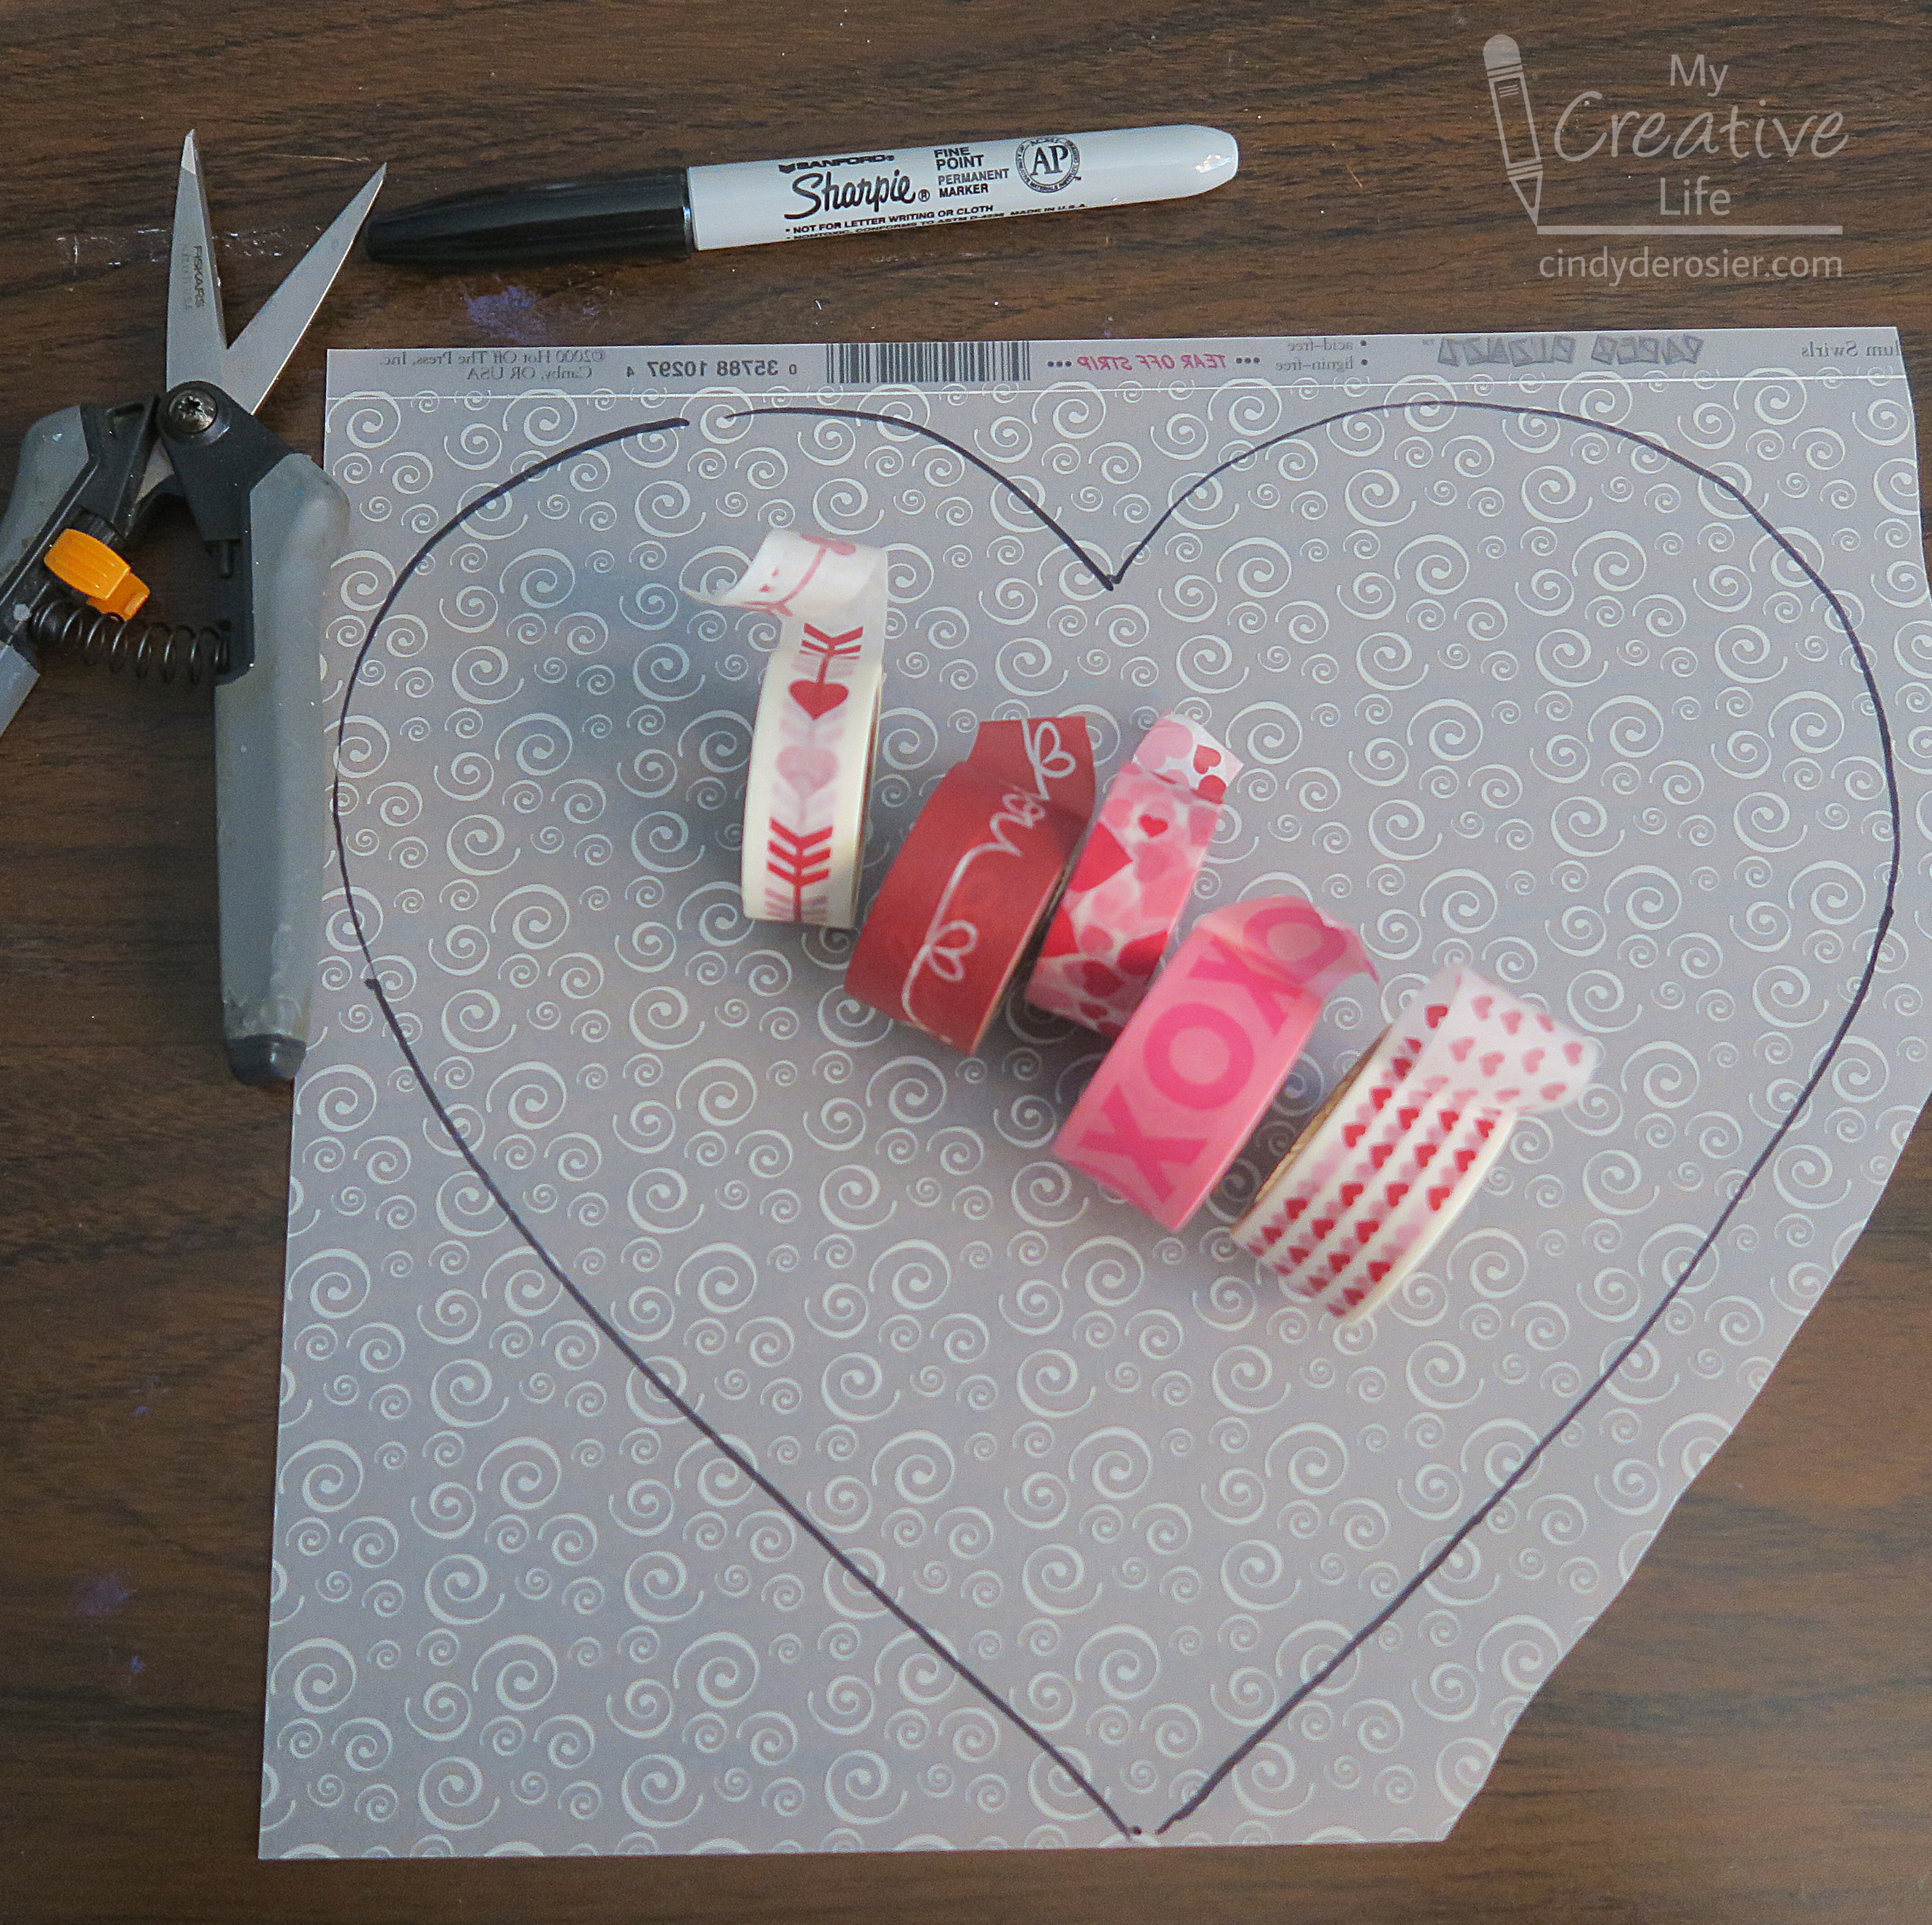

Arrange the washi tape in an order you like. Apply the first tape horizontally across the center of the heart (I started with the eye-catching "i ♡ you" tape), allowing the ends of the tape to hang over the edge of the outlined heart slightly. Add each tape above that one until you have filled the top portion of the heart. The size of your heart and the width of your washi will determine how many rows that is. 
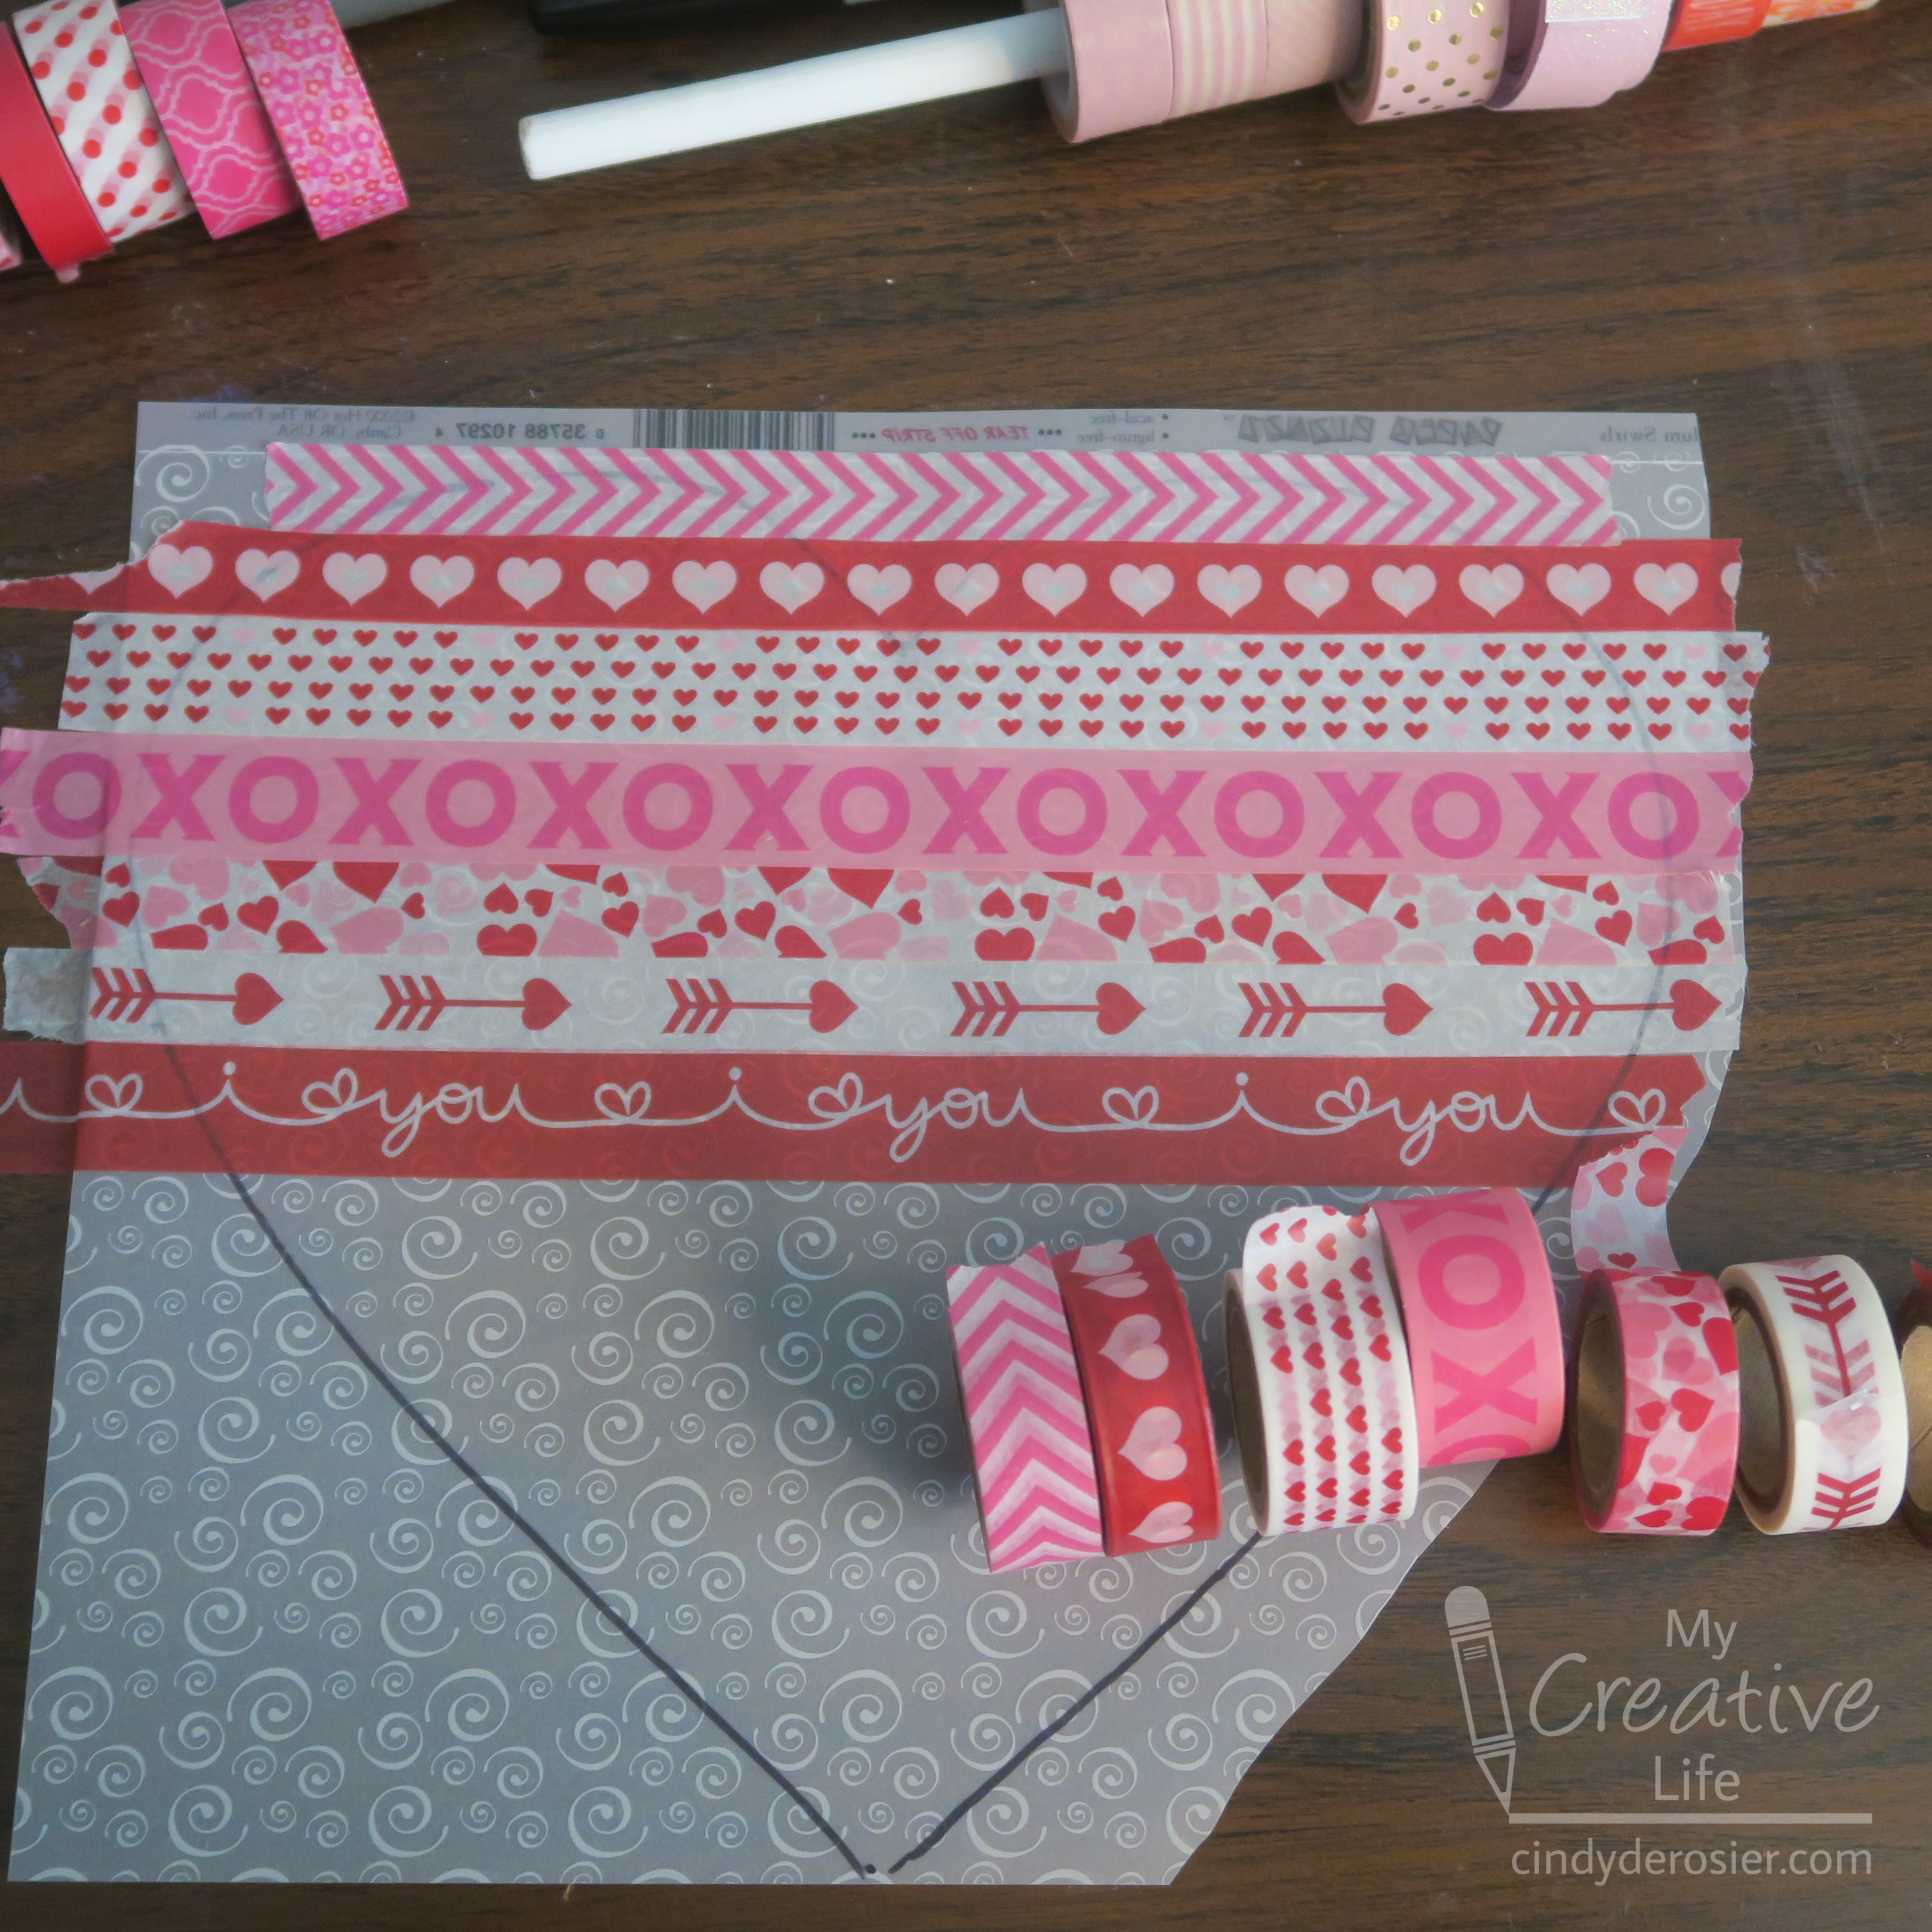

Keeping the tapes in the same order, fill in the bottom of the heart. You'll end up with the tapes mirrored across the 'equator' of the heart. Press all the tapes down firmly. 
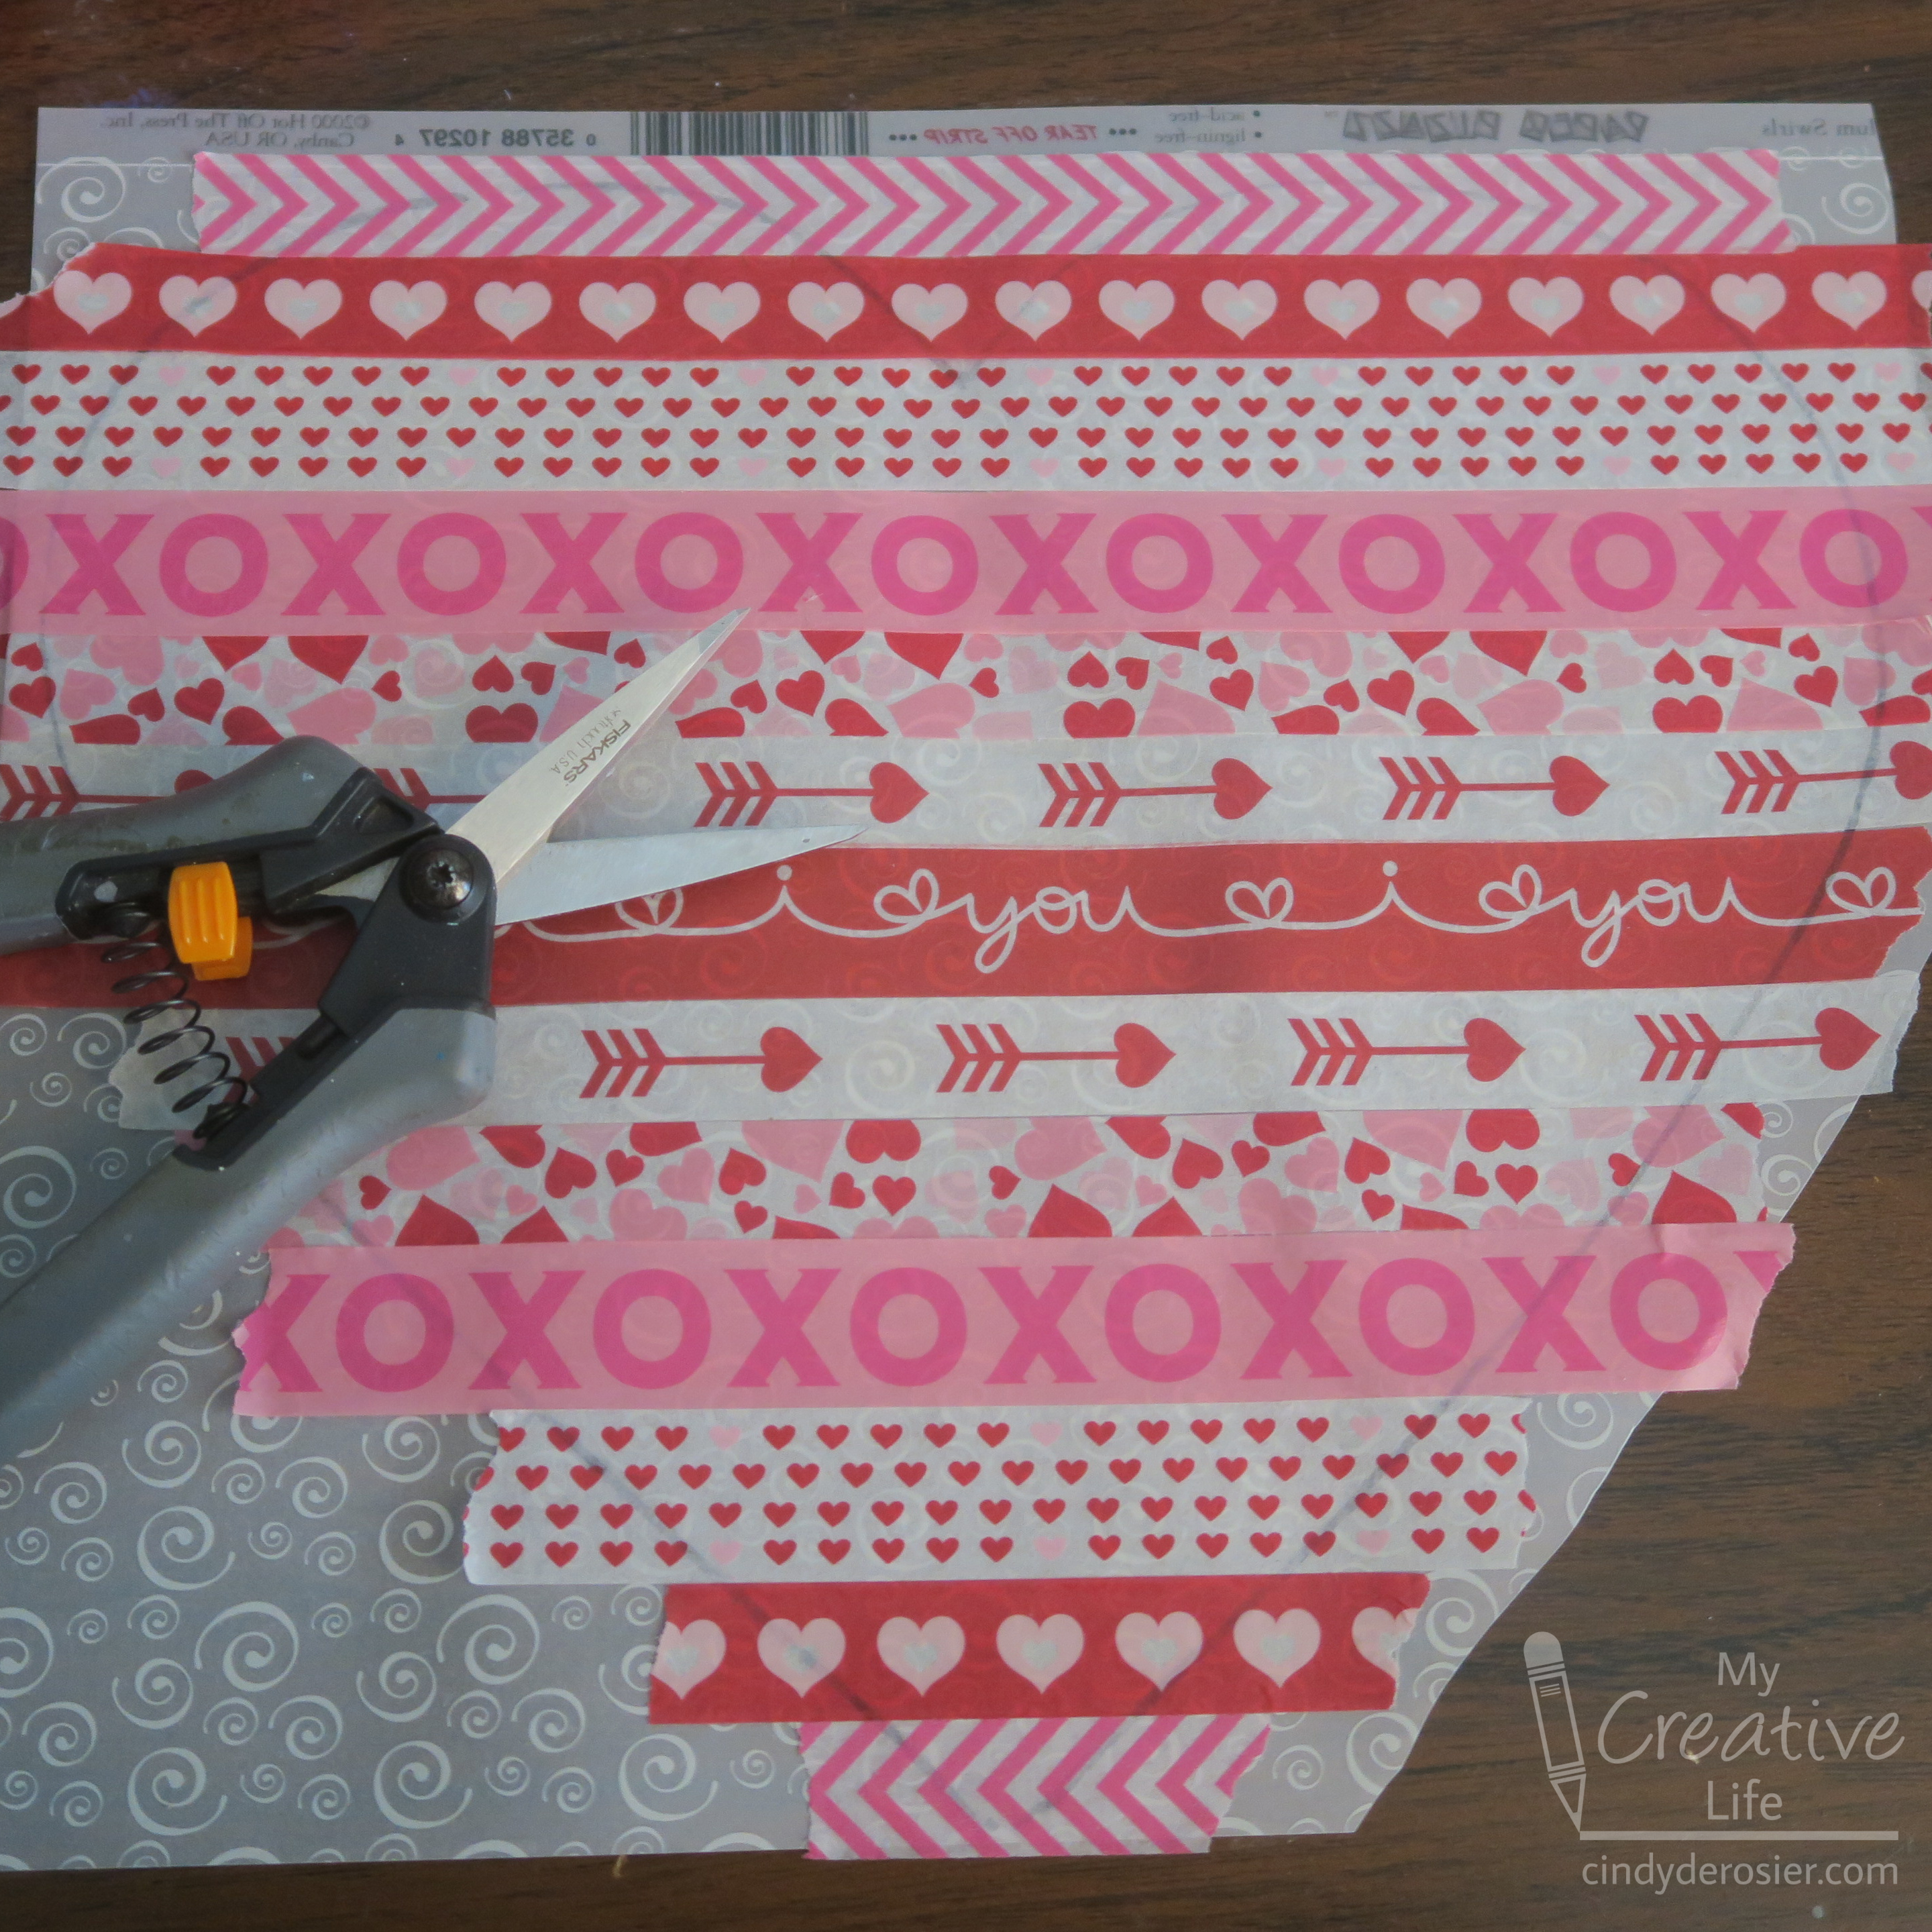

The black Sharpie line will show through the washi. Cut just inside this line. Then tape your suncatcher to a window and enjoy!


Obviously, you can use this technique for any holiday or occasion. Just change the washi tape and the shape of the vellum. It's such a quick and easy project, one I'll definitely be doing again. 

11/20/18

Hot Glue Sequin Suncatcher

Check out the suncatcher I made! There's not a lot of sun to catch right now, but it's still pretty. 


My inspiration for this project came from Hot Glue Hacks and Crafts. (This is an affiliate link, as are other links throughout the post.) I received a copy of this book from the publisher to review. 


I was really excited to review this book because I know the authors! Angie Holden and Carolina Moore are both talented and prolific bloggers who produce top-notch stuff. They've been working hard on this book and it was so exciting to get my hands on a copy and learn everything there is to know about hot glue. And I mean everything! I'm not a hot glue expert by any stretch of the imagination, so Hot Glue Hacks and Crafts taught me a lot. I had no idea there were so many types of hot glue! Glow in the dark?! Foam? NO STRING?!?!? 

In addition to all the fun tips and hints, the book includes fifty unique and fun projects. See the flip flops on the cover? Entirely hot glue (and a button). Crazy creative, right?! I was inspired by suncatcher made with tissue paper and an embroidery hoop. Being me, I had to take it my own direction, but the basic steps are the same. 


---------

Hot Glue Sequin Suncatcher


Materials: 


Steps:


Preheat your glue gun. Set the mason jar ring upside down on the silicone mat (threaded side up). Squirt a generous amount of hot glue into the opening of the ring, then quickly use the spatula to spread it evenly. Drop the sequins into the hot glue. 


Working on a small area at a time, squirt glue onto the inner edge of the ring and dump sequins on it. Continue until you have coated the whole inner ring. Give the suncatcher a good shake and reattach any sequins that aren't secure. You can also fill any gaps at this point. 


Finally, cut a piece of ribbon and glue it to the ring to make a hanger. Hang your suncatcher in a window. I chose Christmas colors and will be moving it from the window to the tree once it is up!

I'd encourage you to check out so Hot Glue Hacks and Crafts and try some of the projects yourself. It would make a great gift for a crafter, perhaps paired with some of the specialty glues in fun colors or scents (yes, scented hot glue is a thing!). Happy glueing! 

8/15/13

Colored Glue Suncatchers

During Vacation Bible School earlier this summer, Trevor made a beautiful cross-shaped suncatcher by squirting colored glue onto a transparency, letting it dry, then peeling it off. He loves it and shows it to everyone who visits our house. I thought it would be fun to make more suncatchers using a slightly different technique. Affiliate links below. 


Colored Glue Suncatchers


Materials:


Steps: 


Begin by putting a puddle of glue into the middle of the lid.  Pick up the lid and rotate it until there is a thin layer of glue covering the entire base.  We added more glue to the lids in this picture, as there wasn't quite enough.  Better to start with too little though, as you can always add more.


Set your lid down on a flat surface and add a few drops of food color.  

 
Use a toothpick to gently swirl the colors.  Do not overmix!  


Stop when it reaches this point... or sooner.  The colors will continue to blend as the glue dries.

Allow the glue to dry COMPLETELY (2+ days, depending on temperature and humidity), then gently peel the suncatcher from the lid.  It should feel totally smooth with no moist or sticky spots. Press it to a window and enjoy.  Here's Trevor's:


I experimented with mine.  I tried cutting the suncatcher with scissors to make shapes and it worked beautifully.  Would punches work?  Yes!  Some punches cut cleanly and others did not, but most brands cut through it just fine.  As you can see, these stars didn't cut perfectly, but I could easily trim them up.  


Other than the long drying time, this is a really fun craft to do with kids!