Showing posts with label 1970's Craft Flashback. Show all posts

2/12/24

Atari Breakout Name Art

I was born in 1972, which means I was four years old when Atari Breakout debuted in 1976. I never played that original version with 8 rows of bricks. The Breakout of my childhood, with a 6-row rainbow of colors, was released in 1978 for the Atari 2600. I'm not sure exactly when our family got our Atari, but I'm guessing 1979. Breakout quickly became one of my favorite games. (Other games I remember playing a lot include: Adventure, Pitfall, Outlaw, Haunted House, and Night Driver.) I have a lot of fond memories of playing Atari with family and friends. Hence, Breakout Name Art. Affiliate links below. 

Name art inspired by Atari Breakout


Atari Breakout Name Art


Materials: 


Steps:


Use the paper trimmer to cut a piece of black cardstock so that it is approximately 10.5 x 11". You will be gluing it to a sheet of 12x12" grey paper. (Change the measurements accordingly if you're starting with paper that isn't 12x12". Basically, you want a wide border of grey to show on the top and narrow borders of grey to show on the sides.) Set the grey aside for now. 

Cut strips of red, pink, orange, yellow, green, and blue cardstock that are 3/8" tall and 11" wide. Glue them to the black cardstock. 


Use a piece of graph paper to translate your name into pixels. It may take some experimentation to get the spacing right. If you're struggling with a letter, try switching the capitalization; some letters are easier using either uppercase or lowercase. 

When you're happy with your name, transfer it (in pencil) to your Breakout rainbow. I colored in each letter as I went because I was confident about the spacing. You can see below that I've colored in CIND and that the Y is ready for black ink. 


Cut a strip of red paper for the paddle and glue it to the paper. Then cut a single pixel from the grey background paper and glue it in place. This is the ball. Orient the grey paper so that the cut part is at the bottom, then glue the black paper on top. This will hide the missing part of the grey paper. 

Name art inspired by Atari Breakout

If you're feeling nostalgia for Breakout (or never played it because you're too young), I strongly recommend getting an Atari Flashback! Yes, they are for sale and yes, they are just as awesome as you remember. Better, actually, because the games are preloaded instead of having to switch out cartridges. I even found a Breakout t-shirt on Amazon. It's available in a lot of colors, which I'd ordinarily appreciate, but Breakout has to have a black background or it's just not Breakout. I'm a purist that way. 

10/30/23

Potholders and Dishtowel Hidden Money Gift

My nephew turned 23 yesterday. I have been giving Timothy hidden money for every gift-giving occasion since he was 13. Almost all of the 37 money gift tutorials I have on my blog were for him. It is getting increasingly difficult to come up with an idea that is both new and able to be mailed out of state, but I enjoy the challenge. 
For his 23rd birthday, I gave him two homemade potholders and a dishtowel. 


Making the potholders was a major blast from the past. I was obsessed with my potholder maker as a kid in the 1970's. Getting a fresh bag of loops was the best! I still have my red metal 1970's potholder maker (affiliate links here and below); at some point I got a plastic one (which they sell in a variety of sizes). Some have instructions to make other things, like this awesome pineapple. Seven-year-old Cindy would have circled that in the Sears catalog for sure! Fifty-one-year-old Cindy *might* buy some yellow and green loops and do some experimenting. 

Speaking of experimenting, I had no idea if hiding money in a homemade potholder was even possible. 
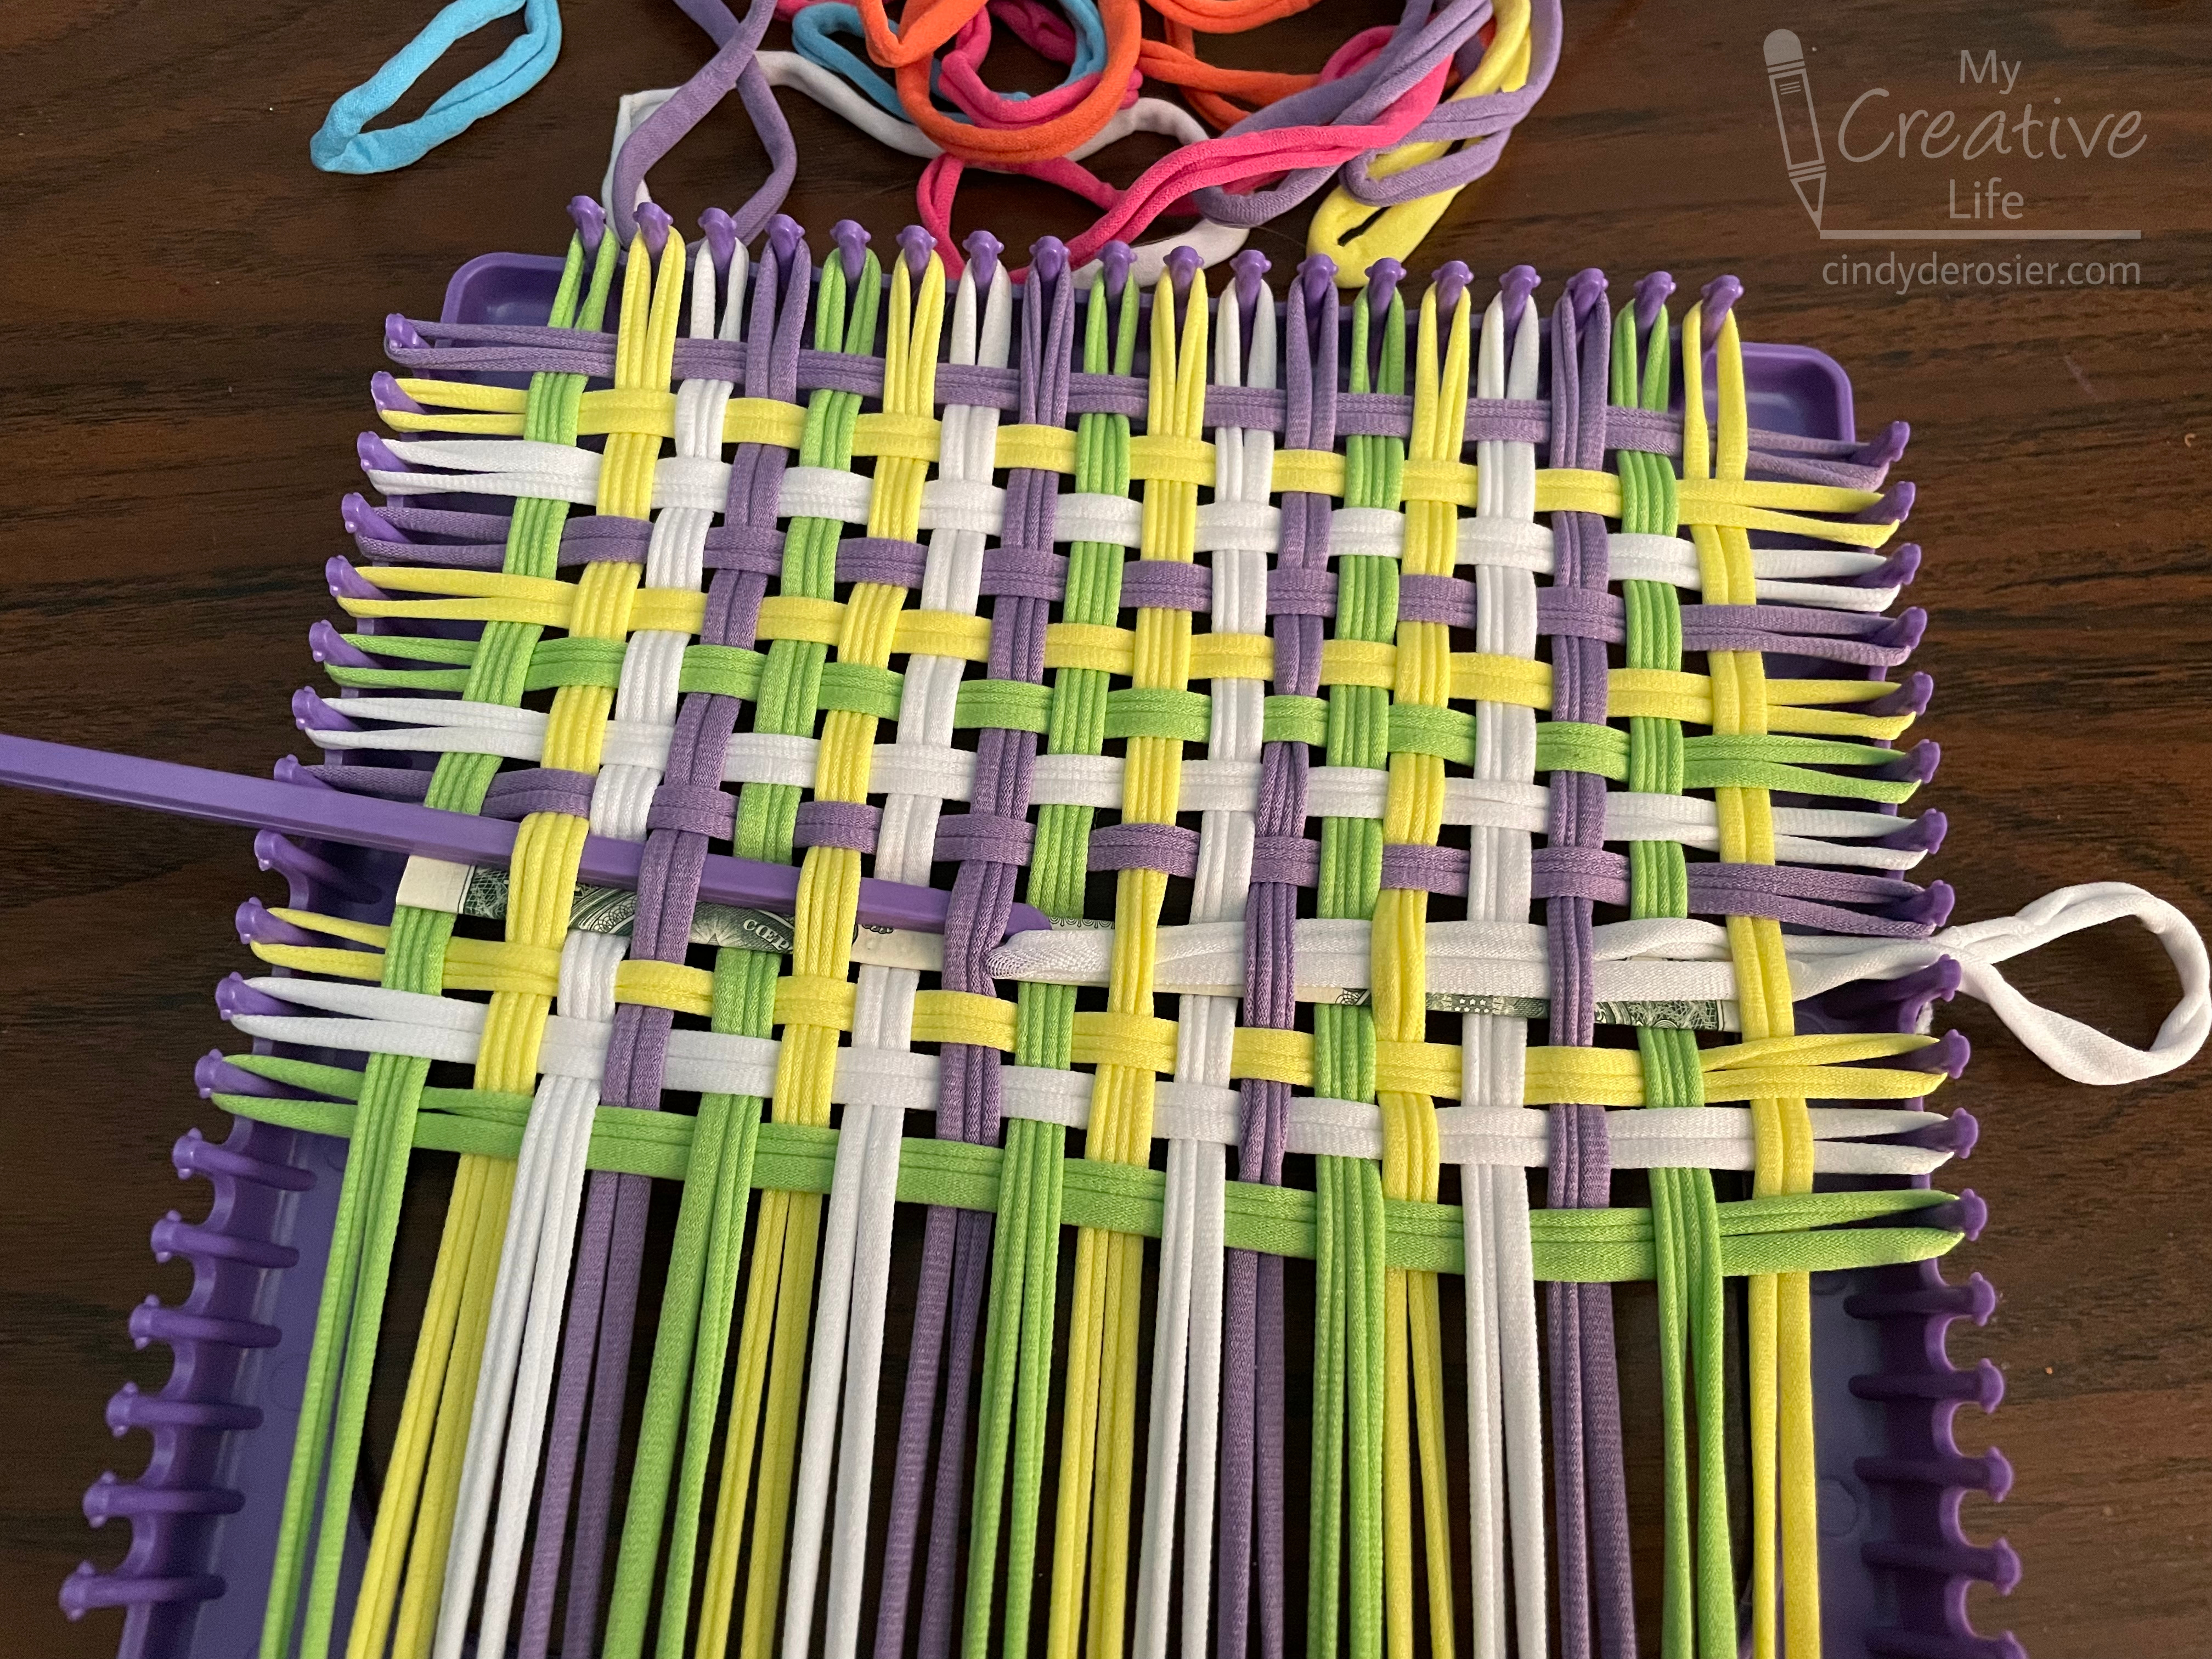
I added loops in one direction, folded a dollar bill so it was really skinny, and wove it into the potholder. So far, so good.  


I wove in more loops, then realized I needed a loop where the money was or I wouldn't be able to bind off properly. So I added a white loop over the dollar bill. 


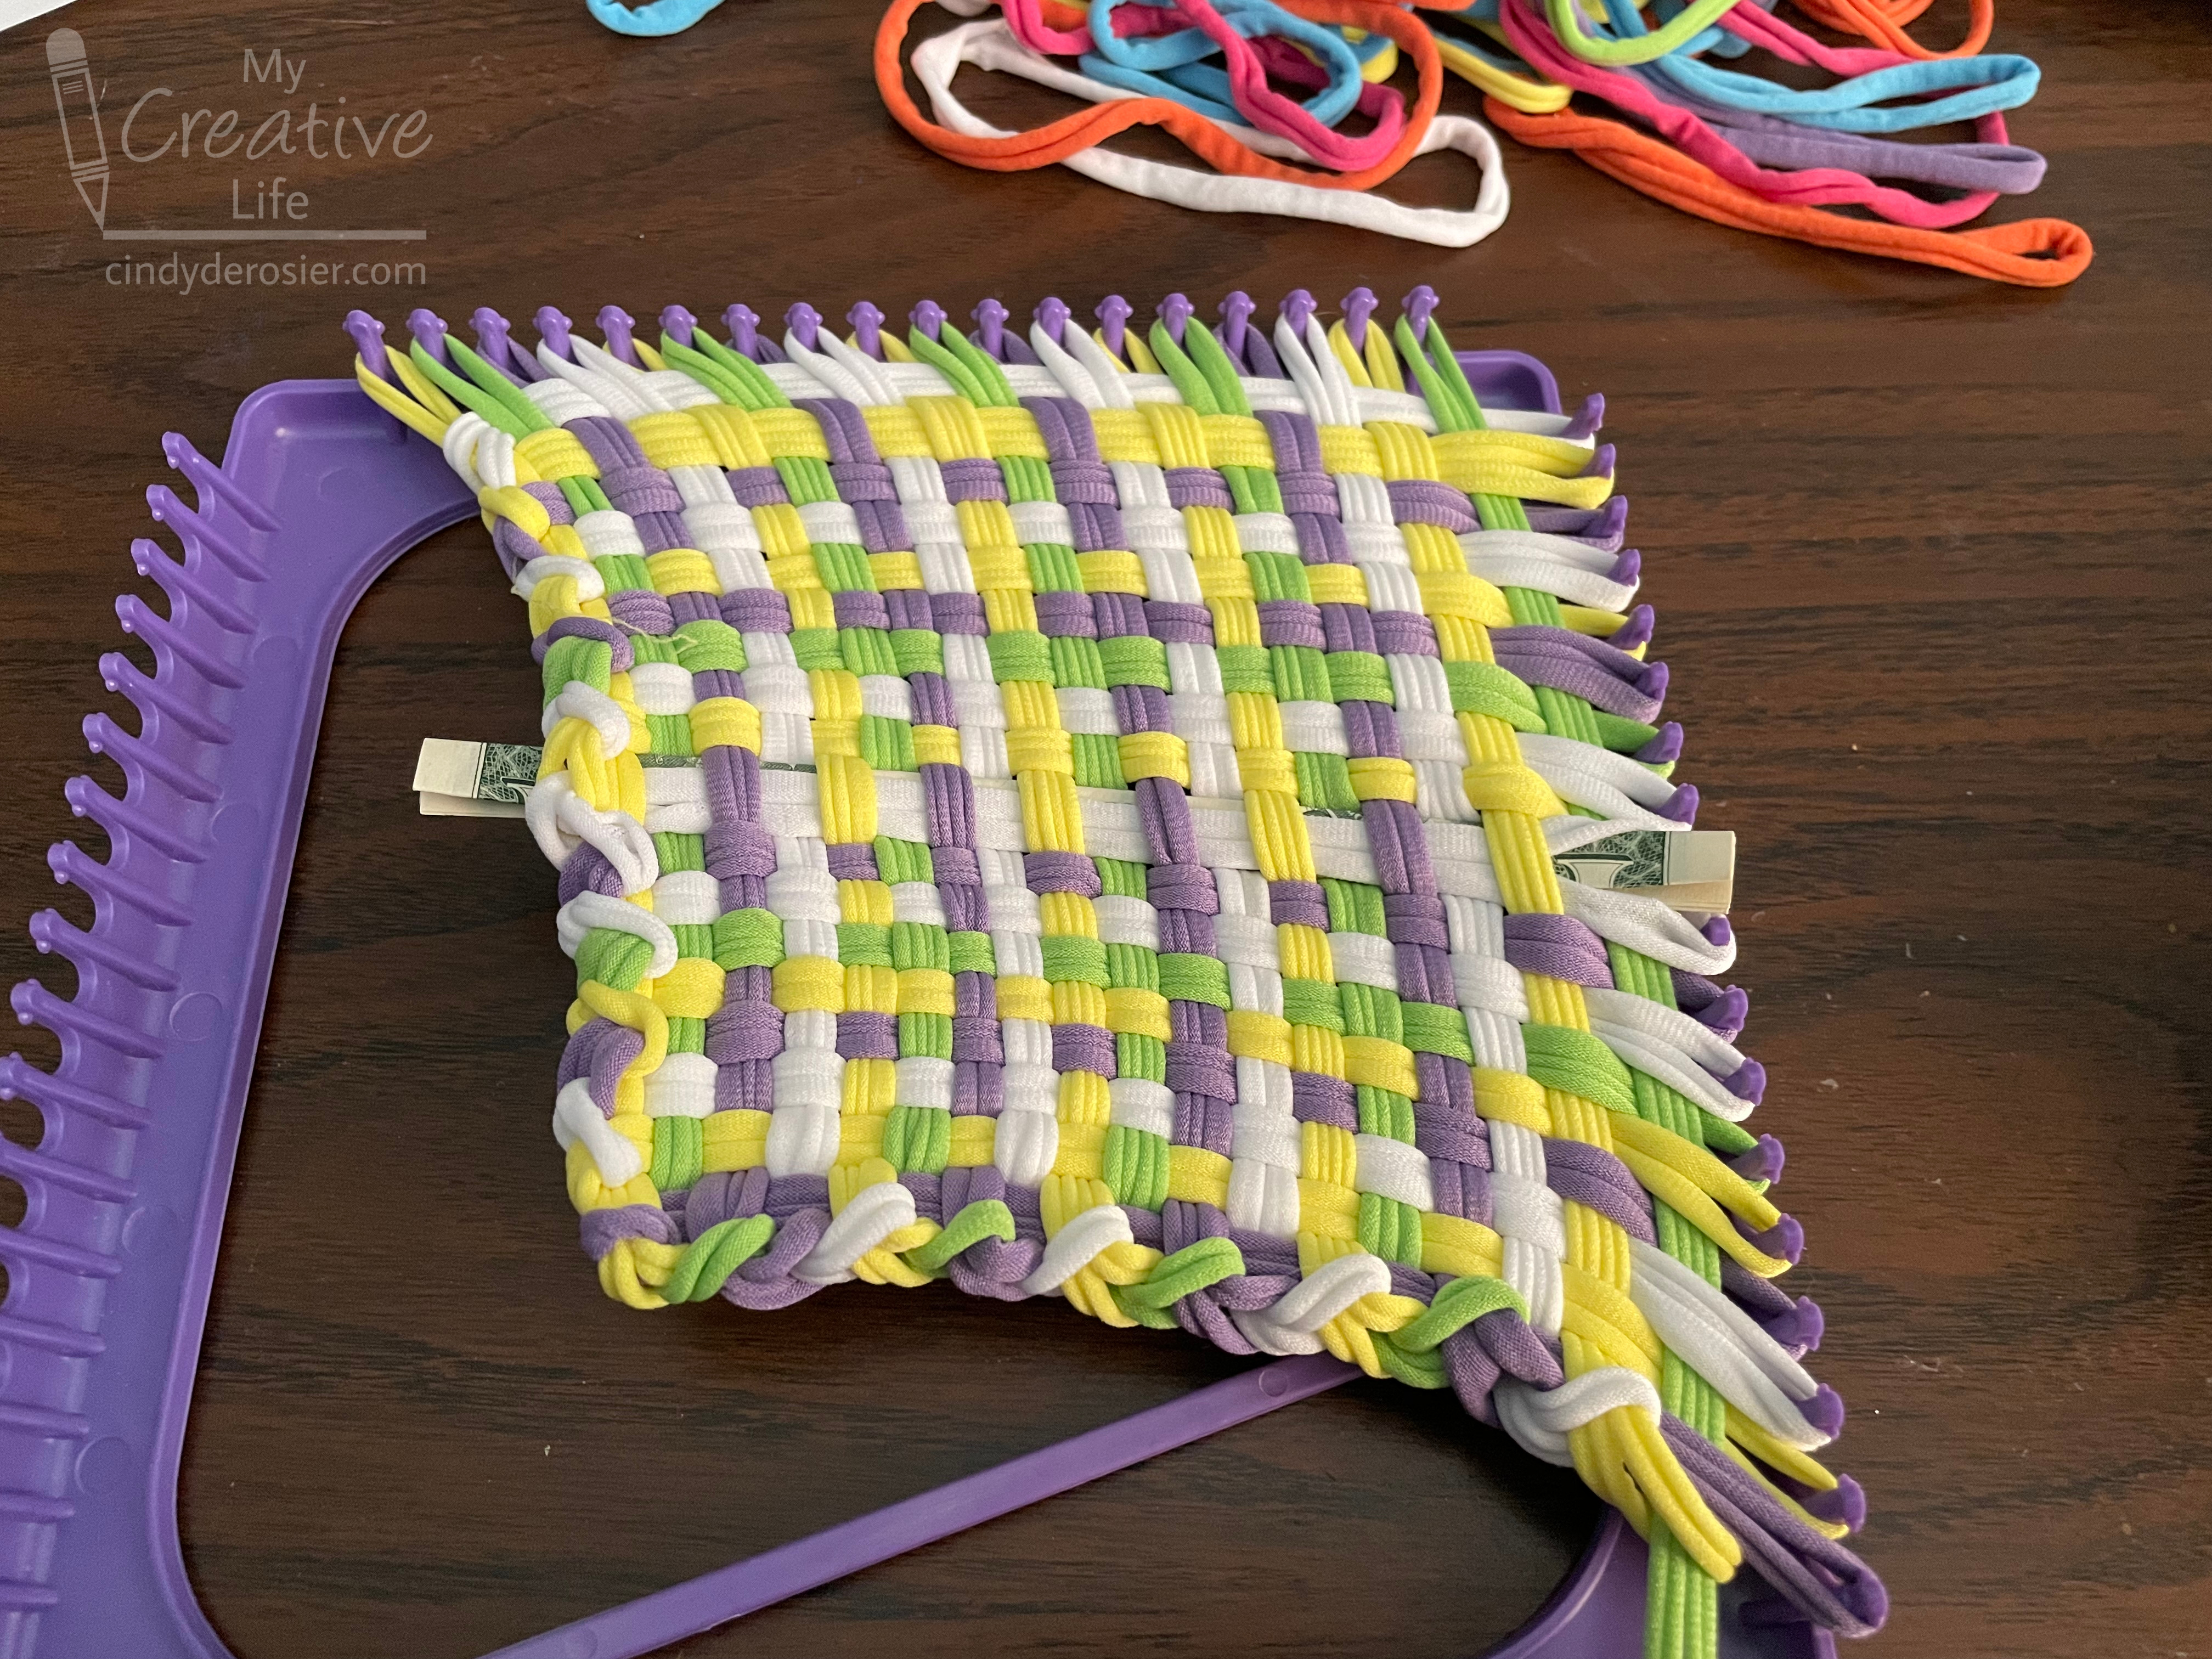
I was pleased with how hidden the money was when I finished. You can see it, but barely. It was more visible on the backside, but not bad. Time to bind off!


Uh oh. 


Darn it. I forgot how much smaller the finished potholders are than the loom. 


Fortunately, I was able to fold the ends over and weave them back in. This is the back (worse) side.... which isn't bad at all. You can see the money, but wouldn't necessarily notice it at first glance. 


For the second potholder, I started by folding the money smaller, plus I folded it so that the green portion was hidden and only the plain edge of the bill (this one's a $5) showed. 


The results were even better than the first one. Time for the dishtowel! I started with a purchased cotton dishtowel, then carefully opened up 1/2" of one of the hems. I folded the $10 and $20 bills up and slid them through the hole, one at a time, in opposite directions. 


Once I re-sewed the hem, you had to look really carefully to see that it was ever opened. The money was not visible at all (but you could feel it). If Timothy didn't know that I always hide money in his gifts, I don't think he would have even noticed it there. Even with the arrows pointing to the four hidden bills, it's pretty well disguised. 


Happy birthday to Timothy! Now I have about six weeks to figure out another money gift to give him for Christmas.

6/10/22

Groovy Glow-in-the-Dark Tape Resist (Inspired by 1970's Roller Rink Carpet)

I LOVED roller skating when I was a kid. Roller skating on the sidewalk was ok, but the roller rink was my true love. My friends and I spent many happy hours at our local rink, Roller King. General Skate was great, but I especially loved the contests, particularly Shoot the Duck, Lucky Dice, and Limbo. My days as a limbo champ are way behind me, but few things in life beat the thrill of knocking out the competition and claiming your free concession vouchers at the DJ booth. Ah, memories!

Two of the defining characteristics of a 1970's roller rinks include blacklight and wildly-patterned industrial carpet, which went up the walls and covered the benches. I loved both of these. I always made sure to wear clothes that would look awesome under the blacklight when I skated. I loved trying to follow the patterns on the carpet. Today's project is an ode to the roller rink of my youth. Affiliate links below.     


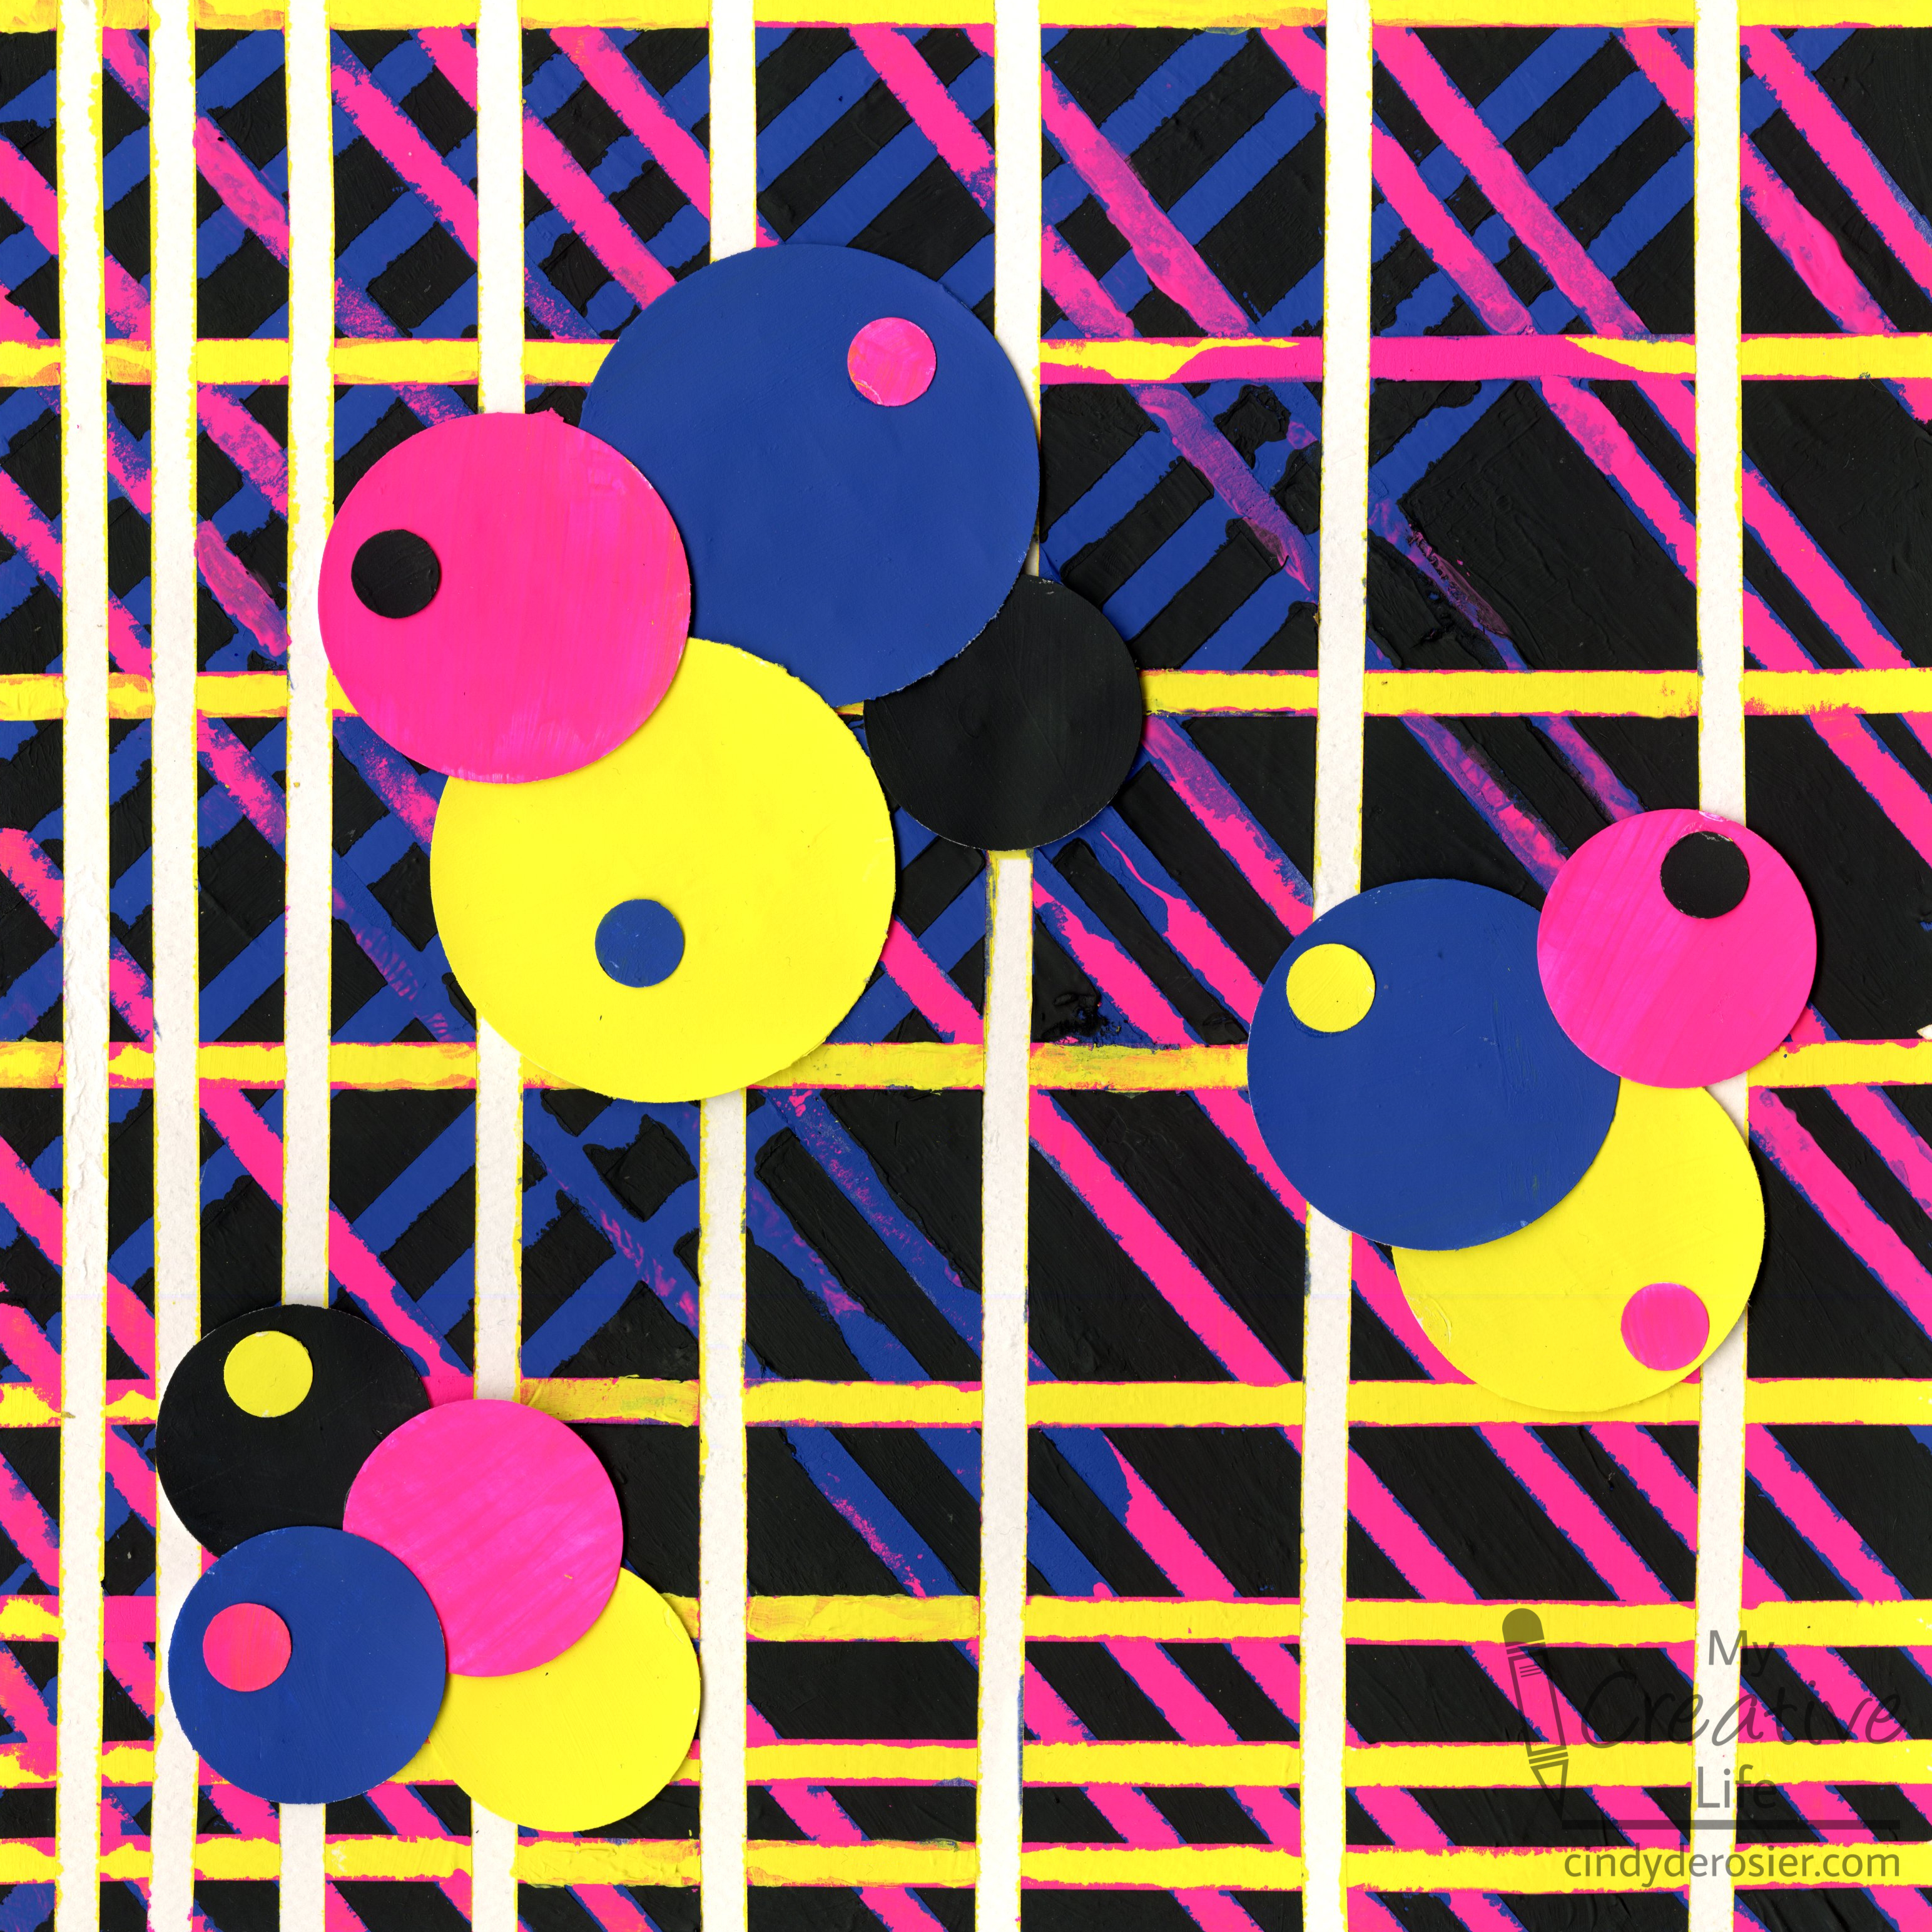
Groovy Glowing Tape Resist Art


Materials: 


Steps: 


Punch 20+ cardstock circles in a variety of sizes. Divide them into four piles for the four paint colors you'll be using. 

Cover your desktop with a piece of cardboard that is larger than the paper you'll be using for the project. Add strips of tape to the paper, all going horizontally. Each piece should extend off the edge of the paper onto the cardboard. (This is important for removing the tape later.) Paint over the entire paper yellow. Then paint one set of cardstock circles. Let both dry completely.  


Add vertical strips of tape on top of the yellow. Again, make sure the ends of the tape extend beyond the edge of the paper. Paint a set of cardstock circles in pink. Let the paint dry completely. 
 

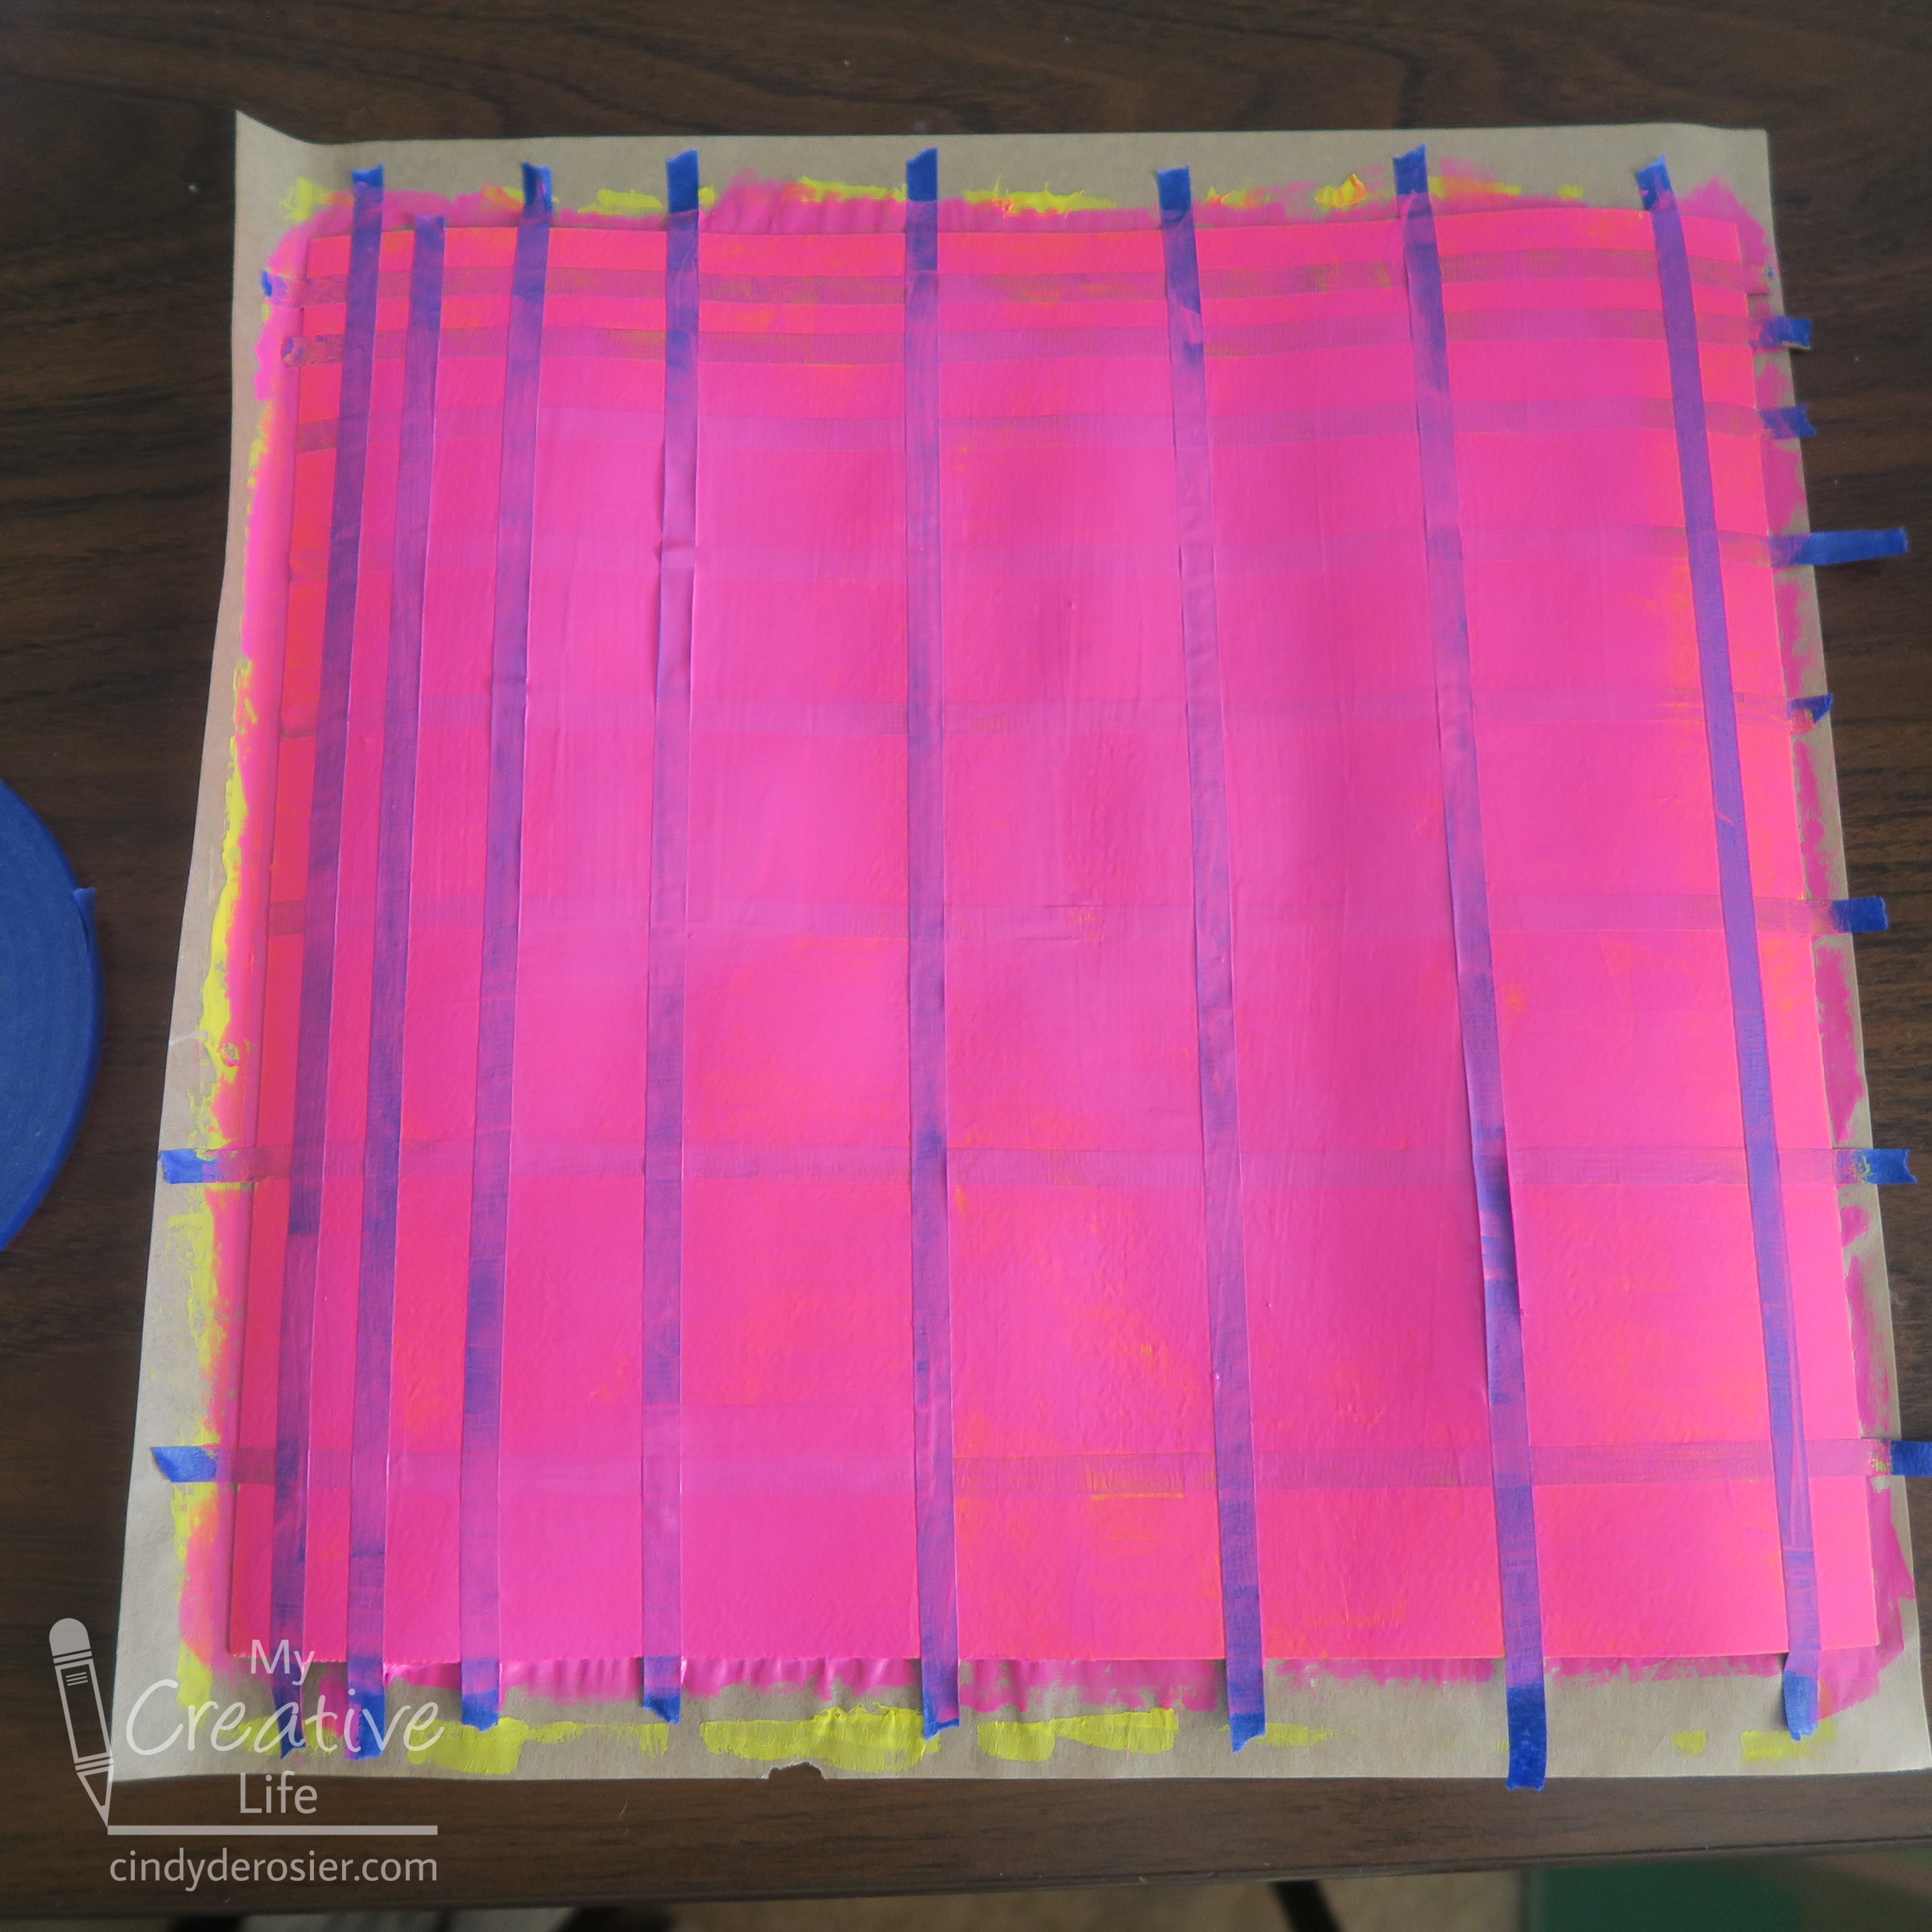
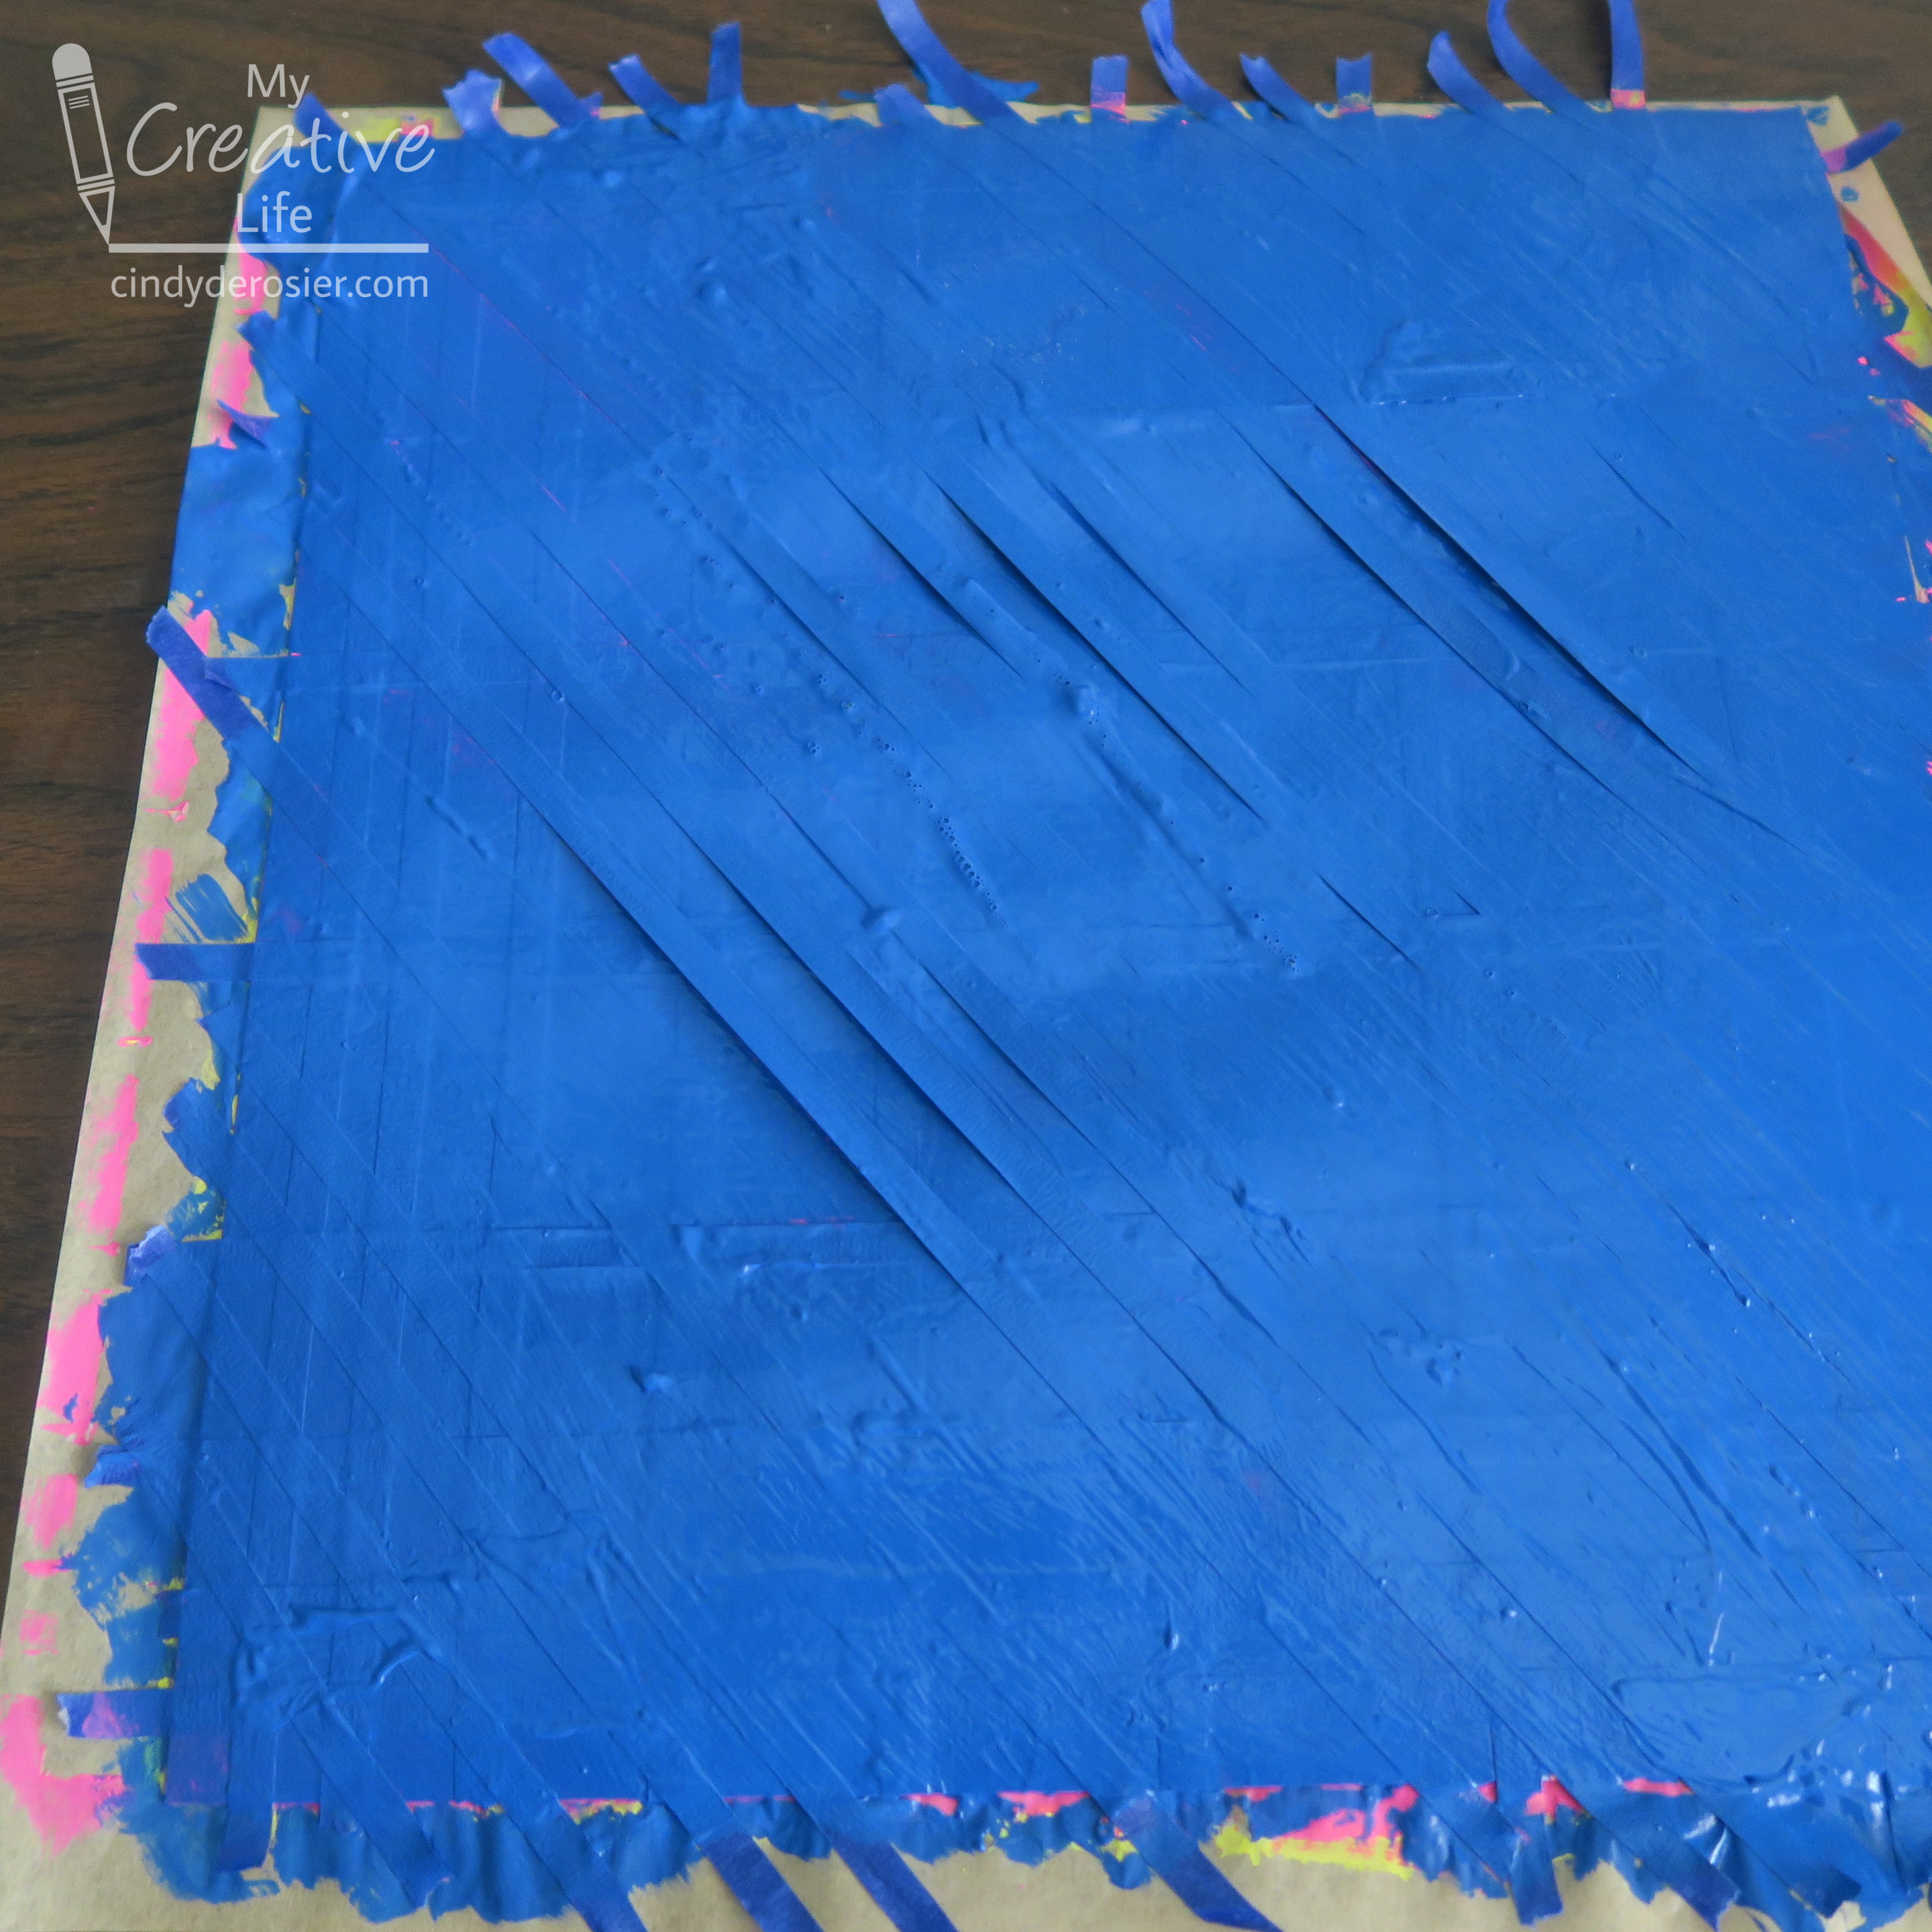
This is a case of "do as I say, not as I did." I didn't let the pink paint dry fully before adding diagonal strips of tape and painting over them in blue. As soon as I did it, I knew I'd messed up. The tape curled in the center (where the paint was still a little moist), as you can see below. 


Not only did that allow blue paint to get underneath and cover up the pink I was trying to preserve, but when the tape stayed curled when I added the final diagonal layer on top. I couldn't get those last pieces to stick well in the center. I did the best I could, then added a layer of black. Then I painted the last of the cardstock circles. 


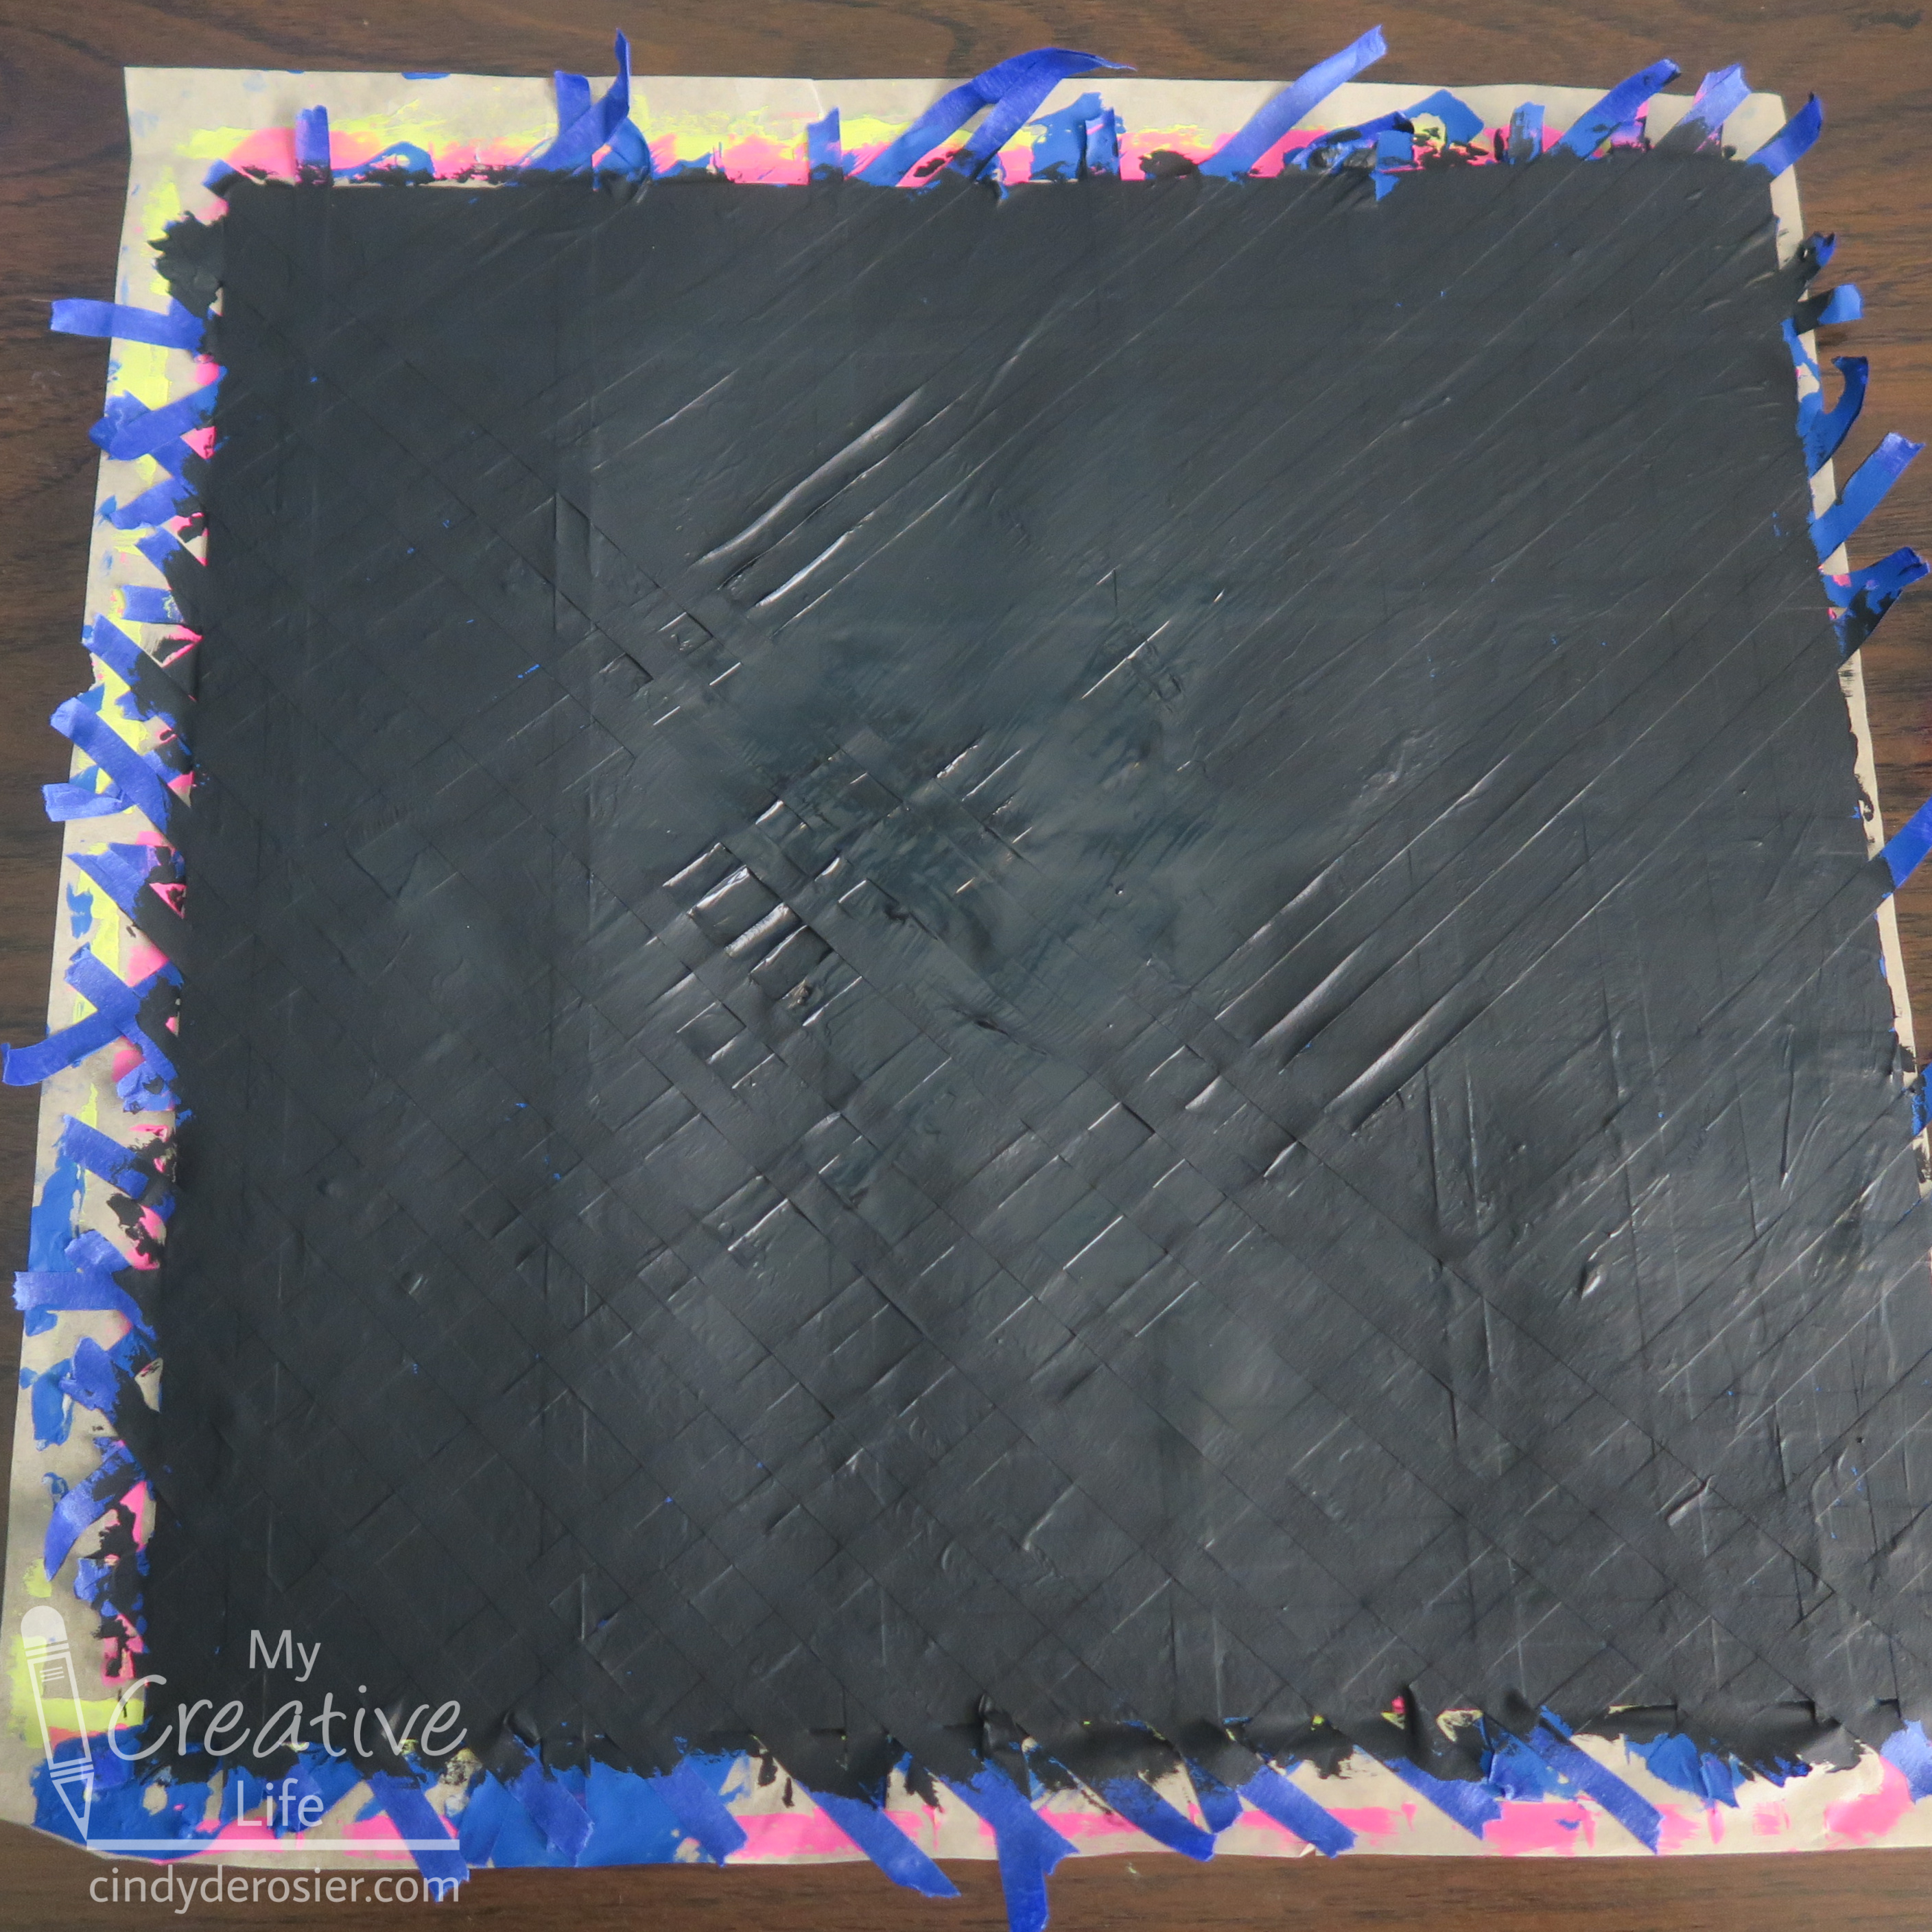
I let everything dry really well. The next day, I slowly and carefully peeled up the tape, starting with the top layer of diagonals, then working down to the other diagonals, then the verticals, then the horizontals. This is what I revealed (rotated 90° in the photo).  


As you can see, I didn't get perfectly clean lines, particularly in the center where the blue covered the pink. There are other places where I apparently didn't press the tape down enough, but that's ok. You can touch up any small mess-ups, or not. If you place your painted circles strategically, they can hide mistakes. 


I had a lot of fun making this and reminiscing about the good ole days at Roller King. 

8/30/12

Crafts of My Childhood: Muppet Prestofix

Look!  It's one of my absolute favorite toys from approximately 1979 - Muppet Prestofix!  So fun uncovering another item from the depths of my childhood closet.  

 
It came with a variety of plastic tiles in different sizes and shapes (1600 pieces, according to the box).

 
I can remember spending hours and hours and hours playing with this.  I was surprised and happy to see that some of the designs I made as a kid were still in the box all these years later.  The kit came with instructions to make all the Muppet characters.  Here's Scooter:

 
I saved some of my original designs too.  Like just about every 7 year old girl in 1979, I loved rainbows.

 
And here's the rain that goes with the rainbow:

 
Trevor couldn't wait to give this a try.  I'm predicting many fun hours of building and creating together. 


For you parents, have you been able to pass your childhood toys down to your kids?  Any in particular that have stood the test of time?  

8/13/12

Fun with Shrinky Dinks

When our neighbors came over for dinner and a crafty playdate, I set out Shrinky Dinks and let everyone create.  

 
The kids (and mommies) had lots of fun making our designs.  We used stamped with StazOn and colored with Sharpies.  Then we punched the holes.  As per the instructions on the package, we put the finished designs on a brown paper bag and slid the tray into the oven.

 
As we watched through the oven door, we saw R's pennant shrink to a perfect circle.  So cute!


C made matching BFF pendants.  Adorable!  
 

But this is how Trevor's and mine turned out.  


What the heck?!  Twisted, lumpy and distorted.  Usually you can press out folds with a spatula while they're still warm.  Not this time.  Apparently our oven has some major problems with even heating.  I haven't had any trouble the last dozen times I've used shrink plastic, like for my Fiskateer necklaces or when I tested what happens when you put rub-ons on the not-yet-shrunk plastic.  I suppose if anyone's projects got messed up due to our oven, it's best that it was ours and not our guests'.  Next time we do Shrinky Dinks I'm going to do a test shrink first!

7/18/12

Ramona Owls

Trevor has just started to get into Beverly Cleary books. I'm thrilled, as she was my favorite author when I was in first grade back in 1978 (and for several years after that). The drive to my inlaws' cabin in Bear Valley is just over 3 hours, so Trevor and I checked out a Ramona audiobook for the drive up and a second one for the drive home.  

In one of the key scenes in Ramona the Brave, Ramona's first grade class makes owls from paper bags for Back to School Night. Ramona adds creative and unique details to her owl and then her nemesis Susan copies Ramona's ideas. After their teacher praises Susan for her creativity, Ramona destroys both Susan's owl and her own.  

I paused the audiobook for a teachable moment:
Me: Trevor, what would you do if someone copied your art ideas?
Trevor: Nothing.  I wouldn't care.
Me: Why do you think it bothered Ramona?
Trevor: Can we make those owls when we get home?
So much for the teachable moment. Yes, Trevor... we can make owls.

Materials: 2 brown lunch sacks (used is fine), a piece of newspaper, brown ink and a stamp of the letter V, glue gun, scissors, yellow and black cardstock scraps.

Start by stamping brown V's on the front, back and sides of one of the lunch sacks. (You could use a pen and draw V's, but stamping is faster and more fun.) Set aside the second lunch sack.

 
Wad up a sheet of newspaper and stuff it into the stamped lunch sack. Fold the ends of the sack over and glue them down.

 
Fold the flap down and glue in place.


Use the yellow and black cardstock to make eyes and glue them into place.

 
Cut wings and a beak from the second lunch sack. Add stamped V's to the wings. Glue the wings and beak into place.  

Here is my Ramona Owl:

 
And here is Trevor's Ramona Owl:


Thanks to Beverly Cleary for books that I loved as a child, enjoyed years later as a teacher, and that are just as good now that I'm rereading them as a mommy. Thanks for stories that leave my son begging for trips to the library. And thanks for inspiring a fun art project.  :)

12/5/11

Crafting with a Warming Tray

Trevor and I are still hard at work making gift tags, but we're taking a break from heat embossing.  We're still using heat though... now we're moving on to the warming tray (affiliate link). 


I love this thing. Mine used to belong to my mom (probably a gift at my parents' wedding in 1970), but I don't remember her ever using it to warm food. I only remember using it to melt crayons onto paper, which I did often as a kid. When I was a teacher, I used to borrow it from Mom a couple of times a year for my students to use. Eventually, she must have gotten tired of me borrowing it so often and let me keep it.

I keep bags of broken, peeled crayons with the warmer. To use it, simply plug it in and wait about two minutes. It will get very warm, but not so hot that you can burn yourself unless you deliberately try. The first time Trevor used it at age 2, I put gloves on his hands so that if he touched the warm surface it wouldn't hurt him. I didn't bother with gloves once he turned 4 and his skin was less sensitive and he understood not to deliberately touch the surface.

Once the tray is warm, put a piece of paper on top and draw with the crayons. The wax goes on creamy smooth and acts almost like paint. You can swirl, blend and layer the colors. When you remove the paper, the wax is instantly dry. 


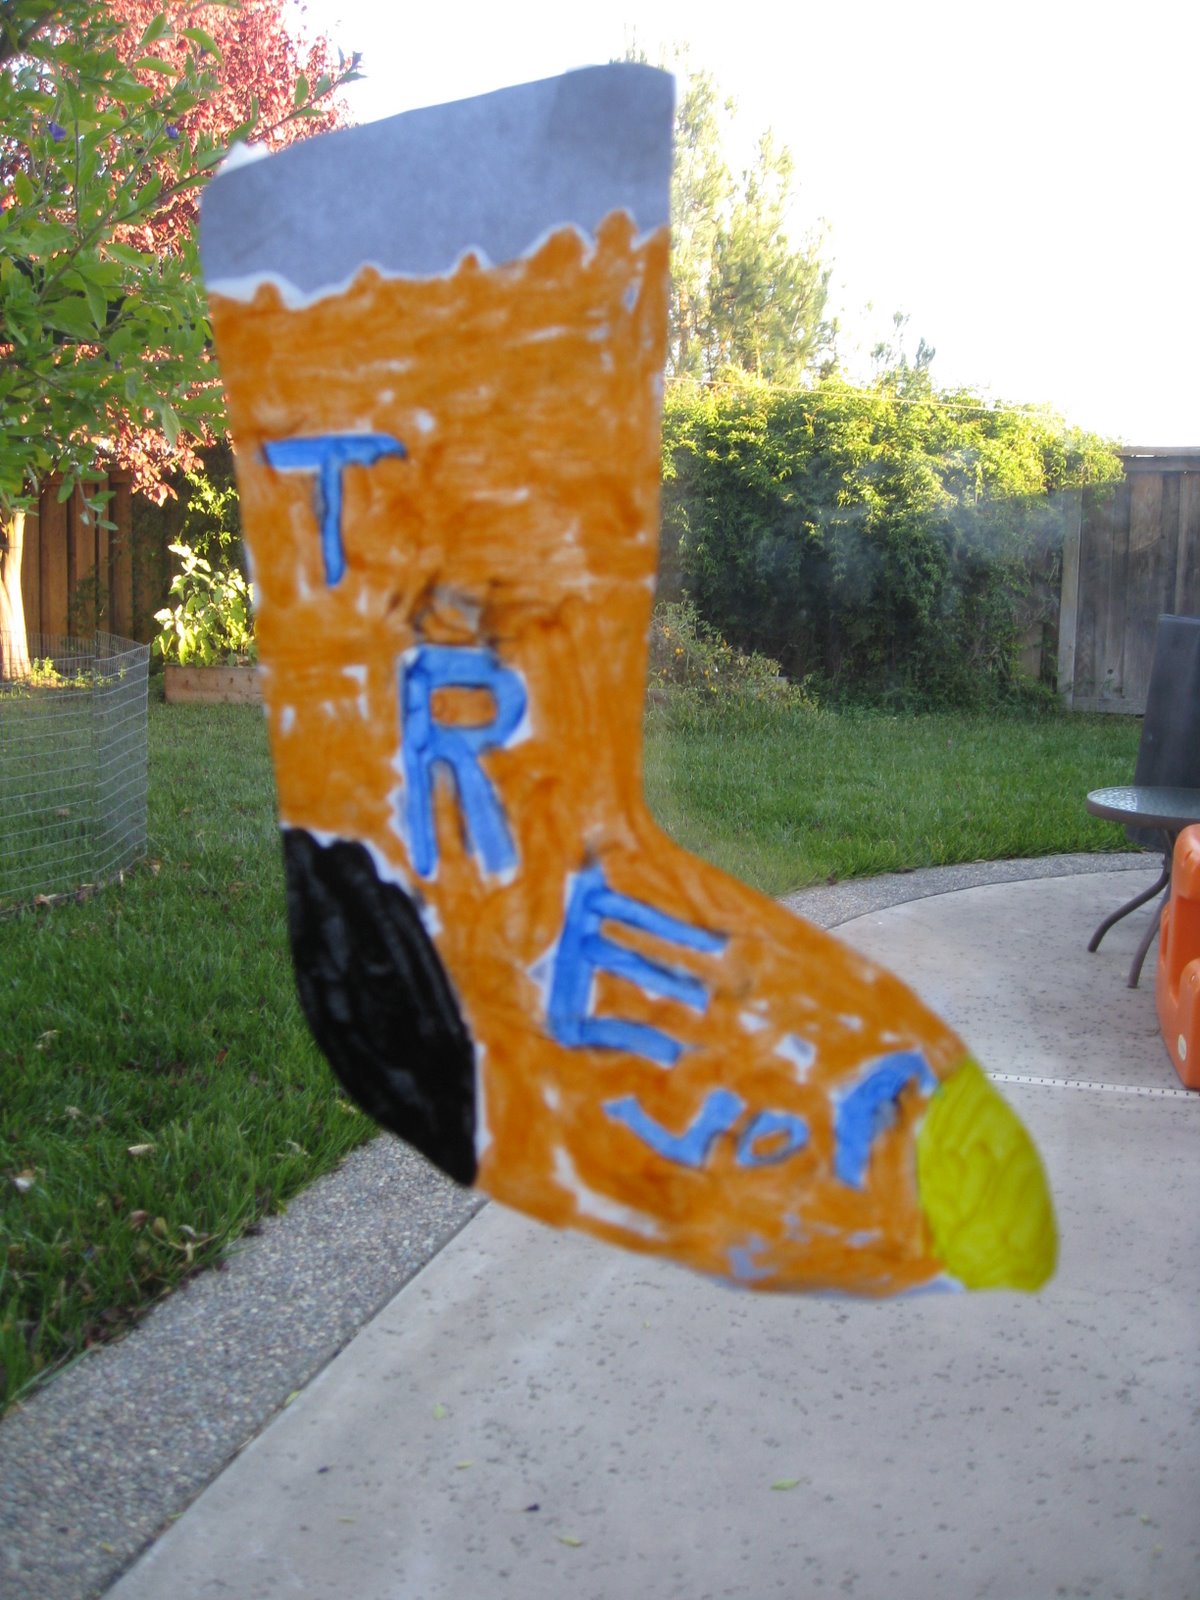
Here's a stocking that Trevor made:  


And here's mine:


I made this tree too:


We also made a bunch of ornament-shaped gift tags by melting stripes and globs of color on a sheet of paper then punching out circles.


Here is a small sampling of our tags. I made the three on the top and Trevor made the three on the bottom:


And here's a close-up. The 'hanger' is a rectangle of silver cardstock and a piece of silver thread, glued to the back of the circle.  


Super cute and really fun! 

8/19/11

Crafts of my Childhood: Spin Art

Raise your hand if you love Spin Art!  Everyone, right?  What's not to love? 


Trevor and I got out the Spin Art (Awesome Art, that is) and set to work creating.

It is such a thrill finally seeing the finished art as the machine starts to slow down. 

No matter how much we tried to control what our designs would look like, it was always a surprise to see exactly how they turned out. 


All so different and all beautiful!  These would make fun cards.  I'll have to remember that next time Trevor is making thank-you cards.