Showing posts with label weaving. Show all posts

10/30/23

Potholders and Dishtowel Hidden Money Gift

My nephew turned 23 yesterday. I have been giving Timothy hidden money for every gift-giving occasion since he was 13. Almost all of the 37 money gift tutorials I have on my blog were for him. It is getting increasingly difficult to come up with an idea that is both new and able to be mailed out of state, but I enjoy the challenge. 

For his 23rd birthday, I gave him two homemade potholders and a dishtowel. 


Making the potholders was a major blast from the past. I was obsessed with my potholder maker as a kid in the 1970's. Getting a fresh bag of loops was the best! I still have my red metal 1970's potholder maker (affiliate links here and below); at some point I got a plastic one (which they sell in a variety of sizes). Some have instructions to make other things, like this awesome pineapple. Seven-year-old Cindy would have circled that in the Sears catalog for sure! Fifty-one-year-old Cindy *might* buy some yellow and green loops and do some experimenting. 

Speaking of experimenting, I had no idea if hiding money in a homemade potholder was even possible. 
I added loops in one direction, folded a dollar bill so it was really skinny, and wove it into the potholder. So far, so good.  


I wove in more loops, then realized I needed a loop where the money was or I wouldn't be able to bind off properly. So I added a white loop over the dollar bill. 
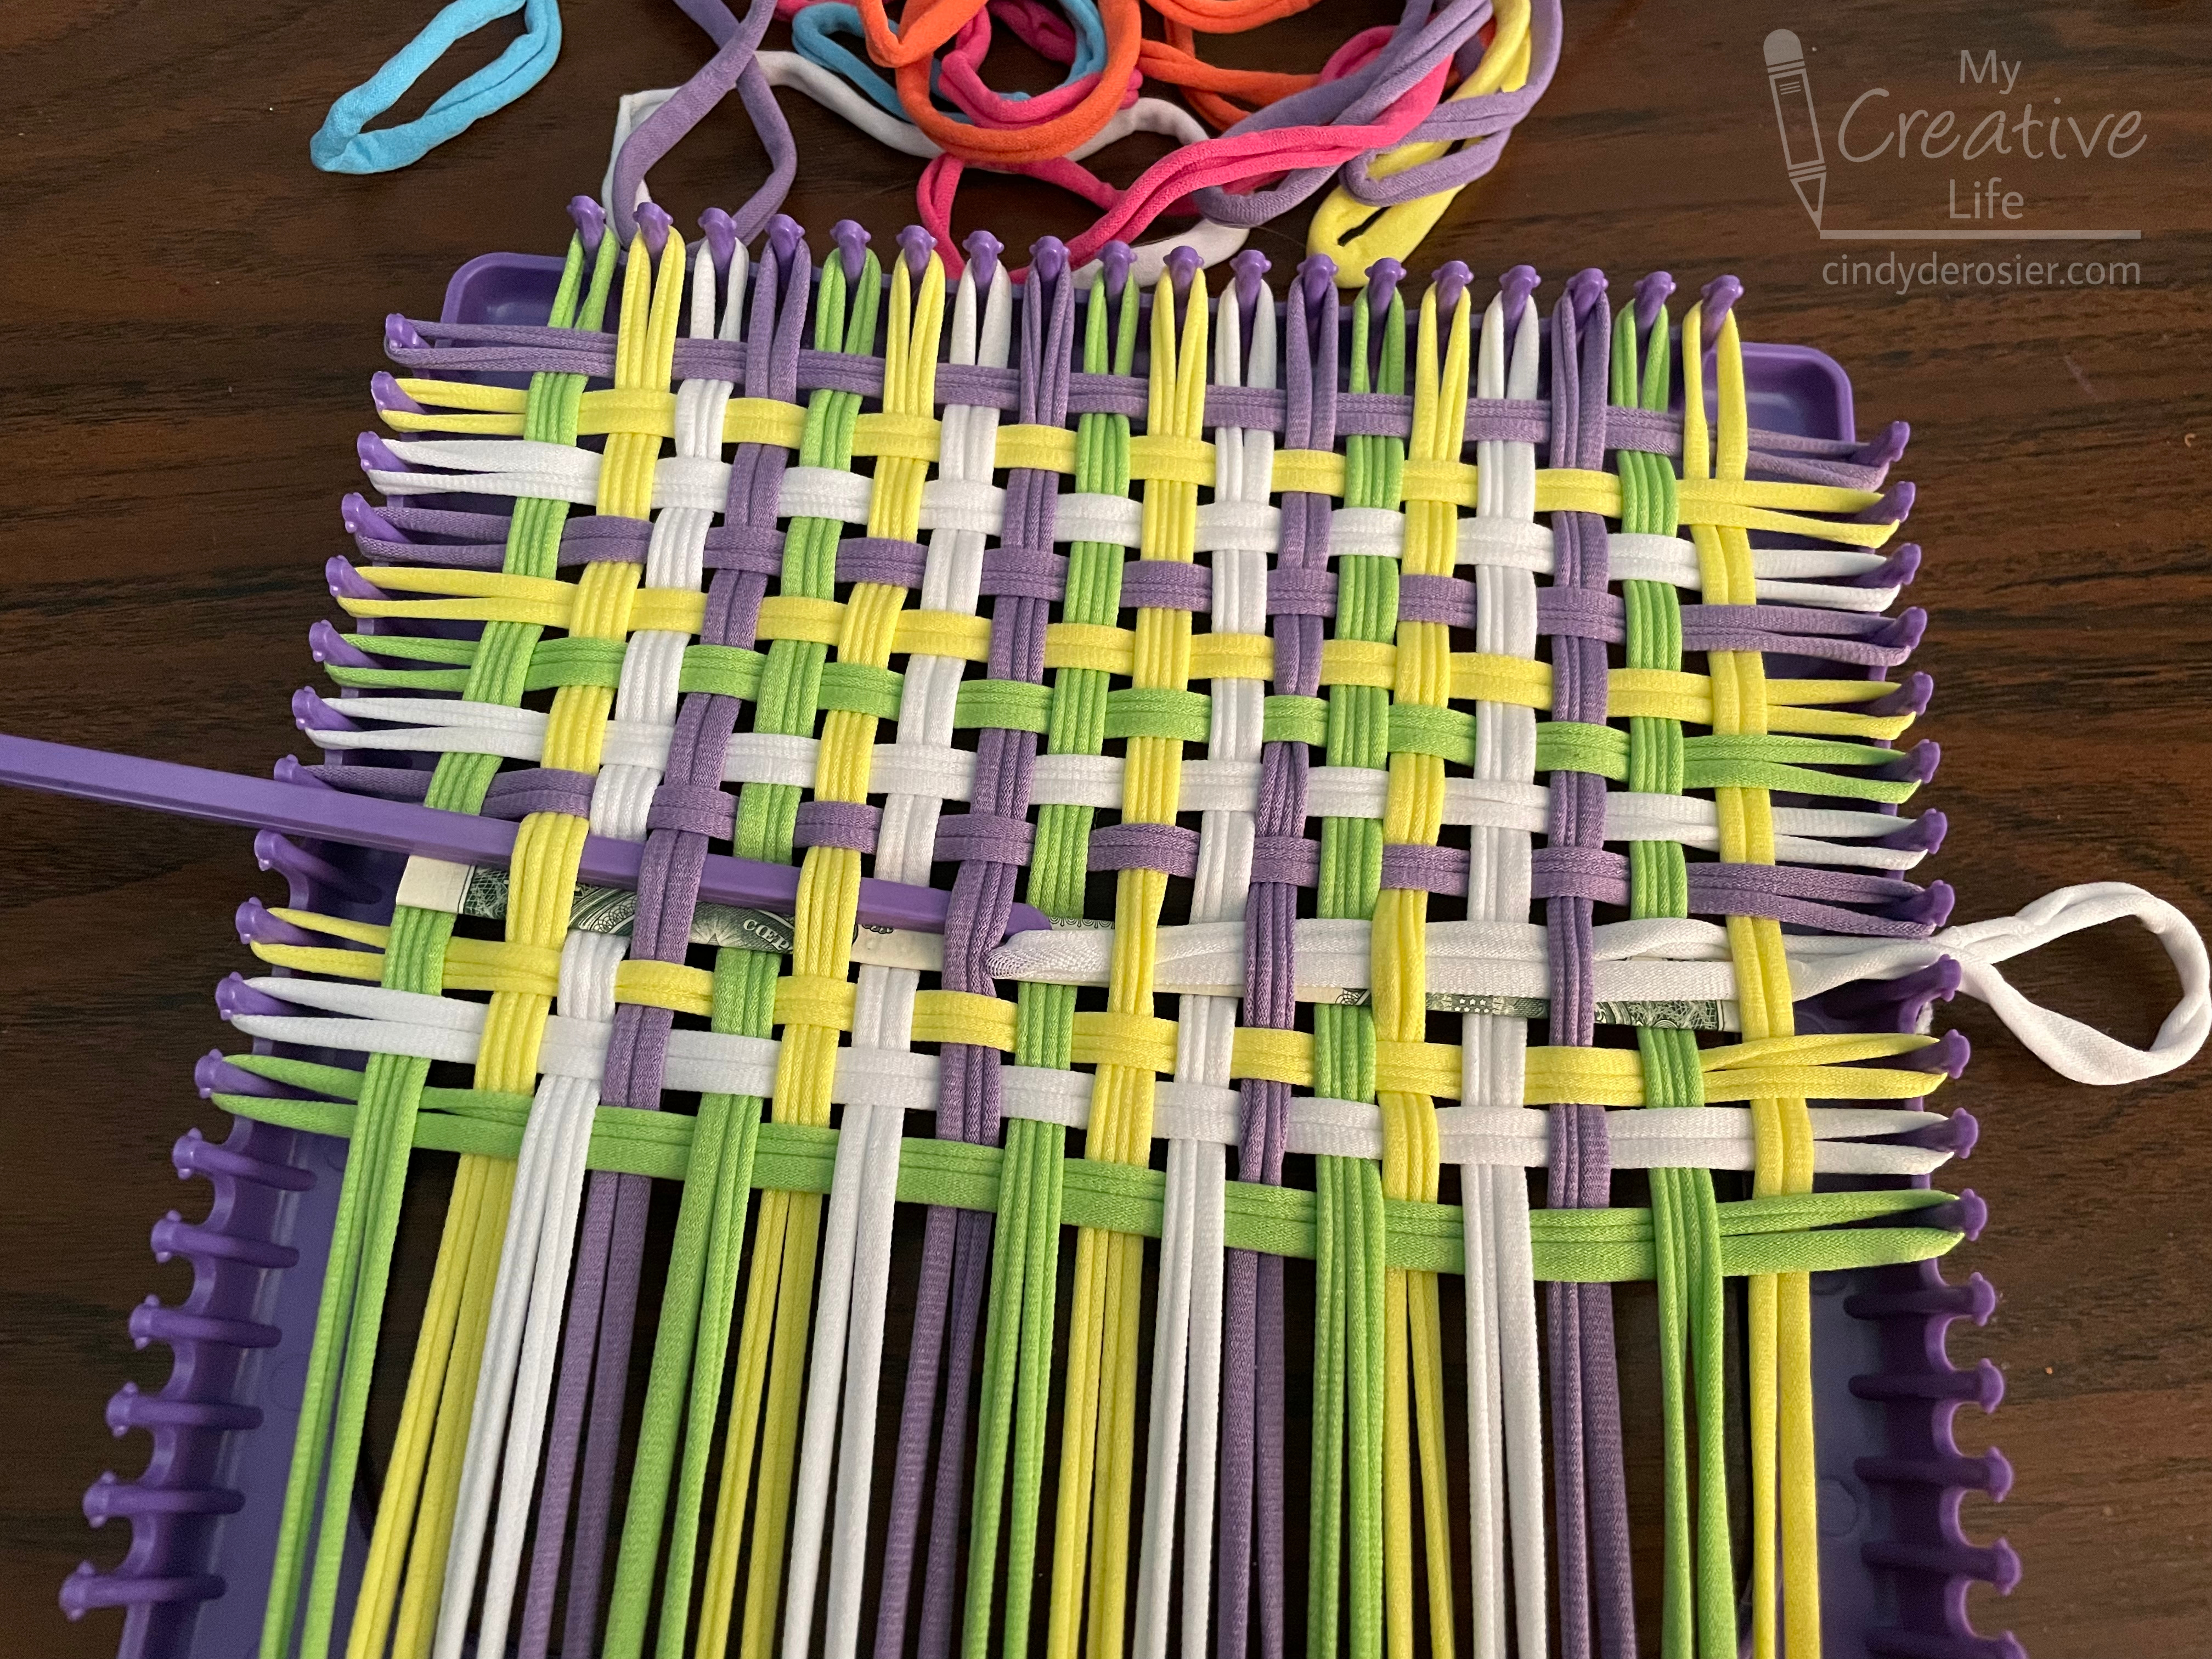

I was pleased with how hidden the money was when I finished. You can see it, but barely. It was more visible on the backside, but not bad. Time to bind off!


Uh oh. 
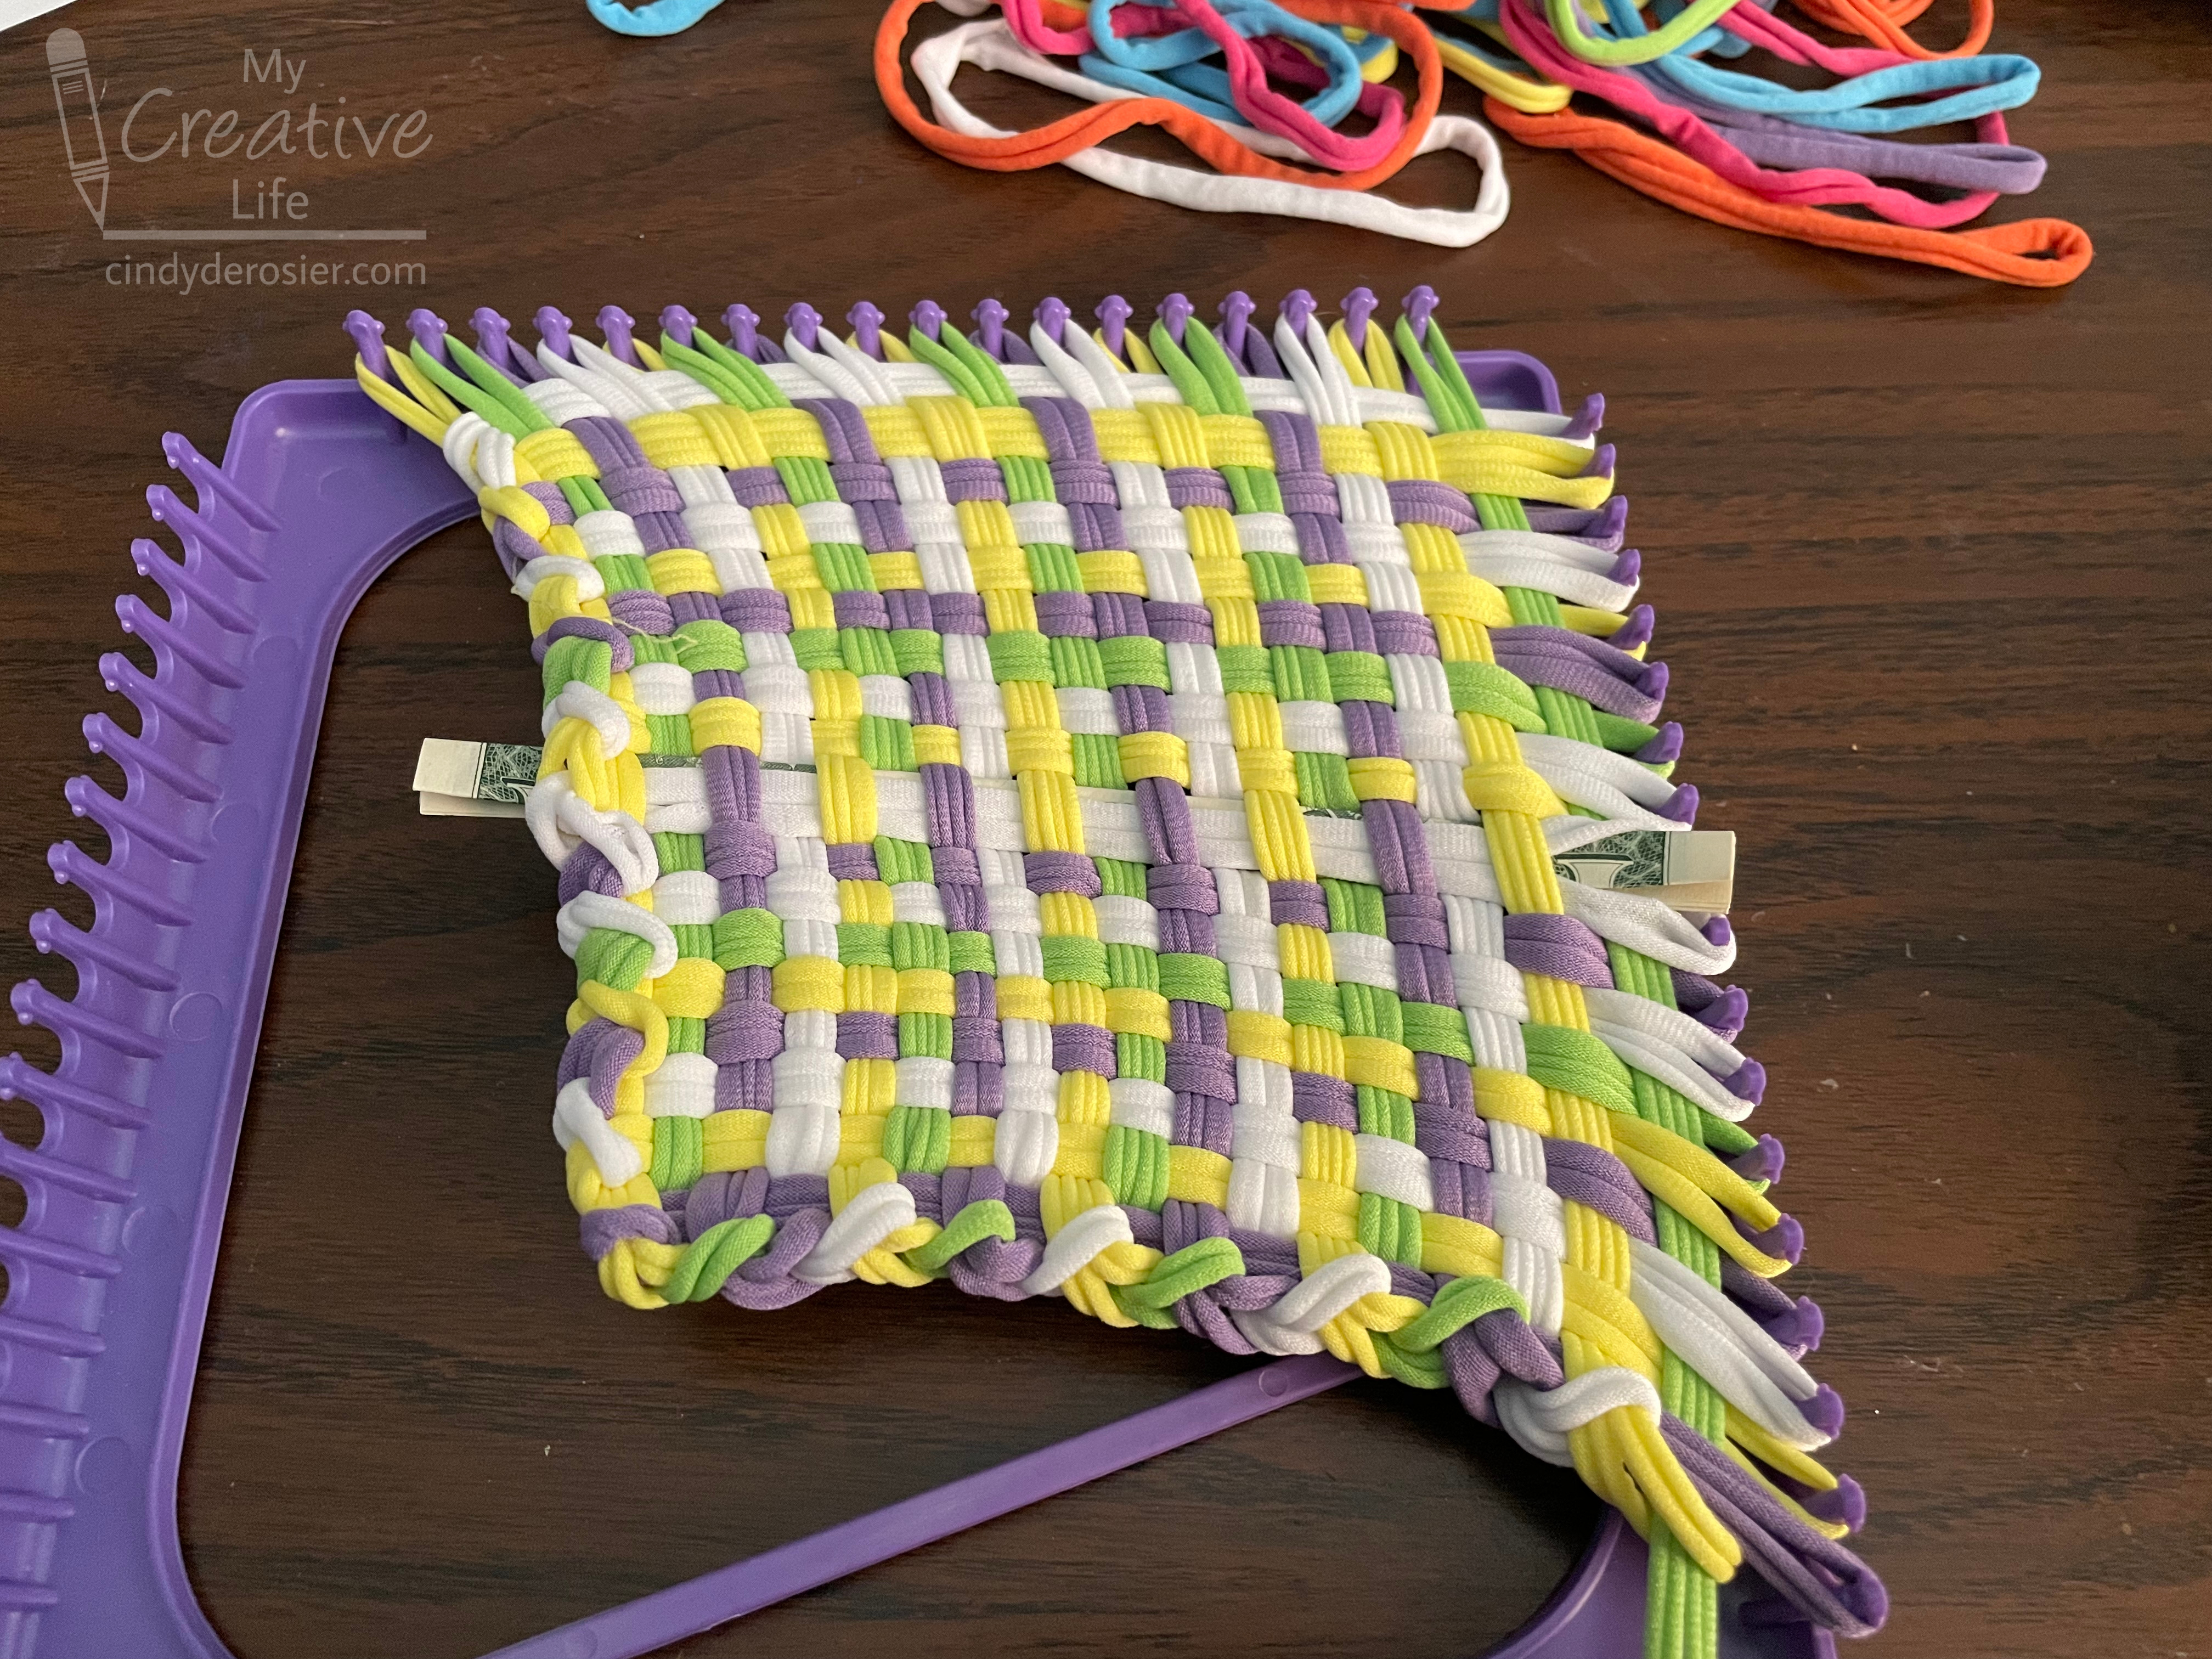

Darn it. I forgot how much smaller the finished potholders are than the loom. 


Fortunately, I was able to fold the ends over and weave them back in. This is the back (worse) side.... which isn't bad at all. You can see the money, but wouldn't necessarily notice it at first glance. 


For the second potholder, I started by folding the money smaller, plus I folded it so that the green portion was hidden and only the plain edge of the bill (this one's a $5) showed. 


The results were even better than the first one. Time for the dishtowel! I started with a purchased cotton dishtowel, then carefully opened up 1/2" of one of the hems. I folded the $10 and $20 bills up and slid them through the hole, one at a time, in opposite directions. 


Once I re-sewed the hem, you had to look really carefully to see that it was ever opened. The money was not visible at all (but you could feel it). If Timothy didn't know that I always hide money in his gifts, I don't think he would have even noticed it there. Even with the arrows pointing to the four hidden bills, it's pretty well disguised. 


Happy birthday to Timothy! Now I have about six weeks to figure out another money gift to give him for Christmas.

5/30/22

Woven Paper Heart (Happy Anniversary, Steve!)

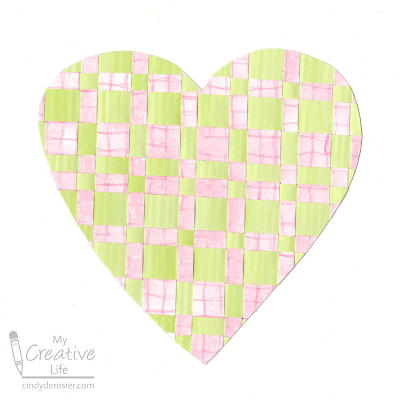
I recently noticed two pieces of patterned paper in my stash with a copyright date of 2004. While I probably have papers that are even older, the first thing that came to mind was, "Wow. These papers are the same age as my marriage." Steve and I got married on May 30, 2004, making today our 18th anniversary. In honor of our special day, I made this woven heart. I like the symbolism. While we were both fine separately, our lives are better woven together and complementing each other.  


I recently shared paper weaving that I did for a scrapbook layout, but turning woven paper into a shape like a heart requires an extra step. Read on for how to make your own. 


Woven Paper Heart


Materials:

  • two different papers
  • paper trimmer or scissors
  • washi tape
  • contact paper (affiliate link)
  • scissors
  • Sharpie
  • craft glue

Steps: 


Cut your papers into strips. I made some 1/2" strips and some 1/4" strips, each 6" long. I lined up the pink strips next to each other and used washi tape to secure them to my desk. Then I started weaving in the green strips. I alternated the 1/2" and the 1/4" pink strips, but used the two different widths of green randomly. It all works. 


Continue until you've woven in enough strips for the size you want your finished piece to be. Cut a piece of contact paper slightly larger than your finished weaving. Remove the liner, then gently lift up your weaving (keeping the washi tape in place) and slide the contact paper underneath, sticky side up. Press the weaving onto the contact paper, making sure it is firmly adhered. This will ensure your weaving doesn't fall apart when you cut it.  


Turn your weaving upside down and use a Sharpie to draw or trace a heart. 


Cut along the lines. Turn the heart right side up and put a tiny dab of glue under the end of each strip that doesn't touch the contact paper. 


Happy anniversary, Steve! I'm so glad my life is woven with yours. 

7/14/21

Sweet Dreams Weaving Practice Craft

A big part of my job at Fun Family Crafts is making sure our site features well-written tutorials for projects kids want to make. A lot of projects come to us as submissions from the creator, but plenty of others are there because I've specifically gone out looking for unique project ideas. When I find an image that would be a good fit for our site, I track down the original source and encourage them to submit the project. Then we add it to our collection of 12,000+ curated kid-friendly craft tutorials

Unfortunately, it's not always possible to find the original source. For example, when a blogger deletes their site, all links that previously led from an image to the tutorial become dead. Another problem occurs when someone downloads a picture of a project they like, then uploads just the photo to Pinterest, without a link to the source. Not only is the creator robbed of the pageviews and affiliate income they would have otherwise had, but the pin is useless because no one can access the tutorial from it. In both of these cases, I use Google Image Search and other techniques to do what I can to find the original source. When that fails, I use the photo as inspiration to design my own version so that a tutorial for the idea exists. Such is the case for today's project.

This version is mine:


And this is the original photo, likely a snapshot of a bulletin board, uploaded without a link or credit:


It's such a clever project, and a great way for kids to work on weaving skills. And they look so cute all grouped together. 
 
---------

Sweet Dreams Weaving Practice Craft


Materials:

  • construction paper
  • scissors
  • glue

Steps:


Begin by making the blanket. Layer two (or more) pieces of construction paper together and cut out a rectangle the size you want the finished blanket to be. Pick one color to be the base (I used blue). Make long, vertical cuts in the base to prepare it for weaving. Do not cut the strips apart! You want them to remain attached. This is the warp. Cut the second piece (I used green) into horizontal strips. These should be detached from each other; these are the weft. Weave the weft over and under the warp. Each strip you add will go the opposite direction of the previous strip. 

When the entire blanket is woven, glue down all the flaps on both sides to secure the weaving. When the glue is dry, trim off any extra material. 

Use construction paper to create the sleeper's head, neck, and face. Cut two hands from the same skin color you used. Add hair, then draw on a face with sleeping eyes. 


Finally, cut out a rectangle for the bed and a smaller white rectangle for the pillow. Assemble everything by gluing the pillow to the bed, the head to the pillow, the blanket under the chin, and the hands at the top of the blanket. 


I'd love to know if the steps I used are the same as the ones the kids used in the original photo. And I really wish I could give credit to whoever designed this project. If you recognize it, let me know and I'll update the post!


4/30/20

Learning to Weave with the Bucilla Weaving Loom

I love trying new-to-me crafts, so I was excited that my BORC from Plaid contained the Bucilla Weaving Loom (affiliate link here and throughout the post). Weaving isn't new to me in the sense that I've done paper weaving and basic yarn weaving, but I'd never done anything besides the plain over-under stitch and I'd never completed an actual woven yarn project. 

The Bucilla Weaving Loom came with everything I needed except the yarn. I chose to use Premier's Sweet Roll Yarn (Gelato Pop and Mint Swirl, which is apparently discontinued). The loom instructions have text and pictures for the Plain Stitch (already knew that one!), the Soumak Stitch, the Looped Stitch, and the Rya Knot. Here are my first few rows. 


The rows worked up quickly and the comb helped keep everything nice and straight. 


Everything stayed nice and straight until it came time to take my project off the loom. In the process of tying off the bottom warp yarn, I messed up the tension a bit. I tried to fix it as I tied off the top warp yarns....


... but the finished piece ended up a bit off-kilter. I also noticed that I cut the fringe a bit unevenly. No matter. I'm happy with it and am confident that each future attempt will be better and better. 


I learned a lot during this first project and thoroughly enjoyed the process. How about you? Have you tried weaving? Any tips or tricks for keeping things straight once you remove your work from the loom?