Showing posts with label sewing. Show all posts

8/25/26

Mini Keepsake Quilt #3

I've finished my third mini keepsake quilt, using (most of) the fabric from Quilt #3. I love how the three mini quilts look hanging on the line together!
 

Since I give away all the quilts I make, these mini keepsakes are the best record I have of the fabrics I used for each. Unfortunately, there were absolutely no scraps of my favorite fabric from Quilt #3 (the leaf green) so I wasn't able to include it in the mini. It's disappointing, but it is what it is. 

Not only are these mini quilts a fun keepsake, but they're good practice for me.... and I still need a LOT of sewing practice. I was exceptionally careful when I cut out my 2" squares and tried my best to maintain the 1/4" seam allowance as I sewed them together. The top looked pretty good - the corners (mostly) matched and the lines were (mostly) straight. After I sewed the completed front to the back and turned it inside out, the mini quilt was (mostly) square. (Well, rectangular.) But when I actually quilted it, things got distorted a bit. I didn't think I needed to pin the layers with such a small project, but apparently I do. I'll try that next time and see if it makes a difference. Always learning = always improving!

8/19/26

Summer Creative Retreat: Pumpkin Embroidery on Watercolor

The second project I completed during Summer Creative Retreat was this embroidered pumpkin. 


I made it during a workshop called "Embroidery on Watercolor" which was taught by Jessica Mack of Brown Paper Bunny Studios


As you can see on the graphic, Jessica taught us how to make different kinds of flowers. I went my own direction and made a pumpkin, which is the official state fruit of New Hampshire. She used a loop start to begin her embroidery, which is something I've never done before. I love taking classes, not only for the inspiration but for those little tips that I otherwise wouldn't have known. Affiliate links below. 


Pumpkin Embroidery on Watercolor


Materials:


Steps: 


Cut your watercolor paper down to the desired size. Mine is 5" square. Add multiple bands of color to the paper. I used green, yellow, and orange and blended them a bit. 

When the paint is dry, use a pencil to draw the design you want as lightly as possible. Poke holes along the pencil lines (always poking from the front) with the paper piercer. Then use embroidery floss to backstitch the design. 


Then fill in the pumpkin and stem with watercolor. 


This is a fun and easy project that can easily be adapted to practically any design. It's a great way to introduce kids to embroidery. Give it a try!

6/23/26

Mini Keepsake Quilts 1 & 2

It is extremely rewarding to make quilts and give them to people in need. I love knowing that someone who is facing what is likely the most difficult time in their life will receive warmth and comfort in the form of a quilt that I made. I've shared photos of the first quilt I ever made and, two weeks ago, my second quilt, but I wanted something more to remember my quilts. So I gathered up the scraps, cut (or pieced) twelve 2-inch squares, and turned them into mini keepsake quilts. 


Just like the originals, the minis have plenty of mistakes, but I'm fine with that. I'm a beginning quilter (and beginning sewist) and I'm proud of these mini quilts. This time last year I couldn't have made them at all. The mistakes show my progress and motivate me to keep improving. 

My plan is to hang a cord on the wall like a clothesline, then use mini clothespins to display my mini quilts. It's going to be so cute!

4/15/26

Fabric Applique Wall Hanging

After making the stuffed cross ornament, I tried another idea using the same fabric. This basic applique project is a great introduction to hand sewing and makes a cute wall hanging. Obviously, you can use a cut-out design from any fabric; it doesn't need to be a cross. The link in the materials list goes to some adorable forest animals. Affiliate links below. 


Fabric Applique Wall Hanging


Materials: 


Steps: 


Cut out the image you're going to applique, leaving a 1/2" border around the edges. Fuse the interfacing to the fabric, then cut out the image precisely. Cut the background fabric about 2" larger than the diameter of the embroidery hoop. Put the background fabric into the hoop, then position the applique piece where you want it. 

Cut a length of embroidery floss in a matching or contrasting color. Choose a hand stitch for your project. I debated blanket stitch but decided to go for the simpler whip stitch. Sew all the way around your shape. 

If your applique is not perfectly centered in the hoop, loosen the embroidery hoop slightly to adjust the background fabric until it looks good. Tighten the hoop, then trim the excess background fabric, leaving 1/4". Glue that to the back of the hoop. 

4/9/26

Stuffed Cross Ornament

Our quilt group has been receiving a lot of fabric donations recently, which we appreciate so much. As we go through the donated fabrics, we sort by color, and occasionally by theme. We also pull out any fabrics that cannot be used on LWR quilts. This includes any prints with religious, patriotic, or military symbols, language, or messages. 

We can't use this fabric for our quilts, so our leader suggested I come up with a craft using it that congregational members could potentially do after church one Sunday. The four different crosses read love, faith, peace, and joy. Each is about 5" tall. 


My first idea was to make ornaments. I cut out two of the yellow joy crosses, put them with the right sides together, then sewed around the edges, leaving the top open. I turned the fabric inside out, stuffed it with Polyfil, added a loop of gold cord, and then used craft glue to close the opening (affiliate links). 


It came out fine, but it's not going to be a great option for the congregation members who usually come to our craft sessions. I have another idea for a project using this fabric that might be a bit easier and less fiddly for the very young and very old who attend. Stay tuned. 

3/26/26

My First Potholders

I learned a lot while making my first quilt. One of the most important things I learned is that I really need to improve my sewing skills. Technically, I already knew that. But while making the quilt, it was painfully obvious that I should practice using the sewing machine a bit before jumping in to make my next quilt. 

A few weeks ago, my quilt group taught an easy potholder craft after church. First we shared a video about the mission of Lutheran World Relief, then we helped the attendees sandwich batting between two squares of material and hand-tie them to make potholders. In preparation (and to get in some sewing practice), I made my first-ever potholder. And then I made two more. 


This is my first potholder. I cut two 11" squares of the same Christmas fabric and two 9" squares of heat-resistant batting (affiliate links here and below), layered them together, and then hand-tied them with red embroidery floss in the center and near each corner. Then I folded up each edge, clipped them in place (so much better than pins!), and sewed. 


For a first attempt, it's not bad. It doesn't look square, but it actually is close. My stitching wasn't quite straight, but that wasn't the problem. The issue is that I cut my fabric squares without paying attention to the checked pattern in the background. I should have made sure those were straight before cutting. Lesson learned. 

This is my second potholder. I cut the fabric correctly, so this time the crookedness isn't an optical illusion. It is definitely not square. As you can see, I machine-quilted this one rather than hand-tying it. I went to great effort to make sure my lines of stitching were as straight as possible and things were looking pretty good until I did the binding. I thought I could just fold up the edges, clip, and sew and it would be fine. Nope!


For my third potholder, I clipped the edges then machine-quilted the layers together. My lines were straight and everything looked great. I did the binding on two of the sides and it still looked good. Then I tried repeatedly to get the other two sides straight. As you can see, I did not accomplish that goal. 
 

Now I know that I should have basted the layers together with pins to prevent them from shifting, which happens during machine quilting. Just clipping the edges in a few places was not adequate. After quilting, I should have squared up the block before attempting to bind it. I'll try those next time. I've also learned about the importance of a walking foot. I assume I wasn't using that, based on the problems I had binding my quilt and the fact that now my potholders look like the problem she outlined in the video. 

Overall, I'm satisfied with my first attempts at potholders. They're recognizable as potholders - a low bar, sure, but that's where beginners start! I'm more than willing to accept imperfection, especially for something utilitarian like a potholder. But I hope that my next attempts show at least a little bit of progress. 

2/20/26

Heart-Shaped Pillows for Breast Cancer Patients

At my first doctor appointment after I was diagnosed with breast cancer, the nurse navigator gave me a pair of heart-shaped pillows, courtesy of Bosom Buddies of Solano County. She explained that they're designed to tuck under your arm after surgery to relieve pressure on the area. They also make wearing a seatbelt tolerable. My heart pillows were indeed extremely useful after surgery, but I appreciated them even more during and after radiation when my skin was so raw and painful

Last week, my friend Ann and I had the chance to finish some partially completed heart pillows at a local quilting store. Someone else had cut, sewn, and stuffed the hearts; we hand-sewed the openings. I finished 9 pillows. It was very satisfying to be able to make these, knowing that they will help other women with breast cancer. Heart pillows are also helpful after cardiac surgery


Many hospitals and support groups like Thriving Pink give out heart pillows and are always looking for volunteers to make them. If you are interesting in making heart pillows to donate, contact your local hospital or support group to find out if they have specific requirements and where they can be dropped off. Once you're ready to start sewing, my friend Becky has a great tutorial. On behalf of the patients who will receive them during one of the most challenging points in their lives, thank you. It means so much. 

6/12/25

Recycled Jeans Artist Roll

Artist rolls are fabric containers used to organize and transport pencils, pens, and other art materials. You can buy them in many different sizes and styles, but you can also make your own. This simple version for kids is made with a recycled jeans pocket and is easy enough for beginners to sew. Affiliate links above and below. 


Here's what it looks like when you untie it.  


While this project is intended for kids, I recommend using adult-sized jeans so that you can fit more into your artist roll. Kids' jeans pockets can be really small. 


Recycled Jeans Artist Roll


Materials:


Steps: 


Remove the pocket from a pair of jeans by cutting as closely to the seams as you can without actually cutting the seams themselves. All seams need to be intact for this project. Cut a strip of denim from one of the legs that is approximately 10" x 2". 

Use a ruler and the dressmaker's pencil to draw a vertical line in the center of the pocket. Draw two more vertical lines to the right and the left, dividing the pocket into four sections. Sew along the marked lines. 

Fold the strip of denim in half lengthwise, with the right sides facing in. Sew along the edge to make a tube. Turn the tube right-side out. I used the safety pin method, but there are other even easier methods you might want to try. 


You can sew the edges of the tube, but I chose to seal mine with Mod Podge.  

Now fill your artist roll and tie it closed. 


You're ready to take your pens and pencils with you wherever you go!

4/2/24

State Flag Embroidery for Kids

Back in my teaching days, I always did at least one (and usually) two stitching projects with my fifth grade students. In December, we sewed felt stockings. Later in the year, we made colonial samplers or a similar project that supported what we were studying in history. 

The vast majority of my students had absolutely no needlework experience. There was always some frustration with threading needles, dealing with tangles, and accidentally pulling the thread out of the needle two seconds after finally getting the darn thing threaded, but overall, almost everyone enjoyed learning how to sew by hand. I had to establish a lot of ground rules regarding needle use and safety, but in 11 years, I literally never had to take a needle away from anyone for using it inappropriately. And nobody ever lost a needle. A few were dropped, but when that happened everyone did exactly what I'd told them to do: freeze until the person who dropped it has picked it back up. (Or else. See: Miss Jones means what she says.)

As a teacher, it can be really hard to squeeze in projects like these. The schedule is already packed with curricula you have to cover - a year's worth of material in Math, English/Language Arts, Social Studies, Science, PE, Music, and whatever else your state or district may require. When you add in the extra effort (and money) it takes to get 32 sets of supplies and then deal with safety protocols before you even teach the skill... well, it can be daunting. But projects like these are SO important for so many reasons. 

With all that said, today's project is for you teachers (and homeschool moms) out there. Specifically, I'm thinking of those of you in Alabama and New Mexico, because your state flags make fantastic beginning embroidery projects. Affiliate links below. 


---------


State Flag Embroidery for Kids


Materials:


Steps: 


Cut felt into 3x5" squares. I photographed the threaded needle on the fabric to remind myself to tell you to use all 6 strands of the floss. That's why the large-eye needles are important. 


Use a ruler and a Sharpie to draw the design you'll be stitching. It's just corner-to-corner for Alabama; for New Mexico, it's a set of 16 lines. You can pre-draw these for students, or better yet, lead them through a lesson that reinforces measuring skills and/or geometry terms. 


Once you've drawn your guidelines, start stitching! I recommend kids start with no more than 18" of floss or there will be major tangles. Teach them not to knot (ha!) the needle; the only knot should be at the end of the floss. Use backstitch for New Mexico and satin stitch (equidistant across the diagonal lines) for Alabama. 

This is a case of "do as I say and not as I do" because I actually made my sample with a couching stitch. It started out fine...


... but it was extremely difficult to keep the main thread straight. About halfway through, I'd wished I'd just drawn the lines with the Sharpie. 

The Alabama flag takes a lot more floss than New Mexico; plan on 4 kids sharing a skein if you make your stripes narrow like I did. If you make the stripes more true to size, you'll need a lot more floss.  

You can hang your finished flags vertically to make a cool classroom banner, or attach them to dowels and flag bases, then display them on students' desks.  


It would be so neat to see a classroom full of these!

10/30/23

Potholders and Dishtowel Hidden Money Gift

My nephew turned 23 yesterday. I have been giving Timothy hidden money for every gift-giving occasion since he was 13. Almost all of the 37 money gift tutorials I have on my blog were for him. It is getting increasingly difficult to come up with an idea that is both new and able to be mailed out of state, but I enjoy the challenge. 

For his 23rd birthday, I gave him two homemade potholders and a dishtowel. 


Making the potholders was a major blast from the past. I was obsessed with my potholder maker as a kid in the 1970's. Getting a fresh bag of loops was the best! I still have my red metal 1970's potholder maker (affiliate links here and below); at some point I got a plastic one (which they sell in a variety of sizes). Some have instructions to make other things, like this awesome pineapple. Seven-year-old Cindy would have circled that in the Sears catalog for sure! Fifty-one-year-old Cindy *might* buy some yellow and green loops and do some experimenting. 

Speaking of experimenting, I had no idea if hiding money in a homemade potholder was even possible. 
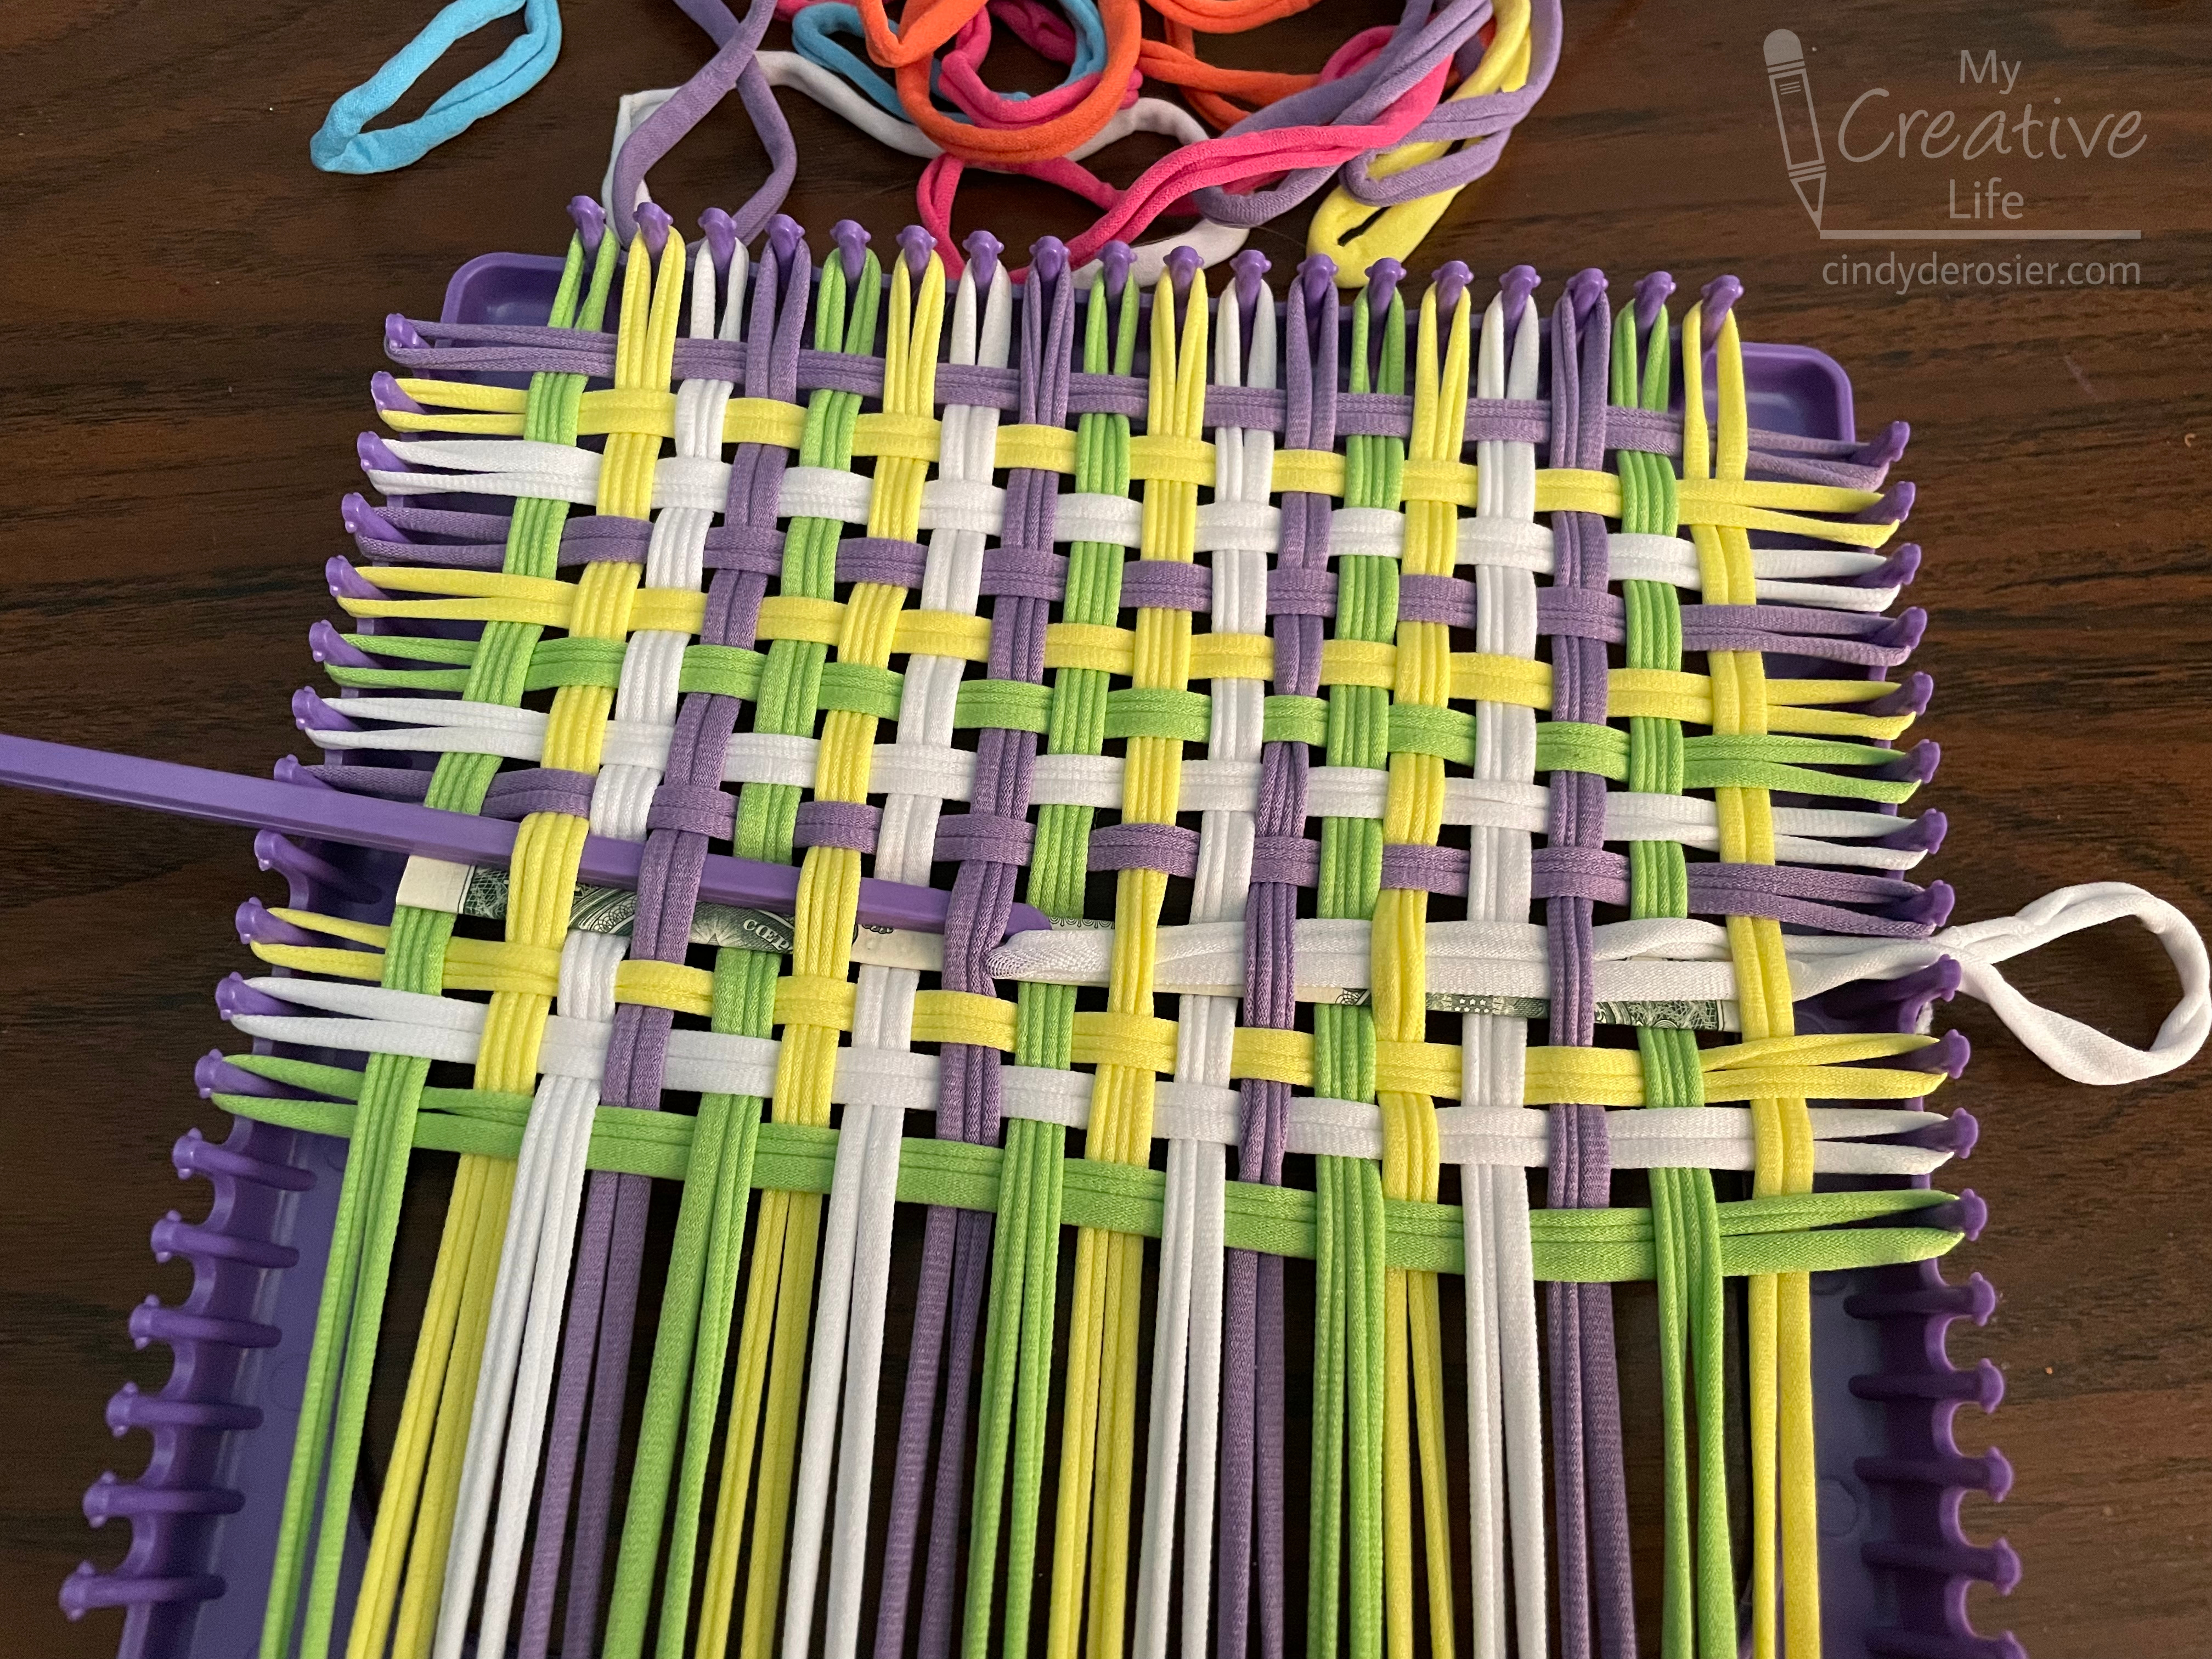
I added loops in one direction, folded a dollar bill so it was really skinny, and wove it into the potholder. So far, so good.  


I wove in more loops, then realized I needed a loop where the money was or I wouldn't be able to bind off properly. So I added a white loop over the dollar bill. 


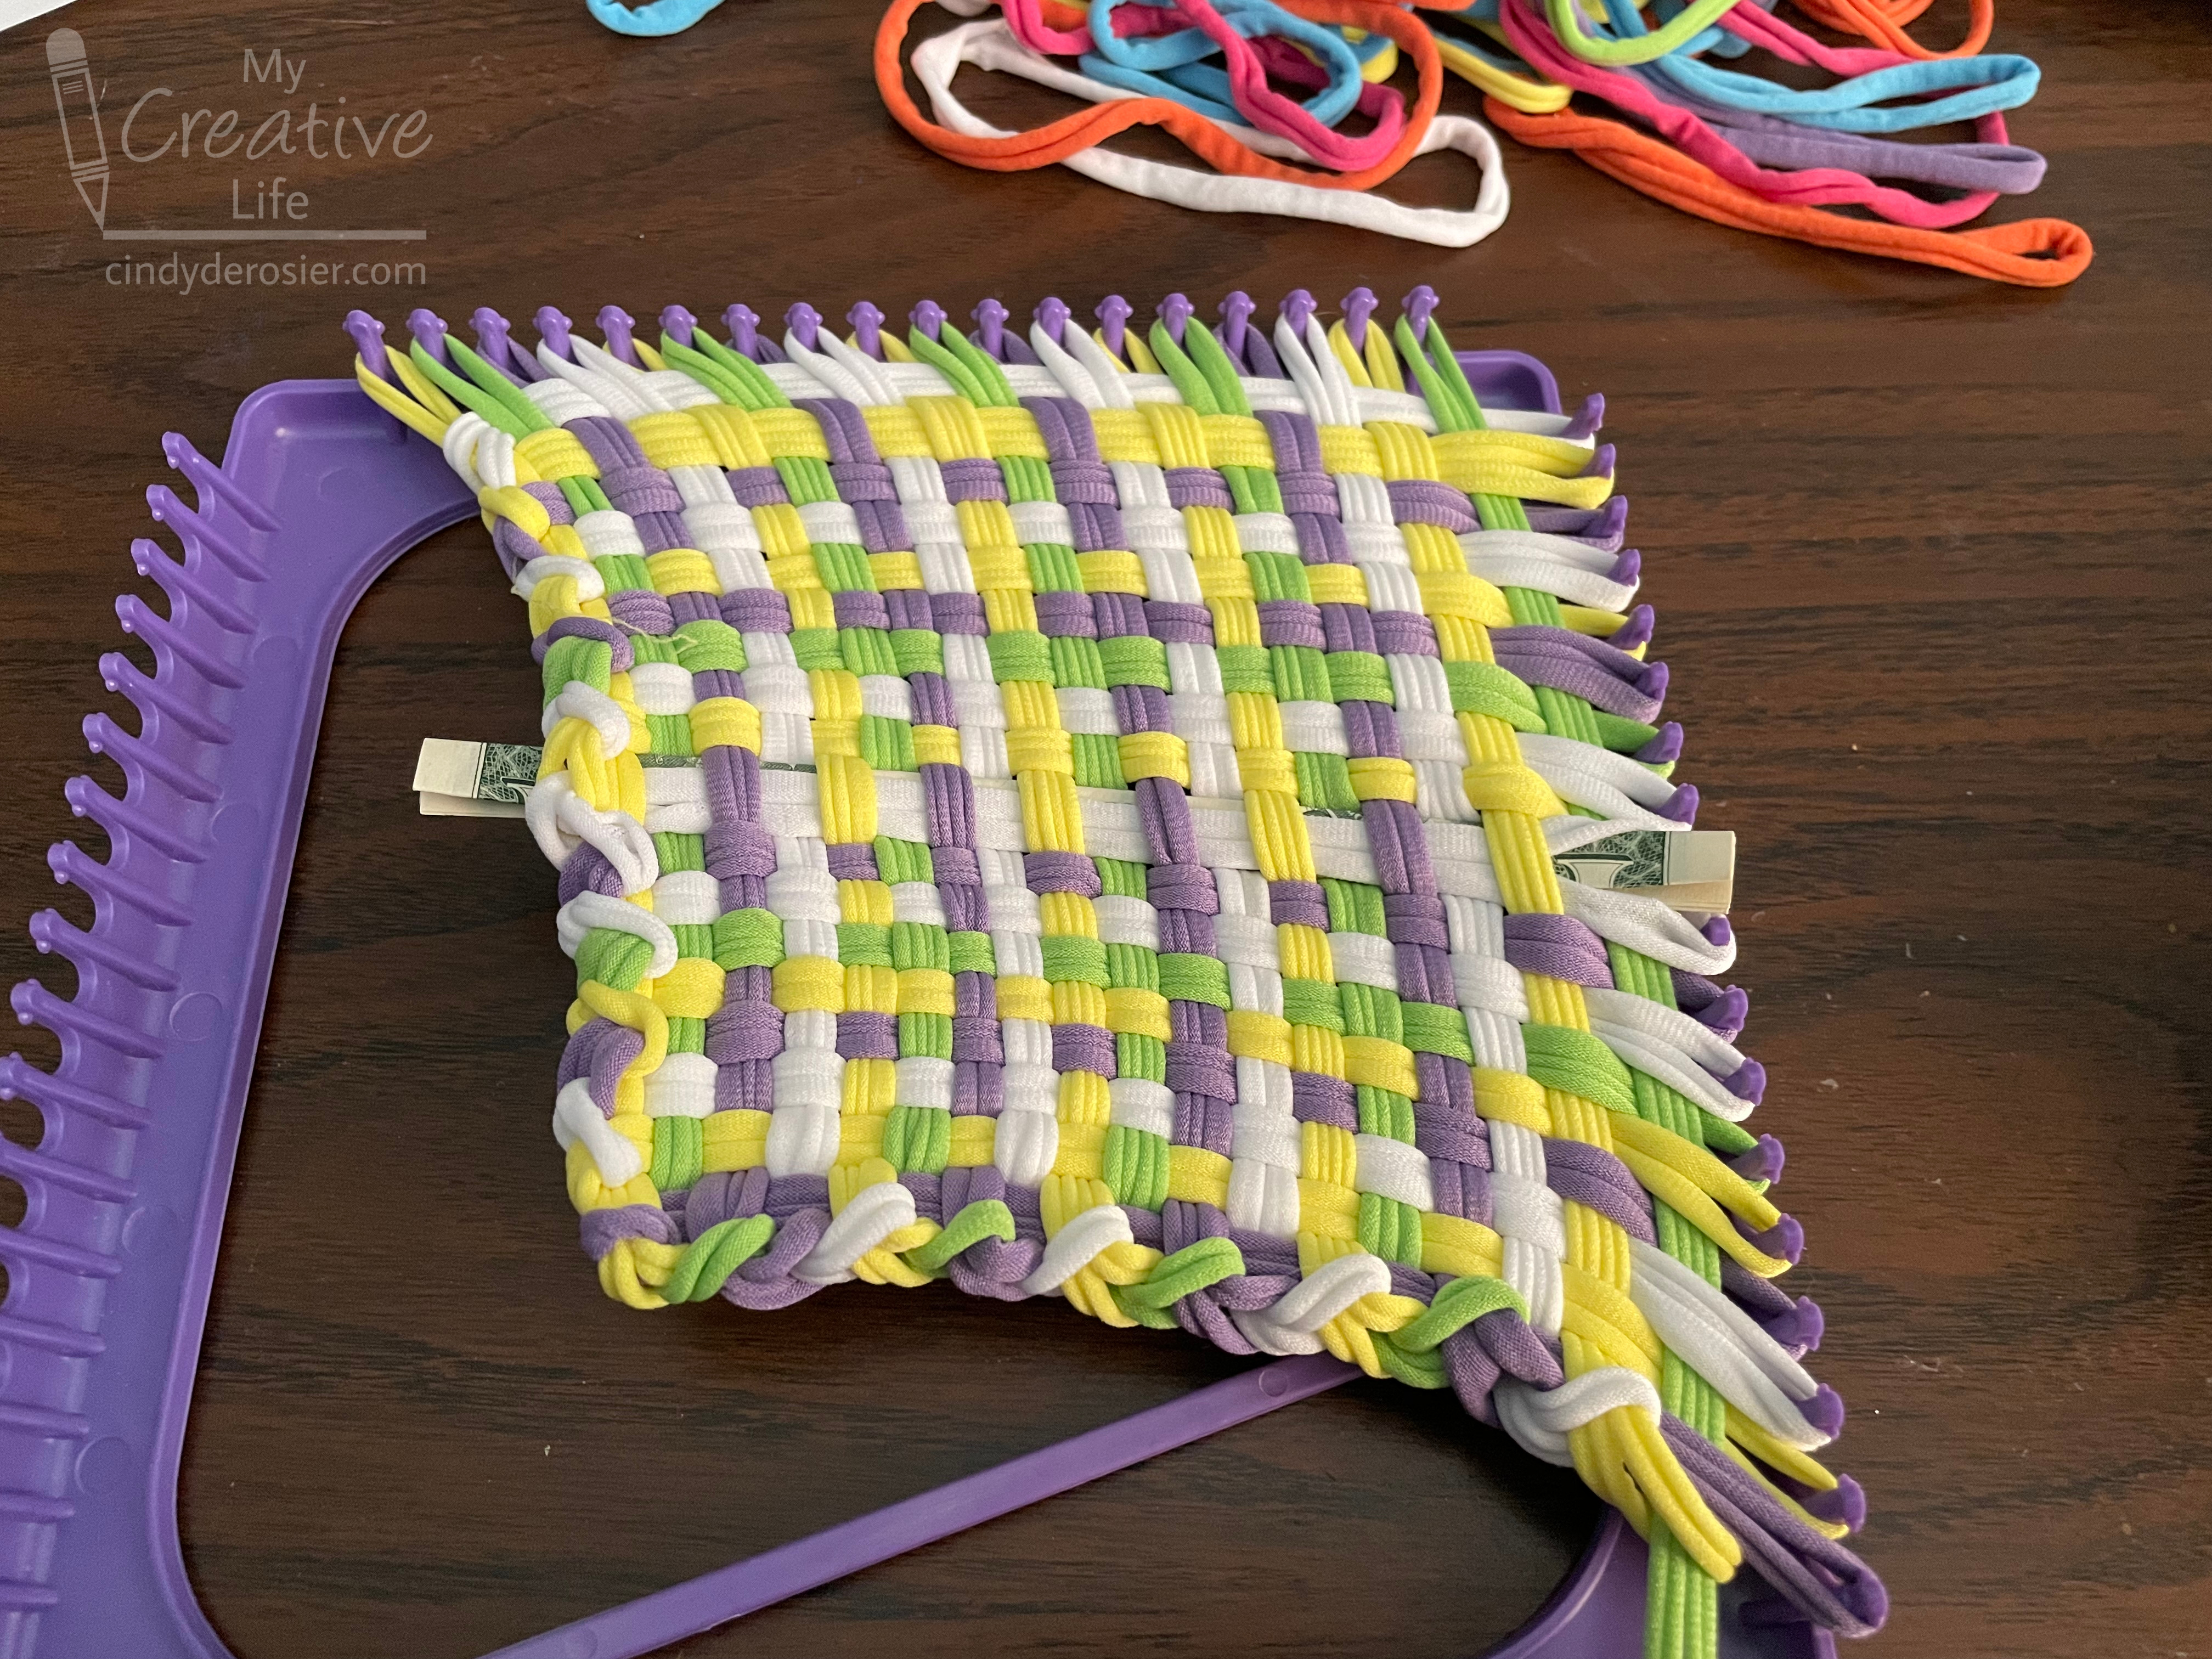
I was pleased with how hidden the money was when I finished. You can see it, but barely. It was more visible on the backside, but not bad. Time to bind off!


Uh oh. 


Darn it. I forgot how much smaller the finished potholders are than the loom. 


Fortunately, I was able to fold the ends over and weave them back in. This is the back (worse) side.... which isn't bad at all. You can see the money, but wouldn't necessarily notice it at first glance. 


For the second potholder, I started by folding the money smaller, plus I folded it so that the green portion was hidden and only the plain edge of the bill (this one's a $5) showed. 


The results were even better than the first one. Time for the dishtowel! I started with a purchased cotton dishtowel, then carefully opened up 1/2" of one of the hems. I folded the $10 and $20 bills up and slid them through the hole, one at a time, in opposite directions. 


Once I re-sewed the hem, you had to look really carefully to see that it was ever opened. The money was not visible at all (but you could feel it). If Timothy didn't know that I always hide money in his gifts, I don't think he would have even noticed it there. Even with the arrows pointing to the four hidden bills, it's pretty well disguised. 


Happy birthday to Timothy! Now I have about six weeks to figure out another money gift to give him for Christmas.

5/18/23

Trevor's Moler Bear

Recently, Trevor sewed a mole-shaped polar bear stuffed animal as a homework assignment. If that's not weird enough, the assignment was in Chemistry.  


As you may remember from your high school days, a mole is approximately 6 x 10²³ and is known as Avogadro's number. It is called a mole based on an abbreviation of the German word for molecule (moleküi) and not for any relation to the subterranean mammal. 

Trevor's Chemistry teacher apparently loves mole puns, so anyone who was earning at least 95% in the class could opt to make a punny mole stuffed animal instead of taking the final exam. She provided a mole pattern, then it was up to the student to sew up something clever. She gave example the example of making a green mole and calling it Guaca-mole. You could also dress up your mole like a super mole-del. 

I don't think Trevor has used the sewing machine since 2014 and he has no experience using patterns, so I was surprised that he chose to make the mole instead of just taking the test that he would surely ace. But I'm all for creative projects and glad he opted to give it a try. He chose to make a moler bear (polar bear + mole). 

He cut out the pattern pieces from white felt...


... and sewed them together, leaving a small opening.  


He turned the fabric right side out, added stuffing, and hand-sewed the opening closed. He sewed on a black felt nose, then glued on googly eyes and little white ears. He did a great job and his moler bear is really cute. More importantly, he learned how to read a pattern, how to thread the sewing machine, how to sew something that isn't just a straight line, and so much more than he would have learned taking a test on a subject he's already mastered. I approve. 


2/13/23

Conversation Heart Valentine Holders

I miss the elementary school version of Valentine's Day. I loved it as a kid, I loved it as a teacher, and I loved it as a parent. I loved making and receiving cards, eating lots of candy (especially conversation hearts!), and doing all sorts of valentine-themed crafting. 

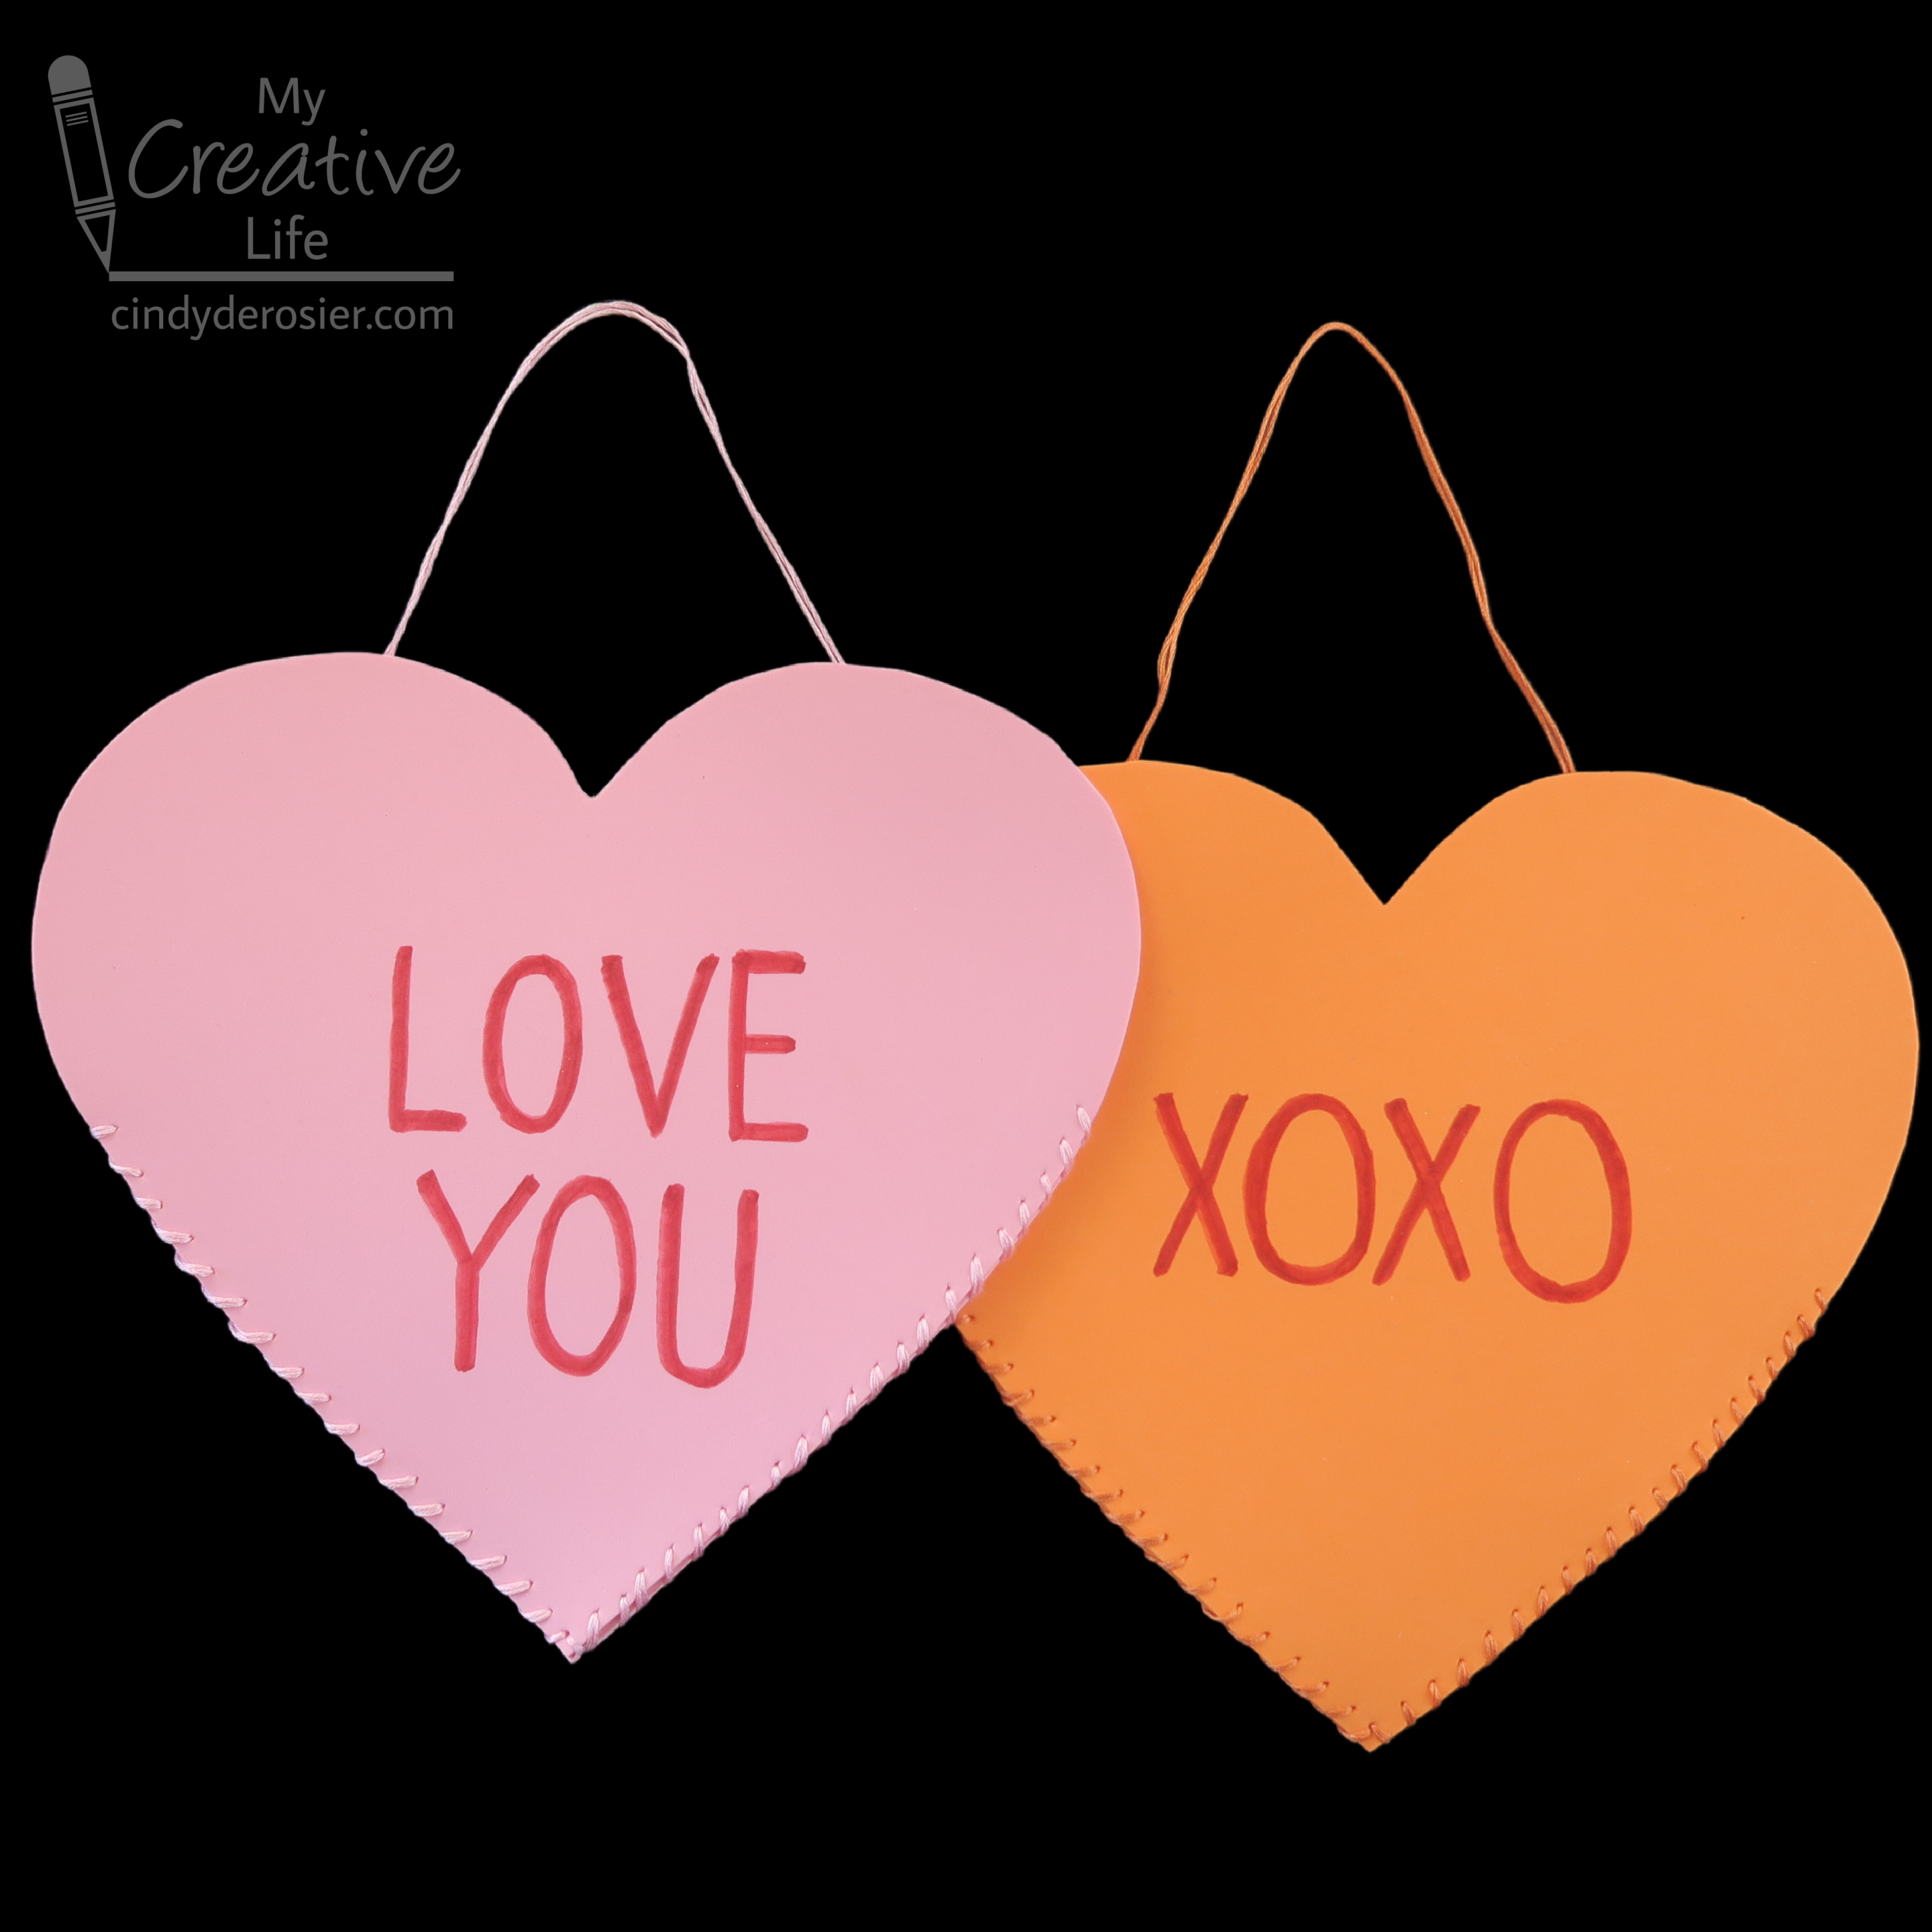
As a bit of a throwback, I made these valentine holders for my two loves, Steve and Trevor. This was the first time I've ever sewn craft foam, something I will definitely be doing again. It's a great way to introduce young crafters to hand sewing. Affiliate links below. 


Conversation Heart Valentine Holders


Materials: 


Steps: 


Create a heart template using scratch paper. It should be big enough to hold cards and whatever else you'll be putting inside. Trace the template onto a sheet of craft foam, then cut out the heart. Repeat this step so that you have two hearts. 

Using conversation hearts as inspiration, think of a message for your valentine holder. You can write the message directly onto the heart with a red pen, or try this trick to make sure you get the spacing even. Write the message on a piece of binder paper, then center the paper onto the heart. Trace over the message with a pencil, pressing firmly. This will make grooves in the craft foam, which you can then trace with the red pen. 


Cut a long strand of embroidery floss. The amount you need depends on the size of your heart, how close you want your stitches to be, and how long you want the hanger to be. I used about 6 feet of floss. I sewed with it doubled up (two 6-strand pieces) but that is optional.  

Tie a knot at the end of the floss. Line up the two pieces of foam and start sewing approximately where your message starts. Don't stitch too high or you won't be able to put stuff into your valentine holder! Conversely, if you stitch too low, your stuff will fall out. Aim for the middle. 

Hide the knot inside the holder, then use a whipstitch to sew down one side toward the point. I went down the left and up the right, but you can do the opposite if you want. 


When you get to the point, do another whipstitch and re-enter the previous hole. Then continue up the other side. 


If you've never sewn craft foam before, let me tell you - it is a dream. Every beginner should learn stitches on craft foam. It's sturdy enough that you don't need to hold it taut like fabric and the needle glides through it with little pressure. 

You're finished sewing when you reach the point opposite where you started. Don't cut the floss yet! To make the hanger, stretch out the amount of floss you want. Put the needle into the very first place you started, but do not pull the floss tight. Bury a knot inside the hanger, then cut off any extra floss. 


Your valentine hanger is ready to fill with cards, candy, stickers, small toys, and other goodies!


Those Peanuts valentines peeking out are leftover from my teaching days (16+ years ago). I went poking on Amazon to see if they still make them, which led me down a path of all sorts of Peanuts-themed valentine stuff. Enjoy!

11/9/22

Paper Plate Constellations

Ready to see what I made for the "Something Beautiful" prompt? I took the suggestion of stars and used it to make a cool paper plate constellation craft. 


While you could certainly do this alone or as a family, I'm imagining this as a craft for a group. Back in my teaching days, I took my students camping each year (3 different camping experiences over the 11 years). Our school also had an annual Space Week. It would have been so cool to assign each kid one constellation to make, then they could work in groups to try to find their constellations in the night sky. Affiliate links below. 

Paper Plate Constellations


Materials:


Steps: 

Paint the paper plate dark blue and let it dry. Use an old toothbrush or stiff brush to flick gold paint over the blue. 

Meanwhile, draw your constellation on a piece of scrap paper. I did the Big Dipper (*not technically a constellation), but you can choose whatever you want. When the paint is dry, place the scrap paper on the paper plate and use a pushpin to poke through each star in the constellation. 


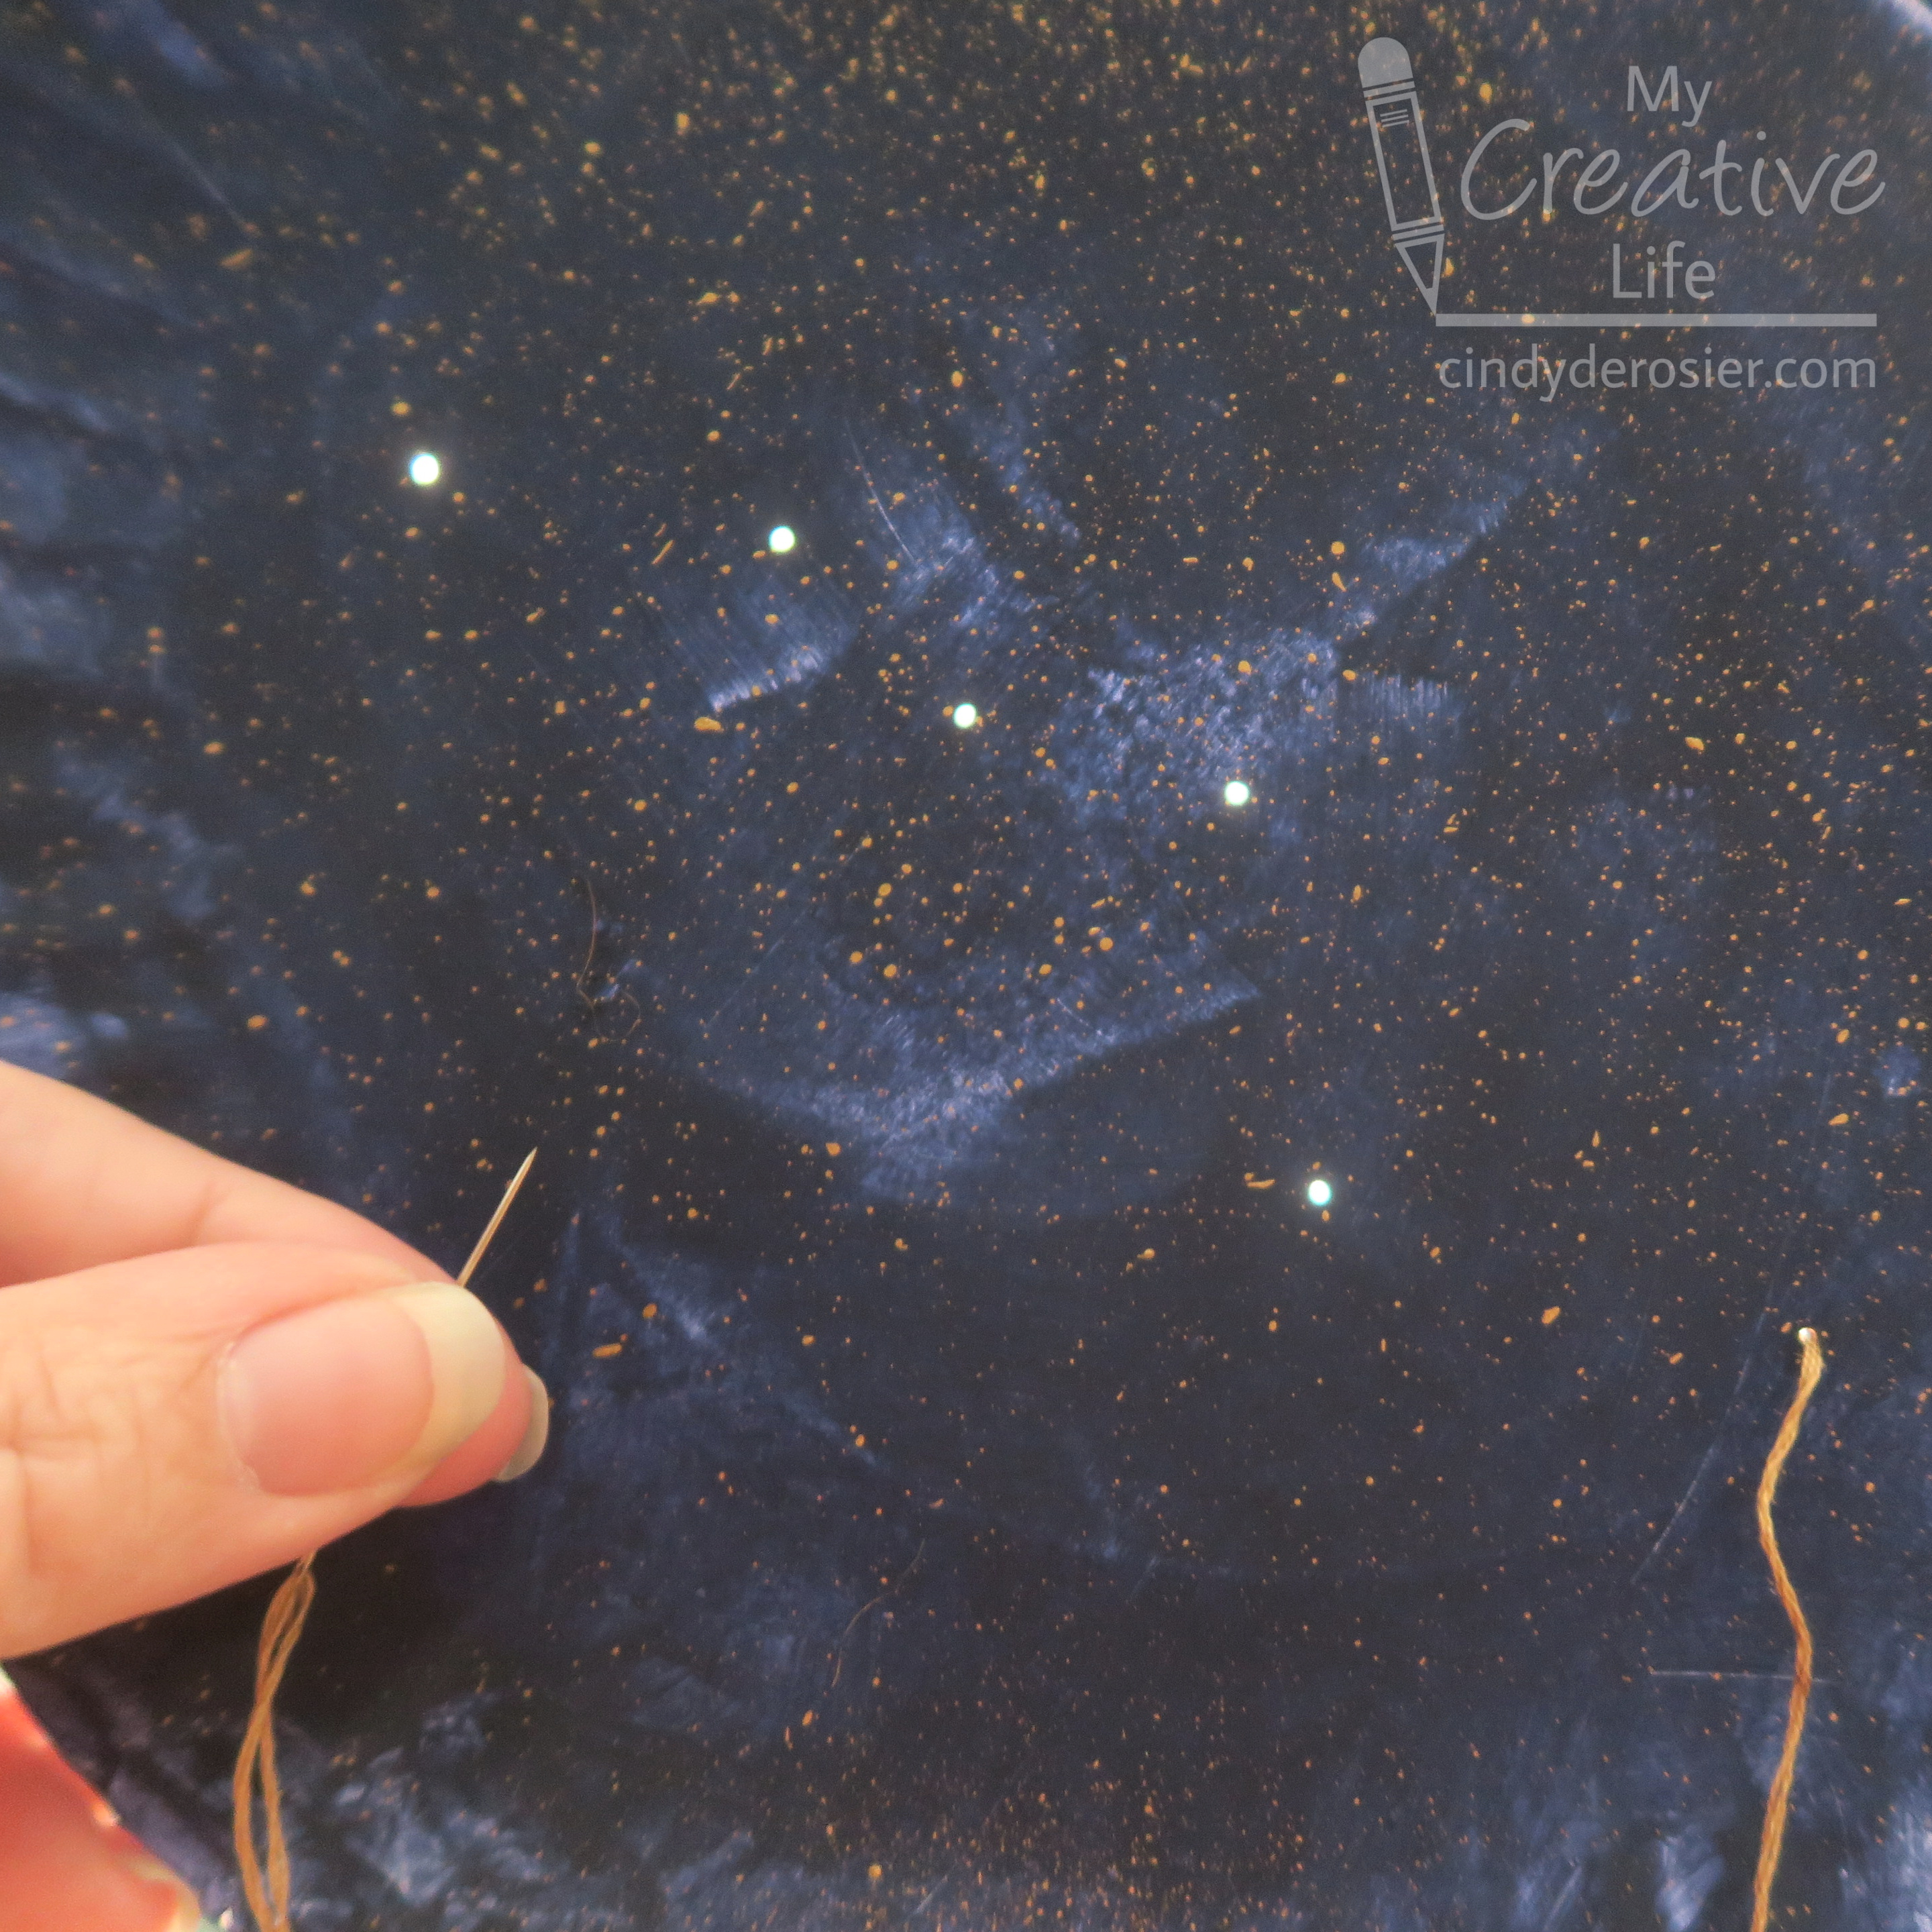
Thread a needle with 3 strands of gold embroidery floss. Stitch the lines of the constellation. The easiest way to do this is to orient yourself toward a window or lamp and hold the plate vertically in front of you as you sew. This makes it easy to see the holes. 


Put a star-shaped brad into each hole. 


*As I noted above, the Big Dipper is technically not one of the 88 recognized constellations. It is actually an asterism that is part of Ursa Major