Showing posts with label rhinestone. Show all posts

8/31/26

Little Dipper Constellation Ornament

There is only one state which has named an official state constellation. Do you know which state it is? Here's a hint. The constellation they selected is the Little Dipper, to honor their nickname as the North Star State. Read here to discover which state it is, then learn how to make an ornament inspired by this constellation. Affiliate links below. 


Little Dipper Constellation Ornament


Materials: 


Steps: 


Mix a drop or two of paint with water to make a wash. Use a sponge to stain the wooden ornament. You should still be able to see the rings of the wood. 


While the paint dries, draw the constellation on a piece of scratch paper, cut to fit onto the ornament. Select rhinestones for each star of the constellation. It's a nice touch to use larger rhinestones for the larger stars.  


Set the rhinestones aside and turn your constellation upside down. Use the pencil scribble transfer technique to make a pattern on the wood ornament. 

Trace the pencil lines with the white Posca. Add tiny white dots randomly on the ornament, then glue the rhinestones where they belong on the constellation. Tie a loop with the silver cord and your ornament is done. 


While I made the Little Dipper because it's the state constellation of Minnesota, this project can easily be adapted to make any constellation. Try zodiac signs for especially nice ornaments; they make a wonderful gift.

-------


While researching constellations, I came across an absolutely fascinating blog post called Visualizing cities as constellations in the night sky. Check it out!

12/10/25

Painted Glass Ornaments

I've been painting glass ornaments to give as a gift. This set of four sparkles and shimmers in the light. I like them individually but I love them together as a set. Aren't the colors pretty? Affiliate links below. 


Painted Glass Ornaments


Materials:


Steps: 


Set up a drying station BEFORE painting. Insert skewers into the styrofoam, leaving enough space between them that the ornaments won't touch. 

Remove the metal tops of the ornaments and set them aside. Use the sponge to cover each ornament with gesso. It's tempting to try to cover the whole thing at once or do sponge painting with the ornament on the skewer, but I found it's easier to cover half of each ornament (while holding it in your hand), let that dry on a skewer, then paint the other half. 

When the gesso is dry, paint the ornaments with your desired colors. (Same recommendation: paint half first, then the other half). For three ornaments I used the three shades of Color Shift that I own, then painted the remaining ornaments with a base coat and corresponding shade of Extreme Glitter. 


When the paint is completely dry, replace the gold hangers. Decorate the ornaments with rhinestones as desired. I found it really handy to use a jewel picker. Add an ornament hanger, decorative cord, or ribbon and they're ready to hang or give as a gift. 

6/15/23

Vase Transformation (Paint + Bling)

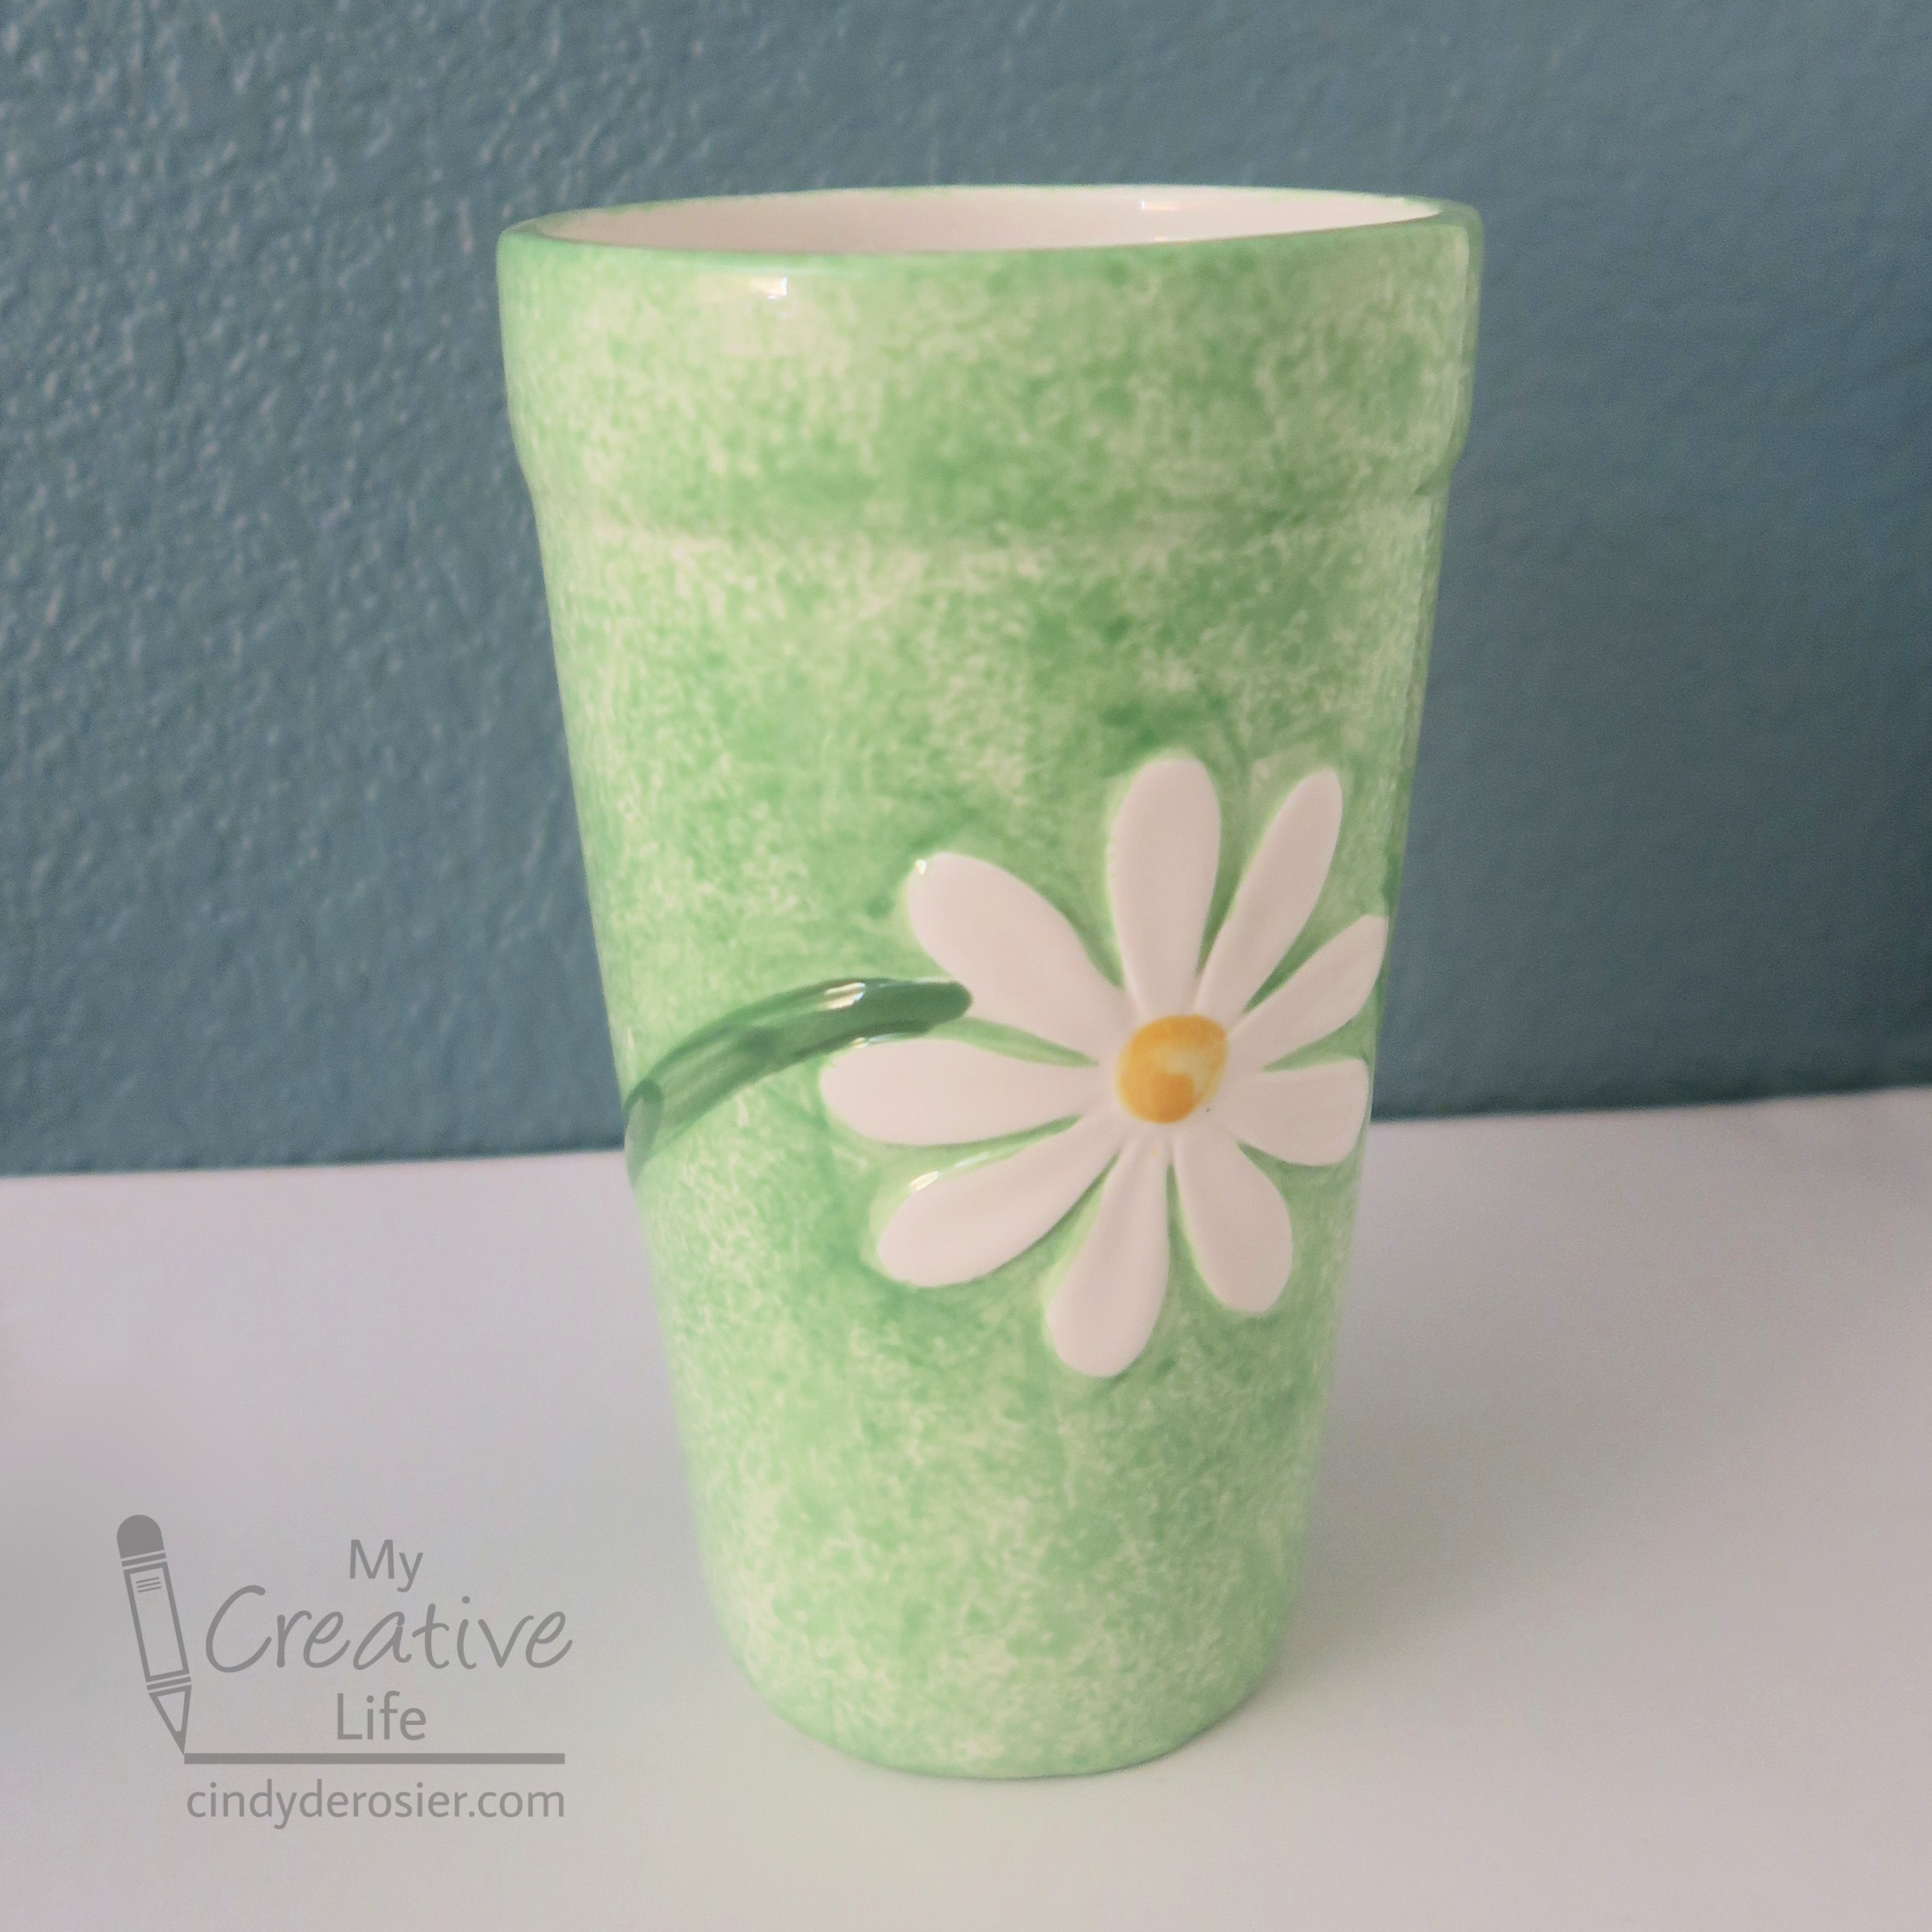
I’ve had a sponge-painted green vase for a really long time. I don’t remember where it came from, but I do know it came to me already painted. I think it was done commercially, but I’m not sure. I'm not the one who painted it and I don’t think I’ve ever used it. I decided to give it a makeover to take it out of the 90’s and make it a bit more modern. Here’s the before and after:


I’m not sure you can tell in the photo, but it’s super sparkly. I started by covering the glossy surface with a thin coat of gesso. (Affiliate link here and throughout the post.) Then I painted the vase black before adding two coats of Extreme Glitter. It was challenging getting into all the tiny crevices between the flower petals, but I used the tiniest brushes and did my best. 

I painted the petals white, the center yellow, and the stem and leaves green. (The stem extends most of the way around the vase and there are leaves on the back. When the paint was dry, I was ready to apply rhinestones. I used self-adhesive green gems for the stem and leaves. I used a strong glue for the flower center and petals. I painted a thin coat of glue on one small section at a time, then added the gems before moving on to another section.


I’m happy with the transformation. The vase looks a lot more modern and is striking on its own. It will look even better filled with flowers.  

6/14/23

Patriotic Craft Stick Flag Drink Coaster

It's Flag Day here in the United States. The Second Continental Congress passed the Flag Resolution on June 14, 1777, giving us a flag with thirteen alternating red and white stripes and thirteen white stars in a field of blue. It's changed 26 times since then. Our current 50-star version, adopted in 1960, is the 27th official US flag and the longest-used version. 

In honor of Flag Day, I created a cute flag drink coaster, perfect for Independence Day or other patriotic parties. The flag isn't accurate, as it is missing 6 stripes and 32 stars. If you're looking for an accurate flag craft, you can find some on my Patriotic Crafts page. Affiliate links below. 


Patriotic Craft Stick Flag Coaster


Materials: 


Steps: 


Paint the craft sticks. One will be entirely white and two are 2/3 white. Two are entirely red and two are 2/3 red. The four partially painted craft sticks are 1/3 blue. Let the paint dry completely, then seal the sticks with Outdoor Mod Podge. 

Glue small rhinestones to the blue portions of the sticks. I used five on the blue/red sticks and four on the blue/white sticks. 

Arrange three mini craft sticks vertically on your work surface and add glue. One by one, transfer the painted craft sticks onto this base. 


That's all there is to it. Enjoy your patriotic drink coasters!