7/14/20

Construction Paper Shark Craft

Every once in a while, you have to drop everything and make a construction paper shark. (No? Just me?)


I get ideas for crafts from the usual sources of inspiration- magazines, nature, blogs, Pinterest, etc. but today's craft was inspired by the laundry. Specifically, this:


I did eventually get the laundry folded and put away, but only after my shark craft. 


---------


Construction Paper Shark


Materials: 

  • construction paper
  • scissors
  • glue
  • black Sharpie


Steps: 


Set one piece of blue construction paper aside to use as the background. Tear a second piece into strips, which you'll layer to make the water.

Cut the shark's head from white, light blue, or light grey construction paper. Save the scraps, as they'll become the shark's teeth.

Cut a piece of black construction paper to make the shark's mouth. It's basically the shape of a cupcake and should be almost as wide as the shark's head.

Use the light scraps to make two lines of bottom teeth. You'll layer these when you assemble the shark. Then cut individual teeth that will go across the top of the mouth. They should be larger in the center and smaller on the ends.


To assemble the shark, glue the upper teeth into place. Layer the rows of bottom teeth and glue them to the mouth. Position the shark's head so that it sticks up above the top of the background paper a couple of inches, then glue it into place. Gently roll back the torn bits on the ocean pieces, then layer them on top of each other, working from top to bottom. 


Glue the mouth into place, then use the Sharpie to add details. I started with the eyes, then did the lines around the eyes and across the nose. Then I added the dots along the top, near the eyes, above the mouth, then down at the water line. 



7/13/20

Scout Crafts and Games

I've been knocking items off my long-ignored blog to-do list left and right recently! It's amazing how much you can get done when you go nowhere, do nothing, and avoid everyone, lol. Anyway, I've gathered all of my Scout crafts, games, and other ideas into one place. 


As with everything else I've indexed, I'm kicking myself for not doing it sooner. Yes, it was a lot of work, but having everything in one place is so satisfying and makes the posts more accessible and thus more useful. And now that it's in place, it'll be a breeze to maintain.

7/10/20

Christmas in Louisiana

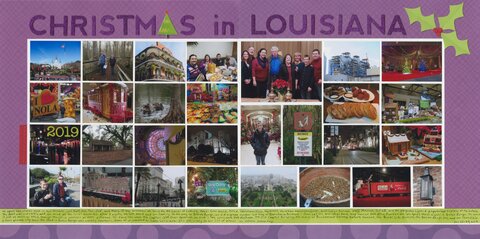
I went a bit non-traditional for my layout about Christmas 2019, which we spent in Louisiana. I'm normally a Christmas green-and-red purist, but I used purple for the main color on this page. Paired with light green and a tiny touch of red, I think it works both for Christmas and for Louisiana.

Christmas in Louisiana (affiliate link)


Believe it or not, all the papers you see are from a Christmas collection. I'd actually used the papers for my Family Mittens projects, which meant that I had to design around the large mitten-shaped holes in my background papers. With a bit of creative cutting, I hid the holes with the photos and the journaling strips. 

Now that this page is in the album, I'm officially caught up with all Christmases. Time to put the Christmas papers and embellishments away for now. Woo hoo!

7/9/20

Cereal Box Art Inspired by Clementine Hunter's Zinnias

Are you familiar with Clementine Hunter? She was a self-taught folk artist who started painting in the 1930's when she was in her fifties. Many of her paintings were done from memory of her life as a black farm laborer on a Louisiana plantation. Some depict farm chores, while others show weddings and other celebrations. 


Clementine Hunter had no formal education of any sort, and certainly no art education. She started painting using cast-off brushes and tubes of paint from an artist who visited the plantation, creating her artwork on any surface she could find (including cardboard boxes, gourds, window shades, and bottles). She was also skilled in sewing, making quilts, tapestries, and other textiles, primarily from scraps and repurposed materials. Many show elements of plantation life. 


While much of Hunter's artwork depicts her life as a farm laborer, she had another favorite subject: zinnias. 


I selected her 1965 "Zinnias in a Pot" as the inspiration for artwork of my own. Hunter's artwork is oil on board.


My artwork is acrylic on cereal boxes.


---------

Cereal Box Art Inspired by Clementine Hunter's Zinnias


Materials:

  • cereal boxes
  • Folk Art paint
  • scissors
  • glue

Steps: 


Open up several cereal boxes and paint large swaths of yellow, blue, and green. Use a variety of shades to create interest. Create flower shapes using reds, pinks, and whites. 


Trim the yellow to make a base for the artwork, then cut a pot and handle from blue. Cut leaves, stems, the trim for the pot, and flowers.


Glue everything together, starting from the bottom. Attach the trim and handle to the vase, then glue that to the background. Add the stems and lower leaves. Then start layering flowers and leaves. It creates really neat dimension. Finally, accent the center of each flower with small bits. 


I thoroughly enjoyed learning about Clementine Hunter and loved using her style to create with different media. There were times that I was frustrated because my painted cardboard wouldn't do what her oil paints did (flower centers in particular), but it was satisfying to work through the challenge and create something that stays true to the original but has plenty of me. 


7/8/20

Orange Juice Mocktail and Felt Orange Slice Coaster

In the deRosier house, special occasions call for Orange Juice Mocktail. It's pretty much a guarantee that we'll make it for birthday and holiday breakfasts, and it sometimes shows up when we host lunch or dinner. I love how it looks on my latest fruit coaster. (Here are the lemon and the lime.)


I've actually shared our 'secret' recipe for Mocktail before (Trevor looks so little!!!), but I'll repeat it here: Fill a glass 2/3 full of orange juice, then pour in Sprite or 7-Up until the glass is almost full. Add a tablespoon of grenadine and serve. If you pour the ingredients in a different order, you don't get the beautiful ombre, but it tastes just as good. 

The orange slice coaster is essentially identical to the lime slice, other than the color. Both have 10 segments. Instructions and affiliate links below.


Orange Slice Felt Coaster


Materials:


Steps: 


Cut out a circle of orange felt, approximately 4" in diameter. Cut out a circle of white felt that is slightly smaller than the orange circle. Then cut out another orange circle that is slightly smaller than the white one. 

Set the large orange circle and the white circle aside. 

Fold the smaller orange circle in half. Cut along the fold, then cut each half into 5 triangles. They don't need to be identical, as they definitely aren't in nature. Snip off the corners of each triangle so they are rounded. Space them evenly on the white circle, trimming if necessary until they resemble the segments of an orange. 

Use a orange thread and a very short running stitch to sew the orange segments to the white circle. Start at the tip of one segment, work around the edges until you reach the tip again, then move over to the next segment. 

When all the segments are attached, use white thread and the same short running stitch to attach the white circle to the orange circle.


When your coaster is done, make yourself an Orange Juice Mocktail. A delicious reward for a job well done!