Showing posts with label styrofoam ball. Show all posts

11/3/23

No-Sew Ice Cream Sundae Costume for Three

I love Halloween. This year, our family dressed up as an ice cream sundae.  
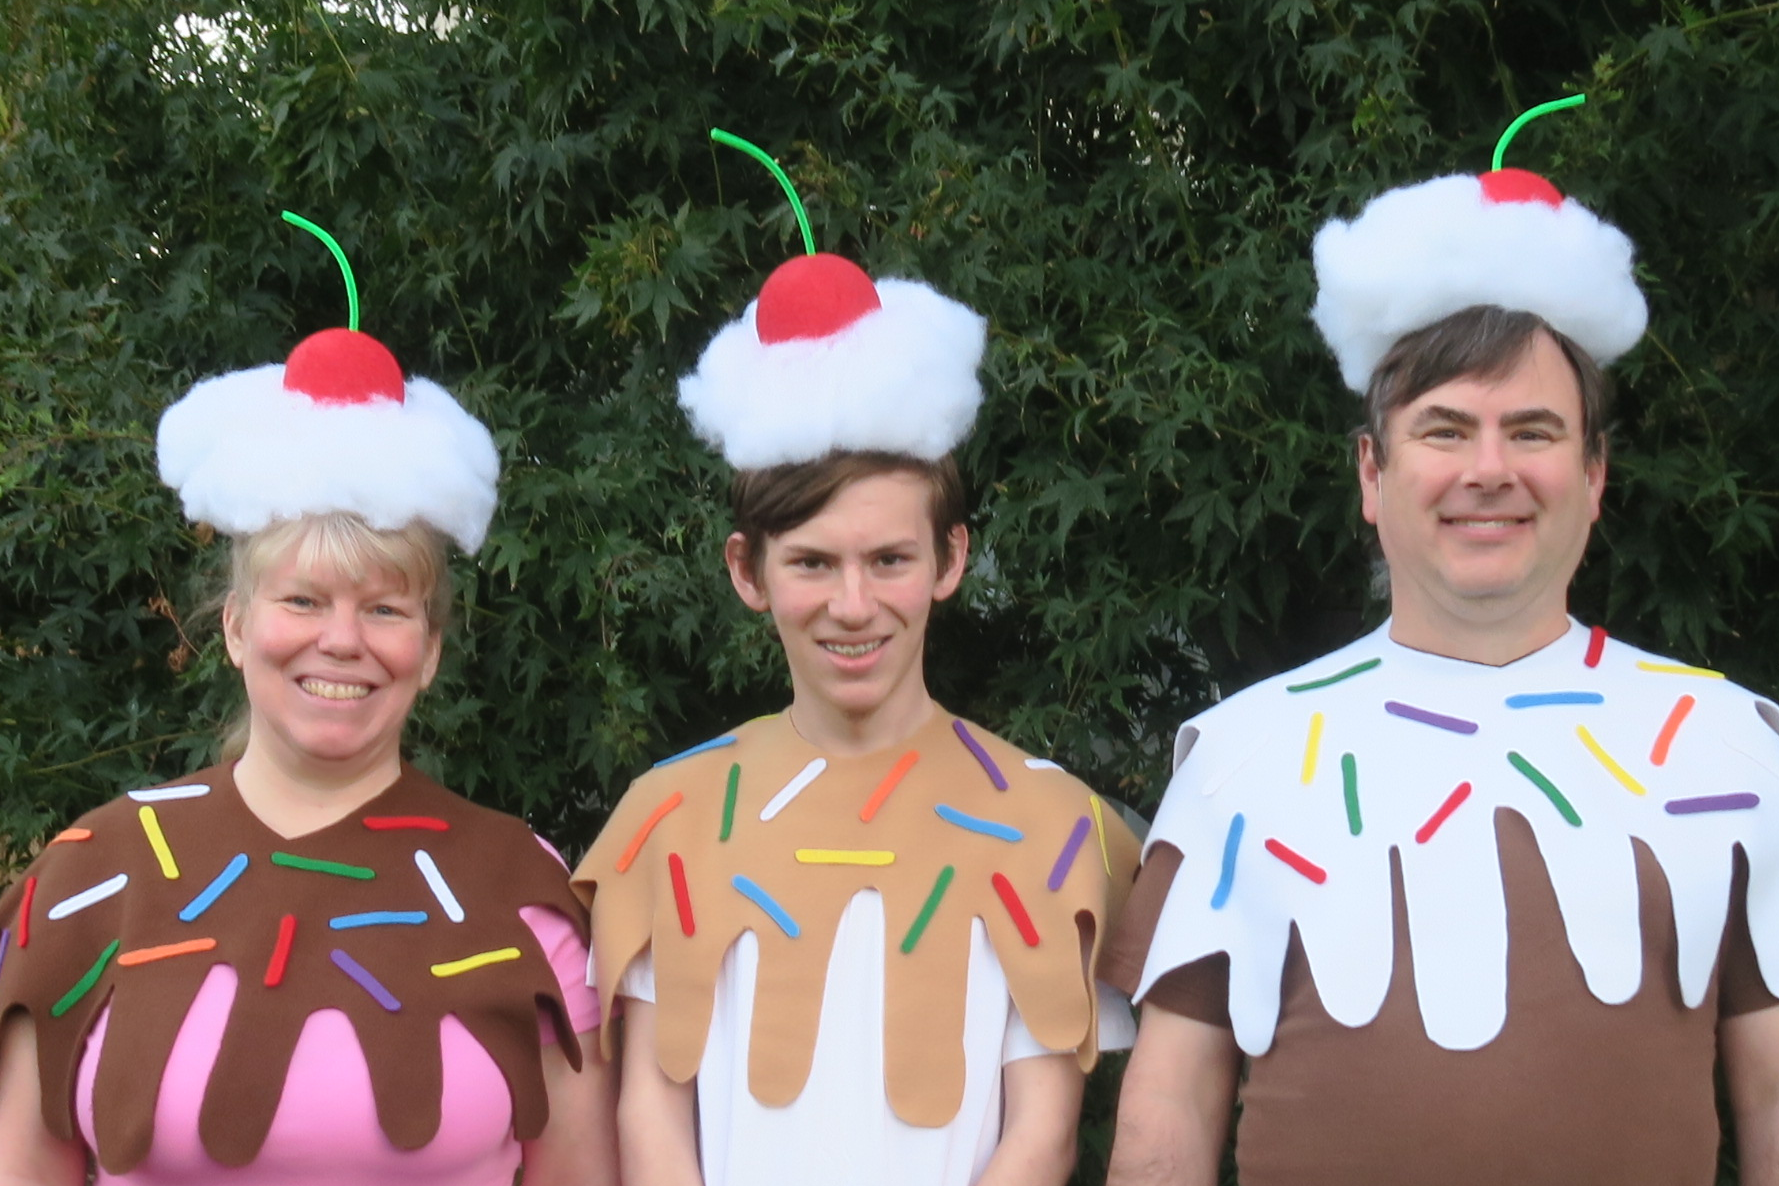

It's a fun costume for three people, but could just as easily work for one or two. You could easily add a stuffed (or cardboard) banana and turn this costume into a banana split. Or dress an additional person with a banana costume (affiliate links here and below). A lot of the kids who came to the door and saw just me thought I was dressed as a cupcake. So that's another possibility! 

This costume took very little time to make, which is good since I didn't start until just a few days before Halloween. Even better, there's no sewing involved. And best of all - the chocolate, caramel, and marshmallow sauces are removable, so you can wear the t-shirt afterwards as part of your regular wardrobe.


No-Sew Ice Cream Sundae Costume


Materials:


Steps: 


I started by figuring out which of us already owned plain t-shirts in each particular ice cream color, then bought polar fleece to pair accordingly. I got white (marshmallow) fleece to go with Steve's brown (chocolate) shirt, camel (caramel) fleece for Trevor's white (vanilla) shirt, and dark brown (chocolate) fleece to go with my pink (strawberry) shirt. Each of those "toppings" is essentially a cape. 

I tried to make a paper template for the capes, but that failed. So I used inexpensive felt instead. After figuring out how long (22") and wide (30") I wanted the capes, I cut a neck hole in the felt and added some random drips. I made adjustments by cutting, of course, but also stapling the felt in a couple of places to make it more the shape I wanted. Then I put the template on the polar fleece and cut out the shapes.  


Each cape got 16 sprinkles, which I cut from the craft felt. They're approximately 3" long. I scattered them on the capes and used the glue gun to adhere them. 


I had colorful party hats on hand, so I cut the tops off of them, then painted them with gesso. You can skip this step (and the associated drying time) by starting with white hats in the first place. I painted the styrofoam balls red. 

When the paint was dry, I used hot glue to attach the styrofoam balls to the party hats. I used a paper piercer to poke a hole at the top of each. Then I snipped green pipe cleaners in half, gave them a gentle bend, and pushed them into the holes. No glue needed.  


I shaped the Fiber-fil into cylinders and then glued them to the party hats. 


That's all there is to it! You could add velcro or another closure to the topping capes; we just used safety pins. The hats stayed on pretty well until we bent over; bobby pins will help keep them in place. 


This was a really fun costume. It's easy to store (pull out the cherry stems, stack the hats, and fold the capes) so I'll be hanging onto them to possibly wear in the future. 

4/24/20

A New Batch of Kids' Crafts Roundups

I've been busier than ever running Fun Family Crafts. It should come as no surprise that our traffic is way, way up as people have been searching for activities for kids to do during the COVID-19 pandemic. With almost 12,000 kid-friendly craft tutorials for toddlers through teens, it's no exaggeration to say we have something for everyone. 

My focus for the last few weeks has been on crafts that use materials that people likely already have at home. With that in mind, here are the new roundups I've been making. First, Cereal Box Crafts. There are 58 on the site right now. One of mine is in the graphic below. Can you spot it? 


Next up, Button Crafts for Kids. We have 340 button crafts ideas, which made it really hard for me to pick which to include in the roundup. As always, I tried to choose the widest variety possible. One of mine is in there.  

Button Crafts for Kids

It took me forever to deal with the Styrofoam Ball Crafts for Kids. I had to delete several dozen of my favorites from someone who recently deleted her blog and thus all her tutorials. (I HATE when that happens.) Then I had to clean up the tags for all the styrofoam projects to pick out the stryfoam ball ones. And then I had to deal with the fact that styrofoam is actually a brand name (the proper generic is polystyrene). Crafters who work for styrofoam competitors tag their project with those brand names, which never get searched. In the end, I found 71 styrofoam ball crafts. One of mine is in the graphic below.

Styrofoam Ball Crafts for Kids

Next was Recycled Can Crafts. We have 84 different projects. Many are variations on classic desk organizers (like R2-D2 below), but there are many other uses as well. As always, I tried to show the greatest possible variety in the graphic. One of them is mine. 

Recycled Can Crafts for Kids

I had the most fun putting together the roundup of Yarn Crafts. Even though there were 434 crafts to choose from, the ones that were bright and colorful jumped right out at me and it wasn't as hard to narrow them down as it usually is with so many options. And I LOVE the way the title block came out. Two of the projects in this roundup are mine. 

Yarn Crafts for Kids

Finally, Garden Crafts. We have so many cute ideas. I think my favorite is using an old garden hose to make a wreath. So cute!


As always, I made all the graphics using PicMonkey. I've been paying $6/month for their Basic plan for about 2 years and I couldn't be happier with it. 

2/26/15

Styrofoam Koalas

My nephew Timothy recently returned from his Make-a-Wish trip to Australia. They had a fantastic time. I loved reading the updates, seeing the photos, and hearing all about it. Here's Timothy, holding a koala. 


The real-life koala inspired these styrofoam koalas. Make your own! Affiliate links below. 


---------


Styrofoam Ball Koalas


Materials: 


Steps: 


Paint the styrofoam balls grey. The easiest way is by pouncing the paint onto the surface of the styrofoam rather than trying to brush it on. I chose to poke a dowel into each ball so that I could paint them in one sitting instead of doing one side and then the other. 


While the paint is drying, cut out grey ears and black noses and mouths. I laid the pieces out to check that I liked the proportions.


Once I was happy with the size of the ears, noses, and mouths, I rounded the inside edge of the ear pieces to match the curve of the styrofoam ball. Here you can see the difference between the rough shape (left) and the one I rounded (right).


Use strong craft glue to attach each of the facial features to the styrofoam ball, saving the ears for last. They will slump under their own weight if you don't hold them in place for a few minutes. After holding them for 2 or 3 minutes, the ears should stick without slumping. Allow them to dry completely without touching them.

When the koalas are dry, you can use them to decorate a favorite framed photo, like I did.


They also make really fun pencil toppers. If you used a dowel while painting them, there is already a perfectly-size hole in the perfect place!