Showing posts with label pipe cleaner. Show all posts

8/27/26

Pipe Cleaner Lollipop

Did you know that the lollipop (originally Lolly Pop) was invented in Connecticut? This beloved treat was first produced in 1908 by George Smith of the Bradley Smith Company of New Haven. Connecticut named the lollipop its official state candy in 2024. Celebrate this sweet treat with a quick and easy pipe cleaner craft. Affiliate links below. 


Pipe Cleaner Lollipop


Materials:


Steps: 


Stack the four pipe cleaners and begin to twist them together. You can twist them loosely at first and then go back and tighten them, or twist them tightly from the beginning. Either way, you want a tight twist. 


When you've twisted the pipe cleaners together all the way to the end, begin coiling the twist. Keep the coil tight as you twist. It should hold on its own, but you can also add a drop of hot glue occasionally to keep it totally secure. 


Use hot glue to attach the lollipop stick to the finished coil. 


Quick and easy! Now go enjoy a lollipop in honor of George Smith, the Bradley Smith Company, and the great state of Connecticut. 

3/20/26

Puzzle Piece Flower Bouquet

Puzzle pieces make beautiful flowers. This is a fun craft for your guests to make during a puzzle themed party, or you can make them ahead of time as decoration. Affiliate links below. 

Paint a coat of gesso on to the puzzle pieces. When it is dry, add a coat of acrylic paint. Use a colored pencil to add lines that mimic the veins and ridges of petals. Then glue a pom pom in the center of the flower. 


Twist the pipe cleaners to form leaves. I made two leaves with stems and two without. I recommend making all the leaves with stems, as you can always cut them off later. Add a coat of glue to each leaf and lay it on top of tissue paper. 


When the glue is dry, cut around each leaf. Twist the stems of the flowers together. 


Twist the stems of the leaves around the flower stems. (I did that with the two I had, then glued a third leaf in place. I didn't use the fourth leaf.) Arrange the flowers in the vase. 


I love how my puzzle piece bouquet turned out! It's going on display next to my Lego flowers

11/3/23

No-Sew Ice Cream Sundae Costume for Three

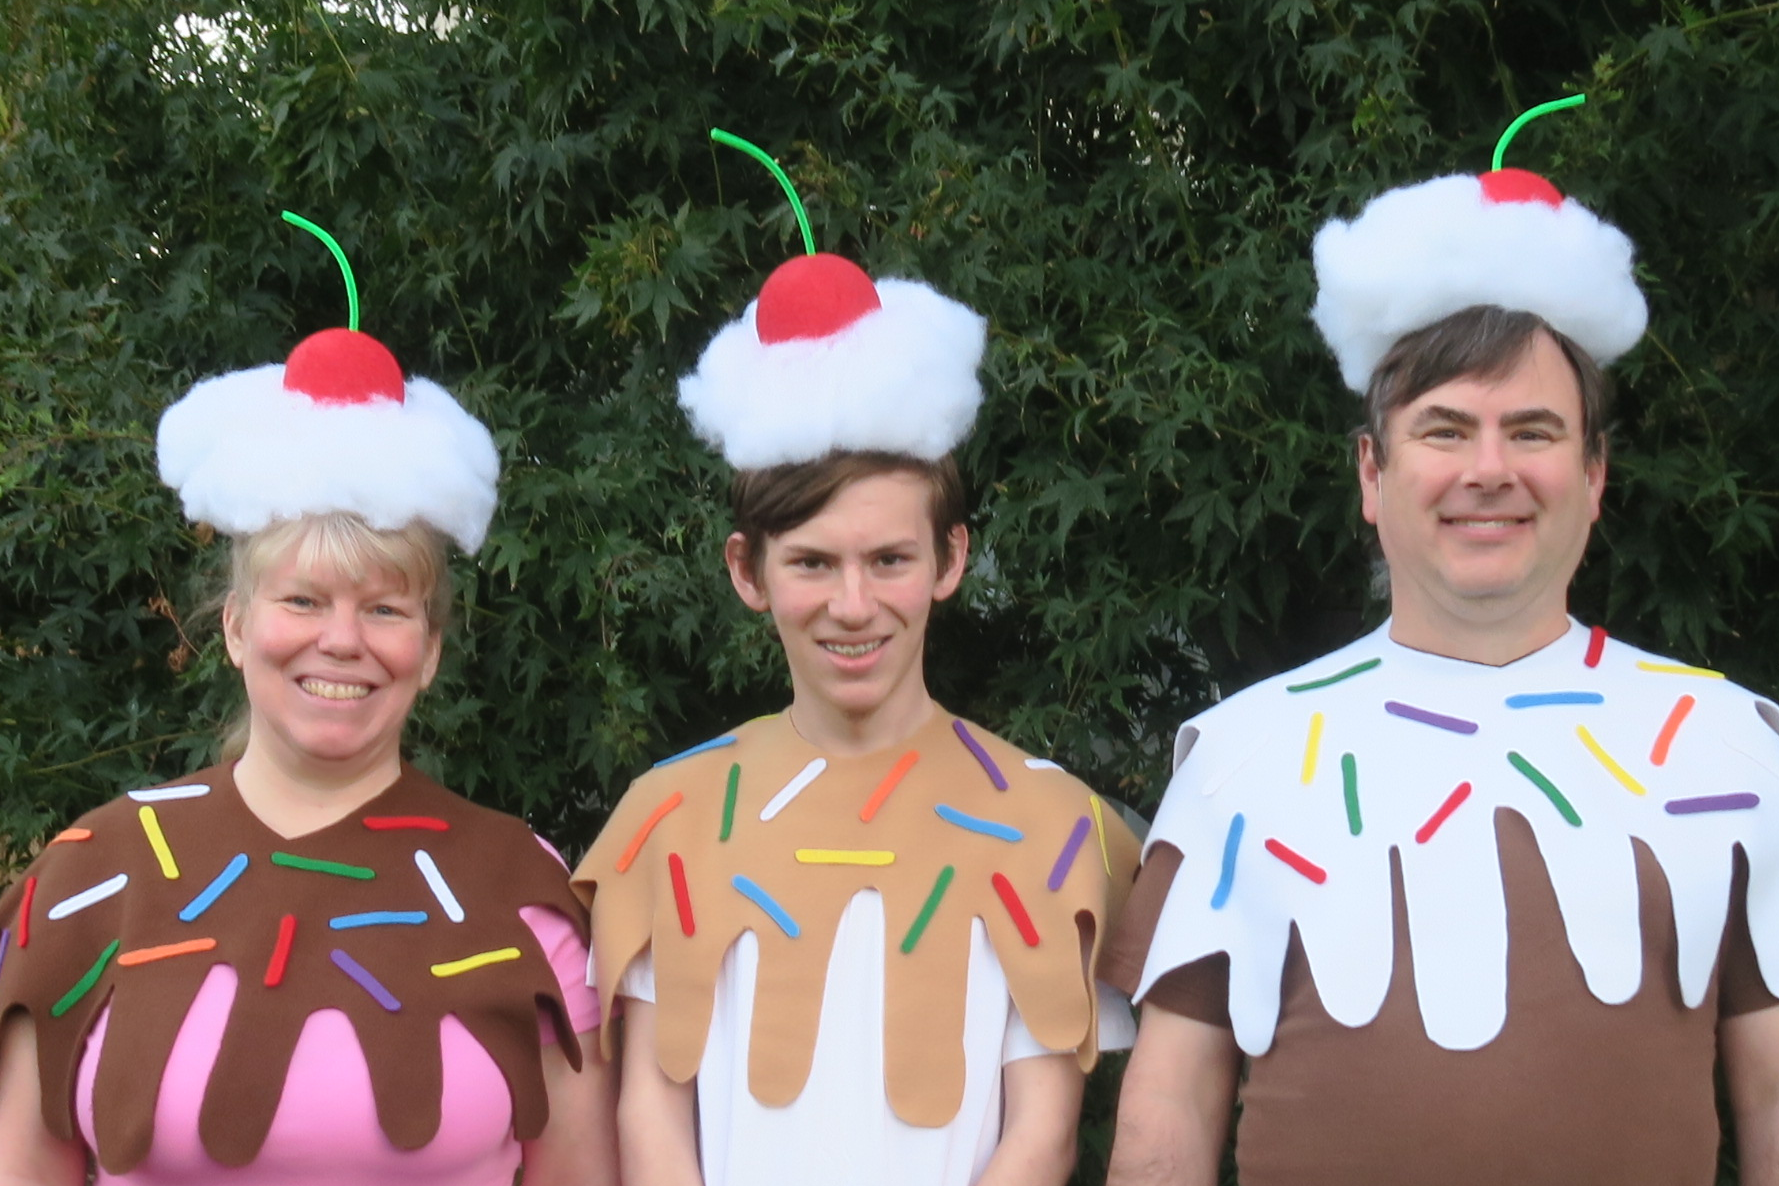
I love Halloween. This year, our family dressed up as an ice cream sundae.  


It's a fun costume for three people, but could just as easily work for one or two. You could easily add a stuffed (or cardboard) banana and turn this costume into a banana split. Or dress an additional person with a banana costume (affiliate links here and below). A lot of the kids who came to the door and saw just me thought I was dressed as a cupcake. So that's another possibility! 

This costume took very little time to make, which is good since I didn't start until just a few days before Halloween. Even better, there's no sewing involved. And best of all - the chocolate, caramel, and marshmallow sauces are removable, so you can wear the t-shirt afterwards as part of your regular wardrobe.


No-Sew Ice Cream Sundae Costume


Materials:


Steps: 


I started by figuring out which of us already owned plain t-shirts in each particular ice cream color, then bought polar fleece to pair accordingly. I got white (marshmallow) fleece to go with Steve's brown (chocolate) shirt, camel (caramel) fleece for Trevor's white (vanilla) shirt, and dark brown (chocolate) fleece to go with my pink (strawberry) shirt. Each of those "toppings" is essentially a cape. 

I tried to make a paper template for the capes, but that failed. So I used inexpensive felt instead. After figuring out how long (22") and wide (30") I wanted the capes, I cut a neck hole in the felt and added some random drips. I made adjustments by cutting, of course, but also stapling the felt in a couple of places to make it more the shape I wanted. Then I put the template on the polar fleece and cut out the shapes.  


Each cape got 16 sprinkles, which I cut from the craft felt. They're approximately 3" long. I scattered them on the capes and used the glue gun to adhere them. 


I had colorful party hats on hand, so I cut the tops off of them, then painted them with gesso. You can skip this step (and the associated drying time) by starting with white hats in the first place. I painted the styrofoam balls red. 

When the paint was dry, I used hot glue to attach the styrofoam balls to the party hats. I used a paper piercer to poke a hole at the top of each. Then I snipped green pipe cleaners in half, gave them a gentle bend, and pushed them into the holes. No glue needed.  


I shaped the Fiber-fil into cylinders and then glued them to the party hats. 


That's all there is to it! You could add velcro or another closure to the topping capes; we just used safety pins. The hats stayed on pretty well until we bent over; bobby pins will help keep them in place. 


This was a really fun costume. It's easy to store (pull out the cherry stems, stack the hats, and fold the capes) so I'll be hanging onto them to possibly wear in the future. 

5/26/23

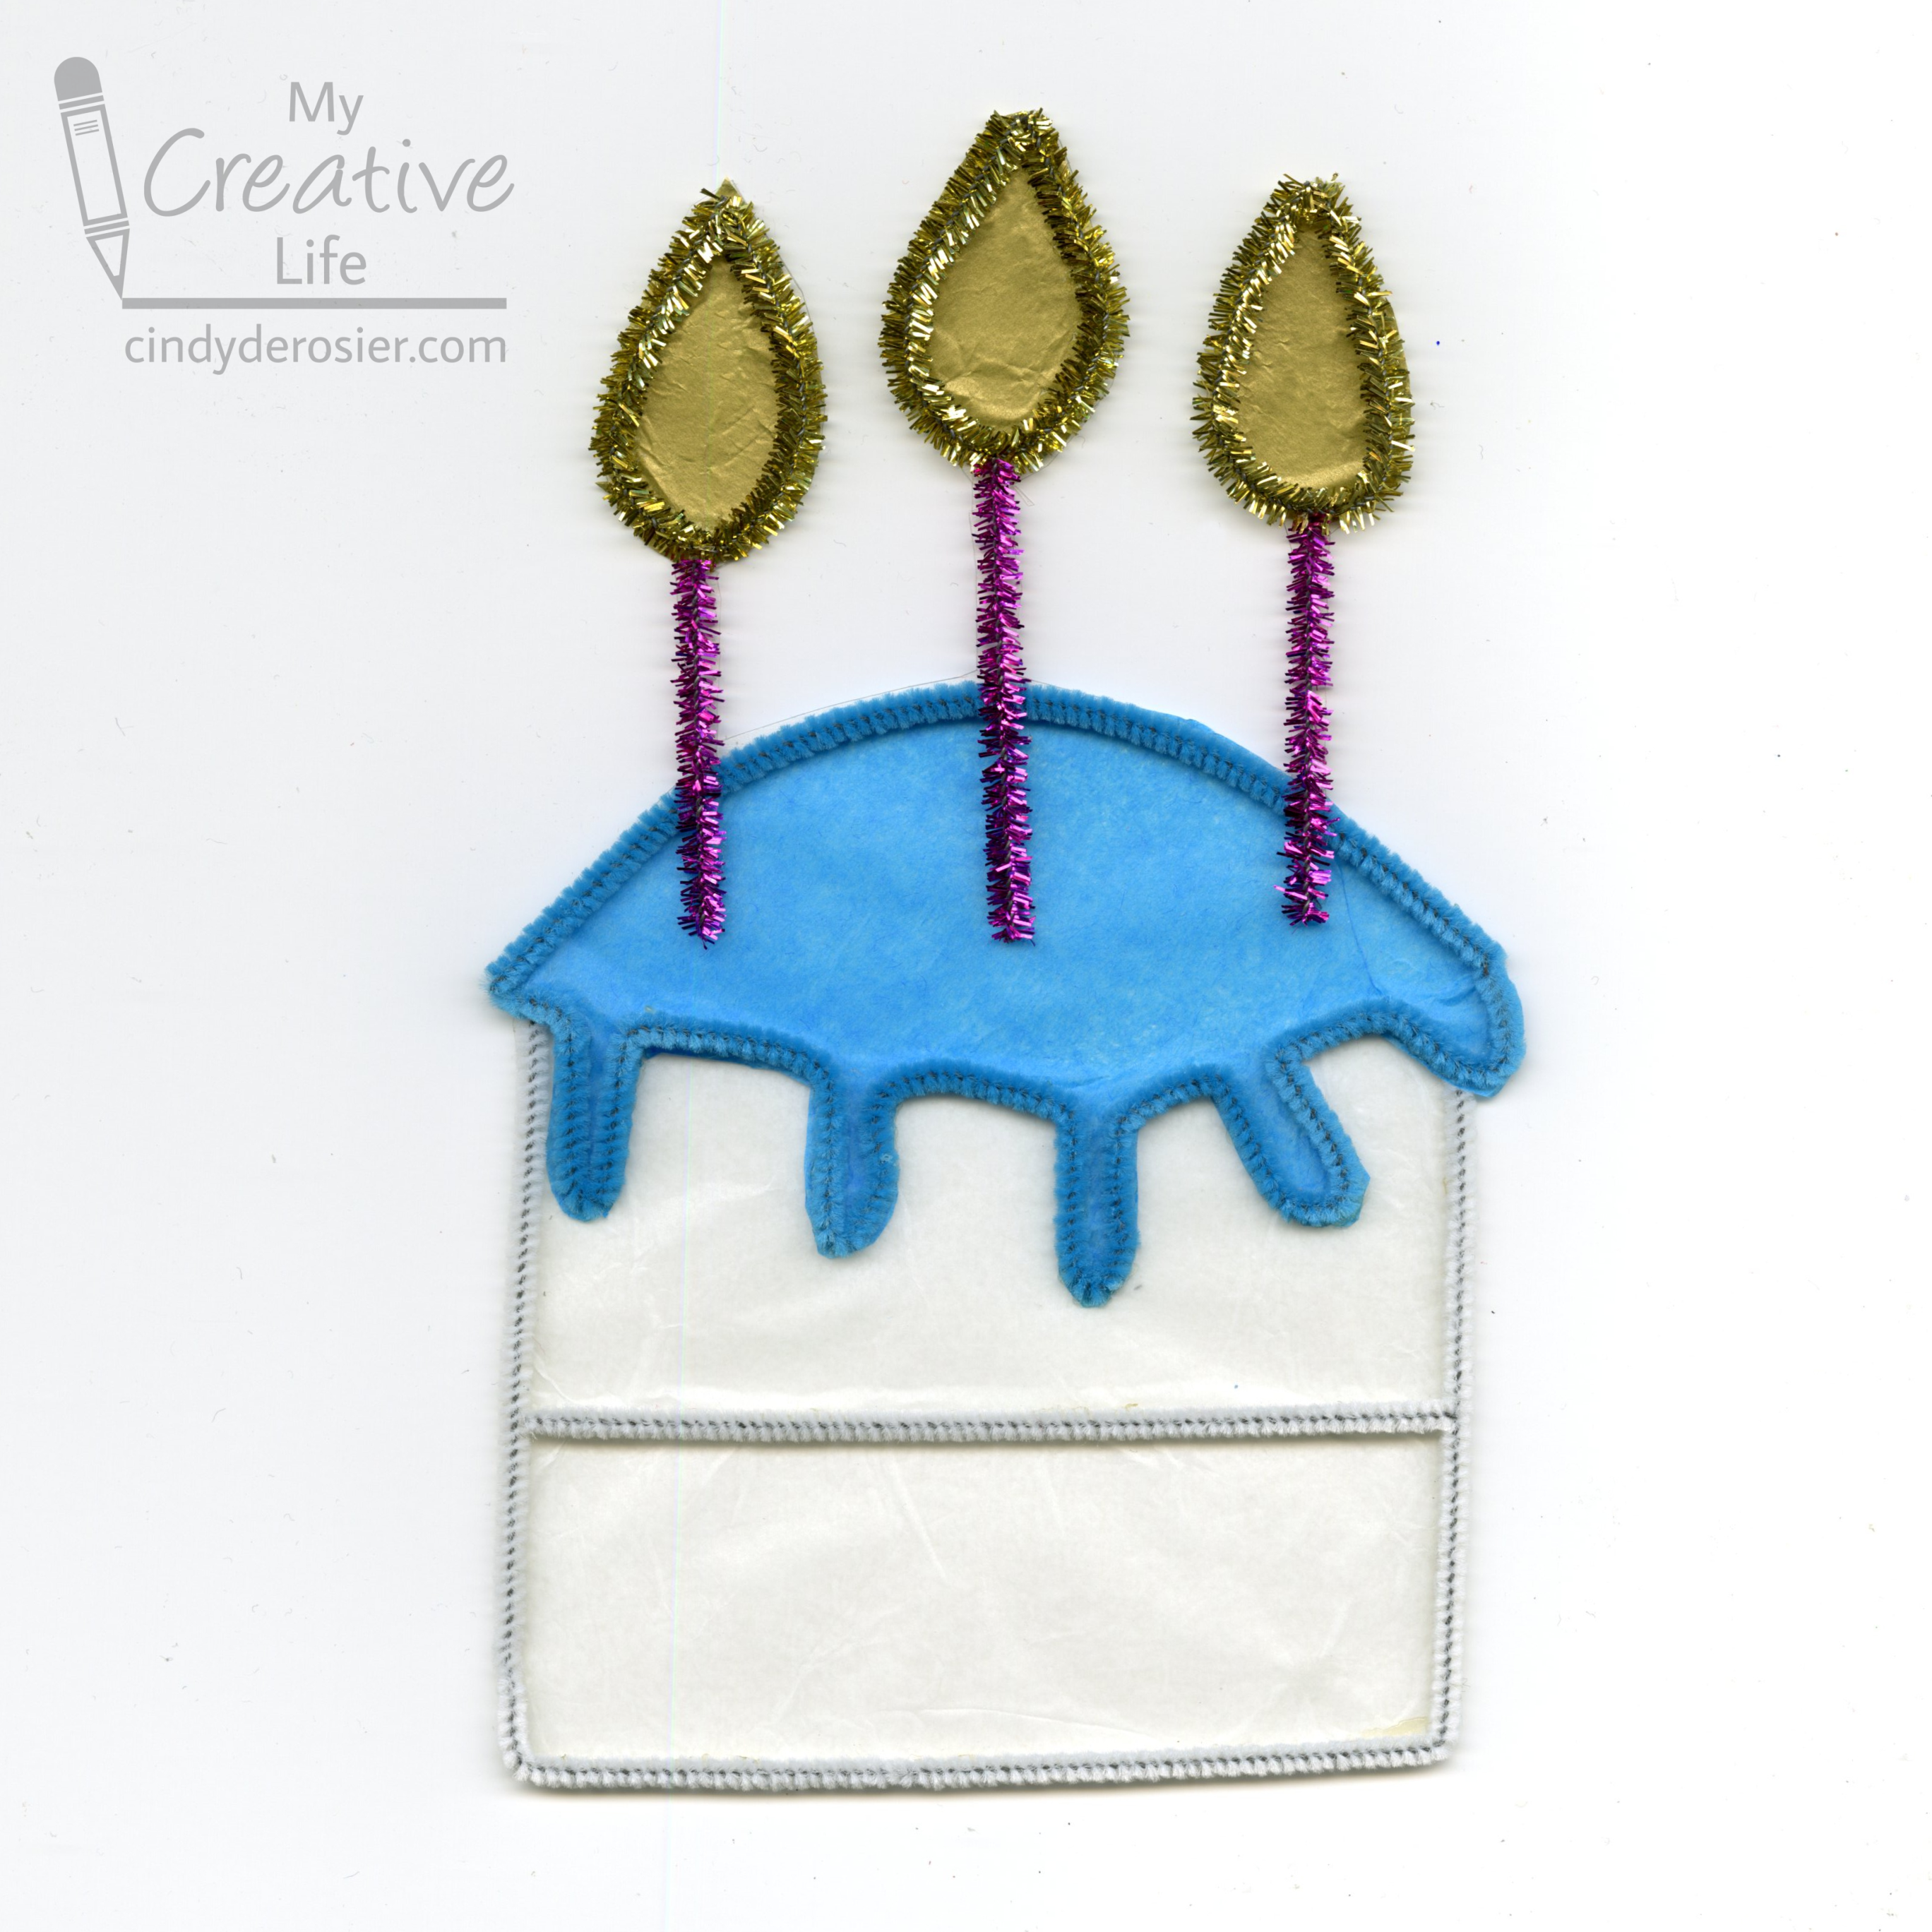
Pipe Cleaner Cake Sun Catcher

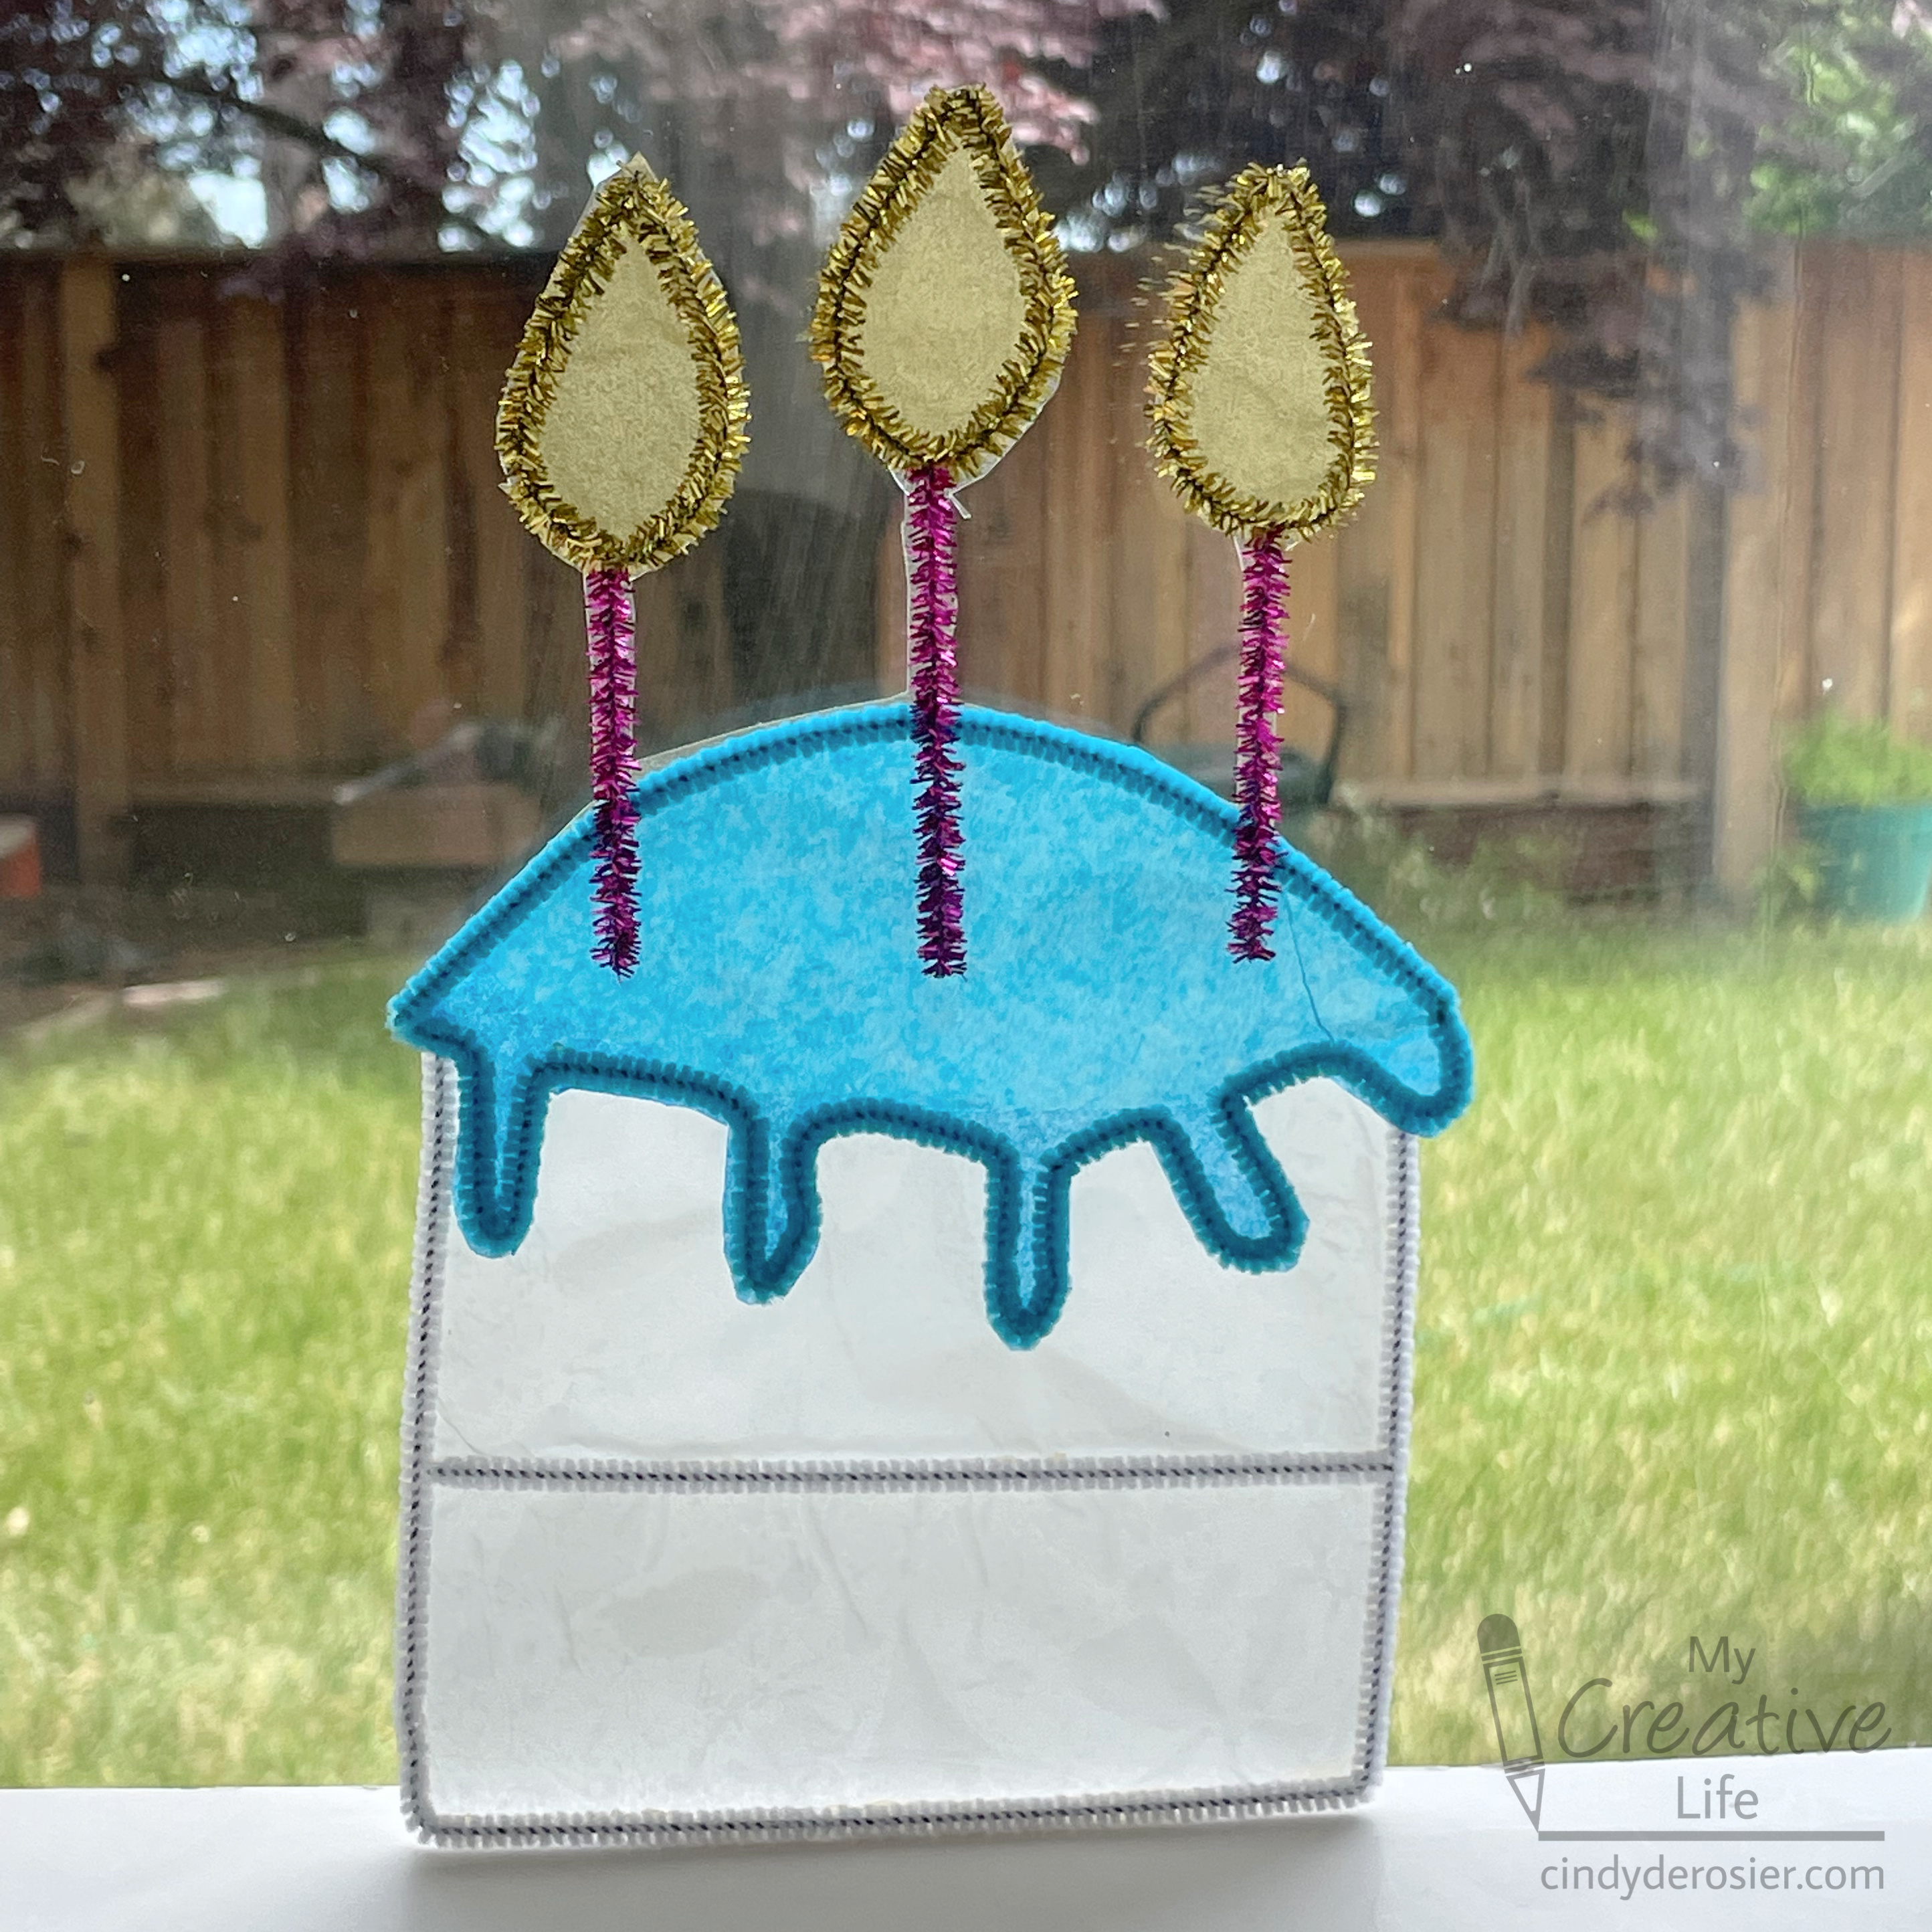
It is so satisfying when I try something new and it works. It took some experimenting to make this sun catcher out of pipe cleaners and tissue paper, but I'm really happy with the results. It looks so pretty sitting in the window. Affiliate links below.


Pipe Cleaner Cake Sun Catcher


Materials:


Steps:


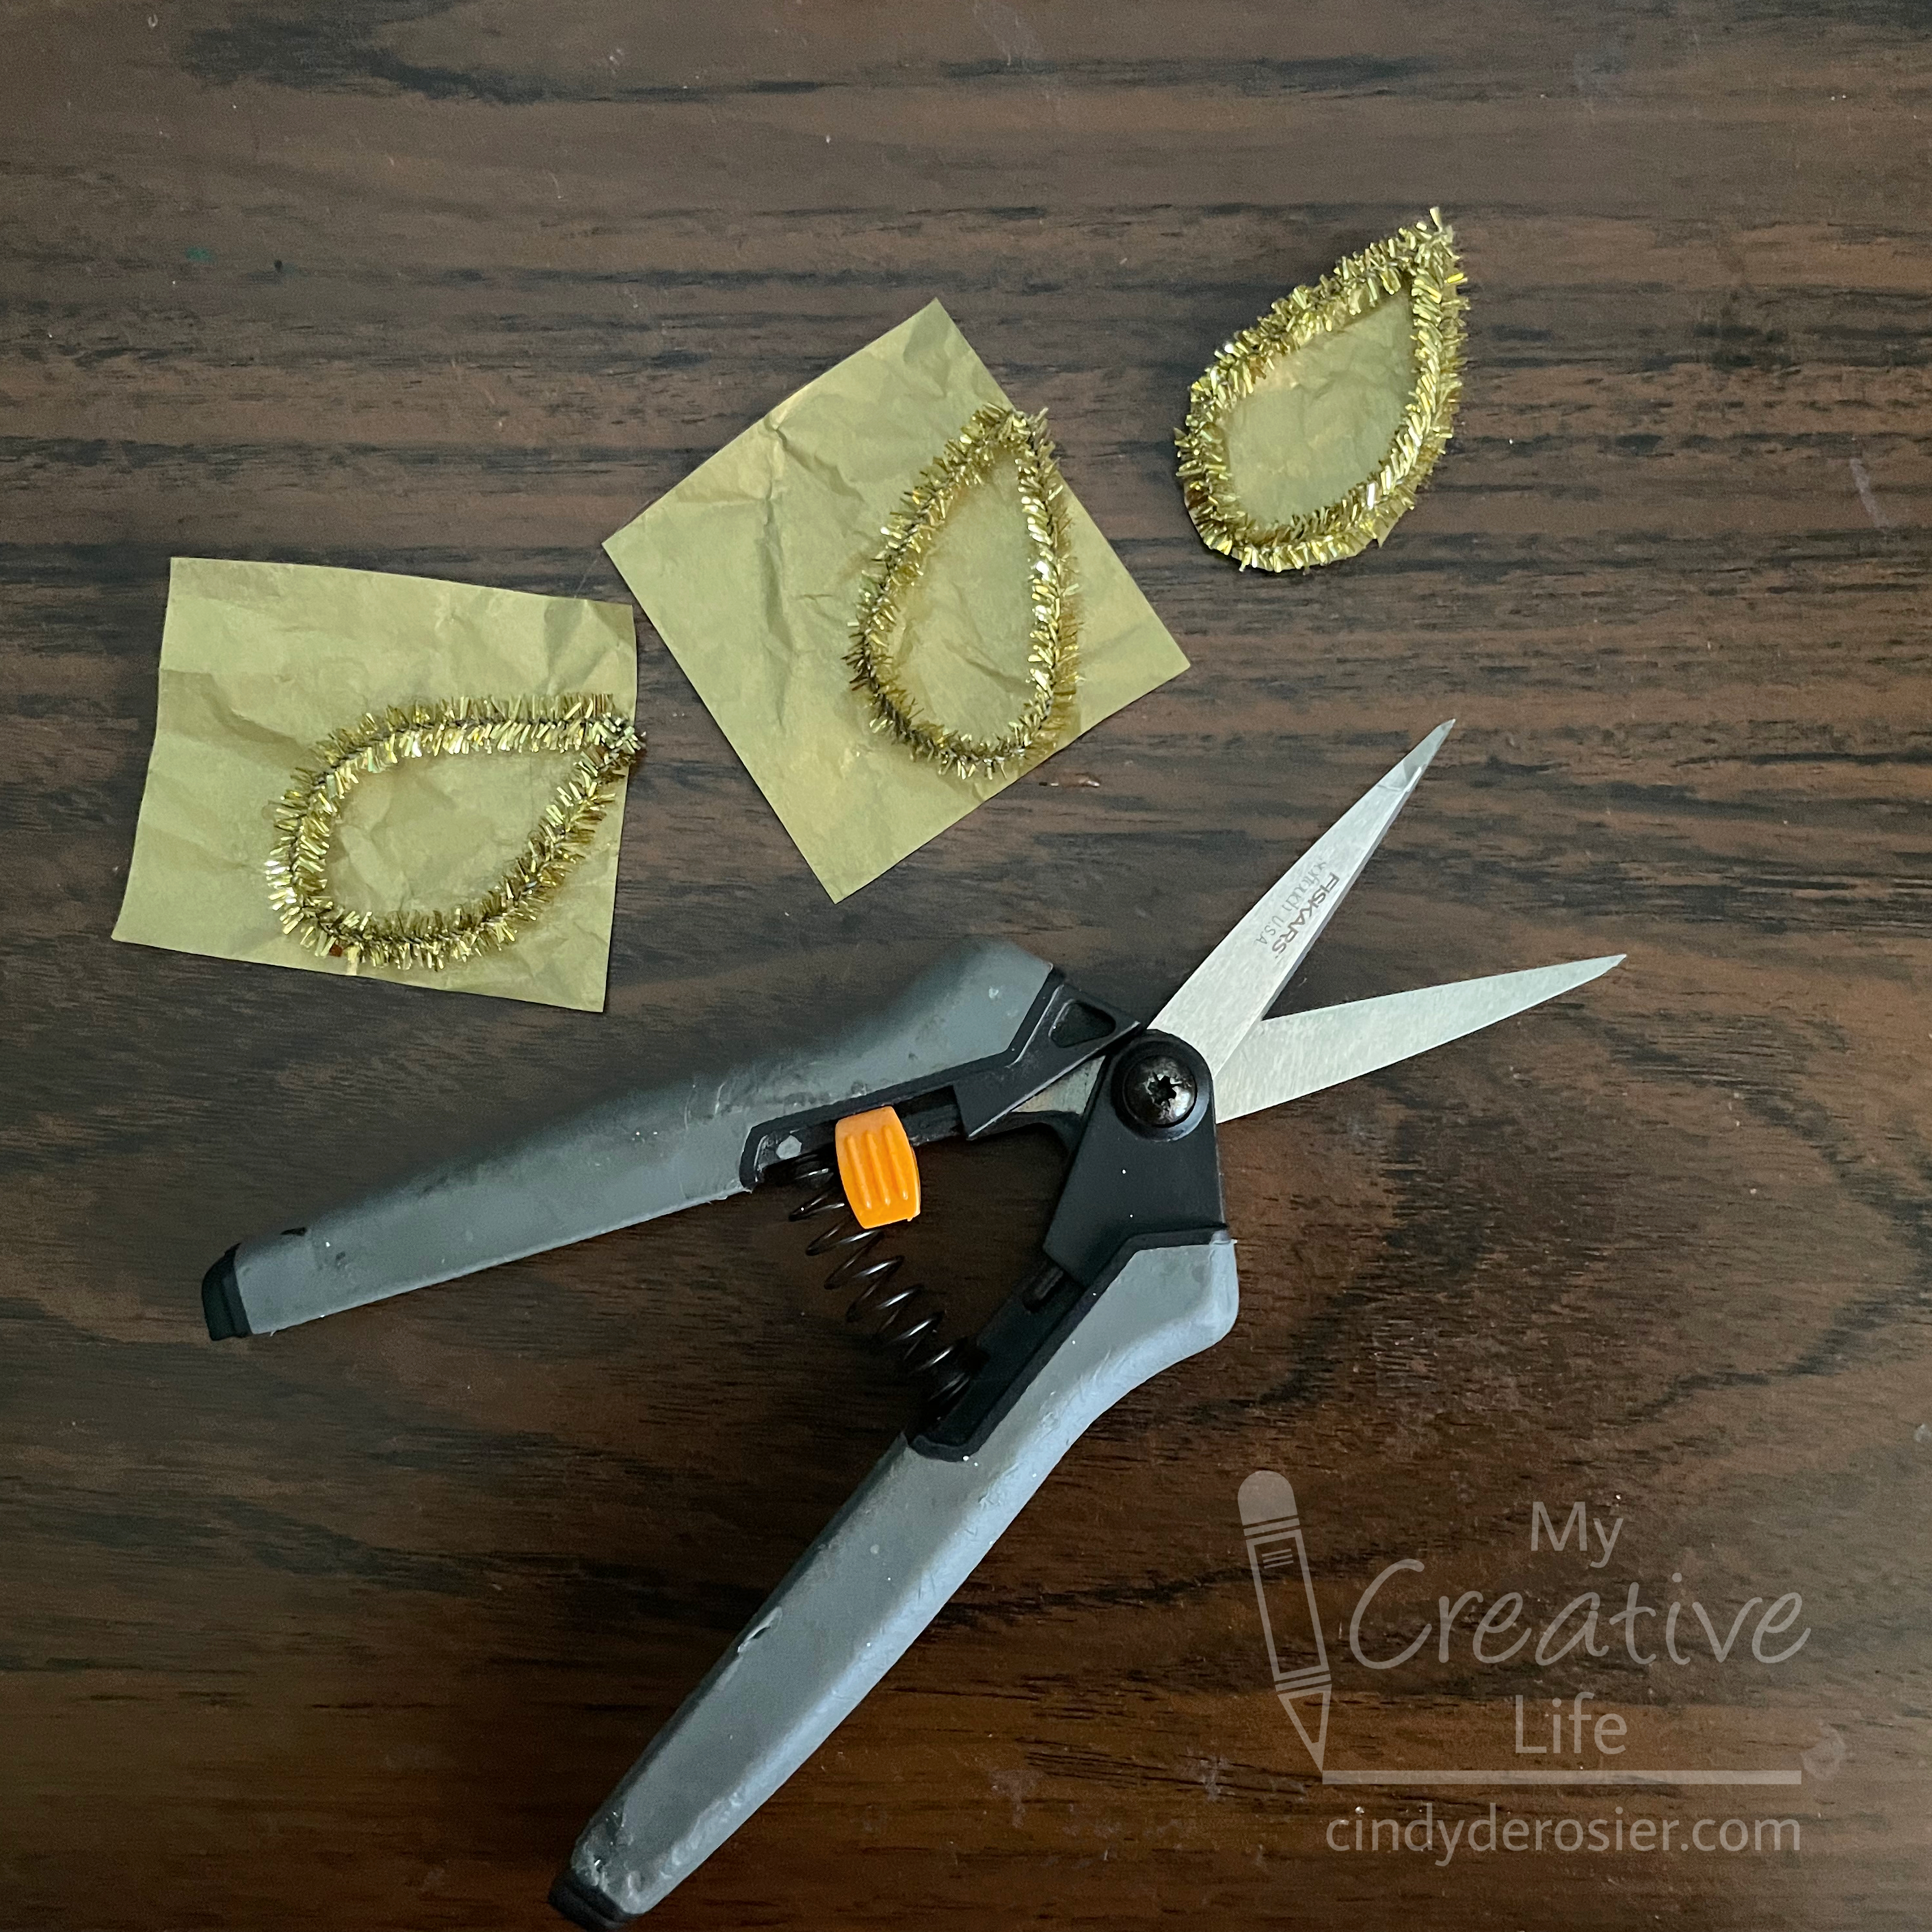
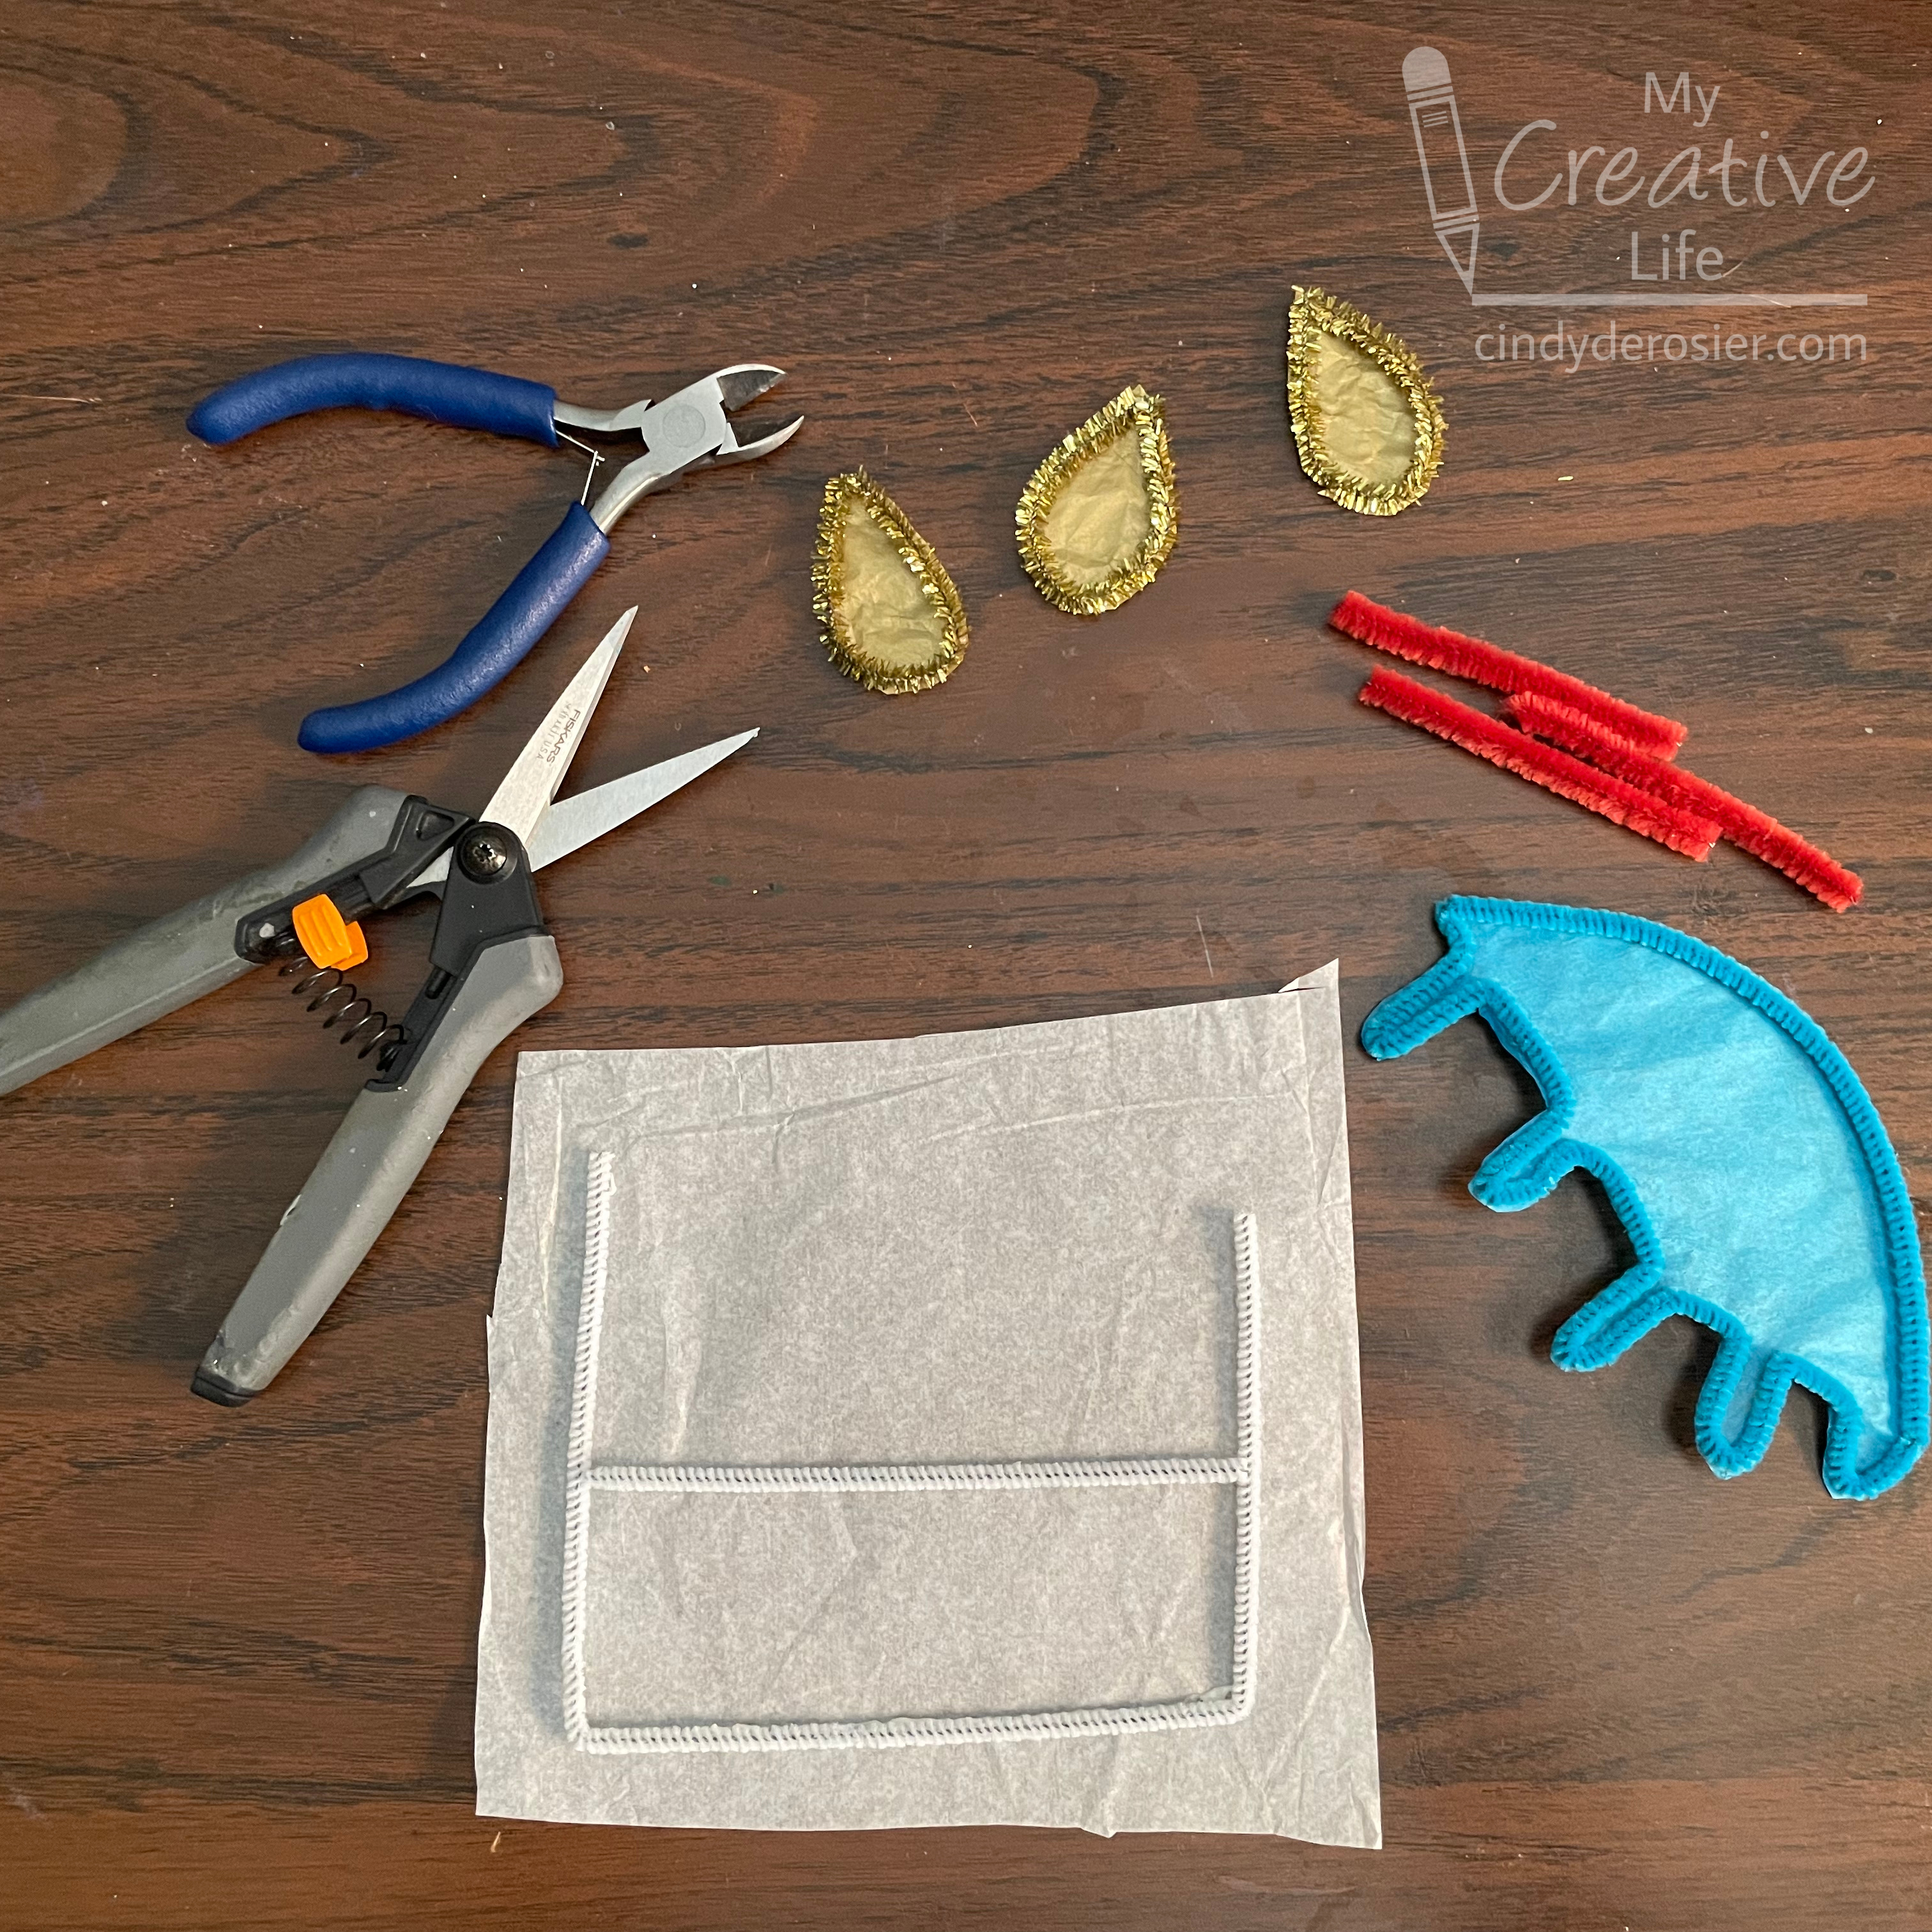
I started with the easiest part of this project, the flames of the candles. Cut a gold pipe cleaner into thirds (use the wire cutters - don't ruin your scissors), then bend each to form a teardrop shape. There's no need to twist the ends together; the bend should hold. You can put a drop of glue between the ends if you want. Put glue onto one side of each teardrop, then place them on pieces of gold tissue paper. Hold them in place for a minute to let the glue set. When the glue is dry, carefully trim away the excess tissue paper. 


Use the same technique for the base of the cake and the frosting. For the cake, bend one white pipe cleaner into rough thirds to make a U-shape. Glue this to a piece of white tissue paper. Use a second white pipe cleaner to cut the piece that forms the layer of the cake. Glue it in place. 

Bend one blue pipe cleaner into an arc that will be the top of the frosting. Use a second pipe cleaner to make the frosting drips. Unless you are extremely lucky or skilled, the frosting won't fit perfectly on the cake the first time you try. Just make adjustments until it's correct, then glue it to blue tissue paper. Again, hold it in place for a minute while it sets so that it doesn't spring out of position.


Cut three lengths of pipe cleaner for the candles. As you can see above, I originally planned to use plain red pipe cleaners. I decided purple glitter candles would look better. 

Trim the cake and frosting. Fit everything together on the table, then cut a piece of contact paper that is slightly larger than the width and height of the assembled project. Peel away the paper backing with the sticky side of the contact paper facing up. Move the cake base to the contact paper and press it down firmly.    


Put glue along the edges of the frosting drips, since they will be touching the cake and not the contact paper. Put the frosting in place. Add glue to the bottom portion of the candles (where they will be touching the frosting) but not to the upper portions (where the contact paper will hold them) and place them where they belong. Then adhere the flames to the contact paper. Let the glue dry completely. 

Not all designs will require this, but because the candles have such narrow attachment points, they could flop forward if not better supported. Through experimentation, I found that adding a second layer of contact paper eliminated the problem without affecting the translucency. Do this by peeling away the backing paper on a second piece of contact paper and placing the assembled cake on top of it. 
 
Carefully cut away the excess contact paper.  


I showed you what it looks like in a window at the top of the post. This is how it looks against white paper.


Obviously, you can use the same technique for any design. I have some ideas I'm eager to try!

4/14/23

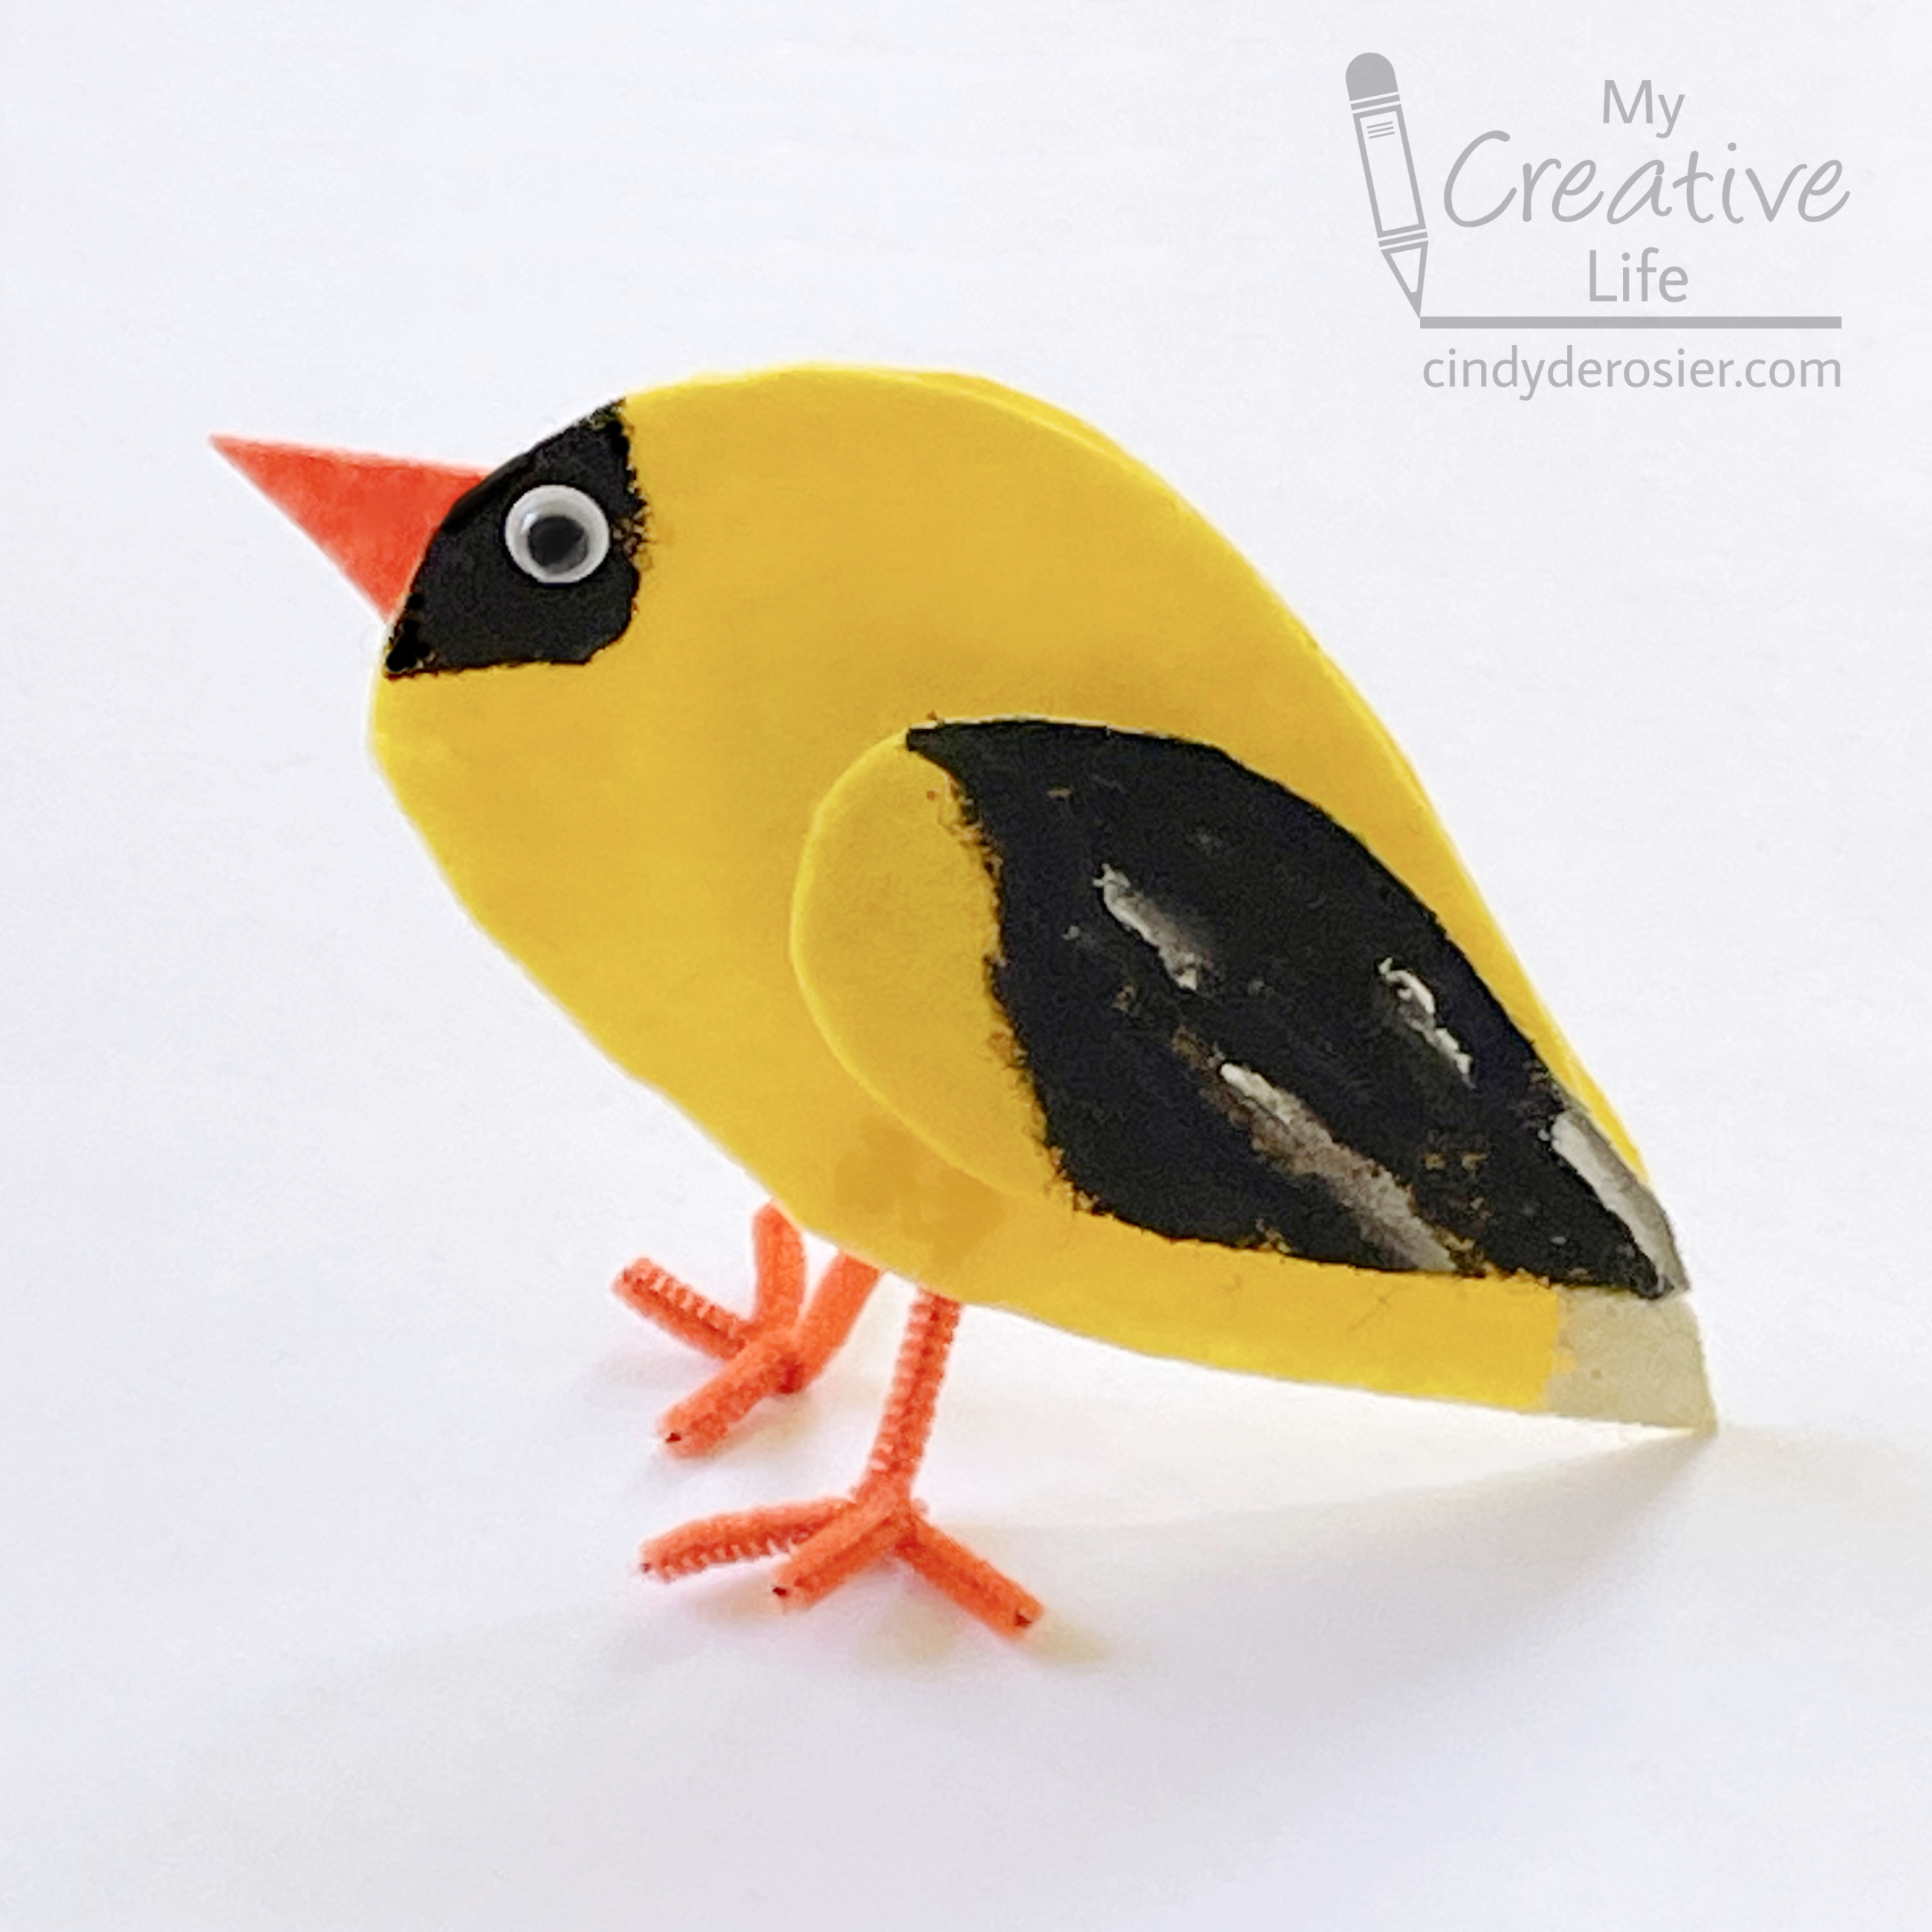
Felt American Goldfinch

My mom is very knowledgable about backyard birds. Despite years of her telling me the names of the various birds at the feeders (both at our home in California and when we visited relatives in Washington), one of the very few I was able to recognize as a kid was the American Goldfinch. Its distinctive yellow body with black forehead and wings stood out from the other various finches and whatnot that congregated at the feeders and birdbath. The goldfinch is the state bird of Iowa, New Jersey and Washington; I'd done my 5th grade State Report on Washington and had to draw a goldfinch for my report, so that helped cement it in my mind. All these years later and I'm still not much better at identifying backyard birds, but I can always spot a goldfinch. 

This felt version stands on its own and is fun project for kids to try. Obviously, you can adapt it for practically any similarly-shaped bird. Affiliate links below. 


Felt American Goldfinch 


Materials: 


Steps: 


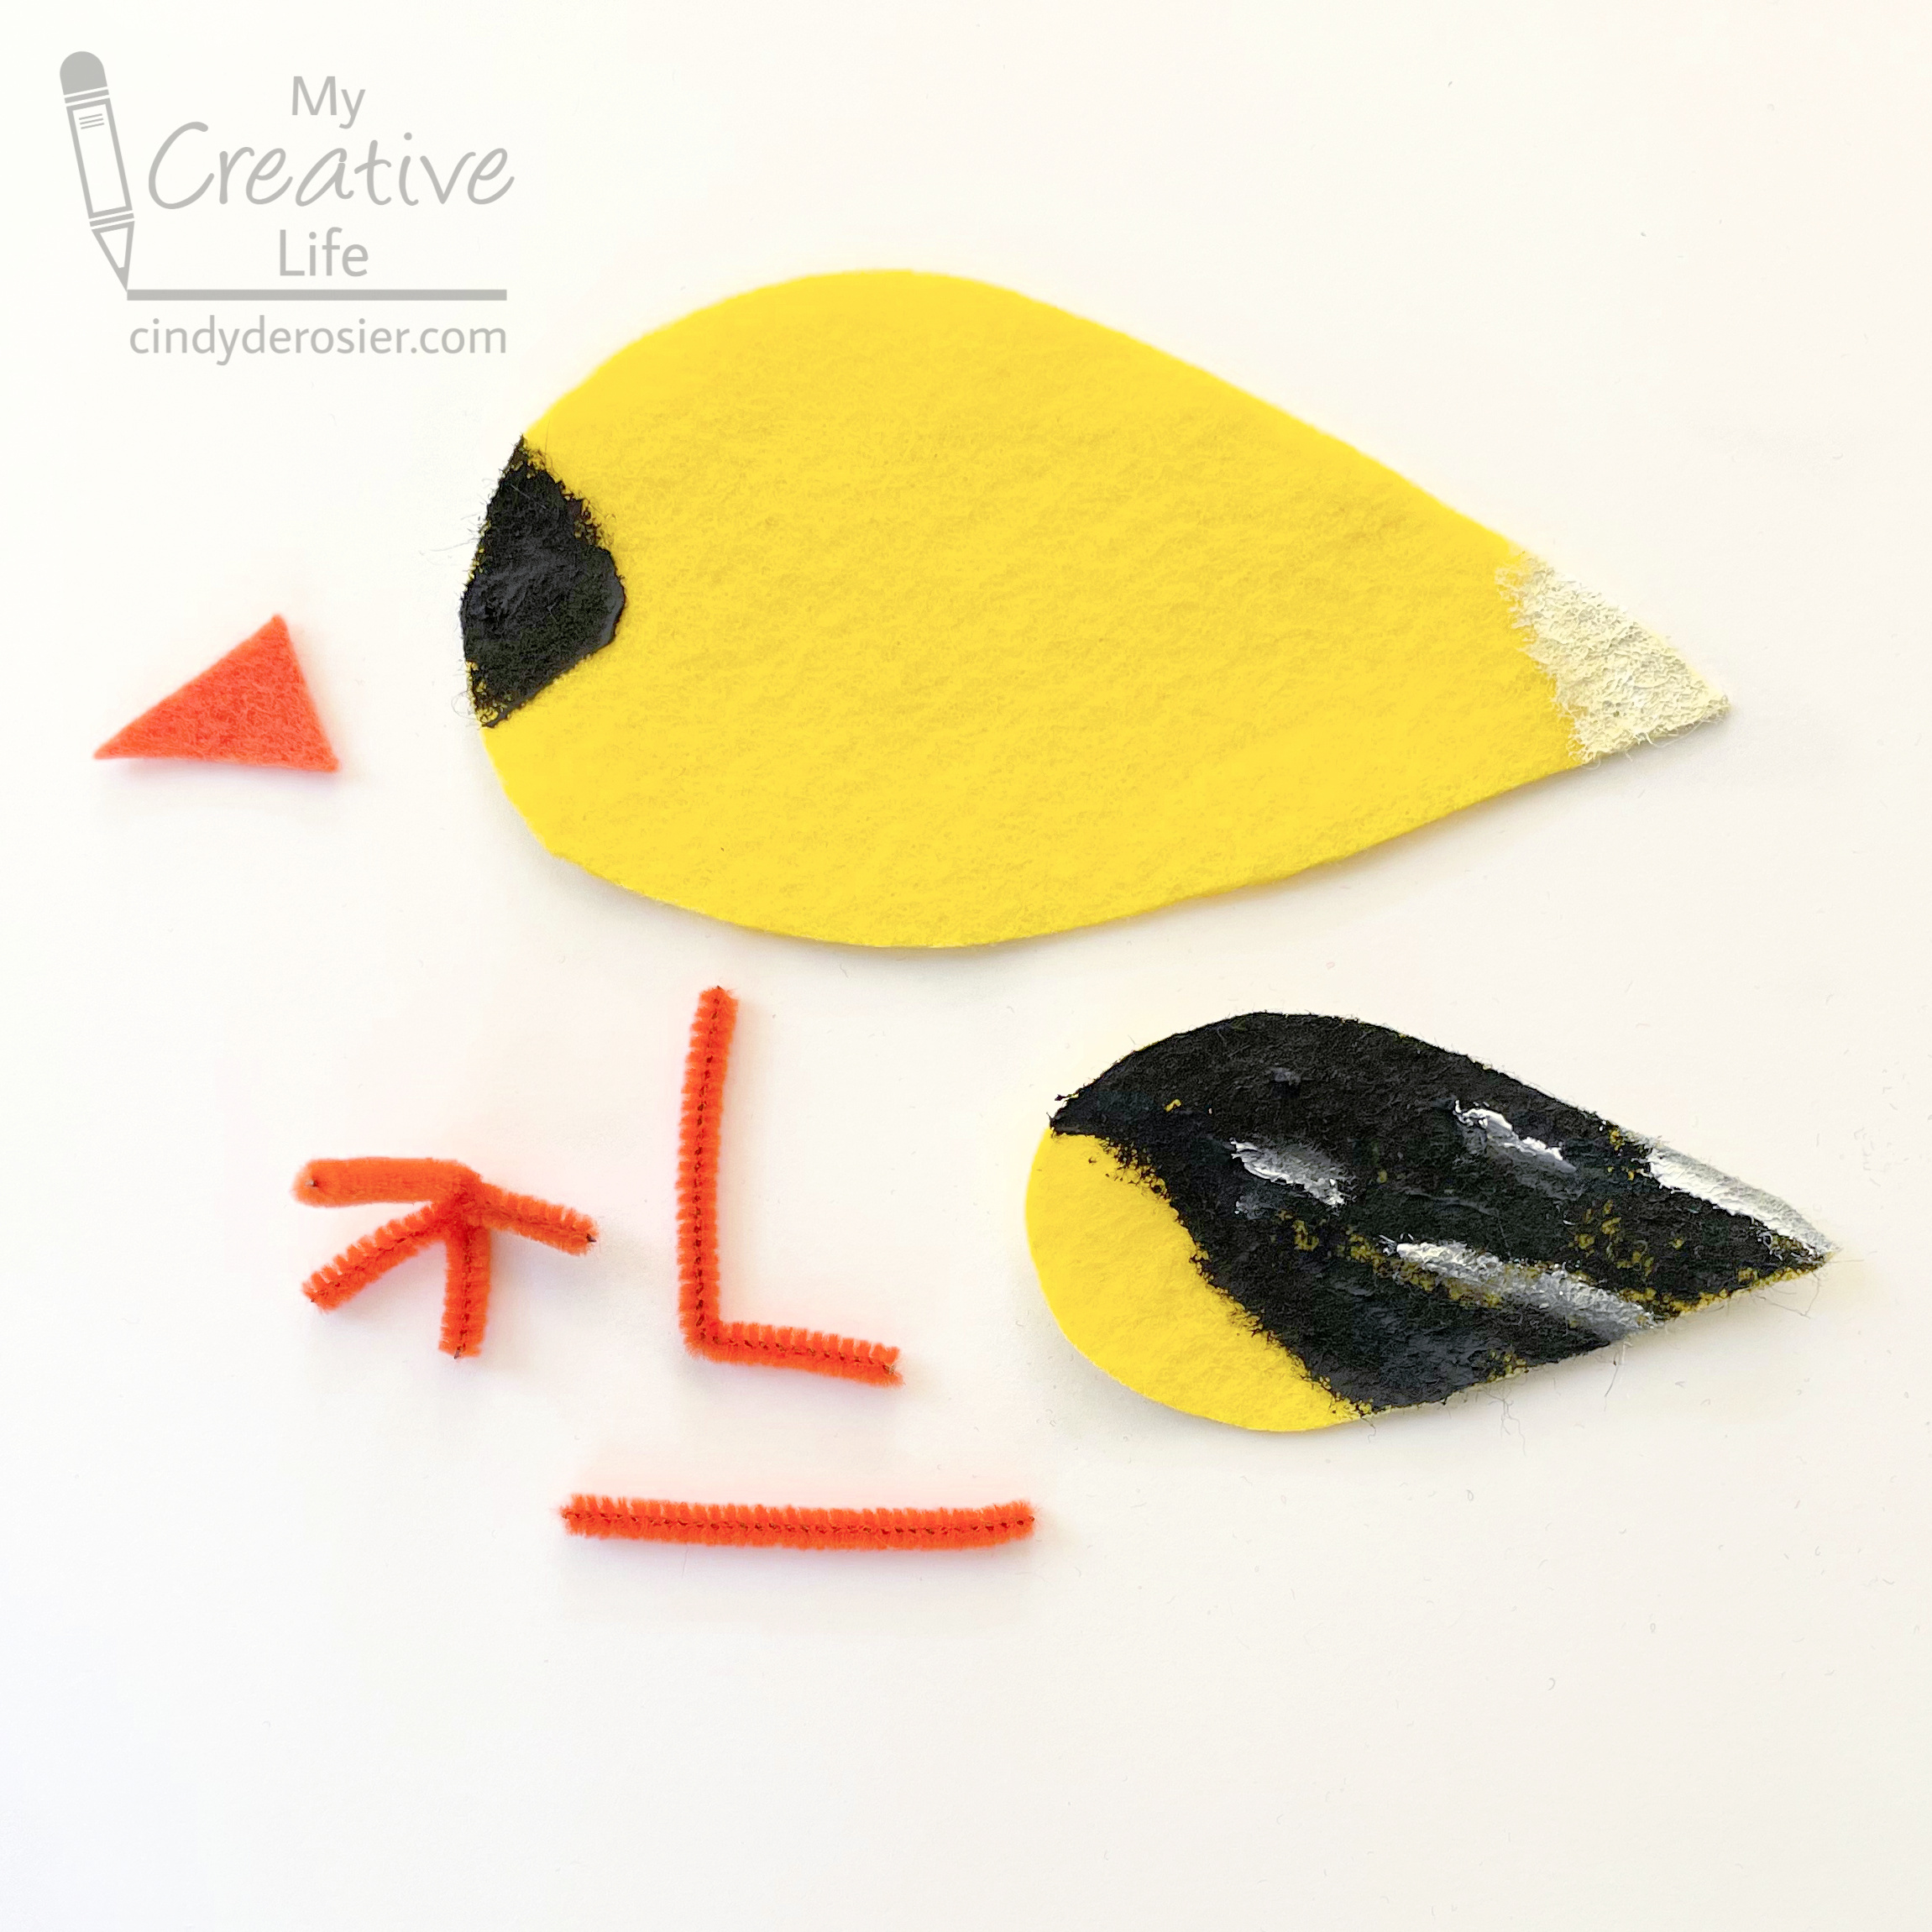
Cut out two large teardrop-shaped body pieces from yellow felt. Cut two smaller teardrop-shaped wing pieces from yellow felt. Cut a triangular beak from orange felt. 

Using a photo of a goldfinch as a reference, paint the forehead and part of the wing black on each of the two body pieces. Paint the tail white on each side, then add streaks of white to the wings. 

Cut an orange pipe cleaner into four lengths. To make each foot (shown completed below on the left), you will need one piece bent like an L and a second straight piece (shown on the right). Twist the straight piece around the L, then adjust the toes so they're evenly spaced. Trim off any excess so that the toes are the same length. 


To assemble your goldfinch, glue the wings and eyes to each side of the body. Glue the legs to the INSIDE of one of the bodies, making sure the toes face forward. Glue the beak to the inside of this body part as well. 

Add glue around the edge of this piece, leaving a gap where the legs are for stuffing. Press the two body pieces together. Push Poly-fil inside the goldfinch, then glue the opening closed. 

You may have to adjust the feet a bit, but once you do, your goldfinch will stand on its own.

10/31/22

"I Am Not Candy Corn"

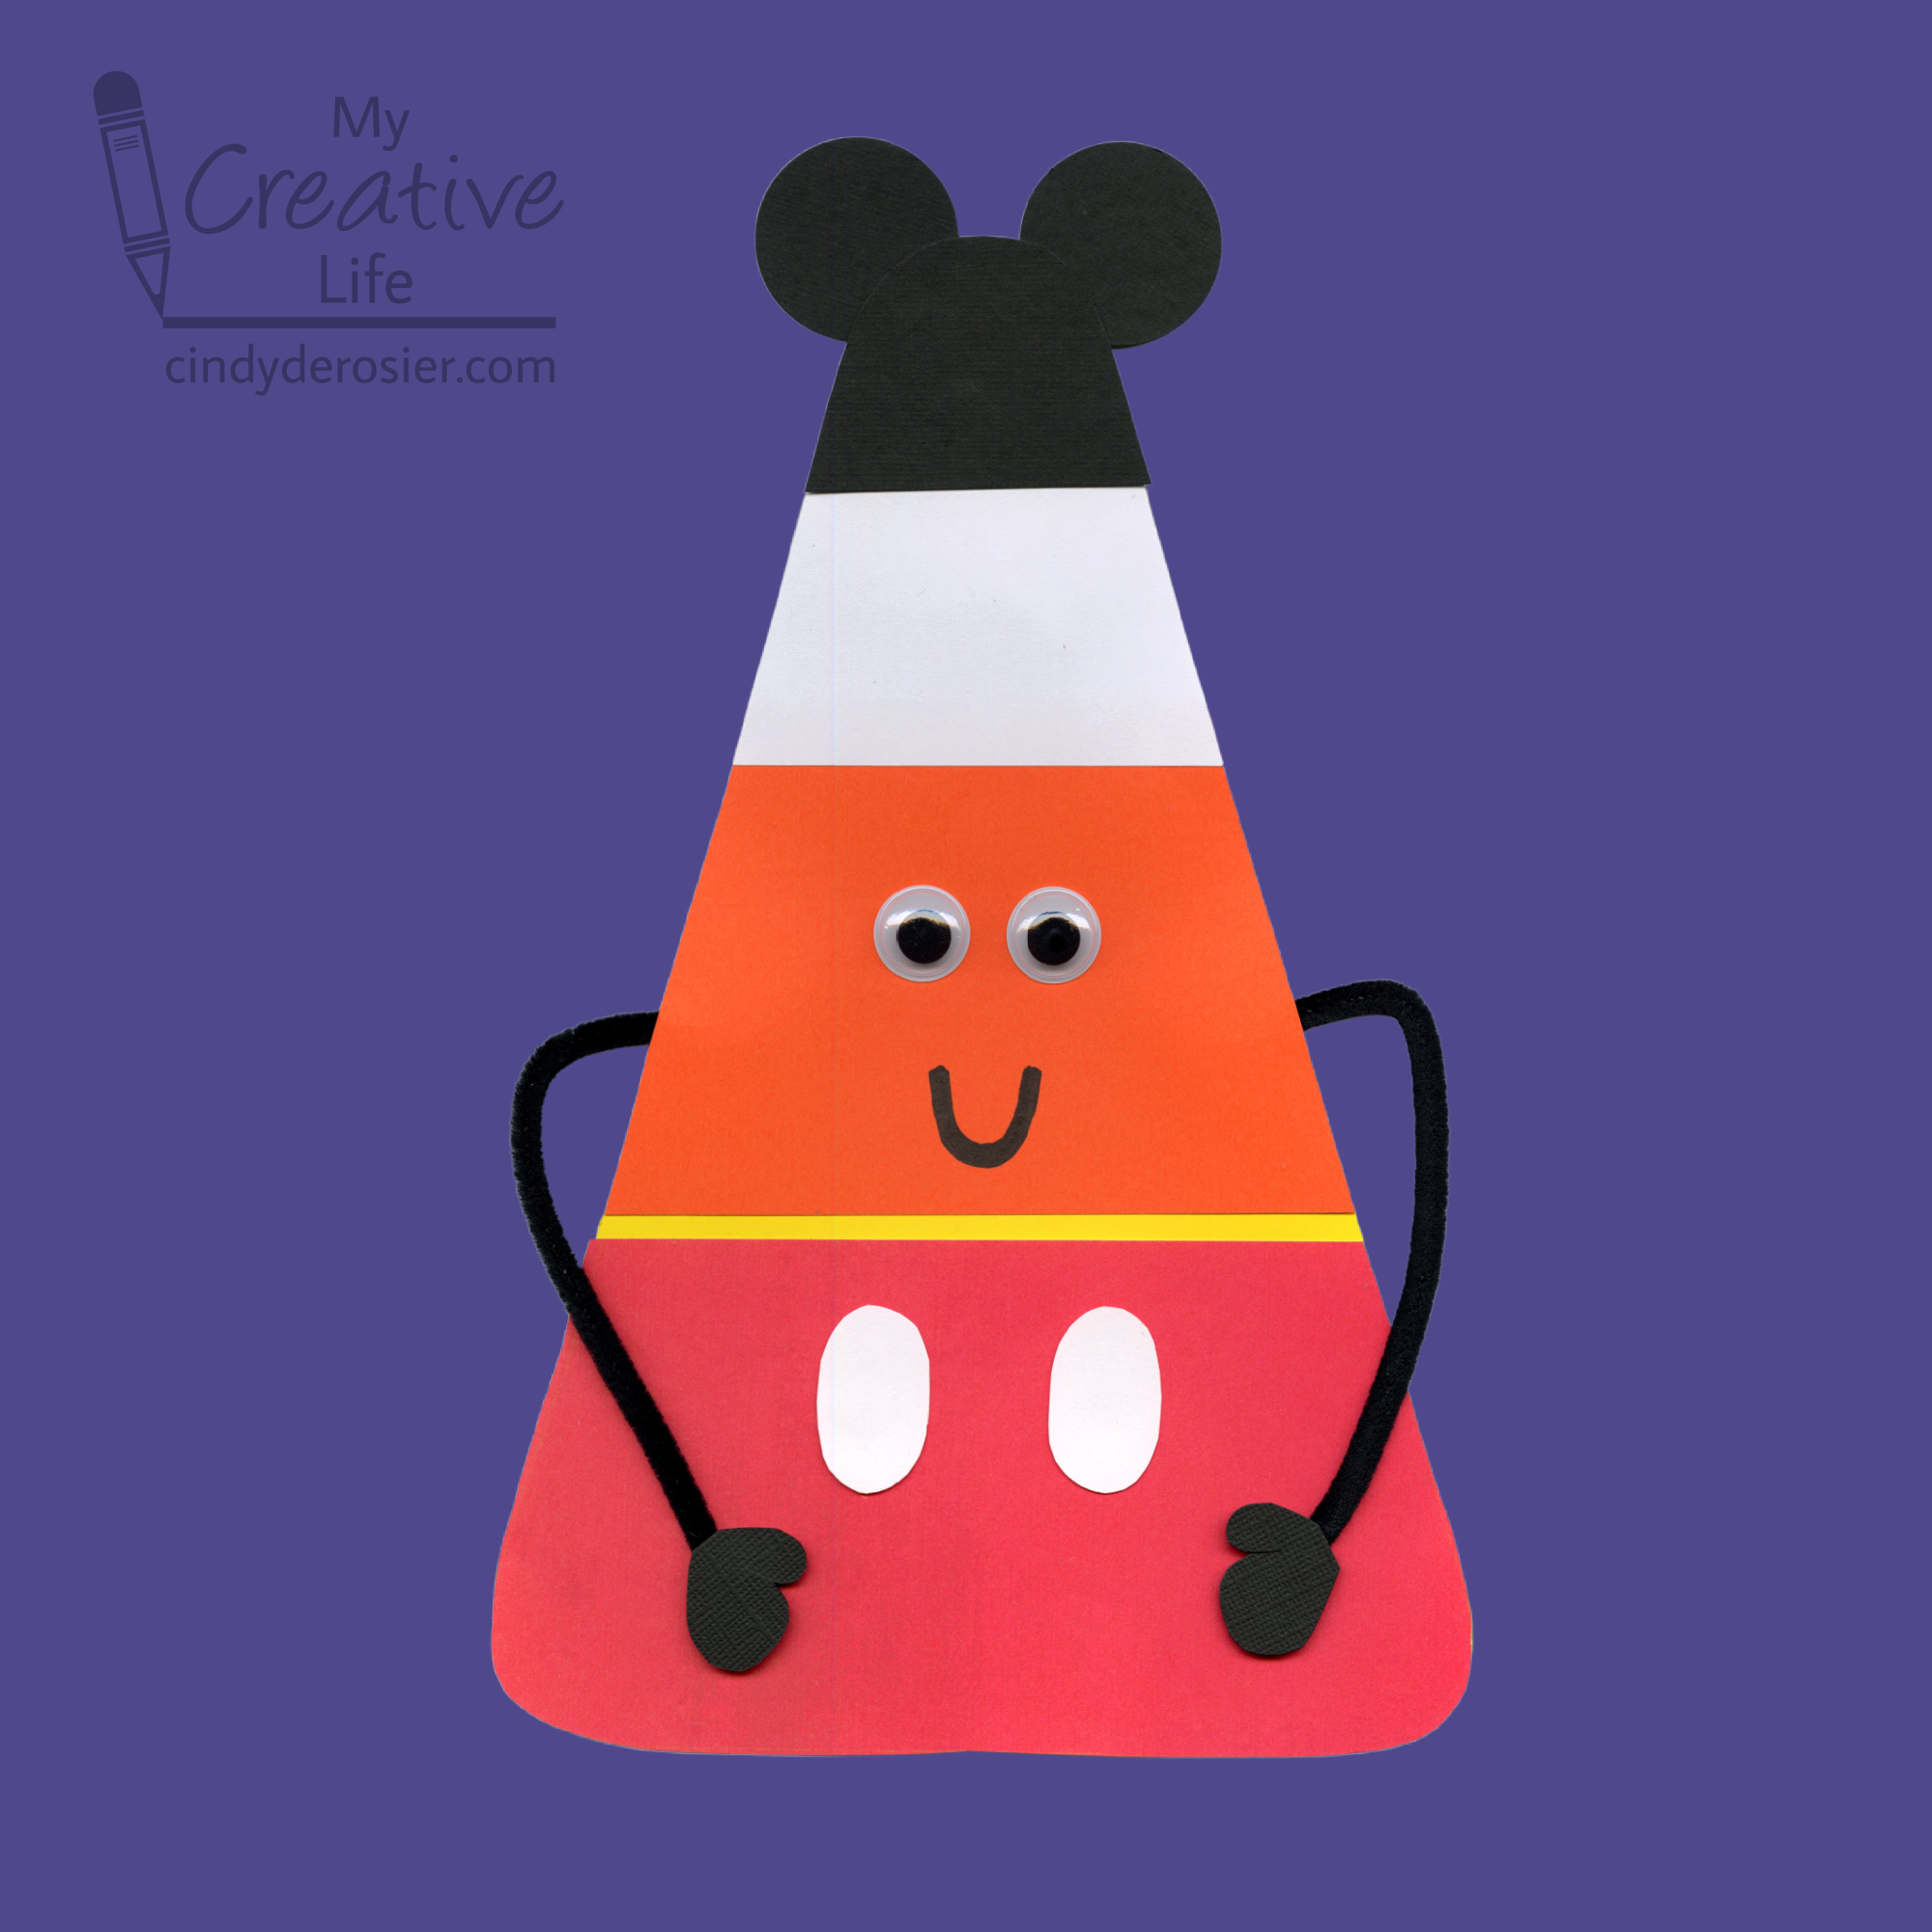
To understand today's craft, take a look at this homework assignment that Trevor completed 10 years ago as a first grader. It's adorable, and so is my version (if I do say so myself. And I do.) Then look at this Candy Corn Character I made last Halloween. When I dug him out of the Halloween decoration box, it got me thinking that October is to my candy corn guy as November is to that turkey. So I gave my candy corn character a disguise. He can wear it until Halloween has safely passed and then return it to the turkey.  


I don't know what all this talk about candy corn is... all I see is Mickey Mouse! 

I would love to have seen how 6-year old Trevor would have disguised his candy corn. Unfortunately, 16-year old Trevor has too much homework and too little interest in crafting with me anymore. Sigh. 

If any of you have 6-year olds with lots of creativity, I'd love to see their versions! Follow the directions to make the Candy Corn Character, then you can add whatever you need for the costume. All I used was black, white, and red cardstock, scissors, and glue. 

By the way, it would be completely inappropriate to snack on candy corn while making this project, but all other candies are on the table. Here's an affiliate link to one of my all-time favorites, which inexplicably is not universally popular. Happy Halloween!

10/13/21

Candy Corn Character

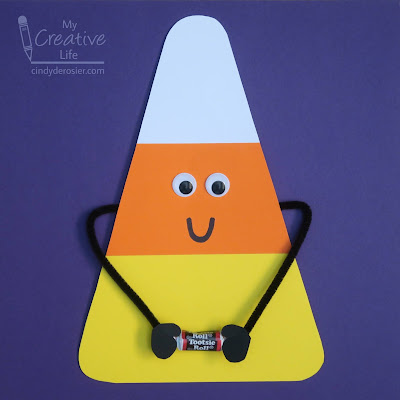
It's a proven fact that googly eyes make everything cuter. Add them to a construction paper candy corn and you have cuteness overload. Not only is this guy adorable, but he'd like to offer you some candy. Affiliate links below. 


Candy Corn Character


Materials:


Steps:


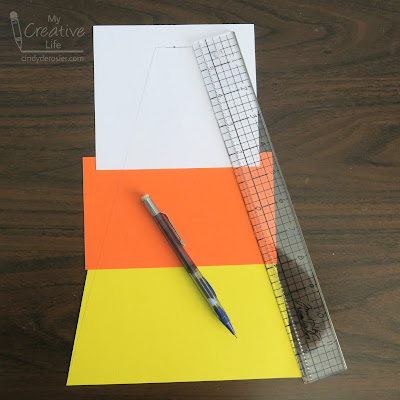
Cut the yellow cardstock into a piece approximately 6"x4", the orange 5"x4", and the white 4"x4". Layer the pieces with a slight overlap and glue them together, as shown below. 

Use a centering ruler (or eyeball it) to find the center of the white cardstock. Mark it with a dot. Extend that line an equal amount (about 1/4") in each direction and mark those points. Use a straight edge to draw lines from each corner of the yellow to the points you just drew. 


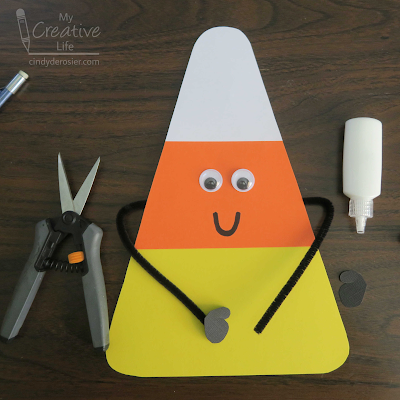
Cut along the two lines to form a triangle. Then round off the three corners to make the iconic candy corn shape. 

Glue the googly eyes in place, then draw a Sharpie mouth. Cut a pipe cleaner in half, then bend them to form arms. Glue them to the back of the candy corn. Cut two hands/gloves from black and glue them to the ends of the pipe cleaner pieces. 


When the craft glue is dry, use a Glue Dot to attach the candy to the candy corn. If you're careful, you'll be able to remove the candy in the future without damaging your character. 

Are you a fan of candy corn? For fun, I searched "weird candy corn" to see what came up and I was not disappointed. Perhaps I can interest you in these, um, unique flavors

7/27/21

Playdough Texture Tools

I was a big fan of Play-Doh when I was a kid. Specifically, I liked the play sets. My favorites were the barbershop, the ice cream maker, and the barbecue set. (These affiliate links go to the modern versions of the 1970's toys I loved.) I still like playing with doughs and clays, but it's been years since we've had any Play-Doh in the house. (Trevor played with it occasionally when he was little, but it just wasn't his thing.) Now I use Model Magic, Sculpey, or homemade salt dough when I am in the mood to play with clay.

The last time I had my clay out, I made myself a set of texture tools using random items from the craft room. I'm really happy with how they turned out. 
 

The first step was gathering craft sticks and a bunch of random stuff. I wasn't sure what would print well on clay, so I tried a wide variety of things. 


Next, I attached each item (pony beads, buttons, a wooden swan, a rubber band, yarn, a chipboard tree, pipe cleaner, a shiny trim, Twisteezwire, pennies, and a feather) to craft sticks. I used hot glue for everything except the rubber band, pipe cleaner, and Twisteezwire, which I just wrapped around their craft sticks. 


I pressed each into the clay....


.... lifted them up to see the results. Most of them printed very well! The only total failure is the feather. The clay stuck to it and it didn't print well. The thin trim isn't great, but it was better than expected. 

I am most happy with the pony beads and the buttons. They give great texture to the clay. My second favorites are rubber band, pipe cleaner, and Twisteezwire. 


Make your own set of texture tools for playdough! Kids will love every step, from searching the house for items to use, to pressing their tools into dough to create textures. If you try anything that works particularly well (or particularly poorly!) let me know in the comments. 

7/22/21

Puzzle Piece Monarch Butterfly

After you turn a puzzle piece into an alien, the next logical thing to do is to turn one into a butterfly. A monarch, to be specific. Affiliate links below. 


Puzzle Piece Monarch Butterfly


Materials:


Steps:


Prep the puzzle piece by painting a coat of gesso on the glossy surface. When the gesso has dried, add an orange base coat. Let it dry completely. 

Use a fine-tip Sharpie to color the sides and edges of the puzzle piece black. Then use an ultra-fine Sharpie to add lines that mimic the patterns of a monarch. 
 

With the white Uniball pen, add dots around the outside edges. 


Wrap a pipe cleaner around the puzzle piece to make the body of the butterfly. The top and bottom should extend beyond the puzzle piece, and the ends should be hidden on the back side. 

Cut a piece of Twisteezwire and wrap it around the the top of the pipe cleaner, twisting to secure it. Curl then ends around the body of the pen to create the curl.  


So far, I've turned puzzle pieces into a ladybug, crab, reindeer, girl, wreathalien, and now a butterfly. Trevor has made a spider and a bug. There are still several dozen pieces left from the terrible puzzle - what should I make next?

7/9/21

Handprint Monarch Butterfly

I'm a huge fan of handprint (and footprint) crafts. If you ever see me staring at my hand while twirling it slowly around, I'm probably thinking about a potential handprint craft. Today's is a monarch butterfly. Affiliate links below.


Handprint Monarch Butterfly


Materials: 


Steps:


Paint a clothespin black, then set it aside to dry. 

Dip one hand into orange paint, then use the paintbrush to add black lines on top of the orange paint. Work quickly so that it doesn't dry. 


Press your hand onto the blue paper. Pay attention to which hand you are stamping - the right hand goes on the left and the left hand goes on the right. Repeat the process with the second hand, leaving a small gap between the two handprints.


Use the tip of the paintbrush handle to add tiny white dots along the edges of the handprints. Let the paint dry completely. 

Wrap a length of pipe cleaner around the clothespin and then bend the ends gently to make antennae. Glue the clothespin to the center of the paper between the two handprints. 


The monarch butterfly is the official state insect of Alabama, Idaho, Illinois, Minnesota, Texas, Vermont, and West Virginia, but no matter where you live it's a great craft to make.

3/24/20

Posable Spoon Elvis (Jailhouse Rock Era)

As promised in my Cardboard Tube Elvis tutorial, I made a Young Elvis craft for you. Specifically, it is a Posable Spoon Elvis from Jailhouse Rock. 


I watched the Jailhouse Rock video about a thousand times for inspiration. It's one of my all-time favorite dance routines. Did you know that Elvis choreographed this himself? 


Are you inspired to make your own Posable Spoon Elvis? Affiliate links below. 


---------


Posable Spoon Elvis


Materials:


Steps:


Paint a thin coat of gesso on the spoon. (This will allow the paint to stick without peeling off.) When it is dry, paint the face and neck with Light Flesh. Set it aside to dry completely. 

Cut out the clothes from felt. You'll need a white rectangle for the shirt, two black sleeves, two black jacket panels, and a pair of pants. 


Use the Sharpie to draw horizontal stripes on the white shirt. 

Cut two lengths of black pipe cleaner that are just shorter than the sleeves. Bend the remaining pipe cleaner in half. It will be for the pants. 

Use the Sharpie to draw hair and facial features. Remember that the real Elvis' face is not shaped like a spoon, so cut yourself some slack if your version doesn't quite look like the King. 


Use a strong craft glue to attach the pipe cleaners to the sleeves and the pant legs. Glue the sleeves and other jacket pieces to the shirt. Set the clothes aside to dry. 


Use the scissors to cut construction paper hands, shoes, and uniform number for the jacket. Glue them in place. Fun fact: In the movie, Elvis' character wears #6239 on his uniform while in prison, but it changes to #6240 once he's out.

Glue the jacket and the pants to the handle of the spoon. When everything is completely dry, you can pose Elvis' arms and legs to mimic your favorite of his dance moves.


Not an Elvis fan? You can follow the same steps to create anyone you want! By changing the skin tone, hair color, and clothes, you can make your own action figure of a celebrity, historical figure, or family member. Give it a try!

12/5/19

Pipe Cleaner Wreath Ornament

If you're not familiar with Red Ted Art, it's well-worth checking out. While I don't personally know Maggy, I've admired her kid-friendly crafts for years. Today's project is inspired by Maggy's Easy Yarn Wreath Ornament. I was curious to see what would happen if I switched out the yarn for pipe cleaners. I love the result! Affiliate links below.


Pipe Cleaner Wreath Ornament


Materials:


Steps:


Trace a 3" circle with a 2" inner circle on chipboard. Cut out the pieces to make the base of your wreath.

Snip a green pipe cleaner in half and set one piece aside. Fold the other piece in half, and hold it behind the base with the folded end pointing toward the outside of the wreath. Bend the two ends up and over the base, then thread them through the folded end. Pull tight. 


Continue adding pipe cleaner halves until the whole base is covered. 


Give the pipe cleaners a trim so that all the ends are even.


Bend the outer portions of the pipe cleaners to the left to mimic the way a real wreath is assembled. 


Cut a length of monofilament and tie it around the wreath to make a hanger. 

Take a red pipe cleaner (don't snip it in half like the green ones) and twist it to form a bow shape. Glue it to the wreath, covering the monofilament hanger. Add colorful pom poms to the wreath, including a red one in the center of the bow. 


Hang your finished wreath on the tree, use it as a gift topper, or slide it down the neck of a wine (or sparkling cider) bottle for a fabulous hostess gift!