Showing posts with label no sew. Show all posts

11/3/23

No-Sew Ice Cream Sundae Costume for Three

I love Halloween. This year, our family dressed up as an ice cream sundae.  
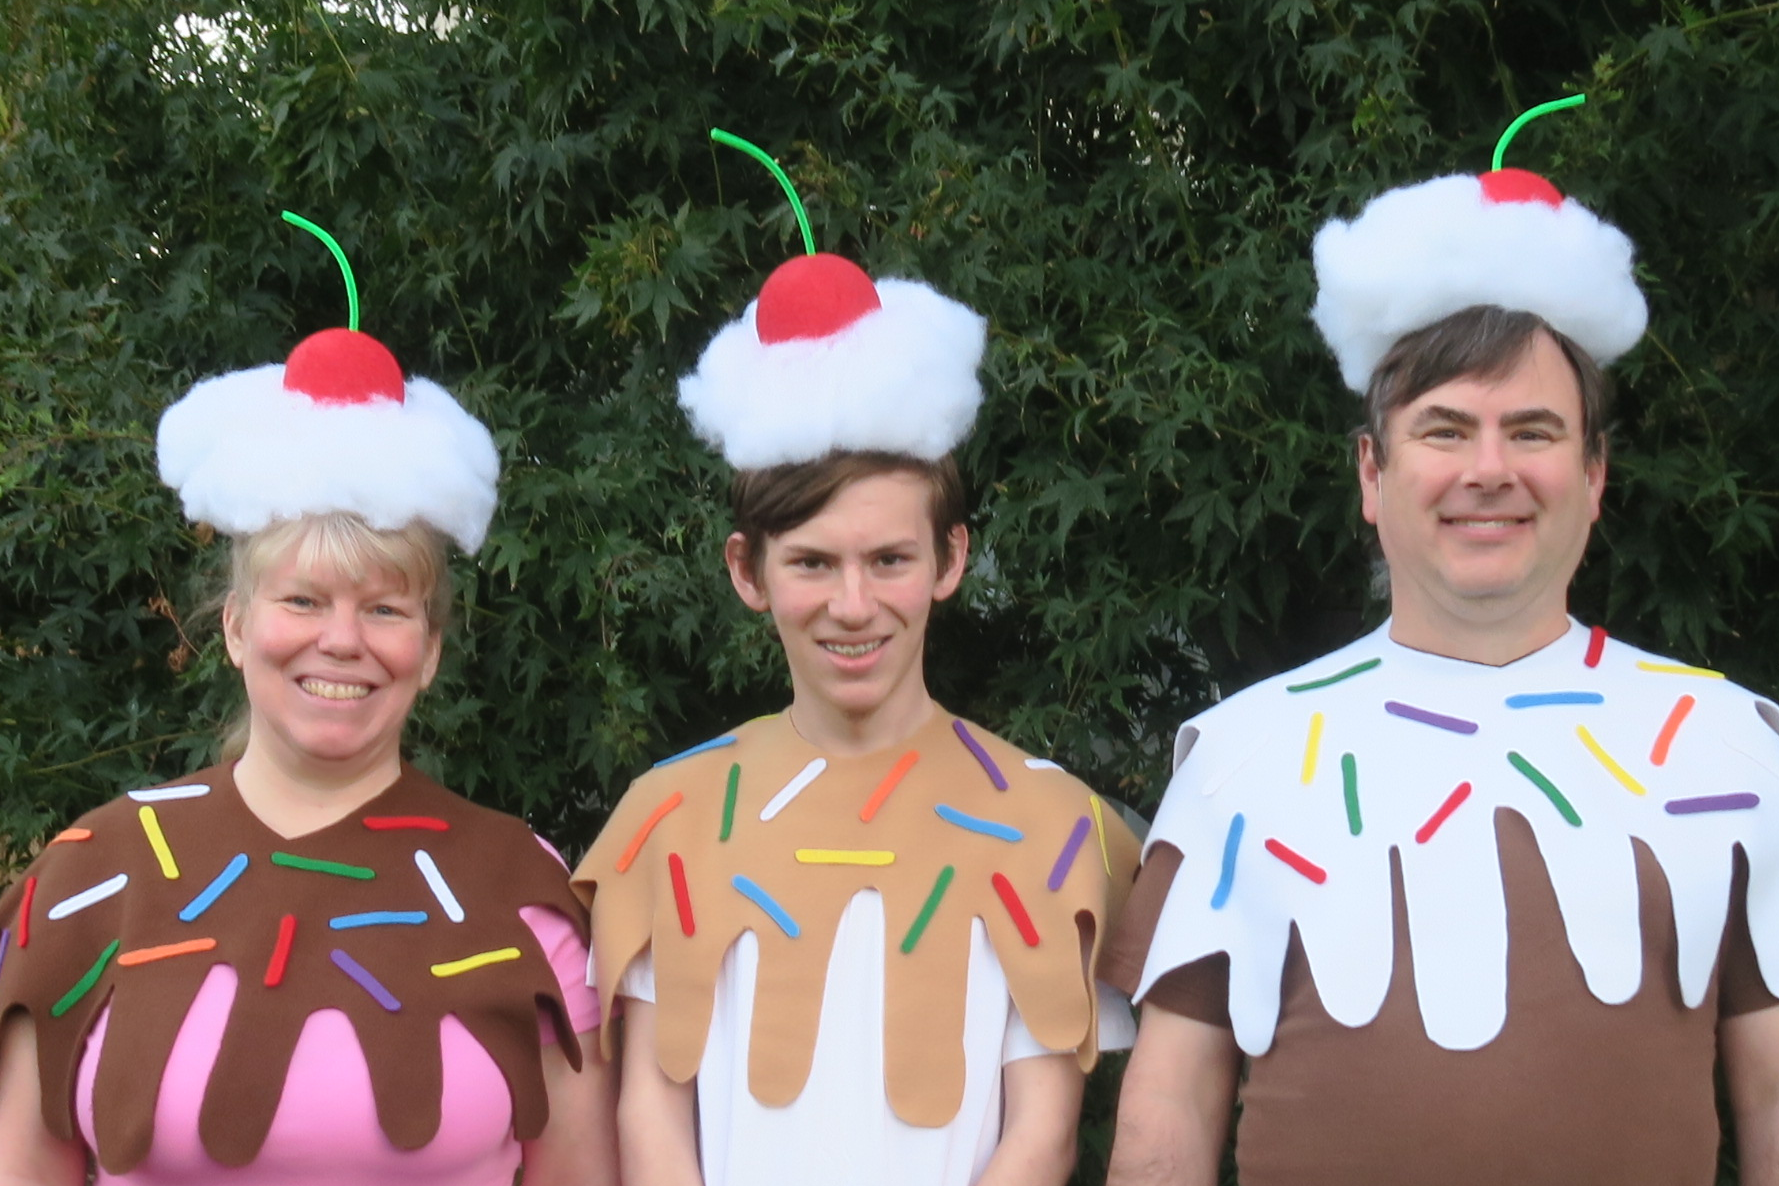

It's a fun costume for three people, but could just as easily work for one or two. You could easily add a stuffed (or cardboard) banana and turn this costume into a banana split. Or dress an additional person with a banana costume (affiliate links here and below). A lot of the kids who came to the door and saw just me thought I was dressed as a cupcake. So that's another possibility! 

This costume took very little time to make, which is good since I didn't start until just a few days before Halloween. Even better, there's no sewing involved. And best of all - the chocolate, caramel, and marshmallow sauces are removable, so you can wear the t-shirt afterwards as part of your regular wardrobe.


No-Sew Ice Cream Sundae Costume


Materials:


Steps: 


I started by figuring out which of us already owned plain t-shirts in each particular ice cream color, then bought polar fleece to pair accordingly. I got white (marshmallow) fleece to go with Steve's brown (chocolate) shirt, camel (caramel) fleece for Trevor's white (vanilla) shirt, and dark brown (chocolate) fleece to go with my pink (strawberry) shirt. Each of those "toppings" is essentially a cape. 

I tried to make a paper template for the capes, but that failed. So I used inexpensive felt instead. After figuring out how long (22") and wide (30") I wanted the capes, I cut a neck hole in the felt and added some random drips. I made adjustments by cutting, of course, but also stapling the felt in a couple of places to make it more the shape I wanted. Then I put the template on the polar fleece and cut out the shapes.  


Each cape got 16 sprinkles, which I cut from the craft felt. They're approximately 3" long. I scattered them on the capes and used the glue gun to adhere them. 


I had colorful party hats on hand, so I cut the tops off of them, then painted them with gesso. You can skip this step (and the associated drying time) by starting with white hats in the first place. I painted the styrofoam balls red. 

When the paint was dry, I used hot glue to attach the styrofoam balls to the party hats. I used a paper piercer to poke a hole at the top of each. Then I snipped green pipe cleaners in half, gave them a gentle bend, and pushed them into the holes. No glue needed.  


I shaped the Fiber-fil into cylinders and then glued them to the party hats. 


That's all there is to it! You could add velcro or another closure to the topping capes; we just used safety pins. The hats stayed on pretty well until we bent over; bobby pins will help keep them in place. 


This was a really fun costume. It's easy to store (pull out the cherry stems, stack the hats, and fold the capes) so I'll be hanging onto them to possibly wear in the future. 

7/24/23

Felt Cardinal Pencil Topper

I think it's so weird that we talk about most animals year-round, while there are others we've assigned to a certain season. It's as if rabbits and chicks only exist in the spring, flamingoes and tropical fish disappear if it isn't summer, bats and owls are only alive in the fall, and penguins and polar bears vanish when winter ends. I get that some of that is based on climate; tropical fish live in warm water and polar bears live in cold water. But they live there year-round! 

Despite existing year-round with quite a large range, cardinals are considered part of the winter animal category. If there is an image of a cardinal on a card, the sentiment probably references Christmas or winter. You don't see cardinals on Easter greetings, even though baby cardinals start hatching then, just like baby chickens. It's weird. 

All this to say that I made a cardinal craft during the summer. And you can too. Affiliate links below. 


Felt Cardinal Pencil Topper


Materials:


Steps: 


To make the cardinal, you will need two red felt bodies, two red wings, two black faces, and one orange beak. I recommend using scratch paper to make a template for yourself, unless you want to just wing it (pun intended) like I did.


Use floral tape to wrap a stem of leaves to a pencil. I used an artificial rose I had laying around and just pulled the flower off to save for a different use. 

Glue the face and wings to the two body parts.


Add an eye to each face. If you're using self-adhesive enamel dots, proceed. If you're using Enamel Accents, let them dry completely. 

Put a line of glue around the inside of one body piece, leaving the belly area open. Put the beak in place, then add a line of glue onto the part of the beak that will be covered by the second body piece. Set that piece on top of the first, essentially making a beak sandwich. Let the glue dry completely. 

Add as much or as little stuffing as you want, then add a generous amount of glue to the opening. Place it onto the prepared pencil, clamp it closed, and let the glue dry completely.  


Perfect for any time of year! This craft is particularly great if you live in one of the seven states (Illinois, Indiana, Kentucky, North Carolina, Ohio, Virginia, and West Virginia) that have named the cardinal as their state bird, or if you're a fan of the any of the Cardinals sports teams!

6/2/21

No-Sew Jeans Pocket Pencil Holder

Remember the jeans I cut apart to make the denim D and the zipper Z? In the spirit of not letting anything go to waste, I turned the pocket into a pencil holder. 
 

It couldn't be easier. I used my left-handed dedicated fabric scissors (righties- try these fabric scissors) to cut out the complete pocket. I also cut out a chunk of the side seam to use as the strap. (Affiliate links here and below.) 


I flipped the pocket over, positioned the strap, and then added some Supertite Multi-Grab to secure the strap. 


Once the glue is dry, it's super strong. Fill the pocket with pencils and anything else you need close at hand and hang it by your desk or anywhere else. It's really easy to grab and go, too. 


Super quick, cute, useful, and a great way to reuse jeans that can't be mended anymore!