Showing posts with label button. Show all posts

3/14/25

Sewing a Sock Bear

I got a hole in one of my socks, so I did what anyone would do: cut it up to see if I could turn it into a sock bear. As one does. 


Is a sock bear a thing? There are sock monkeys, of course, and you might remember Sock Lion. Sock Bear is significantly less sophisticated, but I kinda like him. This post contains affiliate links. 

I started by cutting the sock with the hole into a simple tube with two ears, as shown below on the left. 


I turned the sock inside out and then sewed the ears together. 


That is not what I should have done. I should have sewn the tan felt onto the ears when they were open flaps. It would have been a lot easier. I backstitched a mouth onto an oval of tan felt, then sewed the brown fabric button to that. Then I sewed the snout to the sock. 


Then it was time for the googly eye buttons. I stuffed my bear with Poly-Fill, then thought about how I was going to close it to keep the stuffing in. I wanted it to stand up, so I decided the best solution was to sew an extra piece of sock around the opening. 


It's a simple project as it is, but if I were doing this with kids (a Cub Scout Bear den, for example) I would make it even easier. The biggest change would be using hot glue for most, if not all, of the sewing. I'd probably still have them sew the mouth, but you could use a brown Sharpie instead. 

9/30/22

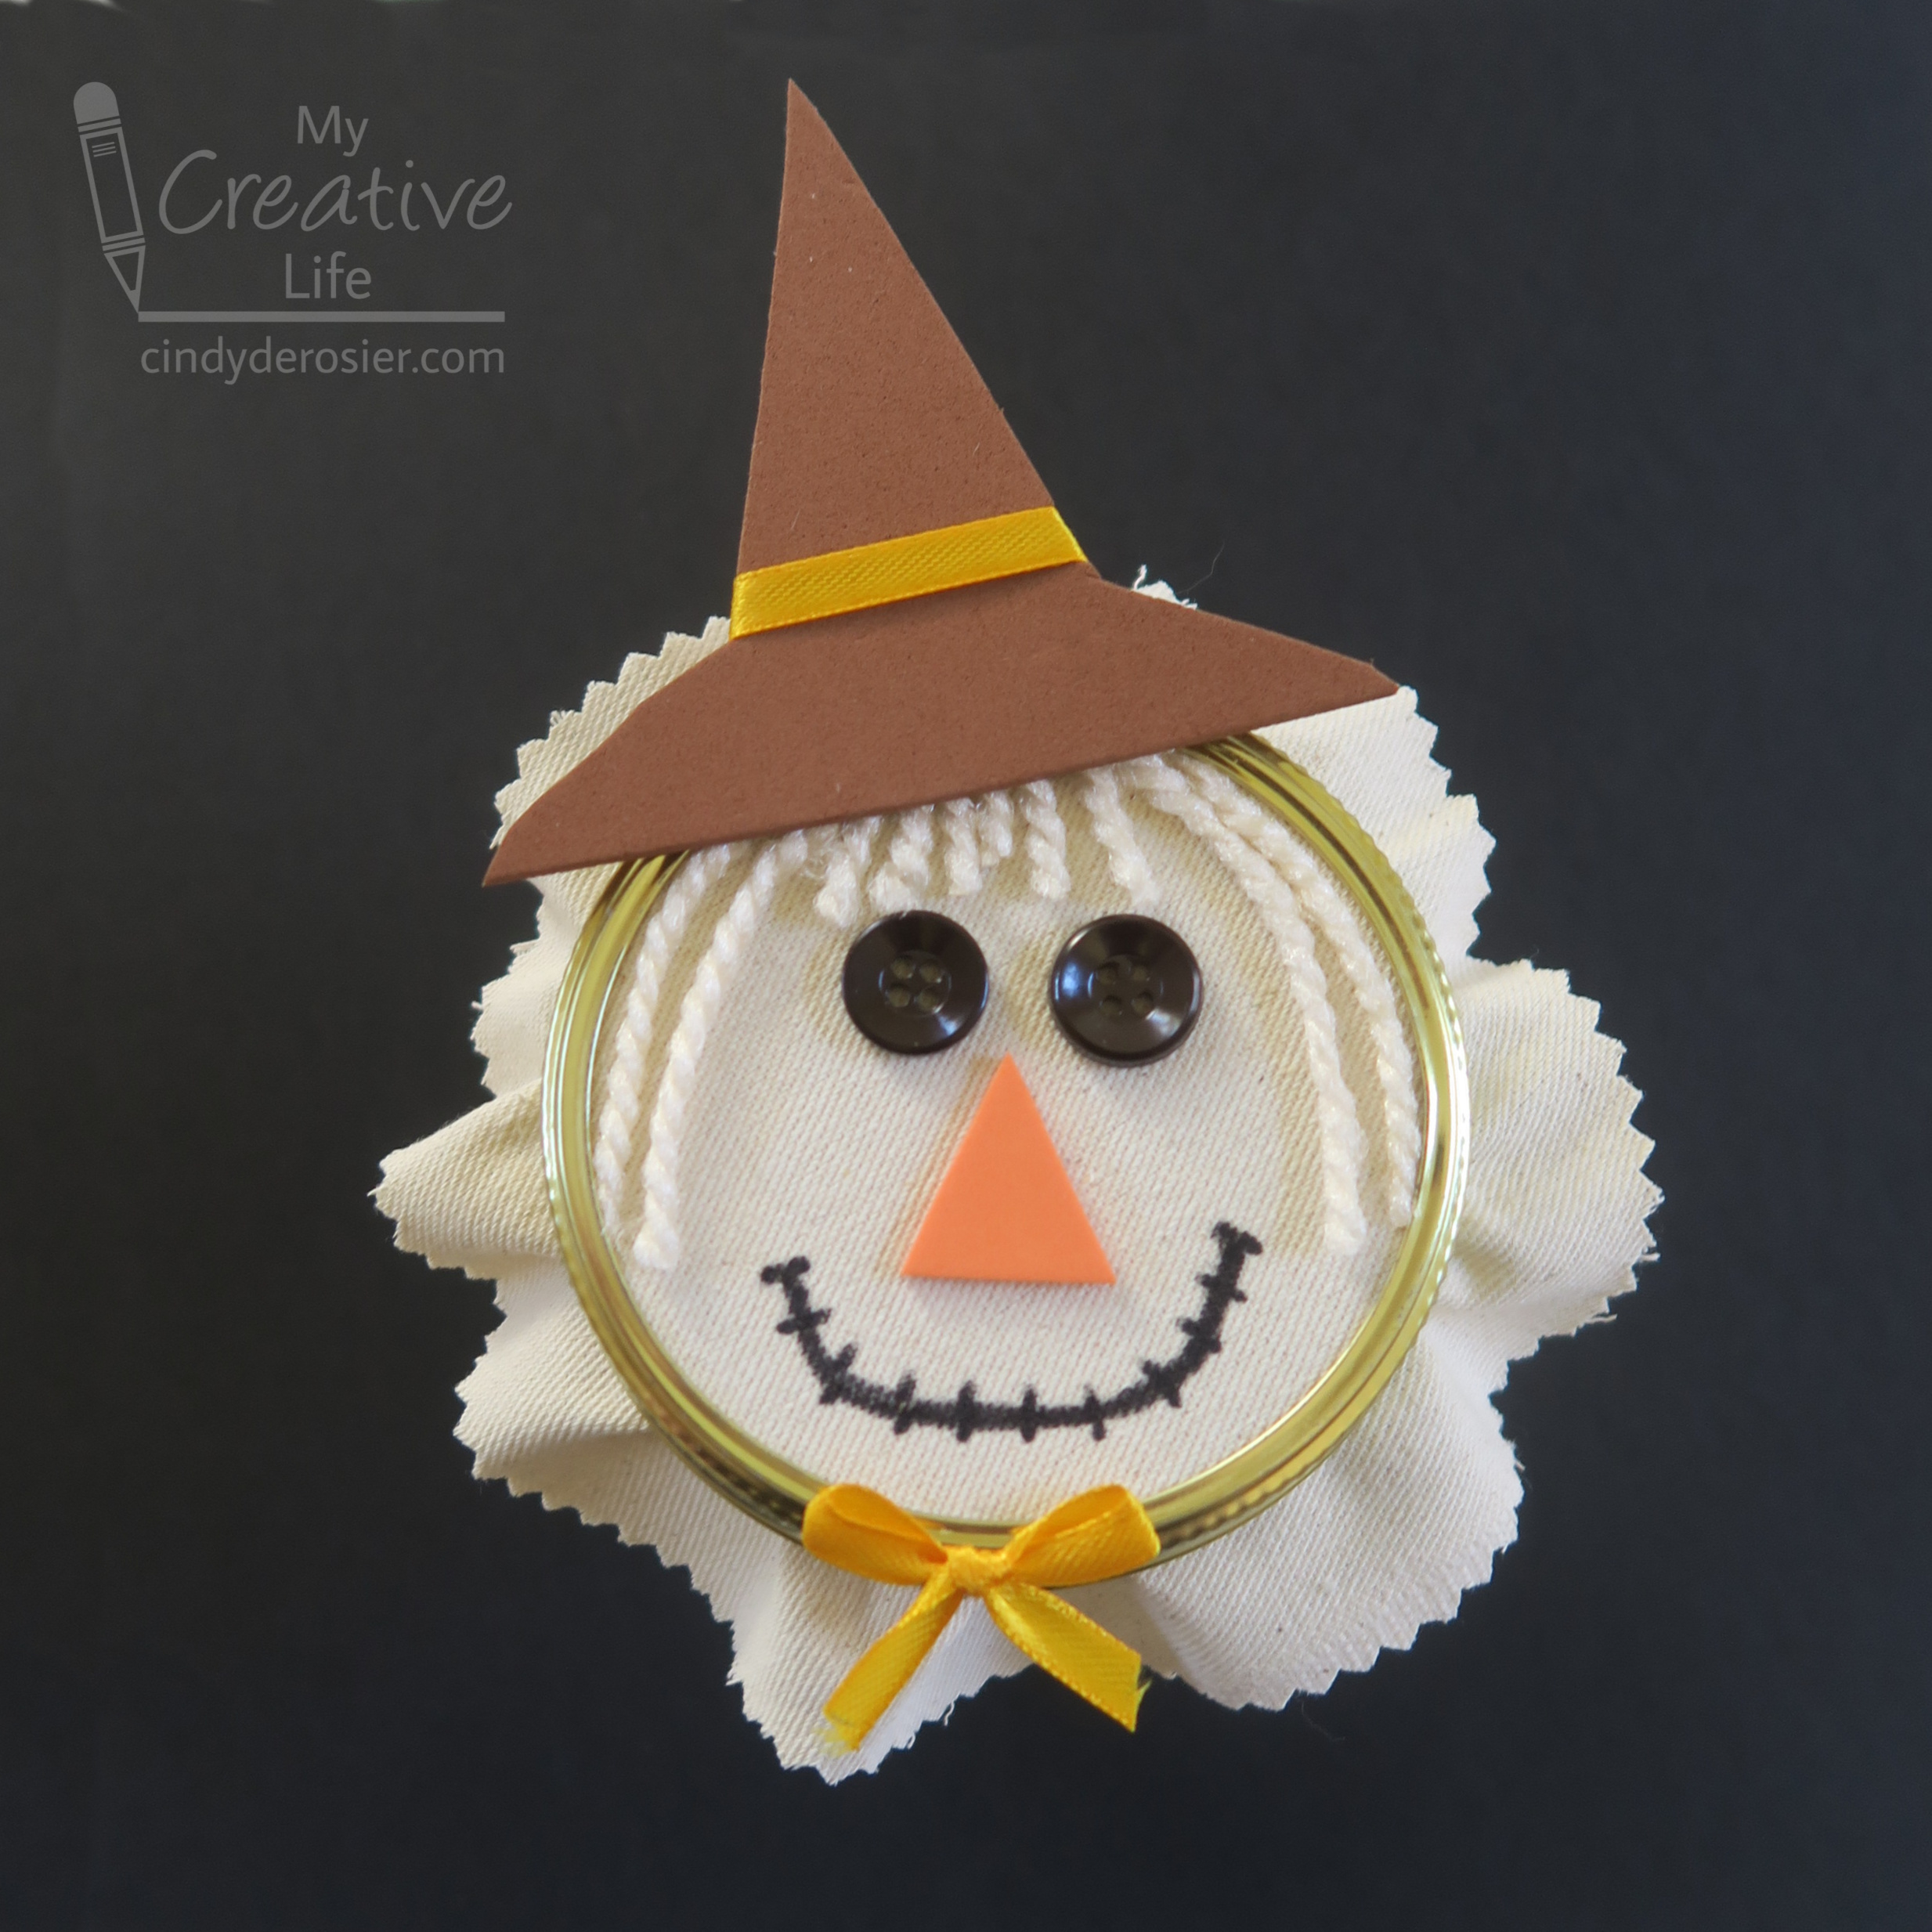
Scarecrow Mason Jar

This Scarecrow Mason Jar is such a fun way to share a fall treat with friends! You can fill it with anything you want, but I designed it with Cinnamon Spice Caramel Apple Popcorn in mind. Affiliate links below. 


Scarecrow Mason Jar


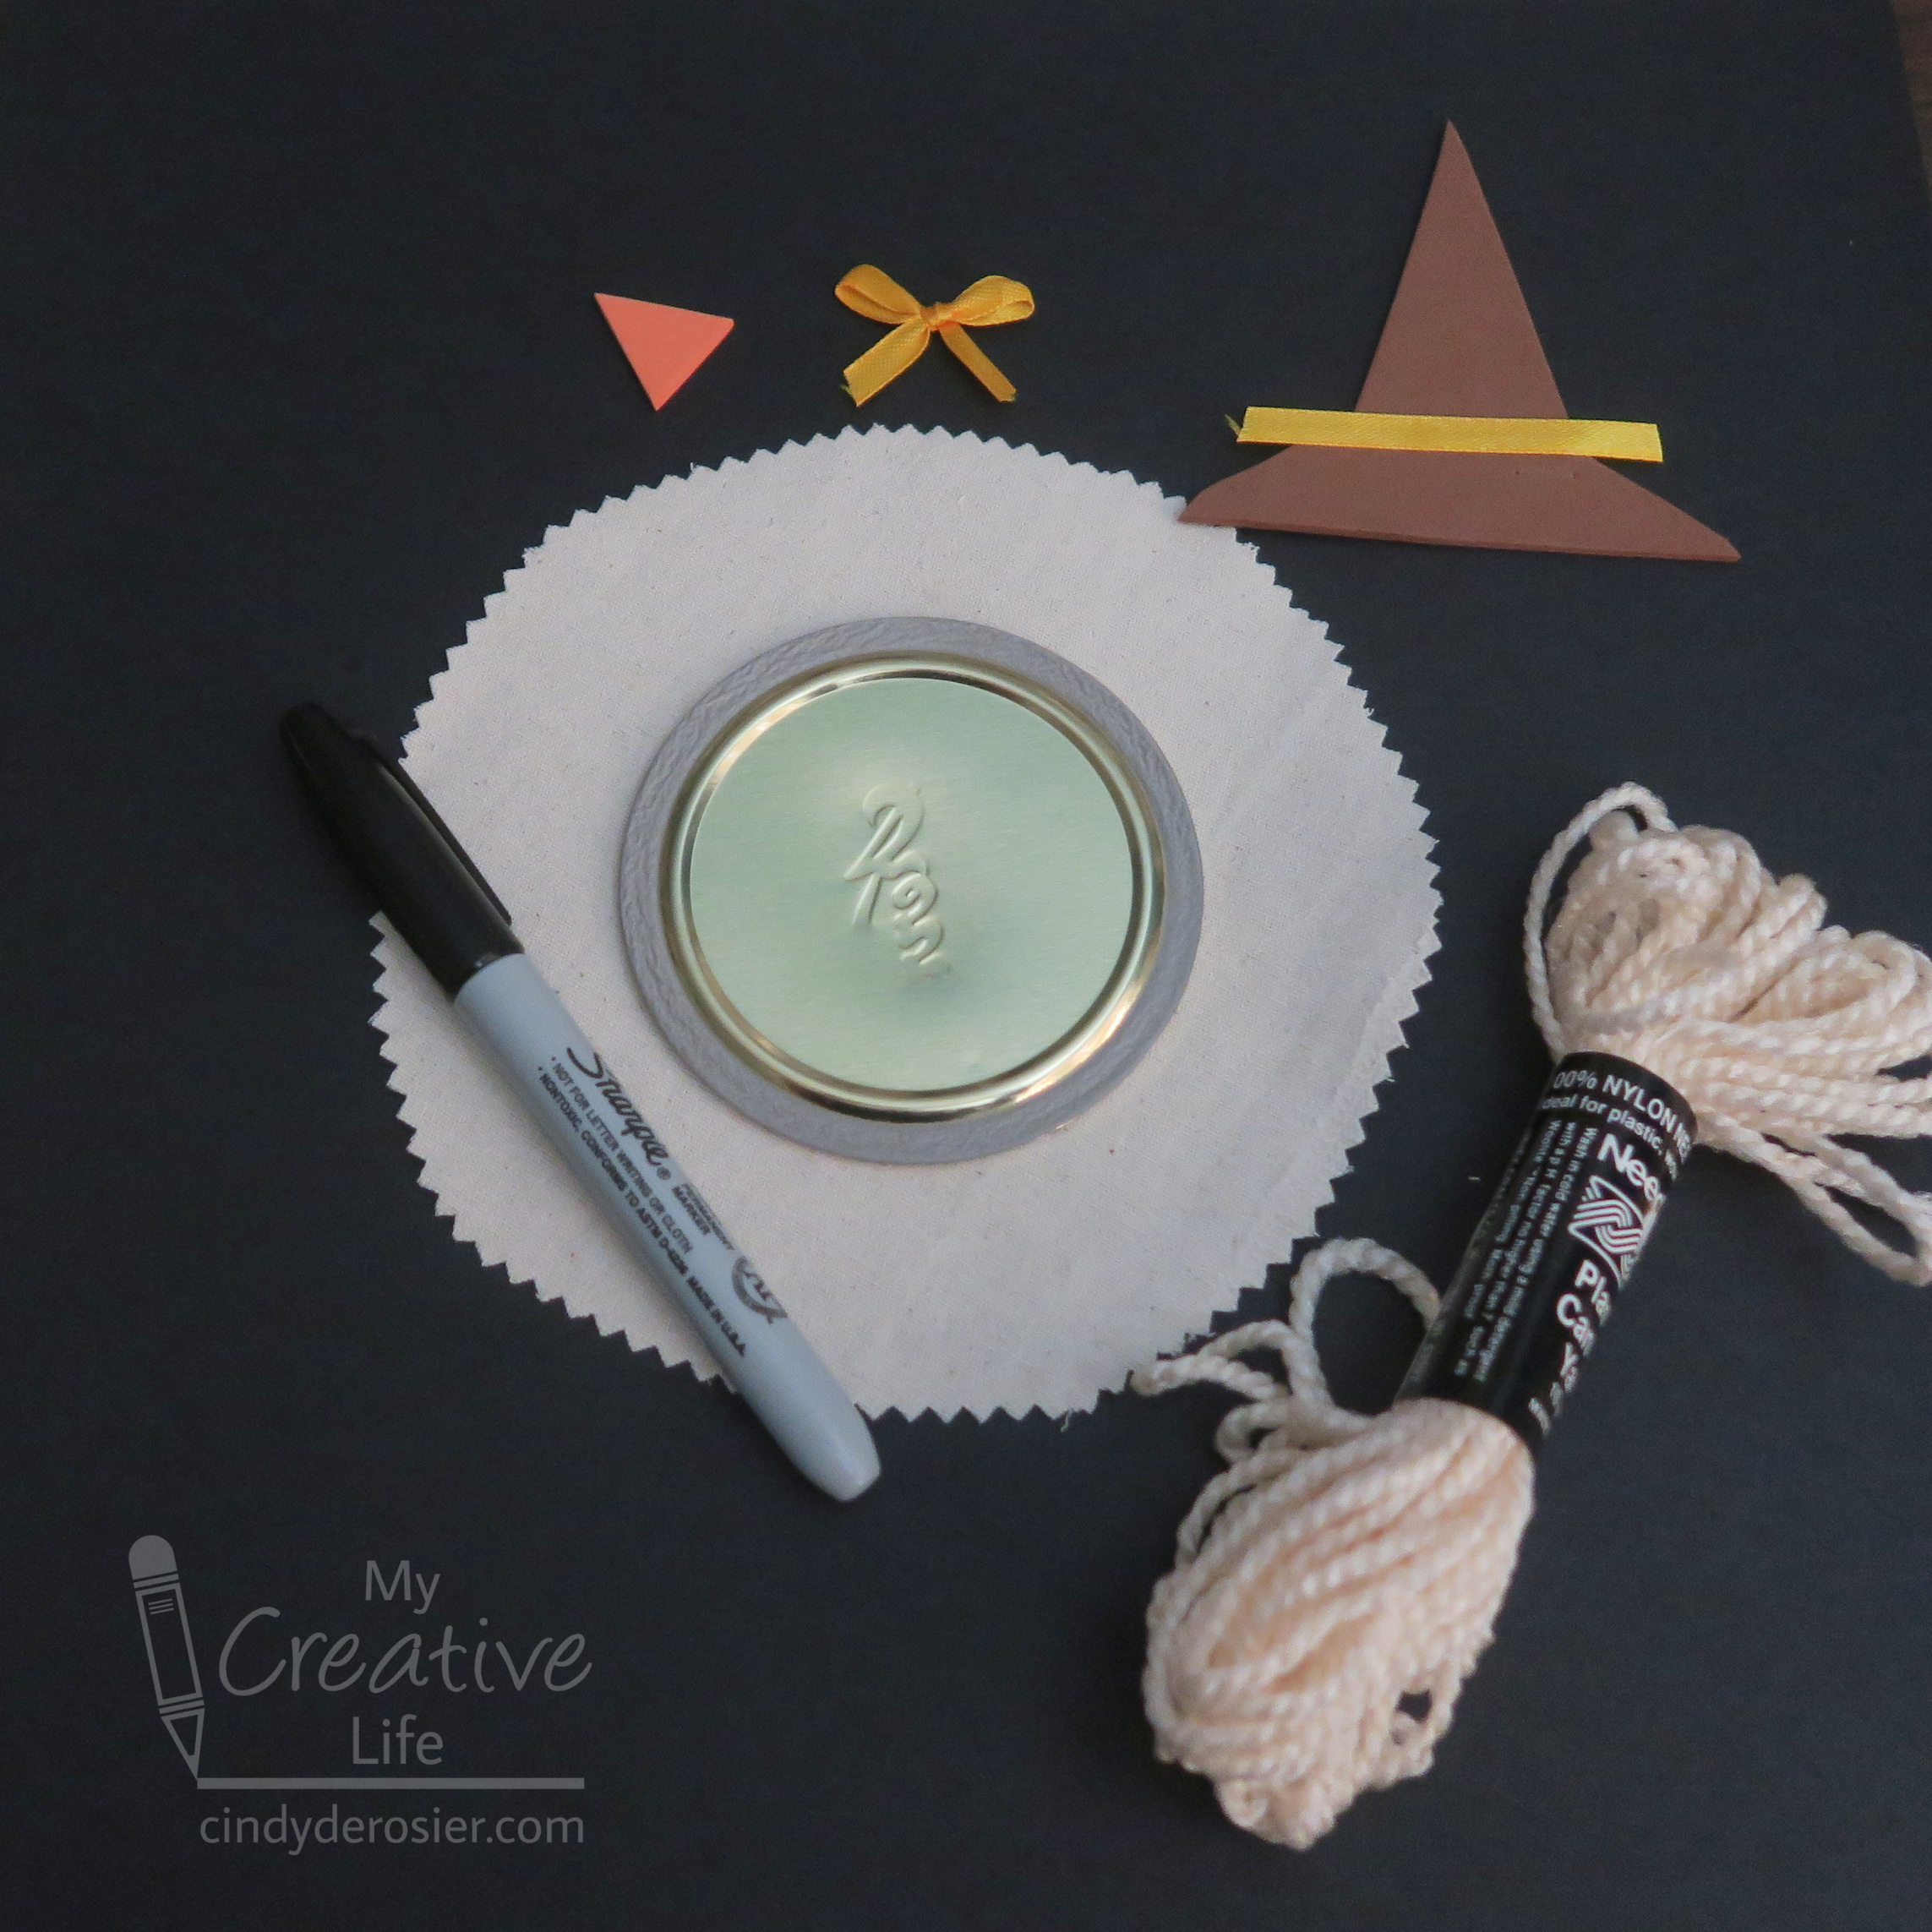
Materials:


Steps: 


Use the pinking shears to cut a circle of fabric approximately 6" in diameter. Glue the lid to the center of the fabric. 

Use regular scissors to cut lengths of yarn for the scarecrow's hair. Then cut a triangle nose from orange craft foam and a pointy hat from brown craft foam. Cut a length of ribbon to make a hat band, then tie another piece of ribbon into a small bow. 


Fill the mason jar with the popcorn or other treat, then add the lid. Screw on the ring tightly. 

Glue lengths of hair to the scarecrow, trimming as necessary. Glue the hat on top. Glue the eyes, nose, and bow into place. Use the Sharpie to draw the scarecrow's mouth. 

7/27/21

Playdough Texture Tools

I was a big fan of Play-Doh when I was a kid. Specifically, I liked the play sets. My favorites were the barbershop, the ice cream maker, and the barbecue set. (These affiliate links go to the modern versions of the 1970's toys I loved.) I still like playing with doughs and clays, but it's been years since we've had any Play-Doh in the house. (Trevor played with it occasionally when he was little, but it just wasn't his thing.) Now I use Model Magic, Sculpey, or homemade salt dough when I am in the mood to play with clay.

The last time I had my clay out, I made myself a set of texture tools using random items from the craft room. I'm really happy with how they turned out. 
 

The first step was gathering craft sticks and a bunch of random stuff. I wasn't sure what would print well on clay, so I tried a wide variety of things. 


Next, I attached each item (pony beads, buttons, a wooden swan, a rubber band, yarn, a chipboard tree, pipe cleaner, a shiny trim, Twisteezwire, pennies, and a feather) to craft sticks. I used hot glue for everything except the rubber band, pipe cleaner, and Twisteezwire, which I just wrapped around their craft sticks. 


I pressed each into the clay....


.... lifted them up to see the results. Most of them printed very well! The only total failure is the feather. The clay stuck to it and it didn't print well. The thin trim isn't great, but it was better than expected. 

I am most happy with the pony beads and the buttons. They give great texture to the clay. My second favorites are rubber band, pipe cleaner, and Twisteezwire. 


Make your own set of texture tools for playdough! Kids will love every step, from searching the house for items to use, to pressing their tools into dough to create textures. If you try anything that works particularly well (or particularly poorly!) let me know in the comments. 

4/24/20

A New Batch of Kids' Crafts Roundups

I've been busier than ever running Fun Family Crafts. It should come as no surprise that our traffic is way, way up as people have been searching for activities for kids to do during the COVID-19 pandemic. With almost 12,000 kid-friendly craft tutorials for toddlers through teens, it's no exaggeration to say we have something for everyone. 

My focus for the last few weeks has been on crafts that use materials that people likely already have at home. With that in mind, here are the new roundups I've been making. First, Cereal Box Crafts. There are 58 on the site right now. One of mine is in the graphic below. Can you spot it? 


Next up, Button Crafts for Kids. We have 340 button crafts ideas, which made it really hard for me to pick which to include in the roundup. As always, I tried to choose the widest variety possible. One of mine is in there.  

Button Crafts for Kids

It took me forever to deal with the Styrofoam Ball Crafts for Kids. I had to delete several dozen of my favorites from someone who recently deleted her blog and thus all her tutorials. (I HATE when that happens.) Then I had to clean up the tags for all the styrofoam projects to pick out the stryfoam ball ones. And then I had to deal with the fact that styrofoam is actually a brand name (the proper generic is polystyrene). Crafters who work for styrofoam competitors tag their project with those brand names, which never get searched. In the end, I found 71 styrofoam ball crafts. One of mine is in the graphic below.

Styrofoam Ball Crafts for Kids

Next was Recycled Can Crafts. We have 84 different projects. Many are variations on classic desk organizers (like R2-D2 below), but there are many other uses as well. As always, I tried to show the greatest possible variety in the graphic. One of them is mine. 

Recycled Can Crafts for Kids

I had the most fun putting together the roundup of Yarn Crafts. Even though there were 434 crafts to choose from, the ones that were bright and colorful jumped right out at me and it wasn't as hard to narrow them down as it usually is with so many options. And I LOVE the way the title block came out. Two of the projects in this roundup are mine. 

Yarn Crafts for Kids

Finally, Garden Crafts. We have so many cute ideas. I think my favorite is using an old garden hose to make a wreath. So cute!


As always, I made all the graphics using PicMonkey. I've been paying $6/month for their Basic plan for about 2 years and I couldn't be happier with it. 

1/30/15

Twisteezwire Critters

I was browsing the Twisteezwire website while writing up my review of their Mask Kit when their Puzzle Piece Bug tutorial caught my eye. I'm always on the lookout for fun crafts using puzzle pieces! (You may recall the ridiculous situation with a puzzle purchase awhile back that resulted in me having a large stash of useless puzzle pieces.) I showed the tutorial to Trevor and he was totally onboard with the idea of making puzzle piece Twisteezwire bugs. Affiliate links below. 

We each started by choosing a puzzle piece and Twisteezwire. We followed the steps to make three sets of legs to create a basic insect. We continued with the antenna. Then we used Glue Dots to attach googly eyes. With the basic technique mastered, we were able to use our own creativity to make some totally cute (if I do say so myself!) critters. Introducing....
  

Dot, the Ladybug
(by Cindy)


To make Dot, you need a red puzzle piece, 3 Twisteezwires (red, black, and white), six red beads, two googly eyes, glue dots, six black sequins, glue, and wax paper. Make a basic bug with the puzzle piece, red legs, and black antenna. Slide a bead about 1/2 inch up each leg and twist to secure. Add eyes. Create wings by looping the white wire, sliding it through a set of legs on the underside of Dot, then forming another loop. Tear two small pieces of wax paper that are slightly larger than the loops. Put glue on the back of the loops, then attach the wax paper. Let the glue dry completely, then trim the excess wax paper away from the loops. Glue the sequins to Dot's back.


Buggy, the Bug
(by Trevor)


To make Buggy, you need an orange puzzle piece, two Twisteezwires (green and orange), six orange buttons, two googly eyes, and glue dots. Make a basic bug with oversize antenna. Thread each leg through the button holes, then twist to secure. Add eyes.


Chesapeake, the Blue Crab
(by Cindy)


To make Chesapeake, you need a neutral-colored puzzle piece, Twisteezwire (blue and black), eight blue beads, two black beads, glue dots and googly eyes. Start by making a basic bug. Add a bead to each of the middle and back legs, twisting to secure. Add two beads each to the front two legs to form claws. Cut a small length of black wire for the eye stalks and attach like you would antenna. Glue googly eyes in place.


Spinner, the Spider
(by Trevor)


To make Spinner, you need a neutral puzzle piece, tan Twisteezwire, a large black pom pom, a medium black pom pom, glue, glue dots, and googly eyes. Begin by cutting the tan Twisteezwire into fourths, not thirds like usual. Attach the first three sets of legs as usual, and add the final set of legs opposite the third set, using the same technique. Bend up the end of each leg slightly to allow Spinner to balance. Glue the large pom pom onto the back of the puzzle piece and the medium pom pom onto the front. Use glue dots to attach the googly eyes to the face.

........

What do you think? Any favorites? Trevor is already talking about the next set of critters we're going to make!

3/26/13

Bunny Week, Day 2: Paper Bag Bunny

Welcome to day 2 of Bunny Week! Today I'm sharing a fun and easy paper bag bunny project. Isn't it cute?


Paper Bag Bunny


Materials: 


  • paper bag
  • scissors
  • pink construction paper
  • glue
  • black pen
  • googly eyes
  • pink button
  • cotton ball

Begin by cutting a rectangle out of the top of the paper bag, then round off the remaining parts to make the ears, as shown in the picture.

 
Cut the pink construction paper to fit inside the ears. Glue these in place. Use the pen to draw a mouth and whiskers.

 
Glue googly eyes and a button nose in place.

 
Open up the bag and stand it up. The ears will be in two pieces - carefully glue these together, then glue the top opening closed. Add a cotton ball on the back. So easy and so cute!

This is one of Trevor's bunnies. He made two - one to save to enter in the fair and one to play with. My bunny is the one at the top of the post.  
 
I have another bunny craft to share tomorrow for Day 3 of Bunny Week!

8/9/12

Homemade Find It

Are you familiar with the Find It toys (affiliate link)? They are awesome. I first learned about them about 4 years ago when my nephew was in the hospital and someone gave him one to pass the time. They're also great for the car, airplane, or waiting for an appointment. Trevor got this one as a belated birthday gift and we've all had great fun playing with it. 


When Trevor asked if we could make our own version, I immediately said yes. I found a clear plastic container and then searched the house for something that would work as filler. We decided to use buttons, but there are lots of other things that would work if you don't have a huge button collection like I do. Dried beans, rice, gravel, and macaroni would all be fine.  

The next step was finding small items to hide amongst the buttons. Between Trevor's toys and stuff from my craft room, it was easy to find enough objects. As we added items, we wrote them down on piece of scrap paper. Here's our completed Find It.

 
Did you find the pom pom, star, truck or friendship pin in that picture?  How about a pom pom, pony bead, skateboard, snake, bow, and fire truck in the next picture?
 
The last thing we did was type up our list of all the items we put in our Find It, which Trevor titled "Cool Collections."

 
Trevor hovered over the printer waiting for the list, grabbed it, and ran to have Daddy try to solve the Find It. After about 20 minutes of work, Steve found everything except the googly eye.

 
Trevor is so proud of his homemade Find It that he's been bringing it just about everywhere he goes. Here are Grandma and Grandpa solving it.


This was such a fun thing to make and I can't believe how many hours of enjoyment Trevor has gotten from it so far! We'll definitely be making more homemade Find Its in the future.

10/18/11

Pipe Cleaner Spiders

Many years ago, I used to do a really cute pipe cleaner spider craft with my fifth graders. I love seeing my sample each year when I unbox the Halloween decorations.


---------


Pipe Cleaner Spider


Materials: 


  • 4-hole black button
  • four pipe cleaners
  • two googly eyes
  • craft glue


Steps:  


Bend each pipe cleaner in half and force the bent end through one of the holes of the button. It should protrude about 1/2 inch or so, depending on the size of your button. This step is either easy or very difficult depending on the size of the buttonholes. If it is a very tight fit, try rotating the pipe cleaner as you push it through. Repeat with the other three pipe cleaners.

Bend the ends of the pipe cleaners down to cover the button.


Bend the legs to form the shape of the spider.

Glue on eyes.

---------

It's been at least a decade since I've made one of these, so I'd forgotten that a few of the steps are a little tricky. Trevor wasn't able to thread the bent pipe cleaners through the buttonholes, so we adapted the project to match a kindergartener's dexterity. 

Start with the same supplies, but instead of bending the pipe cleaners, leave them straight. Thread each of the four pipe cleaners through a buttonhole.

Working with one pipe cleaner at a time, twist the two ends around each other to secure them to the button. Bend the pipe cleaners to form the spider legs.

(For this picture, I removed the other three pipe cleaners to make it easier to see what to do.)

Continue to twist and then bend all eight legs.


Add eyes and you're done!