Showing posts with label costume. Show all posts

11/3/25

Chemist Halloween Costume

This year, I dressed as a chemist for Halloween. 
 

That's my own front porch. Rather than open the door repeatedly as trick-or-treaters showed up, I thought it would be more fun to just hang out on the porch to pass out candy. And indeed it was. The trick-or-treaters loved my set-up and had lots of questions about the mystery liquids, the test tubes, and letters on my sign. I loved watching them choose their candy from petri dishes. I chatted with parents and was much more involved with my neighbors than if I'd stayed inside and just opened the door when people knocked. 

I'm really pleased with my name badge and candy sign. I used PicMonkey to create the images, printed them, then backed them with cardstock. I slid the CINDy into a badge holder and I folded the CaNDy into a table tent. 


I'm fortunate that I can spell my name with elements from the periodic table. Steve was disappointed to learn that he can't. Neither can Trevor. My mom (KAtHY), my sister (KArI), nephew (TiMoThY), niece (AlLiSON), and mother-in-law (PAt) all can. 

If you are interested in dressing up as a chemist, here's a supply list to get you started. Affiliate links below. 


Chemistry Costume and Porch Decorations


Materials: 


This costume was so much fun! I'm going to have to start thinking now about how I can top it next year. 

9/27/24

Easy, Unique, and Affordable Homemade Halloween Costumes

I'm a big fan of homemade Halloween costumes. Not only are they guaranteed to be one-of-a-kind, but they are often less expensive to make than buying a costume would be. (I spent exactly $0 for Trevor's toga costume.) And if your child wants to be something besides a superhero, princess, or character from a popular TV show, you might have a hard time finding the exact LEGO Minifig Robber costume or campfire costume they're picturing at a store. 

You do not need to know how to sew to make a homemade costume. I can barely do a poor job of hemming a pair of pants, let alone sew an outfit. Most of the costumes I've made start with a men's t-shirt and involve scissors and hot glue, not a sewing machine. 

I've made a lot of homemade Halloween costumes over the years. These are some of the most popular. 
 

Did you happen to notice that all of the costumes feature the same model (Trevor) except for the center one? That's my niece, Allison, showing off the 'Put Me in the Zoo' costume. I love these photos. So many good memories! 

To find out how to make each costume, clink the link under the photo to go to the tutorial. You'll find materials lists and step-by-step instructions. 


If you're looking for Halloween projects, pumpkin carving ideas, or crafts for Dia de los Muertos, you can find all of those here: Halloween Crafts for Kids. Enjoy!

1/5/24

Documenting Halloween 2023: Ice Cream Sundae Costume

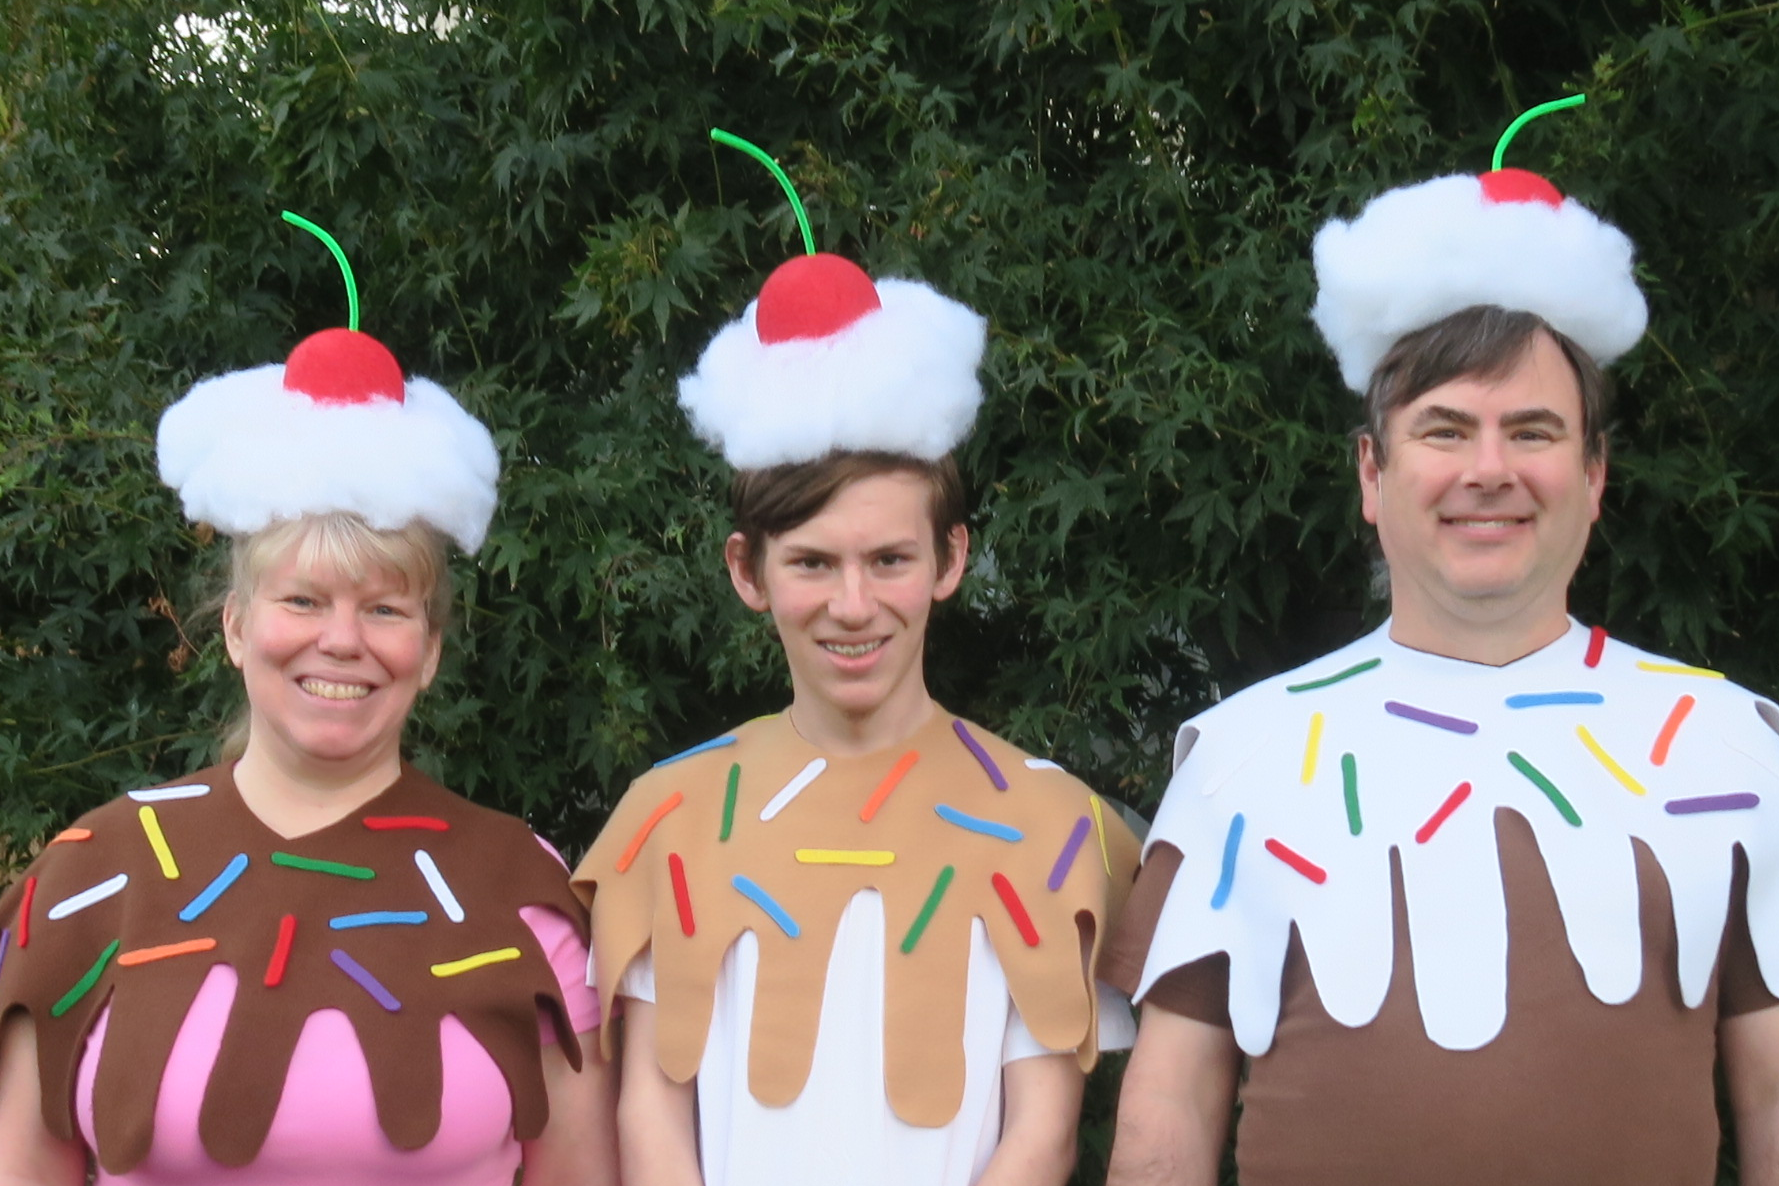
For Halloween 2023, our family dressed up as an ice cream sundae. Most of our trick-or-treaters thought we were cupcakes. Close enough, I guess!

We spent Halloween with the same friends we usually do, but this year we didn't take a group picture. Or any other pictures, for that matter. So my one and only Halloween layout is about our costume. 
 

I really like this layout. For one thing, it was fun to use such a non-traditional color scheme. I'm pretty sure rainbow polka dots haven't appeared on any Halloween page I've ever made (including the time we dressed as a rainbow!). In fact, before I added the embellishments, nothing about this page looked like Halloween at all. The pumpkins, bats, witch hat, and candy corn made a big difference. I'm happy to have this layout in the album. 

11/3/23

No-Sew Ice Cream Sundae Costume for Three

I love Halloween. This year, our family dressed up as an ice cream sundae.  


It's a fun costume for three people, but could just as easily work for one or two. You could easily add a stuffed (or cardboard) banana and turn this costume into a banana split. Or dress an additional person with a banana costume (affiliate links here and below). A lot of the kids who came to the door and saw just me thought I was dressed as a cupcake. So that's another possibility! 

This costume took very little time to make, which is good since I didn't start until just a few days before Halloween. Even better, there's no sewing involved. And best of all - the chocolate, caramel, and marshmallow sauces are removable, so you can wear the t-shirt afterwards as part of your regular wardrobe.


No-Sew Ice Cream Sundae Costume


Materials:


Steps: 


I started by figuring out which of us already owned plain t-shirts in each particular ice cream color, then bought polar fleece to pair accordingly. I got white (marshmallow) fleece to go with Steve's brown (chocolate) shirt, camel (caramel) fleece for Trevor's white (vanilla) shirt, and dark brown (chocolate) fleece to go with my pink (strawberry) shirt. Each of those "toppings" is essentially a cape. 

I tried to make a paper template for the capes, but that failed. So I used inexpensive felt instead. After figuring out how long (22") and wide (30") I wanted the capes, I cut a neck hole in the felt and added some random drips. I made adjustments by cutting, of course, but also stapling the felt in a couple of places to make it more the shape I wanted. Then I put the template on the polar fleece and cut out the shapes.  


Each cape got 16 sprinkles, which I cut from the craft felt. They're approximately 3" long. I scattered them on the capes and used the glue gun to adhere them. 


I had colorful party hats on hand, so I cut the tops off of them, then painted them with gesso. You can skip this step (and the associated drying time) by starting with white hats in the first place. I painted the styrofoam balls red. 

When the paint was dry, I used hot glue to attach the styrofoam balls to the party hats. I used a paper piercer to poke a hole at the top of each. Then I snipped green pipe cleaners in half, gave them a gentle bend, and pushed them into the holes. No glue needed.  


I shaped the Fiber-fil into cylinders and then glued them to the party hats. 


That's all there is to it! You could add velcro or another closure to the topping capes; we just used safety pins. The hats stayed on pretty well until we bent over; bobby pins will help keep them in place. 


This was a really fun costume. It's easy to store (pull out the cherry stems, stack the hats, and fold the capes) so I'll be hanging onto them to possibly wear in the future. 

12/7/22

Halloween 2022

I already shared this year's Halloween costume, where Steve and I dressed up as a "Spaghetti Western." Here's the scrapbook page from our Halloween festivities. 

Halloween 2022 (affiliate link)

I paired a photo of Steve and me in our costumes with a group picture of the six of us around the fire pit, roasting marshmallows. I added three pieces of patterned paper (2 color blocks and the green sliver), grounded it with a border sticker, then decorated with more stickers. Everything on the page is from the same collection except for the number stickers. It's rare that I do that; as simple as they are, most of my pages have at least four manufacturers represented. This really simple page from 2011 (!) has ten manufacturers. I should try that challenge again and see how many I can use. 

11/4/22

Spaghetti and Meatballs Crazy Hair Day

I love costumes, but I wasn't planning to dress up for Halloween this year. Trevor didn't want to wear one, so I hadn't prepared a family costume like I usually do. Then Halloween came and I was bummed to not dress up. Around noon, I decided to make myself a quick and easy costume.

This costume takes advantage of the fact that my hair is blonde and really long right now. While it was my Halloween look, I think it's better described as a fun idea for Crazy Hair Day. Affiliate links below. 


Spaghetti and Meatballs Crazy Hair Day


Materials:


Steps: 

Put your hair into a high, tight ponytail. Ideally, you want it directly on top of your head. Cut an X in the bottom of the plastic bowl, then thread it onto the ponytail until it is resting against your head. It should be comfortable and completely secure. Arrange your hair inside the bowl to resemble spaghetti. Pin it if necessary. I just left mine loose. 

Cut apart the brown socks (avoiding the toe seam, the cuffs, and any threadbare heels) and use them to cover the styrofoam balls. Stretch the fabric tightly and glue it in place, then trim any excess. As you can see, my first meatball (in the background) has a toe seam in it. I didn't end up using it. 


Glue a bobby pin to each meatball, covering the place where the fabric is gathered. When the glue is completely dry, attach the meatballs to your hair. Then poke a fork into your hair. I used a real fork, which was not ideal. It slumped a bit and I had to readjust it a couple of times. It's much better to use one of the metallic-looking plastic forks. 

Cut a triangle from a long side of an 8.5" x 11" piece of chipboard. Lay it on top of the checked fabric. Cut the fabric so that it extends 3 or 4" beyond the chipboard in each direction. Glue the fabric to the chipboard, then cut a slit in the fabric on the side with the missing triangle. The slit should extend all the way to the point of the triangle. 


With the slit facing you, gently slide the fabric-covered chipboard onto the top of your head. It will sit under the bowl and be very secure. Other than the fork slipping, the whole thing was very comfortable and stayed in place for the 8+ hours that I wore it.   

Steve will wear whatever I tell him to (yet another of the many things I love about him), so I brainstormed a coordinating costume for him to wear. The hay was Steve's idea. Can you tell what we are, standing next to each other and "reading" our outfit from left to right? 


We're a spaghetti western. Clever, right?! 

Hopefully I can talk Trevor into dressing up with us next year, but if not, I'm going to plan something for Steve and me. Halloween is fun no matter what, but I love it even more when I'm dressed up. 

3/1/22

Bash Bowl 2022: The Rainbow Costume (Halloween 2021)

Sadly, Bash Bowl 2022 has come to an end. I've had so much fun challenging myself with each week's Playbook. This is my second (and final) layout from Week 4: 
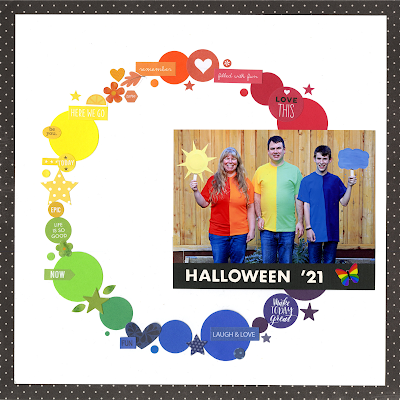
This page, about our three-person rainbow Halloween costume, was so much fun to make! I started by tracing a circle onto white cardstock, then placed punched circles to define the space for each color. Then it was just a matter of finding stickers, punches, and other doodads to fill in the space. 

Here's the before picture: 


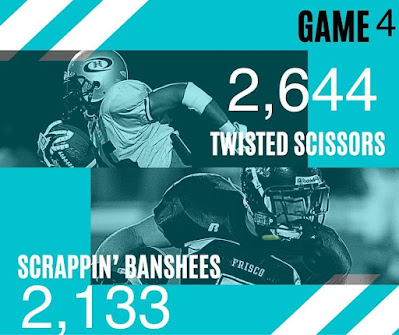
I earned 4 points for Team Twisted Scissors: 1 for the dotted paper, 2 for the clusters (I consider each color to be its own cluster), and one for the completed page. Again, it would have been really easy to add brads and get the extra point, but it was more important to me to keep my page flat. I thought about working triangles into the page, but since they had to be at least 1", they didn't play well with my other elements. Ultimately, being happy with the page is more important than scoring points, and I am very happy with this page. 

My lack of brads and triangles ultimately didn't matter. Twisted Scissors claimed the victory for Game 4 and overall!


I'm thrilled with how many pages I made during Bash Bowl 2022 and definitely plan to make this an annual tradition. 

11/2/21

Rainbow Halloween Costume for Three

For Halloween, our family of three dressed as a rainbow. 
 

Even though I am completely incompetent with the sewing machine, this costume was easy enough that it only took me a few hours to make. I made some mistakes along the way, so you get to benefit by learning from my errors.

The biggest error? That image above is a lie. I digitally flipped it to get the colors in ROYGBIV order. The actual photo has us in VIBGYOR order. Even though I actually thought about how to get the colors with red at the left and purple at the right, I still messed it up. Sigh. Affiliate links below. 


Rainbow Halloween Costume for Three


Materials:


Steps:


Fold each t-shirt in half as precisely as you are able. Mark the center with clips or pins, then carefully cut the each shirt in half. 


After all the shirts are cut, pair them together red-orange, yellow-green, and blue-purple. Here's where I went wrong. I chose the wrong half of each shirt. I should have red and yellow on the left sides, and orange and green on the right sides.  


I strongly recommend you lay out all the shirts in order to make sure you are using the correct sides. You might luck out and get a t-shirt brand where the front and back are symmetrical, but ours had a dip in the front with a very high back that would have been weird to wear backwards. 

When you are sure you have the correct order, it's time to sew. Carefully match the fronts of the shirts together and clip one of the sides in place. 


Sew that seam, being sure to backstitch at the hem and the neck to secure the seam. Clip the second seam together. Sew that seam, then turn the shirt right-side out. Repeat the process for the other two shirts. 

To make the rain cloud, cut a cloud shape from chipboard and paint it grey. Glue it to a jumbo craft stick. Tie glow beads onto pieces of silver thread and tape them to the back of the cloud so that they dangle like raindrops. 


To make the sun, cut 8 triangles of chipboard to make the sun's rays. Paint them and the backs of two paper plates yellow. Glue one plate to the craft stick, then glue the rays to the front of that plate. Glue the second plate on top to sandwich the rays between the two plates. 


Then you just have to make sure you stand next to each other in the correct order through the entire costumed celebration! 

This was a fun costume and so easy. Half of each shirt is leftover, so in theory I could either sew up the correct rainbow, mix-and-match the colors to make random two-tone shirts (opposites on the color wheel?), or come up with other way to use the fabric. I'm open to suggestions!


I hope you all had a wonderful Halloween!

4/17/20

Reindeer PEZ Costume

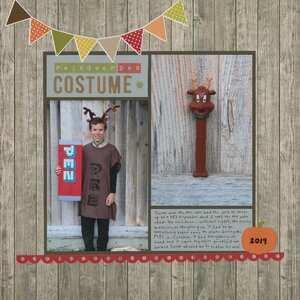
I'm all about looking for the bright side. And right now, the bright side is that I'm getting a lot of scrapbooking done. My BCF's and I have been doing Zoom crops regularly and it's just what I need to keep my spirits up. This layout is all about Trevor's reindeer PEZ Halloween costume

Reindeer PEZ Costume (affiliate link)

It's weird thinking back on October and remembering the inconvenience of the Public Safety Power Shutdowns (PSPS) that were going on while I was making the costume and the ever-present fear of wildfire. It feels like a lifetime ago, yet here we are with the even greater inconvenience of a stay-at-home order and the ever-present fear of COVID-19. Fortunately, we were safe then and are safe now. Many others are not so lucky. 

11/6/19

Pez Dispenser Halloween Costume

This year, Trevor dressed as a Pez dispenser for Halloween. 


Specifically, he was this reindeer Pez dispenser. 


A perfect resemblance, no?


I made 95% of the costume during the power outage. No glue gun, sewing machine, or artificial light for me! Given the choice, I recommend electricity. Affiliate links below. 


---------


Pez Dispenser Halloween Costume


Materials:


Steps: 


Remove the sleeves from the t-shirt. Print out PEZ and put it under the t-shirt on the light table. Carefully trace the letters onto the shirt. (Yea, electricity!)


Cut the styrofoam so that it has the same proportions as a package of Pez. Ideally, you should use a foam cutter. I used a steak knife, which is really messy. (As an added bonus, you can't vacuum without electricity and trying to sweep up staticky bits is impossible. I shouldn't have done this indoors, but hindsight is 20-20.) 

Wrap the ends with duct tape. 


Wrap the felt around the middle of the Pez package, leaving the silver edges exposed. Glue it in place with the FabriTac. Print out PEZ in blue, cut out the letters, then glue them to the fabric. Use the Sharpie to write the other information onto the Pez package. I wrote exactly what was on the actual Pez container, except I changed the net weight to the weight of the styrofoam prop.

Measure a piece of ribbon to fit around your neck, add an extra inch, then cut. Sew the snaps onto the ends, then sew the bells to the front center.

After you're dressed, add a red reindeer nose using face paint. (Fun fact: This is the very first time Trevor has worn face paint. All his life, he has refused face paint, temporary tattoos, and anything similar. I only put the tiniest amount on to give him a red nose. He hated it, but was cooperative for the pictures.)


Due to the insanity that was our life last week, Trevor tried on his costume for the first time about 30 minutes before his friends showed up to trick-or-treat. If he'd tried it on sooner, I would have made some changes. I would have altered the shirt to make it narrower to more closely mimic the shape of the Pez dispenser, plus added a rigid piece to define the rectangular shape. Brown sweatpants would have helped the look too. But even without those improvements, both Trevor and I were happy with how it turned out. And we all had an awesome Halloween. 

5/28/19

Alfredo Linguini

At first, I was stumped by the Scrapbook and Cards Today Disney challenge for National Scrapbook Day. I didn't have any printed photos from Disney trips and no untold stories. And then I realized that Pixar counts as Disney, and that I still needed to scrap the pictures of Trevor's Ratatouille-inspired Halloween costume. Woo hoo!

Alfredo Linguini (affiliate link)


I went with black and white only so as not to overwhelm the nighttime photo. The gingham paper suggests the checked pants that chefs often wear. I'm really happy with the idea to dot the final i in the title with a chef's hat sticker. 

Here's the tutorial in case you'd like to make your own Linguini and Remy costume. It's one of the easiest costumes I've ever done. 


Trevor will be 13 soon, so I don't know what his plans are going to be for Halloween this year. I hope he still dresses up, regardless of whatever he decides to do. We always have so much fun designing and making his costume together. 

11/5/18

DIY Light-Up Ratatouille Costume and an Eyeball Mocktail

I'm thrilled with how Trevor's Halloween costume turned out. Making it was a joint effort between Steve and me. Check it out:


---------

Chef Alfredo Linguini and Remy Costume


Materials:


Steps:

Draw or print an image of Remy holding a spoon. Cut it out, then use the Sharpie to color it in completely. 


The next part is really easy: ask Husband Extraordinaire to come up with a light. If you do not have access to my husband or your own Husband Extraordinaire, it's easy to make your own using a few small parts. Steve used leftover parts to wire up a bright white LED in series with a resistor and a battery. 


Here's the schematic:


In a pinch, you could use a small stick-on light like this, but I'm concerned this one would be too heavy. If you're able to find one that is very lightweight, give it a try! 

I gathered the toque, the cut-out of Remy, the light, and the battery, along with my tape runner and Glue Lines.


I used the tape runner to put glue on the FRONT of Remy, then attached him to the inside front of the toque. I put two Glue Lines on the back of the circuit board, then attached it to the inside back of the toque. I left the battery out for now, since there's no on and off switch. 


I put the battery in the toque then we did a photo shoot with Trevor around 5:00 pm on Halloween in our backyard. It was bright and sunny, so you can't tell that there's a light on in his toque.
  

Here's Trevor at 7:00 pm while he was out trick-or-treating. It was fun to see Remy emerging slowly as the sun went down. 


And in case you were wondering... Yes, Steve and I did dress up, but we didn't coordinate with Trevor. Or each other. I had planned to make family costumes, but had to prioritize some other things, so we went with stuff from the costume box.


You can probably just make out the rat on my arm and the snake slithering down my chest. I don't think you can see the spider on my hat, nor my too-subtle green skin. And you definitely can't see the cockroach and eyeballs in my cauldron. 

When we returned to the house after trick-or-treating, I made a drink from the items in my cauldron (and maybe a few items from the refrigerator...)


To make your own eyeball mocktail, start by washing and drying a ping pong ball. Draw in the details. I used Sharpies, but you could use food-safe markers if you prefer. Combine equal parts of lemon juice, orange juice, and apple juice, then add a splash of vanilla Torani and a drop or two of green food color.  Float the eyeball in the drink, making sure the liquid doesn't come in contact with the ink. Delicious!