Showing posts with label Halloween. Show all posts

11/11/25

Trick-or-Treat 2025

Dressing in a chemist costume and greeting trick-or-treaters this Halloween was so much fun! 

Trick-or-Treat 2025 (affiliate link)


This was the first layout I made for Game 3 of the BYSS World Series. Unfortunately, my team (Scrappin' Banshees) lost again last week. While we won't be winning the Series, I'm hoping that we can get on the board this week and not lose in a sweep. This is the week's assignment: 


My layout earned four points for the Banshees. The NovMember prompt asked us to get inspiration from any element of any BYSS member's layout, other than the color or design of the layout. I chose to use the embellishment cluster in the bottom right corner of this page by Lisa Angie Miller. Hers is a smily face, a layered button, and the year '21; mine are two pumpkins (with smily faces) and the year '25. And some candy corn. 


My other three points come from including journaling, using specially textured paper (my background paper is embossed), and including an outdoor element (bat stickers). Go Banshees!

11/3/25

Chemist Halloween Costume

This year, I dressed as a chemist for Halloween. 
 

That's my own front porch. Rather than open the door repeatedly as trick-or-treaters showed up, I thought it would be more fun to just hang out on the porch to pass out candy. And indeed it was. The trick-or-treaters loved my set-up and had lots of questions about the mystery liquids, the test tubes, and letters on my sign. I loved watching them choose their candy from petri dishes. I chatted with parents and was much more involved with my neighbors than if I'd stayed inside and just opened the door when people knocked. 

I'm really pleased with my name badge and candy sign. I used PicMonkey to create the images, printed them, then backed them with cardstock. I slid the CINDy into a badge holder and I folded the CaNDy into a table tent. 


I'm fortunate that I can spell my name with elements from the periodic table. Steve was disappointed to learn that he can't. Neither can Trevor. My mom (KAtHY), my sister (KArI), nephew (TiMoThY), niece (AlLiSON), and mother-in-law (PAt) all can. 

If you are interested in dressing up as a chemist, here's a supply list to get you started. Affiliate links below. 


Chemistry Costume and Porch Decorations


Materials: 


This costume was so much fun! I'm going to have to start thinking now about how I can top it next year. 

10/24/25

Silly Ghosts Halloween Craft

Not all kids like the scary aspect of Halloween. This fun project features silly ghosts and challenges kids to experiment with different cartoon-style facial features. Affiliate links below. 


Silly Ghosts Halloween Craft


Materials: 


Steps: 

Cut a piece of black cardstock into the size you want your finished art to be. Then cut squares of patterned paper to fill the background. My background is 8" with nine 2.5" squares, but you can make any size you want. Glue the squares in place. 


Cut ghost shapes from white cardstock. Try to vary the shapes, making them different sizes, with and without arms, etc. Then draw silly faces on each ghost. Play around with different eye shapes and mouth shapes, then add teeth or tongues to some of the ghosts. It could be fun to add silly eyebrows, mustaches, or other features too. Glue the ghosts in place. 


If you're looking for other ideas for Halloween crafts (or costumes or carved pumpkins), be sure to check out all of my Halloween tutorials. There are also a few ideas for Dia de Los Muertos. Enjoy!

1/17/25

Halloween 2024

We spent Halloween 2024 with our friends Ken and Sheena. The plan had been for me to cook, but an ant invasion in our kitchen motivated us to move our dinner plans to a restaurant. A nice benefit was that the waitress took a group photo instead of us trying to do a group selfie.  

Halloween 2024 (affiliate link)

I don't use a lot of Project Life style cards on my layouts, so it was fun to design a page with four of them. I did my journaling differently too; I typed it directly onto my photo before having it printed. I like the white on black for this page. 

10/10/24

Decorating Disney-Themed Halloween Cookies and a Wormy Apple Cookie

Last weekend, I took a cookie-decorating class at Every Baking Moment with my friend Rebecca. The last time Rebecca had been there was for Trevor's 8th birthday party (he's 18 now). I took a different cookie-decorating class there once, two years ago (which apparently I never blogged about?!), so I was excited to give it another go. 

The instructor demonstrated how to make eight different Disney-themed Halloween cookies, then we were set loose to create. It was so much fun trying out different techniques! I've never used a stencil on cookies before, like we did on Madame Leota. Nor have I used a dehydrator for cookies. We dried the red of the apple before adding the green on top. 


Compare my nine cookies above with the eight cookies below that the instructor made. 


I went my own direction with a few of the cookies, but not always intentionally! I should have made curved lines of black frosting on my spiderweb cookie, but I made straight lines. Oops. I put a leaf on the poison apple, but not on the Mickey pumpkin... and I didn't even notice until I photographed my cookies the next morning. I outlined Oogie Boogie in black after the green had tried to see if I could follow the lines (no). I skipped the writing on the cauldron. I'm terrible at writing, but it would have provided a little camouflage for the bad flooding job I did. I think I used the thick black frosting intended for writing instead of the 15-second frosting. I did a good job flooding the bat, so I must have used the correct frosting for that. The central Mickey with the spider was my own idea.  

We were allowed to take home some undecorated cookies plus any leftover frosting. These are the cookies I made at home, without any time pressure. Notice that the pumpkin Mickey is infinitely better than the one I made in class?


As for the letters on the bat, I piped them onto parchment paper rather than directly on the bat, then transferred them over when they dried. I piped each letter dozens of times and then picked the best of each and they still don't look great. 

Since the apple was not someone else's idea (or trademarked character), here's a tutorial. Affiliate links below. 


---------


Wormy Apple Cookie


Materials: 


Steps: 


Bake and cool apple-shaped cookies, then prepare the royal icing. If you're making your own, aim for the consistency of honey. Color the icing with your desired shades. I made a green apple with an orange worm because those were the colors of icing I had, but you could make red, green, or yellow apples and orange, green, or pink worms. You'll need a little bit of black for the hole. You may also want a brown stem. I used green since I didn't have brown.  Put your colored royal icing into the piping bags. 

Working on parchment paper and with one cookie at a time, flood the apples with your desired color(s). Use the scribe tool as needed. While the icing is still wet, pipe a circle of black onto the apple. Set the cookie aside to dry. 

To make the worm, pipe a series of 5 of 6 circles touching one another onto a piece of parchment. The circles will sink together, leaving a vague impression of body segments. Use the scribe tool to dot two black eyes onto the worm while it is still wet. Let the worm dry completely. 

Peel up the dried worm (ew), add some dots of icing onto the back to act as glue, and place it on the apple. When the icing is dry, your cookies are ready to serve!

9/27/24

Easy, Unique, and Affordable Homemade Halloween Costumes

I'm a big fan of homemade Halloween costumes. Not only are they guaranteed to be one-of-a-kind, but they are often less expensive to make than buying a costume would be. (I spent exactly $0 for Trevor's toga costume.) And if your child wants to be something besides a superhero, princess, or character from a popular TV show, you might have a hard time finding the exact LEGO Minifig Robber costume or campfire costume they're picturing at a store. 

You do not need to know how to sew to make a homemade costume. I can barely do a poor job of hemming a pair of pants, let alone sew an outfit. Most of the costumes I've made start with a men's t-shirt and involve scissors and hot glue, not a sewing machine. 

I've made a lot of homemade Halloween costumes over the years. These are some of the most popular. 
 

Did you happen to notice that all of the costumes feature the same model (Trevor) except for the center one? That's my niece, Allison, showing off the 'Put Me in the Zoo' costume. I love these photos. So many good memories! 

To find out how to make each costume, clink the link under the photo to go to the tutorial. You'll find materials lists and step-by-step instructions. 


If you're looking for Halloween projects, pumpkin carving ideas, or crafts for Dia de los Muertos, you can find all of those here: Halloween Crafts for Kids. Enjoy!

1/5/24

Documenting Halloween 2023: Ice Cream Sundae Costume

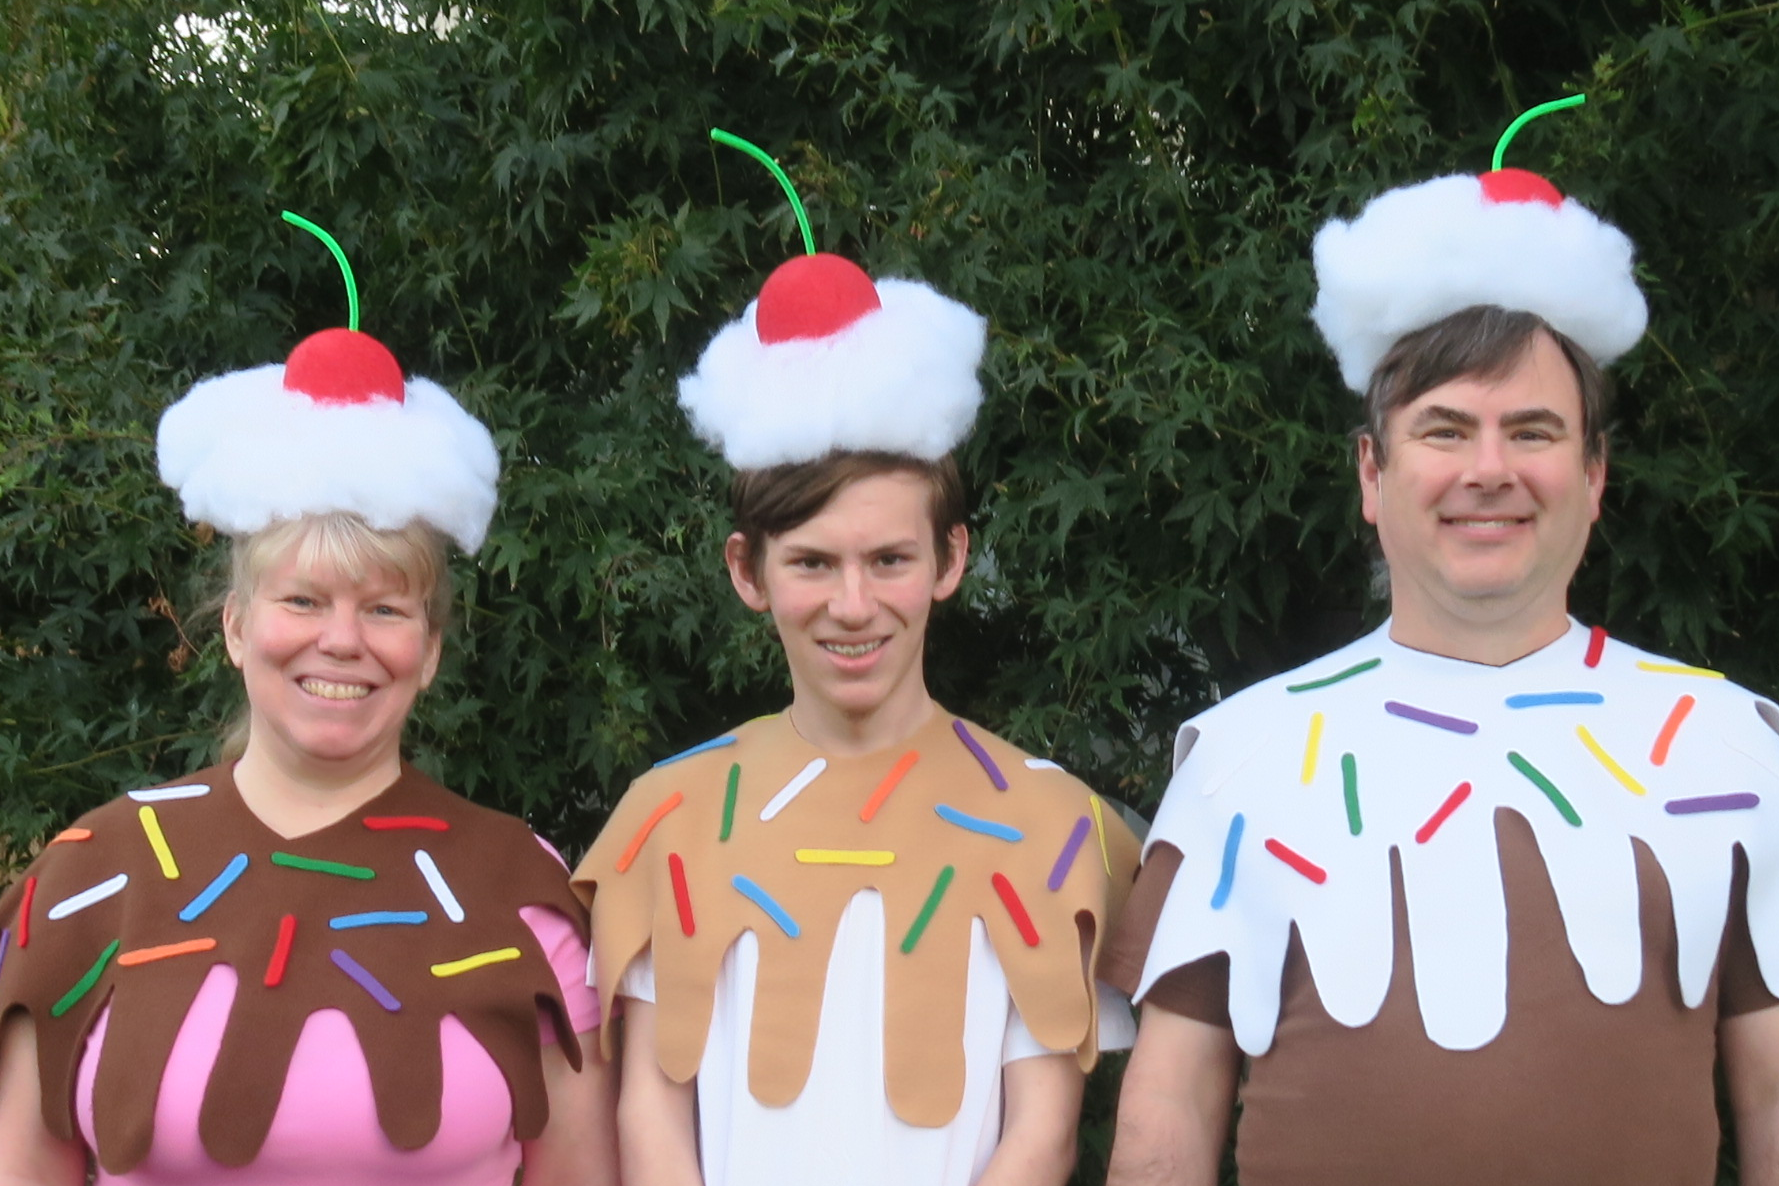
For Halloween 2023, our family dressed up as an ice cream sundae. Most of our trick-or-treaters thought we were cupcakes. Close enough, I guess!

We spent Halloween with the same friends we usually do, but this year we didn't take a group picture. Or any other pictures, for that matter. So my one and only Halloween layout is about our costume. 
 

I really like this layout. For one thing, it was fun to use such a non-traditional color scheme. I'm pretty sure rainbow polka dots haven't appeared on any Halloween page I've ever made (including the time we dressed as a rainbow!). In fact, before I added the embellishments, nothing about this page looked like Halloween at all. The pumpkins, bats, witch hat, and candy corn made a big difference. I'm happy to have this layout in the album. 

11/3/23

No-Sew Ice Cream Sundae Costume for Three

I love Halloween. This year, our family dressed up as an ice cream sundae.  


It's a fun costume for three people, but could just as easily work for one or two. You could easily add a stuffed (or cardboard) banana and turn this costume into a banana split. Or dress an additional person with a banana costume (affiliate links here and below). A lot of the kids who came to the door and saw just me thought I was dressed as a cupcake. So that's another possibility! 

This costume took very little time to make, which is good since I didn't start until just a few days before Halloween. Even better, there's no sewing involved. And best of all - the chocolate, caramel, and marshmallow sauces are removable, so you can wear the t-shirt afterwards as part of your regular wardrobe.


No-Sew Ice Cream Sundae Costume


Materials:


Steps: 


I started by figuring out which of us already owned plain t-shirts in each particular ice cream color, then bought polar fleece to pair accordingly. I got white (marshmallow) fleece to go with Steve's brown (chocolate) shirt, camel (caramel) fleece for Trevor's white (vanilla) shirt, and dark brown (chocolate) fleece to go with my pink (strawberry) shirt. Each of those "toppings" is essentially a cape. 

I tried to make a paper template for the capes, but that failed. So I used inexpensive felt instead. After figuring out how long (22") and wide (30") I wanted the capes, I cut a neck hole in the felt and added some random drips. I made adjustments by cutting, of course, but also stapling the felt in a couple of places to make it more the shape I wanted. Then I put the template on the polar fleece and cut out the shapes.  


Each cape got 16 sprinkles, which I cut from the craft felt. They're approximately 3" long. I scattered them on the capes and used the glue gun to adhere them. 


I had colorful party hats on hand, so I cut the tops off of them, then painted them with gesso. You can skip this step (and the associated drying time) by starting with white hats in the first place. I painted the styrofoam balls red. 

When the paint was dry, I used hot glue to attach the styrofoam balls to the party hats. I used a paper piercer to poke a hole at the top of each. Then I snipped green pipe cleaners in half, gave them a gentle bend, and pushed them into the holes. No glue needed.  


I shaped the Fiber-fil into cylinders and then glued them to the party hats. 


That's all there is to it! You could add velcro or another closure to the topping capes; we just used safety pins. The hats stayed on pretty well until we bent over; bobby pins will help keep them in place. 


This was a really fun costume. It's easy to store (pull out the cherry stems, stack the hats, and fold the capes) so I'll be hanging onto them to possibly wear in the future. 

10/26/23

Serendipity Witch Drawings

First zombies, then monsters, now witches! 


I used the same materials and followed the same basic steps, but with two exceptions. First, I started out with random shapes that were relatively symmetric, since witches are living humans (unlike zombies and monsters).


When I added facial features and hats, I made each different. No two mouths, noses, or sets of eyes are the same. And I intentionally avoided the the offensive, stereotypical witch nose


I varied the hairstyles, length, and color. And I used a variety of skintones, leaning heavily on greys like I did with the zombies.  

As I was drawing my witches, I was imagining their different personalities. As my mind wandered, I thought how ridiculous (and fun) it would be to choose four of my witches and design a sitcom around them living together in the Golden Girls' Miami house. Speaking of which, have you ever noticed how much Golden Girls merch there is on Amazon (affiliate link)?! It's surprising, yet awesome. Anyway... witches. I had a lot of fun drawing them. I encourage you to give it a go! Like before, it's a great project for someone who "can't" draw. 

10/20/23

Witchy Halloween Frame

Halloween crafts are some of my absolute favorites. This time I made what I'm calling a witchy frame. Witchy because it is green with warts and embellished with a broom. Affiliate links below. 

Steps: 


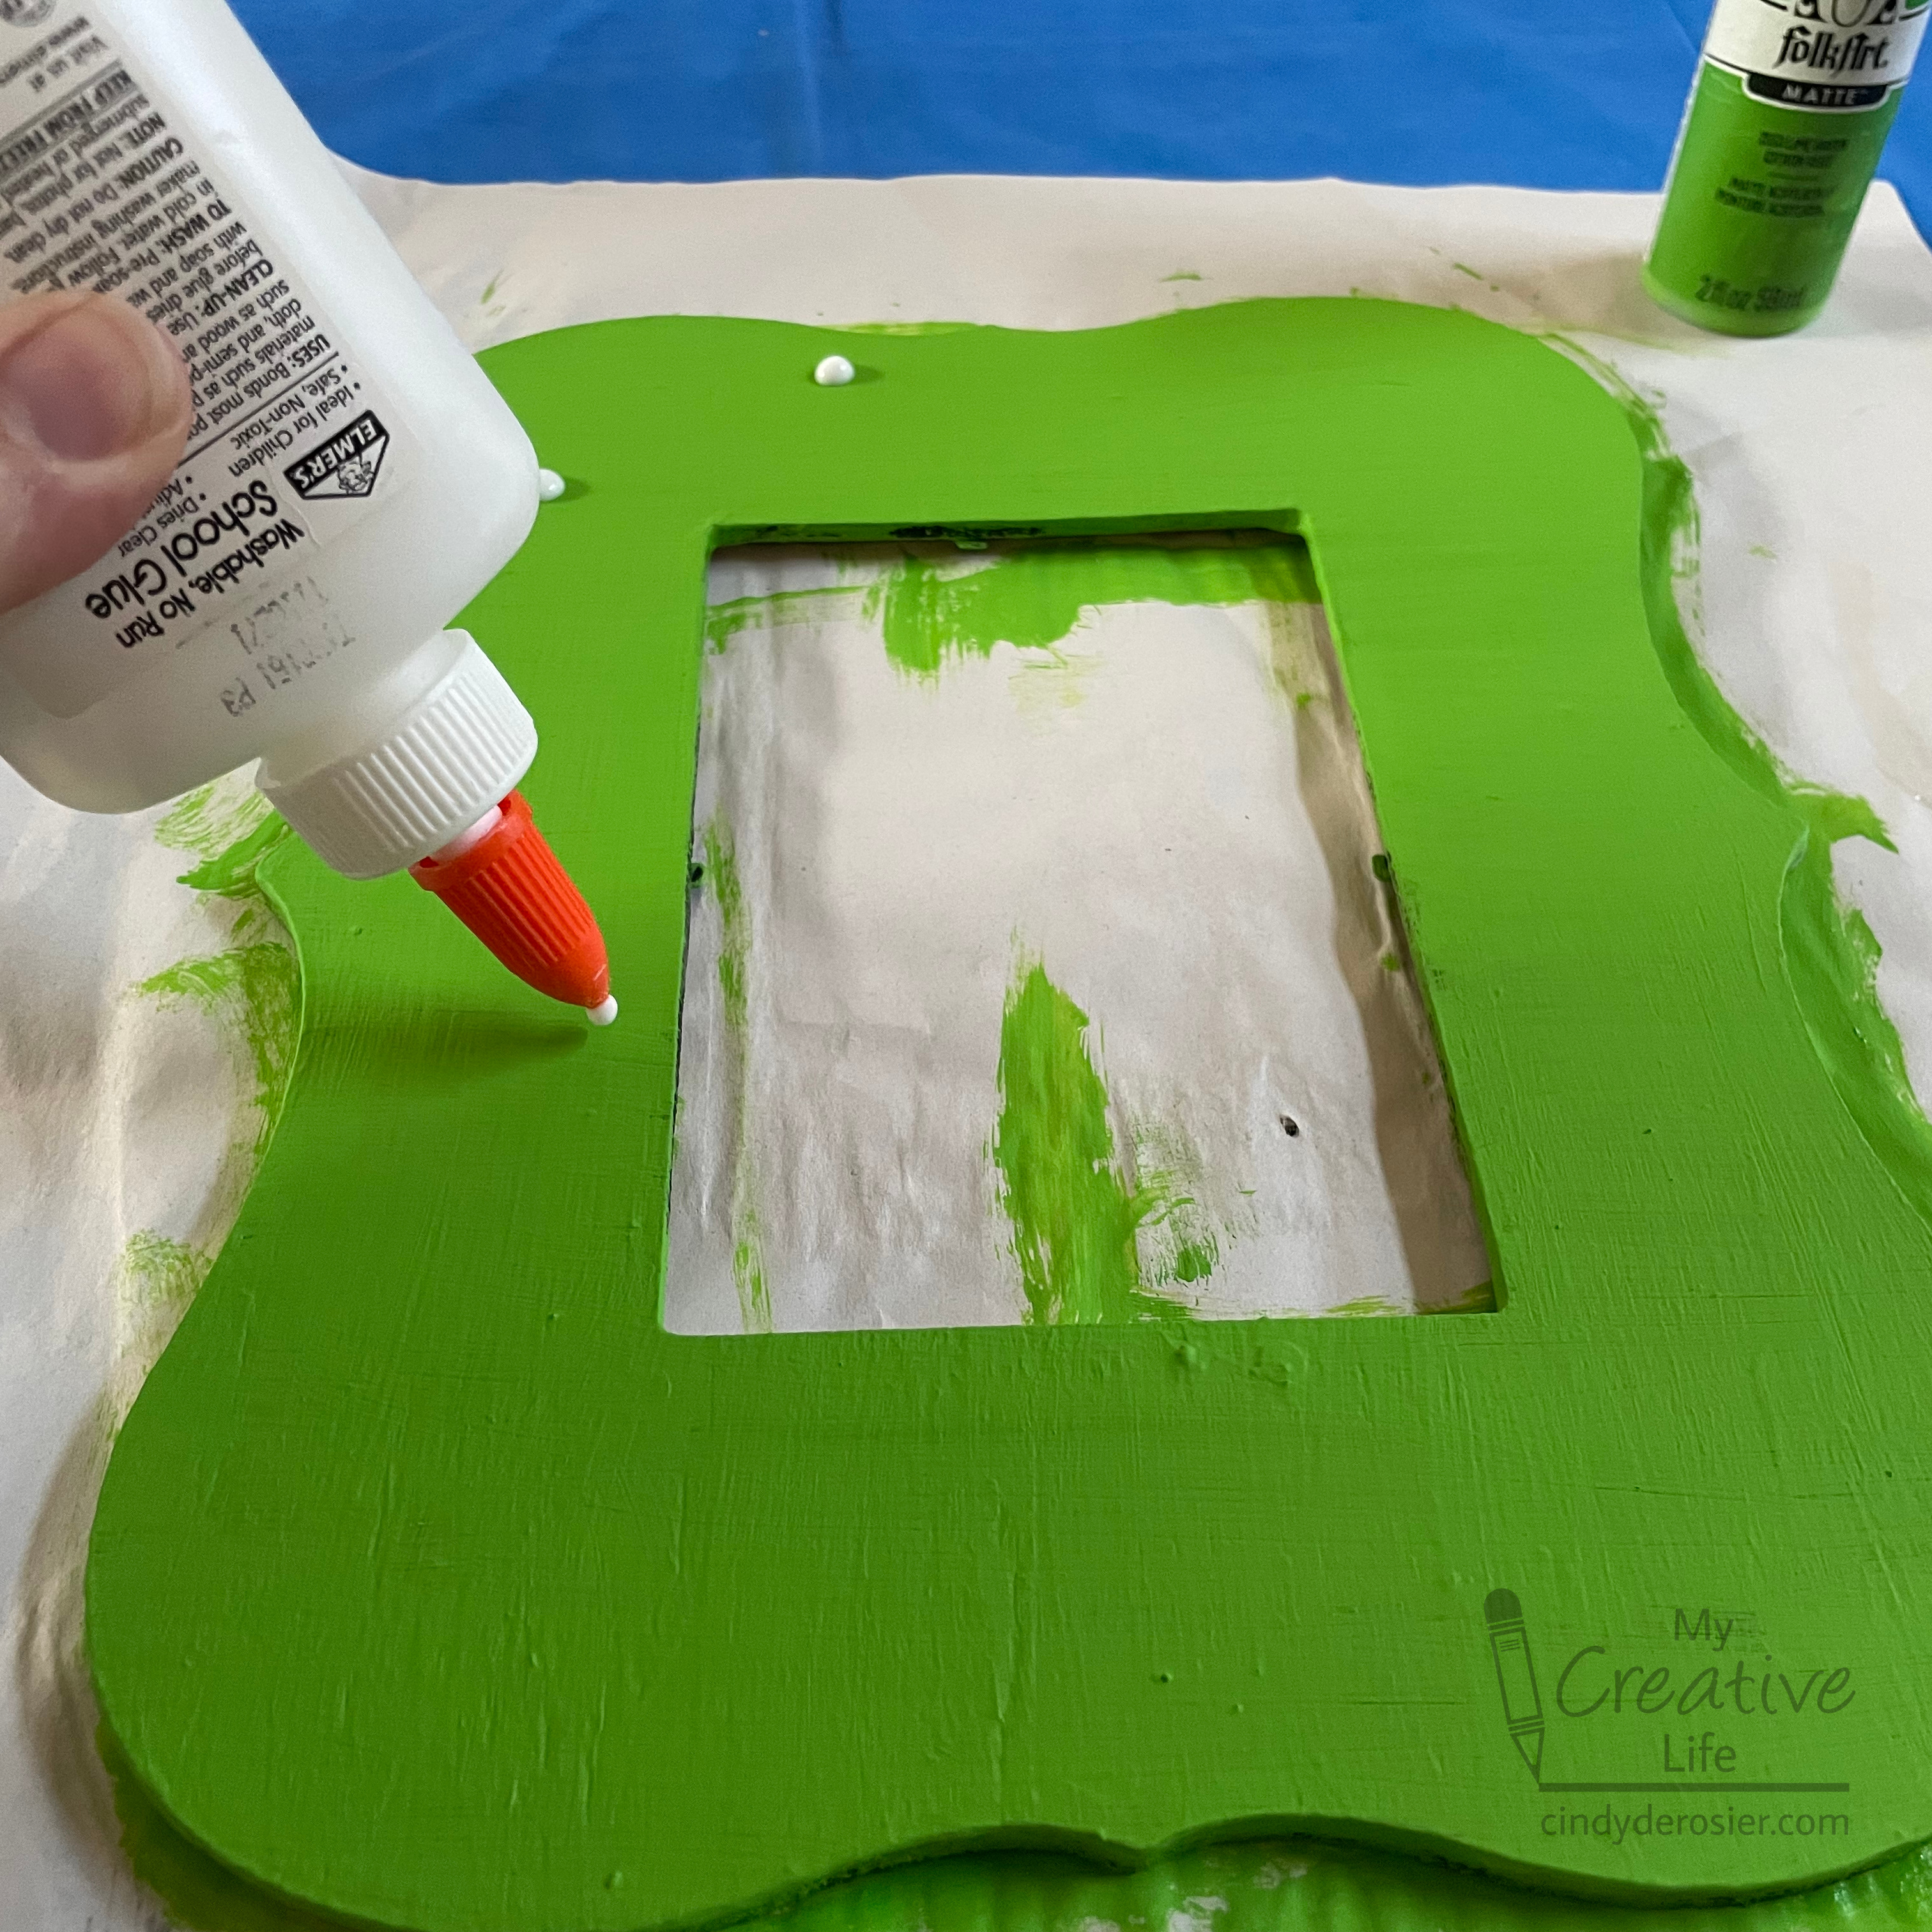
Paint the frame lime green. Let the paint dry completely, then add dots of glue randomly on the frame. They will dry flatter and larger than the original drop. 


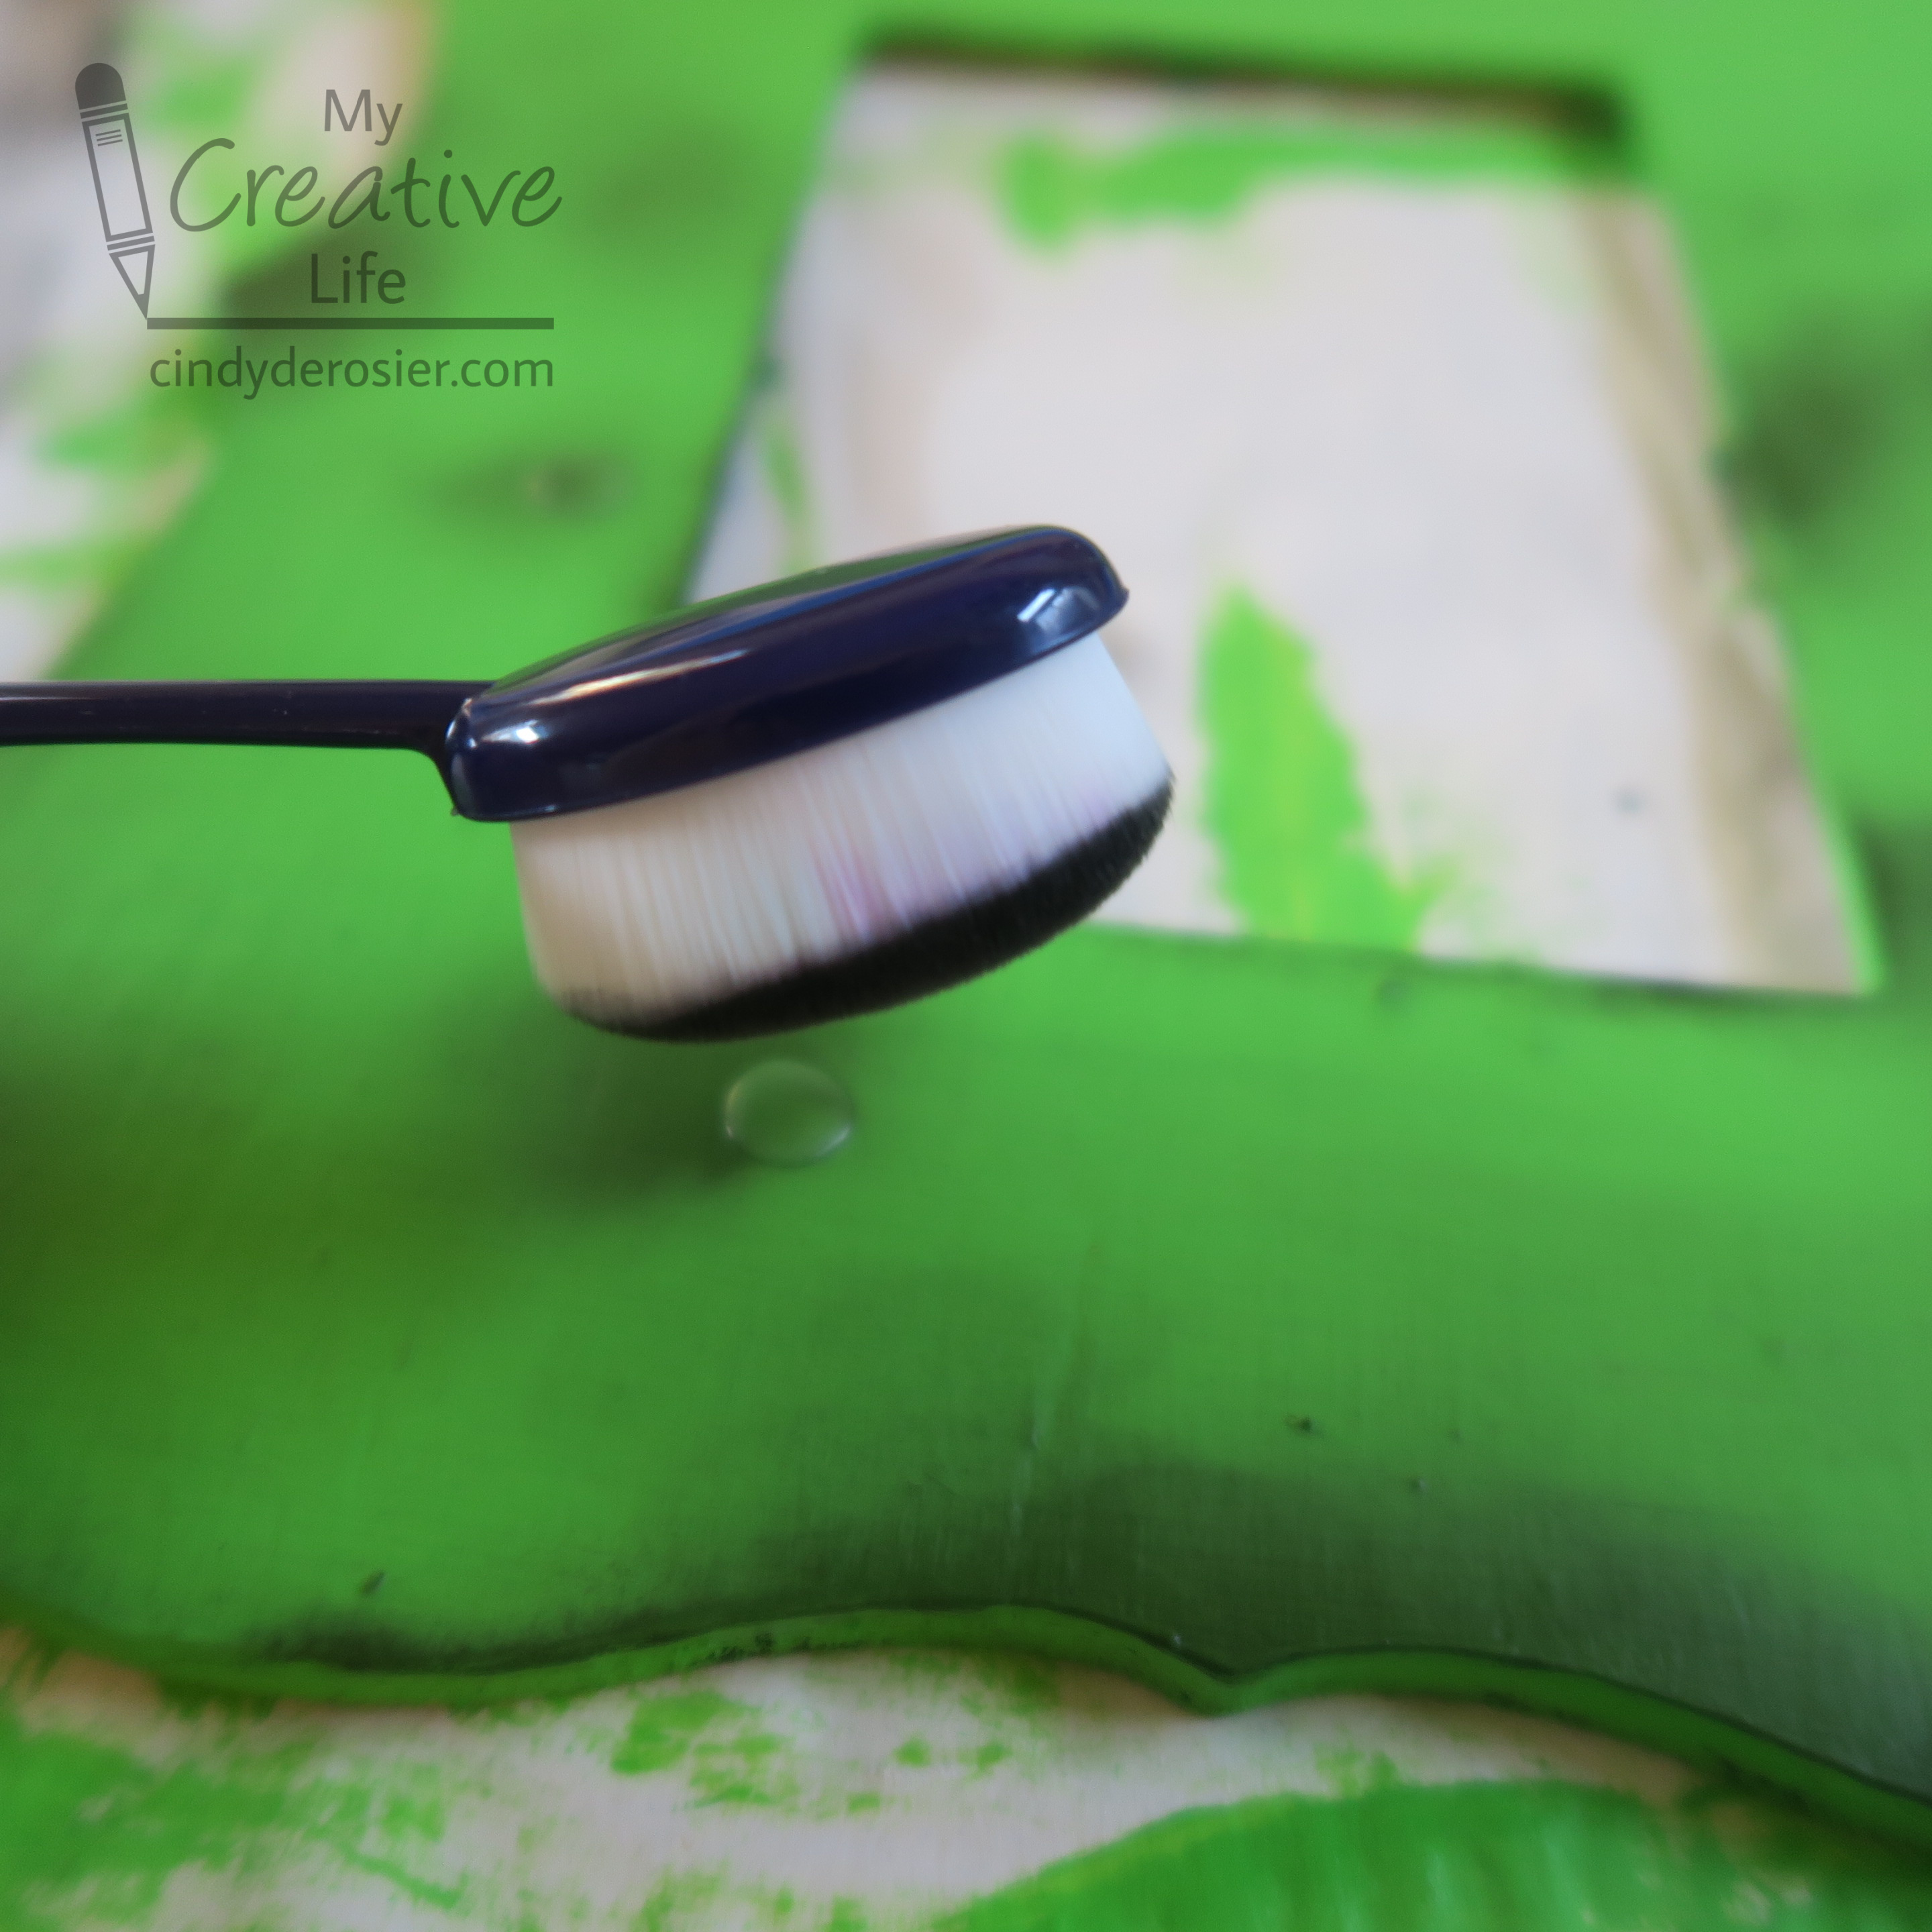
Let the glue dry completely. This could take a full day or more. When the glue is dry, use a blending brush to apply a small amount of grey or black ink over the dried spots of glue. Add some ink to the edges of the frame as well. 


This is how mine looked when I was done with the ink. That's the top of the frame facing the camera. 


Use Supertite to glue a broom and a spider to the frame. When the glue is dry, add a Halloween photo or message to the frame. 


I don't think I've mentioned it on the blog, but Trevor got braces early last week. I'm eating braces-friendly food in solidarity with him (because it would be super rude for me to expect him to avoid popcorn, caramel, and other favorites while I eat them in front of him), so I'm going to need to think what Halloween candy looks like this year. My favorites and Trevor's favorites are a no-go. Any suggestions for braces-friendly Halloween candy?

10/19/23

Serendipity Monster Drawings

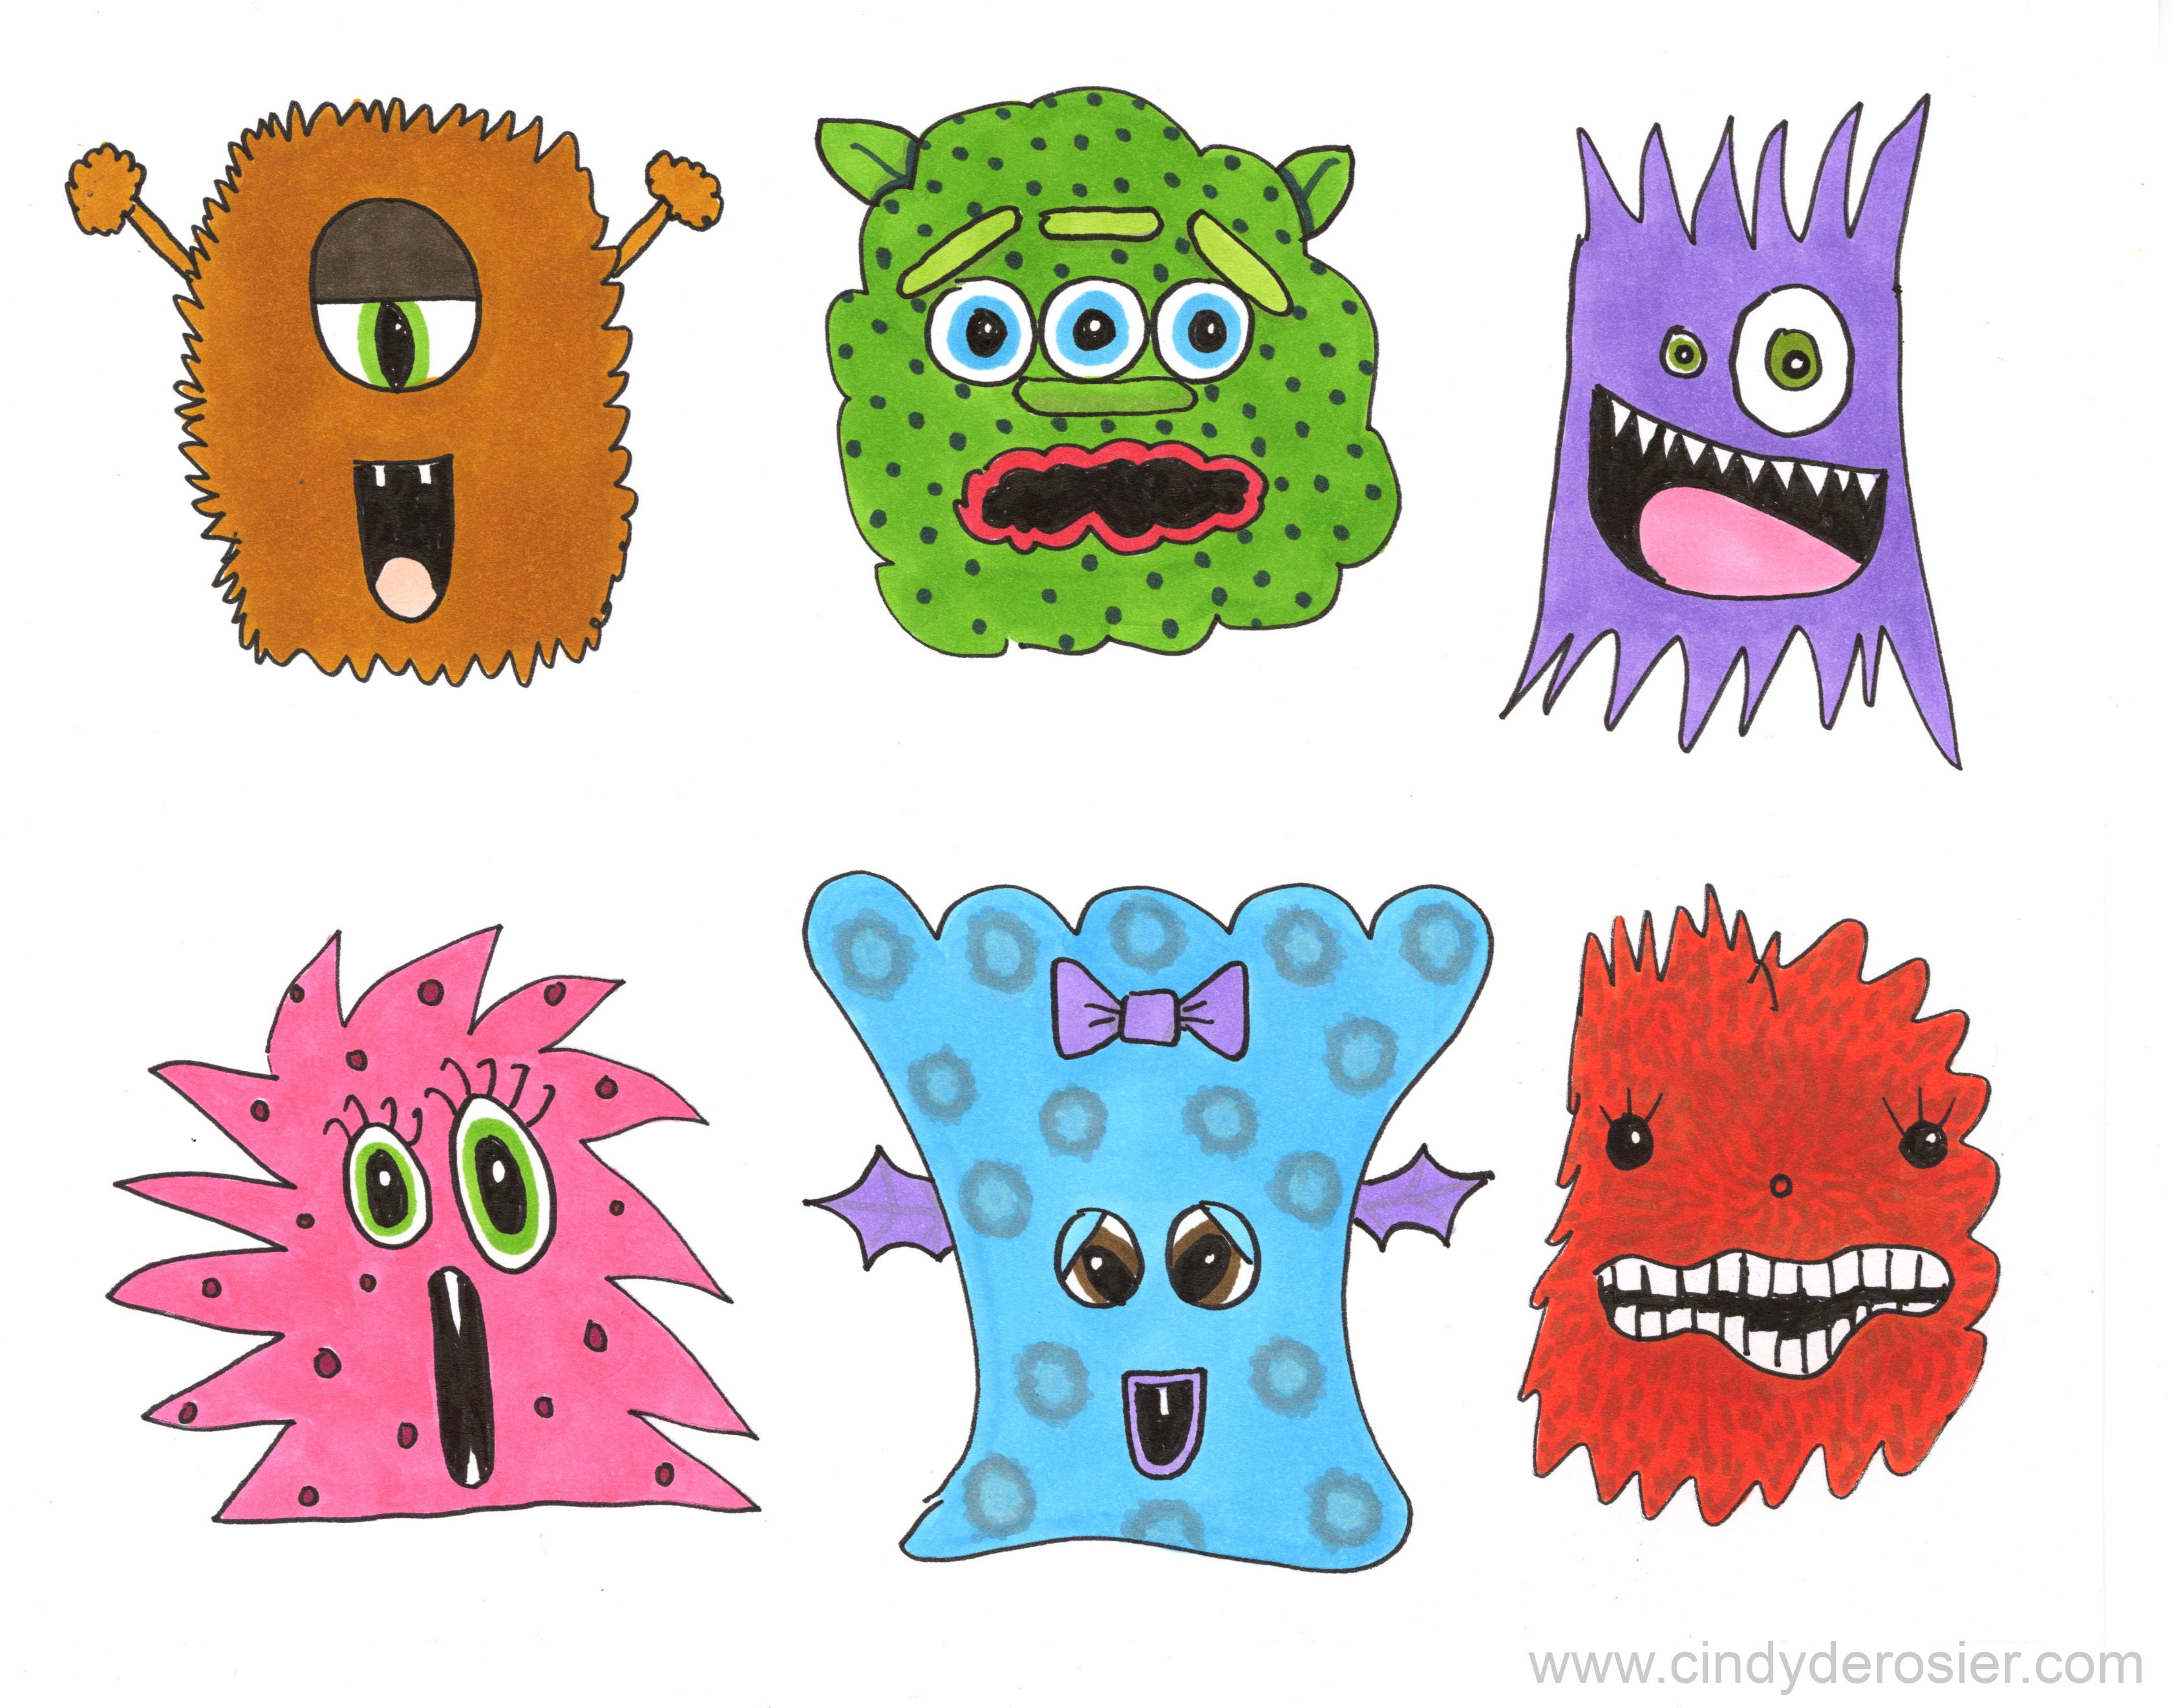
I had so much fun with my zombie drawings that I made a monster version. Once again, monsters are great for people who "can't" draw, because there is literally no right or wrong about how a monster looks!


I used exactly the same supplies and same steps as with the zombies. I drew some quick shapes with a flair pen....


... added details...


... and then colored them in with Ohuhu markers. 


This is a great activity on its own, but is also a fantastic warm-up to a creative writing assignment. Draw your monsters, then use one or more of them in a story. Or cut them out, glue them to craft sticks, and have a puppet show! Or design a product label that one of these monsters is endorsing. The possibilities are endless... and so much fun!


10/13/23

Serendipity Zombie Drawings

I hate hearing people say that they can't draw. Of course you can draw! Maybe you can't draw realistic portraits because you haven't been taught how and haven't practiced enough, but you certainly can draw. Today's zombie project is perfect for people who "can't draw." Zombies aren't real, so there's no right or wrong when it comes to drawing them. Literally anything goes! 

This is my first-ever attempt at drawing zombies. 
 

I'm calling these Serendipity Zombies because I started by drawing random shapes on a piece of paper. I didn't try to make face shapes or think about how each would look as a zombie - I just drew rounded shapes using a black flair pen (affiliate link here and below). 


Then I started drawing details (bulging eyes, gaping mouths, exposed brains, missing teeth, random wounds...) in each one. 


Then it was time to color. While I spent less than 5 minutes total drawing the faces, I took my time coloring so that I could practice blending and shading with my Ohuhus. I limited myself to using one set (rather than using all 460?? markers) so that I'd be forced to blend. I chose the Kaala Landscape set, one of my very favorites. 


I will be doing this again because it was SO MUCH FUN! 

10/11/23

Trick or Treat Halloween Jar Coloring Page

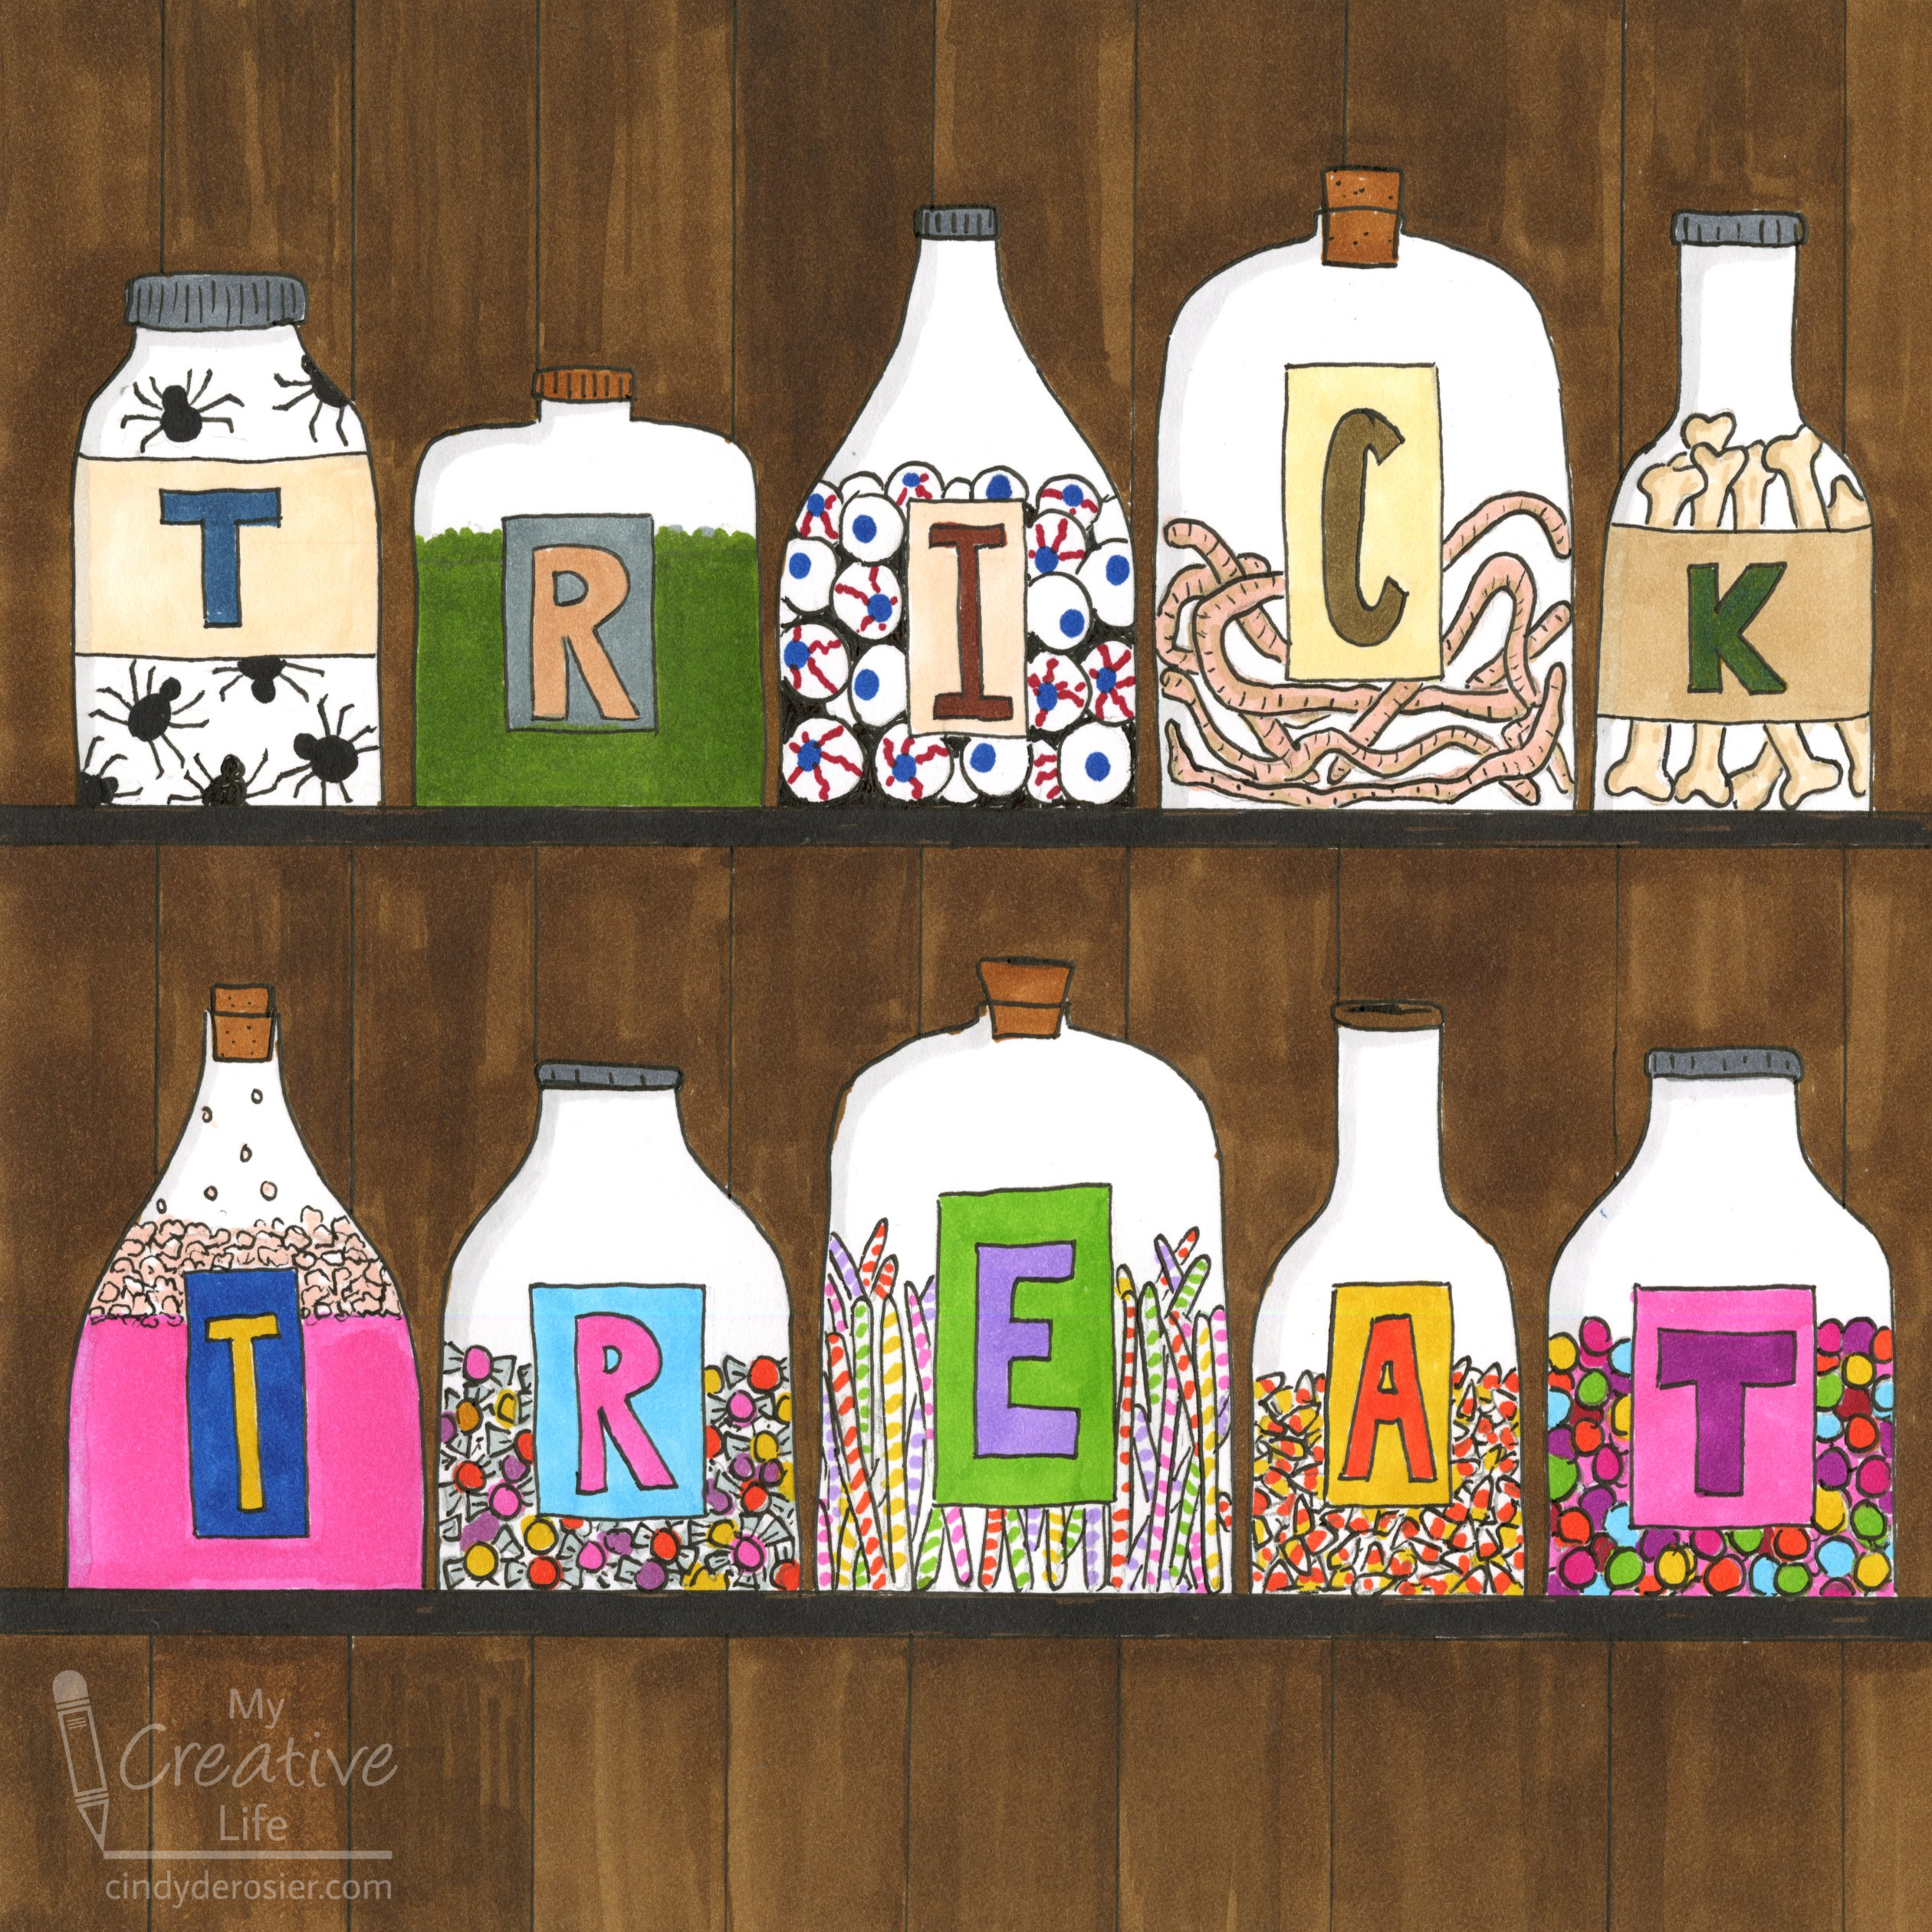
I was in the mood to color, so I pulled out my awesomely huge collection of Ohuhu markers and drew this:
 

Halloween crafts are so much fun! I loved deciding what trick or treat options someone might put in jars on their shelves. In retrospect, perhaps the eyeballs should have gone into a jar with a larger opening though. 

Below you'll find all the steps I did to make my drawing. If you want to skip the first steps and print out my line drawing as a coloring page, feel free. Affiliate links below. 


---------


Trick or Treat Halloween Jar Coloring Page


Materials:


Steps: 


Fold a scrap of cardstock in half. Cut out half-jar shapes along the fold so that they open to make a complete jar. Repeat with jars of different shapes and sizes, making sure they'll fit nicely on the drawing paper you're using.  


Use the fineliner to draw two horizontal lines on your drawing paper. These are the shelves. Position your jars the way you want them, then add a tiny dab of repositionable adhesive to the back of the jars to hold them in place. Carefully trace around each jar, then remove them. 

Add labels to your jars. 


Now grab those Ohuhus and start coloring! Fill each of the TRICK jars with something creepy and each of the TREAT jars with something tasty. You can color first and then outline in black, or outline first and then color. Both work. Obviously, you could also sketch your ideas with a pencil first. When you've filled your jars, you can add lids and stoppers. Or not. I toyed with the idea of leaving the lid off the spiders and putting them all over the page. 
 

The last step is coloring the background, which really makes the jars pop. I used a single Ohuhu pen to make the wood paneling. You can get great variegation by laying down different amounts of ink. 


If you're seeing this on the day I published it, Amazon has an AMAZING sale on Ohuhu markers right now! Check out all the different styles and sets. I've never seen a better price on alcohol markers, and Ohuhu makes some of the best.