Showing posts with label wearable. Show all posts

12/10/24

St. Lucia Day Star Boy Hats

St. Lucia Day is a Swedish tradition, celebrated each year on December 13. It commemorates the martyr Lucia of Syracuse, who brought food to Christians hiding in Roman catacombs, lighting the way with a wreath of candles on her head. The modern celebration features a procession with Lucia, trailed by handmaidens, star boys, and gingerbread men. In addition to being the bearer of light, Lucia brings treats. These include gingerbread biscuits and S-shaped saffron buns. 

Many Lutheran churches in the United States celebrate St. Lucia Day, either annually or occasionally, on the Sunday closest to the 13th. I remember having celebrated it a handful of times in my childhood. On Sunday, my church will be celebrating St. Lucia Day, for the first time in many years. I was in charge of making the hats for our four star boys. Affiliate links below. 


St. Lucia Day Star Boy Hats


Materials:


Steps:


Tie the end of a piece of string to a pencil, then cut it so that it is 18” long. Hold the loose end of the string at one of the corners of the poster board, then use the pencil to draw an arc extending from one edge of the poster board to the other. If you need more than one star boy hat, repeat the process on the opposite corner of the poster board; it is large enough to make two hats. 

Cut along the arc. Draw or trace stars onto the center of the hat, then draw a 1.5" border along the arc. Fill in the stars and border with Treasure Gold. It will take two coats, but the shine is well-worth the effort. 

When the paint is dry, it is time to coerce your poster board into a cone. It doesn’t want to become a cone, so this is a little tricky. Once you get it into position, use binder clips to prevent it from springing open and trying to un-cone itself. Apply hot glue along the length of the seam, then remove the binder clips. 

Your star boys will keep their hats on with two pieces of yarn tied under their chins. Cut yarn into 12” pieces. Put a 1” line of hot glue on the inside of the side of the cone (where a strap would go) and place a piece of yarn there. Repeat on the process on the other side to make the second strap.

3/6/23

California Pride Necklace

Welcome to California Week, here at My Creative Life! 

All week, I'll be sharing California-inspired crafts, activities, foods, and more. Why? This week I will be attending the 2023 Visit California Outlook Forum. It is the main event for California travel and tourism professionals. This year's conference is in downtown Sacramento. I can't wait for the interesting keynotes and seminars, the many great networking events, and the walking field trip they're offering. Naturally, I had to make my own California-themed necklace to wear to the conference. Affiliate links below. 


California Pride Necklace


Materials:


Steps: 


Paint the wood circle black. When it is dry, add a coat of Stickles to the front. Paint the California wood veneer in Treasure Gold. 

When the paint is completely dry, glue a jewelry bail to the back of the wood circle. Then glue California to the front. String the pendant onto a chain and wear it with pride.  

---------


If you're less of the do-it-yourself type or more of the buy-it-yourself type, check out these cute, ready-made California pride jewelry options in a range of price points. 

4/27/22

Multiplication Facts Bracelets: A Way to Teach Times Tables with Kids

Back in my teaching days, I used games and fun activities to help my students learn multiplication and division facts. One of my favorites, which worked beautifully for Trevor, is Tic Tac Toe Dice. Physical activities, like playing Steal the Bacon with products or coloring multiplication tables, worked for some kids, while songs and chants helped others. Regardless of the method, it's crucial for their future success that kids learn multiplication and division facts as soon as possible. When kids don't know 6x7 or 9x4 off the top of their heads, they're going to struggle with almost all of the math beyond third grade. 

I don't think I ever encountered a 5th grader who didn't know the 1, 2, 5, and 10 facts, and the vast majority of them also knew the 3's and 4's. But I had plenty of students each year who didn't know the 6, 7, 8, and 9 facts well enough to apply them to the more challenging math we did. I wish I'd thought of the idea of Multiplication Fact Bracelets idea back then, because I think these may have helped some of them. Making the bracelets is a useful way to practice facts, of course, but by wearing them and looking at them frequently, and even using them as a fidget device, I imagine some kids could become more confident with their times tables. Affiliate links below. 


Multiplication Facts Bracelets


Materials: 


Steps: 


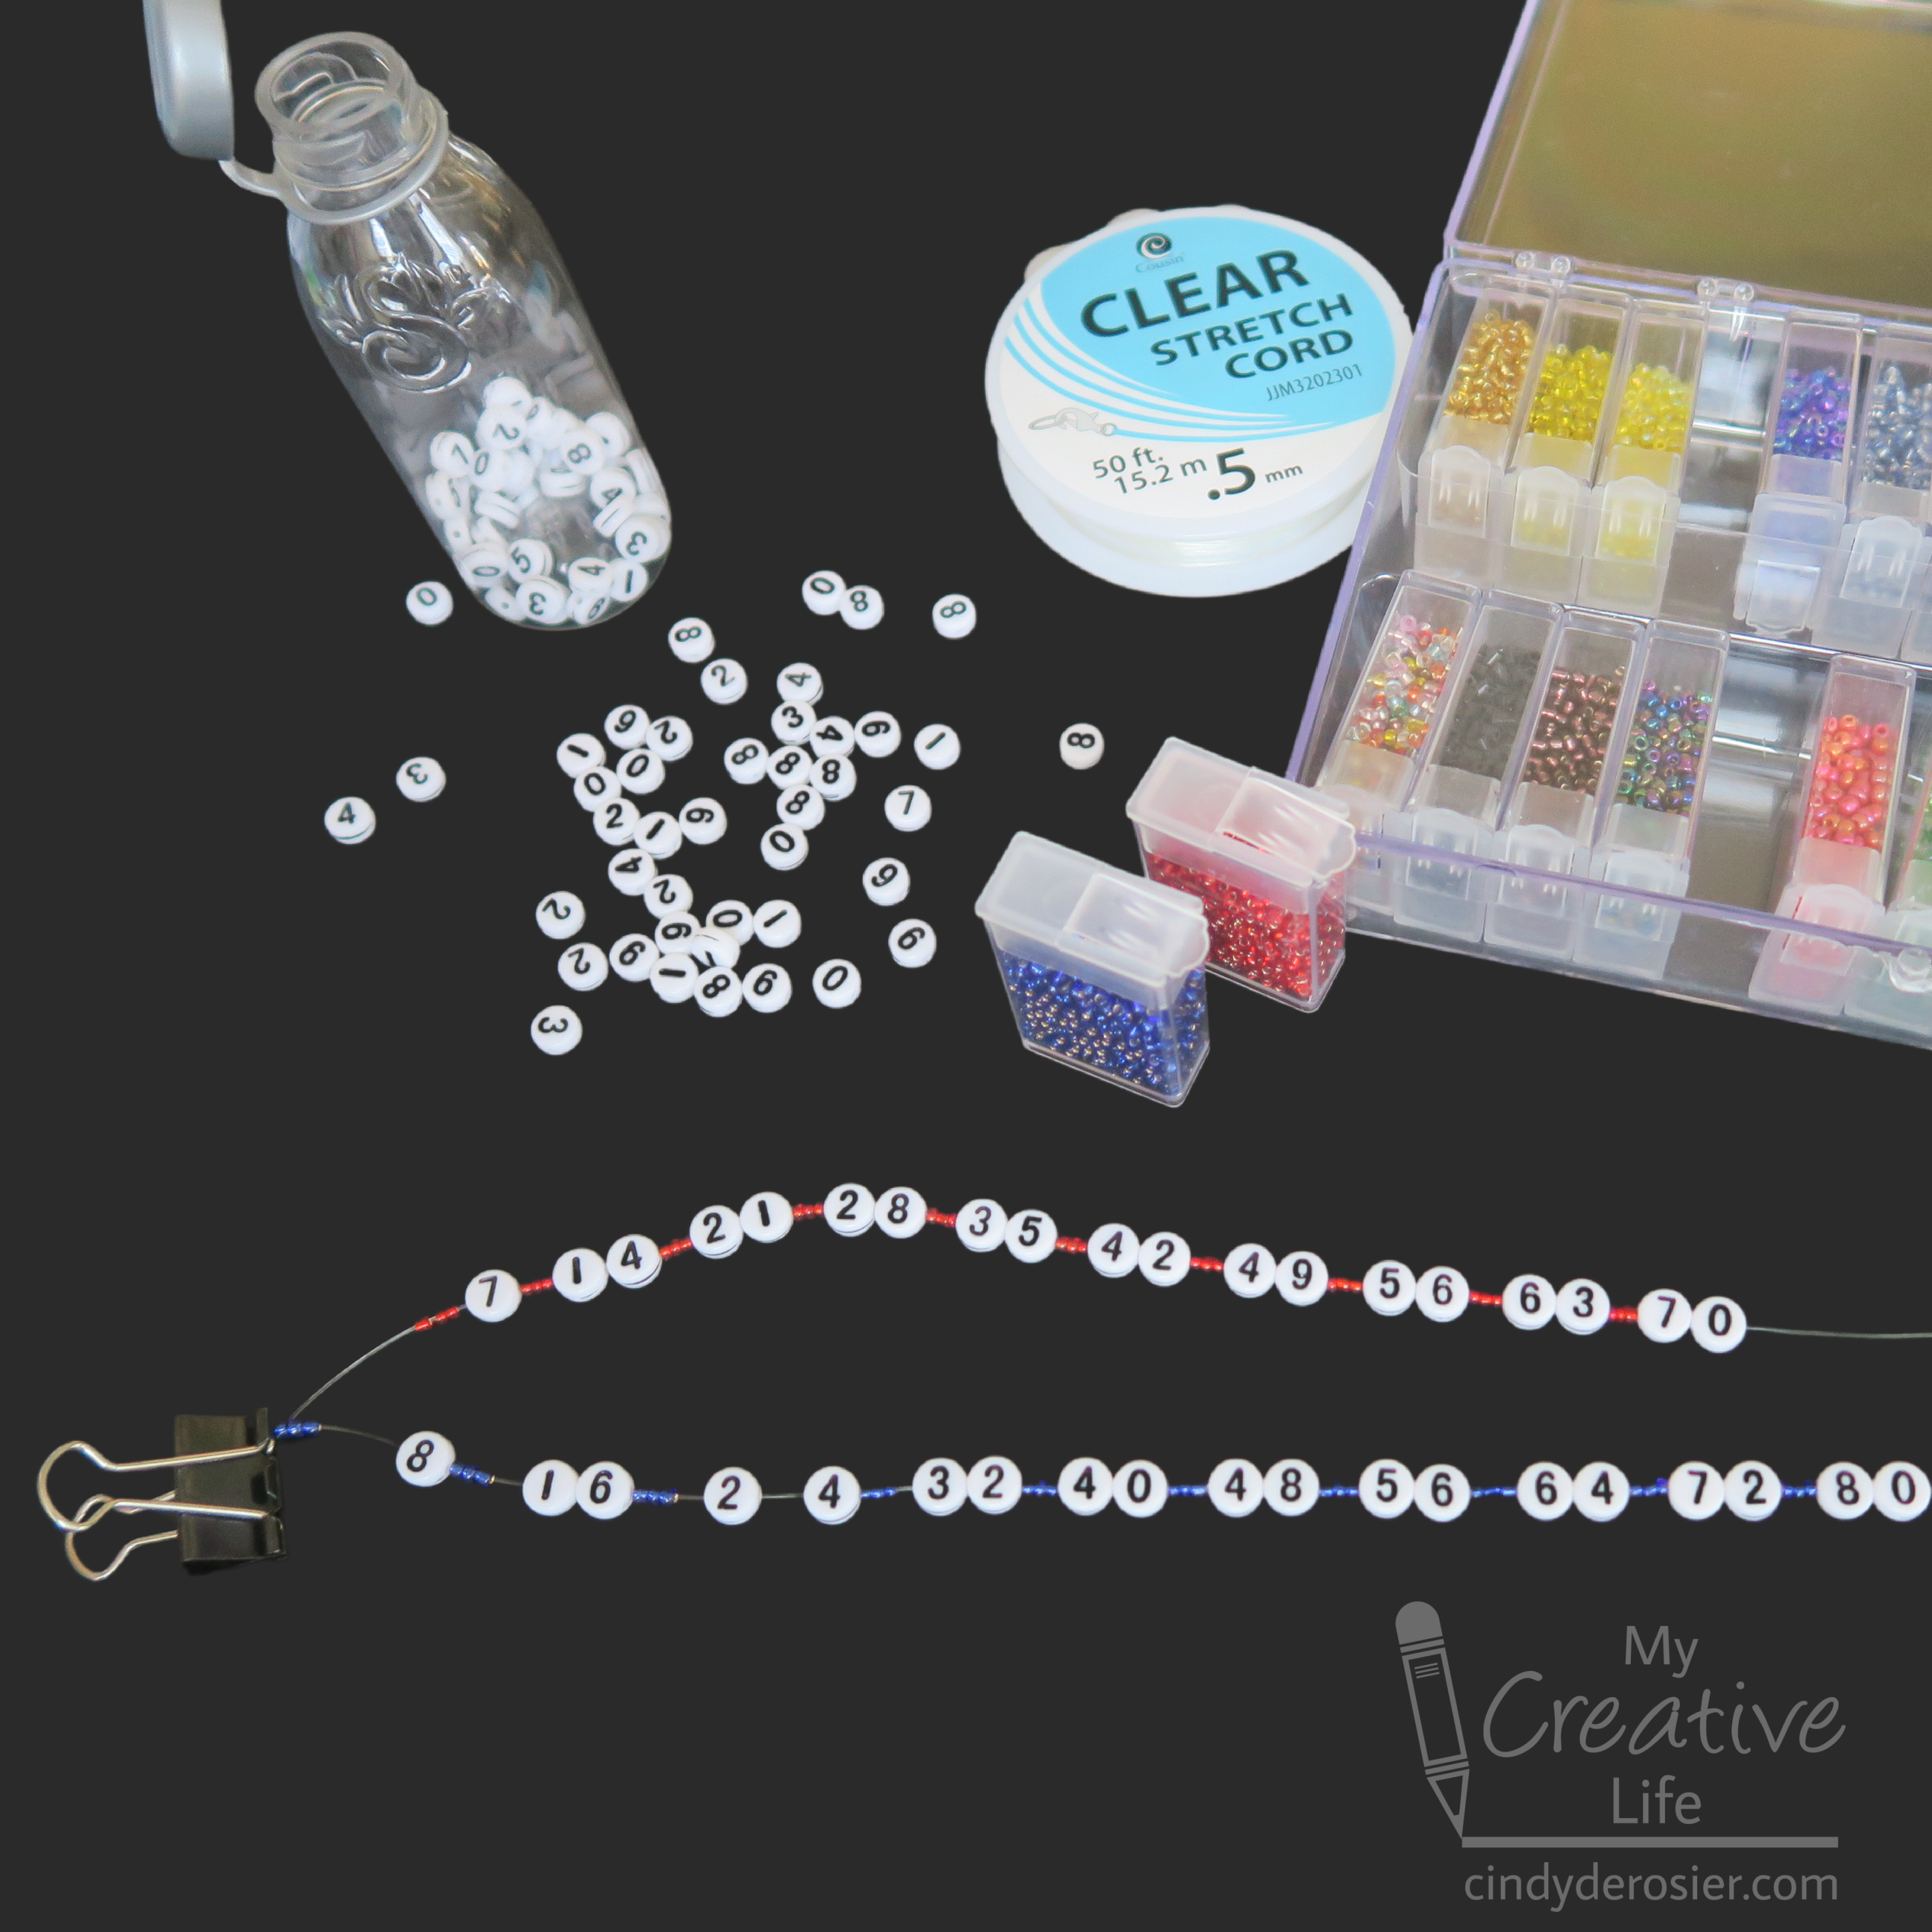
Cut a 12" length of stretch cord. This will leave you with plenty to tie off the bracelet when you're done beading. Attach a binder clip to one end of the stretch cord to keep the beads from falling off that end. 

Choose a single color of seed beads for each bracelet. I used yellow for the 6's, red for the 7's, blue for the 8's, and green for the 9's. If you're doing this in a classroom, have everyone make the same set of facts in the same colors, so that you can refer to the "blue 8's" bracelet without causing confusion or the inevitable, "My 8's are pink!" interruptions. I'll use the blue 8's for this tutorial; obviously, follow the same steps for the other bracelets. 

Begin by putting three blue seed beads onto the cord. The cord is sturdy enough that you can use it to poke into the hole of a bead to thread it. Then add the number 8. Add three more blue seed beads, then then 16. Three more blue seed beads, then 24. Make sure the numbers are all facing the same direction. There is no up and down for 0, 1, 3, and 8, but it matters for the others, particularly the 6 and 9. Continue this pattern until you reach 80.
  

Carefully remove the binder clip and then tie the ends together using a surgeon's knot. It's basically the same as the square knot they already know with an extra 'up and over' when you make it. 


Put the tied bracelets on a piece of parchment paper, then add a dot of glue directly onto the knot you just tied. Let the glue dry completely, then cut off the extra cord. 


The surgeon's knot and glue combination is strong, but to make sure your bracelet doesn't come apart when you're stretching it to put it on, hold onto the knot with one hand while you stretch the bracelet over the other. 


These bracelets are also fun for teaching the concept of Least Common Multiple. In the photo, you can see that 56 is visible on both the red (7) and the blue (8) bracelets and that 48 is visible on both the yellow (6) and the blue (8). Are these the LCMs of those pairs of numbers? Rotate the two bracelets to see if there's another lower number they both share!

4/18/16

Olympics Bracelet

I'm not a sports fan by any stretch of the imagination, but I do love the Olympics. The Summer Games open in Rio in just over 3 months and I'm really looking forward to watching as much as I can. I *think* I have convinced Trevor to go with an Olympics theme for his birthday party this year. There are so many possibilities for fun crafts and activities.

I love the symbolism behind the Olympic flag. The five interlocking rings are said to represent the 5 continents that come together for the Oympics. The colors of the flag (blue, yellow, black, green, red and white) were the colors of the flags of all nations at the time it was designed (1912). Here's a really simple and inexpensive bracelet inspired by the Olympic flag that would work equally well as a party activity or a favor. Affiliate links below. 


-------

Olympics Bracelet


Materials:


Steps: 


Cut a piece of clear stretch cord about 2-3 inches longer than the desired wrist circumference. Attach to a binder clip to one end (to prevent the beads from fall off one end as you thread them on the other). Start threading the beads on the cord, beginning with 8 whites. Then add 1 each of blue, yellow, black, green, and red. Add 8 more whites and test the fit. Add or subtract white beads until the bracelet is the correct size.

To finish your bracelet, remove the binder clip and tie the ends together tightly using a normal overhand knot (the first step in tying a shoe). Tie a second knot using a surgeon's knot. It is basically the same thing as an overhand knot but you put the end through the loop an extra time. Pull tightly to secure it. Trim the excess cord or thread it back through the beads to hide the ends. You can add a drop of glue to the knot to make sure it's extra strong, but it's not necessary.

-------

I'll announce the winners of the giveaway later today. Good luck!

2/24/15

Heart Ombre Tie-Dye Shirt

Here's the final version of the ombre tie-dye shirt Trevor and I made using the Tulip Mini Tie Dye Kit. 


After setting the dye following the manufacturer's guidelines, we washed and dried the shirt. Then we played with a few ideas of how to embellish the shirt before settling on what you see. The large heart on the pocket is cut from Oly*Fun (one of the other awesome materials I received at the FaveCrafts Blogger Event) and hand-stitched in place with a simple running stitch. We added a pink button on top of that and a trio of heart buttons along the hem on the opposite side. So easy! It was a birthday gift for my niece, Allison. She liked it. Trevor was thrilled.