Showing posts with label beads. Show all posts

4/27/22

Multiplication Facts Bracelets: A Way to Teach Times Tables with Kids

Back in my teaching days, I used games and fun activities to help my students learn multiplication and division facts. One of my favorites, which worked beautifully for Trevor, is Tic Tac Toe Dice. Physical activities, like playing Steal the Bacon with products or coloring multiplication tables, worked for some kids, while songs and chants helped others. Regardless of the method, it's crucial for their future success that kids learn multiplication and division facts as soon as possible. When kids don't know 6x7 or 9x4 off the top of their heads, they're going to struggle with almost all of the math beyond third grade. 

I don't think I ever encountered a 5th grader who didn't know the 1, 2, 5, and 10 facts, and the vast majority of them also knew the 3's and 4's. But I had plenty of students each year who didn't know the 6, 7, 8, and 9 facts well enough to apply them to the more challenging math we did. I wish I'd thought of the idea of Multiplication Fact Bracelets idea back then, because I think these may have helped some of them. Making the bracelets is a useful way to practice facts, of course, but by wearing them and looking at them frequently, and even using them as a fidget device, I imagine some kids could become more confident with their times tables. Affiliate links below. 


Multiplication Facts Bracelets


Materials: 


Steps: 


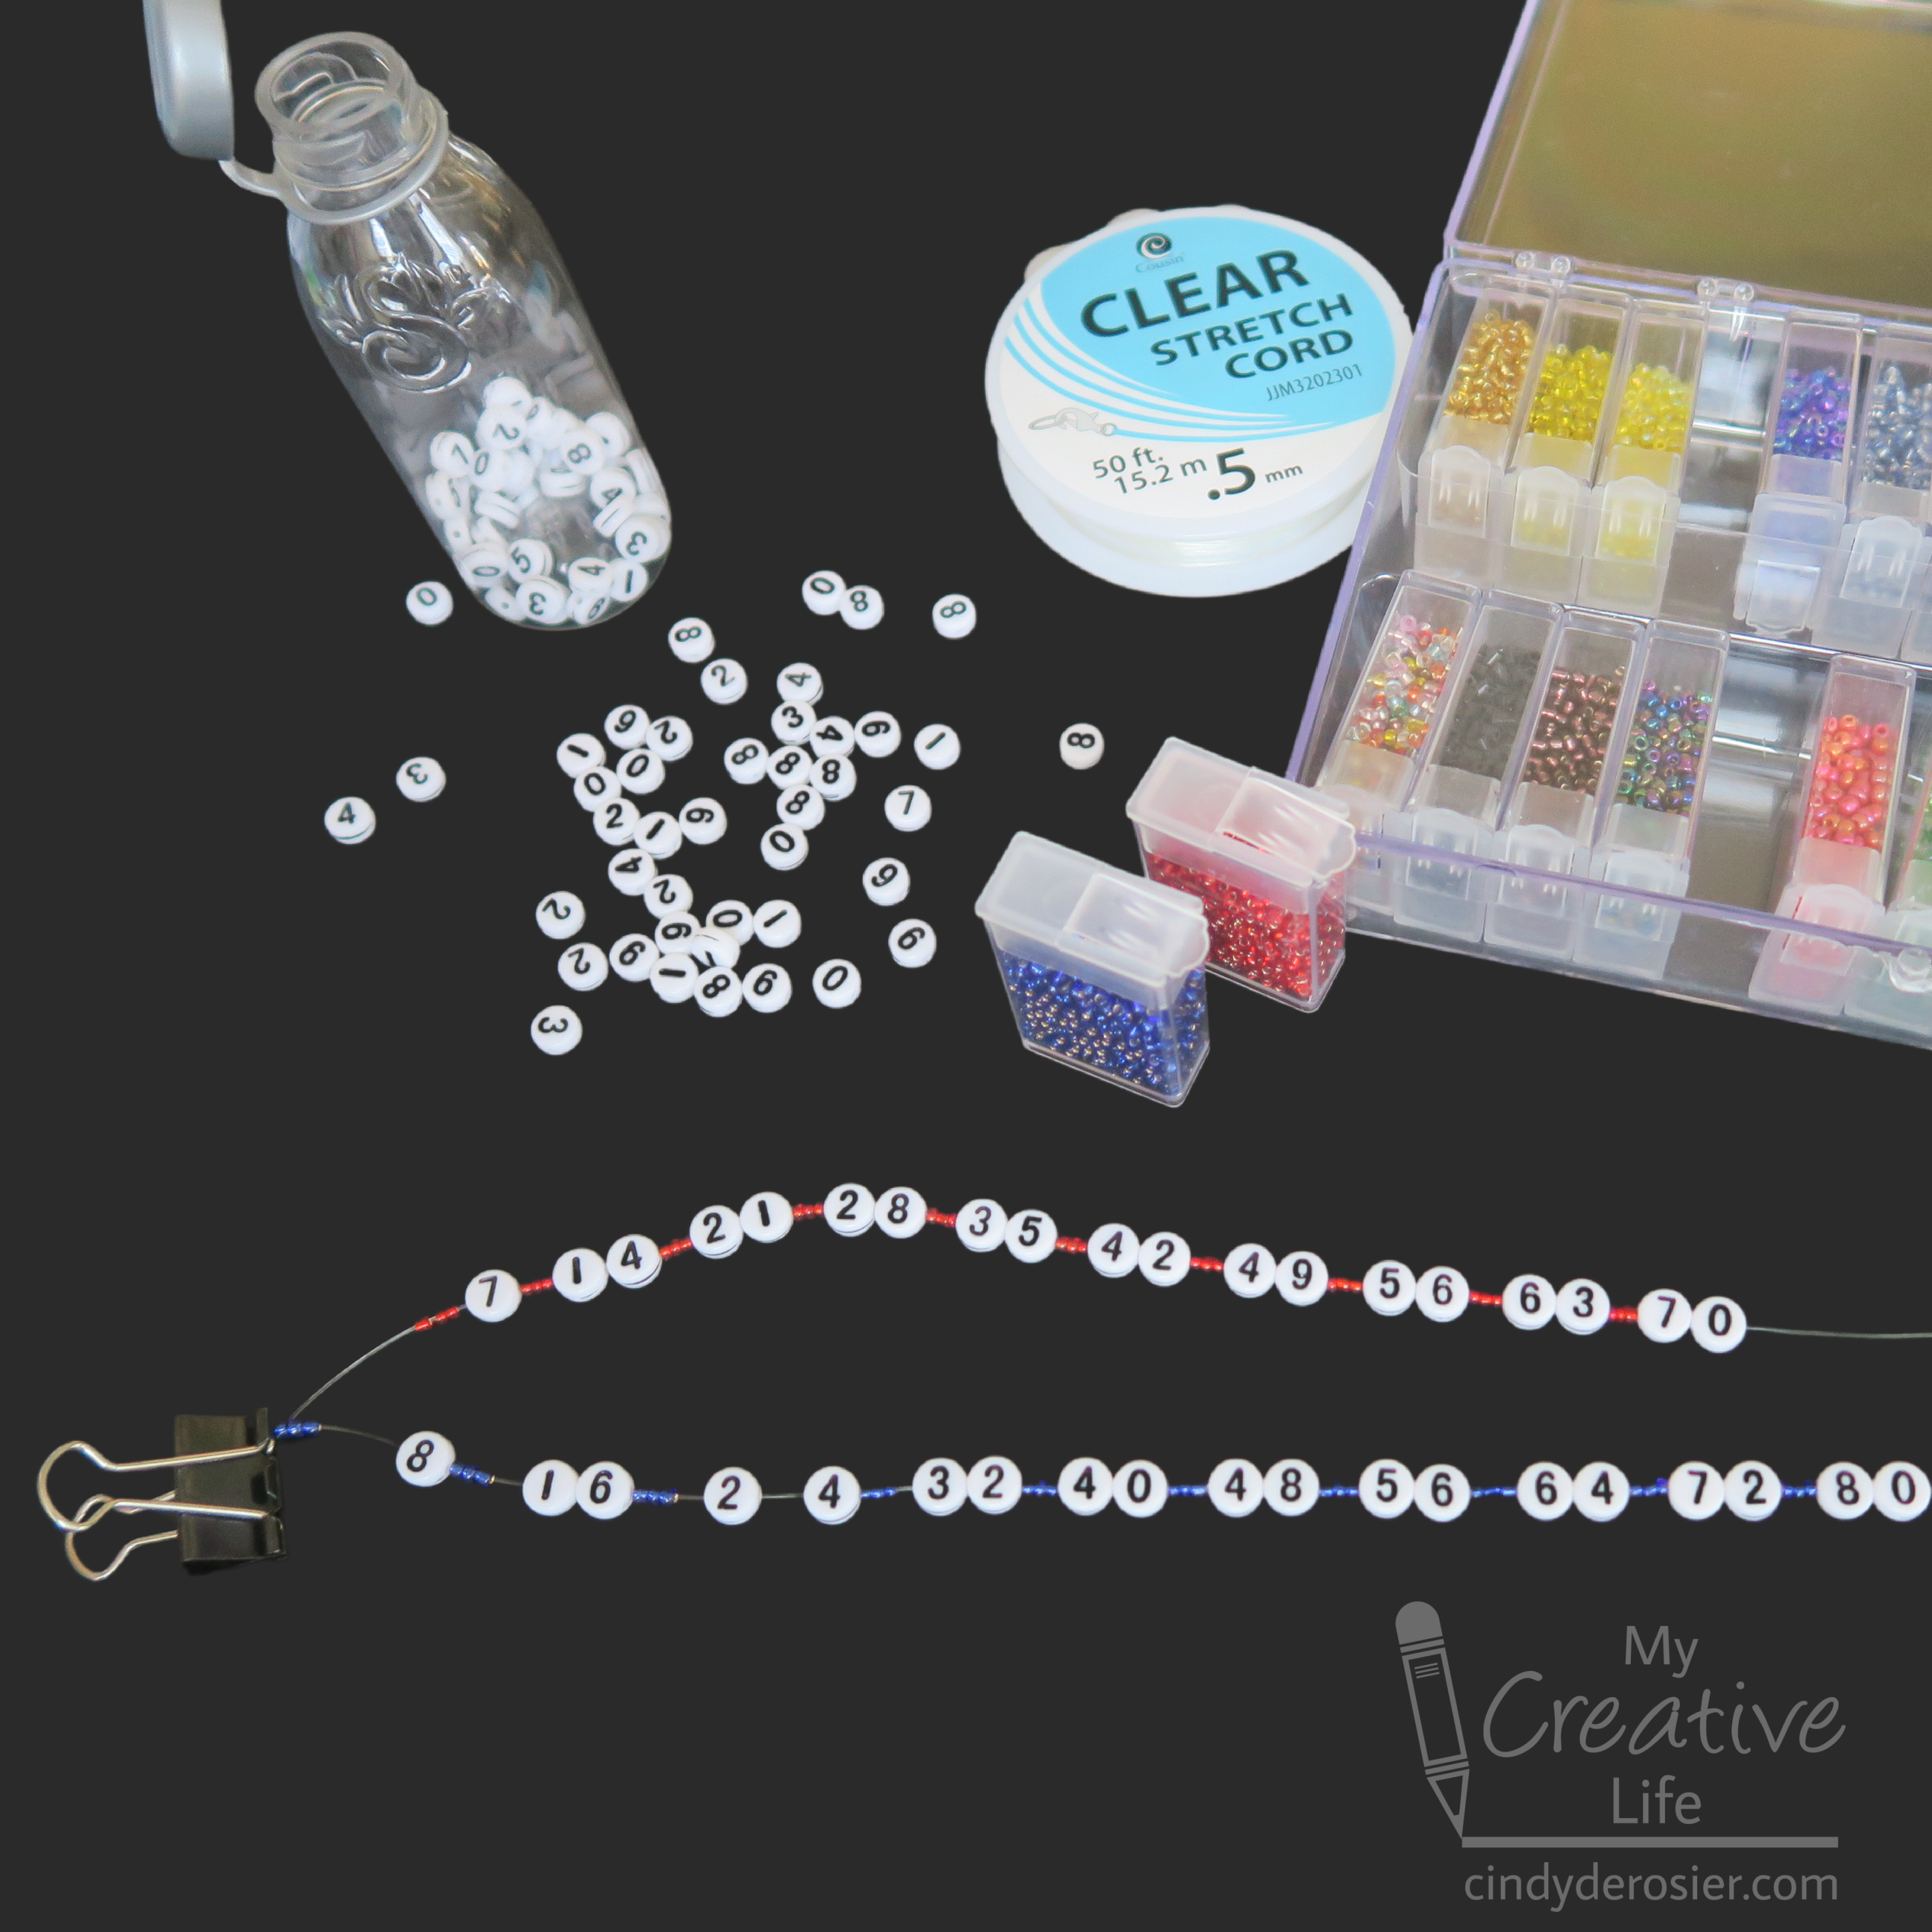
Cut a 12" length of stretch cord. This will leave you with plenty to tie off the bracelet when you're done beading. Attach a binder clip to one end of the stretch cord to keep the beads from falling off that end. 

Choose a single color of seed beads for each bracelet. I used yellow for the 6's, red for the 7's, blue for the 8's, and green for the 9's. If you're doing this in a classroom, have everyone make the same set of facts in the same colors, so that you can refer to the "blue 8's" bracelet without causing confusion or the inevitable, "My 8's are pink!" interruptions. I'll use the blue 8's for this tutorial; obviously, follow the same steps for the other bracelets. 

Begin by putting three blue seed beads onto the cord. The cord is sturdy enough that you can use it to poke into the hole of a bead to thread it. Then add the number 8. Add three more blue seed beads, then then 16. Three more blue seed beads, then 24. Make sure the numbers are all facing the same direction. There is no up and down for 0, 1, 3, and 8, but it matters for the others, particularly the 6 and 9. Continue this pattern until you reach 80.
  

Carefully remove the binder clip and then tie the ends together using a surgeon's knot. It's basically the same as the square knot they already know with an extra 'up and over' when you make it. 


Put the tied bracelets on a piece of parchment paper, then add a dot of glue directly onto the knot you just tied. Let the glue dry completely, then cut off the extra cord. 


The surgeon's knot and glue combination is strong, but to make sure your bracelet doesn't come apart when you're stretching it to put it on, hold onto the knot with one hand while you stretch the bracelet over the other. 


These bracelets are also fun for teaching the concept of Least Common Multiple. In the photo, you can see that 56 is visible on both the red (7) and the blue (8) bracelets and that 48 is visible on both the yellow (6) and the blue (8). Are these the LCMs of those pairs of numbers? Rotate the two bracelets to see if there's another lower number they both share!


11/2/21

Rainbow Halloween Costume for Three

For Halloween, our family of three dressed as a rainbow. 
 

Even though I am completely incompetent with the sewing machine, this costume was easy enough that it only took me a few hours to make. I made some mistakes along the way, so you get to benefit by learning from my errors.

The biggest error? That image above is a lie. I digitally flipped it to get the colors in ROYGBIV order. The actual photo has us in VIBGYOR order. Even though I actually thought about how to get the colors with red at the left and purple at the right, I still messed it up. Sigh. Affiliate links below. 


Rainbow Halloween Costume for Three


Materials:


Steps:


Fold each t-shirt in half as precisely as you are able. Mark the center with clips or pins, then carefully cut the each shirt in half. 


After all the shirts are cut, pair them together red-orange, yellow-green, and blue-purple. Here's where I went wrong. I chose the wrong half of each shirt. I should have red and yellow on the left sides, and orange and green on the right sides.  


I strongly recommend you lay out all the shirts in order to make sure you are using the correct sides. You might luck out and get a t-shirt brand where the front and back are symmetrical, but ours had a dip in the front with a very high back that would have been weird to wear backwards. 

When you are sure you have the correct order, it's time to sew. Carefully match the fronts of the shirts together and clip one of the sides in place. 


Sew that seam, being sure to backstitch at the hem and the neck to secure the seam. Clip the second seam together. Sew that seam, then turn the shirt right-side out. Repeat the process for the other two shirts. 

To make the rain cloud, cut a cloud shape from chipboard and paint it grey. Glue it to a jumbo craft stick. Tie glow beads onto pieces of silver thread and tape them to the back of the cloud so that they dangle like raindrops. 


To make the sun, cut 8 triangles of chipboard to make the sun's rays. Paint them and the backs of two paper plates yellow. Glue one plate to the craft stick, then glue the rays to the front of that plate. Glue the second plate on top to sandwich the rays between the two plates. 


Then you just have to make sure you stand next to each other in the correct order through the entire costumed celebration! 

This was a fun costume and so easy. Half of each shirt is leftover, so in theory I could either sew up the correct rainbow, mix-and-match the colors to make random two-tone shirts (opposites on the color wheel?), or come up with other way to use the fabric. I'm open to suggestions!


I hope you all had a wonderful Halloween!

7/27/21

Playdough Texture Tools

I was a big fan of Play-Doh when I was a kid. Specifically, I liked the play sets. My favorites were the barbershop, the ice cream maker, and the barbecue set. (These affiliate links go to the modern versions of the 1970's toys I loved.) I still like playing with doughs and clays, but it's been years since we've had any Play-Doh in the house. (Trevor played with it occasionally when he was little, but it just wasn't his thing.) Now I use Model Magic, Sculpey, or homemade salt dough when I am in the mood to play with clay.

The last time I had my clay out, I made myself a set of texture tools using random items from the craft room. I'm really happy with how they turned out. 
 

The first step was gathering craft sticks and a bunch of random stuff. I wasn't sure what would print well on clay, so I tried a wide variety of things. 


Next, I attached each item (pony beads, buttons, a wooden swan, a rubber band, yarn, a chipboard tree, pipe cleaner, a shiny trim, Twisteezwire, pennies, and a feather) to craft sticks. I used hot glue for everything except the rubber band, pipe cleaner, and Twisteezwire, which I just wrapped around their craft sticks. 


I pressed each into the clay....


.... lifted them up to see the results. Most of them printed very well! The only total failure is the feather. The clay stuck to it and it didn't print well. The thin trim isn't great, but it was better than expected. 

I am most happy with the pony beads and the buttons. They give great texture to the clay. My second favorites are rubber band, pipe cleaner, and Twisteezwire. 


Make your own set of texture tools for playdough! Kids will love every step, from searching the house for items to use, to pressing their tools into dough to create textures. If you try anything that works particularly well (or particularly poorly!) let me know in the comments. 

7/21/21

The Latest Six Craft Roundups

Time to share another batch of craft roundups I've made for Fun Family Crafts! First, Barn Crafts for Kids. One is mine. Can you spot it?  


Cactus crafts are some of my favorites. One of the ones below is mine. As always, I made this graphic using PicMonkey. I've used it long enough that I'm developing some of my own hacks. For example, to make the sand for the title graphic, I started with a sand-colored rectangle, added a glitter texture, then faded the texture until it left just enough texture to mimic sand. Then I used the eraser tool to make an irregular edge. 


Next, Photo Crafts for Kids. Two of the ones below are mine, but neither one has photos of Trevor, Steve, or me. 


Next is Clown Crafts. Two of these are mine. 


Next, Pony Bead Crafts. None are mine. 


This roundup of Shark Crafts for Kids was my favorite to make. Two of the projects are mine. I really wish I'd thought up those socks. 


With the addition of these, we are up to more than 120 Craft Collections at Fun Family Crafts. It's fun seeing them all together. It also lets me see at a glance which graphics need updating (which remains my absolute favorite part of my job). Yea, PicMonkey!

11/30/20

Heart Santa Magnet

The Heart Turkey has a friend. Meet Heart Santa!

 
They both are made with wooden hearts and they're both refrigerator magnets, though you could easily turn them into napkin rings or ornaments. 


Paint one heart red and one with your desired skin tone. Set them aside to dry.
 
Cut two pieces of embroidery floss, each around 3 inches. Tie a pony bead to one end of each piece to make Santa's legs.

Cut a hat from red construction paper or cardstock. From the scraps, cut a tiny round red nose. Cut a thin black strip for the belt, a small yellow square for the belt buckle, then an even smaller black square for the center of the buckle. 

Tear the cotton ball in half. Shape one half into a beard, then divide the other half to make the fur trim of Santa's hat, the pom pom on the end of the hat, and two eyebrows. 


Orient both hearts so they are upside down (point at the top, rounded area at the bottom). Glue the googly eyes to the center of skin tone heart. Add the eyebrows, nose, and beard. Glue the trim and pom pom to Santa's hat, then glue the hat to his head. Glue the belt to the red heart, then add the buckle and the inner buckle. Glue the head onto the body. Glue the legs behind the body, trapping them beneath the magnet.


A typo while I was writing this post turned Santa into Satan and left me giggling on and off for ten minutes. This led me to wonder if there are any kid-friendly Satan crafts out there. Alas, there seem to be only Satan-as-serpent crafts and printables about avoiding temptation. But my search yielded this hilarious news story about Satan in Vancouver Island, BC. It's literally old news (2019) but even if you saw it last year, it's funny enough to read again. You're welcome.

4/18/16

Olympics Bracelet

I'm not a sports fan by any stretch of the imagination, but I do love the Olympics. The Summer Games open in Rio in just over 3 months and I'm really looking forward to watching as much as I can. I *think* I have convinced Trevor to go with an Olympics theme for his birthday party this year. There are so many possibilities for fun crafts and activities.

I love the symbolism behind the Olympic flag. The five interlocking rings are said to represent the 5 continents that come together for the Oympics. The colors of the flag (blue, yellow, black, green, red and white) were the colors of the flags of all nations at the time it was designed (1912). Here's a really simple and inexpensive bracelet inspired by the Olympic flag that would work equally well as a party activity or a favor. Affiliate links below. 


-------

Olympics Bracelet


Materials:


Steps: 


Cut a piece of clear stretch cord about 2-3 inches longer than the desired wrist circumference. Attach to a binder clip to one end (to prevent the beads from fall off one end as you thread them on the other). Start threading the beads on the cord, beginning with 8 whites. Then add 1 each of blue, yellow, black, green, and red. Add 8 more whites and test the fit. Add or subtract white beads until the bracelet is the correct size.

To finish your bracelet, remove the binder clip and tie the ends together tightly using a normal overhand knot (the first step in tying a shoe). Tie a second knot using a surgeon's knot. It is basically the same thing as an overhand knot but you put the end through the loop an extra time. Pull tightly to secure it. Trim the excess cord or thread it back through the beads to hide the ends. You can add a drop of glue to the knot to make sure it's extra strong, but it's not necessary.

-------

I'll announce the winners of the giveaway later today. Good luck!

12/21/15

Beaded Wreath Ornament

If you are looking for the Project Penguin Craft Challenge, go here.

..........

This time of year is tough for craft bloggers. We're making all this awesome stuff to give as gifts, so we can't share it on our blogs without spoiling the surprises. Yet no one is looking for Christmas craft tutorials in January after those gifts have been opened, which means the posts could go largely unnoticed. To share or to wait... that is the question.

I'm going to wait on most of my projects because surprising friends and family is the best part of homemade gifts. But I will share one or two. Today, a beaded wreath ornament. Affiliate links below. 


Beaded Wreath Ornament


Materials: 


Steps: 

Begin by cutting approximately a foot of wire. String 45 green seed beads onto it, then twist the ends to secure the beads in place. Obviously, you can use more beads to make a larger wreath if you want.


Snip any excess wire off one end and curve the other end to form a hook. Shape the wreath into a circle. Attach a second piece of wire at the 1:00 position on the wreath, wrapping it around itself a few times to hold it in place.


Add one red bead, then wrap the wire around the green beads, skipping over a few before adding the next red bead.


This project takes some dexterity, so I'd recommend it for upper elementary age kids and up. Trevor (age 9) did just fine.


When you reach the 11:00 position on the wreath, twist the wire around itself to hold it in place, then snip any extra wire. Cut a piece of red cord and form a bow, then glue it to the wreath, trying to cover the wires at 1:00 and 11:00. 


The three of us whipped out nine wreaths in about 20 minutes, at a total cost of around $5 with plenty of beads, wire and cord left over. They're going to look really cute dangling from our gifts, then eventually hanging from our relatives' Christmas trees.