Showing posts with label napkin ring. Show all posts

4/11/22

Clay Leaf Print Napkin Rings and Coasters

We have beautiful hydrangeas along our side yard that are determined to grow enough to completely block the walkway beside our house. I've explained that they are welcome to grow as high as they'd like and can spread out against the fence, but to please allow us to have the path. I frequently need to do a bit of light pruning to remind them that the flower bed is their territory, but the concrete is our territory. 

I took a few of the pruned hydrangea leaves inside and used them to make leaf prints from oven-bake clay. I LOVE how they turned out!


When I made my clay leaf prints, I hadn't thought about what purpose they could serve, besides just sitting on a table being decorative. And then I realized that they are perfect to use as napkin ring and coasters! Affiliate links below. 
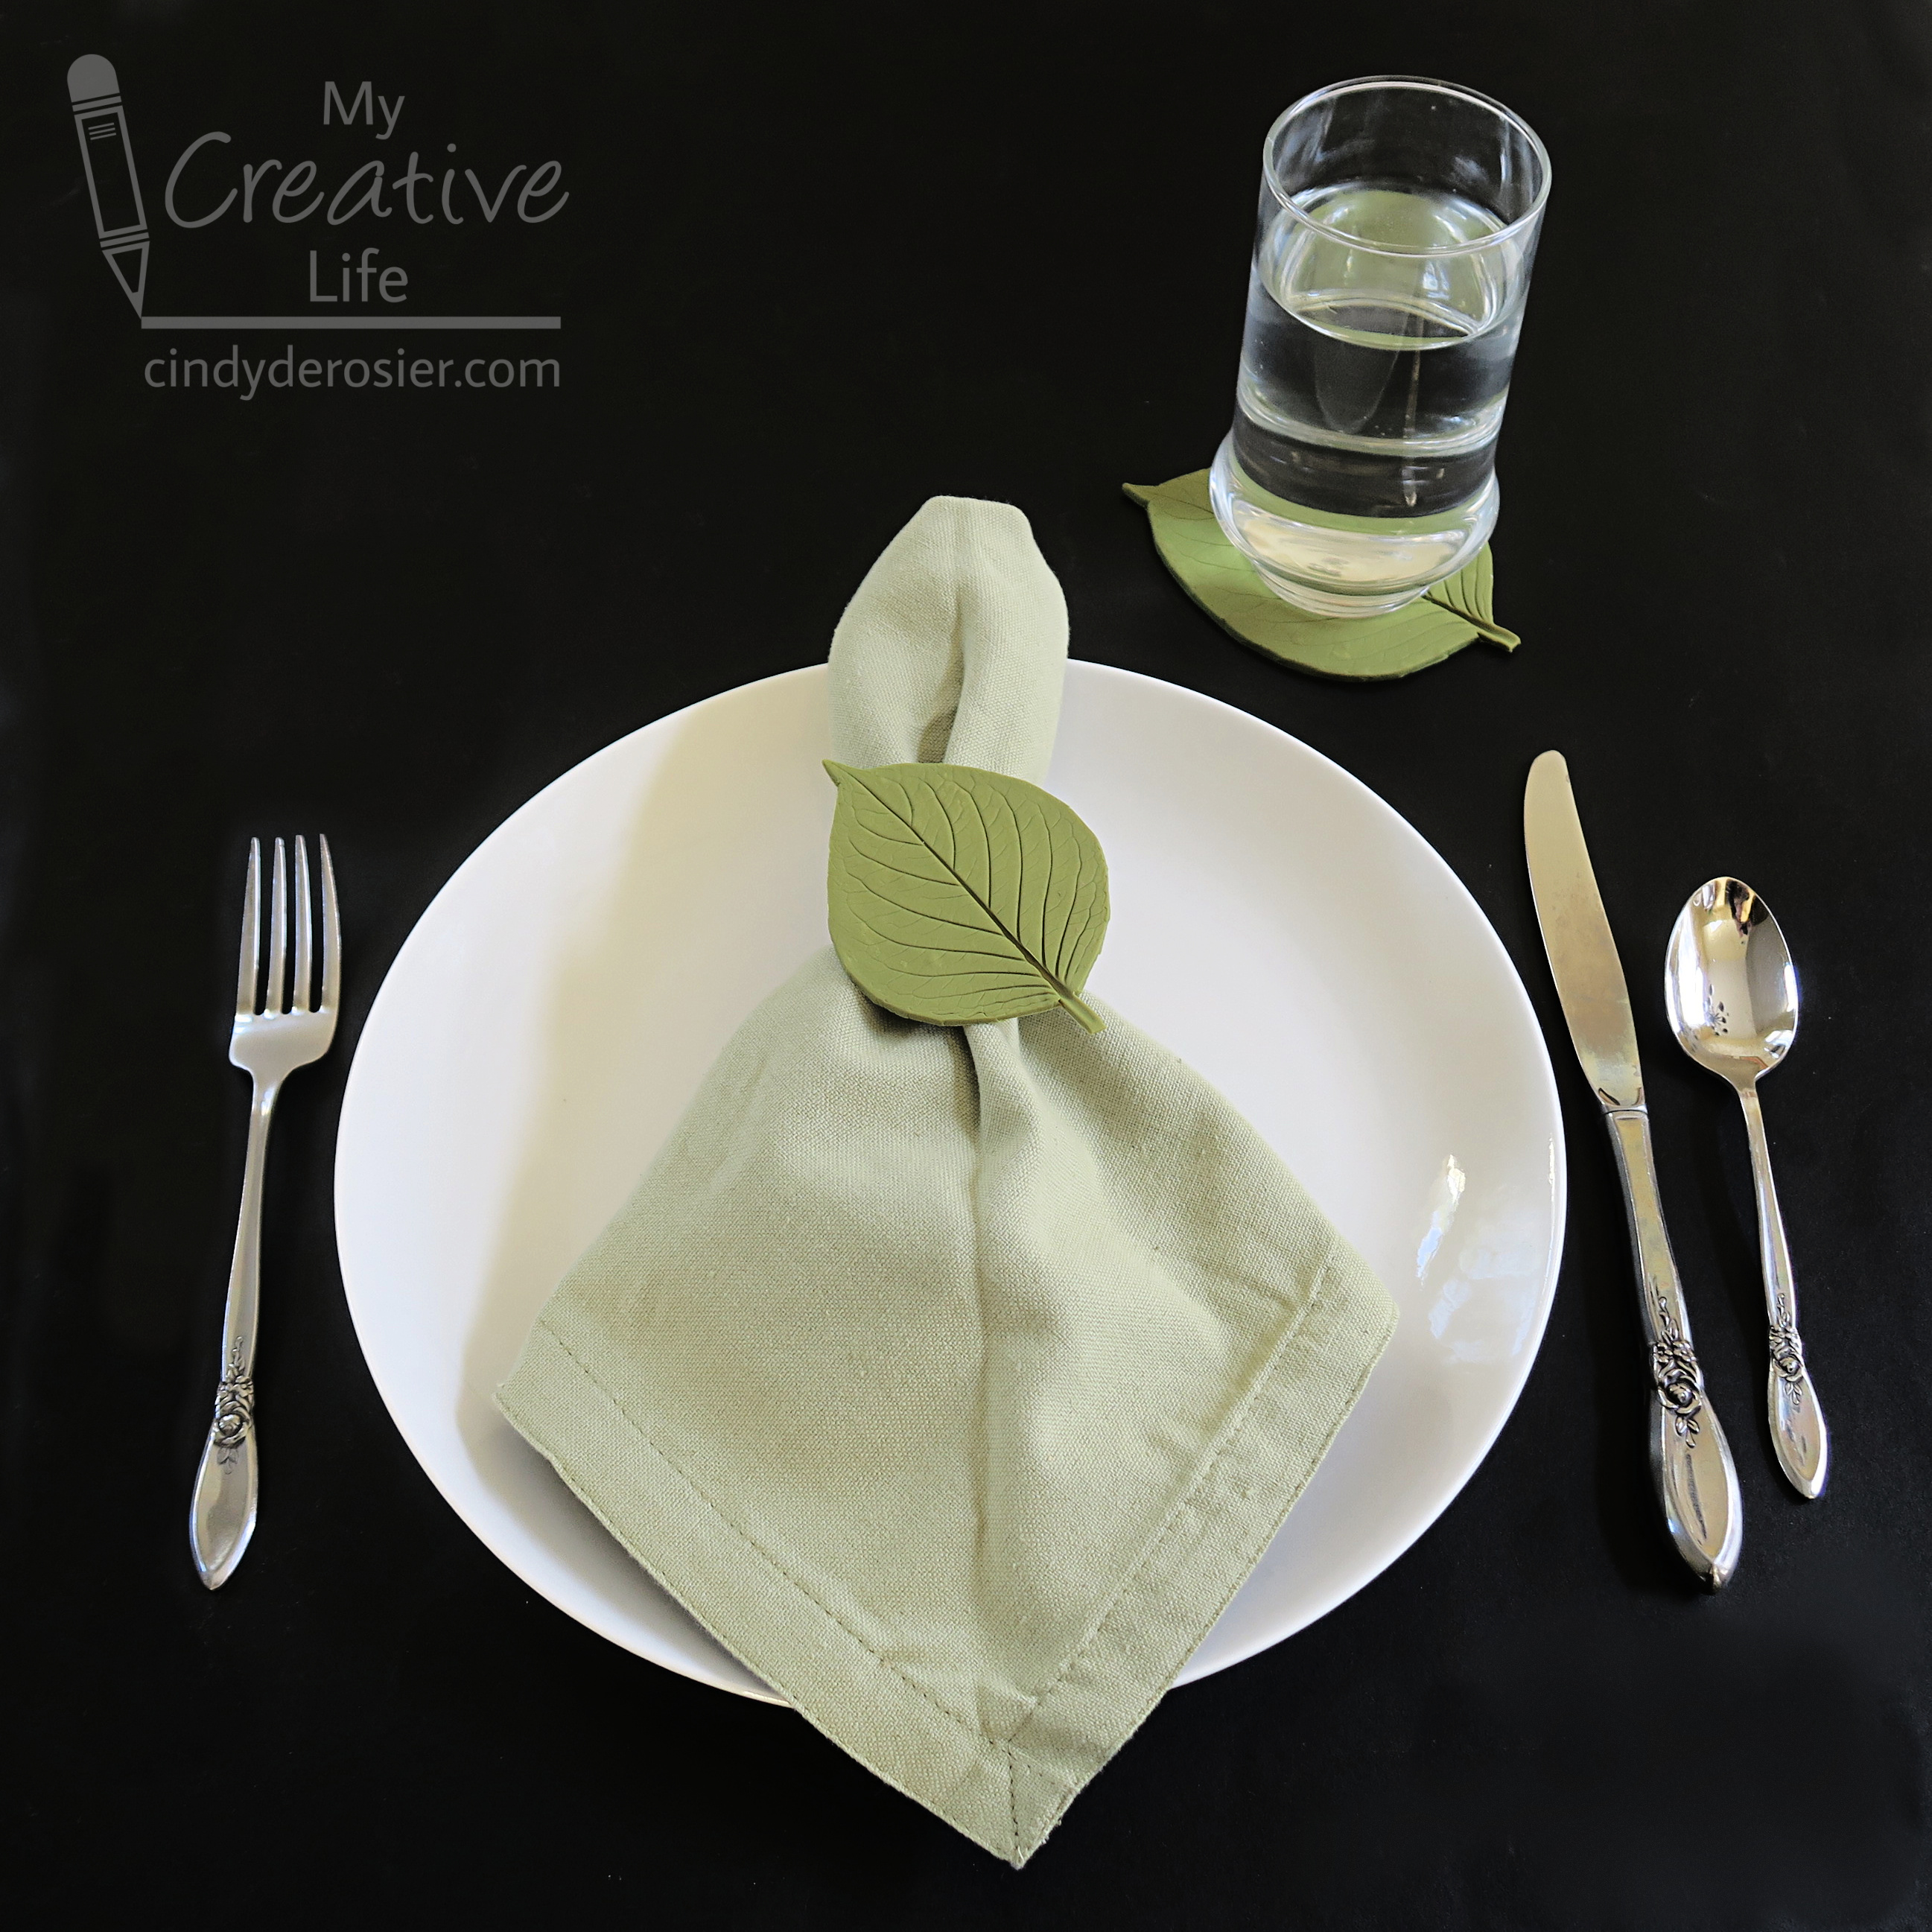


Clay Leaf Print Napkin Rings and Coasters


Materials:


Steps:


Mix a small amount of Red and a generous amount of Granny Smith together to make your desired color. Roll out the clay 1/4" thick, then place the leaf on top. Gently roll the leaf into the clay, then carefully remove the leaf. 

This was my first attempt. After placing the leaf, I rolled too hard, which made the clay uneven and pushed the stem too deep. Sculpey is infinitely reusable until you bake it, so if your first attempt is not perfect, just re-roll the clay and try again! 


When you have a print you like, use the clay tools to remove the excess clay around the edges. Hydrangea leaves are serrated, but I wanted a smooth edge, so that's how I trimmed it. 


Roll out the excess and make more leaves. I used a large leaf for the coasters and a smaller leaf for the napkin rings. 


Put the leaves on a sheet pan and bake at 275°F for 15 minutes. If you see any bubbles in your baked leaves when you take them out of the oven, immediately press a second sheet pan on top of the hot leaves to flatten them. Let the leaves cool completely. 

Use Supertite to glue the smaller leaves to the napkin rings. 

Note that while Sculpey clay is non-toxic, it has not been tested for food use. So while your coaster is a great place to rest a drinking glass, don't use it as as bread plate or serve any other food directly on it.

3/6/18

Coloring Page Napkin Rings for Easter

This post contains affiliate links. 

Today I'm sharing the next project in my ongoing "What You Can Do with a Completed Coloring Page Besides Leave it in the Book" series: napkin rings!


You can turn just about any coloring page into napkin rings, but I chose to use one of my favorite pages from Easter Wonders Color Art. I received this coloring book from Leisure Arts and I love it!


Making napkin rings really couldn't be easier. Cut an empty cardboard tube into 1" rings, then paint each piece white. While they are drying, use microtip scissors to cut out your colored images. 


Glue the cut images to the rings.


Slide napkins into the rings and place one on each plate. You're all set for a special Easter meal!


As you might have guessed, Easter Wonders Color Art has quite a few pages that feature bunnies. I'll be sharing a project using one of those coloring pages soon!

6/24/14

Spider Napkin Ring and a Fair Wrap-Up

Yesterday I shared the spider-themed tablesetting that Trevor entered at the county fair.  His napkin ring was my favorite part.  I had absolutely nothing to do with making it, other than cutting the cardboard tube, then plugging in the glue gun and monitoring its use.  The design and implementation is 100% Trevor.


Materials: empty cardboard tube, black paint, 2 brown pipe cleaners, black pom pom, brown pom pom, 2 black seed beads, scissors, hot glue gun, and craft glue.

Begin by cutting about 2 inches off of a cardboard tube.  Paint it black and let it dry. Meanwhile, bend one pipe cleaner into something that looks approximately like this:


Bend the other one in mirror image.  Heat up the glue gun.  Line up the two pom poms and two pipe cleaners like in the photo and glue them together, then glue the whole thing to the napkin ring.  Use craft glue to attach the seed beads.  Done!

We did a lot more than just Trevor's tablesetting contest while we were at the fair.  Top priority though was seeing how his other entries did.  Here's his entry in the poster contest.  First place!


The Pinewood Derby cars aren't judged in the 5-8 year old category.  They just receive a participation ribbon.... unless they are selected as Judge's Favorite!


You can see a much better photo of Trevor's "Toothless" car here.


Trevor was thrilled with his Judge's Favorite, first, and third places.  A very fine showing, indeed!  He's entered the bulk of his art and craft projects in our local county fair, which isn't until August.  So expect another fair wrap-up in about 7 weeks!

7/16/13

Owl Napkin Rings

Have you noticed how much I love napkin rings? I've shared a bunch of the ones Trevor and I have made, including bunny napkin rings for spring, acorn napkin rings for fall, turkey napkin rings for Thanksgiving, and holly and star napkin rings for Christmas. Today I'm sharing our latest napkin rings, owls. They're fun year-round.


---------

Owl Napkin Rings


Start by cutting about two inches off an empty cardboard tube. Round the cut slightly, so that there are points on the left and right and a dip across the front and back. Paint it brown inside and out.

 
Add googly eyes and a yellow cardstock beak.

 
Cut rounded triangles from brown cardstock to make wings. Curl them slightly outward before gluing them to the body.  


Add a napkin (notice the owl print?) and you're set!  

 
I know it's been quite a few months, but I haven't forgotten about the J, U, and Y children's crafts I promised. We've brainstormed what we're going to do, but they've taken a back seat to both Kidding Around and all the projects we've been making for the various fairs we're entering. And speaking of the fair, tomorrow I'll share how Trevor used his owl napkin ring.

11/9/12

Thanksgiving Napkin Rings

Trevor and I have been busy making Thanksgiving napkin rings. Aren't they cute?!


Materials: cardboard tube, brown paint, cardstock scraps (brown, yellows, oranges, and reds), scissors, glue, and googly eyes.  


Use the scissors to cut a 1-inch ring from the tube. Paint it brown, inside and out. Set it aside to dry. Use the brown cardstock to cut a pear-shaped turkey body. Add googly eyes, a triangle beak, and a wattle.  

 
Cut triangle feet. Bend one corner of each triangle up and apply glue. Attach to the back of the turkey body.

 
Glue the turkey body onto the dry cardboard ring. It should stand up. Here's Trevor with his.


Cut a variety of turkey feathers from the cardstock scraps. Attach to the back of the cardboard ring.

 
 Add a napkin and they're ready for the Thanksgiving table!  

 
I made the turkey at the top of this post. This turkey was one of Trevor's. Like the orange napkins? They're the ones Trevor made for the tablesetting contest he entered. Not only are they perfect for a bunny-themed luncheon, but they're great for all the fall holidays too!

9/13/11

Fall Acorn Napkin Rings

Last week, Tonya Gibbs posted a tip at Flamingo Scraps about how to keep Glossy Accents unclogged. In the comments, I said that I needed a post telling me how to use Glossy Accents, since I never use mine! She responded on Friday with a new post which showed 5 projects using Glossy Accents and Crackle Accents. At the end, she challenged me to use Glossy Accents on my next project.

Well, there's something about being called out by name in front of hundreds that motivates a person to accept a challenge! I was most inspired by Tonya's use of Glossy Accents to make a 'dewdrop' on a flower. I was thinking about that as I was walking to pick Trevor up from kindergarten, my feet crunching the zillions of acorns on the sidewalk. I gathered a large handful of acorns and decided to experiment with Glossy Accents on them.

Of course, the second Trevor saw me he noticed that I had a huge handful of acorns. He was instantly curious about what project I had planned for us to do together. I told him we'd be making napkin rings. He said, "Great! What are napkin rings?" I love his enthusiasm. Affiliate links below.


---------

Fall Acorn Napkin Rings


Materials:


Steps:


Cut rings from a cardboard tube, then paint them with fall colors. While they are drying, stamp oak leaves using Staz-On, then do a color wash over that. Cut out the leaves, then coat them and the acorns with Glossy Accents.

When everything is dry, tie twine or ribbon around the rings and use Glossy Accents to attach the leaves. I used a glue gun to attach the acorns.

Here's a closer look at one of my napkin rings:


Here are the ones Trevor made:


What a fun project!  Not only did the Glossy Accents work well as an adhesive, but I love the shine that it provides. How have you used Glossy Accents? Leave a link in the comments- I'd love to get other project ideas!