Showing posts with label Coloring book. Show all posts

7/22/26

Posca Colored Pencils and the National Parks Postcard Coloring Book

Many of you probably know Posca for their amazing paint markers, but did you know that they now make colored pencils as well? When the folks from Posca reached out to me to try their 12-pack of colored pencils, I happily accepted. Posca Colored Pencils have a creamy wax-hybrid formulation intended to produce bright and consistent color, with the ability to blend and layer smoothly. I was eager to see how these pencils would perform. This post contains affiliate links. 


I decided to use the Posca pencils to color an image from the new-to-me National Parks Postcard Coloring Book. This A6-size book contains images from 20 units of the National Park System on thick cardstock appropriate for mailing. 


I selected the image of a bald eagle at Olympic National Park and started coloring. I loved how vibrant the color was and how easy it was to get good coverage. The pencils felt good in my hand. The colors blended well, although with only 12 colors it was infinitely more difficult to get subtle blends than if I'd had a larger set. The thick paper of the postcard took color beautifully and worked very well with the pencils. 


Here is my finished postcard. 


This is what the back looks like. I added a tiny bit of color, but didn't want to cover the writing area. I'll probably end up decorating it after I address it and add my message. 


I really enjoyed this project. The Posca colored pencils are a delight to use, though having only 12 colors is very limiting. The postcards feature beautiful images printed on paper that it ideal for coloring. The small size allowed me to finish the project in a much shorter amount of time than a standard coloring page. I'm eager to use both the pencils and the coloring book again!

4/20/26

The Fifty States By ColorIt: Missouri

I have a new coloring book that I absolutely love and I'm so excited to share it with you! The Fifty States by ColorIt is everything I want in a coloring book (affiliate links here and below). The hand-drawn illustrations are gorgeous, the thick paper is very high quality, and the spiral binding on top means the pages lay flat. 


I love that each of the designs features so many of the official state symbols. I picked a random page to color first, which happened to be Missouri. The design includes the state animal (Missouri mule), state bird (Eastern bluebird), state dessert (ice cream cone), state flower (hawthorn blossom), state game bird (Northern bobwhite), state grape (Norton), state insect (honeybee), state monument (Gateway Arch), state musical instrument (fiddle), state tree and arboreal emblem (flowering dogwood), state tree nut (black walnut), plus the state seal and state flag. 


I colored the page with Prismacolors. They performed beautifully on the thick, smooth paper. I am really happy with how my page turned out and can't wait to color another state!

11/16/23

DIY Reverse Coloring Book Pages

Are you familiar with reverse coloring books? A normal coloring book provides the lines and you color it in, while a reverse coloring book provides color and you add the lines. They burst onto the scene a couple of years ago and have grown in popularity. You can find reverse coloring books with all sorts of themes, colors, and moods. Affiliate links below. 


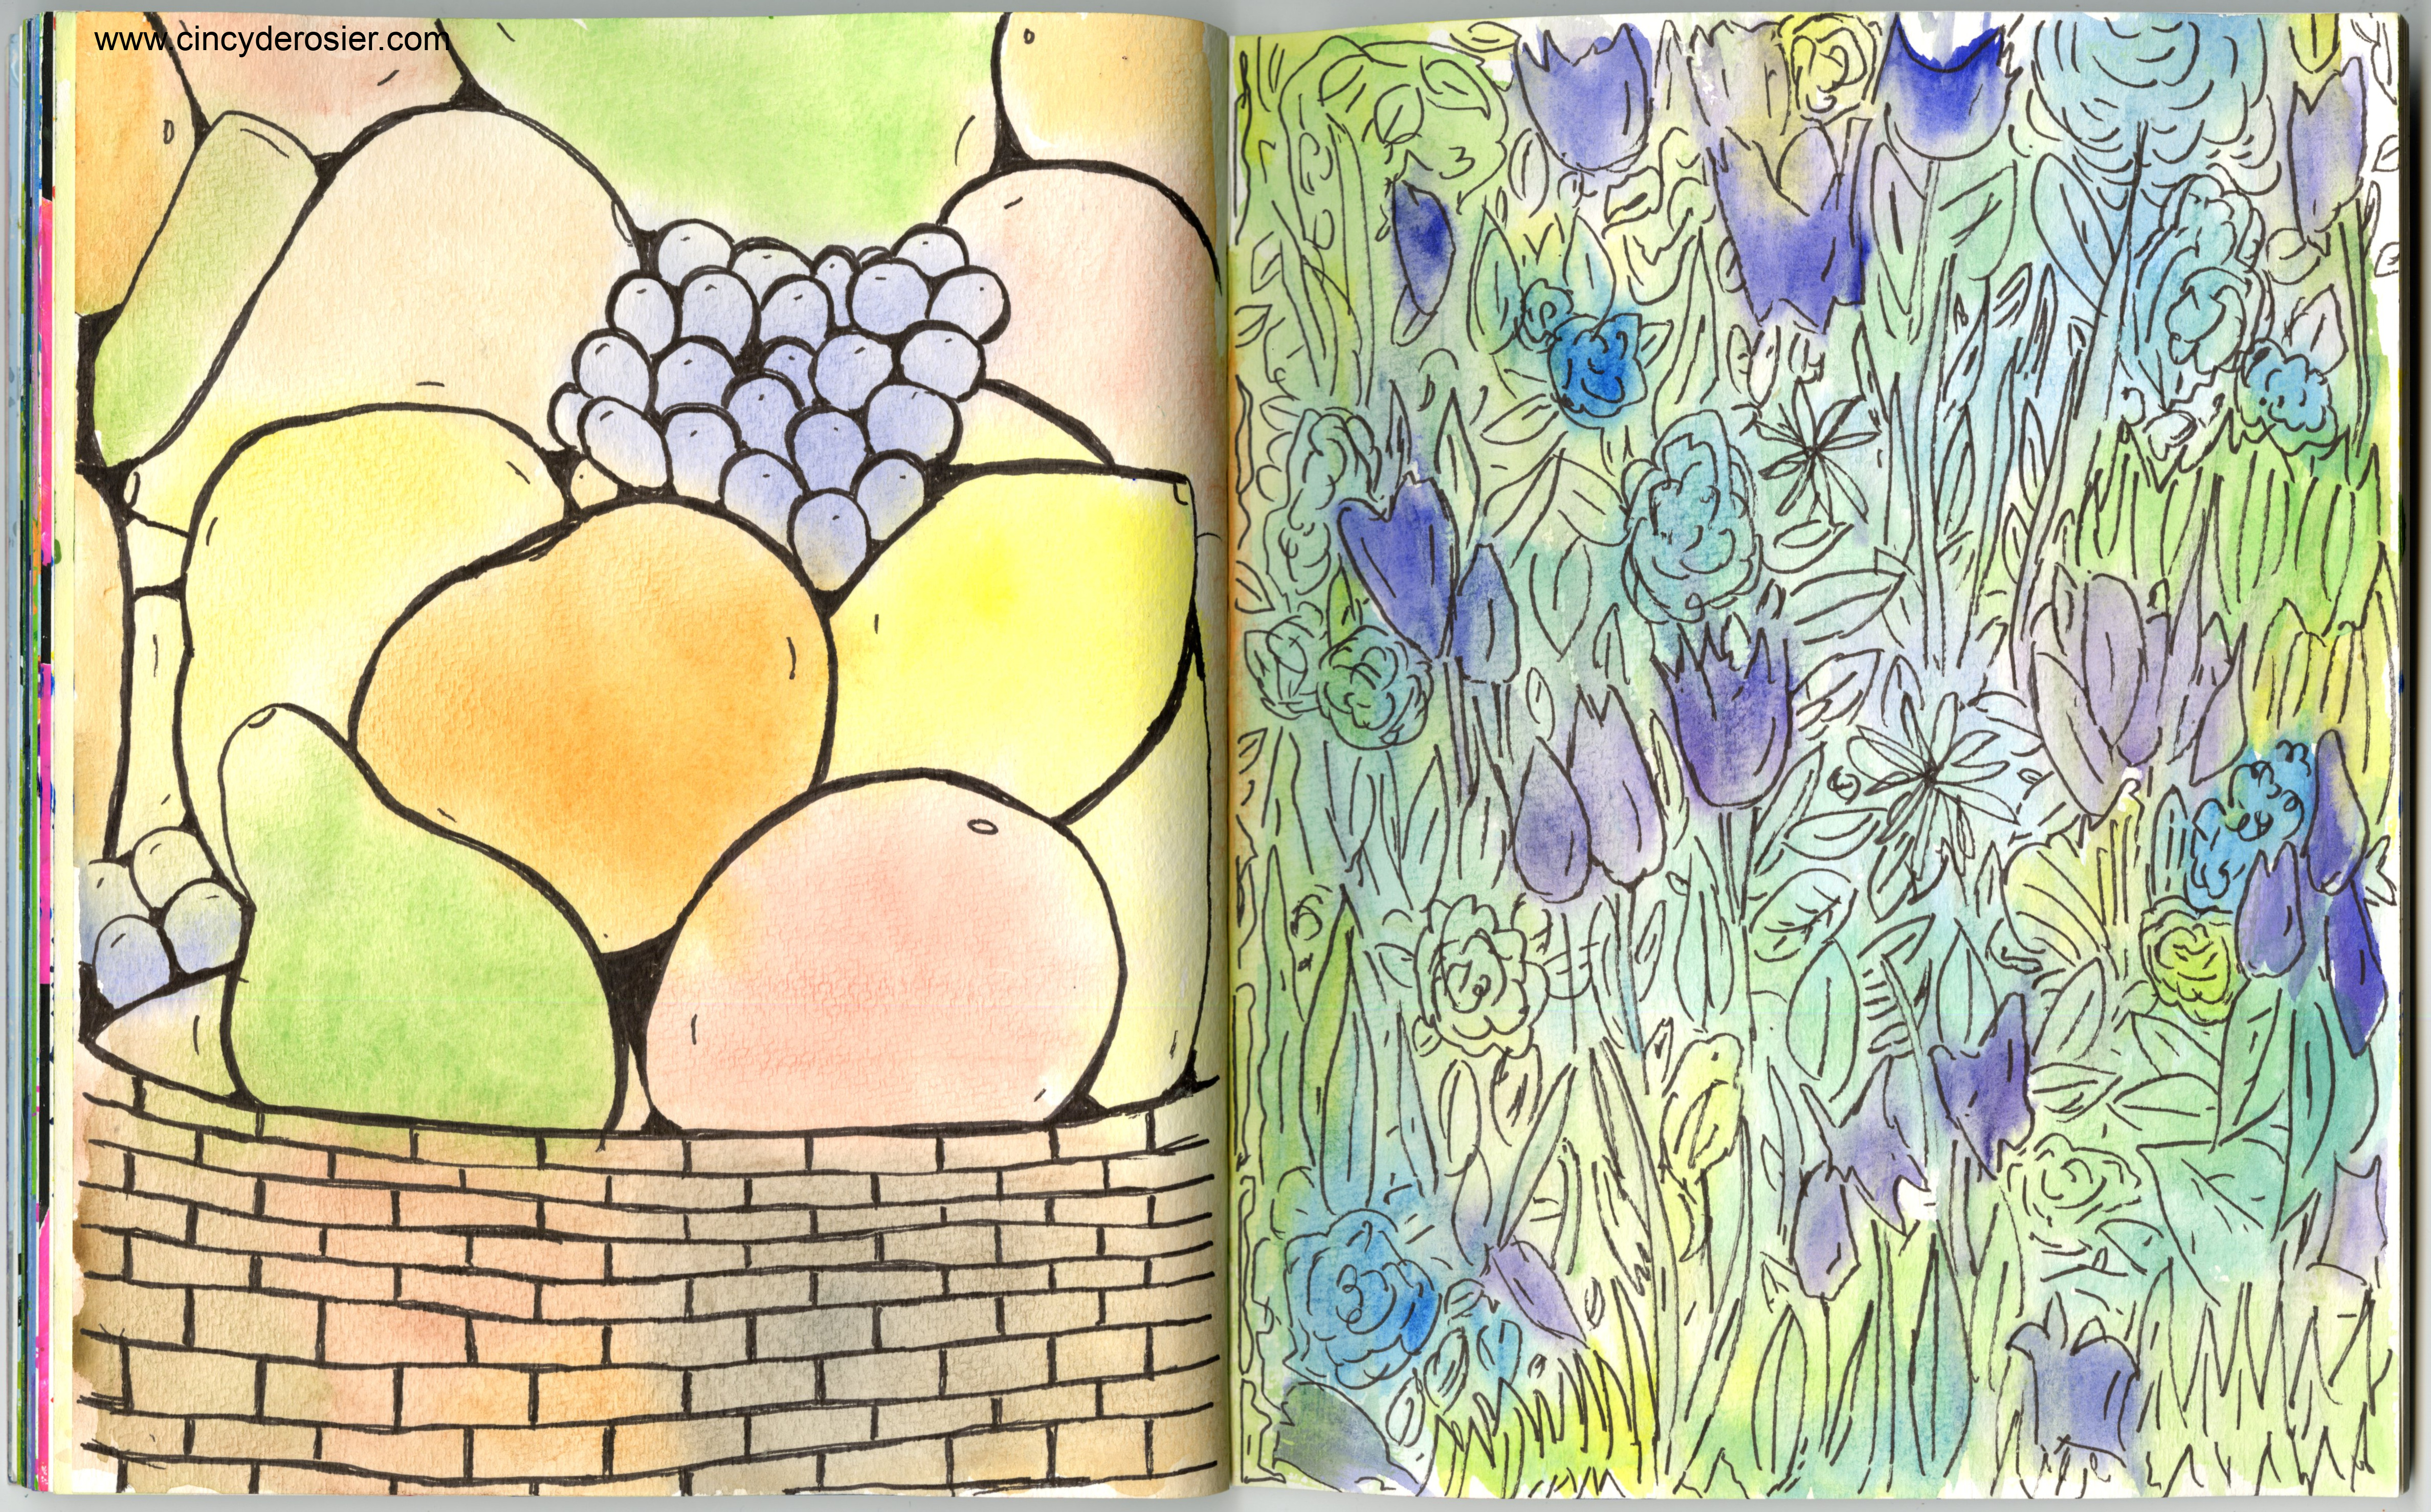
Reverse coloring books are great for sparking creativity. They make a fun gift for kids or adults. I made a DIY version to take along during my craft retreat with Jonna this past weekend. The day before we left, I painted this in my sketchbook:


No plan, no goal, just blobs of color in an interesting arrangement. I flopped on the couch in our hotel room, took a few minutes to figure out what I saw on each page, and then started drawing with a black Flair pen. Take a minute to decide what you would draw, then scroll down to see mine. 

-----

-----

-----

I made a basket of fruit and a scene of wildflowers. 


This was such a fun activity and something I definitely want to do again! I could see pre-painting a stack of these for early finishers to do in the classroom. They'd also be a fun waiting room or restaurant activity for kids. Since the color is already there, you only need to bring a single pen. Lots of possibilities!

4/13/23

Disneyland Park Colouring Book

Spell-check doesn't like the U and neither do I, but today I'm reviewing the Disneyland Park Colouring Book and that's how it's spelled. 
Let me jump ahead and say: I really like this coloring book (I can skip the U when I'm not naming the title). It is fully of really nice illustrations, organized by Land in both Disneyland and California Adventure. It's up-to-date enough to include the Inside Out Emotional Whirlwind and Star Wars: Galaxy's Edge, though obviously not the new Toontown that opened three weeks ago. The paper quality is quite good and there's just the right amount of detail. All of the classic characters are featured throughout. 

My only real complaint about this coloring book is that images are printed on both sides. This isn't necessarily a problem if you're working in colored pencil, but markers bleed through and ruin the other design. So before you color with markers, you either need to scan and reprint your pages (legal only for your own use if you've purchased the book) or just accept that you'll only be coloring half the designs in the book. I accept that. 

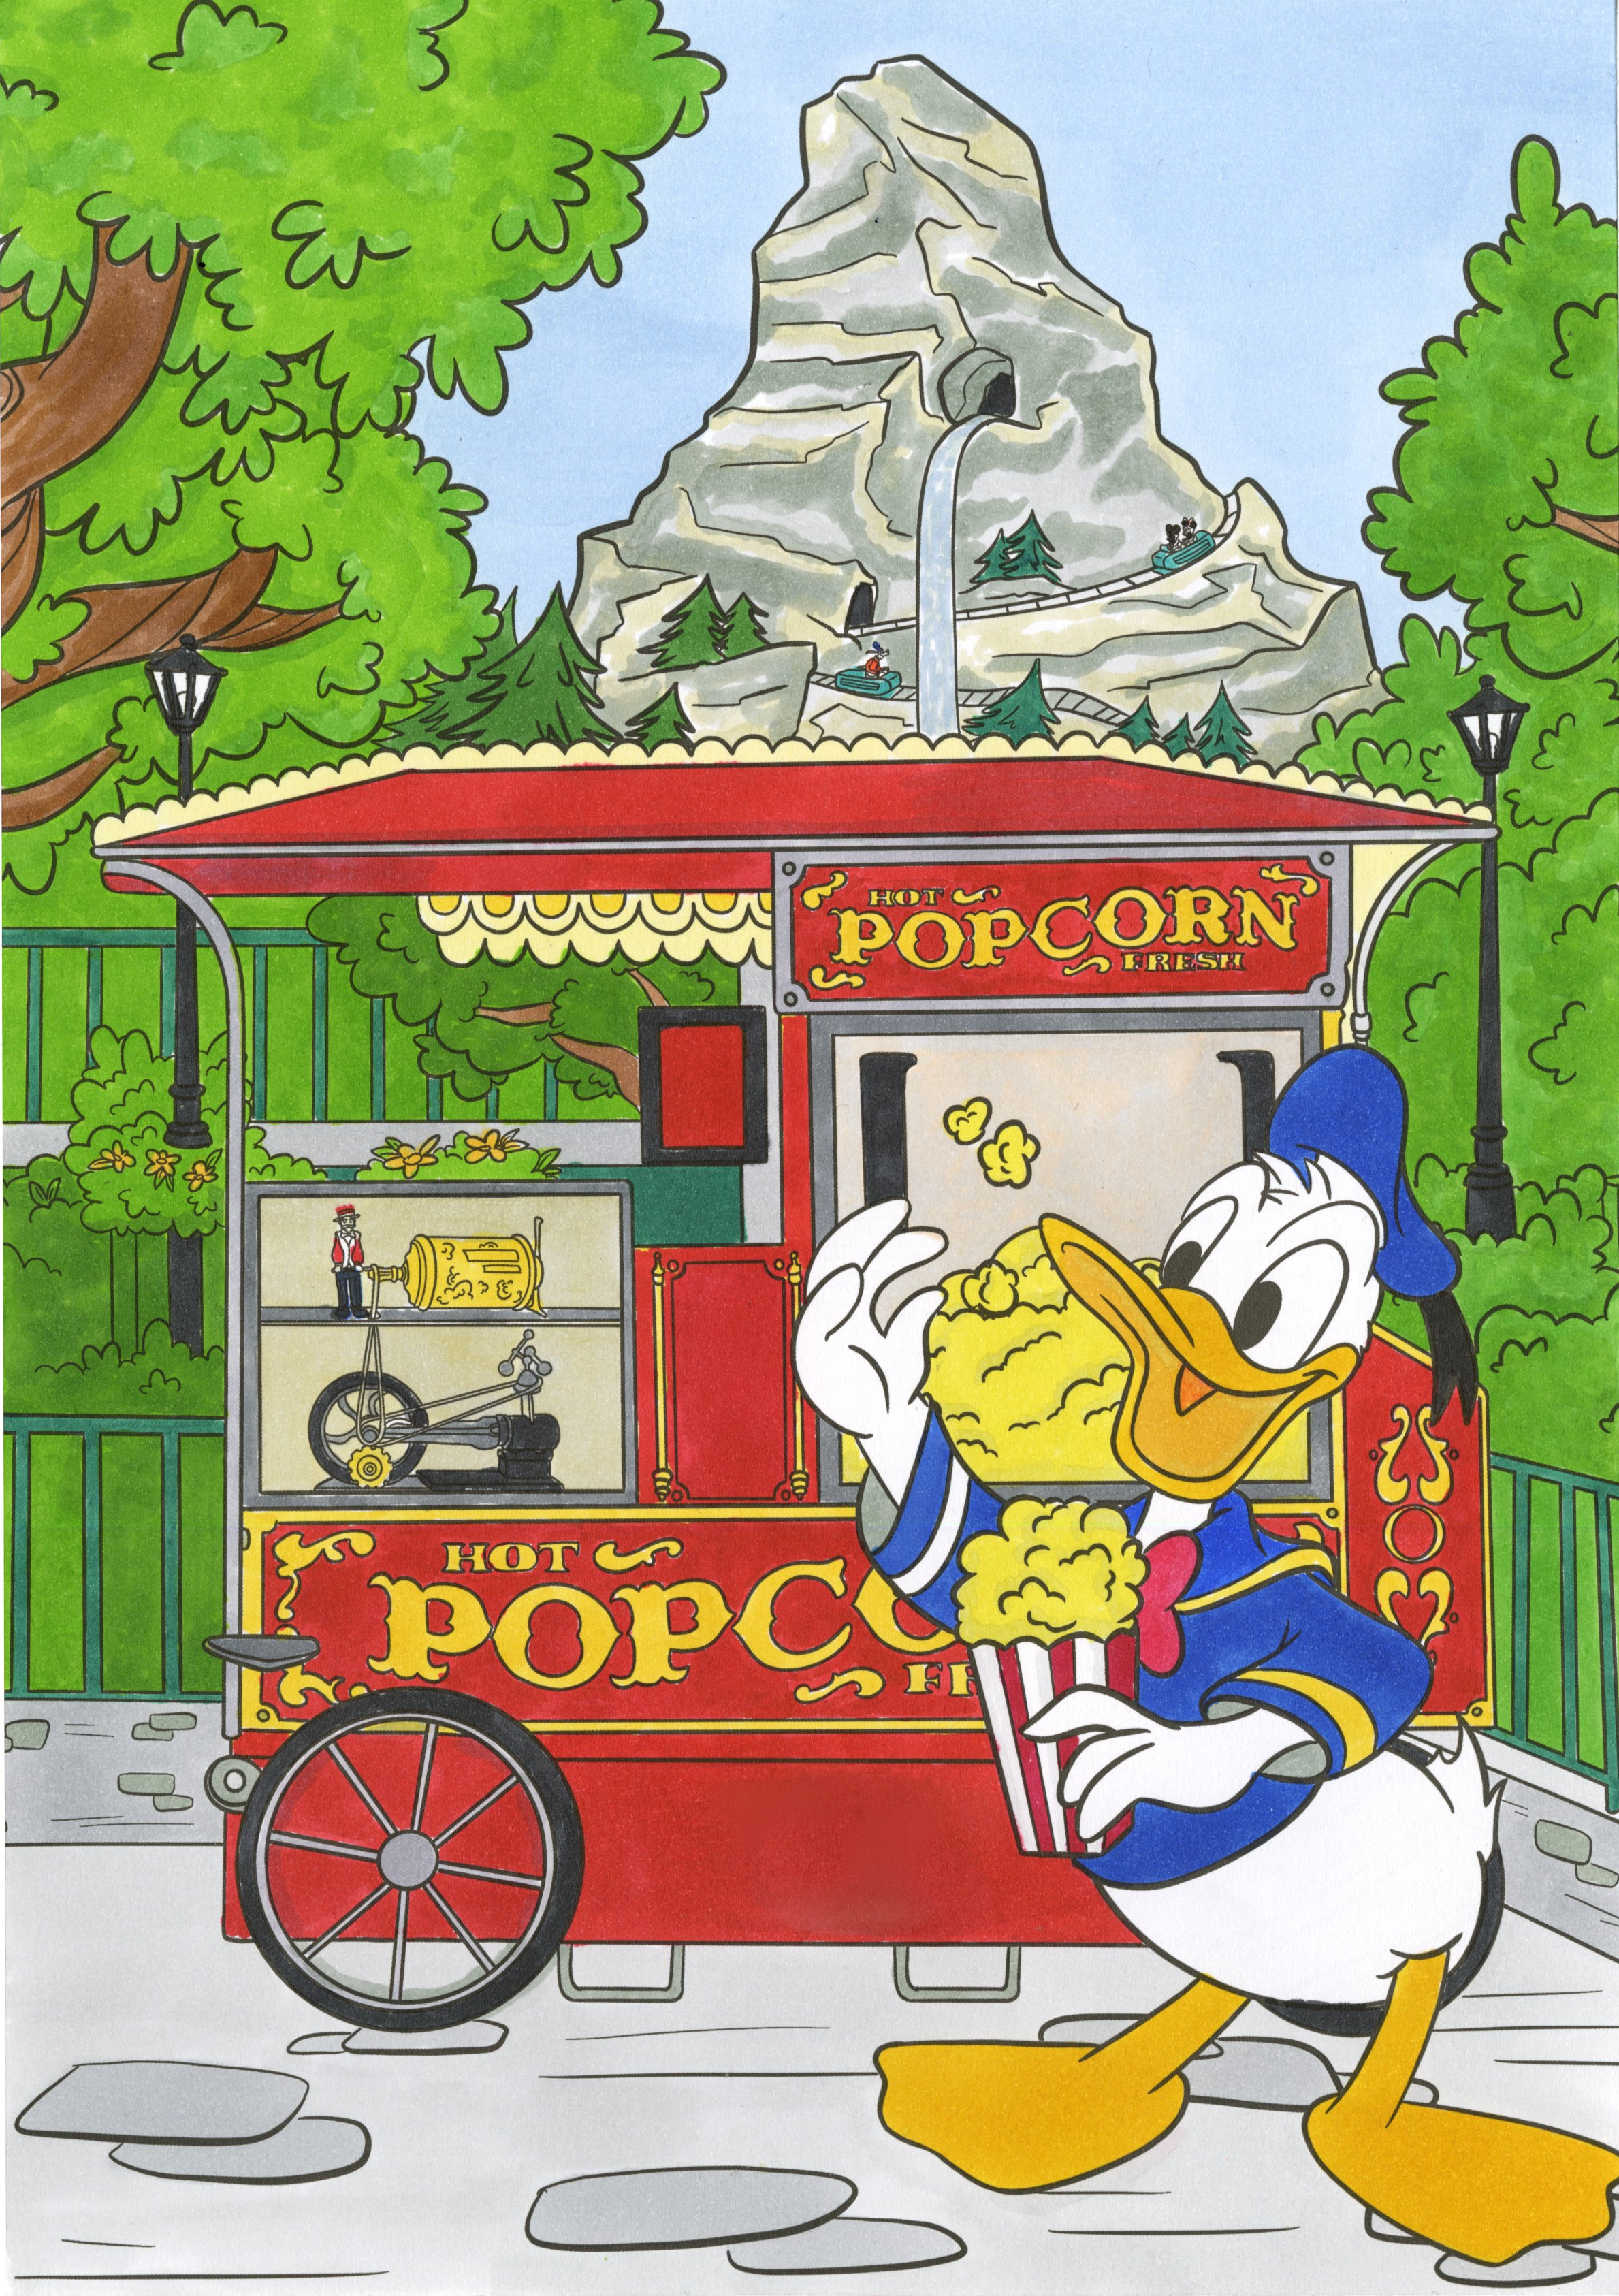
Here is the first page I colored, done with my ginormous set of Ohuhu markers


I have a lot to learn about shading with alcohol markers, but overall I'm happy with how it turned out. It was really tempting to grab my Prismacolor colored pencils to do the shading and to fill in the tiniest areas, but I wanted to challenge myself to use nothing but the Ohuhus. Next time, I'll be using both. I'm debating what page to do next. Maybe the Dumbo ride. Small World? The teacups? Pirates of the Caribbean? There are so many fun designs!

I don't know if it's an issue with other pages, but I did find some minor mistakes with this one. I didn't notice them until I was coloring them and they don't bother me that much. But if you look carefully, you can see a misplaced pole that goes nowhere on the left, a line on the popcorn card that disappears when it passes behind the wheel, and a wonky post on the right. 
    

That said, there are some super awesome details as well. They're almost too tiny to see, but if you look at the Matterhorn bobsleds, Goofy is riding the one to the left of the waterfall and Mickey and Minnie are riding the other one. Also, that's a mini Dapper Dan behind the glass cranking the popcorn machine. Did you know that each Land's popcorn cart has a different character there?! I had no idea until I stumbled upon this fabulous blog post about Disneyland's popcorn carts. The next time I'm at Disneyland, I'll be checking all of them out now that I know!

I can't wait to color my next page from the Disneyland Park Colouring Book!

1/20/23

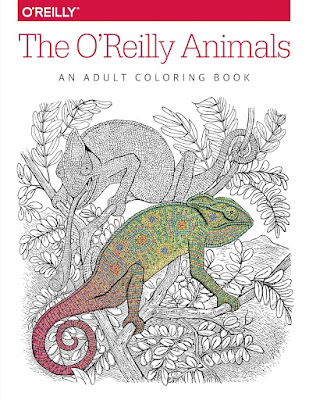
The O'Reilly Animals Coloring Book

 Steve bought me a coloring book for Christmas and I loooove it. 


The O'Reilly Animals Coloring Book features twelve beautiful, highly-detailed animal images, each adapted from engravings that, in turn, were inspired by illustrations in natural history books from the 18th and 19th centuries. Affiliate link here and below. 


If you don't know the story of the O'Reilly animals, it's well-worth a read. I hadn't heard of them until I married my computer-scientist husband, who has a substantial collection of O'Reilly books. The covers are so distinctive and completely unlike any of his other professional materials. 

As I mentioned, the O'Reilly coloring book has only 12 pages, which is unusually few for a coloring book. I like every single design, which is pretty much NEVER the case. I am super picky about coloring books. Not only is the paper in this book high-quality, but they're printed single-sided, so you don't have to choose between designs. The images are realistic and detailed, but not overly so. 

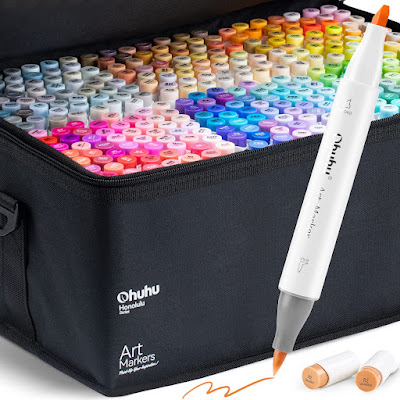
I colored the first page, Toucans, using the 320-set Honolulu series alcohol markers by Ohuhu


The folks at Ohuhu sent me this complete set to try out and I'm happy to report that they color like a dream! The range of colors is incredible and the ink flow is just right. I used both the brush and chisel ends for coloring and love the options for both precision and coverage.

I will share a complete review of the Ohuhu 320-marker Honolulu markers on Monday, so be looking for that. In the meantime, buy yourself a new coloring book. You deserve it. 

1/3/22

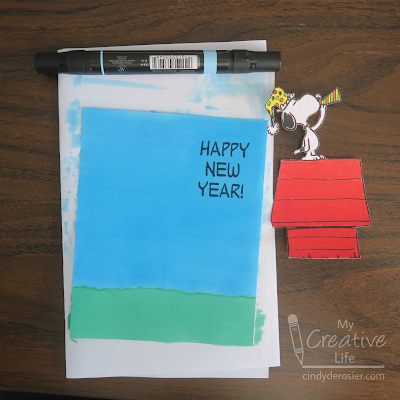
Happy New Year from Snoopy and Me

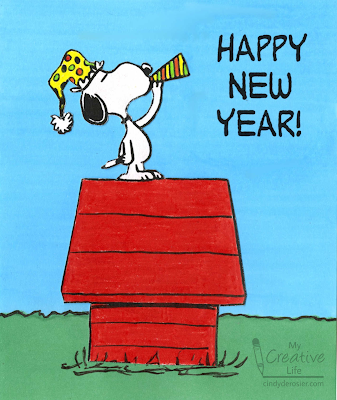
Happy New Year from Snoopy and me! 
 

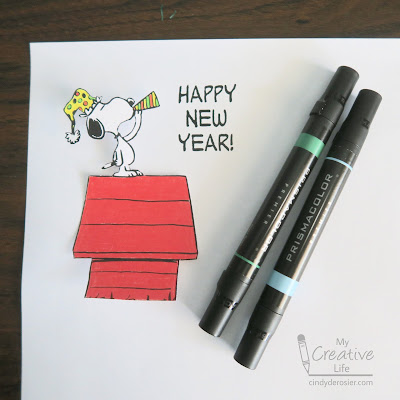
I had a lot of fun creating this craft because I love Peanuts and I love coloring. I started by downloading one of the free coloring pages on the Schulz Museum website, reduced the size to 30%, and printed it on Neenah Bristol Vellum (affiliate links here and throughout the post). I colored the image with Prismacolor colored pencils, then cut it out with microtip scissors. That let me get rid of the HONK HONK HONK text that I didn't want.

Next, I used Groundnut font to print Happy New Year! on a separate piece of paper.


I cut the paper to size, then I used green and blue Prismacolor art markers to color the background. 


I used a 0.8 micron pen to draw the line between the grass and the sky, then I glued the cut-out piece into place. I added lines and blades of grass at the bottom of the doghouse. 


Not only are there downloadable coloring pages on the Schulz Museum website, but there are a bunch of different ones at Peanuts.com, including the one I colored for Halloween

Happy New Year to you all! 

11/9/21

Football Helmet Collage

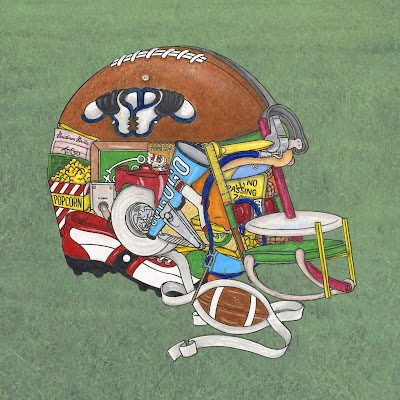
I've finished another coloring page from Don Stewart's Quirky Collages to Color (affiliate link here and below). The Football Helmet collage was the most difficult one I've done so far, for several reasons. 


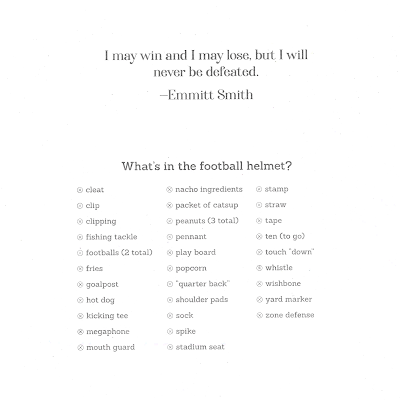
The image is larger than ones I've colored previously and made up of more hidden objects, but it's the fact that I don't know anything about football that made it particularly tough. I had to ask Steve for help identifying some of the objects. Can you spot each of them listed below in the picture above? 


Once I figured out what everything was, then I had to look up some of the items to know if they're supposed to be a certain color. Once I picked out colors, I gave everything a base coat with art markers. Then I covered the whole thing with my newly-expanded collection of Prismacolor colored pencils and tried to work out shadows and highlights (with limited success). When I was done coloring, I cut out the helmet with microtip scissors, then adhered it to photo-realistic grass patterned paper

I really love this this coloring book and am looking forward to tackling (ha ha!) my next page. 

10/29/21

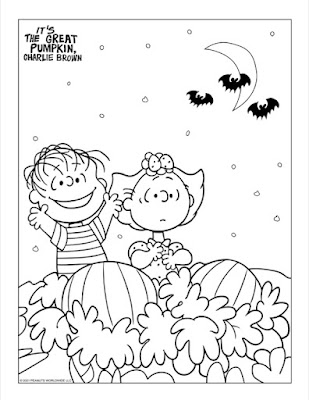
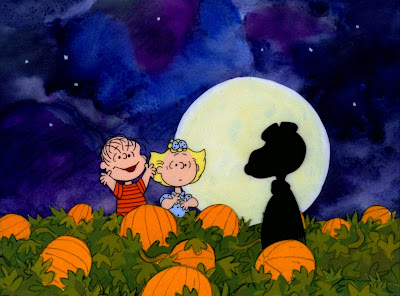
Coloring Linus and Sally Awaiting the Great Pumpkin

After discovering that watercolor doesn't work well on my new colored-pencil- and printer-friendly cardstock, I wanted to try markers on it. Markers make a great base for colored pencil work. I looked for a fun (and non-pirated) Halloween coloring page and printed this one of Linus and Sally awaiting the Great Pumpkin. It has a large background area that would take forever to cover with just colored pencils, so it was ideal for experimenting with a marker base.


We own It's the Great Pumpkin, Charlie Brown on DVD (affiliate link here and below) and have watched it dozens of times, but I wanted a reference photo to color my page.  This was the closest I could find to the coloring page. 


I was originally thinking that I'd get to practice shadows with this coloring page, but once I looked at the reference photo, I tossed out that idea. With the exception of the sky (which looks like watercolors), each color is a solid fill in a space. Adding shadows or shade variation would change the look of this very classic style. 

I added a quick marker base to my printed coloring page using my Prismacolor markers. As is particularly obvious in the sky, I didn't try for good coverage and made no attempt at blending. My plan was to do that with colored pencil. 


I should note that I was frustrated with the limited number of markers I have. Specifically, I don't have a deep blue, any decent skin tones, or much variety of greens. It's very hard to believe that only four months ago I said "my collection is now big enough to meet most of my coloring needs." Nope! 

Here's what my page looked like after I added colored pencil. 


I was able to fix the skin tone and the greens easily, but I'm not thrilled with the sky. I wasn't able to do as much blending as I'd expected, despite using lots of light layers. It felt like the marker had filled some of the tooth. After three layers, any additional colored pencil I attempted to add just made crumbs and didn't blend. It was frustrating, plus I had a heck of a time keeping the crumbs off of the surrounding areas that were already colored in. I've seen some artists use a makeup brush to sweep away the crumbs; I definitely need one, although I'd prefer not to generate as many in the first place. I'm going to have to do more experimentation to see if the marker base limits how much colored pencil the paper can hold.

As I've been going through my colored pencil class, I've been keeping a list of questions and problems as they arise. I've also been noting things I want to try, as well as techniques and tools that don't appeal to me. I'll share that list next week in hopes that some of you out there can help me!

10/18/21

Coloring State Butterflies

Fun fact: 48 of the 50 states have an official state insect. (The two that don't are Iowa and Michigan.) Some states have named more than one state insect, where others have multiple categories of insects. For example, Alabama has a state insect, a state agricultural insect, and a state butterfly. (Oddly, their state insect is a butterfly, but they named a different butterfly as their state butterfly.) Delaware has a state bug, a state butterfly, and a state macroinvertebrate. Tennessee has the most, having designated two official state insects, a state agricultural insect, and a state butterfly.  

It's the butterflies that I'm focusing on today. 

There are 29 states with either a state butterfly or state insect that's a butterfly. Seven are monarchs, and one is a Mullerian mimic to a monarch. I've made a couple of monarch crafts fairly recently, so I wanted to focus on some of the other state butterflies. And, of course, I've been working obsessively with colored pencils lately, so that's what I used. 

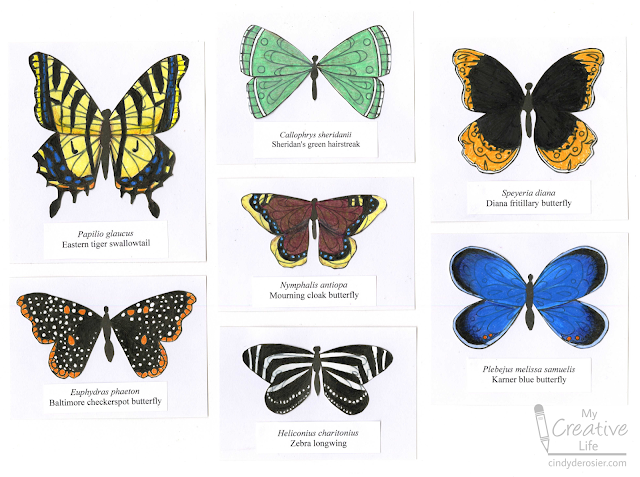
Here are the seven butterflies I made, representing: Alabama, Delaware, Georgia, North Carolina, South Carolina, and Virginia (Eastern tiger swallowtail); Arkansas (Diana fritillary butterfly); Florida (Zebra longwing); Maryland (Batimore checkerspot butterfly); Montana (Mourning cloak butterfly); New Hampshire (Karner blue butterfly); and Wyoming (Sheridan's green hairstreak). 


In retrospect, I made things WAY harder for myself than necessary. Rather than drawing the butterflies myself, or printing out line drawings, I used a black pen to alter an existing coloring page. I went through all the state butterflies and the seven drawings on the coloring page to decide which images would work for which butterflies. Then I started blacking in the changes. It was very tedious and took much (MUCH) longer than drawing them would have. Not to mention, I was left with lines from the original designs that didn't belong. Nevertheless, I pushed on. 

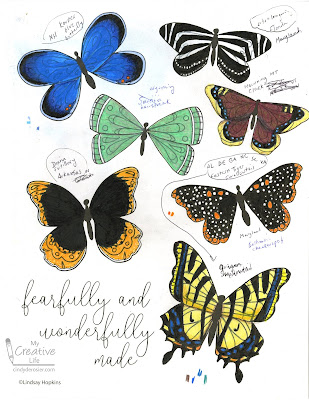
Here you can see that I've begun altering the butterfly on the bottom right of the page. I'd originally started to change it into an Oregon swallowtail (which is why you see "Oregon" written above it) but I ended up making the similar Eastern tiger swallowtail. You can see in my notes that I planned to turn the butterfly directly above the sentiment into "Arkansas or Colorado." I went with Arkansas' Diana fritillary butterfly. 


Here are each of the butterflies fully colored, along with my notes. You can also see a few places where I swatched my colored pencils. 


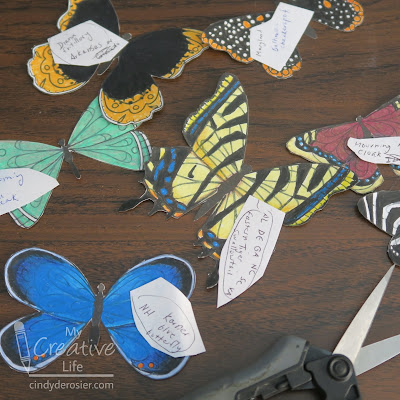
The next step was fussy-cutting all the butterflies. That took awhile, too. 


Finally, I mounted each butterfly on white cardstock and added a typed label with the scientific name and the common name. I love the way the butterflies all look together. 


This was a challenging project that taught me a lot. Someday I might redo these (drawing them by hand instead of starting with lines that shouldn't be there) and adding in the remaining state butterflies. But it's not going to be anytime soon. I'm officially taking a butterfly break. 

10/14/21

Printable Halloween Tags to Color

I've worked my way through almost all of Sarah's coloring videos and have learned so much! I mentioned awhile back that I'd found her video about the best paper for printing coloring pages to be extremely helpful. Based on her recommendation, I ordered a pack of Neenah Bristol Vellum (affiliate link here and below), waited impatiently for it to arrive, and crossed my fingers that it would work with our printer. I'm happy to report that it does! 

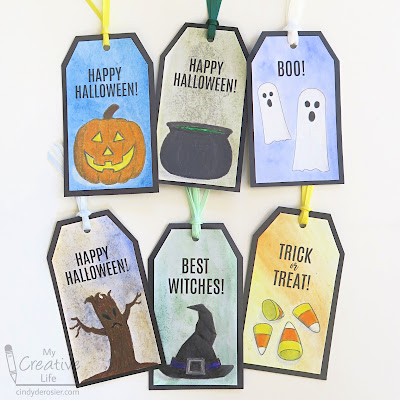
My first project was making Halloween tags. 


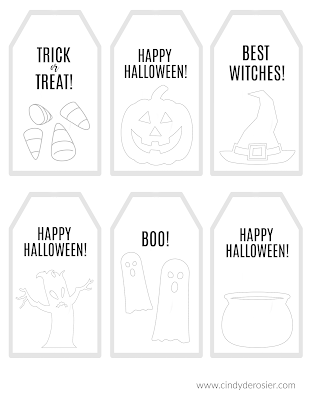
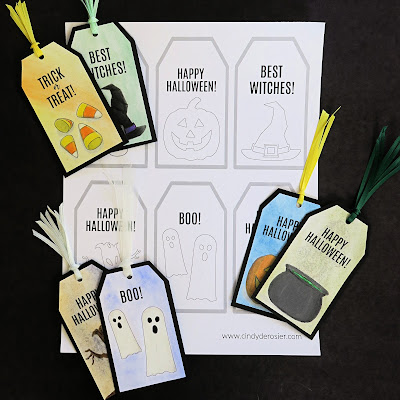
I started by designing the printable using PicMonkey. I printed the text at 100% but faded the borders and the graphics to 60%. (You can download it (for free) here.)


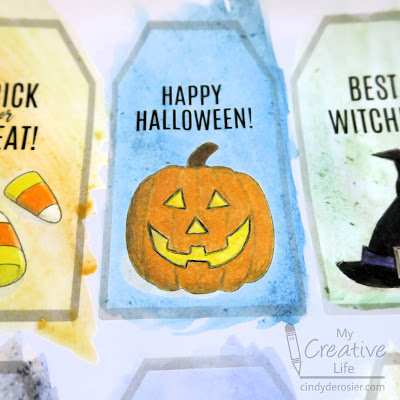
I used my Prismacolor Premiers to color the images and was delighted with the way the colors laid down on the bristol vellum. I was particularly pleased with the shadows on the candy corn and the hat, as well as the shading on the 'white' ghosts. My plan was to add a watercolor background to the tags... 


... which ended up being a not-good idea. When I tried to go any sort of blending, the paper pilled. And my subtle grey shadows ended up looking weirdly white. 


But no matter. I learned a lot. And by matting the tags with black cardstock and adding coordinating ribbon, the tags don't look half bad. 


I'm going to have to do some experimenting with watercolors over colored pencil using a more appropriate paper for wet media. I also want to try using the colored pencils over watercolor to see the difference.

10/7/21

Framing Multiple Colored Pencil Images

One nice thing about moms (or my mom anyway) is that they love everything their child makes and happily hang their kid's creations all around the house. Even when their child is 49. 

When I asked you guys for ideas about what to do with these coloring page images I'd cut out, my mom suggested that I put them in a frame and give it to her. So I did. I had to play around a bit to get the best composition possible with the different colors and sizes. The fact that the margins aren't even really bugs me, but I know my mom won't care. Or notice. 


In retrospect, I wish I hadn't cut the images apart. It would have been much easier to frame the intact pages. Everything about this was a learning experience!

9/28/21

Colored Pencil Progress

Last week, I discovered Colored Pencil Magazine exists. Now I've learned that there is a Colored Pencil Society of America. I'm continually amazed by how much I didn't know about colored pencils, despite using them regularly for 47+ years! 

I've also discovered that I own more colored pencils than I thought I did. I keep my open-stock colored pencils on the paint shelf in the craft room and the complete sets in the craft room closet, plus Trevor has a bunch in his bedroom and more at his desk. Before making my colored pencil swatches, I did what I *thought* was a thorough search of the other places more pencils would be hiding. And yet I continue to find colored pencils here and there. It's a good problem to have, I suppose, but it makes me realize there are a few more drawers and bins in the house that need reorganization. 

Here is my latest colored pencil effort. The pages are from Leisure Arts' Love Grows and colored with Prismacolors (affiliate links).   


I'm really happy with the progress I'm making with blending and shading, thanks to Sarah's videos. Speaking of which, Sarah is on a quest to reach 100K subscribers on YouTube by the end of 2021. Considering how valuable her content has been to me, I'm doing my part to help her out. If you have enjoyed any of her videos I've shared, or want to learn more about colored pencils, subscribe to Sarah's YouTube channel. She's giving away a bunch of prizes as her following grows, so there's some extra incentive for you!

I like to do something with my colored images, but these have me stumped. Ordinarily, I'd fussy-cut them and use them on cards or something. But the many tiny leaves, cactus spines, and line-thin stems make these a very poor choice for fussy-cutting. I used the trimmer to separate the images, thinking maybe I could use them that way. Here they are, with a colored pencil for scale:


If you have any thoughts on how I can use these, let me know!

9/16/21

An Atypical Sympathy Card

 The coloring page that I shared with you yesterday? I used it to make a sympathy card. 


It is very different than sympathy cards I've made in the past. The most obvious difference is the color palette - pinks and greens that focus on celebrating life rather than mourning death. Another difference is the amount of time I spent making it. Sympathy cards always take me longer than other cards, but between coloring and burnishing the image (another thing I learned about after watching Sarah's videos), adding the stitching, and embossing the sentiment, this probably holds the record for the card that took me the longest to make. And that is a good thing. 

As I made the card, I thought about a life well-lived. I thought about a dad who was devoted to his family, who loved spending time in nature, and who always had a smile on his face. I met John when I was 8 or 9, when he and Jonna joined the same Father/Daughter program my dad and I were in. Over the years, our families spent a lot of time together. John helped me move into the apartment I shared with Jonna in college, but even more notably, he helped me move out of the apartment long after Jonna had moved out. I remember the huge smile on his face during my wedding, and the even bigger smile when I introduced him to my baby for the first time. John will be missed by many and I'm glad he was a part of my life. 

9/15/21

"Art Class" #1: Improving My Coloring

One of my creative resolutions for 2021 is to take two art classes. I was hoping to do in-person classes, but here we are in September and I haven't found any that I want to take. I looked at some online classes and found some interesting options, but nothing was quite right for one reason or another. I decided to take a different approach: I would pick two art-related skills I'd like to learn/improve and then I'd search for the corresponding content.  

The first skill I'm tackling is improving my coloring. Besides picking out colors that look good and staying within the lines on a coloring page, what else is there to coloring? As it turns out, a LOT. 

To be honest, it wasn't until I colored the hummingbird gift bag that I realized how much skill coloring well requires. The more I've read, the more I realize how much I have to learn. (Isn't that the case with everything?) With the hummingbird image, I attempted to add shading and texture to the flowers. I had some success, but realized this would be the perfect topic for the first class I'd put together for myself. Since then, I have skimmed dozens of blog posts and watched snippets many YouTube videos looking for a great instructor. I am thrilled to have found Sarah Renae Clark

Sarah is a coloring book author and talented artist from Australia. Her blog posts are well-written and illustrated beautifully, but it was her YouTube videos that truly drew (haha!) me in. 

These are three of my favorites. Each contains lessons I was immediately able to put into place to improve my coloring.  


This is the first coloring I've done since starting my 'class.' The image is from the Love Grows Coloring Book (affiliate link). 


It took a lot more time than it used to take me to color a similarly sized project, but the extra time was particularly good for this project. Tomorrow I'll tell you why. 

7/20/21

Quirky Collages: Hummingbird Gift Bag

I've completed another coloring page from Don Stewart's Quirky Collages to Color (affiliate link here and below). This time, I colored his hummingbird collage. I used Prismacolor art markers, cut out the image using microtip scissors, and adhered it to a plain gift bag.  


Here's a closer look at the colored image. Can you spot the nine flowers that make up the hummingbird? You should find: anthurium, bird of paradise, calla lily, chrysanthemum, crocus, hydrangea, orchid, rose, and trumpet vine. 


Adding your colored images to gift bags is a great way to get them out of the coloring book and seen. It's also an easy way to personalize a gift bag. Just choose an image you know the recipient will love!

4/27/21

Teacher Appreciation Day Gift Box

Teacher Appreciation Day is May 4, one week from today. This is a wonderful opportunity to tell those special teachers in your life just how much they mean to you. Teaching can be very challenging; a kind note from a student or a parent may be exactly what a teacher might need to temporarily forget the hard parts and remind themselves what a rewarding job it is. 

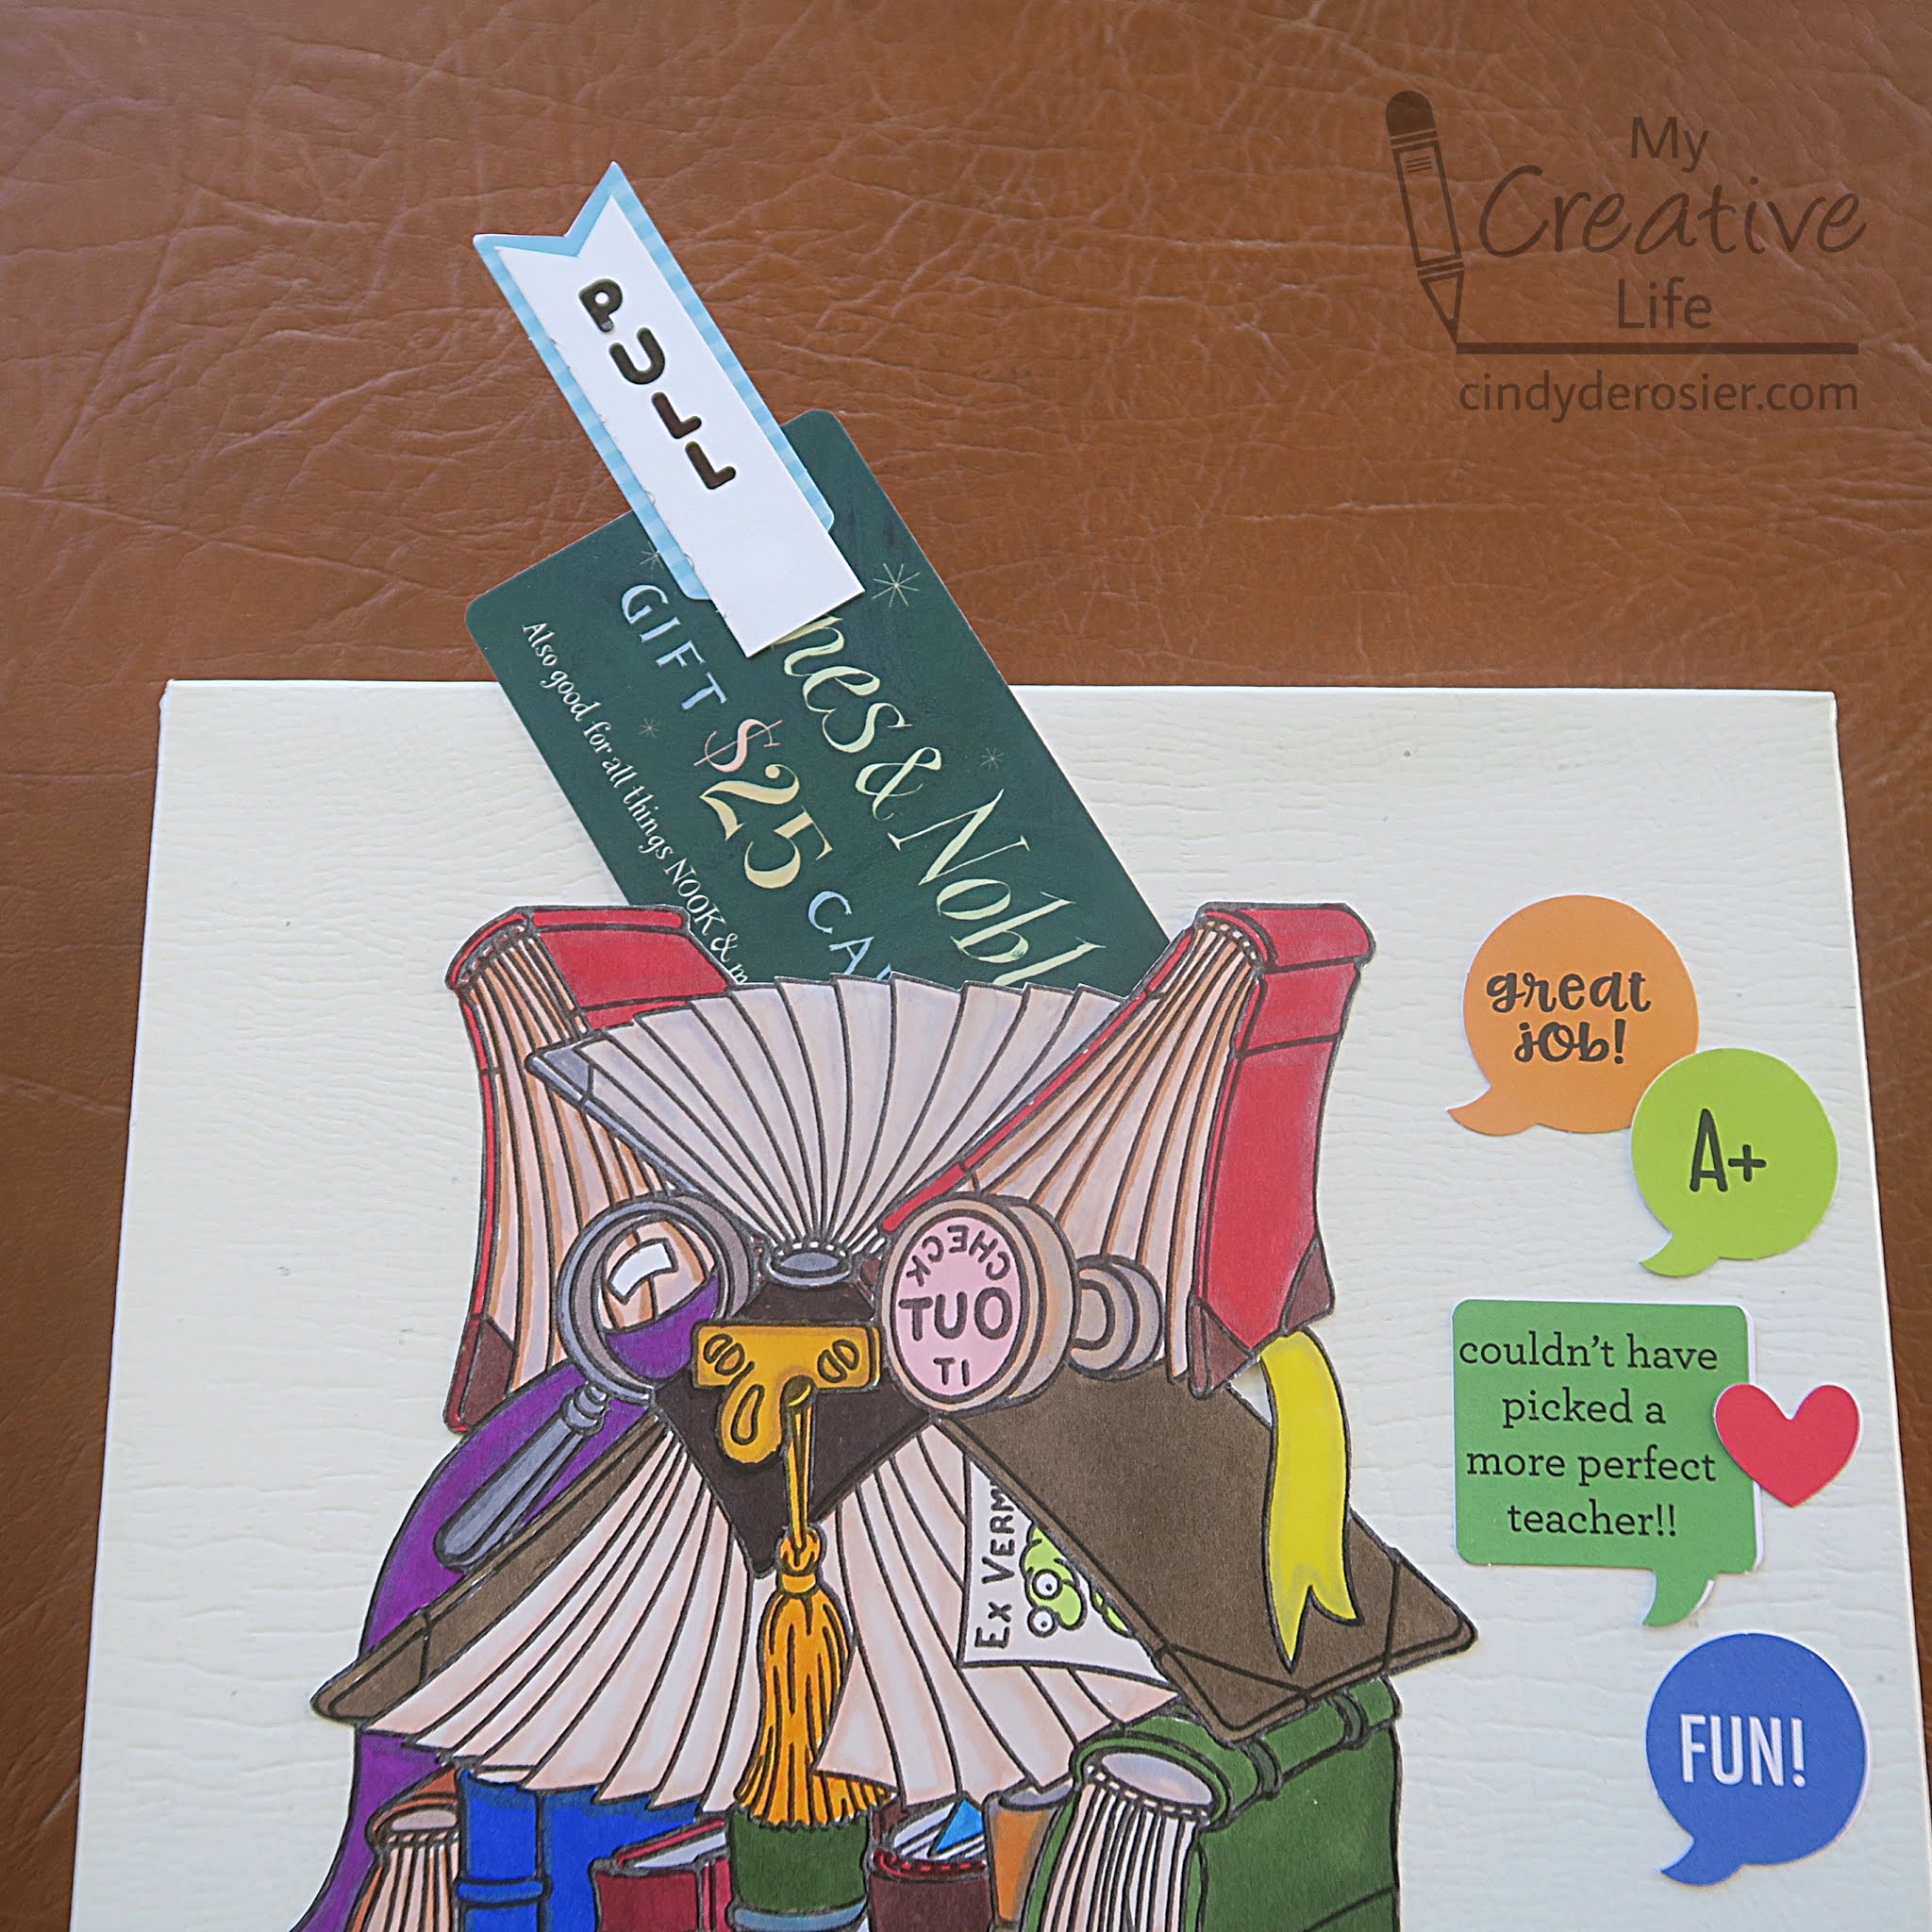
When I came across the owl drawing in Quirky Collages to Color, I thought it would be awesome to use it to decorate a gift box for a teacher. So that's exactly what I did.  


Did you notice the pull tab? It's attached to a bookstore gift card. This is my #1 recommendation when people ask me what gifts teachers want. I've never met a teacher who didn't spend their own money on books for the classroom, or who wouldn't love to buy some books for themselves to enjoy. Affiliate links below. 


Teacher Appreciation Day Gift Box


Materials:


Steps:


Color in the owl image using markers. With microtip scissors, carefully cut out the image. Place it on top of a gift box. Arrange the Chit Chat die cuts to the side of the owl and adhere them in place. Turn the owl upside down and apply adhesive along all the edges EXCEPT for the top edge between the two "ear" books. Carefully adhere the owl to the box. 

Cut a scrap of white paper and write PULL on it, layer it on a Chit Chat banner, then tape it to the end of the gift card. Slide it into place. 


So what should you put inside the box? Here are some ideas, based on what my fellow teachers and I frequently bought for our classrooms, using our own money:


Happy Teacher Appreciation Day to all of my former colleagues and all of the other hardworking teachers out there!

4/15/21

Quirky Collages to Color

I have a new coloring book that I absolutely love. Don Stewart's Quirky Collages to Color (affiliate link) includes 32 awesome illustrations to color. What makes this coloring book unique is that each illustration is a collage made up of dozens of smaller items that fit a theme. 

The first design I colored was The Right Brain. It was so much fun! I used my beloved Prismacolor art markers


As you can see, the shape of the brain is formed entirely by art supplies. They are listed on the back of the design. Can you spot each one? 

  • airbrush
  • craft stick
  • eraser
  • French curve
  • glue
  • loop tool
  • marker
  • paint
  • paintbrushes
  • palette
  • pen
  • pencil
  • pincushion
  • precision knife
  • ribbon
  • scissors
  • tape
  • triangle
  • utility blade
  • watercolor set


There is a quote associated with each design, too. The Right Brain's is by Frida Kahlo: "I never paint dreams or nightmares. I paint my own reality."

I received a copy of Quirky Collages to Color this week, directly from the publisher. But that wasn't the first time I saw the content of the book. Back in October, the publisher sent me a digital copy of the book to review. I loved it... in fact, I liked it enough that they printed my endorsement on the back cover!


You can see my name and review (multiple times) in the Amazon listing as well. 

I can't wait to color the next design! The hardest part is going to be choosing which one to do next. 

10/25/19

Kind People are My Kind of People

Way back in my beginner teacher days, my aunt Vickie (then a 4th grade teacher and now a curriculum specialist who doesn't seem to understand how to retire) taught me how to do a cool art project with Sharpies, cling wrap, and aluminum foil. I used a page from one of my favorite coloring books by Leisure Arts to show you this unique craft. Affiliate links below. 


---------


Kind People Are My Kind of People


Materials:


Steps: 


Remove the coloring page from the coloring book. Put it on top of a piece of chipboard, then cover it with plastic wrap. It should be tight and without wrinkles. You can tape the back if you'd like. 


Use the sharpies to color in your design. Outline everything in black for the best results. 


Carefully remove the top half of the plastic wrap and check that your coloring is dark enough. I didn't outline with black and my design looked too washed out, so I carefully rewrapped the plastic wrap and did the outlining. 


Carefully remove the plastic wrap and set it aside. Remove the coloring page - you can use it for a future project.

Cut a piece of foil that is bigger than the chipboard. Gently ball up the foil, then unfold it and smooth it out. Don't ball it up too tightly or you'll have difficulty smoothing it. Repeat this process if necessary, then wrap the foil around the chipboard. Cover the foil with the plastic wrap and tape it on the back side. Mount the artwork onto black cardstock that's been trimmed to 9" x 11.5". 


You can do this with any coloring book, or draw a design or quote of your own. Be creative!