Showing posts with label leaf. Show all posts

10/19/22

Fall Leaf Luminarias

Luminarias looks so pretty lining a path at night. Use fall leaves to make make your own luminaries to display during autumn. They're particularly nice to set out for Halloween to welcome the trick-or-treaters. Affiliate links below. 


Fall Leaf Luminarias


Materials: 


Steps: 


Spread out the paper bags and arrange the leaves on top of them. I made my luminarias two at a time and used a box to contain the spray. 


Spritz the spray ink over the leaves until the visible white area is mostly covered. If you leave visible white, there won't be contrast when you remove the leaves.  


You can remove the leaves immediately and set the bags aside to dry while you spray the next batch. Continue until you've decorated enough bags to line your walkway. 

Fill the bags with an inch or so of dried beans (or rice or pebbles). You want enough to keep the bags upright and in place. Nestle the tea lights into the beans and arrange the luminarias. Beautiful!
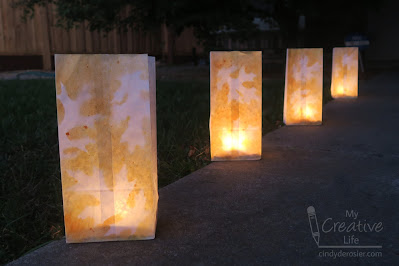

I made these for fall, but luminarias are even more common for the Christmas season in places like New Mexico. I found this fascinating article about the difference between luminarias and farolitos that you might enjoy. You can make a winter version by following the same steps. Try using different elements from nature (holly leaves and berries, for example). You can also use different colors. 

 

10/7/22

Fall Leaf Fashion

A few days ago, I went for a long walk to collect fall leaves for an upcoming craft. As I was thinking about all the common ways to craft with fall leaves, it occurred to me that most are designed for young children. For example, my Fall Leaves Wall Hanging is easy enough for preschoolers to do. I challenged myself to come up with a fall leaf craft that would appear to tweens and older kids who are no longer interested in gluing leaves to a paper plate to make a wreath. Presenting, Fall Leaf Fashion!


I started by cutting out models to inspire my fabulous fashions. (Read here, if you've forgotten how in touch with fashion I am.) I had scraps of tan and black cardstock sitting on my desk, so that's what I used. Obviously, you can make your models with whatever skin tone, hair color, and body type you want. 


Here are my models after they were glued. 


I had a wide variety of leaf shapes and colors to inspire my fashions. After a lot of trial and error, and trying different outfits on different girls, I settled on the fashions for my runway show. I hadn't intended a fall collection to look beachy, but at least the garments show creativity in the use of textures, a strong sense of proportion, and good use of color. Hopefully Nina won't be bored. 


I miss the Tim, Heidi, and Nina era of Project Runway

9/15/22

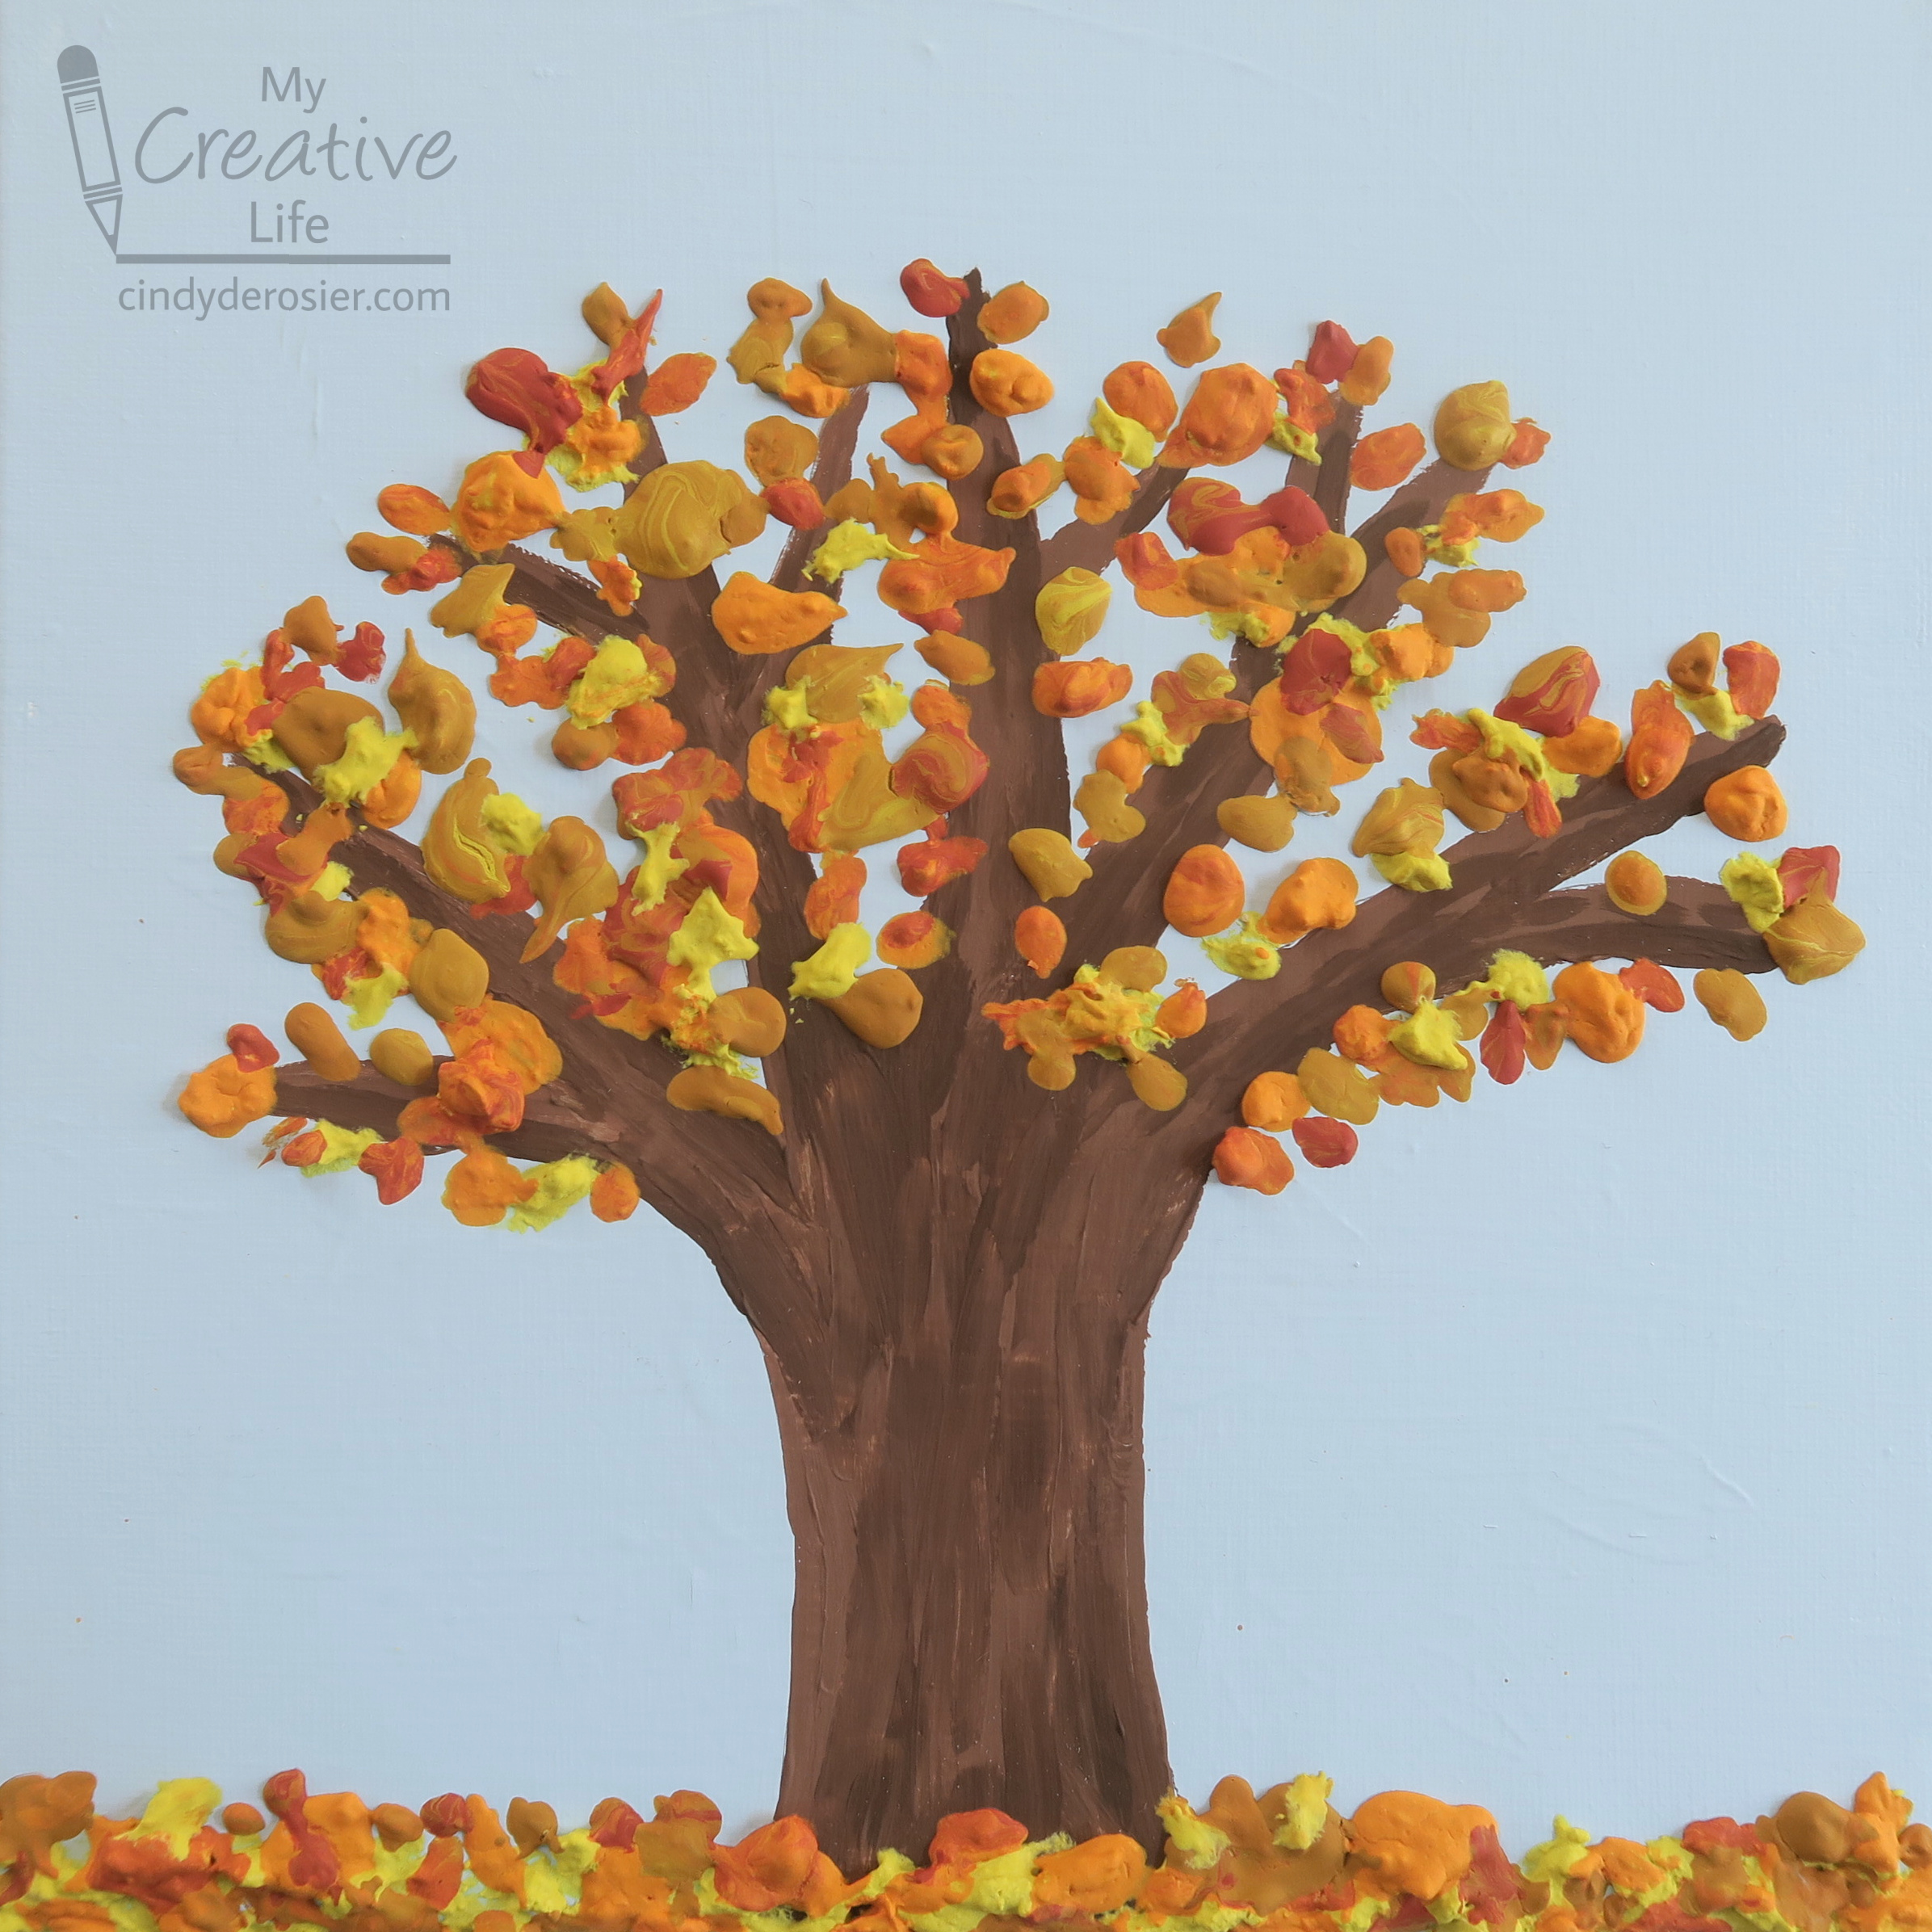
Dimensional Fall Tree (Experimenting with Piping Flour-Thickened Paint)

A large number of the crafts I make could start with the introduction, "So I had this idea and wanted to see what would happen if..." In this case, I wanted to see if I could thicken inexpensive acrylic paint with flour*, then pipe it onto a canvas as if it were frosting. It didn't quite work as I'd hoped, but I'm happy with the end result. And it was a lot of fun to make!


I started out by painting a blue background on a square canvas, then painted a tree onto that. While the paint was drying, I got out the flour, acrylic paints in fall colors, and ziplock bags. 


I put about 1/4 cup of flour into a bag, then added a very generous squirt of yellow paint and a teaspoon or so of water. I added more paint and kneaded the bag until everything was evenly mixed and the consistency of thick frosting. I cut a tiny hole in the end of the bag, then started piping leaves onto my tree. 


It worked well at first and I was enjoying piping little leaves onto the branches. But then my bag clogged. I removed the clog, only to have another clog a few seconds later. I tried to squeeze out that second clog (not wanting to get as messy as I had carefully extracting the first one), but that just made things worse. The more I piped, the globbier the paint got.  


Time for a new technique! I mixed up some orange flour paint and applied it in globs with a plastic knife. It was actually really fun to drop paint globs onto the branches. 


I kept going using that technique, adding two more colors of leaves. When I was happy with my tree, I let the whole thing dry overnight. Success!


*I'm fully aware that there are artist-grade options for thickening paint, like gel medium and modeling paste. And of course, I could have bought thicker (i.e., more expensive) paint to begin with, but the point of my experiment was to make a kid-friendly project using things from around the house. Thus the basic craft paint, flour, ziplocks, and plastic knife. 

Shop Tombow

4/11/22

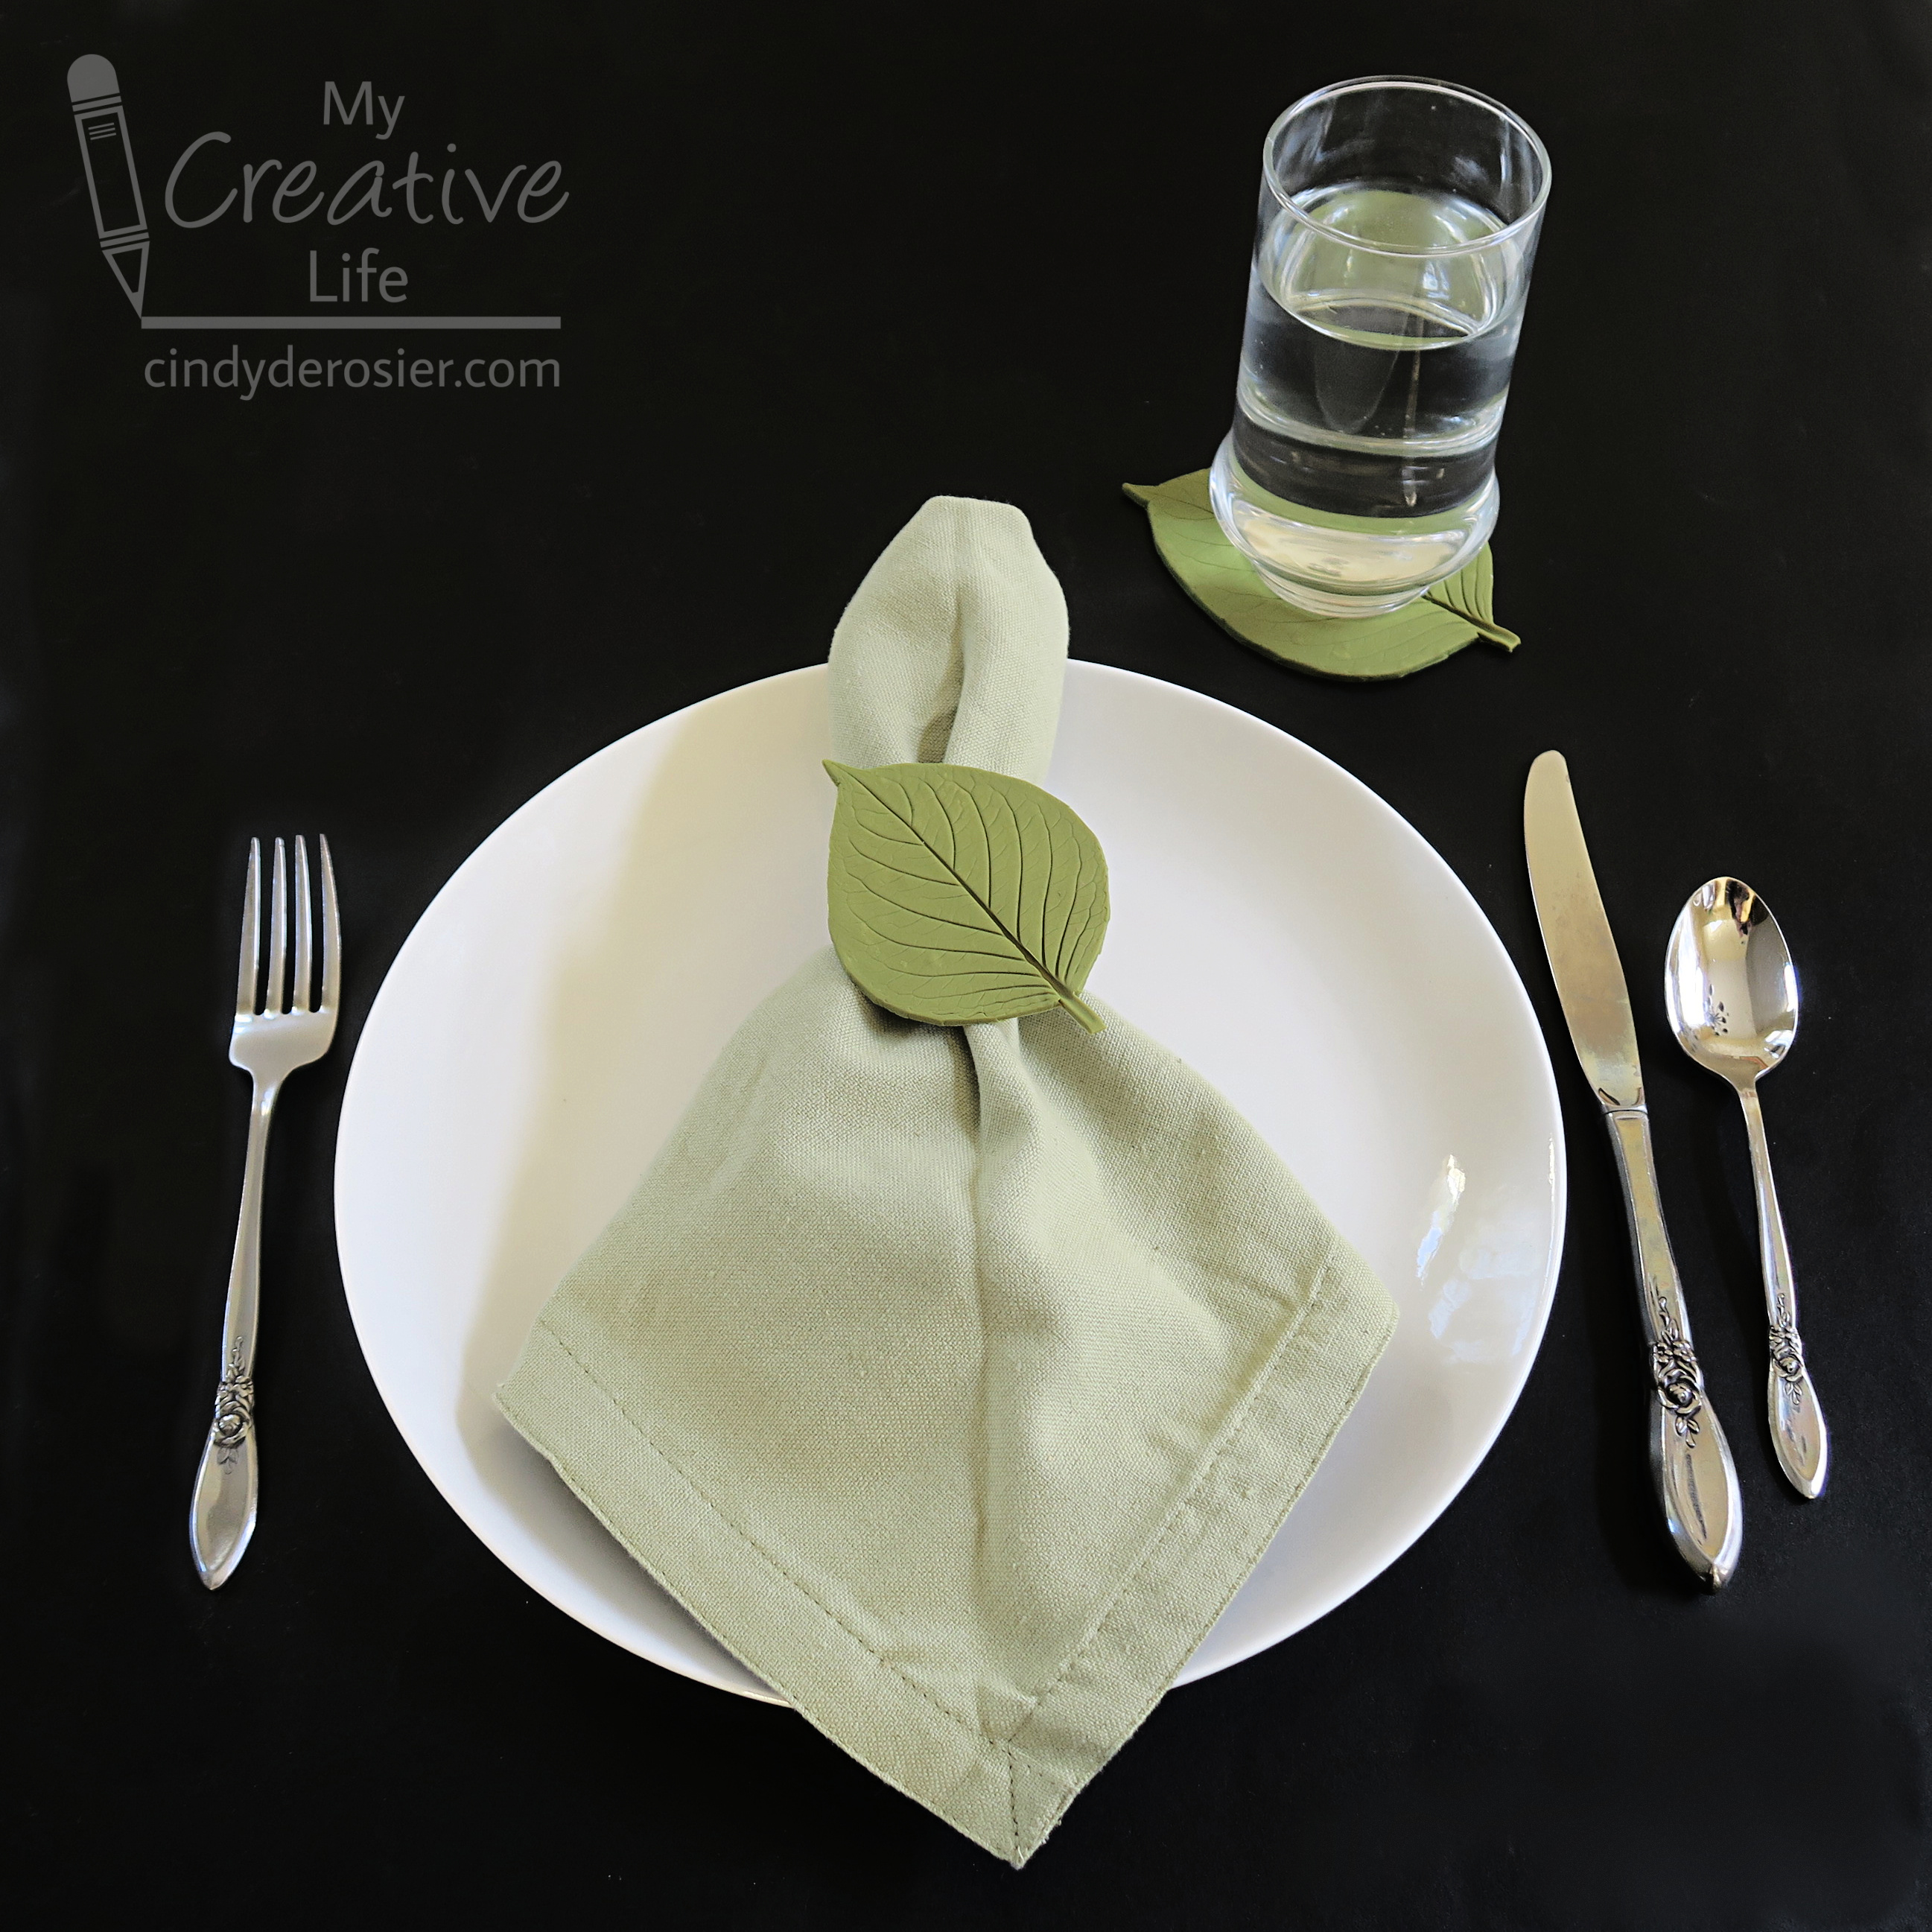
Clay Leaf Print Napkin Rings and Coasters

We have beautiful hydrangeas along our side yard that are determined to grow enough to completely block the walkway beside our house. I've explained that they are welcome to grow as high as they'd like and can spread out against the fence, but to please allow us to have the path. I frequently need to do a bit of light pruning to remind them that the flower bed is their territory, but the concrete is our territory. 

I took a few of the pruned hydrangea leaves inside and used them to make leaf prints from oven-bake clay. I LOVE how they turned out!


When I made my clay leaf prints, I hadn't thought about what purpose they could serve, besides just sitting on a table being decorative. And then I realized that they are perfect to use as napkin ring and coasters! Affiliate links below. 


Clay Leaf Print Napkin Rings and Coasters


Materials:


Steps:


Mix a small amount of Red and a generous amount of Granny Smith together to make your desired color. Roll out the clay 1/4" thick, then place the leaf on top. Gently roll the leaf into the clay, then carefully remove the leaf. 

This was my first attempt. After placing the leaf, I rolled too hard, which made the clay uneven and pushed the stem too deep. Sculpey is infinitely reusable until you bake it, so if your first attempt is not perfect, just re-roll the clay and try again! 


When you have a print you like, use the clay tools to remove the excess clay around the edges. Hydrangea leaves are serrated, but I wanted a smooth edge, so that's how I trimmed it. 


Roll out the excess and make more leaves. I used a large leaf for the coasters and a smaller leaf for the napkin rings. 


Put the leaves on a sheet pan and bake at 275°F for 15 minutes. If you see any bubbles in your baked leaves when you take them out of the oven, immediately press a second sheet pan on top of the hot leaves to flatten them. Let the leaves cool completely. 

Use Supertite to glue the smaller leaves to the napkin rings. 

Note that while Sculpey clay is non-toxic, it has not been tested for food use. So while your coaster is a great place to rest a drinking glass, don't use it as as bread plate or serve any other food directly on it.

4/8/22

Earth Day Nature Collage

There is so much beauty in nature. Some of my favorite crafts are made with fallen leaves, acorns, pinecones, and other found treasures. This project is particularly great for Earth Day, because instead of removing items from nature, you're just rearranging what's already there. There's so much room for creativity. The collage you make is temporary, so be sure to take a photo!


Earth Day Nature Collage


Materials: 

  • leaves, rocks, and other natural materials already on the ground*

Steps: 


Clear a place in the dirt for your collage. I used a place along our fence that has fallen leaves from the neighbor's tree. I pushed them aside to expose a heart-shaped workspace. 

It's easiest to center your project by starting with the R. I made mine out of small rocks. I picked the lightest colored ones I could find so they would contrast with the dirt. I made the A and T next. Then I added the E and the H. Finally, I outlined the shape of the heart with the yellowest of the fallen leaves. 

Don't forget to take a photo! 


*I picked the dandelions (which I was harvesting for Trouble, who LOVES them); everything was already on the ground. 

11/24/21

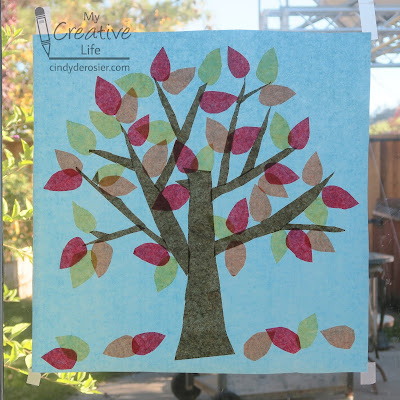
Fall Colors Tissue Paper Sun Catcher

I know we're two months into fall and thus it's a bit late for a fall craft, but we're just getting our fall color now here in northern California. Besides, fall technically lasts for another month. 

Anyway, I had a lot of fun making this tissue paper sun catcher. All of the tissue paper is reused. I'm that person at birthday parties stopping people from throwing away barely-crumpled tissue paper. If you're not that person, I've included affiliate links for tissue paper and other supplies below.


Fall Colors Tissue Paper Sun Catcher


Materials:


Steps: 


First, find a location. You'll be making your artwork directly on a window or glass door. It worked perfectly for me to sit on the floor by our back door to make my project, but it would work just as well standing at a window. 

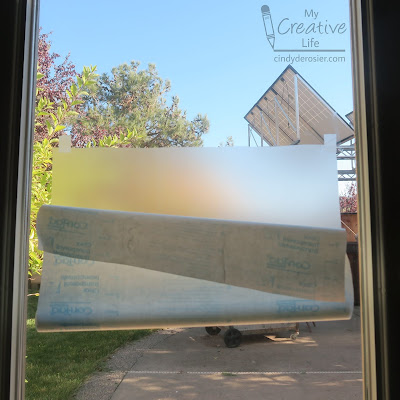
Cut a piece of contact paper that is slightly larger than you want your finished art to be. I used the width of the contact paper (18") by about 22" for mine. With the NON-sticky side against the glass, start peeling away the liner of the contact paper. Use two pieces of tape to hang the contact paper onto the glass. 


Continue peeling away the rest of the liner, then tape the bottom of the contact paper to the window. The sticky part of the contact paper is facing you. 

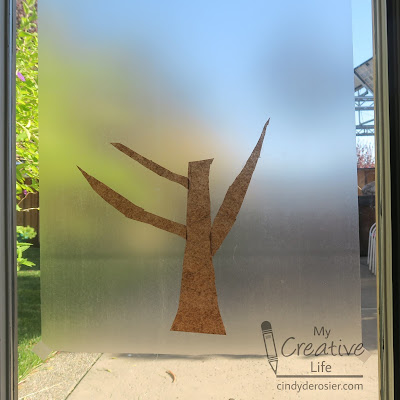
Cut a brown tree trunk and place it on the contact paper. Add a few limbs.   


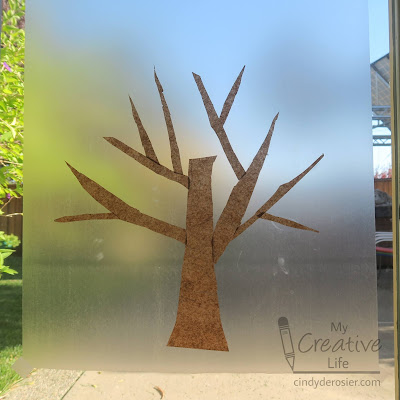
Continue adding smaller branches and twigs until you're happy with the shape of the tree. You'll notice my pieces are not cut evenly, which totally doesn't matter. You may also notice I got some fingerprints on the contact paper. That doesn't matter either. 


Layer red, orange, and yellow tissue paper and cut out stacks of teardrop-shaped leaves. Attach the leaves to the tree. Don't forget to add a few that have already fallen!


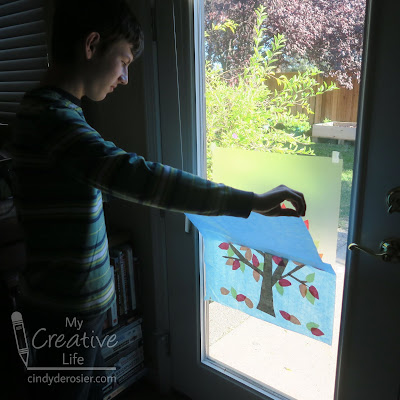
Next, layer a sheet of sky blue tissue paper over the entire design. I strongly recommend getting a helper for this. I had Trevor hold the top of the tissue paper taut while I smoothed the bottom section into place. I worked my way up, pausing halfway to snap this photo...


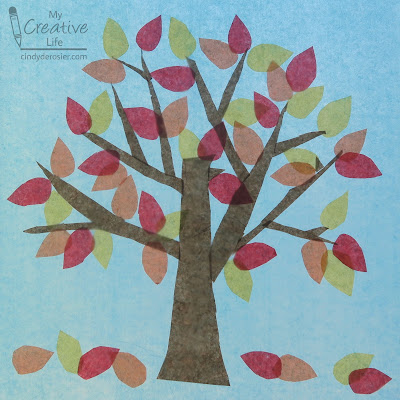
... then smoothed the rest of the tissue paper in place. This is how it looked, cropped to get rid of the door and surrounding glass. The fingerprints aren't visible. 


You can leave your artwork on the window as is, or you can take it down and trim the edges, which is what I did. When I hung it back up, I put the tissue paper side against the glass where it is protected. Did you notice it was mirrored from before?


I'm taking tomorrow and Friday off from blogging. I'll be back on Monday with another tissue paper craft tutorial. Happy Thanksgiving!

9/14/21

Splatter Paint Fall Trees

After sharing so many splatter-painting backgrounds, it's time for a splatter-painted foreground. Rather than the thumb-across-toothbrush technique, I used a different method to achieve the dots and drips. It was so much fun!


Splatter Paint Fall Trees


Materials:

  • watercolor paper
  • crayons (brown, black)
  • acrylic paint (blue, orange, yellow, red-brown)
  • two paintbrushes

Steps:

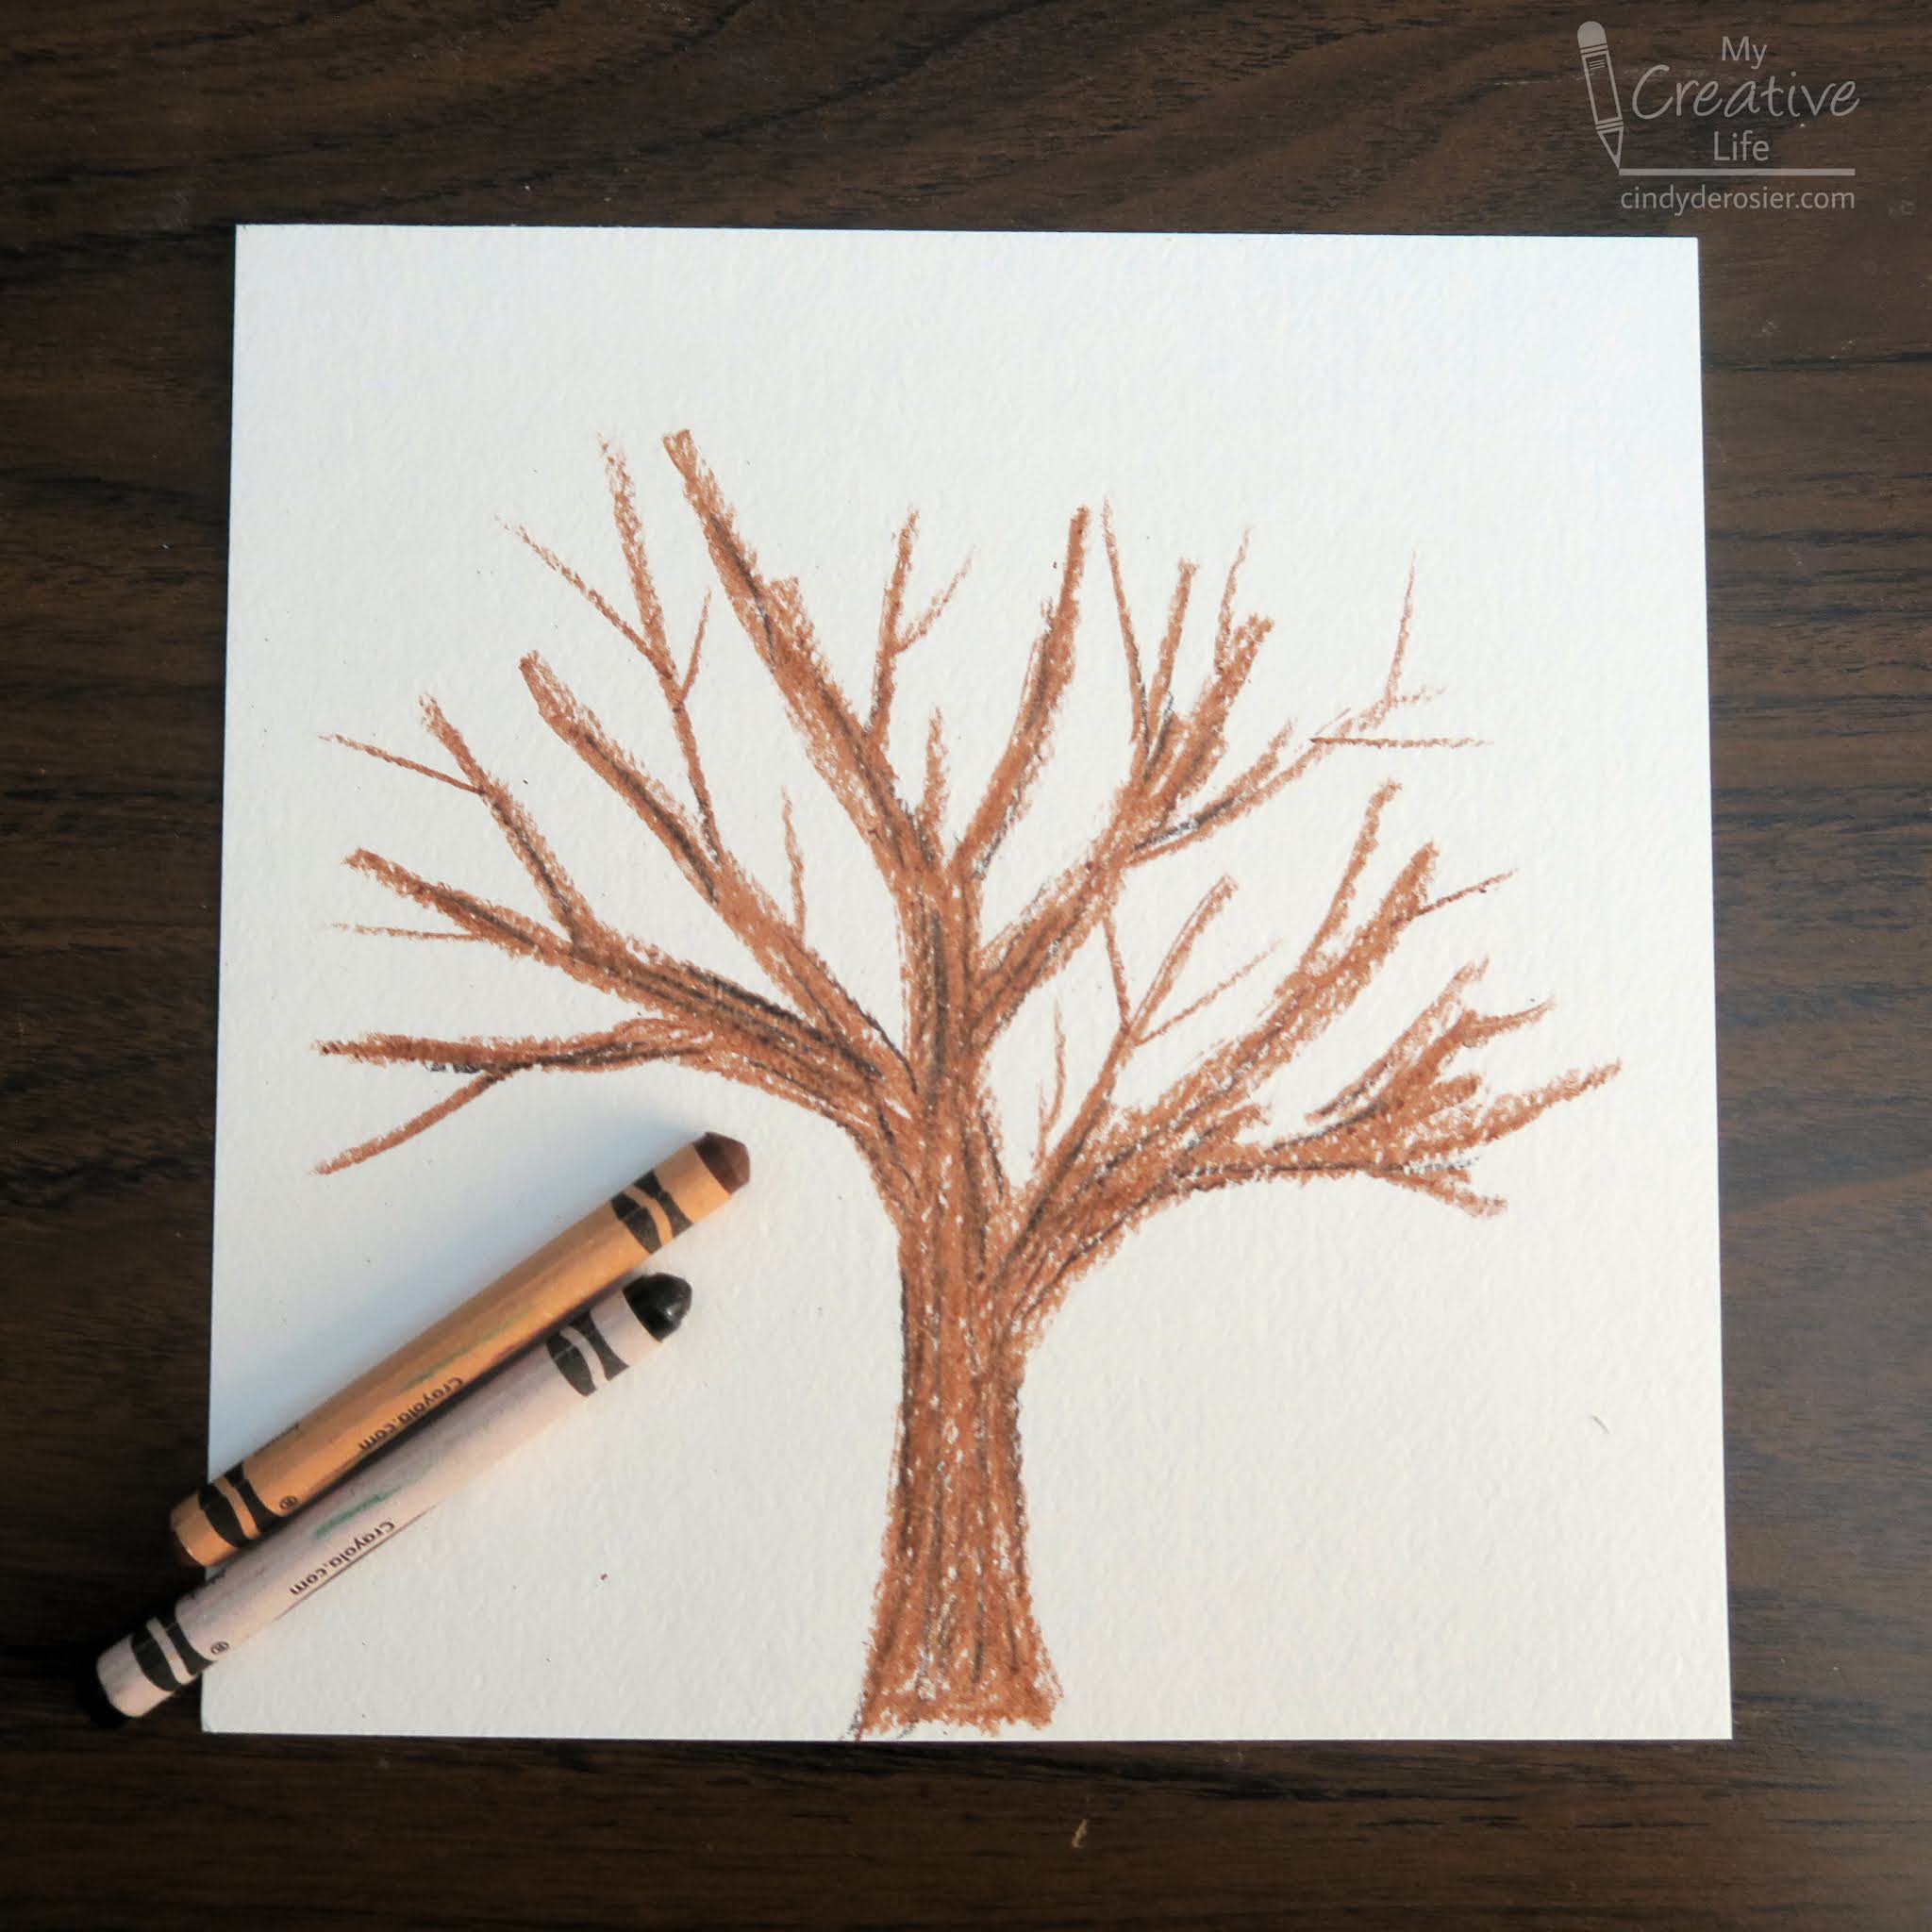
Use crayons to draw bare trees on the watercolor paper. I drew four trees, each with plenty of branches and twigs, then added a bit of shadow with the black crayon. 

Thin the blue paint and use it to create a wash of color on the entire paper. These bits of sky will show through between the leaves of the tree. Let the paint dry. 

Put the painting into a cardboard box. I have a designated box I use to contain the mess when splattering, misting, dripping, and spraying. Hold one paintbrush in each hand. Dip one paintbrush into the red-brown paint, then tap it on the handle of the second paintbrush. This will cause small flicks of paint to splatter down. Experiment with the quantity of paint on the first brush, where you tap on the second brush, and how far from the paper you hold the brushes to get different sizes of splatters. Concentrate the splatters along the base of the trees and in the branches, leaving the space along the middle of the trunks and above the branches relatively unsplattered. You may need to rotate the paper to accomplish this. 


Without cleaning your brush, switch to orange paint and use the same technique to add splatters. Switch to yellow, building up the layers. When you have a good amount of splatters in the two main sections of the painting, use a pouncing motion to fill in any gaps between the leaves on the ground. With the same pouncing motion, do the same to add leaves to bare branches (if desired). 


It's up to you how many leaves you want on your finished artwork. I kept going until I liked how the trees looked. 


This really is a ton of fun to do. There's something very satisfying about seeing drips of paint transform into leaves. 


9/8/21

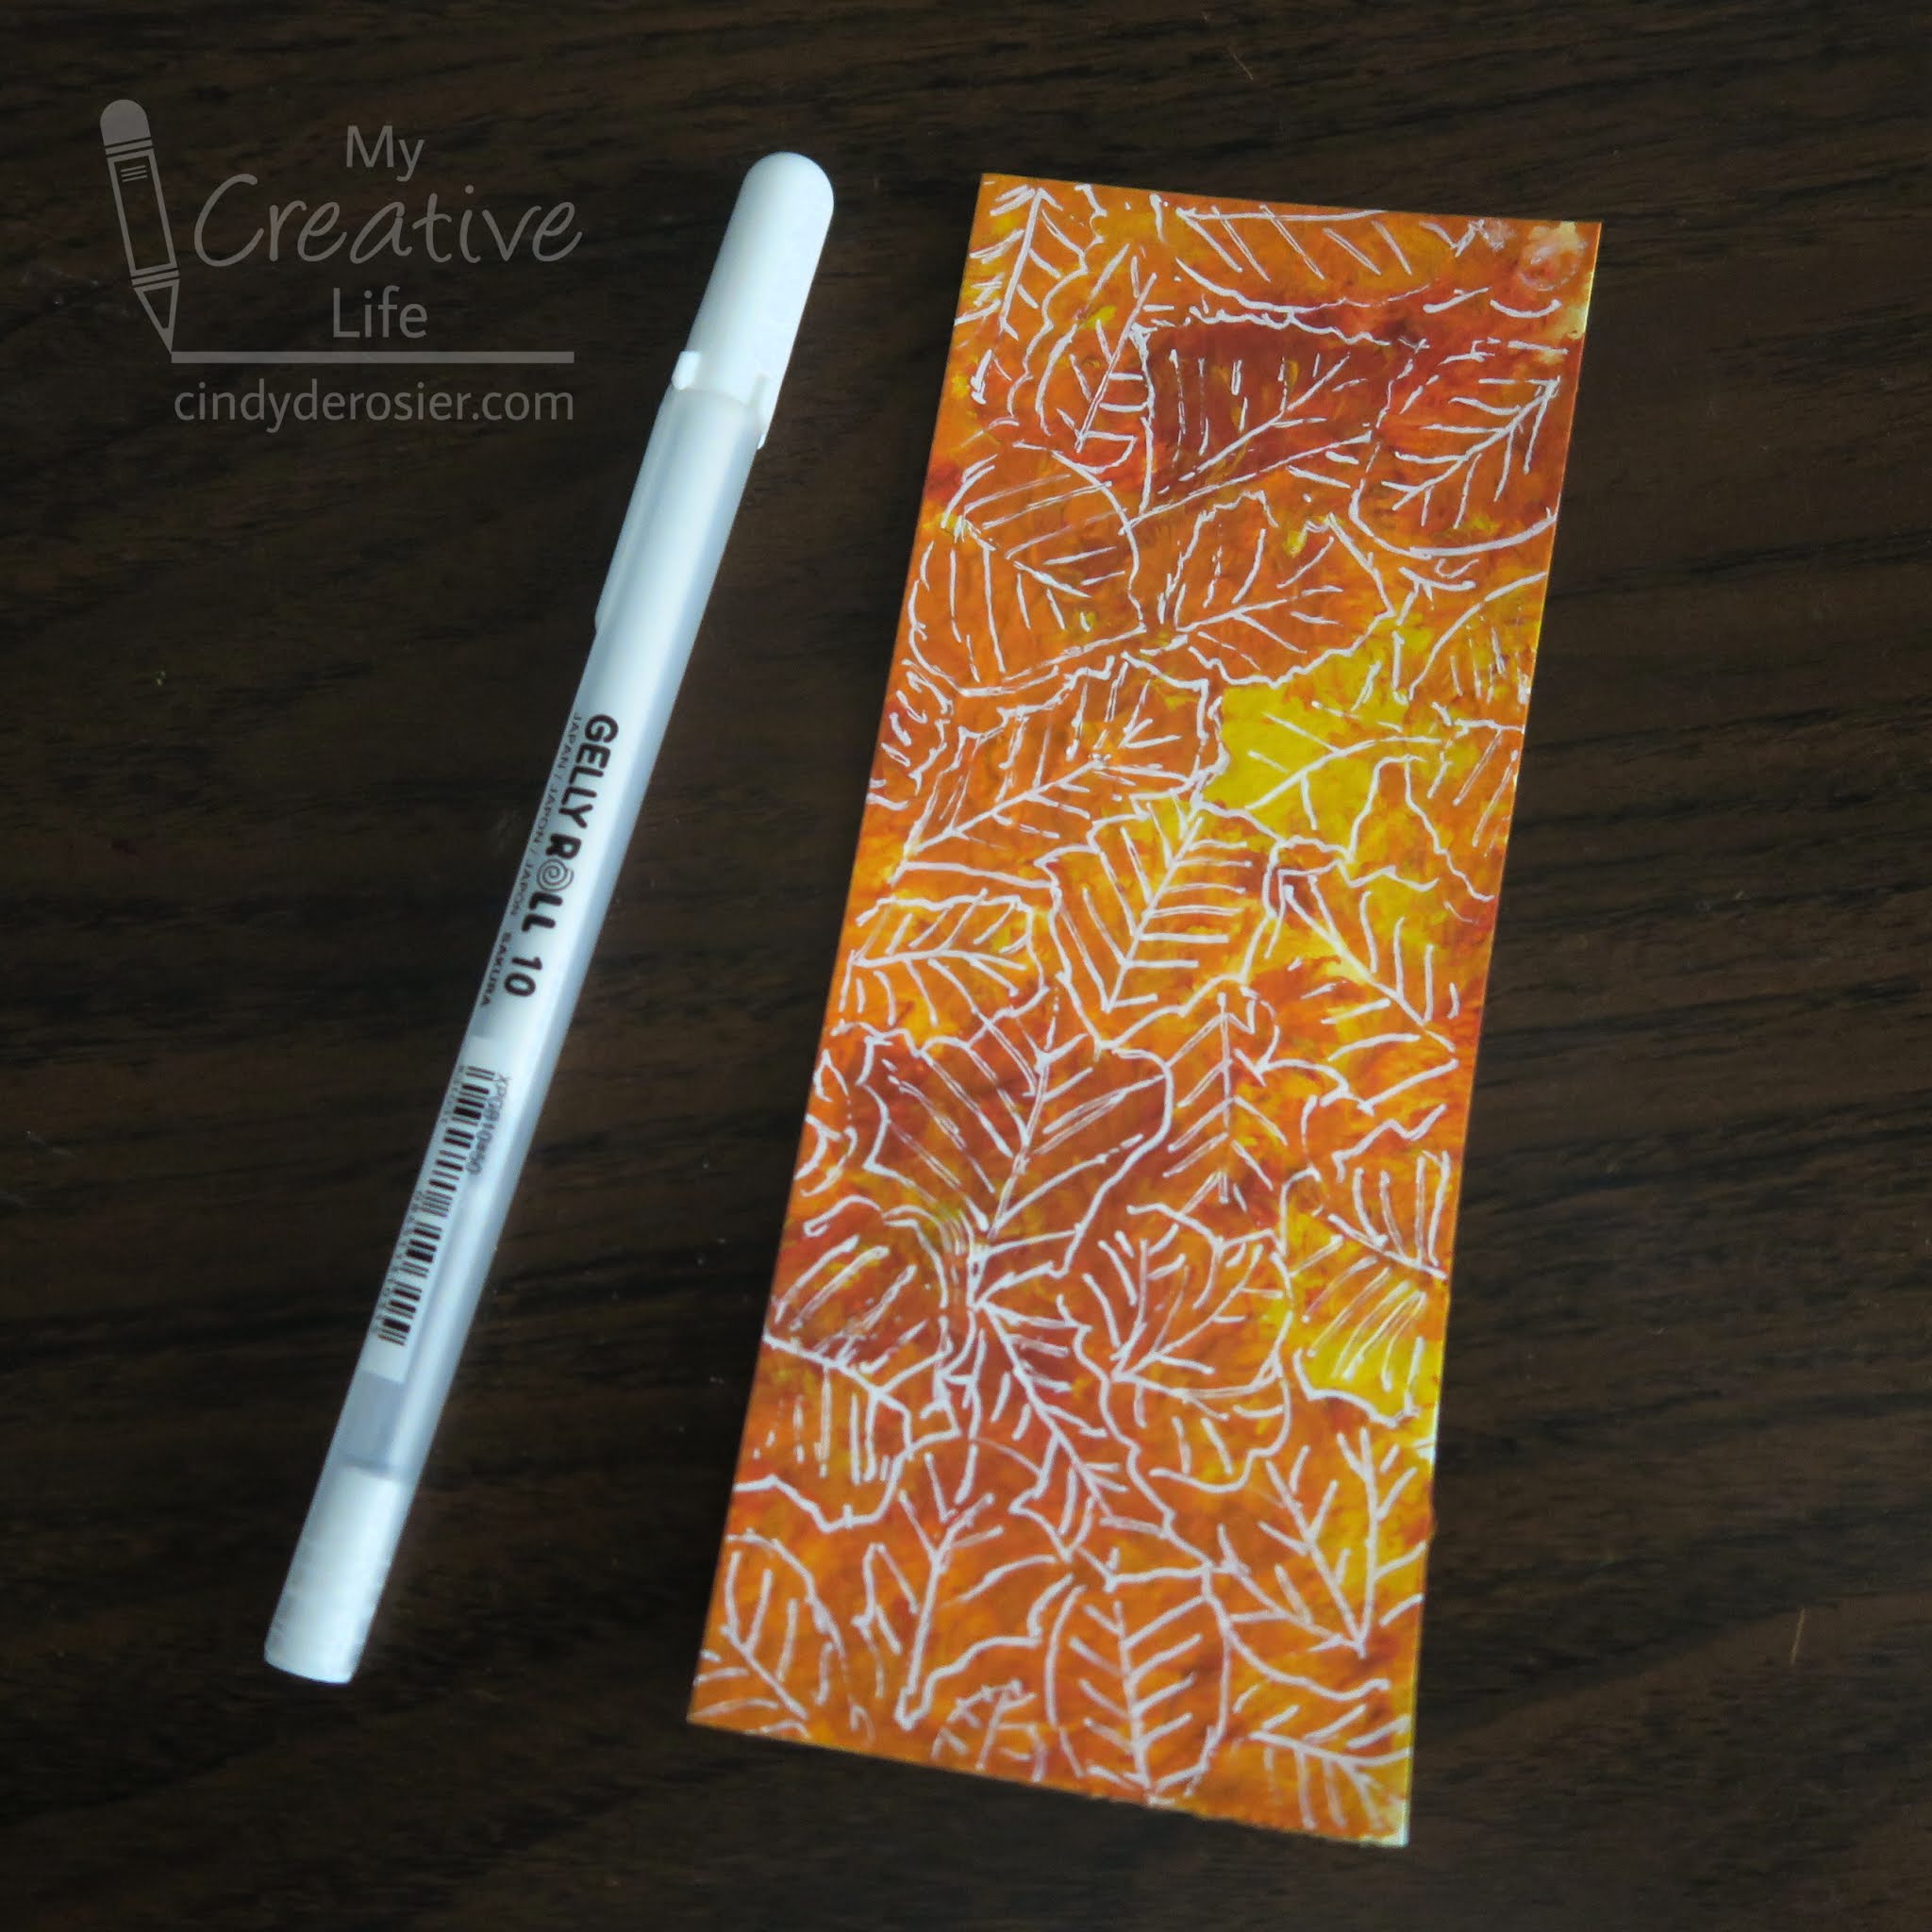
Fall Colors Bookmark

Check out my new bookmark, inspired by fall leaves. 


I made it to answer two questions: 
  • Does a white gel pen write over acrylic paint? (Yes.)
  • Does using a tassel maker improve the tassel-making process? (Yes.)

I like trying new techniques on a bookmark because you really can't mess it up. Worse case, you paint over it and try again. Or you live with an ugly (but still functional) bookmark. Fortunately, this turned out exactly as I'd hoped. Affiliate links below. 


---------


Fall Colors Bookmark


Materials:


Steps:


Dot a generous amount of yellow and orange acrylic paints on a piece of watercolor paper. Gently spread them with a pouncing motion until you are happy with the colors. The surface should be smooth, without lumps of paint. Let the paper dry completely. 


Cut off a piece the size you want your bookmark to be. Doodle leaf patterns in different directions using the gelly roll pen. 


Use the Crop-a-Dile to punch a hole at the top of the bookmark. 

Follow the directions on the tassel maker to make a 3" tassel, then attach it to the bookmark. The folks at Plaid sent me the tassel maker to try. I wasn't sure that I needed it, as I usually just use my right hand to wrap the yarn for the tassel. But I discovered that the tool does indeed make the process easier. It's no surprise that using both hands to tie off the tassel is easier than having one hand literally tied up during the process! 


Tomorrow I'll show you what I made with the paper that was left after I cut off a strip for my bookmark. 

9/1/21

Fall Tree with Tissue Paper Leaves

The calendar says that fall is coming soon, but here in the Bay Area our leaves won't be falling for another 2 or 3 months. All the more reason to embrace fall colors via crafting! 


---------

Fall Tree with Tissue Paper Leaves


Materials:

  • watercolor paper
  • crayons (brown, black)
  • watercolor paint (blue)
  • tissue paper (red, orange, yellow, green)
  • scissors
  • glue


Steps:


Use crayons to draw a tree on the watercolor paper. Add plenty of branches and twigs. 


Add a wash of blue watercolor over the entire paper. The wax of the crayons will resist the paint; dab gently with a paper towel if any droplets remain. Let the paint dry completely. 


Use scissors to cut the tissue paper into tiny bits. I cut a few squares from each color, layered them, and then hacked at them randomly with the scissors. Dot glue onto the branches of the tree where leaves would be. Sprinkle the tissue paper bits onto the branches. Repeat until all the branches are covered. Lift the paper vertically to allow any pieces that are not attached to fall. 


Repeat the steps of cutting tissue paper into bits, dotting the paper with glue, and sprinkling the tissue paper onto the glue, except this time do not include any green tissue paper. (Green leaves wouldn't have fallen yet. I thought of this a little late, so you can see hints of green behind the fallen leaves. I'm pretending its grass.)


This project was really fun to make and took a lot less time than I'd originally expected. It's a great way to reuse ripped or wrinkled tissue paper. Give it a try!

CLICK.BUY. CREATE. Shop Michaels.com today!

6/2/20

Cardboard Tube Stamping and Memory Game

Cardboard tubes are one of the most versatile free craft materials for kids. One of their less-common uses is for stamping. A cardboard tube fits nicely in a young child's hand and is much easier to control than small rubber stamps that require better fine motor skills. Obviously, you can use cardboard tubes to stamp circles. But there are so many more shapes you can make by folding, pinching, and snipping the tubes.  Check it out:


I made the heart, leaf, diamond (kite), oval (football), and pumpkin just by pinching and bending the tubes into the shapes I wanted. For the sun and the flower, I cut slits in the top of the tubes, folded out the cut portions to make tabs, then cut those tabs into the pointy rays of the sun and the rounded petals of the flowers. 

Once the tubes were ready, I spread some craft paint on my Frisbee and stamped the shapes onto thick index cards. I made two of each shape. Then I colored them in with pens. 


Now the cards are ready for a game of Memory! Shuffle the cards, lay them out in a grid, and take turns turning over two at a time. If you get a match, you get another turn. 


There are so many more things you can do with your cardboard tube stamps. Use them to decorate cards, wrapping paper, or tablecloths, just to name a few. Challenge yourself to come up with other shapes you can make with cardboard tubes. There are so many possibilities!

9/16/19

Easy Tape-Resist Tree with Fall Leaves

Check out this fall tree I made, with absolutely no drawing or painting skills required. It's like magic! Affiliate links below. 


Tape-Resist Tree with Fall Leaves


Materials:


Steps:


Orient your chipboard vertically, then put a strip of 3/4" tape straight down the center to make the tree trunk. Fold the ends around to the back of the chipboard.

Use the 1/2" tape to add branches extending diagonally up from both sides of the trunk. Stagger them with uneven intervals between them for a more realistic look.

With the 1/4" tape, add twigs to the branches. Vary their length and angles. 


Dip the edge of the sponge into sky blue paint. Dab it over the tape, covering about half of the exposed chipboard. 


Put red and yellow paint near each other on a palette. Dip a q-tip into one color, then make dots to fill in the unexposed chipboard. Each time you dip, alternate paint colors between yellow and red. This will create the oranges and give the tree a more realistic, random look. 


Carefully pull up the tape, revealing the unpainted chipboard tree.  


When the paint is completely dry, use a dark brown colored pencil to draw lines on the tree to simulate bark. The lines should always go the length of the trunk, branch, or twig. 


Finally, use a lighter brown colored pencil to color in the tree. 


See? No drawing or painting skills needed! And it's a lot of fun. Give it a try!