Showing posts with label penguin. Show all posts

12/9/22

Recycled Cardboard Box Penguin

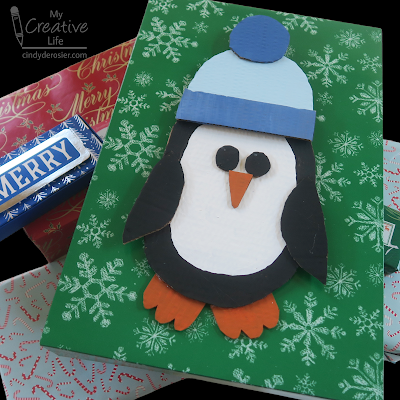
This penguin project is the seventh craft in my series based on crowd-sourced responses to ten questions. Can you guess what the question was? 


Here's a hint:


I asked, "Name something you recycle." I chose the answer of cardboard boxes as the inspiration for my craft. And, in fact, that specific box pictured above helped guide my thinking. When I saw 'made with less material' printed on it, I guessed (correctly!) that it would be easy enough to cut into shapes with scissors. Standard cardboard is best cut with a utility knife, which is great for straight edges, but not for cutting out small, circular items. I designed today's penguin to test how difficult it would be to cut rounded shapes from this thinner-than-usual corrugated cardboard.
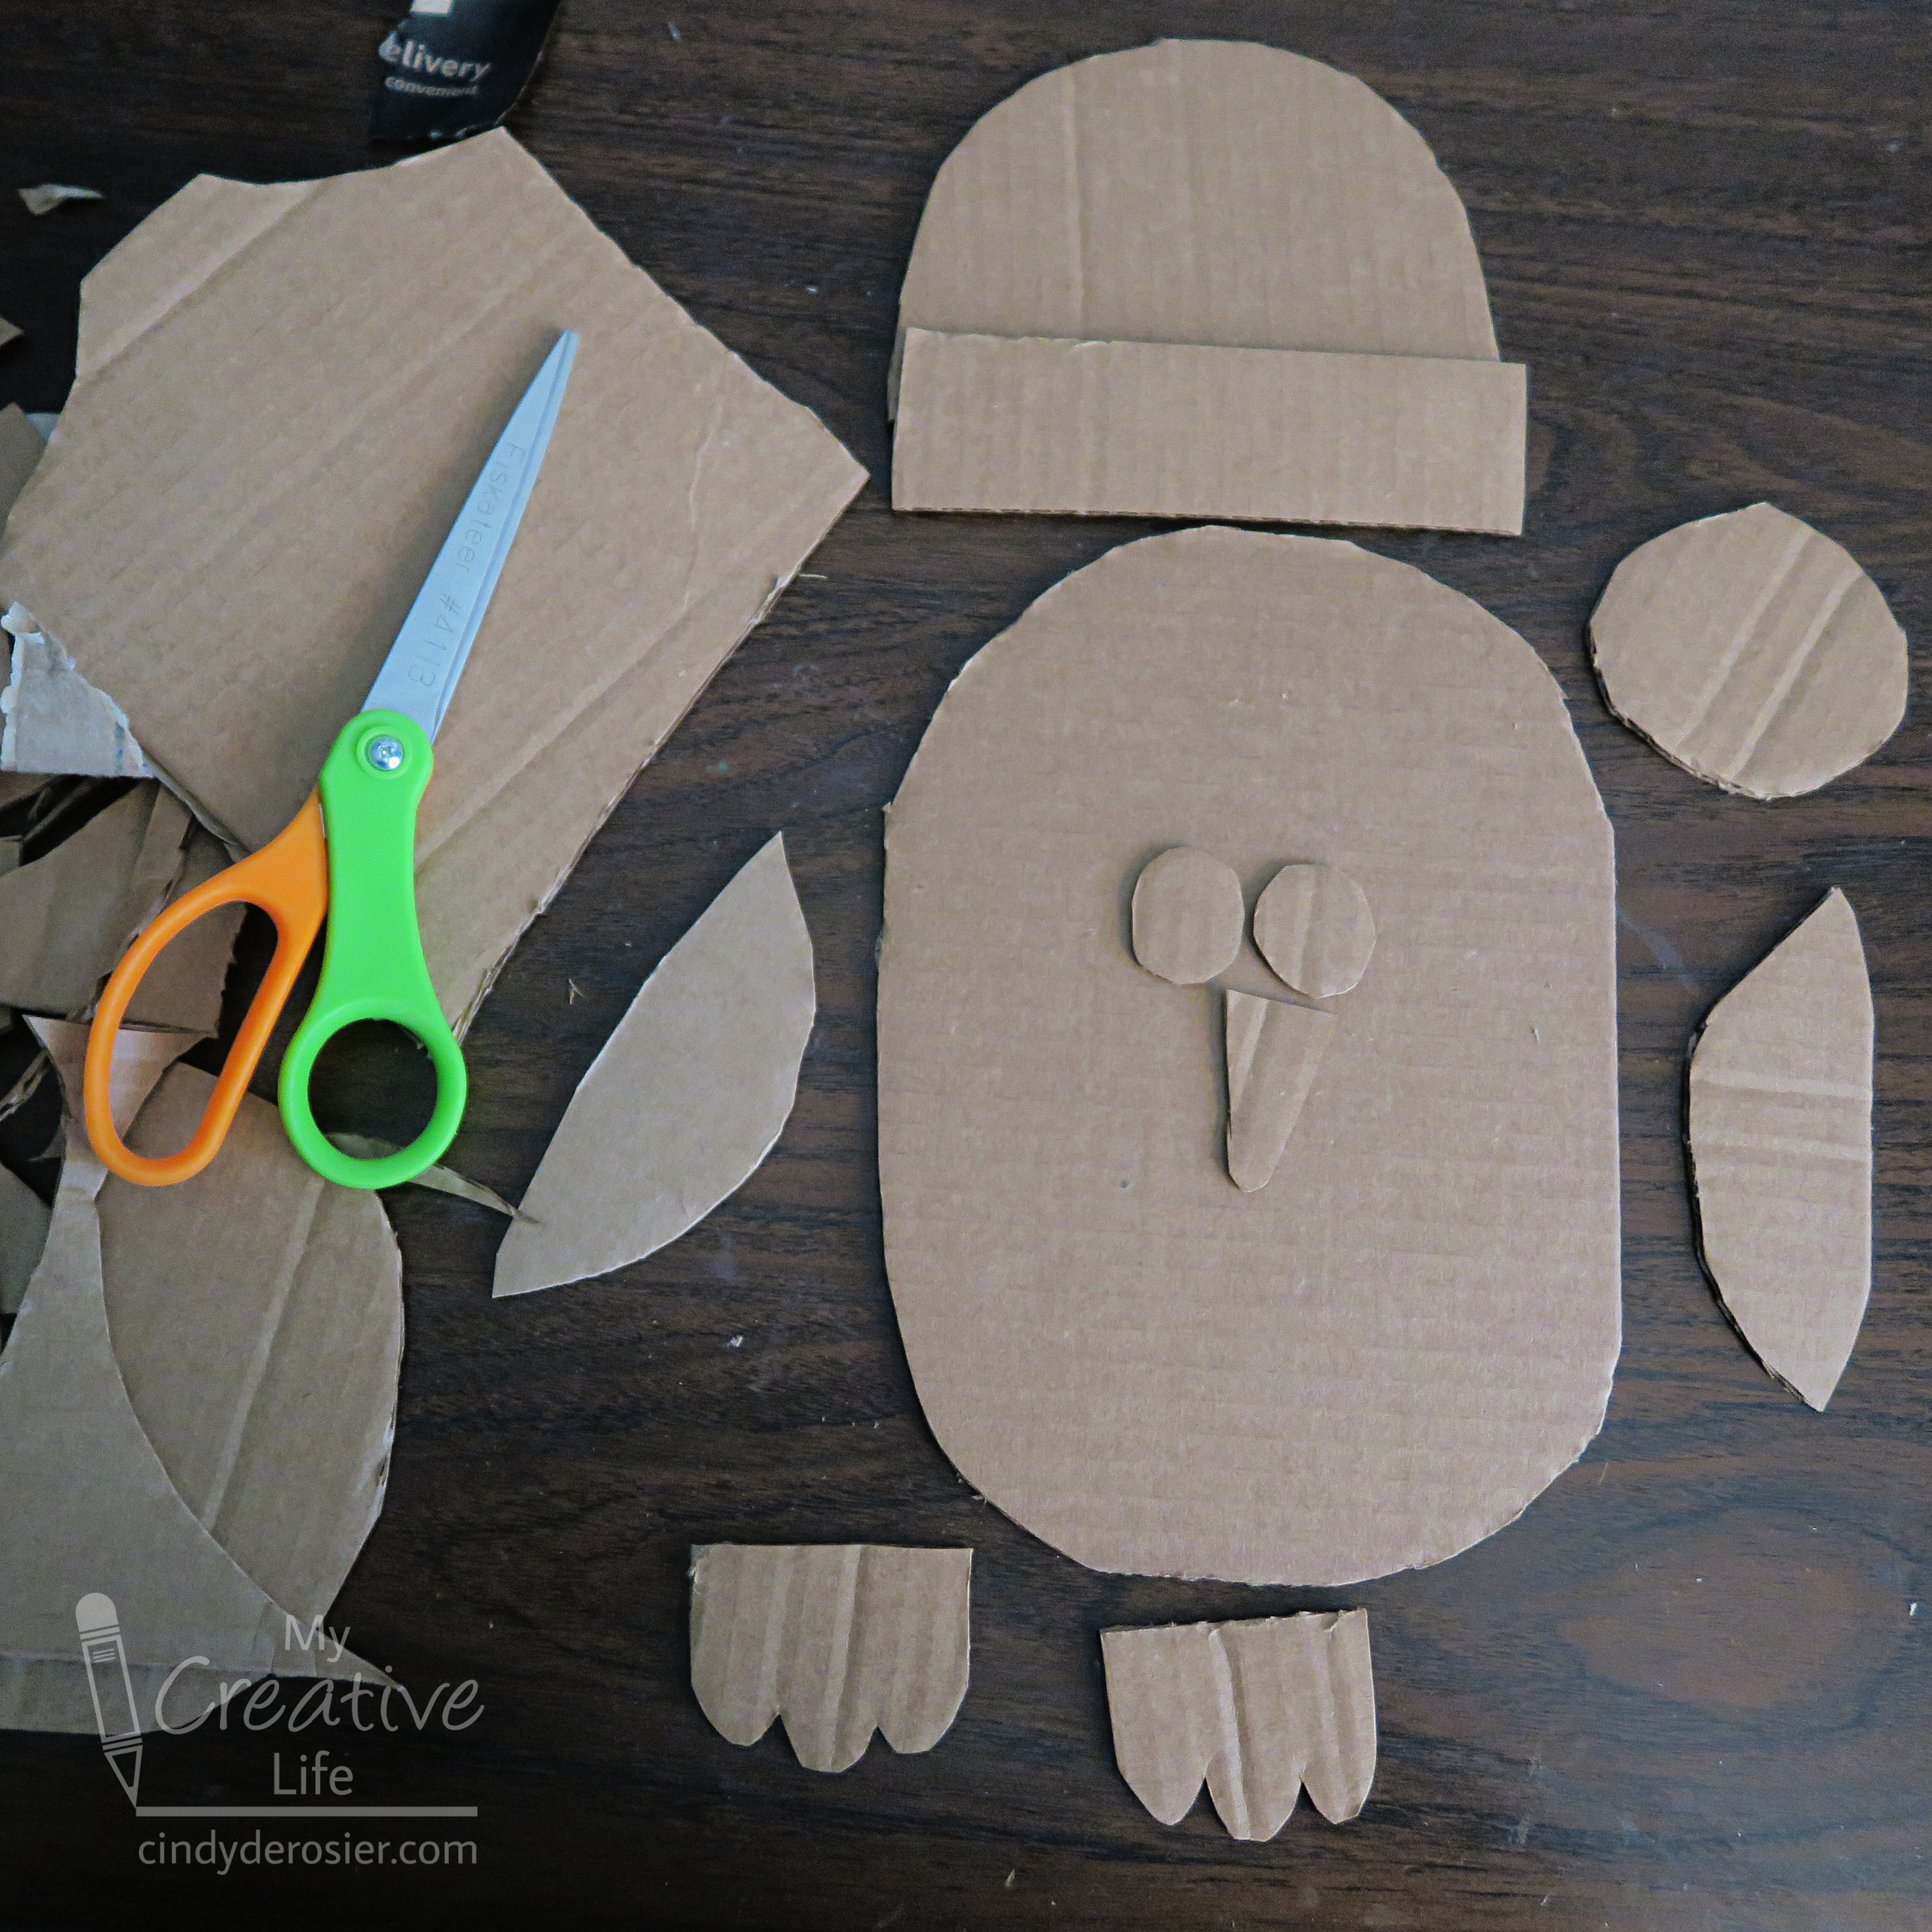
The answer? Not difficult at all! In no time, I had cut out an oval body, circular eyes, a triangular beak, a pair of wings, a pair of feet, a hat, the hat's trim, and the hat's pom-pom.  


I painted all the pieces with acrylic paint and let them dry. Incidentally, I thought it was really interesting how this thinner cardboard reacted to the paint. Look at the slightly lumpy texture. That didn't change when the paint dried. 


Before using the hot glue gun to assemble everything, I started by figuring out what my base layer would be. It's not the body - the feet are tucked behind the body. If I glued the feet to the body and then the hat and facial features on top of the body, the finished project wouldn't lay flat. I would need to prop up the gaps caused by the thickness of the cardboard. 

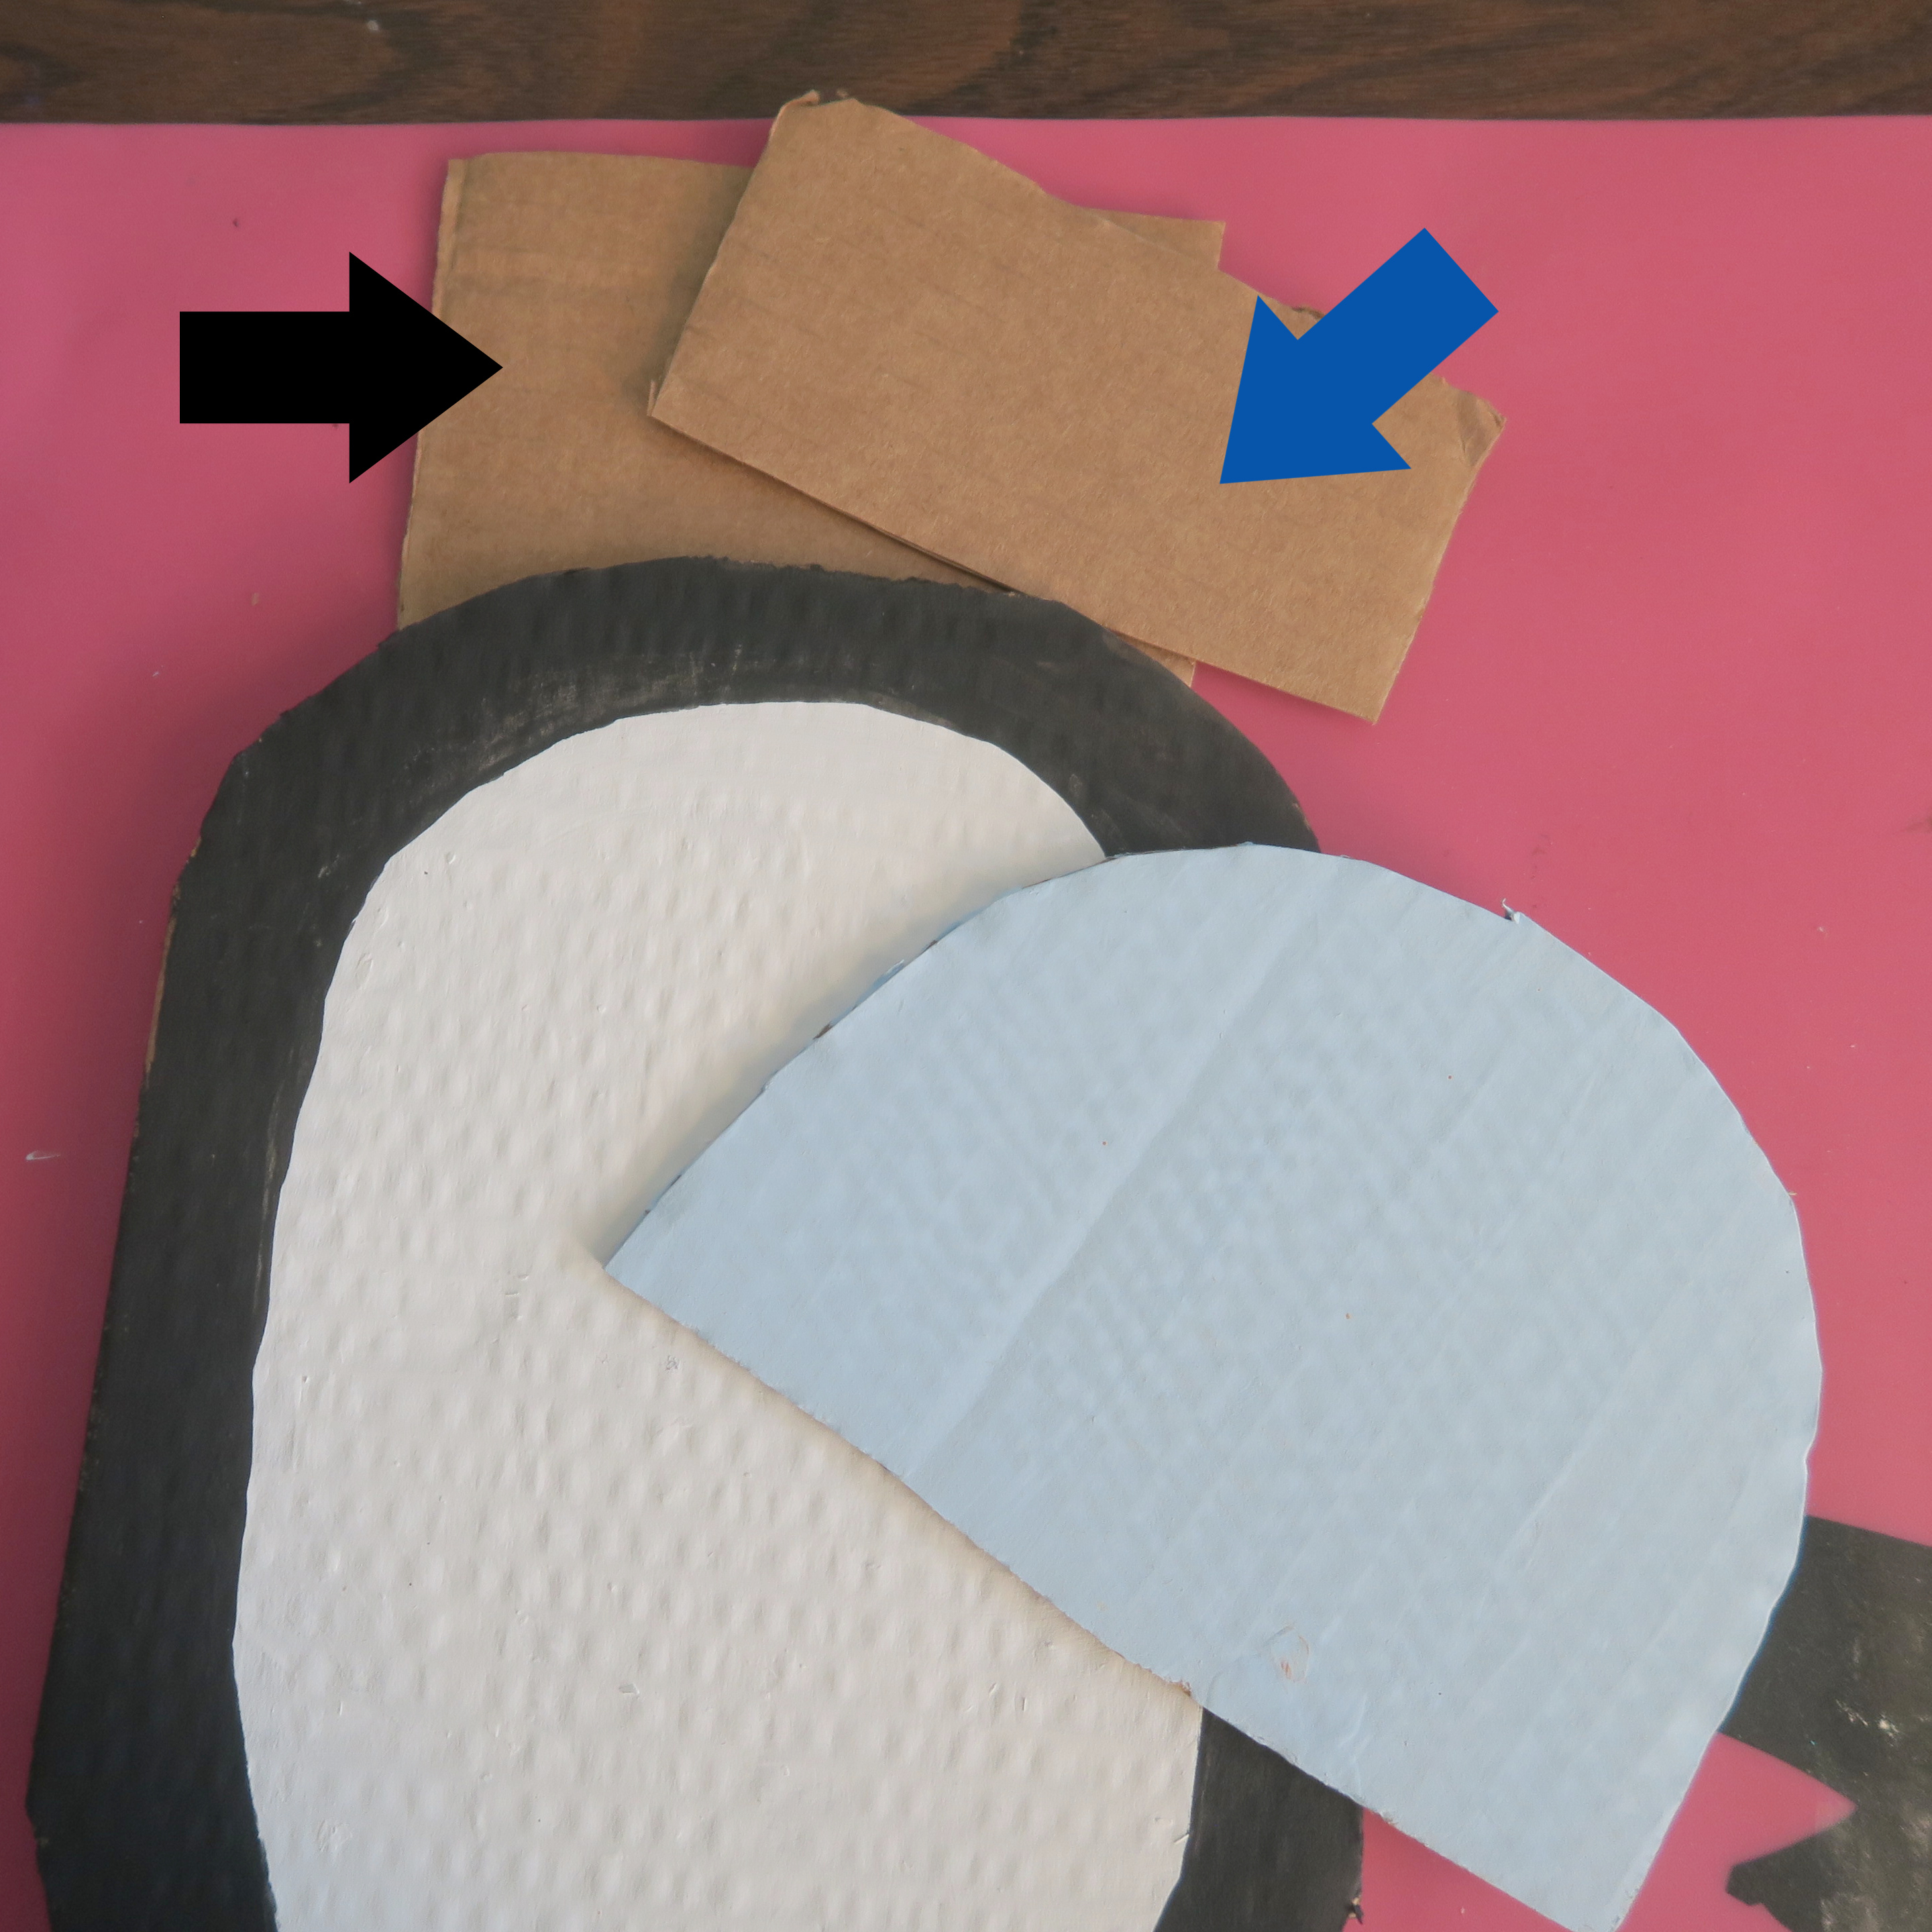
So I cut a piece of cardboard (marked by the black arrow below) that was slightly narrower than the penguin's body and positioned it so that it left room for the feet yet extended beyond the head. I glued it in place, then cut a second rectangle (blue arrow) to fill the gap created between the base and the hat.  

 
Here's how my penguin looked after I glued the rest of the pieces in place.  
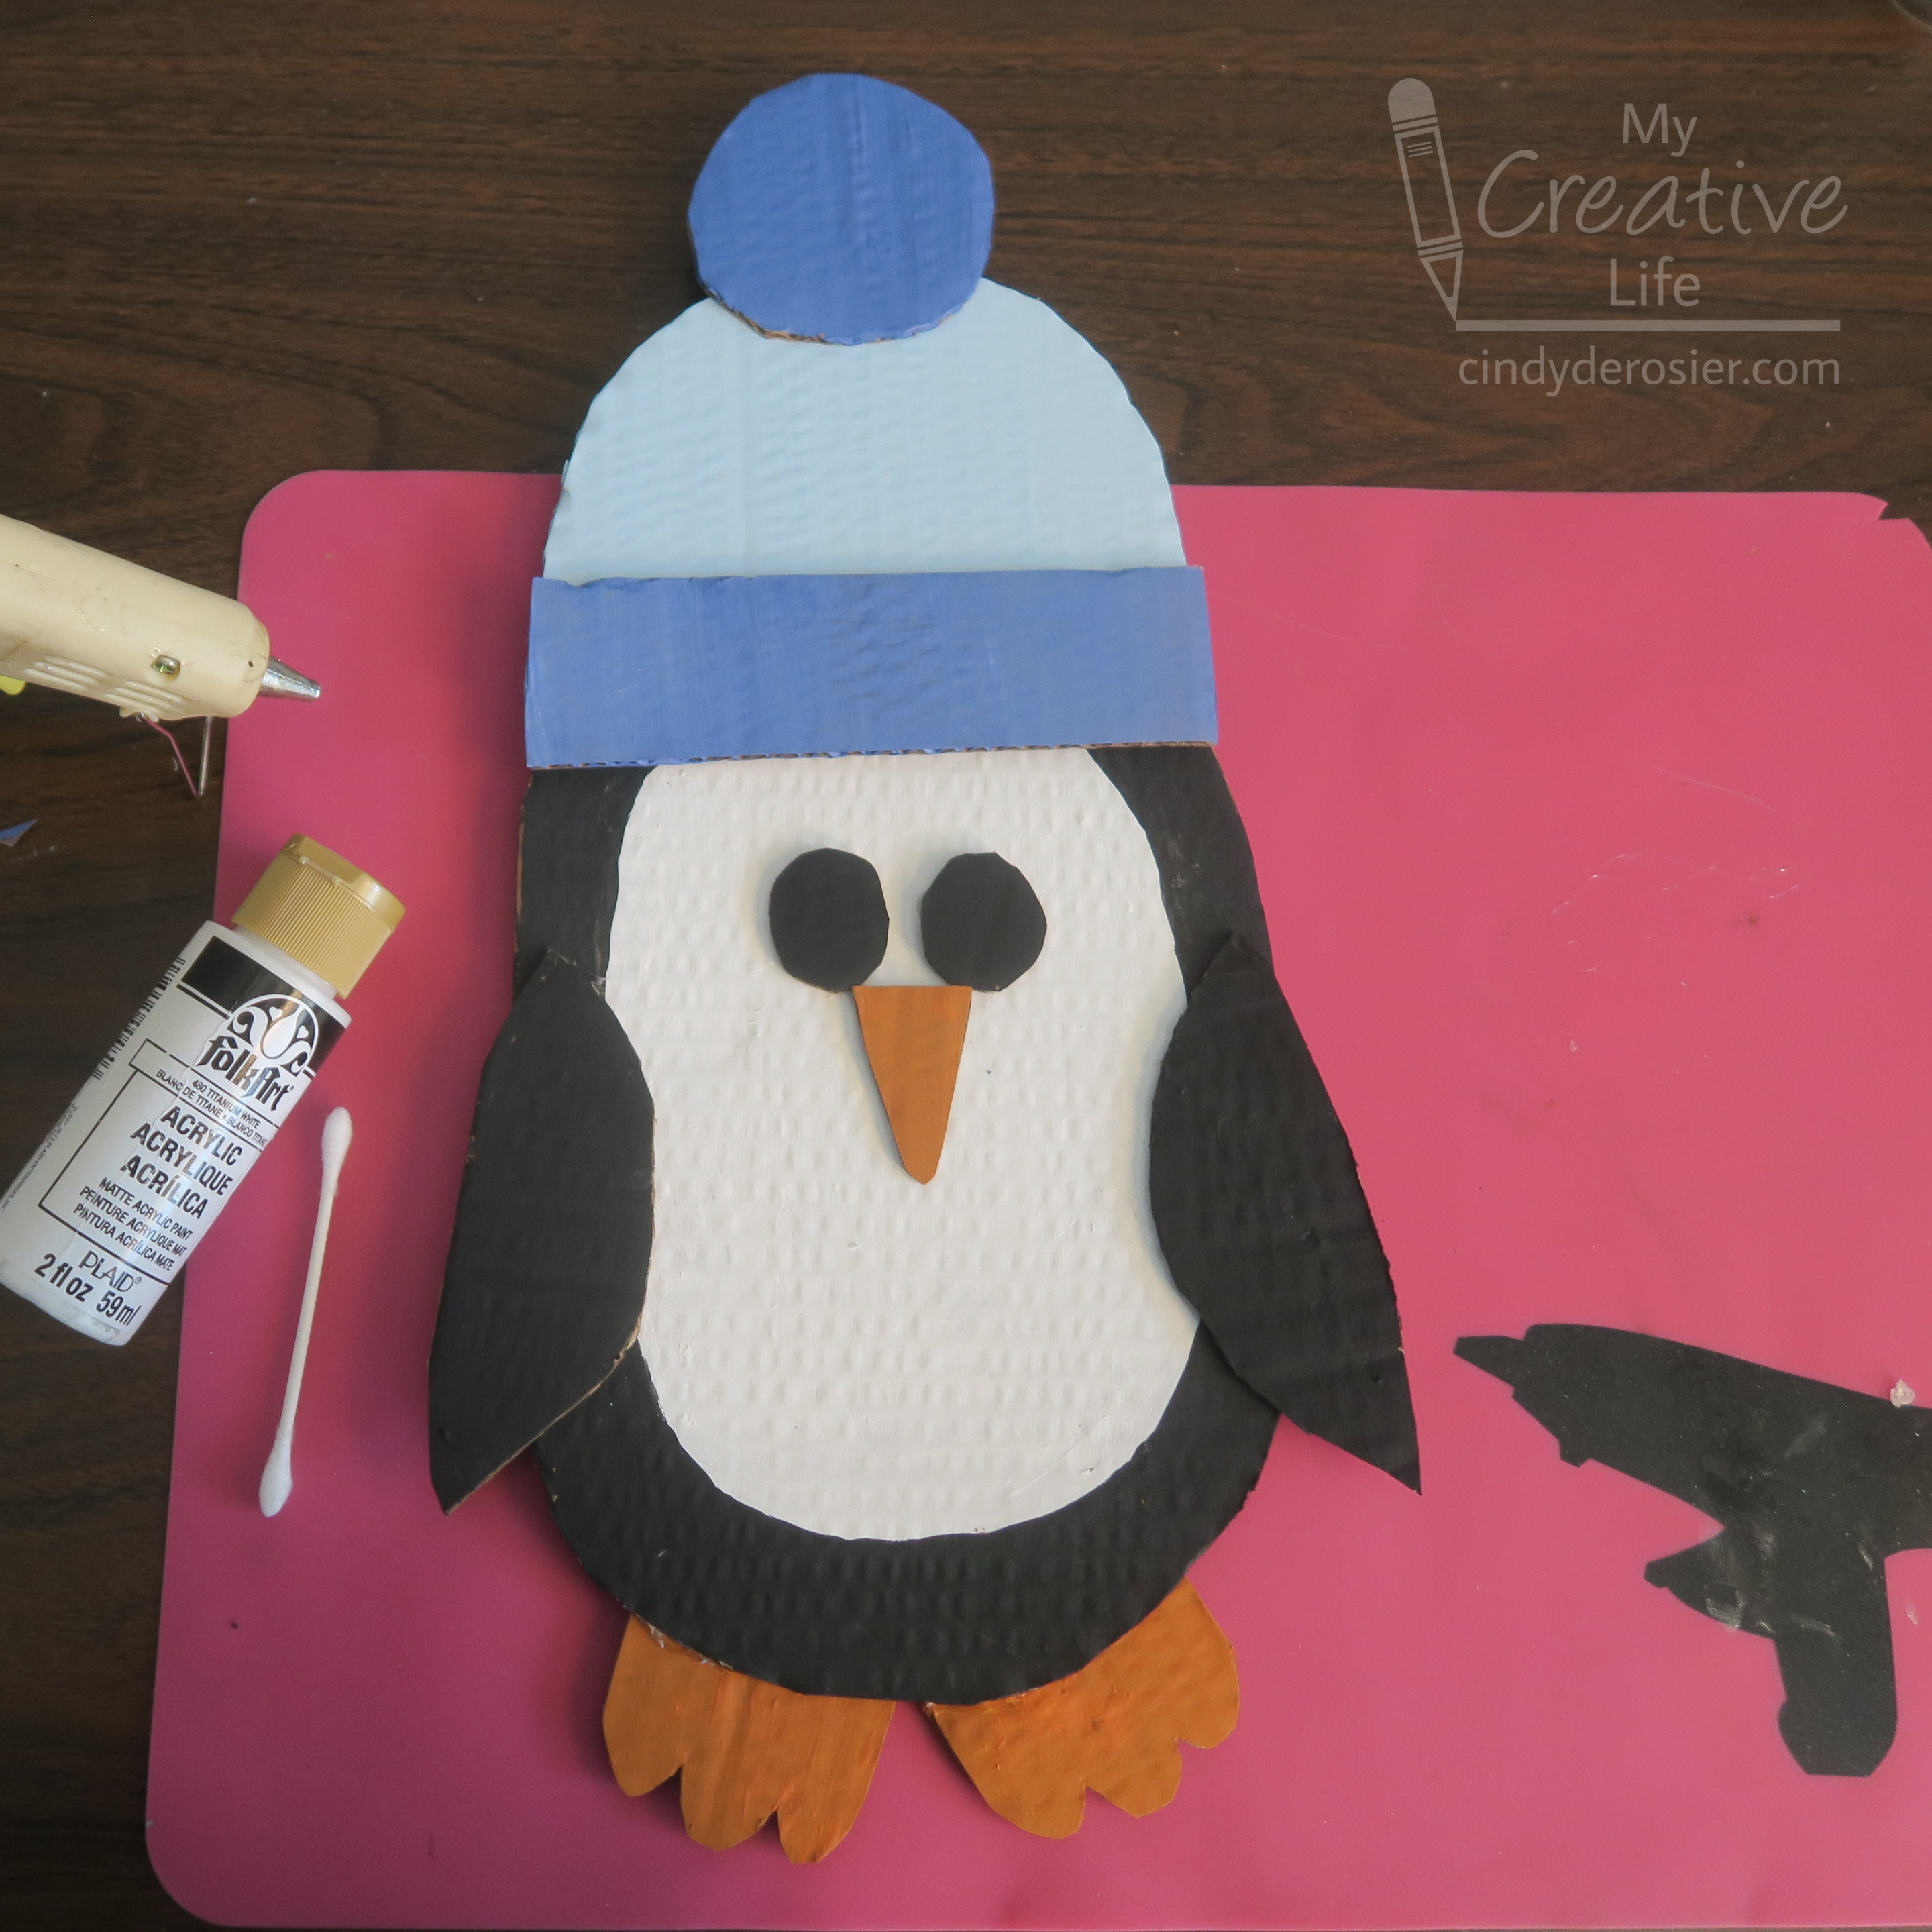

And here's how it looked after I glued it to a robe-sized gift box. I plan to tuck a gift tag under his wing. 


I love that I repurposed the cardboard box that the gift came in to decorate the gift box I used to wrap it! The recipient can use the box again, giving the cardboard box an even longer life. 

12/9/20

Construction Paper Penguin Family Portrait

I was in the mood to do some penguin crafting, so I whipped up this family portrait. The tall one is Steve; Trevor and I are the same height now. 


This is a really easy project that hardly needs a tutorial. Start with a piece of blue cardstock, then layer a white rectangle on the bottom to make the snow. Use the white scraps to make three penguin bodies. Hold each penguin body against a scrap of black cardstock and trim just outside the white piece to make the outer portions of the bodies. Cut a pair of wings for each penguin. Use orange cardstock to cut triangular beaks and feet. Glue everything together, then add googly eyes. Easy and totally adorable!


12/14/18

Oreo Penguins

When our plans to make an Oreo Christmas tree were thwarted, we made Oreo Penguins instead. 


As you can see, they're adorable but far from perfect. A friend once told me that what she loves the most about my blog is that you don't have to have any talent to make the things I share. She immediately blushed and apologized profusely for implying I don't have any talent, but I thought it was hilarious. It's totally true that my projects are not likely to grace the pages of a magazine (except this once!). My projects are doable and rarely require any special skills or expertise. I consider my talent to be thinking up the ideas, figuring out how they're done, and writing clear instructions, rather than the actual execution of the project. Particularly when it comes to edible crafts! So regardless of whether you have any talent or not, go ahead and give these Oreo Penguins a try! Affiliate links below. 


---------


Oreo Penguins 


Materials:


Steps:


Set the Silpat mat on the table with the cooling rack directly above it. Place 4 White Fudge Oreos on the rack, with enough space between them that you can fit your fingers. Use scissors to cut 4 small squares of aluminum foil. Put them on top of one another and fold them in half vertically. Cut the stack of squares into a half teardrop so that they're vaguely heart-shaped when you unfold them. Separate them and press them onto the Oreos, with the end press down the front. In the photo below, you can see three Oreos with the foil positioned on them, plus one piece of foil that I haven't unfolded yet. 


From another angle, with the fourth Oreo now covered:


Melt about 15 black Candy Melts according to the package directions. Drizzle the melted candy over the tops, trying as best you can to avoid the foil-covered area. 


Let the candy set for just a minute or so, then use the tab of foil at the bottom to lift the foil straight up. If you wait too long, you end up with a rough edge instead of a nice smooth line between white and black. If don't wait long enough, you have to be really careful that the extra candy on the foil doesn't slop onto the white portion. How long it takes the candy to set up depends on your room temperature and humidity, so I can't give you a more accurate guess. 

Transfer the penguins to a plate. If you drizzled aggressively, you may end up with a few penguins that are stuck to the cooling rack. Push up from the bottom of the rack with one hand as you're gently pulling up with the other and it should pop free. If you happen to break one doing this, you have my permission to eat it. None of mine broke, so unfortunately I didn't get to eat one. 

Move the now-empty cooling rack, then peel the dripped candy off the Silpat and put it back into the bowl. Remelt the candy. Set up your next four Oreos and repeat the process of adding the foil, drizzling the candy, and then peeling the foil. 


Continue working, four at a time, until all your Oreos are covered. You may need to add more Candy Melts to the bowl. 

In a separate bowl, melt 3 white wafers. Use a toothpick to dot melted white candy onto the backs of the candy eyeballs, then place them on the penguins. They'll set very quickly, so make sure you put them where you want them and don't try to move them. Add a dab of white candy below the eyes and place a sunflower seed beak there. 

Here are some of the penguins I made. As you can see, they are FAR from perfect.


But they are fun! I learned a lot as I went - what consistency is best for the melted candy, where to position the foil and when to remove it, what happens if you try to dip the penguin in the candy melts instead of drizzling, etc. I figured out what to do as I went. Like anything, the more Oreo Penguins I made, the better they turned out. And for a Scout cookie exchange, these imperfect (yet charming) penguins were perfectly fine.  


And I did eventually get to eat one. Delicious!

10/13/15

Penguin Gift Bags

This is Cindy again! I hope you enjoyed Trevor's blog takeover yesterday. It will be interesting to see if that is still what he wants to do for his party once his birthday rolls around in June. I hope so. It's a really fun theme. I especially loved the gift bag. It's so easy to make! Affiliate links below. 


---------

Penguin Gift Bag


Materials: 


Steps: 


Start with a black gift bag, then cut a white piece of cardstock slightly smaller than the bag. Cut a dip at the top and glue it in place. Use orange cardstock to make two feet and the beak. Cut a pair of flippers from black cardstock. 


Glue the eyes in place, the add the beak below the eyes. Then open up the gift bag and glue the feet in place. Finally, add the flippers to the side of the bag. Done!

1/5/12

Cardboard Tube Penguins

Trevor is always sad when the Christmas decorations come down (ok, me too.... ) so I wanted us to make some fun crafts that we could use to decorate the house for January. Perhaps it is the elementary school teacher in me, but the first thing that comes to mind when crafting with kids in January is penguins. Trevor was extremely enthusiastic about making some penguins.


We started by gathering empty toilet paper tubes, black and white paint, paintbrushes, craft foam in yellow and black, googly eyes, scissors and white glue. I hadn't originally planned on it, but we ended up using a glue gun to attach the wings.


First, we painted white ovals on the front of the toilet paper tubes. We let that dry (it only took about 5 minutes), then painted the rest of the tube black. We painted the top 2 inches of the inside of the tube black so that the bare cardboard wouldn't show (no need to paint lower than that- it won't show). Here are the finished tubes- mine is on the left and Trevor's is on the right.


Next, we used the foam to cut out two wings (black), a beak (yellow), and two feet. Here are mine:


Trevor opted for more chicken-like feet. His were much harder to cut out, but he did a great job. 

Once all the parts were cut out, we used white glue to attach the eyes, beaks, and feet. We let those dry. Then we used hot glue to attach the wings. Here are the finished penguins. Mine is on the left and Trevor's is on the right.


Adorable!