Showing posts with label edible. Show all posts

7/8/26

Red, White, and Blue Patriotic Frozen Drinks

When we were invited to a 4th of July party, I asked what we could bring. Suzzi requested a red, white, and blue drink. Last year, she made one using colored beverages with different densities and it was a hit. I wanted to try something different. Rather than relying on density, what if I froze the layers? One problem: we'd need to transport frozen drinks for an hour in the summer heat. If they melted, I'd be showing up at a 4th of July party with a light purple drink instead of a red, white, and blue one. 

I'm happy to report that my drinks arrived frozen and were indeed red, white, and blue. Unfortunately, there was a different problem I hadn't anticipated. Read on to find out what I did, versus what you should do if you want to make this drink in the future. Affiliate links below.


Red, White, and Blue Patriotic Frozen Drinks


Materials: 


What I Did: 


First, I prepared the blue raspberry lemonade Kool-Aid according to the package directions. I cleared space in our freezer, then set the cups into bread pans that would keep them upright while freezing. I filled each cup 1/3 of the way full with the Kool-Aid and put the pans in the freezer. 


When the Kool-Aid was slushy, I added cute patriotic paper straws. This was a big mistake, so don't do that. I let the blue layer freeze completely, then added the white (Limeade) layer and let that freeze completely. 


I made the Cherry Kool-Aid and packed it into a Thermos. We put the bread pans into a cooler and crossed our fingers that the layers would stay frozen during the drive. When we got to the party, I set out the drinks and added the final layer, which remained liquid. They looked so pretty!


It should have been obvious, but freezing paper straws in a drink is a bad idea. You couldn't sip through them since they were frozen in a block of flavored ice. As the drinks thawed, they began to disintegrate. Most of us ended up using a fork to free the straw and then drank the resulting slushie. The good news is that the three flavors go together really well!


What I Would Do Next Time: 


First, I would buy slushie straws instead of paper straws. That's what I put in the materials list at the top of the post. I would not freeze the straws into the drink. In fact, I would not freeze the drinks like this at all. Instead, I would use my beloved Cuisinart ice cream maker to make a slushie of each color and store those in the freezer until it was time to serve them. I'd pack in the blue and tamp it down, pack white on that, and top with red, and THEN add the straws. I don't know how well slushies would travel, but I think this would work well at home. If you give it a try before I do, let me know how it goes!

6/3/25

Edible Flower Crafts for Kids

I love flower crafts. I've made a lot of kid-friendly flower crafts over the years, including quite a few that are edible. I've gathered them all here in one place. Below that, you'll find affiliate links for some fun flower-themed picture books. Enjoy!


Edible Flower Crafts for Kids


  • Black-Eyed Susan Candies - Create eye-catching candies that look like black-eyed Susans. Kids will love making (and eating!) these treats. 
  • Ice Cream Flowerpots - These fabulous flowers are a lot of fun to make. Pre-freeze the ice cream and have kids make their own flowers for a fun summertime party activity. 
  • Fondant Daisies and Roses - Making beautiful daisies and roses from fondant is surprisingly easy and very kid-friendly. Use them to decorate cakes, cupcakes, or other homemade goodies. 
  • Conversation Hearts Bouquet of Flowers - This edible bouquet makes a wonderful gift or a unique centerpiece. 
  • Candy Roses - These beautiful roses are made freehand - no mold required. And I promise it is ridiculously easy! They make a wonderful topper for ice cream. 
  • Glazed Flower Rolls - There are a lot of possibilities with this recipe. Make plain flower rolls to serve with dinner, or add a flavored glaze for a sweet breakfast treat. 
  • Jelly Bean Bouquet - This miniature bouquet is one of the most popular crafts on my blog. It's really easy and is absolutely adorable. 
  • Pineapple Sunflowers - Dark chocolate and pineapple is a fantastic flavor combination. They come together to make stunning edible sunflowers. 
  • Sweet Tarts Flower Cupcakes - Decorate cupcakes with delicious Sweet Tarts Hearts for a fun springtime dessert. It's a great choice for Mother's Day! 
  • Sunflower Seed Brownies - Whether you make sinful brownies or a healthier version, decorate them with cute little sunflower seed flowers. 


Flower Books for Kids


  • The Tiny Seed - Kids love this classic book by Eric Carle that comes with seed-embedded paper you can plant. 
  • Mrs. Peanuckle's Flower Alphabet - Read about 26 types of flowers, from asters to zinnias, in this colorful book.  
  • Planting a Rainbow - Featuring the paper collage artwork of Lois Ehlert, this classic book follows a mother and child who plant a beautiful garden with all the colors of the rainbow. 
  • The Big Book of Blooms - Learn fun and amazing facts about some of the most interesting flowers on the planet. 

1/3/25

100 Grand Hidden Money Gift

For Christmas 2024, I decided to make a hidden money gift inspired by the money-themed 100 Grand Bars.  


Ordinarily when you open a fun-size 100 Grand wrapper, you get a tasty treat of caramel, crispy rice, and chocolate. If you are very careful, you can open the wrapper without tearing it, remove the candy bar, replace it with rolled-up money, and then seal it back together again using the glue that's already on the wrapper. It's surprisingly easy. If you hide the money-filled 100 Grands in a jar with regular ones your recipient won't suspect a thing until they pull out bar and it weighs less than it should! Affiliate links below. 


-----


100 Grand Hidden Money Gift


Materials:


Steps:


Carefully open a 100 Grand Bar by pulling the wrapper apart, the way you'd open a bag of chips. I was able to open three different bars without tearing the wrapper or compromising the adhesive. Remove the candy and replace it with rolled-up cash. Press the wrapper back together to adhere it. 

Fill the mason jar with a mixture of candy bars and money-filled wrappers. Pack them tightly. You won't be able to tell by looking which have candy inside and which are filled with hidden money!

10/10/24

Decorating Disney-Themed Halloween Cookies and a Wormy Apple Cookie

Last weekend, I took a cookie-decorating class at Every Baking Moment with my friend Rebecca. The last time Rebecca had been there was for Trevor's 8th birthday party (he's 18 now). I took a different cookie-decorating class there once, two years ago (which apparently I never blogged about?!), so I was excited to give it another go. 

The instructor demonstrated how to make eight different Disney-themed Halloween cookies, then we were set loose to create. It was so much fun trying out different techniques! I've never used a stencil on cookies before, like we did on Madame Leota. Nor have I used a dehydrator for cookies. We dried the red of the apple before adding the green on top. 

Compare my nine cookies above with the eight cookies below that the instructor made. 


I went my own direction with a few of the cookies, but not always intentionally! I should have made curved lines of black frosting on my spiderweb cookie, but I made straight lines. Oops. I put a leaf on the poison apple, but not on the Mickey pumpkin... and I didn't even notice until I photographed my cookies the next morning. I outlined Oogie Boogie in black after the green had tried to see if I could follow the lines (no). I skipped the writing on the cauldron. I'm terrible at writing, but it would have provided a little camouflage for the bad flooding job I did. I think I used the thick black frosting intended for writing instead of the 15-second frosting. I did a good job flooding the bat, so I must have used the correct frosting for that. The central Mickey with the spider was my own idea.  

We were allowed to take home some undecorated cookies plus any leftover frosting. These are the cookies I made at home, without any time pressure. Notice that the pumpkin Mickey is infinitely better than the one I made in class?


As for the letters on the bat, I piped them onto parchment paper rather than directly on the bat, then transferred them over when they dried. I piped each letter dozens of times and then picked the best of each and they still don't look great. 

Since the apple was not someone else's idea (or trademarked character), here's a tutorial. Affiliate links below. 


---------


Wormy Apple Cookie


Materials: 


Steps: 


Bake and cool apple-shaped cookies, then prepare the royal icing. If you're making your own, aim for the consistency of honey. Color the icing with your desired shades. I made a green apple with an orange worm because those were the colors of icing I had, but you could make red, green, or yellow apples and orange, green, or pink worms. You'll need a little bit of black for the hole. You may also want a brown stem. I used green since I didn't have brown.  Put your colored royal icing into the piping bags. 

Working on parchment paper and with one cookie at a time, flood the apples with your desired color(s). Use the scribe tool as needed. While the icing is still wet, pipe a circle of black onto the apple. Set the cookie aside to dry. 

To make the worm, pipe a series of 5 of 6 circles touching one another onto a piece of parchment. The circles will sink together, leaving a vague impression of body segments. Use the scribe tool to dot two black eyes onto the worm while it is still wet. Let the worm dry completely. 

Peel up the dried worm (ew), add some dots of icing onto the back to act as glue, and place it on the apple. When the icing is dry, your cookies are ready to serve!

3/6/24

Personalized Candy Bar

One of the highlights of our visit to Hershey, PA was the Create Your Own Candy Bar experience. Everyone in our group of 9 chose a different combination of ingredients to put in their personalized bar. Part of the activity was designing our own packaging with our names. It was so much fun. I'd been thinking about it recently and thought how neat it would be if the candy bar itself was personalized with our names. I did some experimenting and came up with this: 

Personalized candy bar, featuring your name!

My prototype is a lemon-lime candy bar with rainbow sprinkles, but yours could be literally anything. There are so many colors of Candy Melts available; pick two colors and then use LorAnn flavorings to give each a different flavor. If you're a chocolate fan, try dark chocolate with white chocolate letters and toffee bits around the edges. That would look (and taste) fantastic. Obviously, you can also add any mix-ins you want to the bar itself. The possibilities are endless!
I used a silicone mini loaf pan to make my bars because that's what I have. It was fine, but using a mold actually intended for candy bars would be better. I've put one in the materials list. Affiliate links below. 


Personalized Candy Bars


Materials:


Steps: 

Start by making your name. Melt the selected color following the instructions on the package, then add your desired flavor. Fill the appropriate letters in the mold. When the candy is set, pop the letters out onto parchment paper. 


Melt the candy you've chosen for the bar itself and add the desired flavor. Pour the melted candy into the candy bar mold (or loaf pan). Gently place the letters onto the surface of the candy. You can leave them raised or gently push them so they're flush with the surface. 


Add sprinkles, nuts, coconut flakes, or whatever you want to the edges of the candy bar. 


Don't be limited by the size of your mold. I made an oval-shaped mini version of a candy bar with just my initials and it came out well (although I was a bit overzealous with the sprinkles). 

Personalized candy bar, featuring your name!

When the candy is set, pop it out of the mold and enjoy! To give personalized candy bars as gifts, place the bars in appropriately-sized treat bags. These would make adorable (and edible!) gift tags that anyone would love to receive. 

3/1/24

Raspberry Lemon Cupcakes

Raspberry and lemon is one of my all-time flavor combinations. Raspberry lemonade, raspberry lemon sorbet, lemon cake with raspberry coulis... seriously yum. I did some experimenting and now I have a new favorite to add to that list: Raspberry Lemon Cupcakes. 


There are three components to my raspberry lemon cupcakes: the lemon and raspberry cake part, the raspberry frosting, and the cute raspberry lemon heart toppers. I started with a box mix for the cake; the frosting is from scratch. Affiliate links below. 


Raspberry Lemon Cupcakes


Ingredients: 


Put the frozen raspberries into a fine mesh strainer over a bowl. Set it aside. 

Grind the freeze-dried raspberries to make a powder. (Or buy powdered raspberries from the get-go). I put mine in a ziplock bag and used a meat mallet to pulverize them, which was fine for this purpose. You could also use a spice grinder


Spoon some raspberry powder into each of space in the heart candy mold. 


Follow the directions on the package to prepare the lemon candy melts. Pour the candy into each mold, then use a toothpick to swirl the powder into the melted candy. Let the candy set.


Follow the directions to make the cupcakes. Before putting the batter into the oven, spoon some raspberry powder on top of each cupcake. Use a toothpick to swirl it into the batter. Don't swirl too much - you want some to be visible. 


While the cupcakes are baking and cooling, pop the cooled candy hearts out of the mold. Then start the frosting. Press the now-melted raspberries through the strainer until you have 1/3 cup of puree. (Save any extra for something else.) 

Whip 1 cup butter until light and fluffy, then add the puree. Blend in enough powdered sugar so the frosting is piping consistency. Transfer it to a piping bag. 


Pipe a swirl of raspberry frosting (naturally a beautiful shade of pink!) onto each cupcake, making sure some of the speckled cake still shows through. Put a candy heart on top of each and enjoy!


What's your favorite dessert flavor combination? Let me know in the comments!

2/19/24

Bread Rose Wreath

Remember the rose wreath that I made out of air-dry clay? I made an edible version (bread dough instead of clay). 


The shaping process was somewhat similar, but the bread dough was much more difficult to manipulate than the clay. Still, it was a fun experiment with delicious results. I used the same basic recipe as for the Sixty-Minute Cloverleaf Rolls, then veered off in a different direction for the shaping and baking. 


---------


Bread Rose Wreath


                                                    3.5 to 4.5 cups flour                            1 cup milk
                                                    3 tablespoons sugar                            1/2 cup water
                                                    1 teaspoon salt                                    1/4 cup butter
                                                    2 packages Fleishmann's yeast


In a large bowl, mix 1.5 cups flour with the sugar, salt, and yeast. Set it aside. Combine milk, water, and butter in a saucepan (or microwavable bowl) and heat until liquids are 120-130°F. Add the liquid ingredients to the dry ingredients and beat at medium speed for two minutes, scraping bowl occasionally. Add 0.5 cup flour and beat at high speed for two minutes. Stir in enough additional flour to make a soft dough. Turn out onto a floured board and knead until soft and elastic, approximately 5 minutes. Place in a greased bowl, turning to grease top. Cover, then place in a warm place (approximately 98°F) for 15 minutes. 

Turn the dough out onto the floured baking mat. Divide dough in quarters, then divide each quarter into three equal pieces. You should have 12 balls of dough, each the same size. Roll 9 of the balls into long ropes, approximately 18" long. Braid three ropes together. 


Curl the braid into a wreath and place it on a Silpat-lined baking sheet. Repeat with the other 6 ropes to make three wreaths in all. 

Divide each remaining dough ball into 9 pieces. Roll the pieces into balls, then smoosh them with the ball of your hand to make petals. 


Pick up one petal, then roll it up to form the inside of the rose. Pick up the next petal and roll it around the center of the rose. Continue the process with the rest of the petals. Place the finished rose on the baking sheet.  

Loosely cover the dough and let rise in a warm place, for approximately 15 minutes. Meanwhile, preheat the oven to 425°F. Bake for 15, then check the roses for doneness. Remove them from the oven and bake the wreaths for another 10 minutes or until done. While the wreaths are still hot, nestle the roses into the wreaths. Let the bread cool on a wire rack for at least 10 minutes. 


Shop my affiliate links! 

                                  Silpat                                            Sili Bake                                         Fleischmann's Yeast

1/23/24

"Hard-Boiled Egg Drink" for April Fool's Day

I love food that looks like one thing but is actually something else. Remember the "bowl of cereal" I made for April Fool's Day a few years ago? Just like that, this "hard-boiled egg drink" is meant to fool the eye, but delight the palate. Can you guess what's in it?


Before I reveal the answer, it is worth mentioning that at least one cocktail made with hard-boiled eggs exists. I haven't tried it, but I suppose I'd be willing to. I'm far less interested in trying any of the hard-boiled egg smoothie recipes out there. 

Hard-boiled egg sliders, on the other hand.... sooo good!


Just split hard-boiled eggs in half, then add bacon, cheddar cheese, and mashed avocado. Use a toothpick to hold them together, then sprinkle salt and pepper on top. They make a fantastic appetizer; in fact, I served them recently when we had a friend over for dinner. 

I made two other egg-inspired dishes for that meal. For the entree, I cooked meatballs in mariana sauce with zucchini, then cracked eggs into the sauce and baked them in the oven. So yummy and a really easy one-pot meal!


I also made some spoonbread. I tried a recipe I'd pinned (as part of my creative resolutions for the year). It was fine, but not amazing. 


I served my "hard-boiled egg drink" for dessert. Have you guessed what's in it yet? Three things: vanilla ice cream, milk, and mango ice cream. (Fun fact: You can buy mango ice cream on Amazon (affiliate link here and below), but I don't recommend doing so unless you have significant money to burn.) 

I put vanilla ice cream and milk in the blender to make milkshakes and poured them into glasses. Then I used a small cookie scoop to make balls of mango ice cream and added them to the milkshakes. Obviously, you could make your own ice creams, but I went the easy route this time and used store-bought. 


It was delicious and such a fun treat. It would make a great addition to a meal on April Fool's Day!

1/15/24

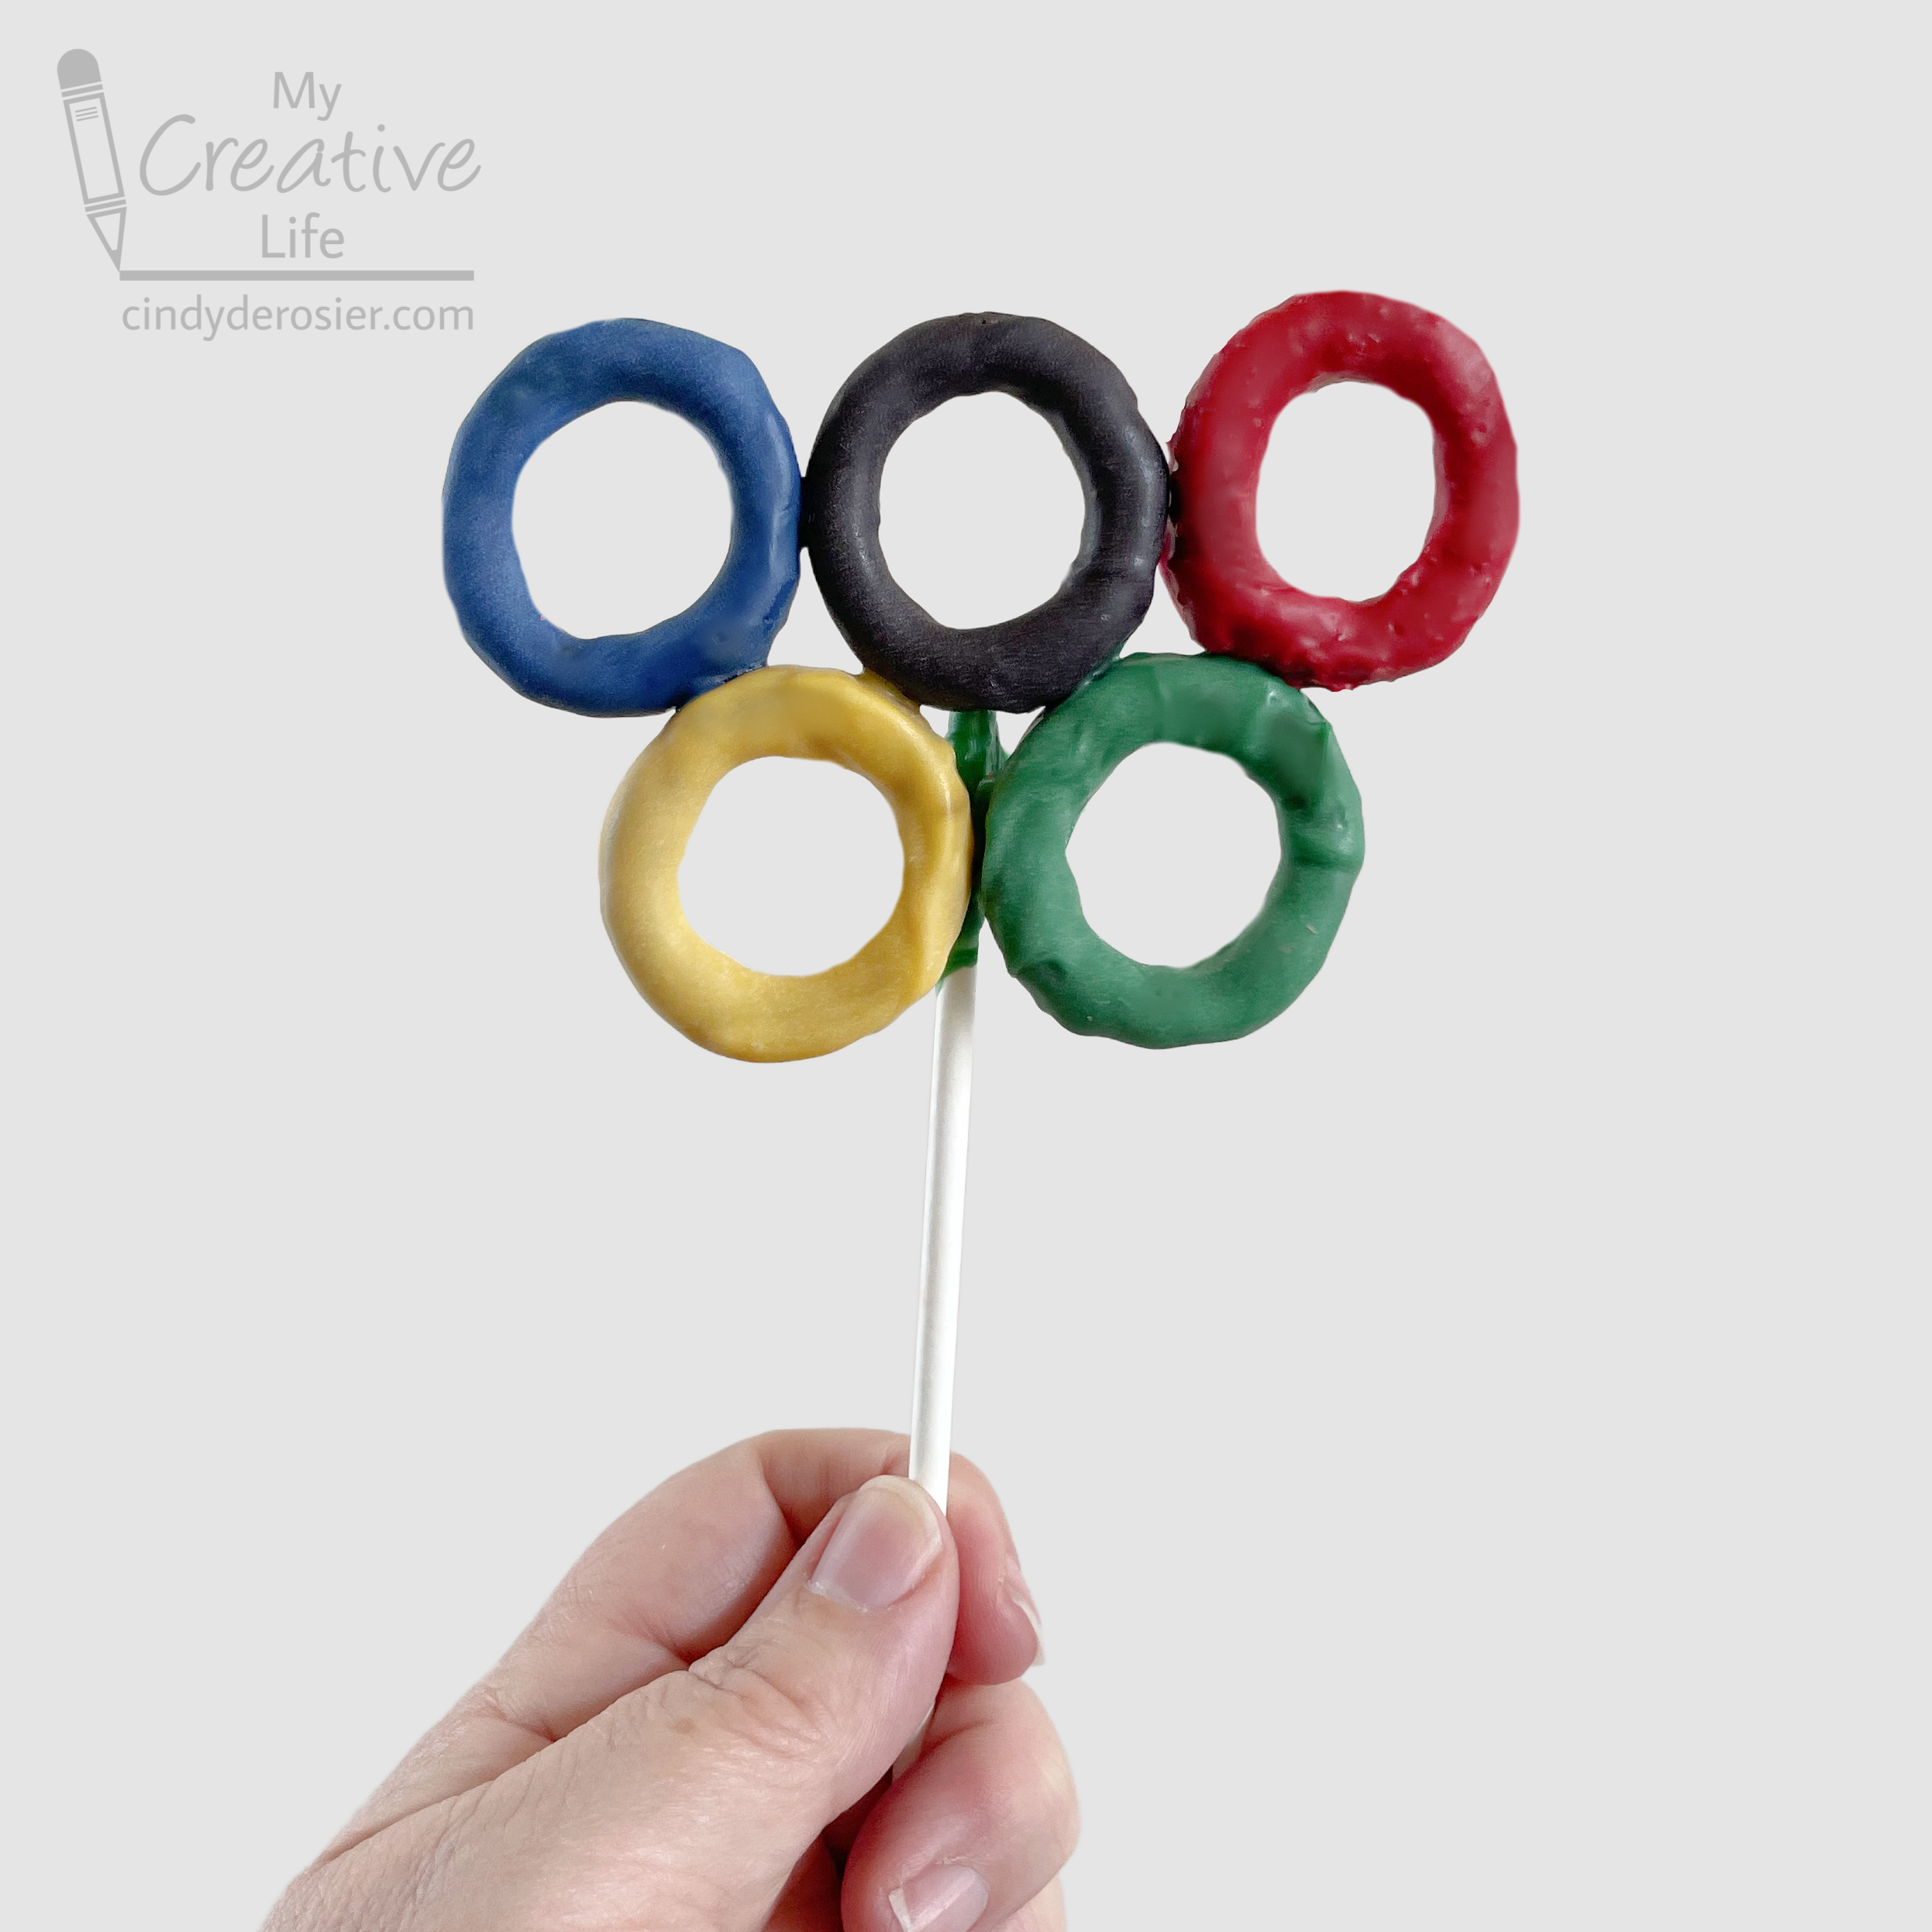
Olympic Rings Treat on a Stick

Back in December when I spotted round pretzels at the store, my first thought was "Olympic rings!" I ended up using them to make an edible Christmas wreath first, but now I made my rings. Affiliate links below. 


Edible Olympic Rings on a Stick


Materials: 


Steps: 


Working with one color at a time, prepare the Candy Melts according to the package directions. Dip a pretzel and allow the extra to drip off, then set it onto a sheet of parchment. Repeat the process until you have blue, black, red, yellow, and green rings. Let the candy set.

Arrange the rings in order on a clean sheet of parchment paper. You can line up your pretzels next to each other, or with 'interlocking' rings like I did on the bottom left. I used broken pretzel pieces to prop up the blue, black, and red rings on top of the yellow and green ones. In the end, the side-by-side rings were easier to make and stayed together better. 

Light the candle and place it nearby. 


Connect the rings by holding a blue pretzel over the candle for a second or two. Replace it on the parchment, pressing gently against the black and yellow rings. 


Melt the green ring and press it against the yellow and black rings. Finally, melt the red ring and press it against the black and green rings. 

When the joints are solid (about 5 minutes, depending on the temperature), flip the joined rings upside down. Melt some white candy and dip the end of a lollipop stick in it, then press it behind the black, yellow, and green rings. Do as I say and not as I do: I used green candy and it shows through. 


If you're looking for other Olympics crafts, I have a bunch! You can also find ideas for crafts inspired by many of the summer and winter events among my Sports Crafts for Kids. Enjoy!

12/12/23

Edible Christmas Wreath

Three years ago, I shared an edible Advent wreath that was super fun to make and turned out really cute. Today's craft is another wreath. But this time it's a Christmas wreath and it's made from different items. See if you can guess what I used, then scroll down to find out! Affiliate links below. 


Edible Christmas Wreath


Materials:


Steps: 


Cover your work surface with parchment paper, then melt the Dark Green Candy Melts following the instructions on the package. 

Coat a pretzel ring with candy, then use the skewer to set it on the parchment. Sprinkle some nonpareils onto the pretzel, then add sugar sprinkles. If you have a partner to do this, that is very helpful. Working alone, I dipped three pretzels before doing the sprinkles for each. (By the way, you can make your own colored - and flavored - sanding sugar very easily.)


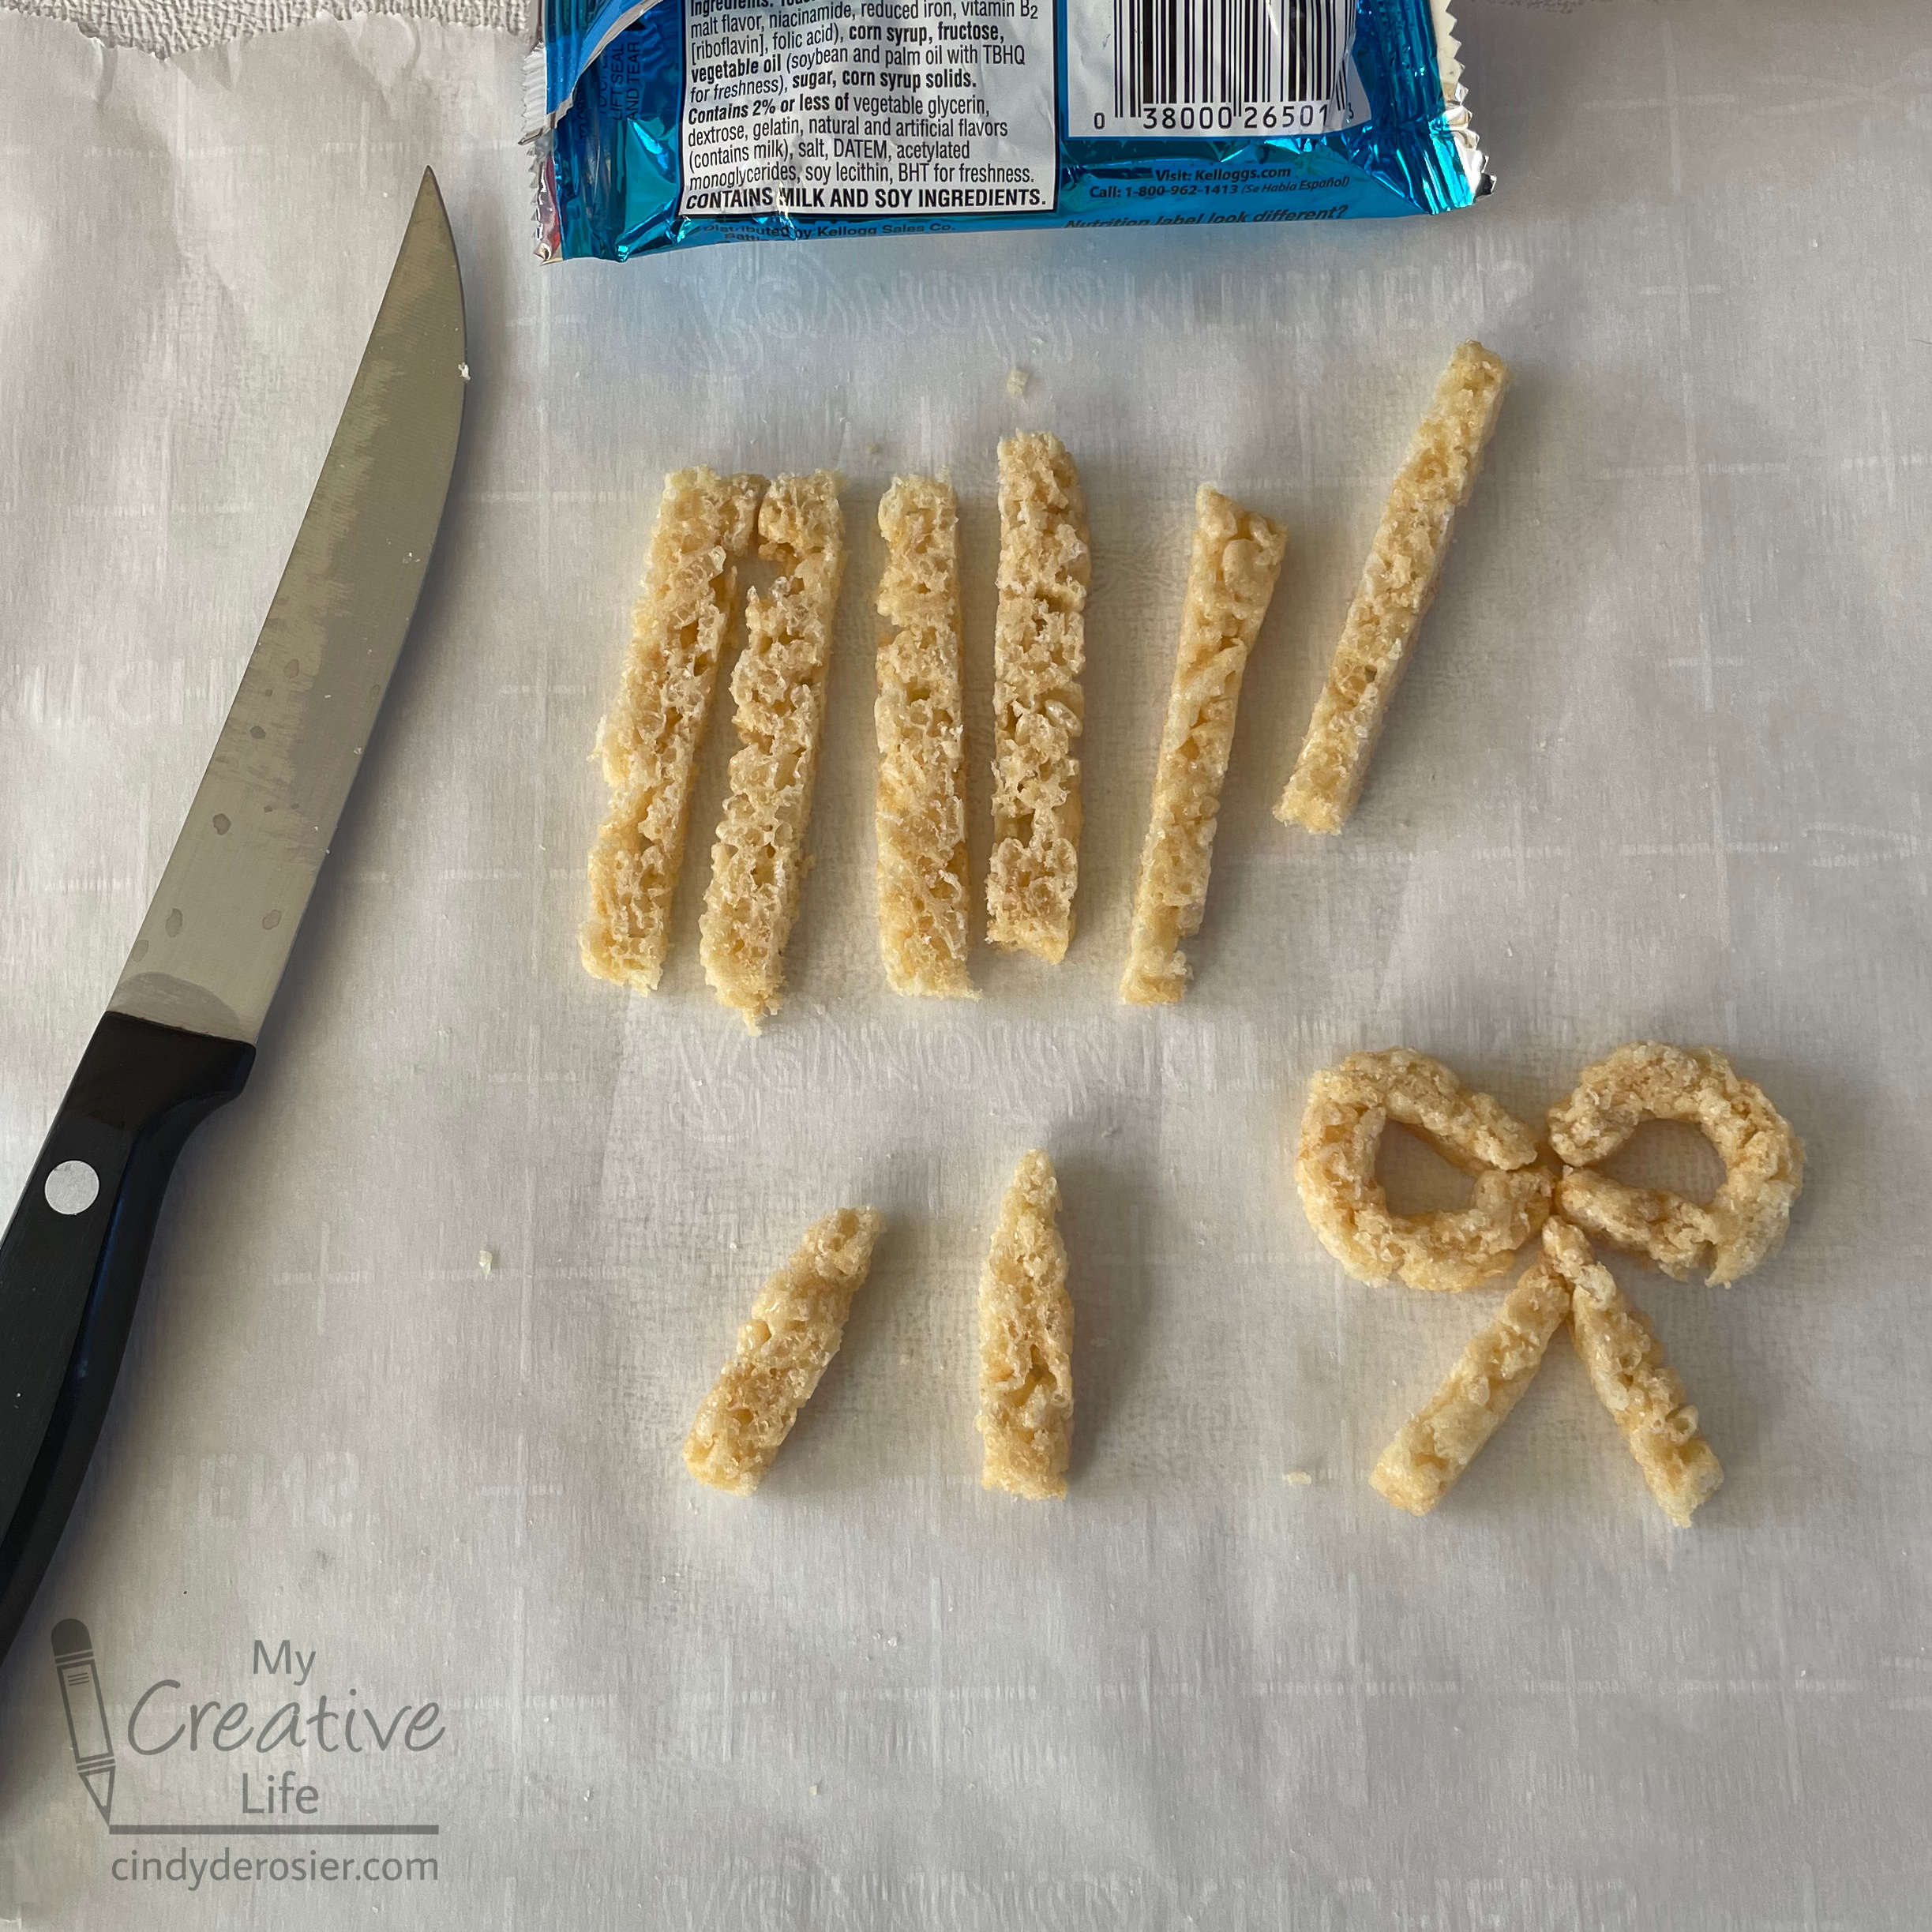
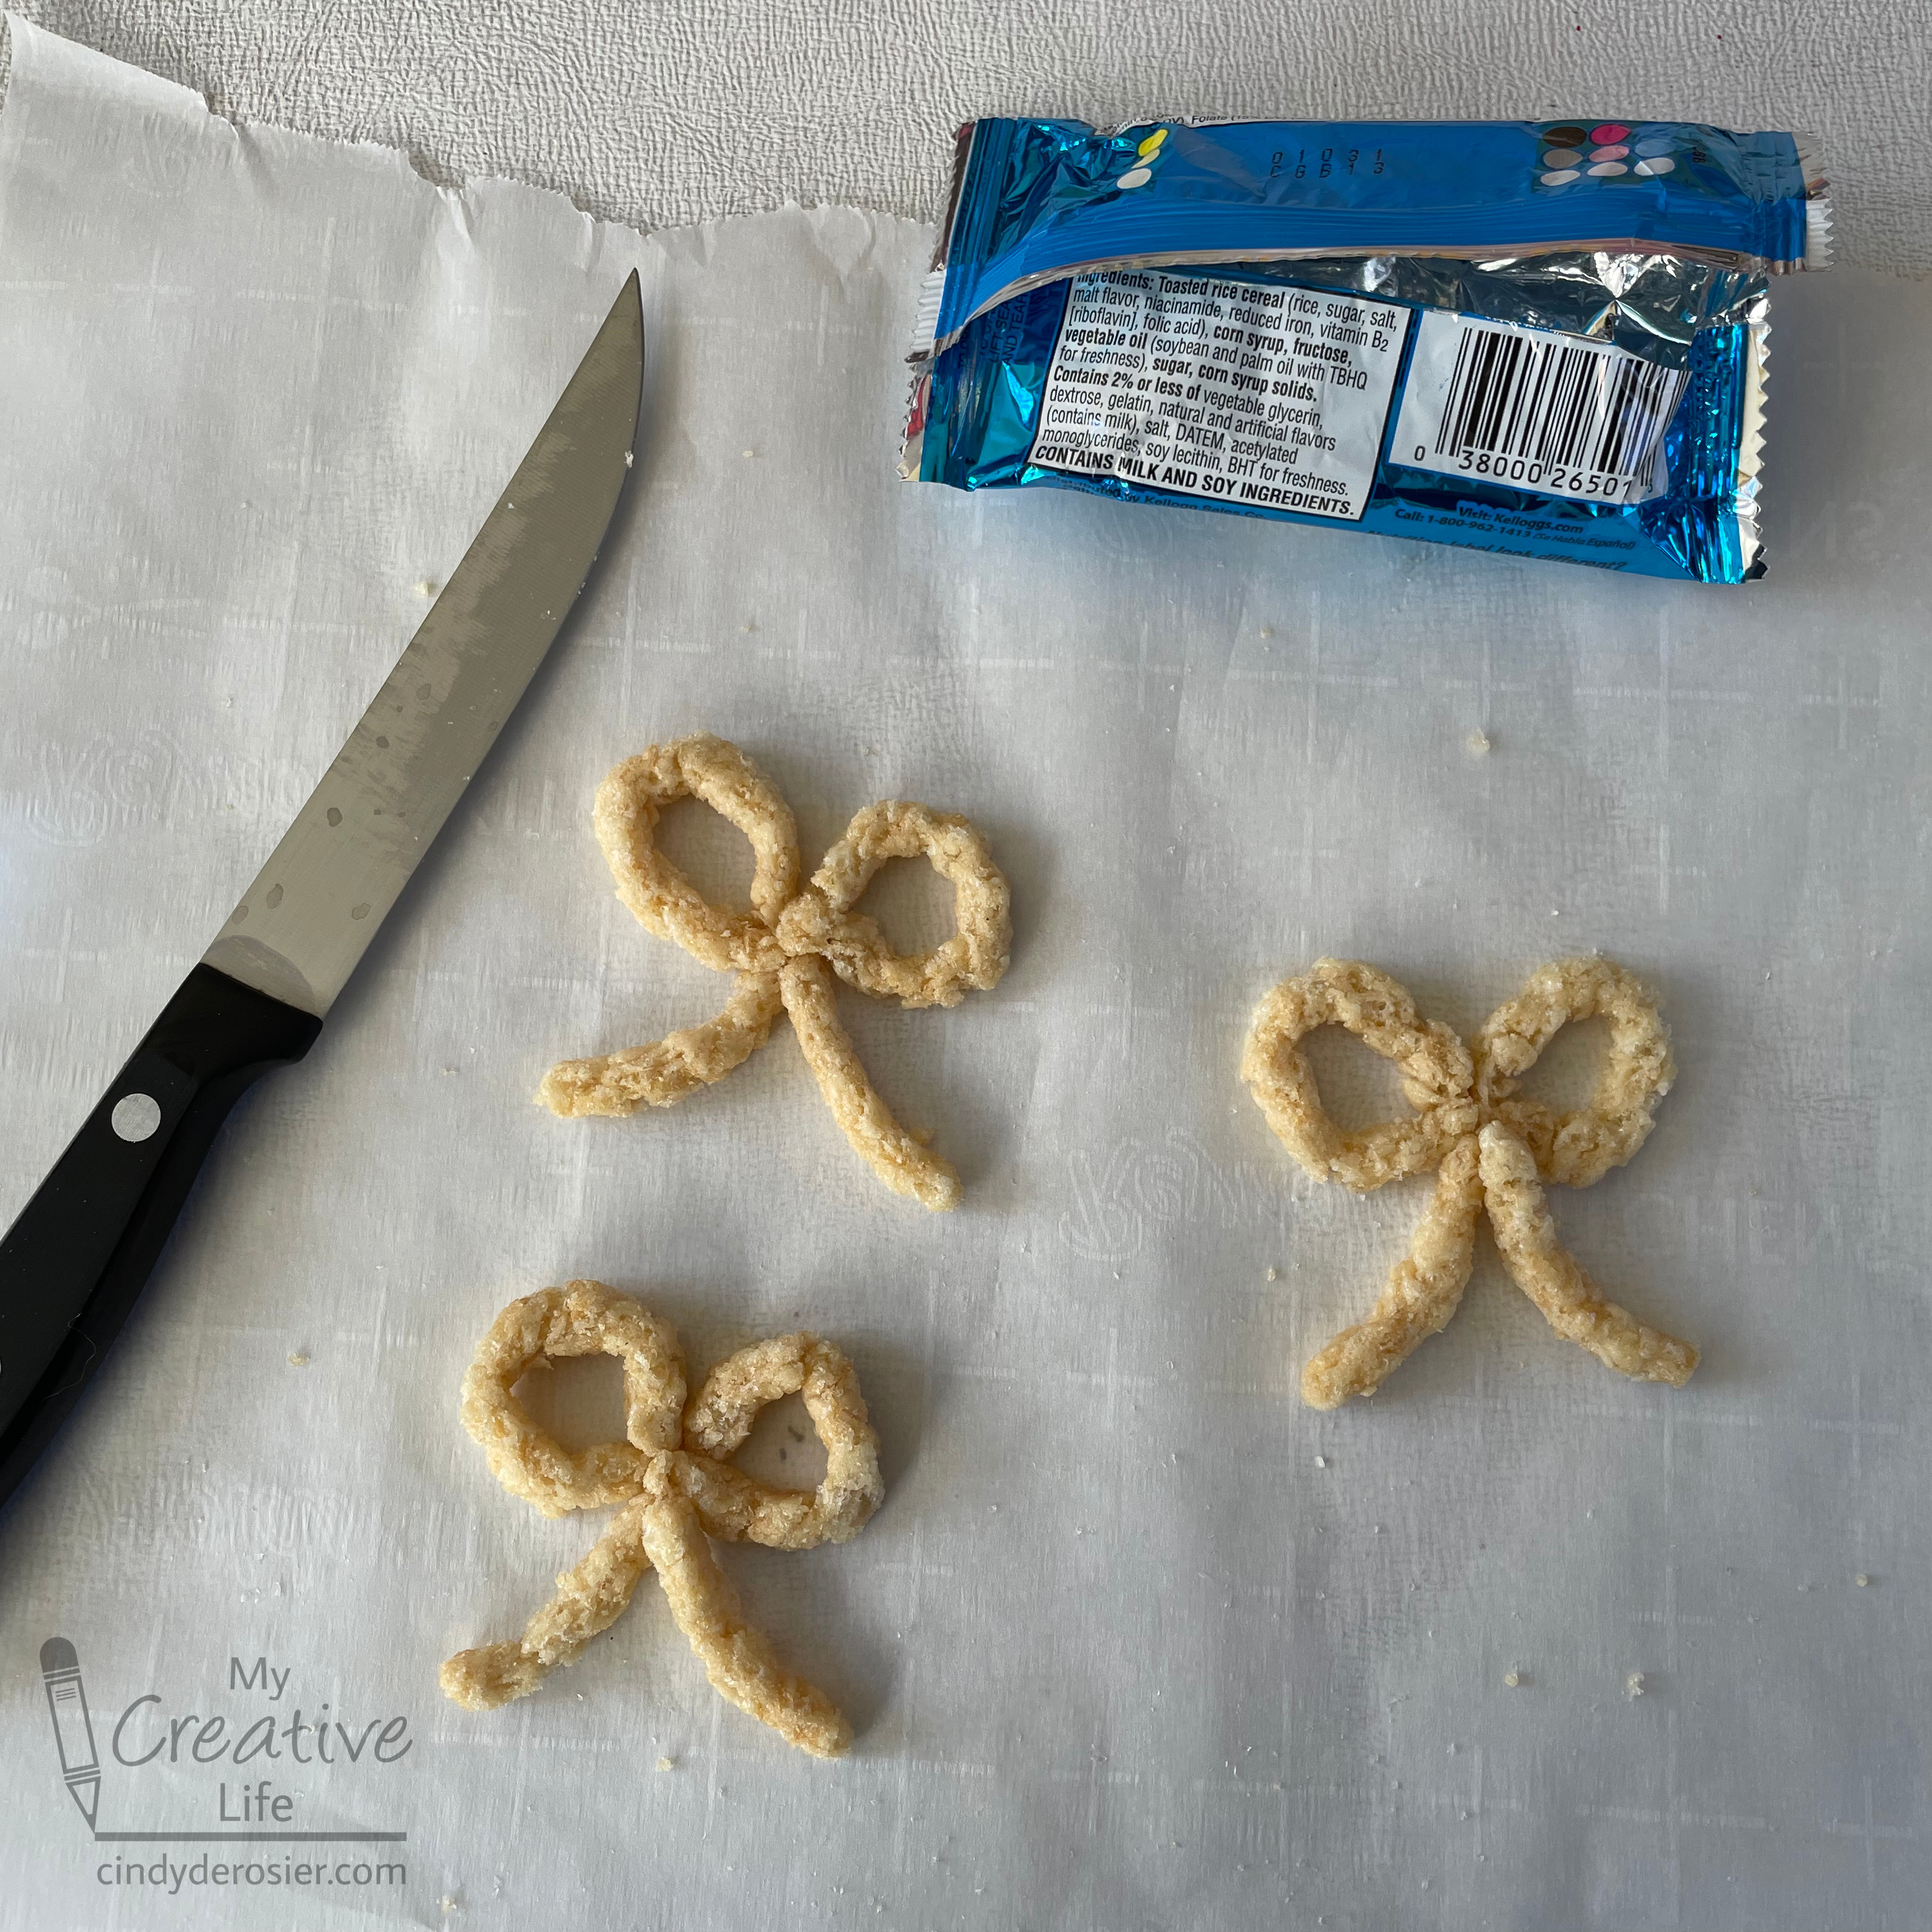
While the mini wreaths are hardening, use a sharp knife to cut a Rice Krispie Treat into thin slices. Use these to make a bow. I took three strips of the same length, curved two to make the loops of the bow, then cut the third in half to make the tails. 


Once you have the basic shape, smoosh the parts together. Then curl the ends slightly. 


Melt the Red Candy Melts, following the instructions on the package. I tried multiple techniques for coating the bows. What worked best was to pour the candy over a bow while it is flat on the parchment paper, then pick it up with skewers, briefly hold it vertically, then set it down on a clean area of the parchment. As soon as you set it down, add the red sprinkles. 

Coat Kix with the melted candy, then place them on the parchment in clumps of three. 

When everything is set, it's time to assemble. You have two choices: either keep everything separate for easy eating (people can grab a single pretzel or two from the wreath) or adhere everything together. I chose the former. The only difference is that you will need melted candy "mortar" to act as glue between everything. 

Arrange one layer of pretzels on a plate (mortar optional), then add three more layers, off-setting each layer from the previous one. Add the Kix-clusters and the bow. 


So how does it taste? Fantastic! A thin candy coating adds just the right amount of sweetness to the salty pretzels. This showstopper will be a hit at any Christmas celebration. 

1/30/23

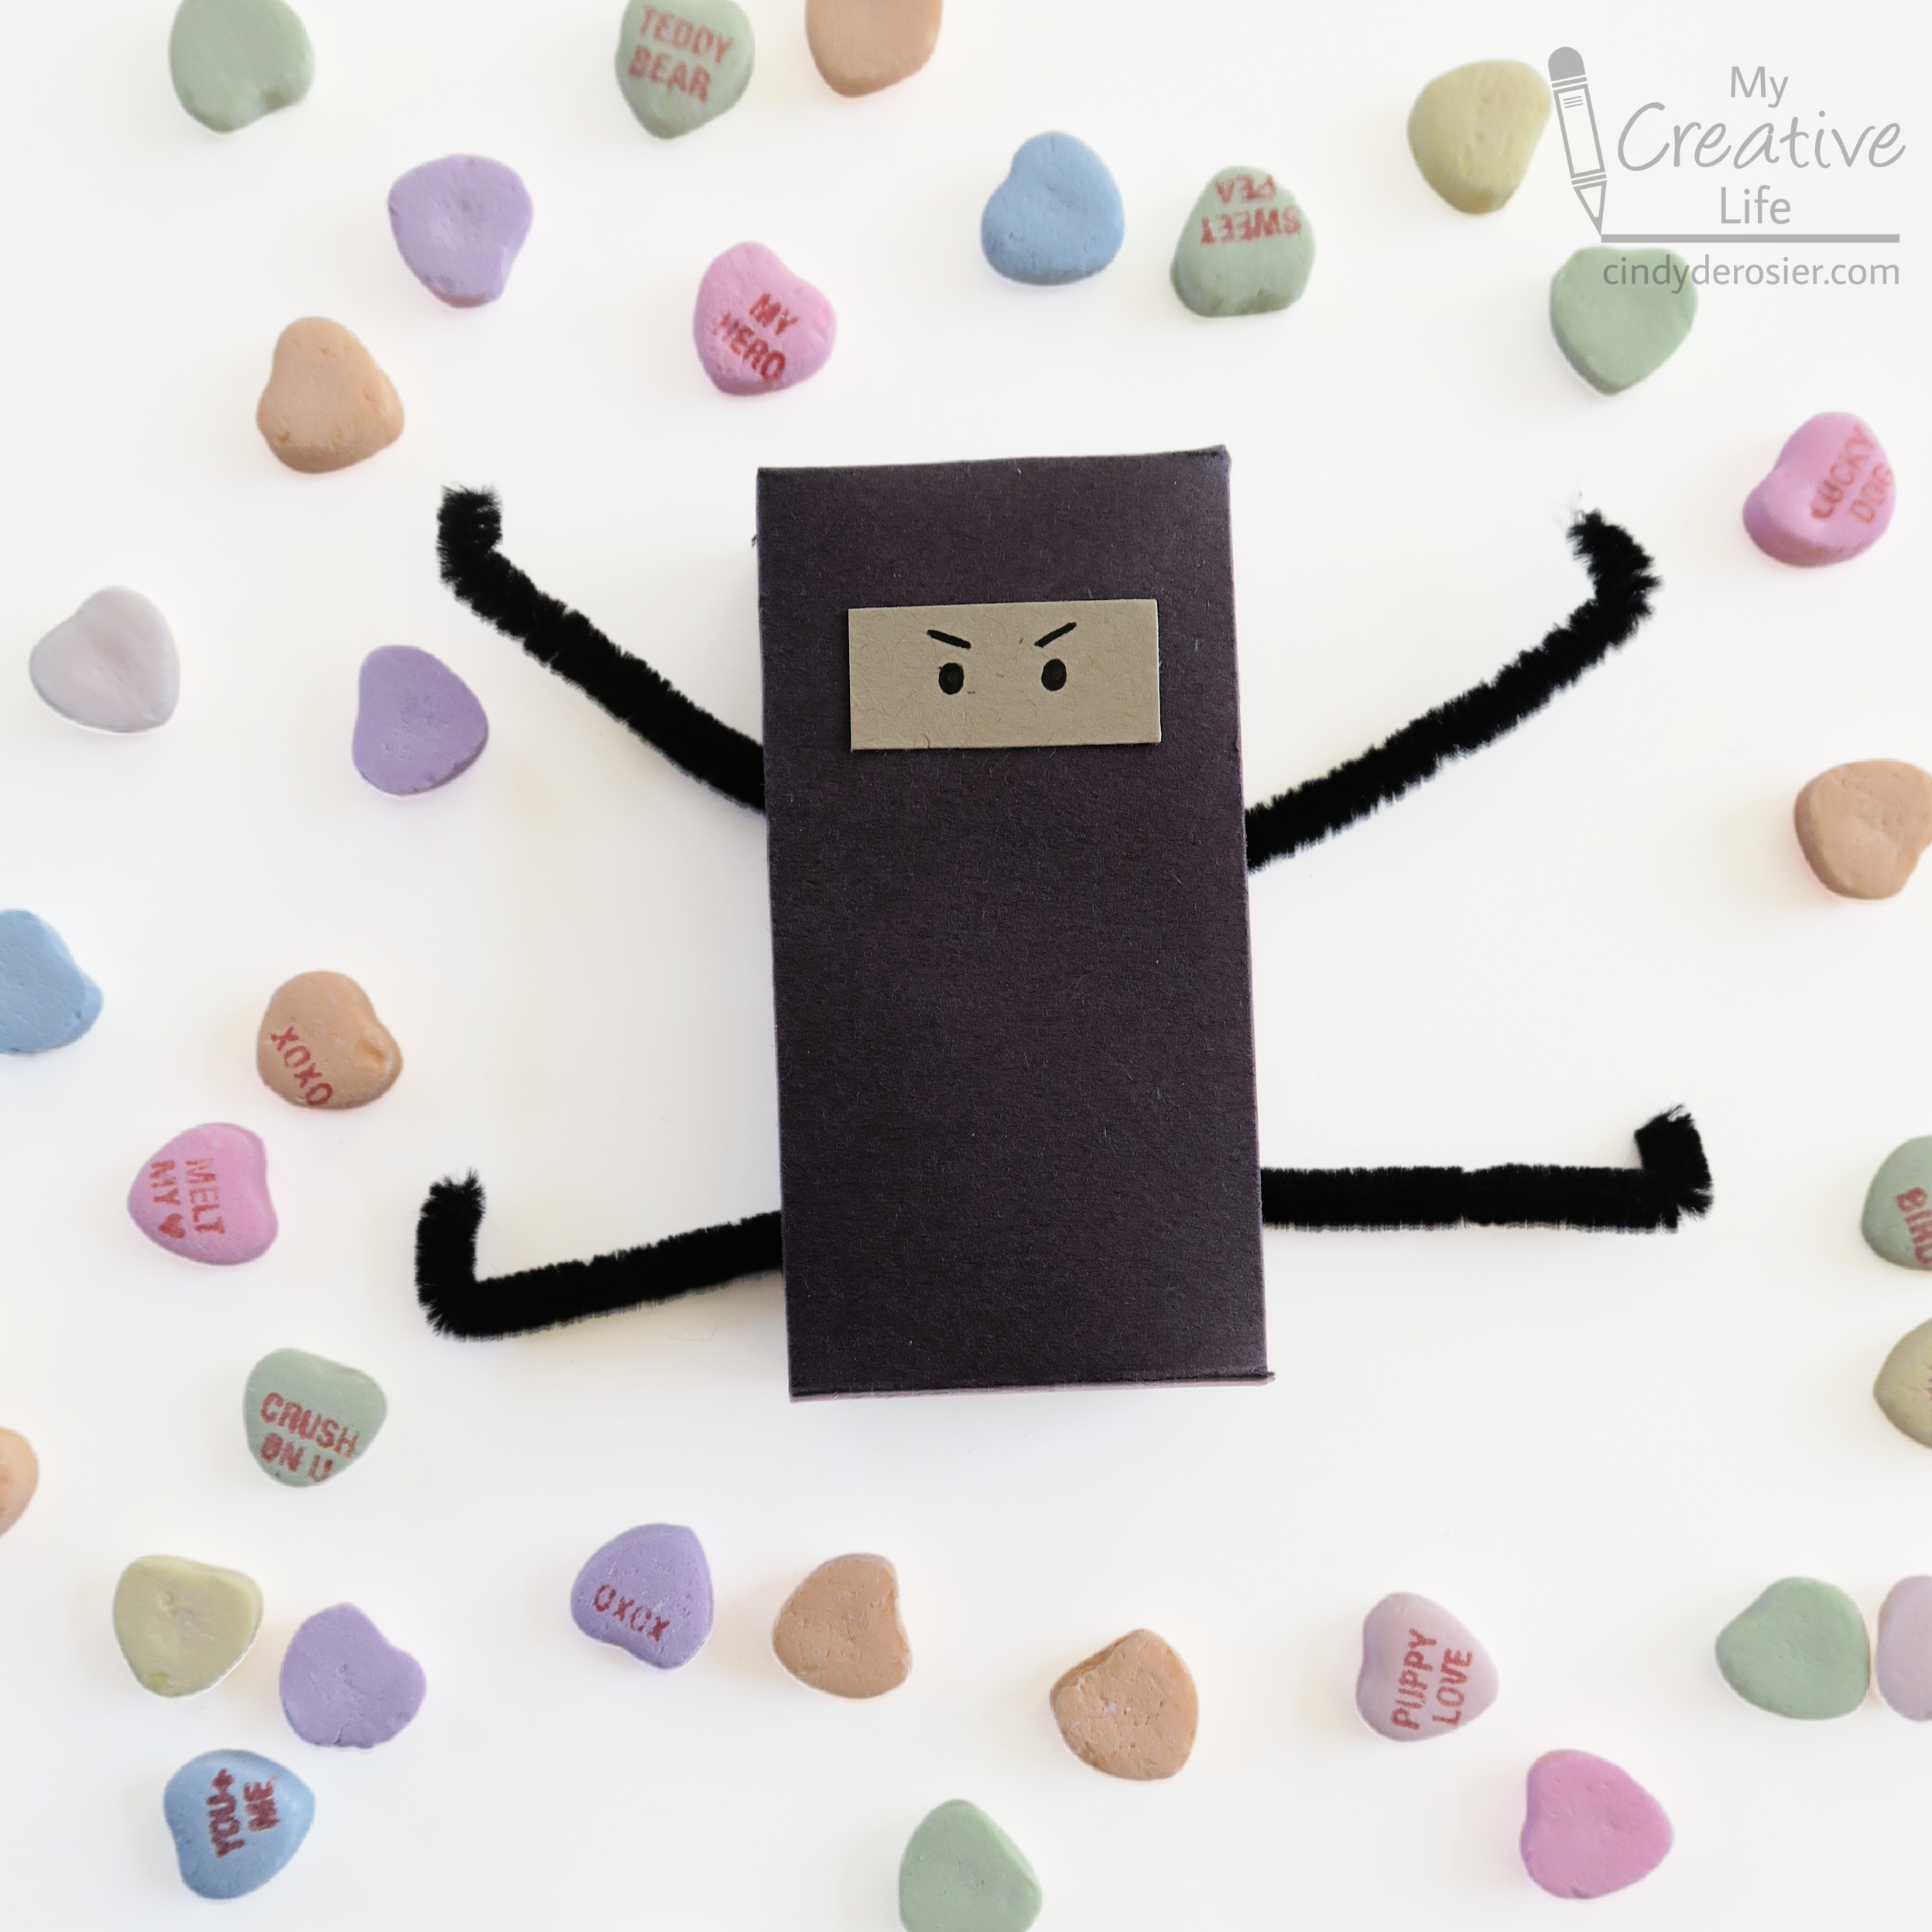
Conversation Hearts Ninja Valentines

I miss the days when Trevor would make cute homemade valentines for all of his friends. I was thinking back to the Ninjago valentines he made in first grade, which inspired me to make a new version of ninja valentines. They start with a box of conversation hearts, which gave me a great excuse to buy conversation hearts. They're one of my favorite candies. 

Hi-ya!


Ka-pow!


Not only are they cute, but posing them is ridiculously fun. Affiliate links below. 

---------


Conversation Heart Ninja Valentines


Materials: 


Steps: 


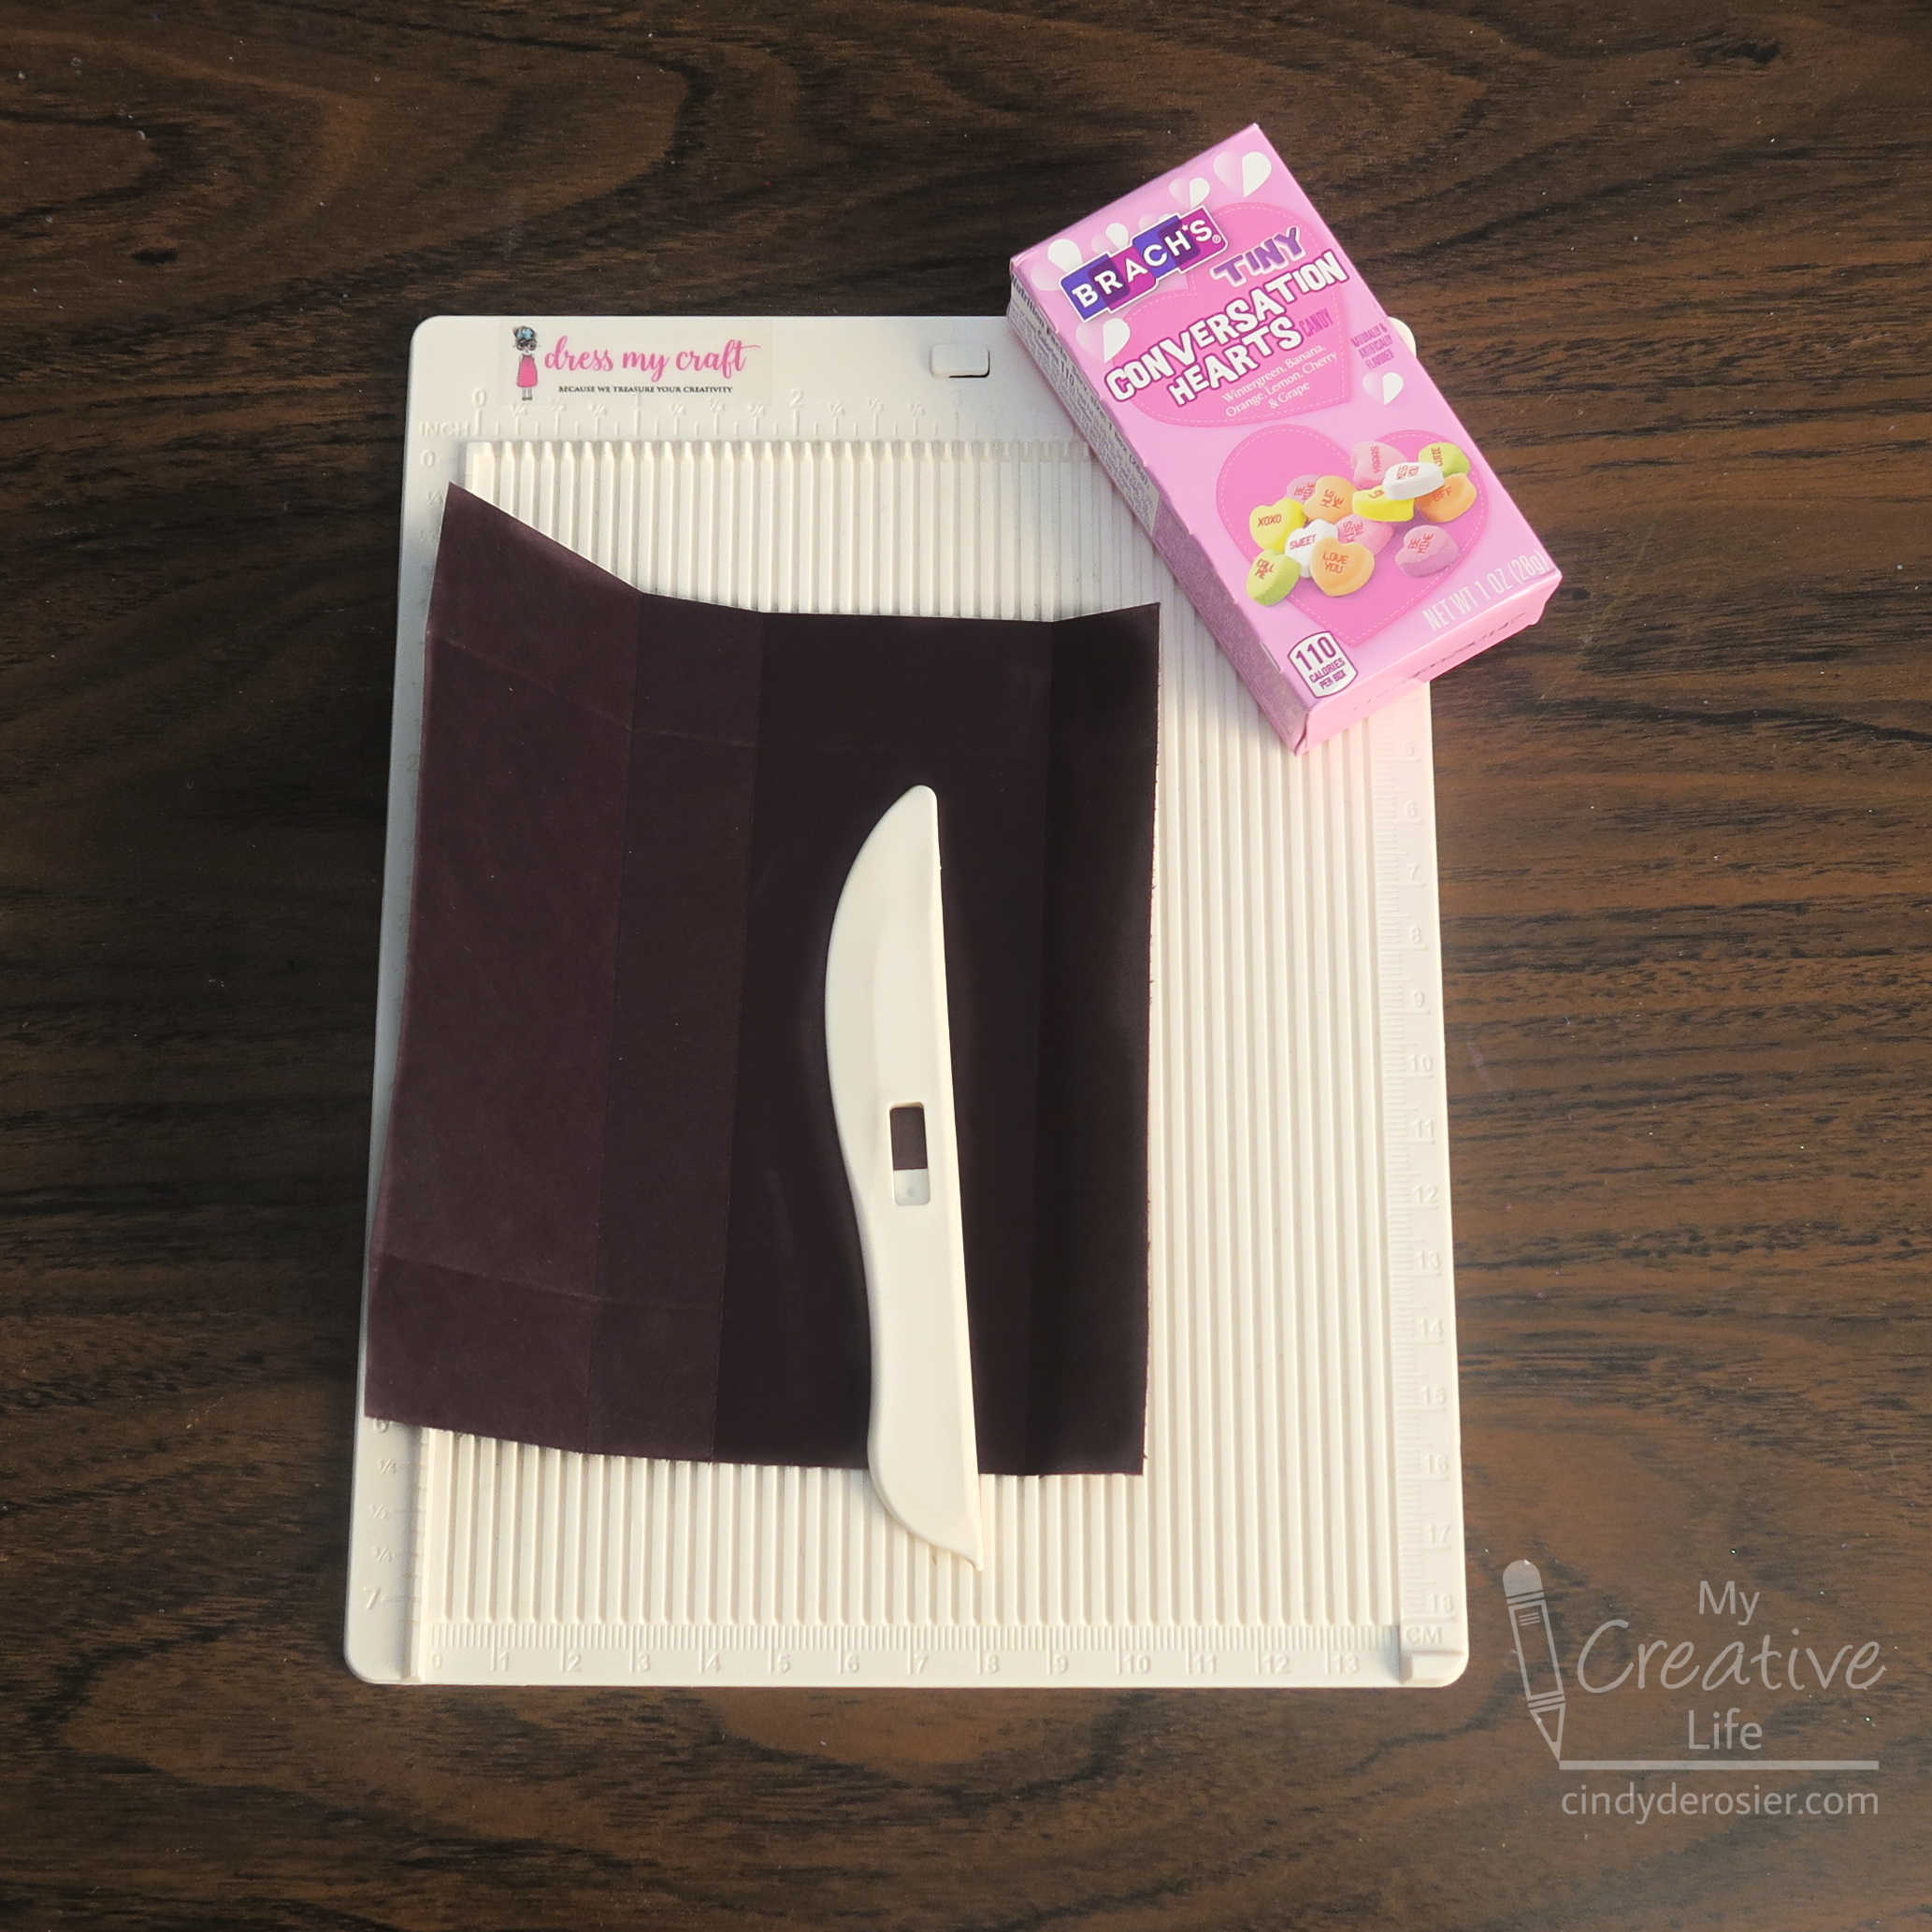
Wrap the box in black cardstock or construction paper. You can simply wrap it like you'd wrap a present, or you can measure, cut a rectangle to size, and score it along the fold lines to get crisp edges. I prefer that look, so that's what I did. 


Secure the paper with the black painters tape, or glue it directly to the box with craft glue. I used tape. Cut a rectangle from your desired skin tone cardstock, then draw on eyes and eyebrows. Glue the rectangle to the box. 

Cut a pipe cleaner in half, then bend each half in half. Bend the ends to form the hands and feet, then position the arms and legs how you want them. Use several pieces of tape to secure them to the back of the box. 

You can give your ninjas as is. But if you want to write a message and/or include to/from information, write it on a label sticker, then attach to the back of the box. This has the added benefit of further securing the arms and legs.

10/14/22

Vampire Fang Treat Bags

If you're one of those weirdos who hates candy corn, or if you can't get behind the idea of candy-coated candy, today's craft isn't for you. Feel free to check out my other Halloween craft ideas

Still with me? Good! Because if you think adding a candy coating to candy is fine, you're probably also fine with giving out edible bloody vampire teeth on Halloween. You're my kind of people. Affiliate links below. 


Vampire Fang Treat Bags


Materials:


Steps: 


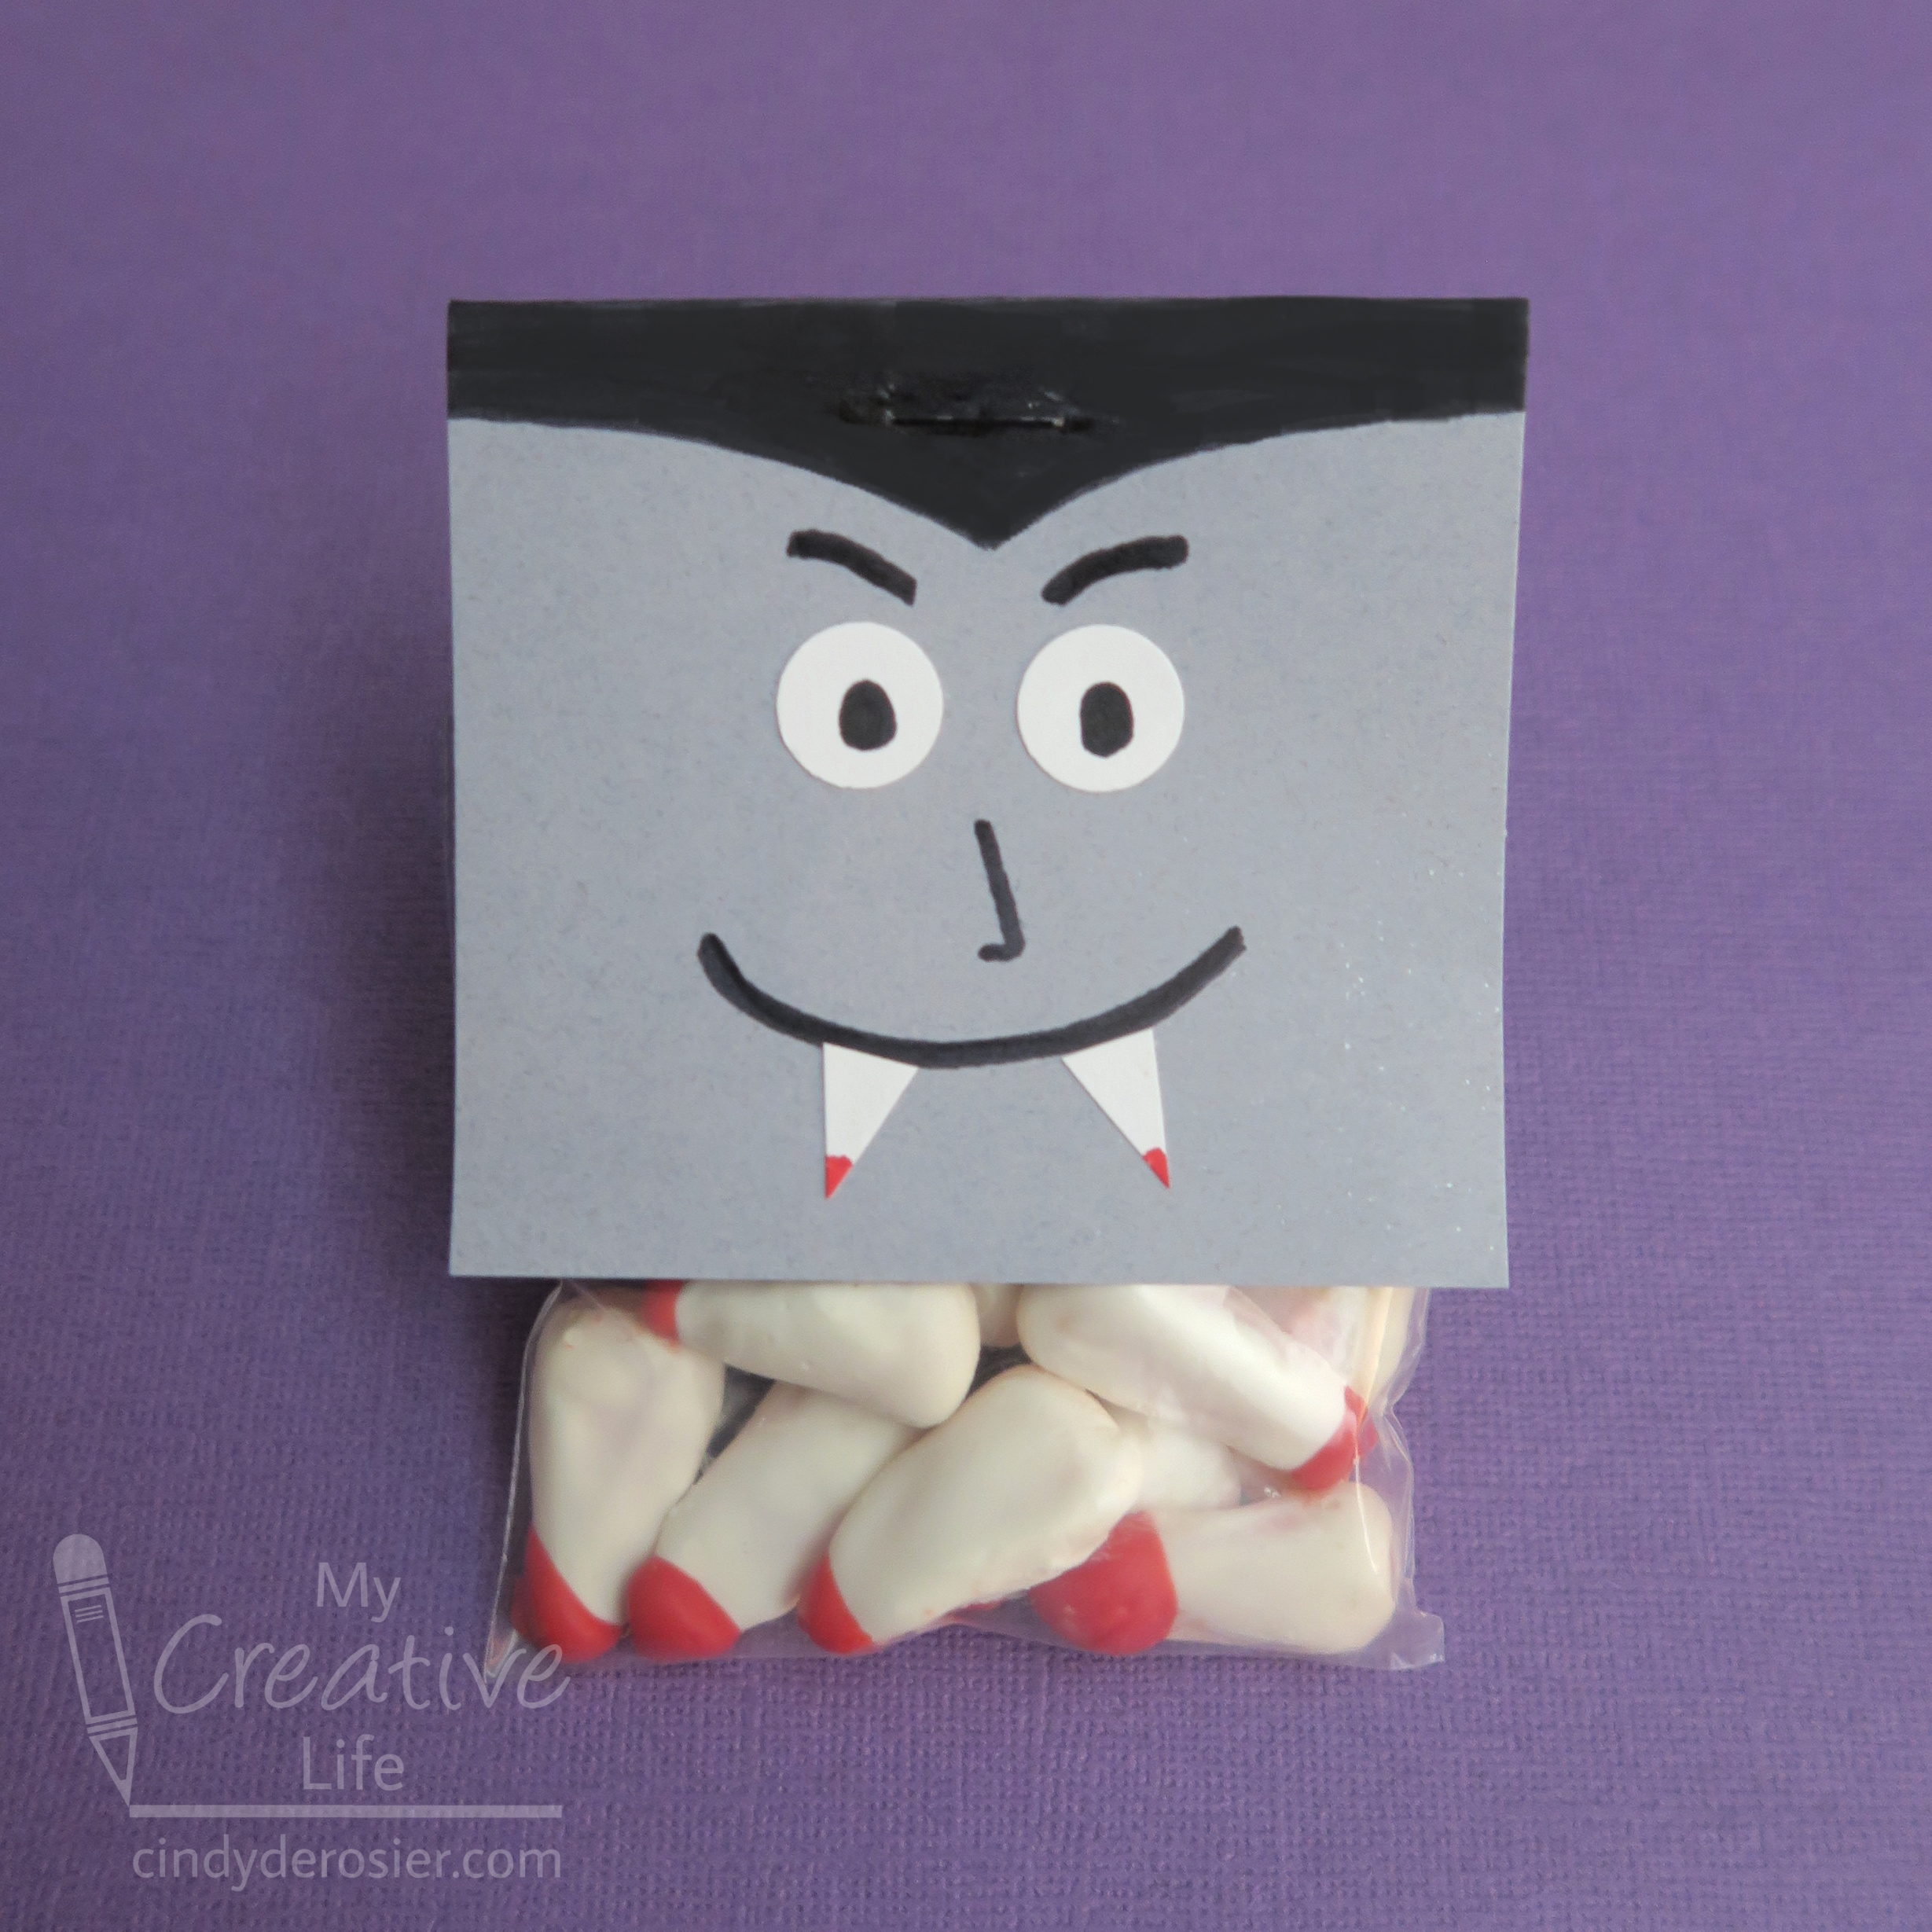
Melt the white candy according to the package instructions. Coat the candy corn with the melted candy and let the excess drip off, then set it on a piece of parchment paper. 


When the candy is completely set, melt a small amount of red candy and dip just the tips. Allow the candy to set completely. Put about 12 fangs into each treat bag, then set them aside. 

Cut one 3" x 6" rectangle for each vampire you're making. Fold the paper in half so that the face is a 3" x 3" square. Punch two eyes from the white cardstock, then cut out two tiny triangular fangs. Use the black pen to draw the vampire's widow's peak, using the fold line as a guide. Draw pupils on the eyes. Add a tiny bit of red to the ends of the fangs.


Glue the eyes to the face, then draw eyebrows, a nose, and a smile with the black pen. Glue the fangs in place. Staple the treat toppers to the bags of candy fangs and you're ready to dispense your candy-covered candy.

If you need another idea for an edible vampire craft, be sure to check out my Dracula Smores!

10/13/22

Pineapple Sunflowers

One of my all-time favorite treats is a wedge of fresh pineapple dipped in dark chocolate. It's a must-have at the Dole Plantation in Hawaii. My latest edible craft takes that amazing flavor combination and adds a salty component and an unexpected crunch from sunflower seeds. Because the pineapple rings are dried, this delicious dessert is easy to make year-round but is especially beautiful on a fall table. Affiliate links below.    


Pineapple Sunflowers


Materials:


Steps: 


Put a piece of parchment on your work surface, then arrange the pineapple rings on the parchment. Put a lollipop stick behind each pineapple ring. Follow the directions on the package to melt the chocolate wafers, then spoon a small amount of chocolate into the holes in the pineapple rings. Add a generous amount of sunflower seeds on top of the chocolate (as shown in the bottom right), then cover the seeds with more chocolate. Allow the chocolate to set completely. 


I experimented with different methods of making these and recommend the directions above. You can make the sunflowers without sticks if you prefer and/or make wedges to accompany the sunflower treats. Enjoy!