Showing posts with label bread. Show all posts

2/19/24

Bread Rose Wreath

Remember the rose wreath that I made out of air-dry clay? I made an edible version (bread dough instead of clay). 


The shaping process was somewhat similar, but the bread dough was much more difficult to manipulate than the clay. Still, it was a fun experiment with delicious results. I used the same basic recipe as for the Sixty-Minute Cloverleaf Rolls, then veered off in a different direction for the shaping and baking. 


---------


Bread Rose Wreath


                                                    3.5 to 4.5 cups flour                            1 cup milk
                                                    3 tablespoons sugar                            1/2 cup water
                                                    1 teaspoon salt                                    1/4 cup butter
                                                    2 packages Fleishmann's yeast


In a large bowl, mix 1.5 cups flour with the sugar, salt, and yeast. Set it aside. Combine milk, water, and butter in a saucepan (or microwavable bowl) and heat until liquids are 120-130°F. Add the liquid ingredients to the dry ingredients and beat at medium speed for two minutes, scraping bowl occasionally. Add 0.5 cup flour and beat at high speed for two minutes. Stir in enough additional flour to make a soft dough. Turn out onto a floured board and knead until soft and elastic, approximately 5 minutes. Place in a greased bowl, turning to grease top. Cover, then place in a warm place (approximately 98°F) for 15 minutes. 

Turn the dough out onto the floured baking mat. Divide dough in quarters, then divide each quarter into three equal pieces. You should have 12 balls of dough, each the same size. Roll 9 of the balls into long ropes, approximately 18" long. Braid three ropes together. 


Curl the braid into a wreath and place it on a Silpat-lined baking sheet. Repeat with the other 6 ropes to make three wreaths in all. 

Divide each remaining dough ball into 9 pieces. Roll the pieces into balls, then smoosh them with the ball of your hand to make petals. 


Pick up one petal, then roll it up to form the inside of the rose. Pick up the next petal and roll it around the center of the rose. Continue the process with the rest of the petals. Place the finished rose on the baking sheet.  

Loosely cover the dough and let rise in a warm place, for approximately 15 minutes. Meanwhile, preheat the oven to 425°F. Bake for 15, then check the roses for doneness. Remove them from the oven and bake the wreaths for another 10 minutes or until done. While the wreaths are still hot, nestle the roses into the wreaths. Let the bread cool on a wire rack for at least 10 minutes. 


Shop my affiliate links! 

                                  Silpat                                            Sili Bake                                         Fleischmann's Yeast

1/16/24

Sixty-Minute Cloverleaf Rolls

Considering that bread is my favorite food of all time and I love making it, it's strange that I haven't shared most of my bread recipes here. Time to change that! These are my go-to rolls for holiday get-togethers. They're really easy to make and taste delicious, especially just out of the oven.  


This recipe, as well as many of my other favorite bread recipes, come from Fleishmann's Bake-It-Easy Yeast Book. That's an affiliate link. I'm shocked to see it available on Amazon, since I got my copy when I was a teenager and it wasn't newly written then. I don't see a publication date in mine, but according to the Amazon listing, my cookbook and I are the same age (51)!


---------


Sixty-Minute Cloverleaf Rolls


                                                    3.5 to 4.5 cups flour                            1 cup milk
                                                    3 tablespoons sugar                            1/2 cup water
                                                    1 teaspoon salt                                    1/4 cup butter
                                                    2 packages Fleishmann's yeast


In a large bowl, mix 1.5 cups flour with the sugar, salt, and yeast. Set it aside. Combine milk, water, and butter in a saucepan (or microwavable bowl) and heat until liquids are 120-130°F. Add the liquid ingredients to the dry ingredients and beat at medium speed for two minutes, scraping bowl occasionally. Add 0.5 cup flour and beat at high speed for two minutes. Stir in enough additional flour to make a soft dough. Turn out onto a floured board and knead until soft and elastic, approximately 5 minutes. Place in a greased bowl, turning to grease top. Cover, then place in a warm place (approximately 98°F) for 15 minutes. 

Turn the dough out onto the floured board. Divide dough in half, then in half again, then in half again. Divide each portion into three equal pieces. You should have 24 balls of dough, each the same size.

I like to weigh my pieces to see how accurate my dividing is. It's not necessary, but your rolls will bake evenly if they're the same size, so it's worth the extra few minutes. I put a piece of plastic wrap on my kitchen scale, weigh each piece, then adjust as needed. I've made these hundreds of times, so I'm fairly accurate. 


Shape each roll into a ball and place it in a greased muffin tin. Use kitchen shears to snip each roll in half, then in half the other direction. Cut almost to the bottom of the rolls. 


Cover; let rise in a warm place for about 15 minutes. Bake at 425°F for 12 minutes or until done. Cool on wire racks. 


Yum! There's nothing better. 

4/20/22

Bake and Be Blessed - Streamlined (No-Knead) White Bread

I recently finished reading a book I thoroughly enjoyed, called Bake and Be Blessed (affiliate link here and throughout the post). Trevor received it during his Confirmation and I finally got around to reading it. It's an unusual book in the best of ways and I wish I'd read it sooner. 

Bake and Be Blessed was written by Dominic Garramone, who successfully merged careers as a Catholic monk, priest, PBS star, and cookbook author. Father Dominic has an excellent writing style and is an interesting person, to say the least. He got a degree in theater before becoming a monk and now has two masters degrees.  


Bake and Be Blessed is part spiritual guide, part cookbook, and part memoir. While I am not Catholic, I found his teachings and reflections to be relevant and helpful. His recipes are appealing, his baking techniques informative, and his personal stories are very interesting. It's a quick read, yet promotes deep thinking. 

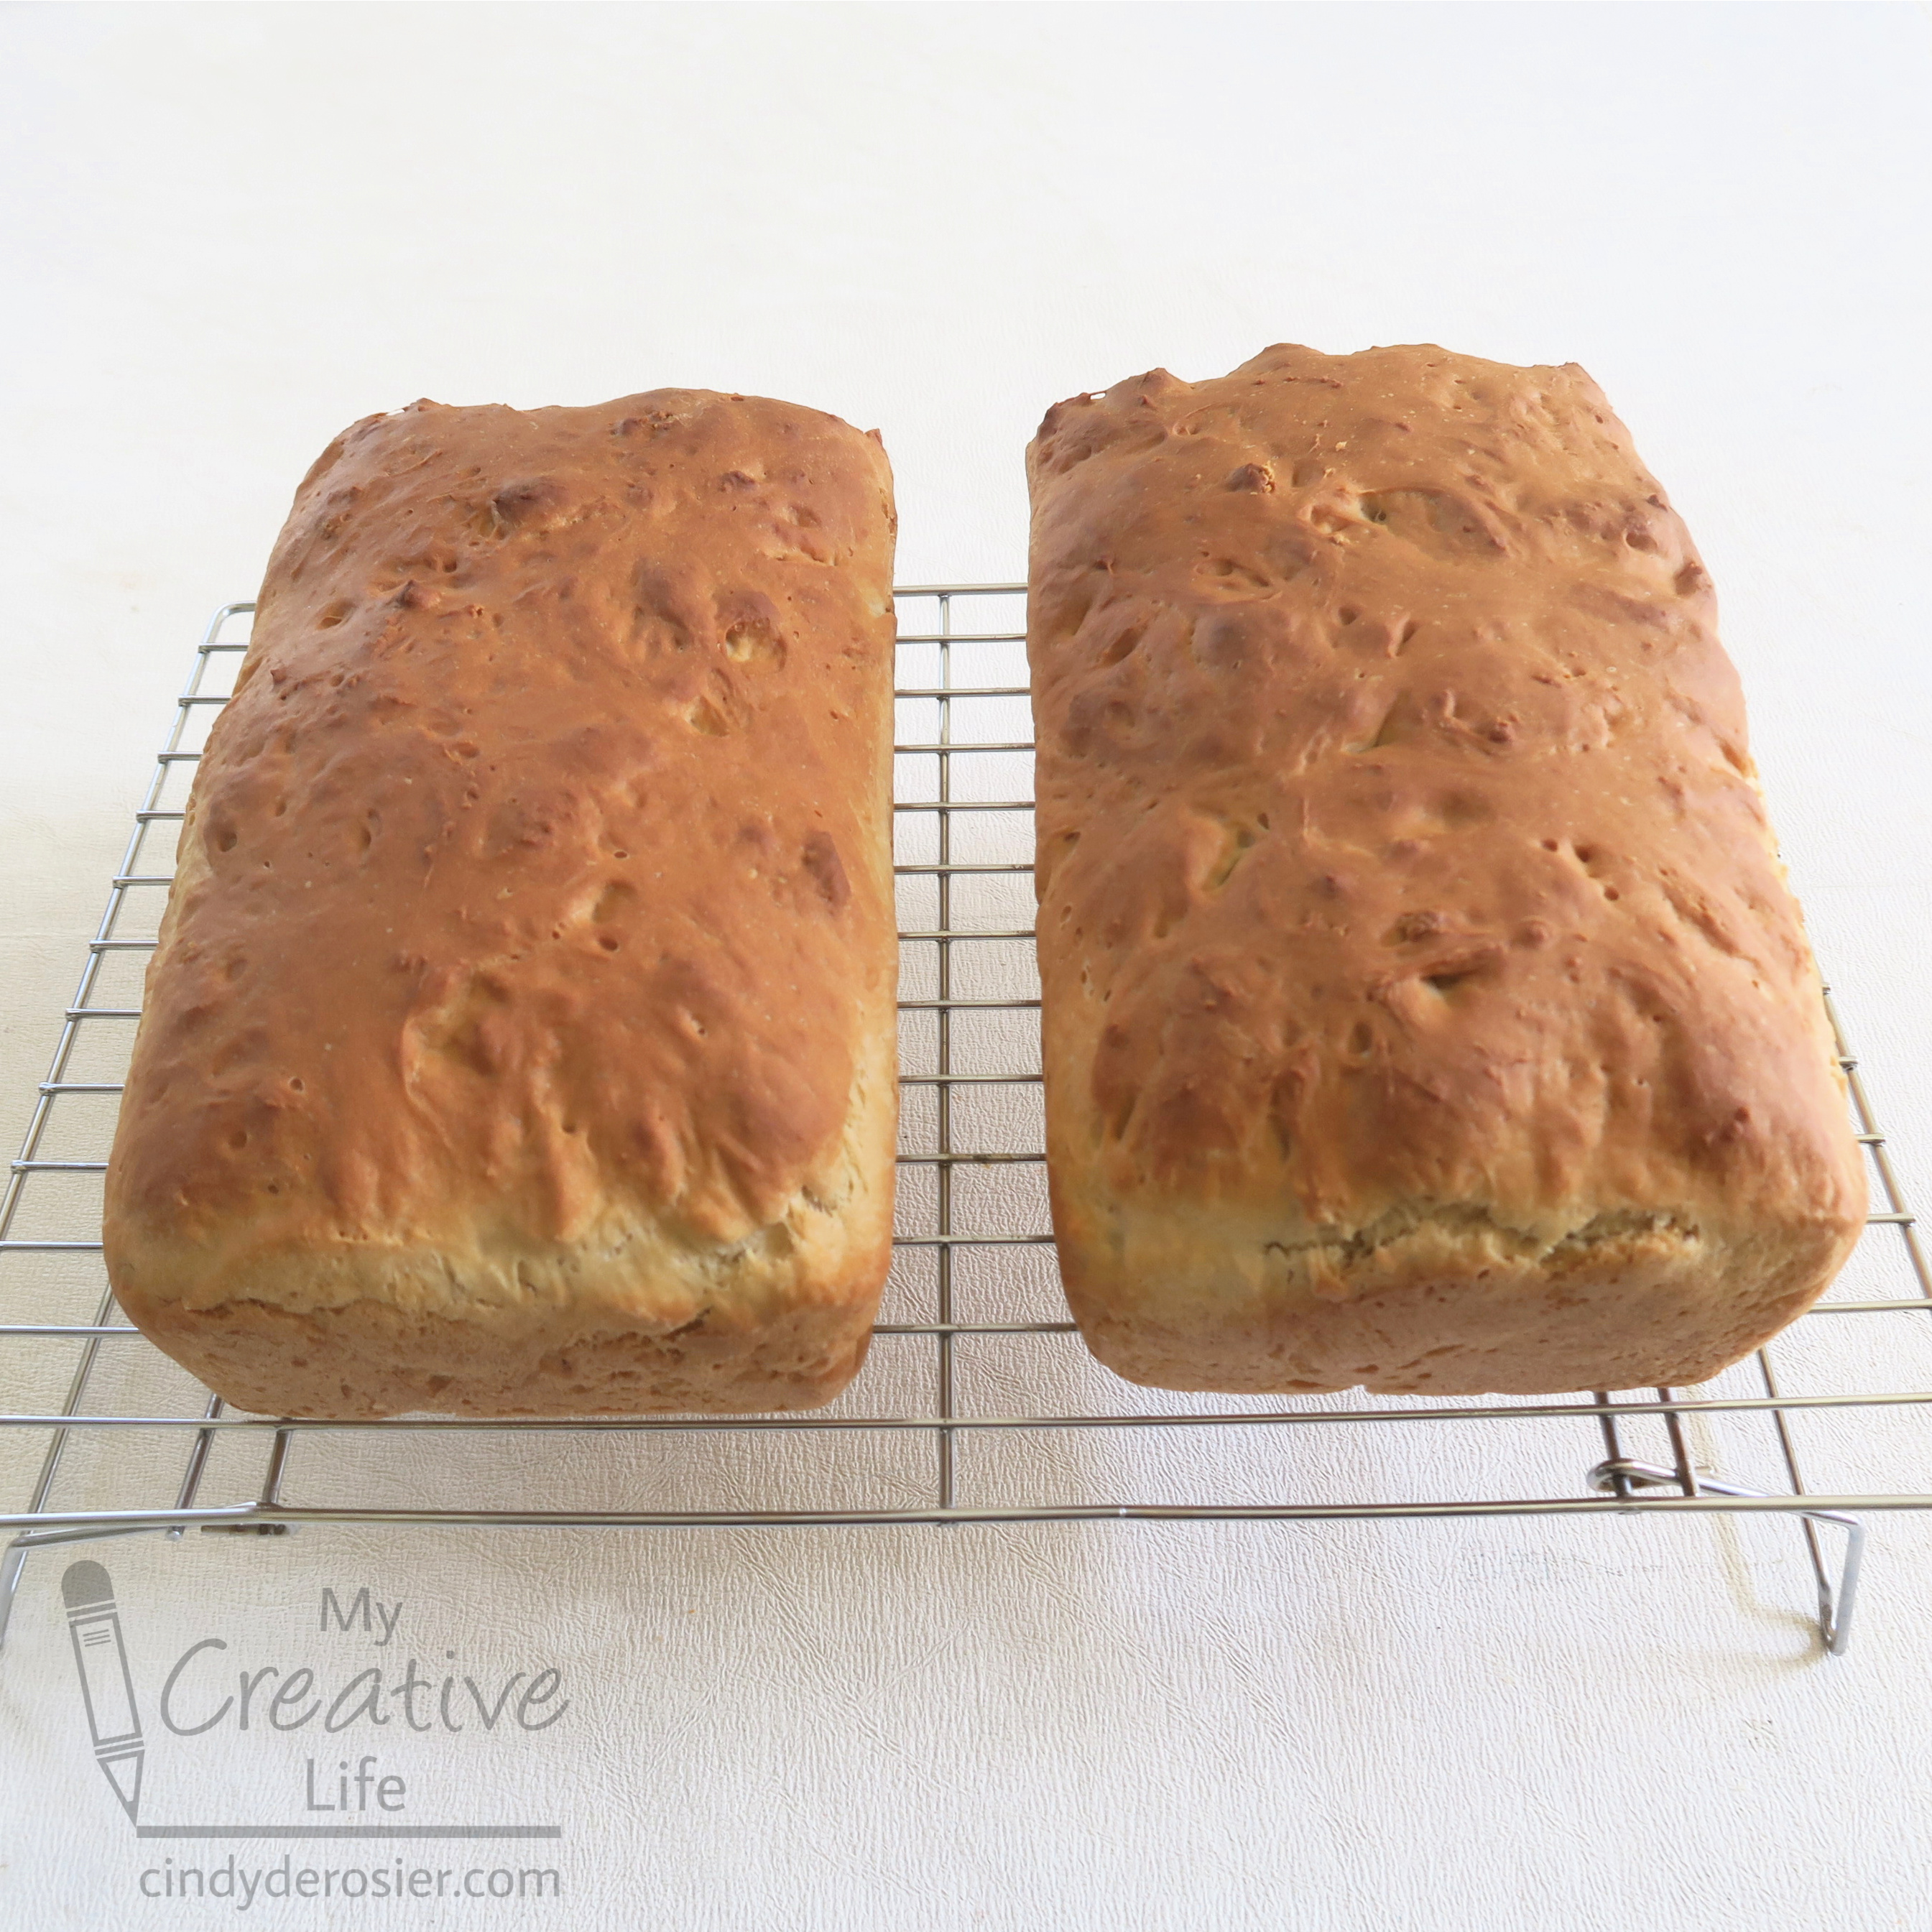
There aren't very many recipes in the book - only 6, I think. I started with Father Dominic's recipe for Streamlined White Bread. This yeast bread is beaten rather than kneaded, so there is less active time involved. It felt very strange spreading a yeast batter into pans rather than kneading a soft dough and forming it into beautiful loaves. This is how my bread look just after I put it in the pans. (They're sitting on a plant stand in a sunbeam to rise.) 


I didn't have a lot of hope that those jagged tops would smooth out beautifully when the bread baked. Indeed, I was correct. The finished bread will not win any beauty contests. 


It might win a taste contest though. This bread is delicious and has a great crumb. The recipe below makes one loaf. I doubled it, because two loaves are better than one and there's no extra effort. 


Streamlined White Bread

by Fr. Dominic Garramone


1 pkg. active dry yeast
1 1/4 c. warm water
2 T. vegetable oil
1 tsp. salt
2 T. granulated sugar
3 c. all-purpose flour

Sprinkle the yeast over warm water in a medium bowl; stir to dissolve. Let stand until foamy. Add oil, salt, sugar, and half of the flour. Using a heavy wooden spoon, beat 200 strokes (or beat on medium speed of an electric mixer about 2 minutes). Add remaining flour and stir until thoroughly incorporated. Cover bowl with a clean cloth and let rise in a warm, draft-free place for about 30 minutes, or until doubled. 

Beat the batter about 25 strokes, then spread evenly in a lightly greased 9x5x3-inch loaf pan. Let rise, uncovered, 30 to 40 minutes, or until the batter just reaches the top of the pan. (Do not allow to over-rise or the bread will collapse during cooling.)

Bake in a preheated 375-degree oven 45 to 50 minutes or until loaf is browned and sounds hollow when tapped on the bottom. Let cool on a wire rack. 

12/4/20

Tangerine Bread Rolls

I've been making a lot of bread during the pandemic, occasionally venturing beyond my tried and true recipes to experiment. These sweet rolls have a hint of tangerine. Paired with a sweet and tart whipped cream spread (featuring this must-have secret ingredient), they're heavenly. 


Tangerine Bread Rolls


                                                                1/4 c. butter                            3 c. flour
                                                                1/4 c. milk                                1 1/2 tsp yeast
                                                                1/4 c. tangerine juice             1/2 tsp salt
                                                                2 T tangerine zest                   2 T sugar, plus extra for rolling
                                                                2 eggs


Heat the butter and milk until they reach 110°F. Stir in the tangerine juice, beating until well-combined. Add the zest and the eggs. Stir in 1 cup of the flour, the yeast, the salt, and 2 T sugar. Beat for 2 minutes at medium speed. 

Stir in the remaining flour in 1/2 cup increments until the dough is soft. Turn it out onto a lightly floured board and knead until smooth and elastic, approximately 10 minutes.  Place the dough in a lightly greased bowl, cover with plastic wrap, and let rise for 1 hour or until doubled. 

Punch the dough down, then divide it into 12 pieces. Shape each into a ball, roll them in the extra sugar, and place them in a greased 9" round cake pan. 


Cover loosely with plastic wrap and let rise again for an hour. Remove the plastic wrap, then bake the rolls at 350°F for approximately 30 minutes or until golden brown. 


These rolls are fantastic as is, warm from the oven. But for an especially decadent treat, whip up this tangy sweet spread. 

1 c. whipped cream
1 c. powdered sugar
1 tsp. tangerine juice
citric acid* to taste, just a sprinkle (affiliate link)
1 tsp. tangerine zest

Fill a small ramekin with whipped cream, then set it aside. In a separate bowl, combine the powdered sugar and tangerine juice. It should be the consistency of a syrup; adjust as needed with juice or powdered sugar. Sprinkle in some citric acid. Spoon the syrup over the top of the whipped cream, then sprinkle with zest. To eat, spread with a knife or dip pieces directly in.  

---------

*Citric acid is a magic ingredient. A tiny sprinkle of it will provide a subtle boost of flavor to all sorts of drinks, desserts, and other dishes; add more and you get a delicious tart bite. Roll homemade candies in it for an extra-sour experience that rivals the most tart commercial candies. It basically keeps forever, although once you have it, you'll start finding more and more uses for it!

11/6/20

Glazed Flower Rolls

I enjoy making bread from scratch, but tend to make the same favorites over and over. That's not an issue; I've made enough bread in my life to have a half-dozen tried and true recipes that I love and I don't have too much incentive to mess with perfection. 

That said, it is fun to use the same bread dough to create different shapes. This week, I challenged myself to come up with a new shape using the same dough as Rose Rolls. I ended up with these glazed flower rolls. 


To make them, I followed the recipe for Rose Rolls until the shaping step. Instead of making coils, I made rounds. Then I used kitchen shears to snip straight down six times on each roll, making the cuts an equal distance apart to form the petals. I gently pushed the petals, then rolled a small ball of dough to place in the center. 


This is how the rolls looked after baking:


When they were completely cool, I put the rolls on a wire rack, made a simple powdered sugar glaze, added food color, then drizzled it over the rolls. 


I am kicking myself for not adding LorAnn flavor extracts (affiliate link here and below) to the glazes. I have 6 or 7 flavors and they are awesome. I particularly love the raspberry and lemon extracts, which would be perfect for the red and yellow rolls. I'm thinking grape for the purple, strawberry kiwi for the pink, and orange cream for the orange. Yum! 


In searching for the LorAnn affiliate link, I discovered that LorAnn sells 'You Choose' packs ranging in size from 2 dram bottles to 100 dram bottles! While I don't think I can justify getting 100 bottles (even though they're much cheaper in larger quantities), I will be putting one of the smaller 'You Choose' packs on my Christmas wishlist for sure. I think it will be a lot of fun to see what flavors someone would pick for me (hint: not banana). There are so many things you can flavor with these oils: water (no calories, lots of flavor!), lollipops and other hard candies, frostings, and baked goods. 

You can see a list of all the flavors in the third photos for the 100 dram bottles listing. Tell me in the comments what flavors you've used or which you'd most like to try!

10/2/20

Sweet Strawberry Snakes

Care for a sssweet ssstrawberry sssnake? They're delissssious and ssso sssatisfying!


They're made from the same dough as Rose Rolls. Just follow the steps through dividing the dough into 18 pieces. 

Roll each piece into a long, thin rectangle. Spread a small amount of jam in the center, then roll up the dough like a jelly roll. Place the snake, seam side down, on a baking sheet. You can see from the picture that I didn't use a Silpat (affiliate link). I should have. Learn from my mistake. 


Cover the snakes loosely with a clean towel and let them rise in a warm place for 30 minutes. Bake at 400°F for 12-15 minutes. Remove from baking sheets and cool on wire racks.

When the snakes are completely cool, add a small amount of orange juice to powdered sugar to make a glaze. Place the wire rack back over the now-cool Silpat-covered pan and drizzle the glaze over the top of the snakes. You can leave the glaze clear (like the two snakes at the bottom of the photo) or add food color. I experimented with two different ways to get bands of color. For the red and grey snake, I coated it entirely in grey, let that set, then dripped red glaze on top to make the stripes. For the green and grey snake, I made grey bands then immediately added bands of green in between the grey. Both worked, but gave different looks. 


Did you notice my green-stained fingers above? Oops. 


When the glaze is completely dry, arrange the snakes on a platter to serve. The sweet bread dough with the strawberry filling and citrus glaze is irresisssssstible!


Ssssseriously delissssious. 

9/21/20

Baseball Sandwiches

They say that when you have a hammer, everything looks like a nail. Well, when you have Food Writers (affiliate link here and throughout the post), everything edible looks like a canvas. It only took a few minutes to turn my ordinary sandwich rolls into baseballs. I added peanuts and popcorn to the plate to create a baseball-themed lunch for the three of us. 


I made my rolls from scratch, using the recipe for 60-Minute Rolls from Fleischmann's Bake-it-Easy Yeast Book. But you can just as easily use store-bought rolls. It couldn't be easier - just draw stitch marks curving around either side of the roll. 


Then slice the rolls and add your sandwich fixings. Be sure to line up the stitching when you put the sandwiches together. 


Looking at this photo makes me want a frozen chocolate malt (eaten with the wooden paddle). That was my go-to ballpark snack when I was a kid... and still is on the rare occasion I attend a baseball game. I've never even checked to see if they're for sale anywhere besides a ballpark. I don't think they'd taste nearly as good anywhere else. 


Sixty-Minute Rolls


                                                            3 1/2 to 4 1/2 c. flour               1 c. milk
                                                            3 T. sugar                                    1/2 c. water
                                                            1 tsp. salt                                    1/4 c. butter
                                                            2 pkgs. yeast

Mix 1 1/2 c. flour, sugar, salt, and yeast in a large bowl. In a separate container, heat milk, water, and butter until very warm (120°-130°F). Add the liquids to the dry ingredients. Beat at medium speed for 2 minutes, scraping bowl occasionally. Add 1/2 c. flour, then beat at high speed for 2 minutes. Stir in enough additional flour to make a soft dough. Turn the dough out onto a lightly floured pastry mat; knead until smooth and elastic, about 5 minutes. Place in a greased bowl, turning to grease top. Cover and let rise in a warm place for 15 minutes. 

Turn out dough onto the floured mat. Divide it into 12 equal pieces. Form each piece into a ball and place on a Silpat-lined baking sheet. Cover loosely with a clean towel and let rise in a warm place for 15 minutes. Bake at 425°F for 12 minutes. Remove from baking sheets and cool on wire racks.  

9/15/20

Breakfast Rose Rolls

Yesterday was all about faux breakfast. How about the real thing today? I've been making these Rose Rolls since I was a kid. 


After we evacuated last month, I realized that I didn't think to bring my favorite cookbooks or folder of treasured recipes. Several dozen of them are preserved digitally on My Favorite Recipes page, but others could have been lost to me forever. For that reason, I'm going to make an effort to post more of my very favorites here.

Fleischmann's Bake-It-Easy Yeast Book (affiliate link here and below) is far and away my favorite bread cookbook. The recipe for Rose Rolls comes from it, though I've made a few small changes over the years. Here's my version:


Rose Rolls


                                                    3 1/2 to 4 1/2 cups flour                      1 1/4 cup water
                                                    1/2 cup sugar                                         1/2 cup butter
                                                    2 tsp. salt                                                1 egg
                                                    2 packages yeast                                   assorted jams and jellies
                                                    1/4 cup powdered milk                        powdered sugar


Combine 1 cup flour, sugar, salt, yeast, and powdered milk in a bowl. Heat the water and butter until they are very warm (120°-130°F). Add liquids to the dry ingredients. Beat 2 minutes at medium speed, scraping the bowl occasionally. Add the egg and another 1/2 cup of flour. Beat on high for 2 minutes. Add enough additional flour to make a stiff dough. Wrap the dough tightly with plastic wrap and refrigerate 2 hours or overnight. 

Place the dough on a lightly floured mat and divide it into 18 equal pieces. Gently roll each piece into a rope, then wind it loosely to form a coil, tucking the end underneath. Place each coil about 2 inches apart on a Silpat-lined baking sheet. 


Cover loosely with a clean towel and allow the rolls to rise in a warm place, free from draft, until doubled (about 1 hour). 

Use your thumb to make 1" indentations into each coil, pressing to the bottom. Fill the holes with your choice of jams and jellies. Bake at 400°F for 12-15 minutes. Remove from baking sheets and cool on wire racks. 

When the rolls are completely cooled, add a tiny bit of water to powdered sugar to make a glaze. Drizzle each roll with glaze. 


Allow the glaze to set, then serve. 


Trust me. These rolls are amazing. 

8/17/20

Pilgrim Loaf

It's no secret that I love bread. There are plenty of foods that I like, but none that I love as much as bread. I made a Pilgrim loaf for the first time in a long while and I'm kicking myself for not making it more often. It is fairly quick and easy to make and so, so delicious. 


Pilgrim Loaf


3 1/2 - 4 1/2 c. flour                            2 T. vegetable oil
1/2 c. cornmeal                                    2 T. molasses
2 1/4 tsp. yeast                                     2 T. honey
1 tsp. salt                                               1/2 c. chopped pecans
1 c. water


Combine 3 c. flour, cornmeal, yeast, and salt in a large bowl. In a separate bowl, heat water, oil, molasses, and honey until very warm (125°-130°F), then add to the dry ingredients. Stir in nuts, then add enough flour to make a soft dough. Knead on a lightly floured surface for 8-10 minutes, or until the dough is smooth and elastic. Cover with a clean towel and let rest for 10 minutes. 

Press the dough into a 9" circle. Fold the dough in half, slightly off center, so that the top layer sits approximately 1" from the bottom edge. Use a sharp knife to make four equally-spaced cuts from the curved edge toward the folded edge, cutting through both layers. Place a Silpat on a baking sheet and sprinkle with 1 T. cornmeal. Place the loaf on the baking sheet, cover it with the towel, and let in rise in a warm place until doubled in size, approximately 45 minutes. 

Bake at 375°F for 40 minutes. Remove from the sheet and cool on a wire rack. 


This bread is hearty, dense, and deeply flavorful. It's great for sandwiches, with dinner, or on its own. 


6/25/18

Banana Split Bread

I recently discovered some overripe bananas I'd thrown in the freezer months ago. The three of us don't love bananas, but when we do eat them, we prefer them to be barely yellow. Trouble likes them fully yellow, but rejects them when spots appear. So into the freezer they go. Obviously, overripe bananas means banana bread. I decided to experiment and see if I could come up with a bread that used the bananas but had other flavors that we prefer more than bananas. I dug around in the fridge and pantry and found strawberries, crushed pineapple, maraschino cherries, and mini chocolate chips. Put them together and you get Banana Split Bread!


I thought I might have invented something unique, but a quick Google search revealed that I am not even close to the first. It's already a thing. Great minds think alike, I guess!

I used my favorite banana bread recipe, but replaced half the banana with crushed pineapple. Then I stirred in chopped strawberries and maraschino cherries. 


I added the fruit mix alternately with flour, baking powder and baking soda to creamed butter and sugar. 


Finally, I stirred in mini chocolate chips. Such a pretty batter!


The bread was delicious. Less banana taste (which is a good thing if, like me, you don't love bananas) and fun mix of flavors in each bite. 


---------

Banana Split Bread


                          1/2 c. butter, softened                                             5 large strawberries, chopped
                          1 c. sugar                                                                    5 maraschino cherries, chopped
                          1 egg                                                                           2 c. flour
                          1 mashed ripe banana                                             1 tsp. baking powder
                          1/2 c. crushed pineapple                                         1/2 tsp. baking soda
                          3 T. juice from crushed pineapple                          1/2 c. mini chocolate chips


Cream butter and sugar in a large bowl. Beat in egg. In a separate bowl, mash the banana. Stir in pineapple and juice, strawberries, and cherries. In a third bowl, combine the flour, baking powder, and baking soda. Add the flour mixture and the fruit mixture alternately to the creamed butter and sugar. Fold in chocolate chips. Bake at 350°F in a greased 9x5x3" loaf pan for 60-70 minutes or until a toothpick inserted near the center comes out clean. Let the bread cool in the pan for 10 minutes, then remove and cool completely on a wire rack. 


7/28/17

Native American Buckskin Bread

Back in my teaching days, I had a combination convection oven / microwave in my classroom that allowed us to do a lot of baking. Trevor's school doesn't allow ovens or even microwaves in classrooms, so there were quite a few history-related cooking projects that I wanted to do during my time with the fifth graders but couldn't. Buckskin bread is one example. 


Buckskin bread is vegan, named for the color of the finished loaf and not for any deer-related ingredients. It is a traditional food of many tribes of the Northwest and is like a dense biscuit. Native women would use plants including cattails, acorns, beans, chestnuts, or quinoa to make the flour, then the bread would be mixed with salt and water and baked over a fire. The modern version uses wheat flour and an oven.


---------

Buckskin Bread


Ingredients: 

  • 2 c. flour
  • 1 tsp. salt
  • 1 tsp. baking powder
  • 1 c. water

Steps:

  • Preheat oven to 400°F and grease a 9" pie pan. 
  • Combine the flour, salt, and baking powder in a bowl. Mix in the water. 
  • Press the dough into the pie pan. 


  • Bake for approximately 30 minutes or until the top is a very light brown. 
  • Turn the bread onto a rack to cool. 
  • Slice into wedges to serve. It is good with savory toppings or sweet things like jam. 

3/25/16

“Bread” - The Fail That Wasn't

I really enjoy trying out new recipes, even if I'm sure they're going to fail. Such was the case with a recipe simply called "Bread" that I found on Cooks.com. The ingredient list includes exactly four items: butter, sugar, yeast and milk. You don't need much baking experience to know that mixing any amounts of those four items is not going to yield anything that would traditionally be called bread. Without some sort of flour or flour-like substance, you simply can't turn yeasty, sweet, milky butter into bread. 

However, four sentences into the cooking instructions mentions self-rising flour. Aha! Now we potentially have the makings of a bread. There's no amount given (simply 'enough'), but at least bread is now possible. But several other things about the recipe gave me pause. First, it's unusual to have a recipe with yeast but absolutely no rising time. And doubly weird to mix yeast and self-rising flour in the same recipe. And even weirder to melt AN ENTIRE STICK of butter in a loaf pan, then pour it out and save it to pour on top of the dough before baking. 

Naturally, I decided to try this recipe when we'd have guests over. Dinner for 12, in fact. Because what fun is a weird recipe that can't possibly work if you don't have 11 dining companions to share it with? None, I say.

I mixed up the bread dough, opting to put in slightly over 2 cups of self-rising flour. With no guidelines for how much was 'enough', I could only make my best guess. Then I poured the melted butter over the top. I'm a big fan of butter, but this did not look promising.


I popped the bread into the oven. During the required 30 minutes, many of my guests peeked through the oven door to see if the butter-pool would somehow turn the dough into bread. No one was especially optimistic, but....


It worked! The loaf smelled amazing and had a buttery, crispy top over a biscuit-like bread. It was very rich, so I cut it into fairly small pieces and advised that no one bother buttering it. Next time I'll try a bit less butter.


I couldn't believe it. I was sure we had a Fail on our hands, but it turned out to be The Fail That Wasn't.


And my review: