Showing posts with label sports. Show all posts

8/26/26

Pop Art Hockey Craft

I was looking through my Sports Crafts for Kids page recently. I have tutorials for 30 crafts representing 14 different sports. None of those is hockey, so it was time to add a hockey craft to the collection. I decided to do my twist on a popular project inspired by the pop art movement of the 50's to 70's. Affiliate links below. 


Pop Art Hockey Craft


Materials: 


Steps: 


Carefully cut out the image of the hockey player. Layer three colors of cardstock together and use a binder clip to secure them together. 

Turn the hockey player upside down and clip it to the cardstock. Trace around the shape, then cut out all three layers at once. 


Arrange the cut images onto a piece of cardstock, with the hockey player in the foreground. Each piece should be evenly spaced and should be lined up with the direction that the athlete is moving. Glue everything in place. 

3/25/26

Tennis Racket Craft

If you've never been, I highly recommend a visit to the International Tennis Hall of Fame in Newport, Rhode Island. Tennis fans will love it, obviously, but even if you know nothing about tennis I guarantee that you will love it too. I learned so much about the sport. Tennis wasn't represented amongst the many Sports Crafts for Kids I've made over the years, so it was time to change that. 

I first played tennis in high school PE. Or maybe middle school PE. Either way, I enjoyed it, relatively speaking. In college, one of my roommates was on the tennis team. After I bought a racket, a third roommate and I would play against her, 2 against 1, and she would beat us every time. Easily. A few years later, I took tennis lessons through the city for a few months. It was fun, but I didn't end up playing again for about 15 years when 8-year old Trevor was interested in learning. He and I played a couple dozen times until he was about 10 and I haven't played since. I still have my racket though; it has the same colors as today’s craft. Affiliate links below. 


Tennis Racket Craft


Materials: 


Steps: 


Sketch a tennis racket onto a piece of chipboard. As you can see, I drew loose ovals until I found a shape I liked, then added the handle at the bottom. If you prefer, make a pattern on a piece of scratch paper or print out a picture and use that as a pattern. 


Cut out the tennis racket. To make mine symmetrical, I cut one side, then used that scrap to cut the other side. That allowed me to fix any imperfections. 


Trace the head of the tennis racket onto a piece of scratch paper, then paint the racket with your preferred color. While you are waiting for the paint to dry, plan out where you want the strings to go. I started with a line in the center, then approximately every 1/2" outward from there, giving me a total of 7 vertical strings. 

When the paint is dry, wrap pieces of colored (or plain) masking tape along the handle to make the grip. 


I had planned to poke holes in the chipboard and sew fishing line through them to make the strings. This failed. I had to use a needle with a fairly large eye in order to fit the fishing line, which threatened to tear the chipboard. I tried a couple of other ideas but eventually abandoned the ideas of holes altogether and switched to embroidery floss and glue. Do yourself a favor and go directly to the floss/glue. 


After a bunch of experimentation, I decided this is the easiest method: Use the craft pick to poke holes into your scratch paper pattern. Clip the pattern to the racket and color in each hole to mark where the strings will go. Remove the scratch paper and put a dollop of glue in that spot. Add a piece of embroidery floss, slightly longer than needed. Let the glue dry completely. 


Tape the racket to the table. Add dollops of glue along the bottom marks and stretch the floss into position. Tape the excess to the table to keep it stretched while the glue dries. Then snip off the extras. 

Repeat the same process with the horizontal strings. I thought about weaving them, but decided I didn't want to test the strength of the glue. It probably would have held. But it looks fine with the strings not woven. If you prefer accuracy, go for it! 


The finished racket!


Speaking of "racket"... as I was writing this post, I spelled it "racquet" about half the time. The more I thought about it, the less confident I was about which was correct. I looked it up. Based on what I learned, I changed my racquets to rackets. For purposes of SEO, I should probably write "tennis racquet craft" at least once in this post. There. Whether you're looking for a racket craft or a racquet craft, I hope my project inspired you to give it a try!

12/2/25

Football Helmet Christmas Tree Ornaments (or Refrigerator Magnets)

Ever since making the NFL helmet refrigerator magnets, I've been paying attention to helmet designs. I had extra wooden shapes, so I decided to paint some college teams. I turned some into Christmas tree ornaments and others into magnets. Affiliate links below.  


Football Helmet Ornaments (or Magnets)


Materials: 


Steps: 


Use a flat brush to paint the base coat for each helmet you are making. When the paint is dry, you can draw your design freehand. Or, if you need a little help getting the proportions of the logo just right, print out an image of the actual helmet that is the same size as the wooden helmet. Cut around the edges, then use this transfer technique to get the design onto your wooden piece. 

Use the liner brush to paint the logo onto the helmet, then paint the facemask in the appropriate color. The facemask continues onto the body of the helmet. I painted freehand, but you can sketch it out first or use the transfer technique again. 

If you are making ornaments, use a hand drill to put holes into the top of the helmet. If you are making magnets, you don't need a hole. Seal the helmet with Mod Podge. 

Add a piece of decorative cord to hang your ornament or apply a magnet to the back of the helmet. 

Here's a closer look at each of the helmets I made (before I decided which would be magnets and which would be ornaments, which is why you don't see the holes yet): 

Indiana University Hoosiers

University of Oregon Ducks

University of Nebraska Cornhuskers

University of Michigan Wolverines

University of Georgia Bulldogs


I like the versatility of this craft. You could easily have a room full of people working on the same basic craft, but each could choose their own team and whether they want it to be an ornament or a magnet. 

10/27/25

Standing Snowboarder Craft

Did you know that Colorado has named three official state sports? Colorado's state summer sport is pack burro racing (!) and its winter sports are skiing and snowboarding. This standing snowboarder craft may look familiar, as it's based on an Olympic snowboarding craft I did awhile back. I used the drawing I made last time as the template for this one, but I changed up some of the materials. I'm happier with this version. Affiliate links below. 


Standing Snowboarder Craft


Materials: 


Steps: 


Sketch a snowboarder and a snowboard onto a piece of Bristol vellum. Draw the arms and hands in any position you want, but make sure the feet are slanted slightly in the same direction. You can substitute a heavier weight paper, but don't go any lighter or your snowboarder might slump instead of standing. 


Color the snowboard and snowboarder with the alcohol markers, then cut out the pieces using microtip scissors. I'm not sure if my snowboarder customized his board to match his favorite scarf, or if he made the scarf to match his favorite board. 


Bend the feet upward so they are at a 90° angle to the rest of the body. Apply a thin coat of Mod Podge to the snowboard, then position the snowboarder onto the wet Mod Podge. When the Mod Podge dries, the board will be shiny and the snowboarder will be permanently connected to the board. 
 

I love how versatile Mod Podge is. And I'm really happy with my snowboarder. 

8/22/25

Football Helmet Refrigerator Magnet Craft

If you have a football fan in your life, you're going to love this football helmet craft! It's fun to do as a team activity, at a sports-themed party, or to make as gifts for football players and fans. You can customize the helmet however you want. Make a replica of the helmet from an NFL, college, or high school team, or design your own from your imagination! Affiliate links below.  


Football Helmet Refrigerator Magnet Craft


Materials: 


Steps: 


Use a flat brush to paint the base coat for each helmet you are making. 


When the paint is dry, you can draw your design freehand. Or, if you need a little help getting the proportions of the logo just right, print out an image of the actual helmet that is the same size as the wooden helmet. Cut around the edges, then use this transfer technique to get the design onto your wooden piece. 


Use the liner brush to paint the logo onto the helmet, then paint the facemask in the appropriate color. 


The facemask continues onto the body of the helmet. I painted mine freehand, but you can sketch it out first or use the transfer technique again. 

If you are going to be putting your magnet on the refrigerator or somewhere else where it could get wet, use the Mod Podge to seal it as soon as the paint is dry. You can skip that step if your magnet is going onto something like an office filing cabinet, where it's very unlikely to get splashed. Finally, apply a magnet to the back of the helmet. 

Here's a closer look at each of the helmets I made: 

Indianapolis Colts


Cincinnati Bengals


Minnesota Vikings


Green Bay Packers


Cleveland Browns... who famously don't have a logo 


As I was painting these, I was thinking about other things you could do with them besides turn them into magnets. Drill a hole into the top and turn them into ornaments. Link them together to make a banner. Or write names on them to use as place settings at a team banquet or party. Lots of possibilities!

1/25/24

Cardboard Tube Bobsled

We have to wait two more years for the next Winter Olympics, but this is as good a time as any for crafts inspired by winter sports. I challenged myself to see if I could turn a cardboard tube into a bobsled. I modeled it (loosely) on the 2022 USA bobsled design. It was definitely a challenge. Affiliate links below. 


Cardboard Tube Bobsled


Materials: 


Steps: 


Start by cutting out a triangle from one end of the cardboard tube. This is going to be the front of the bobsled. Overlap the two pieces so that they form a flat, narrow front. 


Glue this front portion closed, using a binder clip to hold it in place while the glue dries. I ended up also wrapping washi tape around the end to hold it snug while it dried. 

When the glue is dry, cut the tube to your desired length, then remove the portion where the passengers sit. 


Now it's time for painting. Use True Blue on the bobsled. Use Silver for the four runners. While you are waiting for the paint to dry, punch out white stars. When the paint is dry, glue one pony bead to each runner. Put the flag sticker on the front of the bobsled, then write USA with the paint pen. Glue the stars on each side of the bobsled. 


Finally, glue the runners to the bobsled. When the paint is dry, pick your crew. I went with Gandalf, Wyldstyle, Harry Potter, and Plain Blue with Red Hat from 1978


Harry can't see over the top. Good thing he's not steering.


I had a lot of fun making my bobsled. And obviously I had fun photographing it (other than the lack of light... all these rainy days are terrible for photos). I learned a lot about bobsleds, bobsledding, and bobsledders in the process. For example, I learned that bobsleigh and bobsled can be used interchangeably and the one that you use probably says something about where you live. I also learned more about the differences between bobsled, luge, and skeleton, as well as the Olympic history of the bobsleigh. And the history-making Tunisian bobsled team! Such a fun story. Makes me want to watch Cool Runnings again!

7/24/23

Felt Cardinal Pencil Topper

I think it's so weird that we talk about most animals year-round, while there are others we've assigned to a certain season. It's as if rabbits and chicks only exist in the spring, flamingoes and tropical fish disappear if it isn't summer, bats and owls are only alive in the fall, and penguins and polar bears vanish when winter ends. I get that some of that is based on climate; tropical fish live in warm water and polar bears live in cold water. But they live there year-round! 

Despite existing year-round with quite a large range, cardinals are considered part of the winter animal category. If there is an image of a cardinal on a card, the sentiment probably references Christmas or winter. You don't see cardinals on Easter greetings, even though baby cardinals start hatching then, just like baby chickens. It's weird. 

All this to say that I made a cardinal craft during the summer. And you can too. Affiliate links below. 


Felt Cardinal Pencil Topper


Materials:


Steps: 


To make the cardinal, you will need two red felt bodies, two red wings, two black faces, and one orange beak. I recommend using scratch paper to make a template for yourself, unless you want to just wing it (pun intended) like I did.


Use floral tape to wrap a stem of leaves to a pencil. I used an artificial rose I had laying around and just pulled the flower off to save for a different use. 

Glue the face and wings to the two body parts.


Add an eye to each face. If you're using self-adhesive enamel dots, proceed. If you're using Enamel Accents, let them dry completely. 

Put a line of glue around the inside of one body piece, leaving the belly area open. Put the beak in place, then add a line of glue onto the part of the beak that will be covered by the second body piece. Set that piece on top of the first, essentially making a beak sandwich. Let the glue dry completely. 

Add as much or as little stuffing as you want, then add a generous amount of glue to the opening. Place it onto the prepared pencil, clamp it closed, and let the glue dry completely.  


Perfect for any time of year! This craft is particularly great if you live in one of the seven states (Illinois, Indiana, Kentucky, North Carolina, Ohio, Virginia, and West Virginia) that have named the cardinal as their state bird, or if you're a fan of the any of the Cardinals sports teams!

6/22/23

Sparkly 49ers Sign

I rarely work with bling, yet I have an enormous supply of sparkly, glittery things that have been sitting in the craft room forever. Time to use some of it up! This wooden arrow is decorated with gold paint, gold glitter, and leftover Diamond Dotz, It’s super sparkly; the photo doesn’t do it justice.

You may recognize the 49ers logo from a diamond Art kit I completed a couple of years ago. I had enough extra Dotz to make a second logo. Self-adhesive canvas with a printed grid makes it really easy. Affiliate links below. 


Sparkly 49ers Sign


Materials:


Steps: 


Sand the wooden arrow until it is smooth. Add a coat of Treasure Gold. When that is dry, add a generous coat of gold glitter glue. 

Create the logo or design of your choice by applying the Diamond Dotz to the canvas. When it is complete, carefully cut it out with microtip scissors and glue it to the arrow with a strong craft glue.  

10/12/22

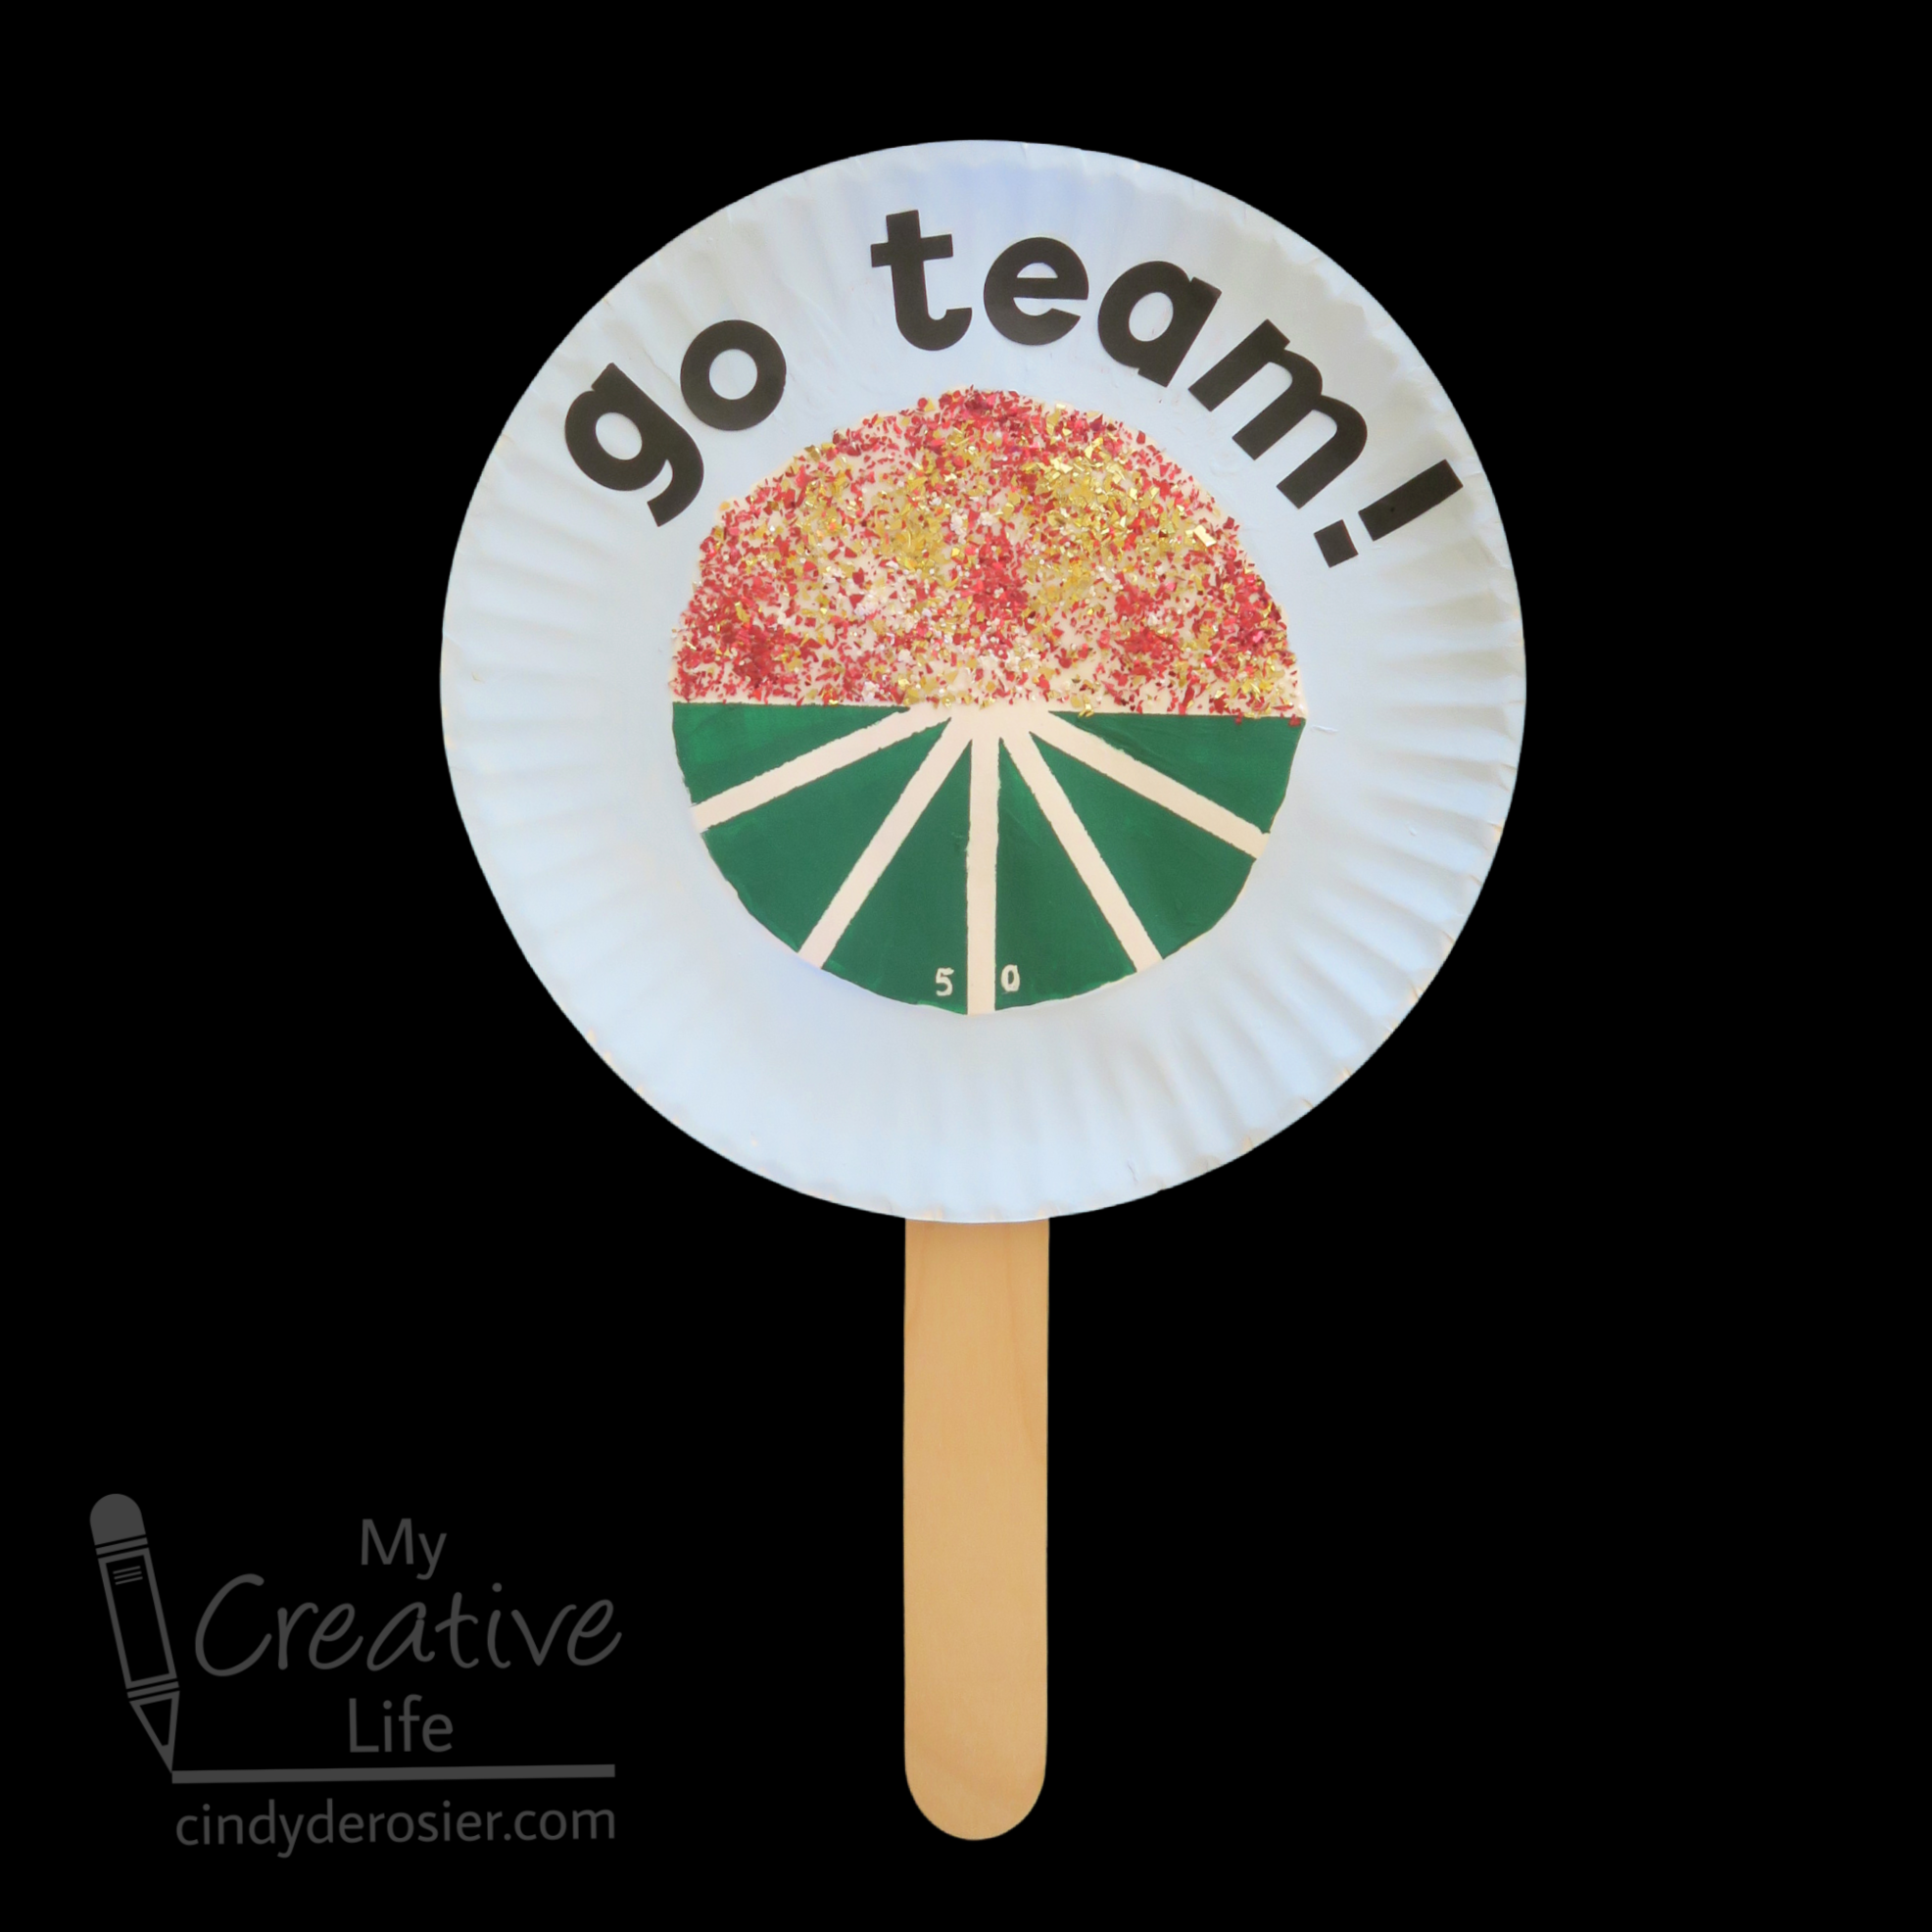
Paper Plate Football Fan

Have you seen the football field cookies that are so popular? They're the inspiration for my project,  a football fan for a football fan! Affiliate links below. 


Paper Plate Football Fan


Materials: 


Steps: 


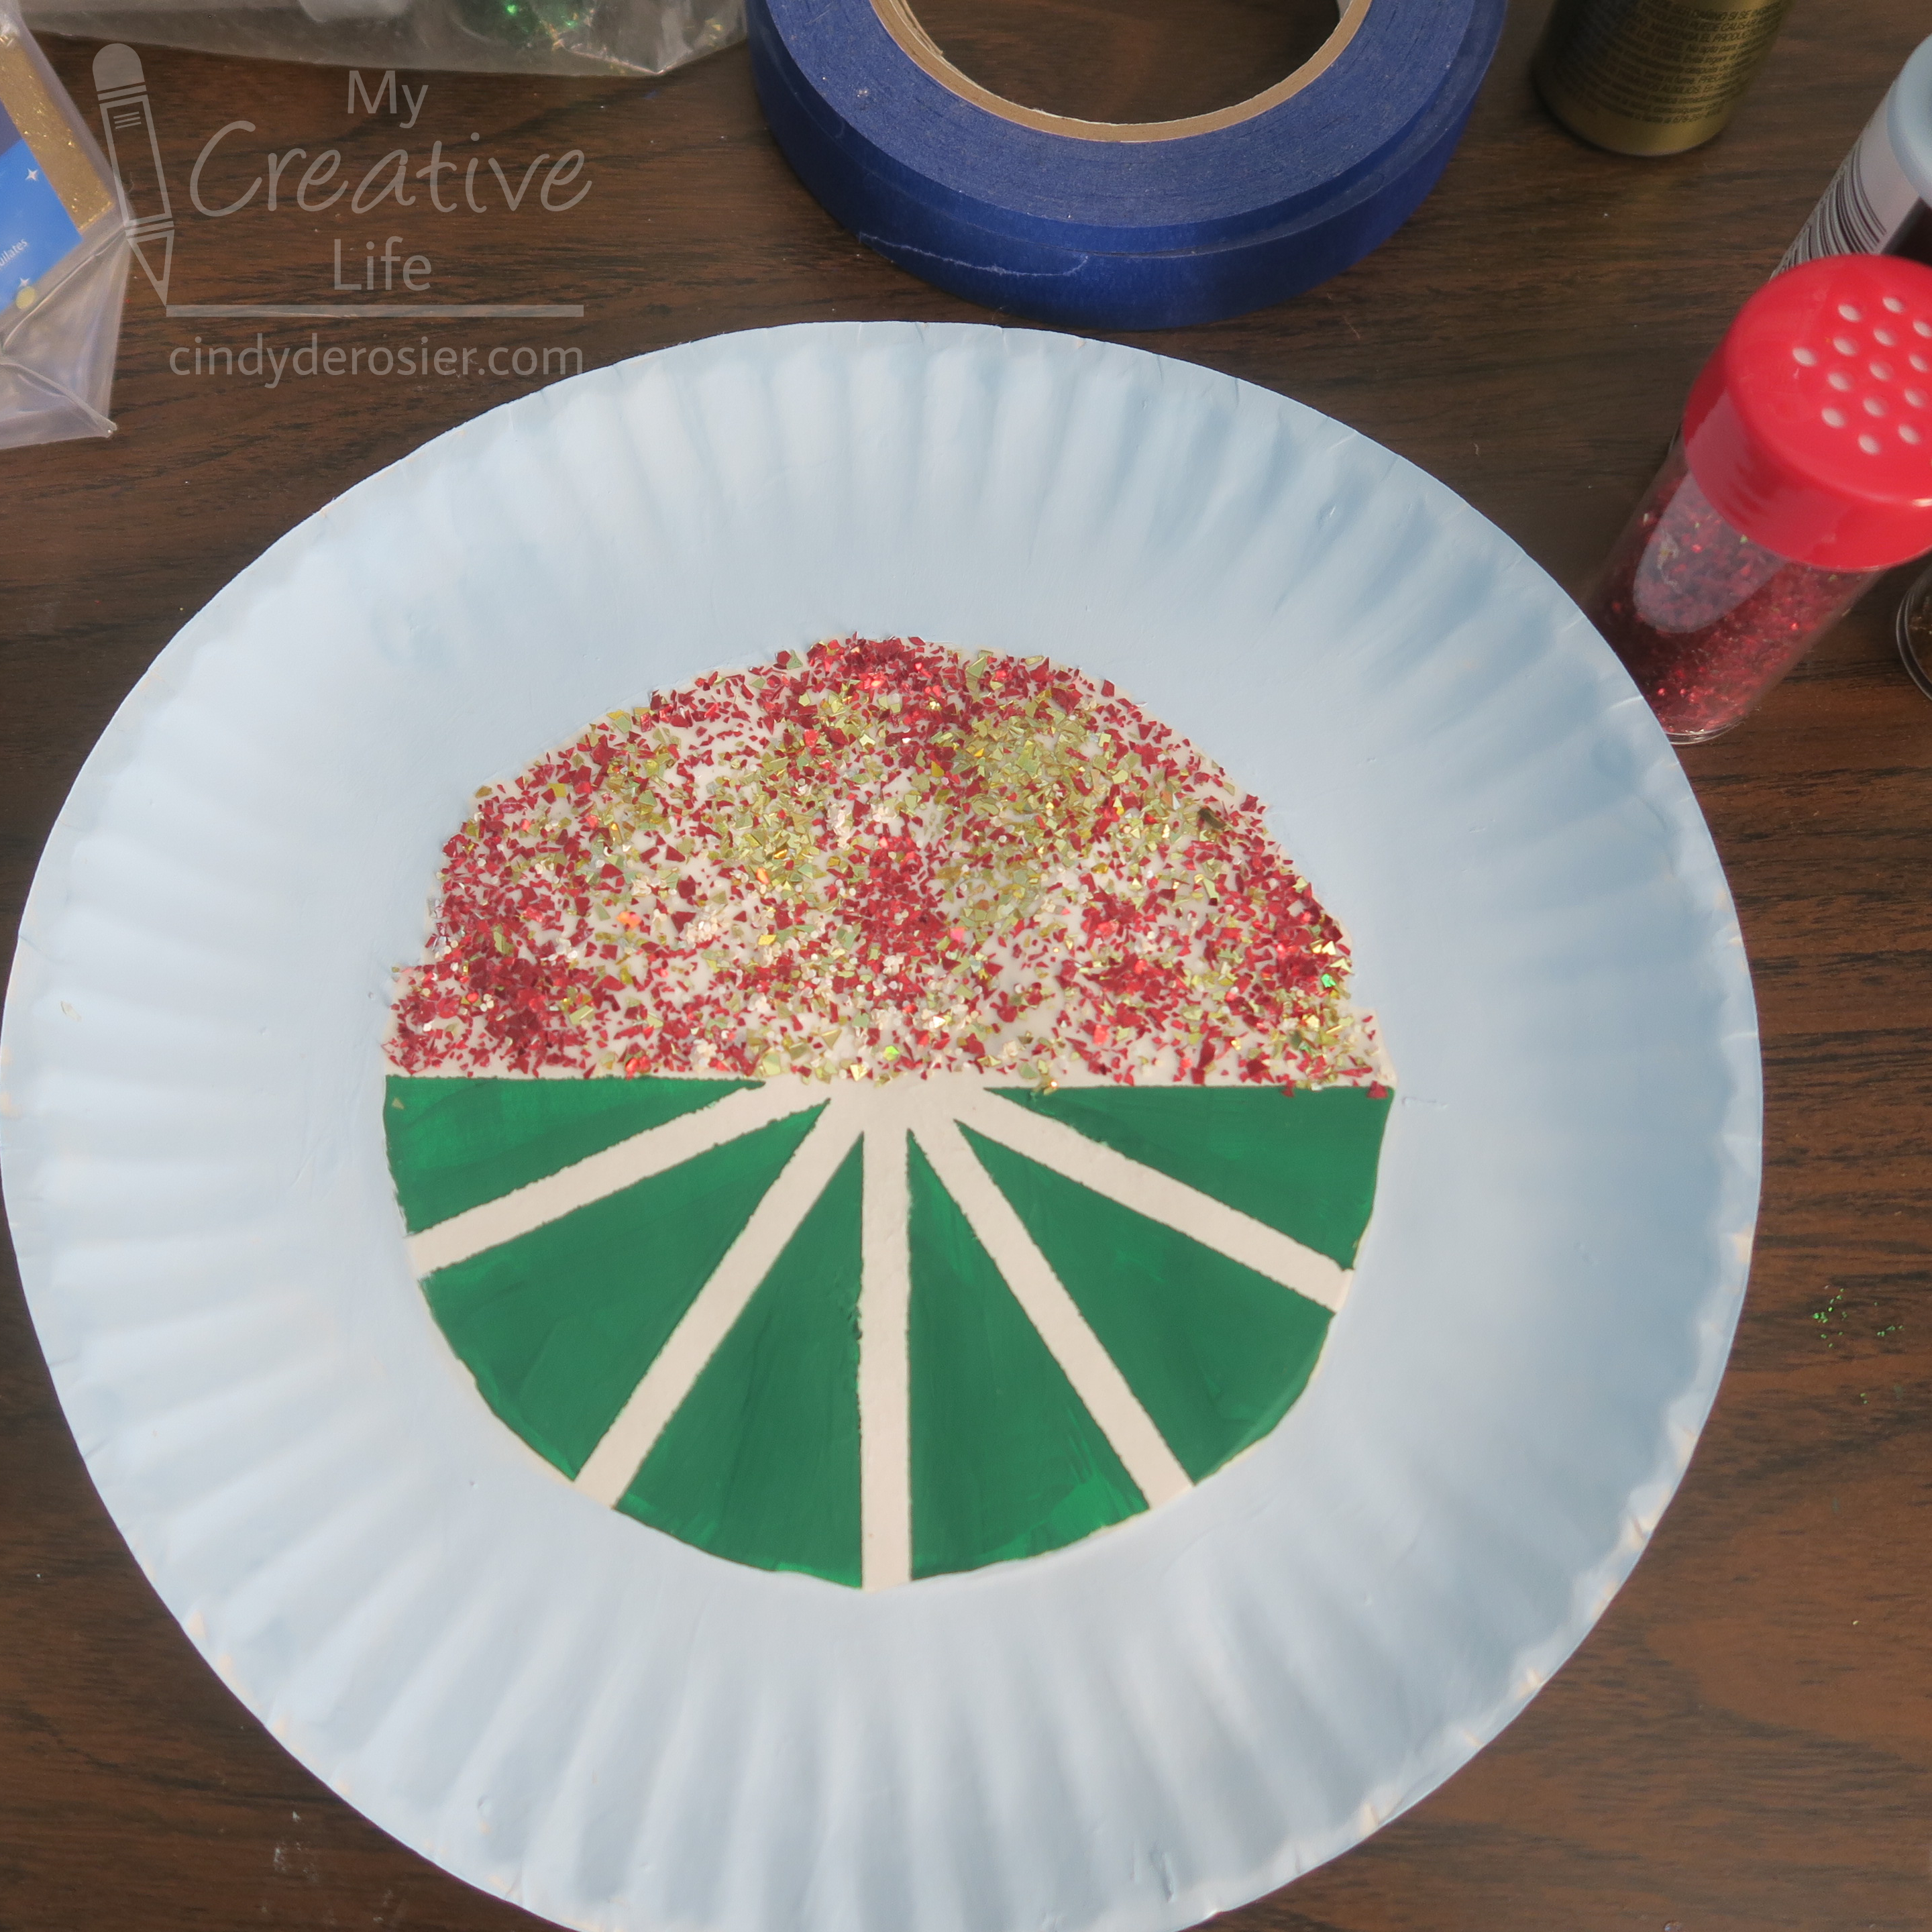
Apply a piece of painter's tape across the middle of the paper plate to establish the horizon. Add five pieces of 1/4" painter's tape radiating down from the center of the plate to form the yard lines.  


Paint the smooth section below the horizon line with green paint. Remove the tape. Paint the bumpy perimeter of the paper plate with light blue paint. 

When the paint is completely dry, rub a thin, even coat of tacky glue to the smooth section above the horizon line. Sprinkle on glitter in your team colors, covering the gluey area. Allow the glue to dry. 


Use a white pen to mark the 50-yard line. 


Add letters to spell out a message on your fan. You can put, "Go team!" like I did, or use the specific name of the school, city, or mascot. 

Glue a 10" craft stick to the back. Now you have a football fan that will help any football fan stay cool while supporting their team!

4/14/22

Snorkeling Egg

 I made this snorkeling egg guy. And I photographed it. 


But it's not my original idea. This is another of those projects we'd featured at Fun Family Crafts, then the creator deleted their website, leaving us with a link to nothing. It's so frustrating. This craft is all over Pinterest as Dye-ving Dudes, but the materials list and steps to make it are gone. 


That original photo provides some clues to the materials. It's obvious that the snorkel is a bendy straw. Everything else I'm not 100% sure. It looks like the mask is a clear lid, but the strap looks like a rubber band. If the lid is indeed clear, the rubber band would show through, which it doesn't. It looks like the flippers might be a thick, white-core paper. And did they draw the pupils on with a Sharpie? I'm not sure. 

My version may not be exactly the same as the original, but that's perfectly OK. At least now one version of the instructions exist. Affiliate links below. 


Snorkeling Egg


Steps:


Bend the straw 90°, then trim the excess off both ends to make a snorkel. Set it aside. Cut two black flippers from black craft foam, then cut a thin strip of craft foam for the mask strap. 


Use a dot of craft glue on the FRONT of the googly eyes, then place them in the clear lid. Set it aside to dry. Put away the craft glue; you'll use hot glue for the rest of the project. 

Glue the lid to the egg to make the mask. Wrap the strip of craft foam around the egg. Trim it so that it just touches the edges of the lid. Glue it in place. Because it's such a thin area, I put a glob of hot glue onto my craft mat and then used a toothpick to dab it onto the foam before pressing it in place. 

Glue the straw to the front of the mask. This is a change I made from the original, which has the snorkel down by the swim shorts. I prefer it higher. 

Glue the flippers to the bottom of the egg. 

I experimented with different ways to make the egg stand up without toppling. The easiest was to put a glob of hot glue onto the craft mat and balancing the egg onto it as shown here. 


Let it sit for about a minute, then peel it up. Use scissors to trim away any glue that extends beyond the flippers. 

The lid I used wasn't crystal clear, so the mask has a bit of a foggy appearance. If you can find a perfectly clear lid, great. Use that. I don't mind that my mask is foggy, but if you feel like the eyes aren't visible enough, use a Sharpie to color them onto the outside of the mask, as shown below.  


I had a few more egg project ideas I wanted to share with you before Easter, but I'm going to have to save them for 2023. Trevor's Eagle project has been consuming most of my daylight hours this week. While he still has three merit badges to complete, a pile of paperwork to do, and a Board of Review to pass before he reaches the rank of Eagle Scout, Trevor's project is officially done. I'll tell you all about it tomorrow.