Showing posts with label magazine. Show all posts

8/28/26

Published in Scrapbook & Cards Today

It was a dream come true when my 2-page layout about my favorite and least favorite things was published in what turned out to be the final issue of Scrapbook & Cards Today. This is the layout I made to document it. 


I included a picture of the cover of the magazine, the page where my layout appears, and a notecard from the founder and publisher of Scrapbook & Cards Today. I'm happy with how the completed layout looks and am so glad to have it in the album. 

10/20/25

Magazine Poetry

Six days after we got home from our epic New York trip and New England cruise, I attended a 2-day retreat for breast cancer survivors put on by Thriving Pink. It was a weekend of friendship, self-care, pampering, and healing. We did a lot of journaling, shared stories, and spent time reflecting on our own cancer journey. 

Of all the activities we did, my favorites were the crafts. The first was a magazine collage. We weren't given specific instructions about how to make our collages; most people collected images of things that represented them (or that they found particularly beautiful) and layered those onto their cardboard cake round (affiliate link). I went a slightly different direction. 


Rather than focus on my favorite things, my project is inspired specifically by my cancer journey. I found an image of poppies that spoke to me and used that as the background. Immediately before this activity, our group had talked about the role our loved ones have played in our recovery and how much our breast cancer has affected them, particularly the primary caregiver. In my case, that has been Steve. I am so grateful for his love and support through diagnosis, treatment, and beyond. He stands strong behind me, like the large poppy behind the slightly smaller one in the foreground. Other poppies surround them both, just as so many others have provided help and support to us both throughout my cancer journey. 

I collected words and phrases from the magazine that spoke to me about my path forward as a cancer patient. I arranged them and rearranged them until I had the short poem you see above. Finally, I added a border of torn magazine bits around the edge. The pieces aren't perfect, just like life isn't perfect. The best we can do is to create a life well crafted, savor memories, let it be, and believe.

Obviously, this project doesn't have to be about cancer. It could be about absolutely anything, from the serious to the frivolous. Each person's will be a unique reflection of who they are and how they feel at that moment. And this is not a project only for adults. Kids are capable of making beautiful and meaningful found poetry too.

8/25/25

All About Me Magazine Name Art

Back-to-school is the perfect time for name art. Today's project lets kids introduce who they are through words and images cut from a magazine. The project incorporates reading skills (a great opportunity to practice scanning) with fine motor skills, a combination you don't find together often. 


All About Me Name Art


Materials: 

  • magazines
  • scissors
  • construction paper or cardstock
  • glue sticks


Steps: 

Select a magazine for your project. It should have plenty of large, colorful images, as well as lots of text. Good choices include magazines about travel, cooking, or nature. Special interest magazines can work too. I used the Visit California guide. 

Start by tearing out large images from the magazine that appeal to you. You'll need as many as there are letters in your name. Set them aside for now. 

Write your name in block letters on scratch paper and cut them out. You do not need to cut out the counters if you don't want to. I opted to leave them for the D and the Y in my name in order to give me more space for my words. 


Arrange the cut-out letters on the images you've chosen, moving each letter around to decide where it looks best. Then cut out the letters. You can see below that I wanted to incorporate the sunset and the crops in my letter Y. I positioned it midway between the two, avoiding the white text on the page. 


When all your letters are cut out, glue them to the construction paper background. As I was doing that, I decided my I needed to be dotted with a heart, even though it's a capital letter. Artistic license. 

Now, go through the magazine and scan for words that appeal to you. They can be any part of speech: adjectives that describe you, nouns that are things you like, and verbs that tell your favorite things to do. Arrange the words onto the letters however you'd like. I grouped them together in a way that was meaningful for me, paying attention to the colors to maintain balance. In the D and the Y, I concentrated words in the areas where I didn't cut out the counters in order to reinforce that shape. 


I love how my project turned out. It would be so much fun to see a whole classroom's worth of names and a great way to get to know each other through art.


ohuhu acrylic markers are the best

1/8/25

Western Meadowlark Magazine Art

Ready to see my latest bird art? I loved making it. 
 

The project starts with a coloring page of the Western Meadowlark, the state bird of Kansas, Montana, Nebraska, North Dakota, Oregon, and Wyoming. I found this coloring page at MontanaKids.com, which is run by the Montana Office of Tourism. State websites are a great source for coloring pages and other resources. Obviously, you can use the technique below for any coloring page, or even for a design you draw yourself! 

---------


Western Meadowlark Magazine Art


Materials:


Steps:


Search through the magazine and tear out blocks of color to complete your image. I found the perfect yellow throughout Visit California's Travel Guide. Tear the block of color into small pieces. For a bird, you want those pieces to mimic the shape of feathers, so aim for some longer, thin pieces (rather than squares). 


Use craft glue to adhere the torn pieces to the coloring page. I had planned to start with the bird and then do the background, but realized it would be a lot easier to do the background first and then put the bird in the foreground. So I switched. 

In the photo below, you can see that I tore out pieces for the legs but didn't glue them down. Instead, I started working on the sky. For that, tear long thin strips of sky blue. Don't worry if you cant find enough of the same color blue for such a large area. The real sky has variation. And besides, it's the background. 


After completing the sky, I worked on the fence post, then added the legs and feet on top of that. I tore the beak from the same area as the legs. I used text for the mottled color of the meadowlark's head, wings, and tail. I finished with the black bib and eye. The last step was trimming my artwork to clean up the edges. I cut mine to a square (because I like squares) but it's perfectly fine to leave it rectangular. 


It took me about 75 minutes to make this project from start to finish. It was very relaxing and I'm happy with how it turned out. 

10/11/24

Sketchbook Revival 2024: Cut-Out Couture

The best part about a workshop like Sketchbook Revival is how far it can take you out of your comfort zone. Nothing about this project, which I made for the class called Cut-Out Couture, is typical Cindy. At all. 


I'm not sure how I feel about my finished piece, but no matter. It was really fun to make and I learned some new things along the way. 


Instructor Allison Wells started with a page in a completed gratitude journal, turned it upside down, cut out a model from a fashion magazine, and glued it to the journal. Then she added paints and scribbles and more paint and other marks before finally adding printed text on top. 

I started with a completed page that I didn't like in my sketchbook, squirted paint randomly on top, and dragged a scrap piece of cardstock through it in different directions until the page was mostly covered. Like the instructor, I left bits of the original showing through. 


She cut her image of a woman from a fashion magazine; my image of an elk came from the California Visitors Guide. When my background was dry, I glued the elk in place, then did some dry brushing to blend it in. I scribbled on the page, then colored in some of the found shapes with the same blue I used for a border. 


Time for marks! I used a Posca pen and colored pencils to add some details, then glued my text in place. It also came from the California Visitors Guide. There is indeed so much to love here in California, including our abundant wildlife. 


I was really tempted to do the next project, which was filling a page with watercolor rectangles. Instructor Wendy Solganik shared a cool tip, which is to put a little bit of the previous color you used into a well and mix it with the next color to ensure a cohesive palette. 


I watched the next 8 sessions without creating along. 


Even when I don't make the project, I learn a lot from just watching the instructors. I've been having so much fun with Sketchbook Revival!

11/28/23

Cooking Magazine Name Art

I start to get twitchy when it's been too long since I've done a name art project. I made this one using a cooking magazine. 


I started by finding big, colorful images of food. Then I cut them out in the shapes of letters. I originally had a prosciutto letter I, but when I saw the ad with a bottle of soy sauce that was the same size as the other letters I'd already cut, I made the substitution. 

Then I cut out a bunch of recipes with white backgrounds and glued them to a piece of cardstock. I had to piece them together to fit, resulting in some recipes that read a lot like Rachel's trifle. That was half the fun. Then I glued my letters over the recipes. Quick, easy, and a great way to use a magazine that had been passed around already and was headed for the recycling bin. 


6/19/23

Popsicle Stick Puzzle Craft

Trevor is 17, so it's been a long time since I stuffed my purse full of things to keep him entertained when we left the house. But I remember those days well. The biggest challenges were at meetings where he needed to stay quiet and entertain himself independently while I was busy. If you're still at that stage, today's craft is for you. Affiliate links below. 


Popsicle Stick Puzzle


Materials:


Select the images you want to use for your puzzle. What you choose will determine the difficulty, so keep that in mind based on the age of the child. The size of the puzzle will also impact the difficulty level. When you've selected an image, lay out craft sticks onto it to determine how many will fit. Here you can see that I've put 7 mini craft sticks onto the beach image. 


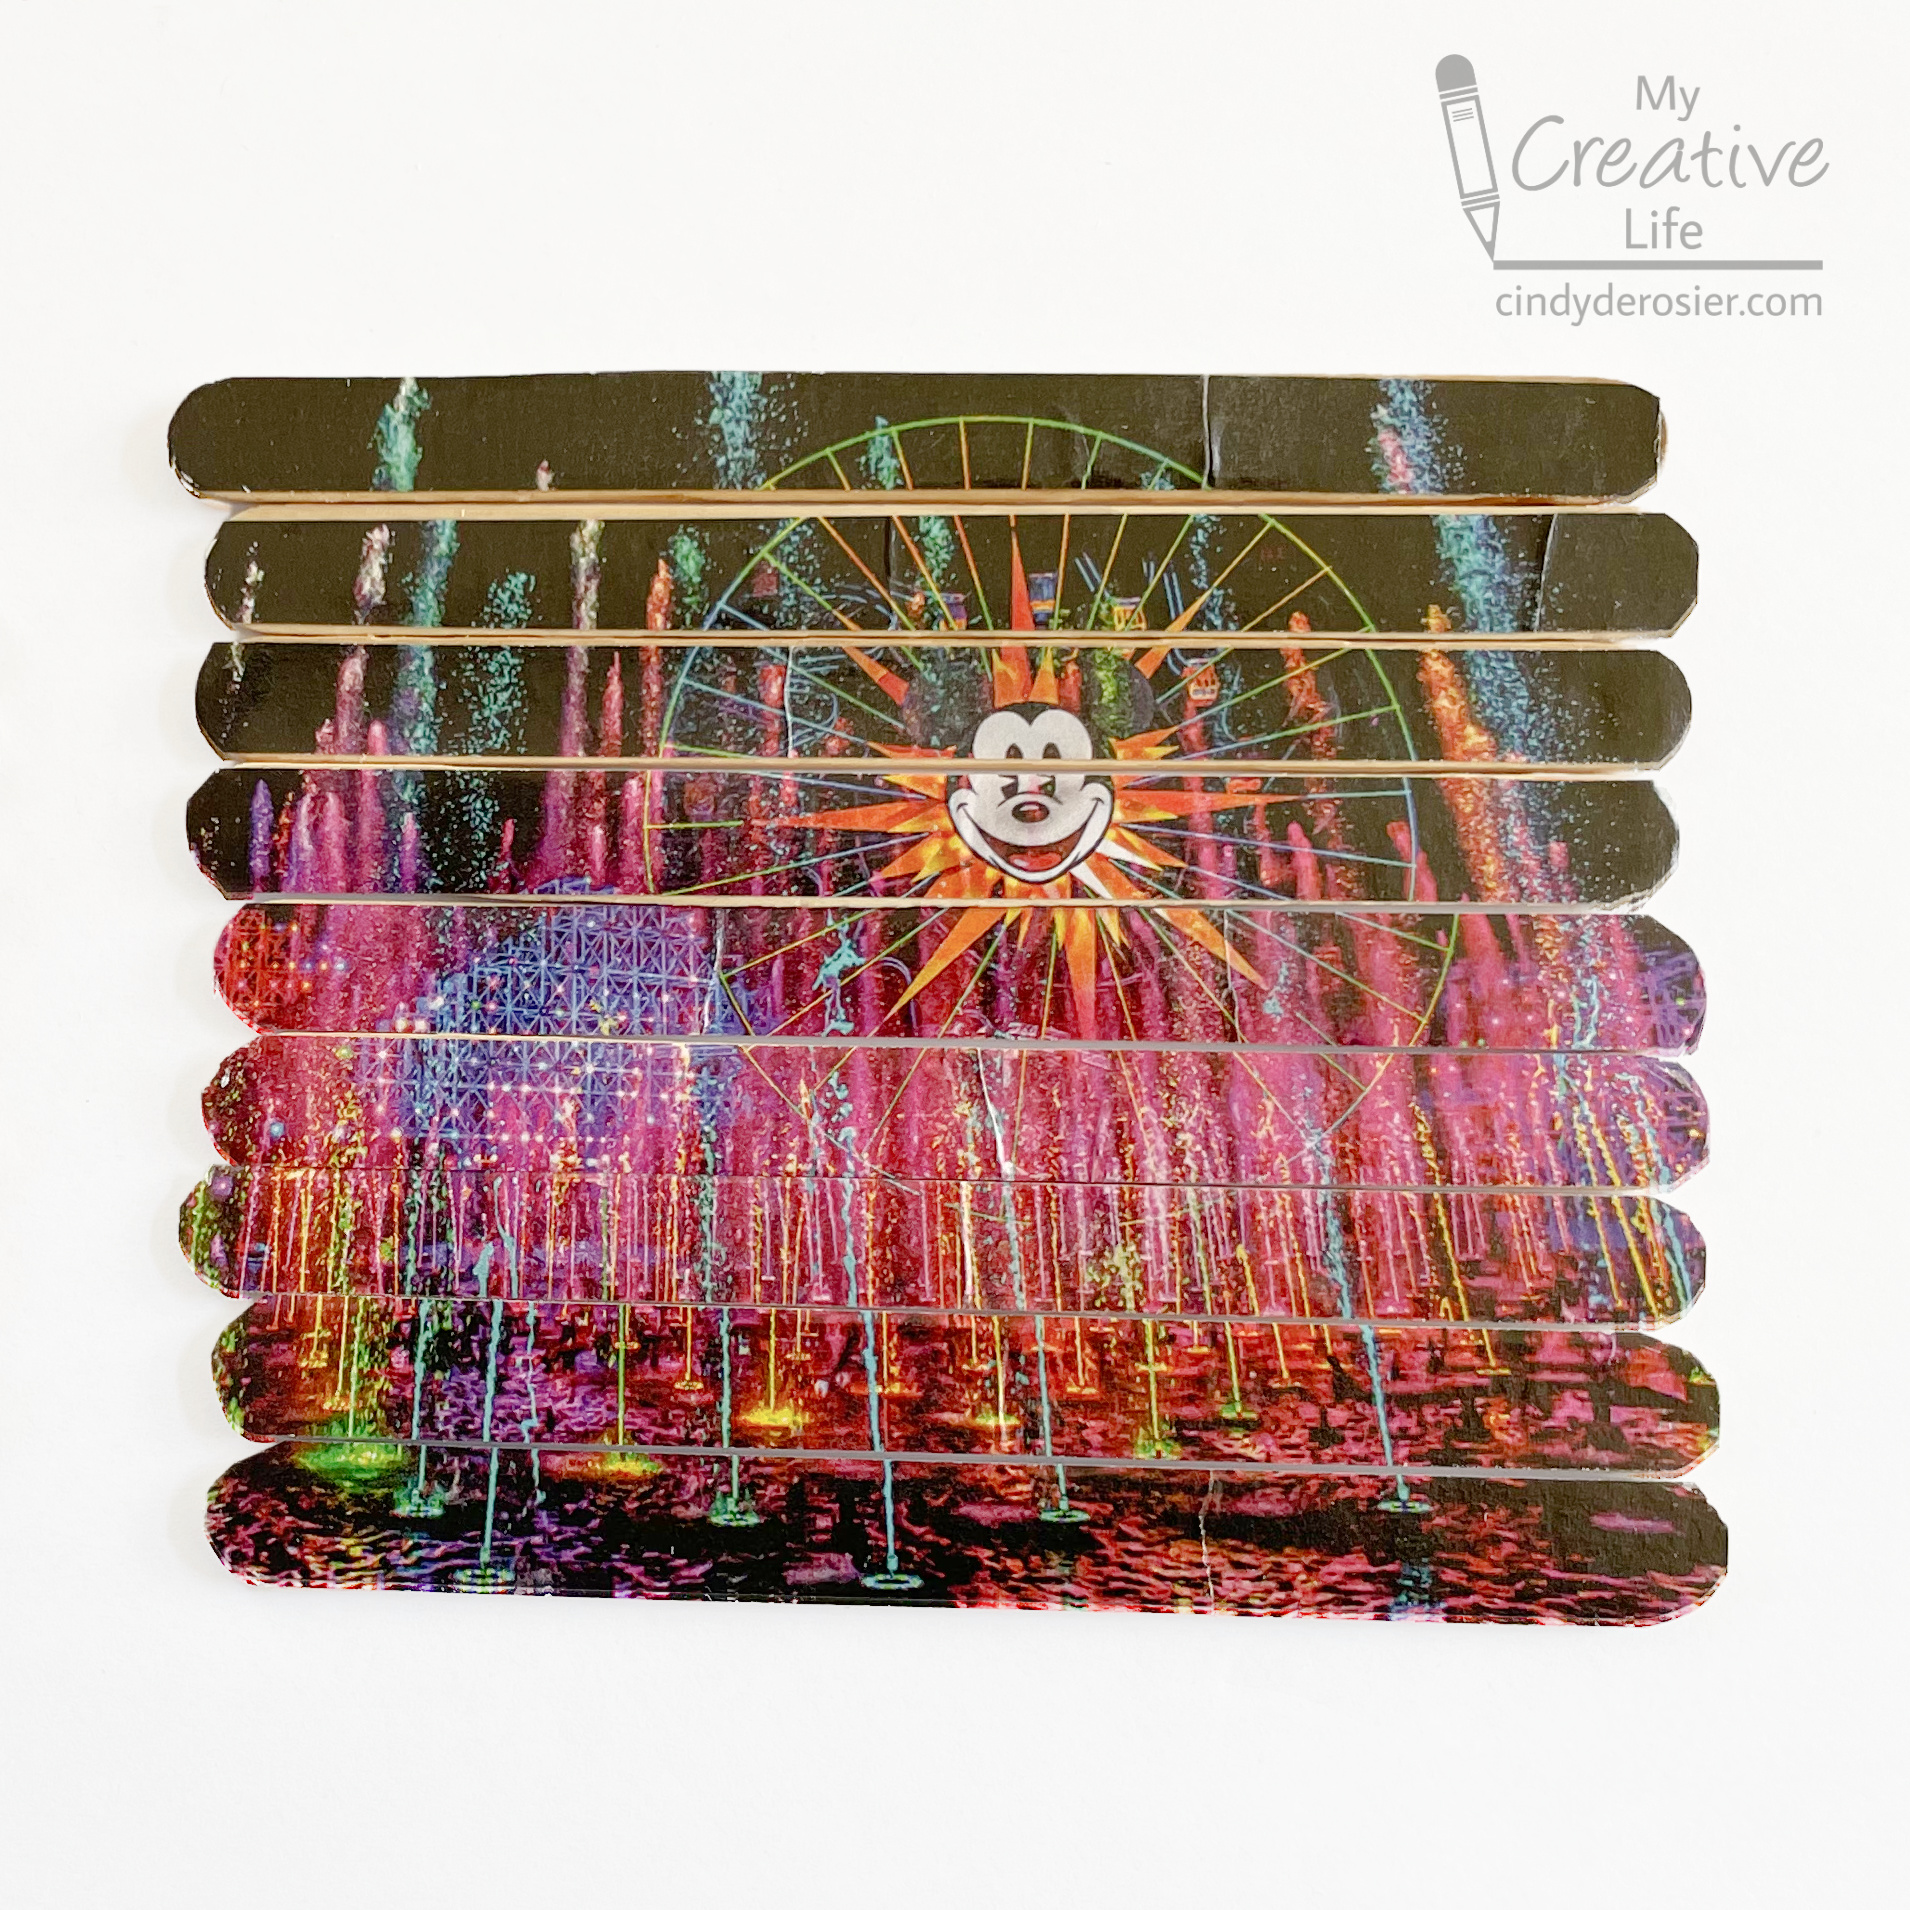
When you've figured out how many craft sticks you puzzle will have, cut the image into strips using the paper trimmer. The strips should be as close to the width of the craft sticks as possible and slightly longer, as you'll be trimming away the excess to round the corners later. Here you can see nine strips of Disneyland's World of Color ready for nine standard-sized popsicle sticks. 


Coat each stick with a thin layer of Mod Podge and smooth the strips in place. Let them dry completely. When they are dry, round off the excess paper from the ends. The microtip scissors make this much easier than with regular scissors. 

Add a coat of Mod Podge over the top of the image to seal it in place. When it's dry, your puzzle is ready. 


Store each puzzle in a zip-top treat bag. 


I used magazine images, but family photos would be great. This is also a fun way to use completed coloring pages. Just make sure whatever image you use gives you enough clues to solve it. Enjoy!

6/6/23

3-in-1 Rainbow Welcome Wreath

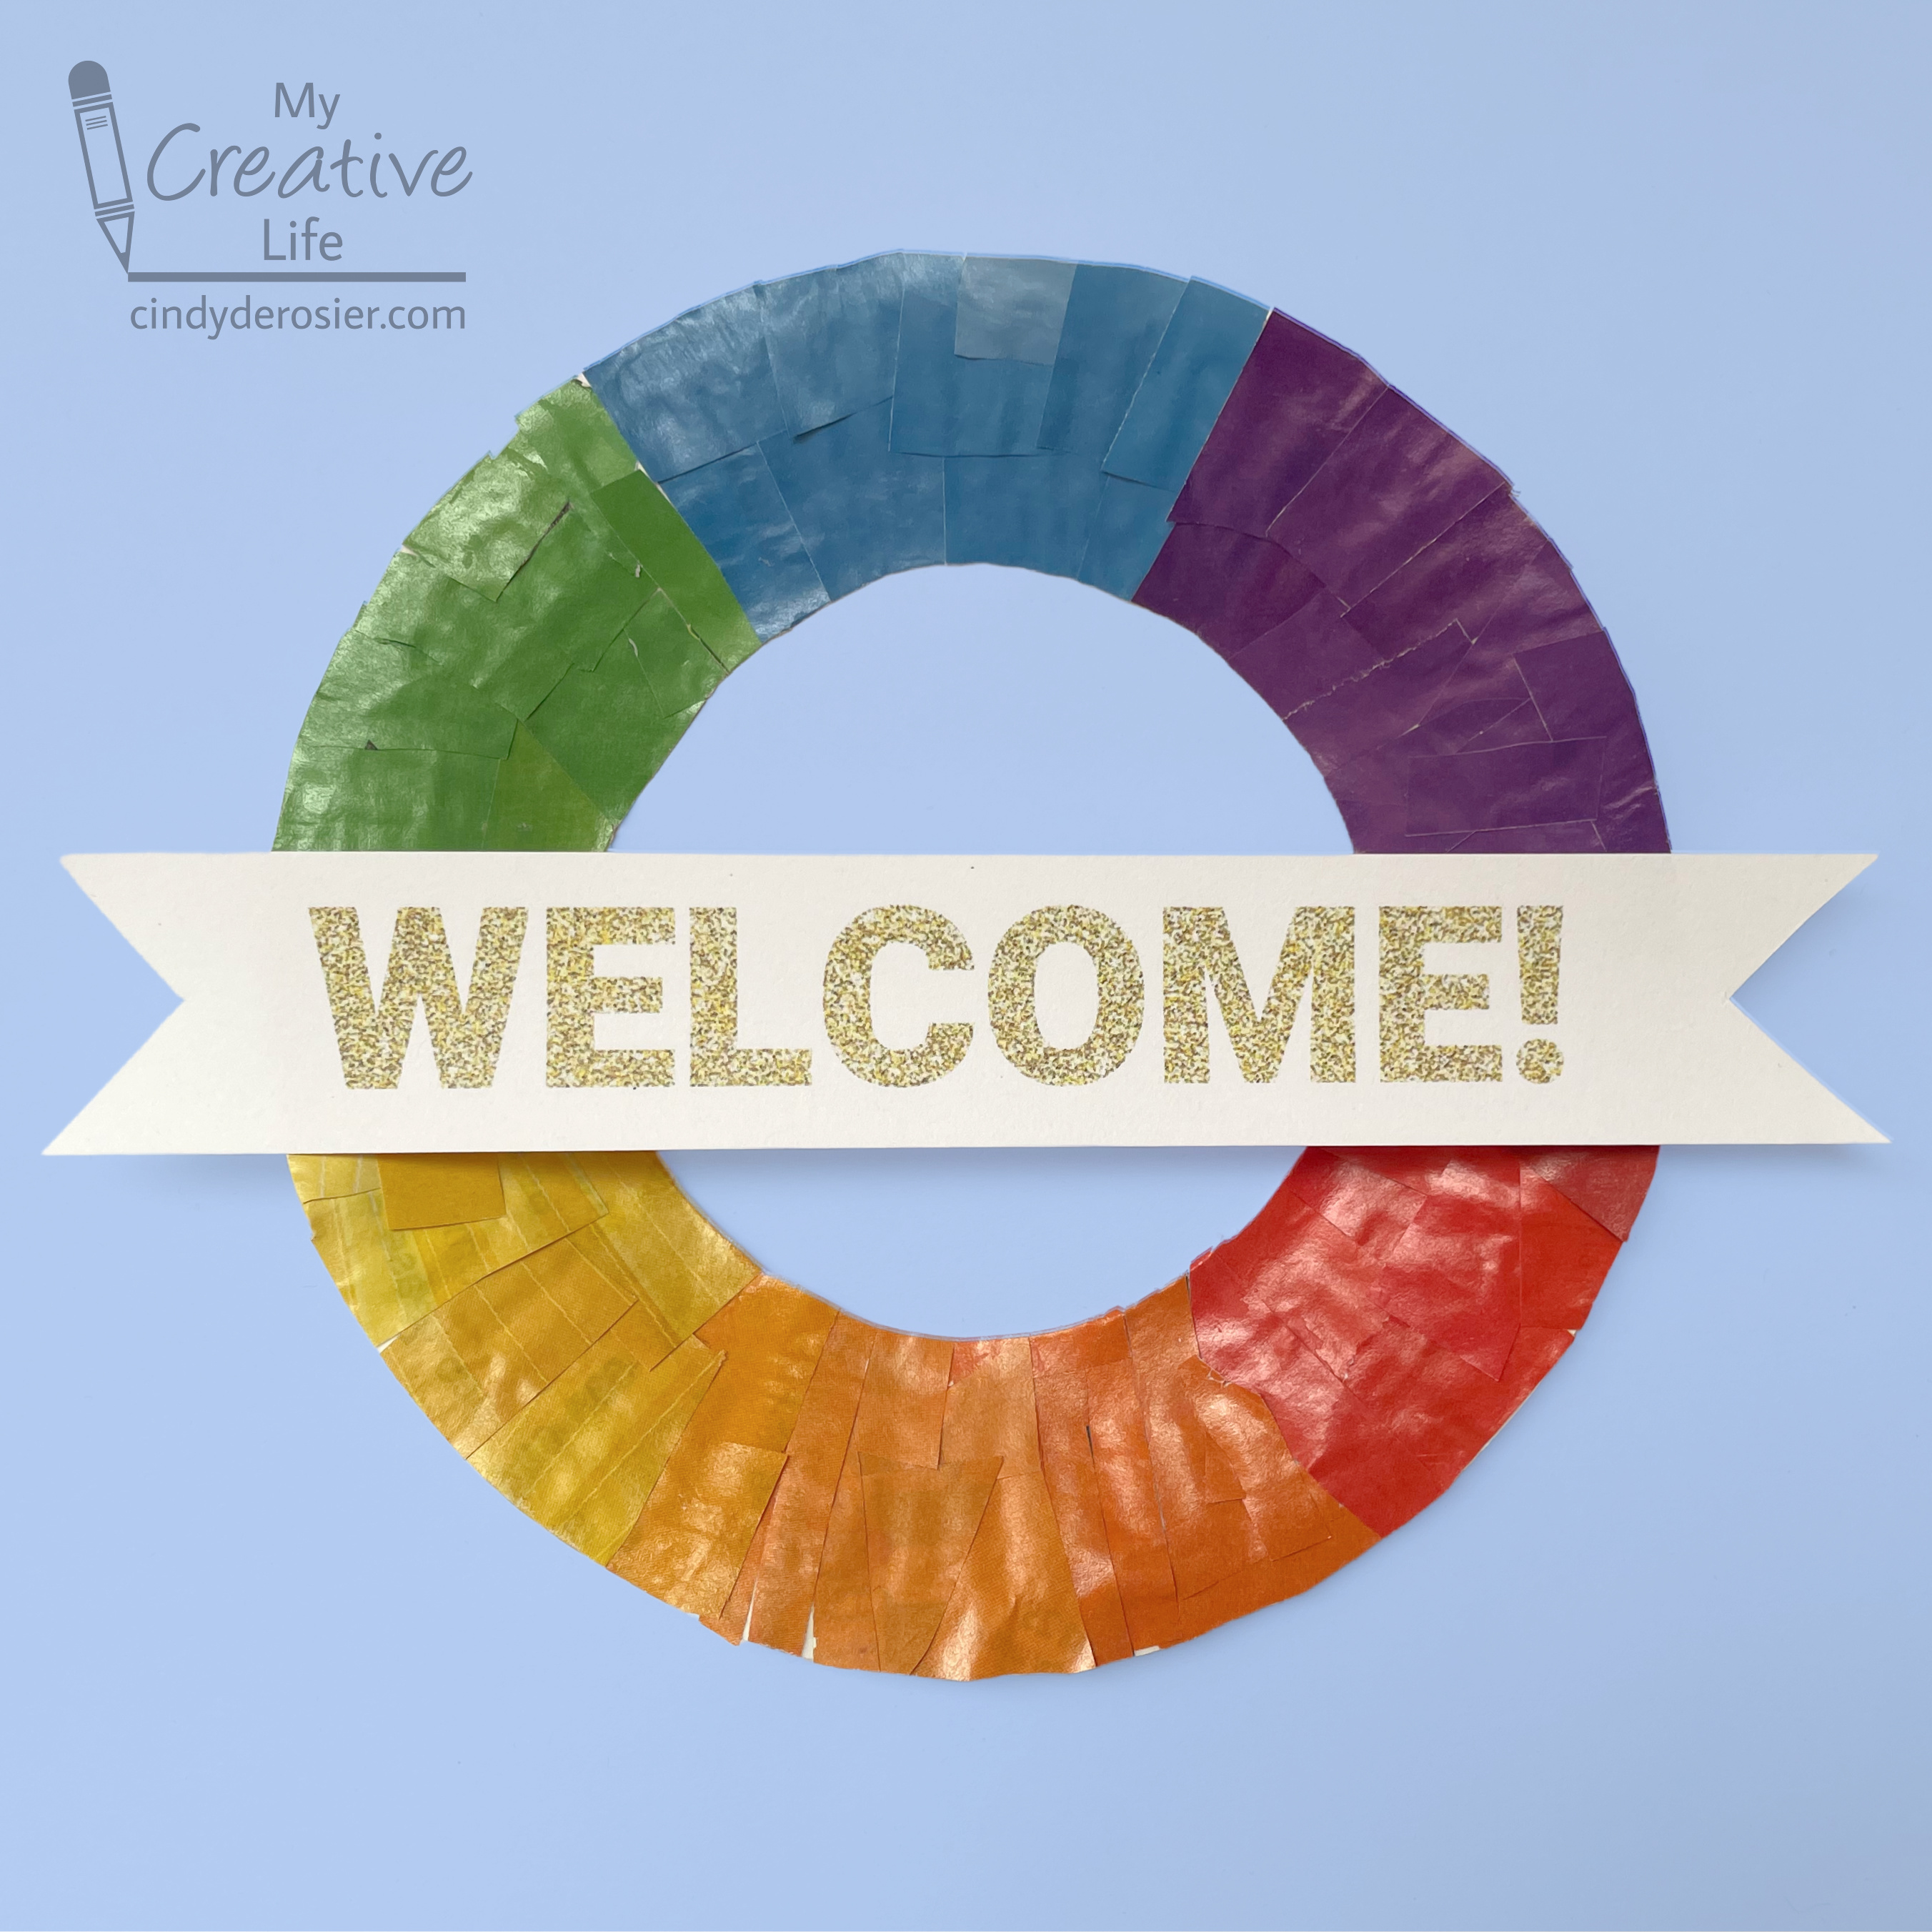
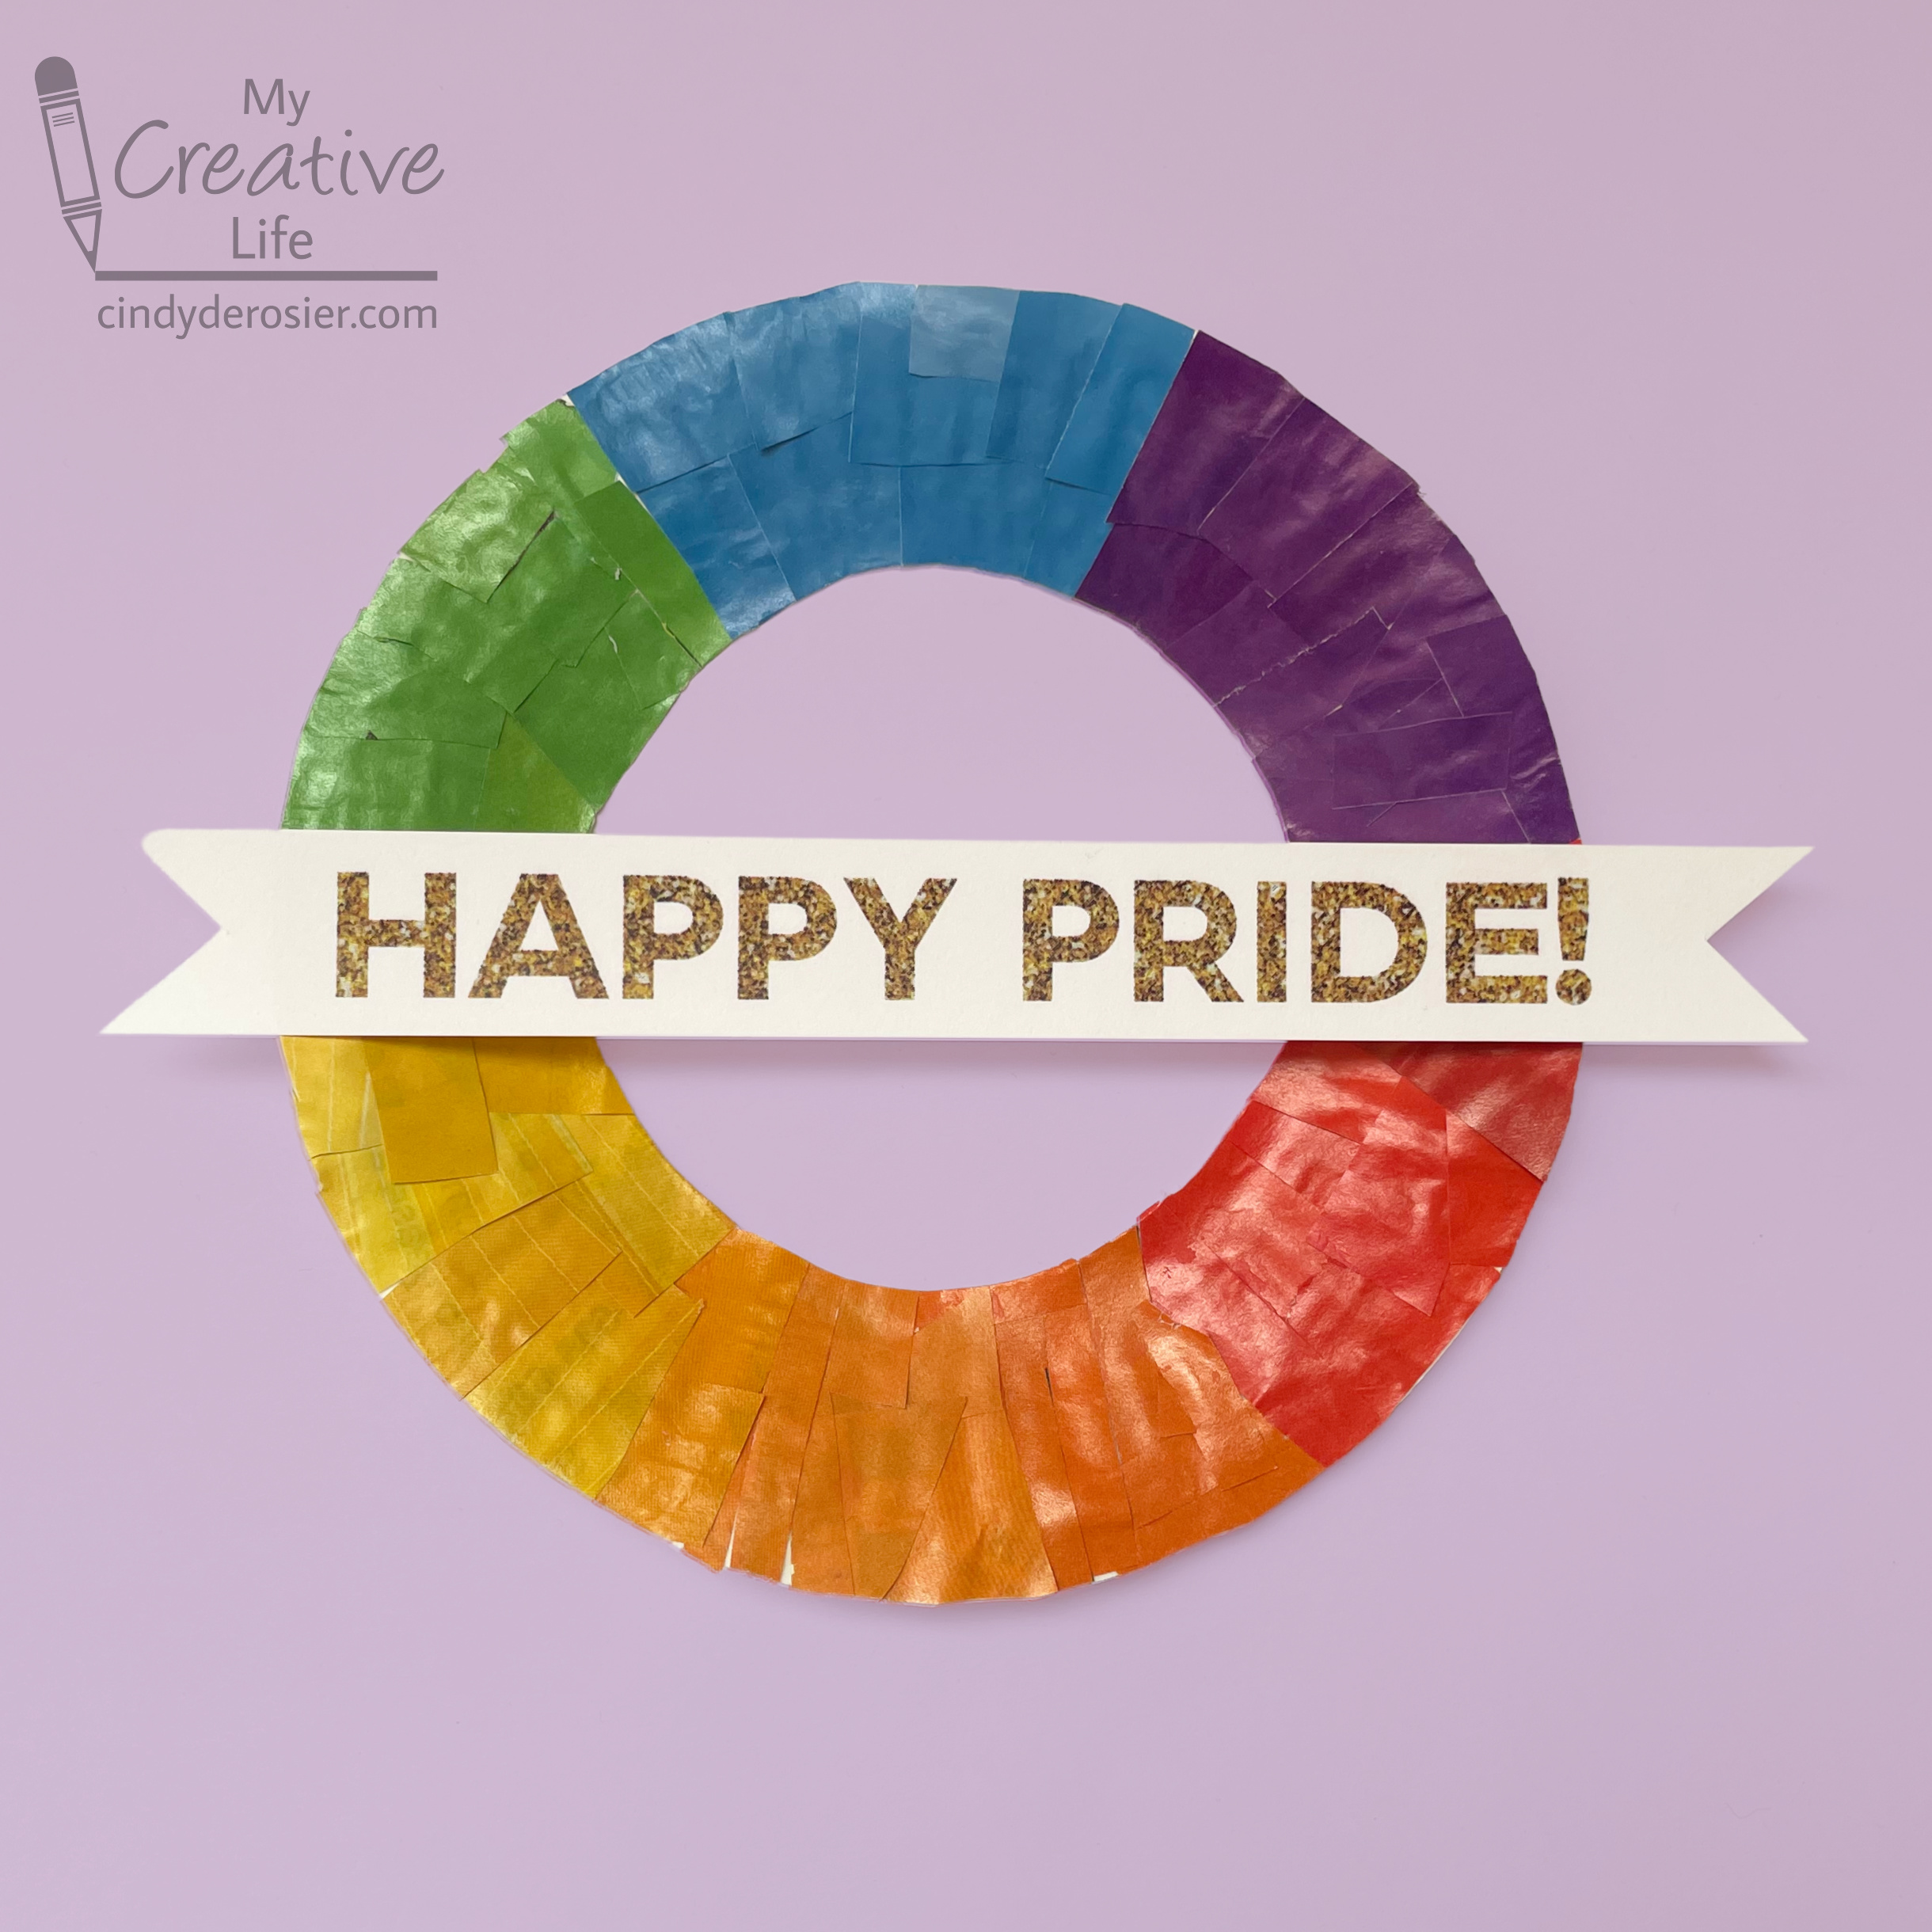
All the beautiful rainbows I'm seeing during June inspired me to make this 3-in-1 rainbow welcome wreath. 


What makes it 3-in-1? I made the sentiment removable, so when June rolls around, you can switch out the more general "Welcome!" for this "Happy Pride!" version. 


This "Lucky" version is for March. Affiliate links below. 


3-in-1 Rainbow Welcome Wreath


Materials:


Steps: 


Cut the center out of a paper plate to make a wreath shape. I used a dessert-size plate, but you can use whatever size you want. 

Go through magazines and tear out pages with red, orange, yellow, green, blue, and purple on them. I used the monthly guide sent to us by the city, which is why you see information about recycling/waste and classes. 


Use a pen to draw lines marking roughly equal sixths on the paper plate. If you think of it like a clock, draw a line at 12:00 and 6:00 first, then lines at 2:00, 4:00, 8:00, and 10:00. This will give you an idea of how much space each color should take up. 

Starting with red, cut around any text or pictures until you have a good-sized pile of red pieces. Glue them into one of the six segments. Working clockwise, do the same with orange, yellow, green, blue, and purple. 


If you are going to be hanging your wreath outdoors, seal it with Outdoor Mod Podge. 


Write or print your sentiments onto white cardstock and trim the ends like banners. If the wreath will be exclusively indoors, you can leave cardstock as is. Otherwise, seal them with clear contact paper. Attach a sentiment to the wreath with poster putty. You should be able to remove it easily when it's time to switch sentiments. 

12/6/22

Candy Cane Magazine Mosaic

Today's project is the fifth in my series based on crowd-sourced responses to ten questions. This one asked respondents to name something kids like. The top answer was candy, which is what I chose to inspire my project. Just like with yesterday's Picasso, I put a holiday spin on this craft. There are no shortage of candy cane crafts at Fun Family Crafts, plenty of which are mine, but a candy cane was perfect for some mosaic techniques I wanted to try. 


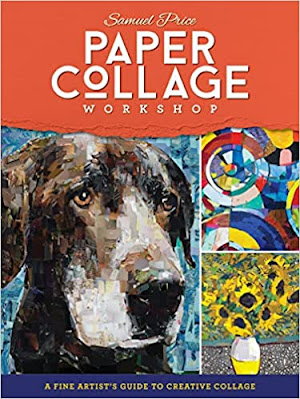
I just finished reading an excellent book, Paper Collage Workshop, by Samuel Price (affiliate link here and below). True to its name, this book feels very much like a workshop, leading the reader through the absolute basics first before progressing to increasingly difficult skills and projects. Check out the detail in this dog portrait. Wow. 


All of the projects toward the back of the book are way (WAY!) beyond my level, but that's fine. I picked up a lot of tips and tricks from Price that I used on my simple candy cane. And I am inspired to eventually try more advanced projects. 


Candy Cane Magazine Mosaic


Materials:


Steps:


Draw a candy cane on the paper. Color in the red stripes, then outline the candy cane with green. No need to be perfect. This will all be covered. And, at least in my case, it still won't be perfect. But no matter!


Go through the magazine to find some large white areas. Cut out the white in the shape of your candy cane. You can do this freehand or by putting the magazine page on top of your sketch and tracing. You will probably use 4-5 different pieces to cover the whole candy cane. Paint a thin layer of glue on the candy cane and place the white pieces where they go.  

Now look through the magazine and pull out sections with red. You may get lucky and find a gardening magazine about tomatoes, as I did. If not, check ads. Lots of then have red since it's attention-grabbing. Cut out the red stripes to fit the shapes, then glue them in place. This is a bit tedious, but again, there's no need for perfection. Here's how mine looked at this point: 


Fill in the background with green. Again, the gardening magazine was great for this; I found a two-page spread that was almost entirely solid green. After I cut out the text and photos, I had a great amount of green to use. I started with cutting pieces to butt up against the candy cane to define its edges and cover my white and red mistakes. Then I just worked my way outward with random squares. 


When the glue is dry, paint a final coat of paint over the entire surface to seal it.  Other than dry time, the project took me about an hour. Obviously, the size of your project and the size you decide to cut your collage pieces will determine how long it will take you. Enjoy!

11/7/22

Wanted Poster Hidden Money Gift

My nephew, Timothy, just turned 22 (!). As always, I came up with a creative money gift for him. This year's is based on a wanted poster. It offers a $36 reward for finding 'The DC Gang.' 


I started by taking the same portraits I used for last year's Presidential Trading Cards and converting them to sepia. I arranged them on a blank document and added the text above and below. I printed the poster onto cream copy paper (affiliate link here and below). 

The next step was hiding the four members of The DC Gang. I took the two most recent issues of Scout Life magazine and looked for places where I could attach a bill and have it look like the portrait connected to the body in the magazine. I attached each bill with Micro Glue Dots, then gave the magazines a good shake to make sure they were firmly attached. 


Then I wrote a note with information about where the gang members were last spotted. They corresponded to the places in the magazine where the bill was hidden. For example, this photo of Andrew Jackson shows him rock climbing in Palo Duro Canyon. George Washington (above) is playing football in Los Angeles.


Happy birthday, Timothy! 

4/30/21

Magazine Symmetry Art

The most challenging aspect of being an elementary school teacher is not the actual teaching part, where you explain or demonstrate how something is done. Sure, a teacher has to be a bit of an expert in everything (since they teach math, language arts, science, history, PE, art, music, and technology to a diverse group of 32 people with different ability levels) and that is definitely a challenge, but most people who go into teaching are quite good at explaining skills or demonstrating techniques across many subjects. That's not the hard part. 

The most difficult part of teaching is classroom management. Those 32 people with different ability levels also have different interests, arrive with varying amounts of background instruction, and have personal issues or circumstances that impact learning (whether positively or negatively). Even assuming all students exhibit excellent classroom behavior (a laughable assumption- in a group exhibiting no distracting behaviors, at least one child will rise to fill the void) and students are somehow so homogenous as to have the same base knowledge and familial situations (equally impossible), people naturally learn and work at different rates. 

All this to say, as a teacher it is really important to know how faster workers will spend their time without disrupting slower workers who require the attention of the teacher. Silent reading and creative writing are both obvious choices, as are independent extension activities like researching more about the topic at hand. You can also put students to work preparing materials.

One of my favorite "if you finish your art project early" activities is Magazine Symmetry Art. Students who finish early could select an image from a stack and use color pencils or other art materials to fill in the missing half. Here are samples from Gabbi (owl) and Ralph (upside down boy). 


Early finishers prepped these for me so that we always had a stack available. They would go through old magazines looking for symmetrical images, cut them out down the line of symmetry, and then glue them to paper. It took some time for my helpers to develop an eye for which images work and which do not. For example, if a face is even slightly tilted or turned, it will look mighty strange when you add the mirror image.  


If you aren't juggling 32 kids in a classroom, you may still find that you need a short activity for 1 or 2 kids to do at home while you tend to something else. Magazine Symmetry Art is a fun choice.



2/10/20

Magazine Heart Valentine Tree

Need a quick and easy valentine idea? It took me under 15 minutes to make this and I love how it turned out. 


Magazine Heart Valentine


Materials:

  • magazine
  • construction paper
  • scissors
  • heart punches (optional)
  • craft glue

Steps:


Cut a tree trunk shape from a page of magazine text. I chose mine from an article about how people met their spouses that I really liked. Glue it just left of center on a piece of construction paper. 

Punch (or cut) small hearts from a red area in the magazine. Check ads - many feature red because it is eye-catching. Glue the hearts to the tree to make leaves. 
Punch (or cut) a large heart, then search the magazine for text to spell the rest of your message. I found the letters I, O, and U plus an exclamation point in red, but I couldn't find a Y. I solved that problem by cutting part of an H off. If you can't find the letters you want, just cut what you need from a solid block of color, or handwrite your message!