Showing posts with label m&m. Show all posts

4/26/22

Candy Cardinals

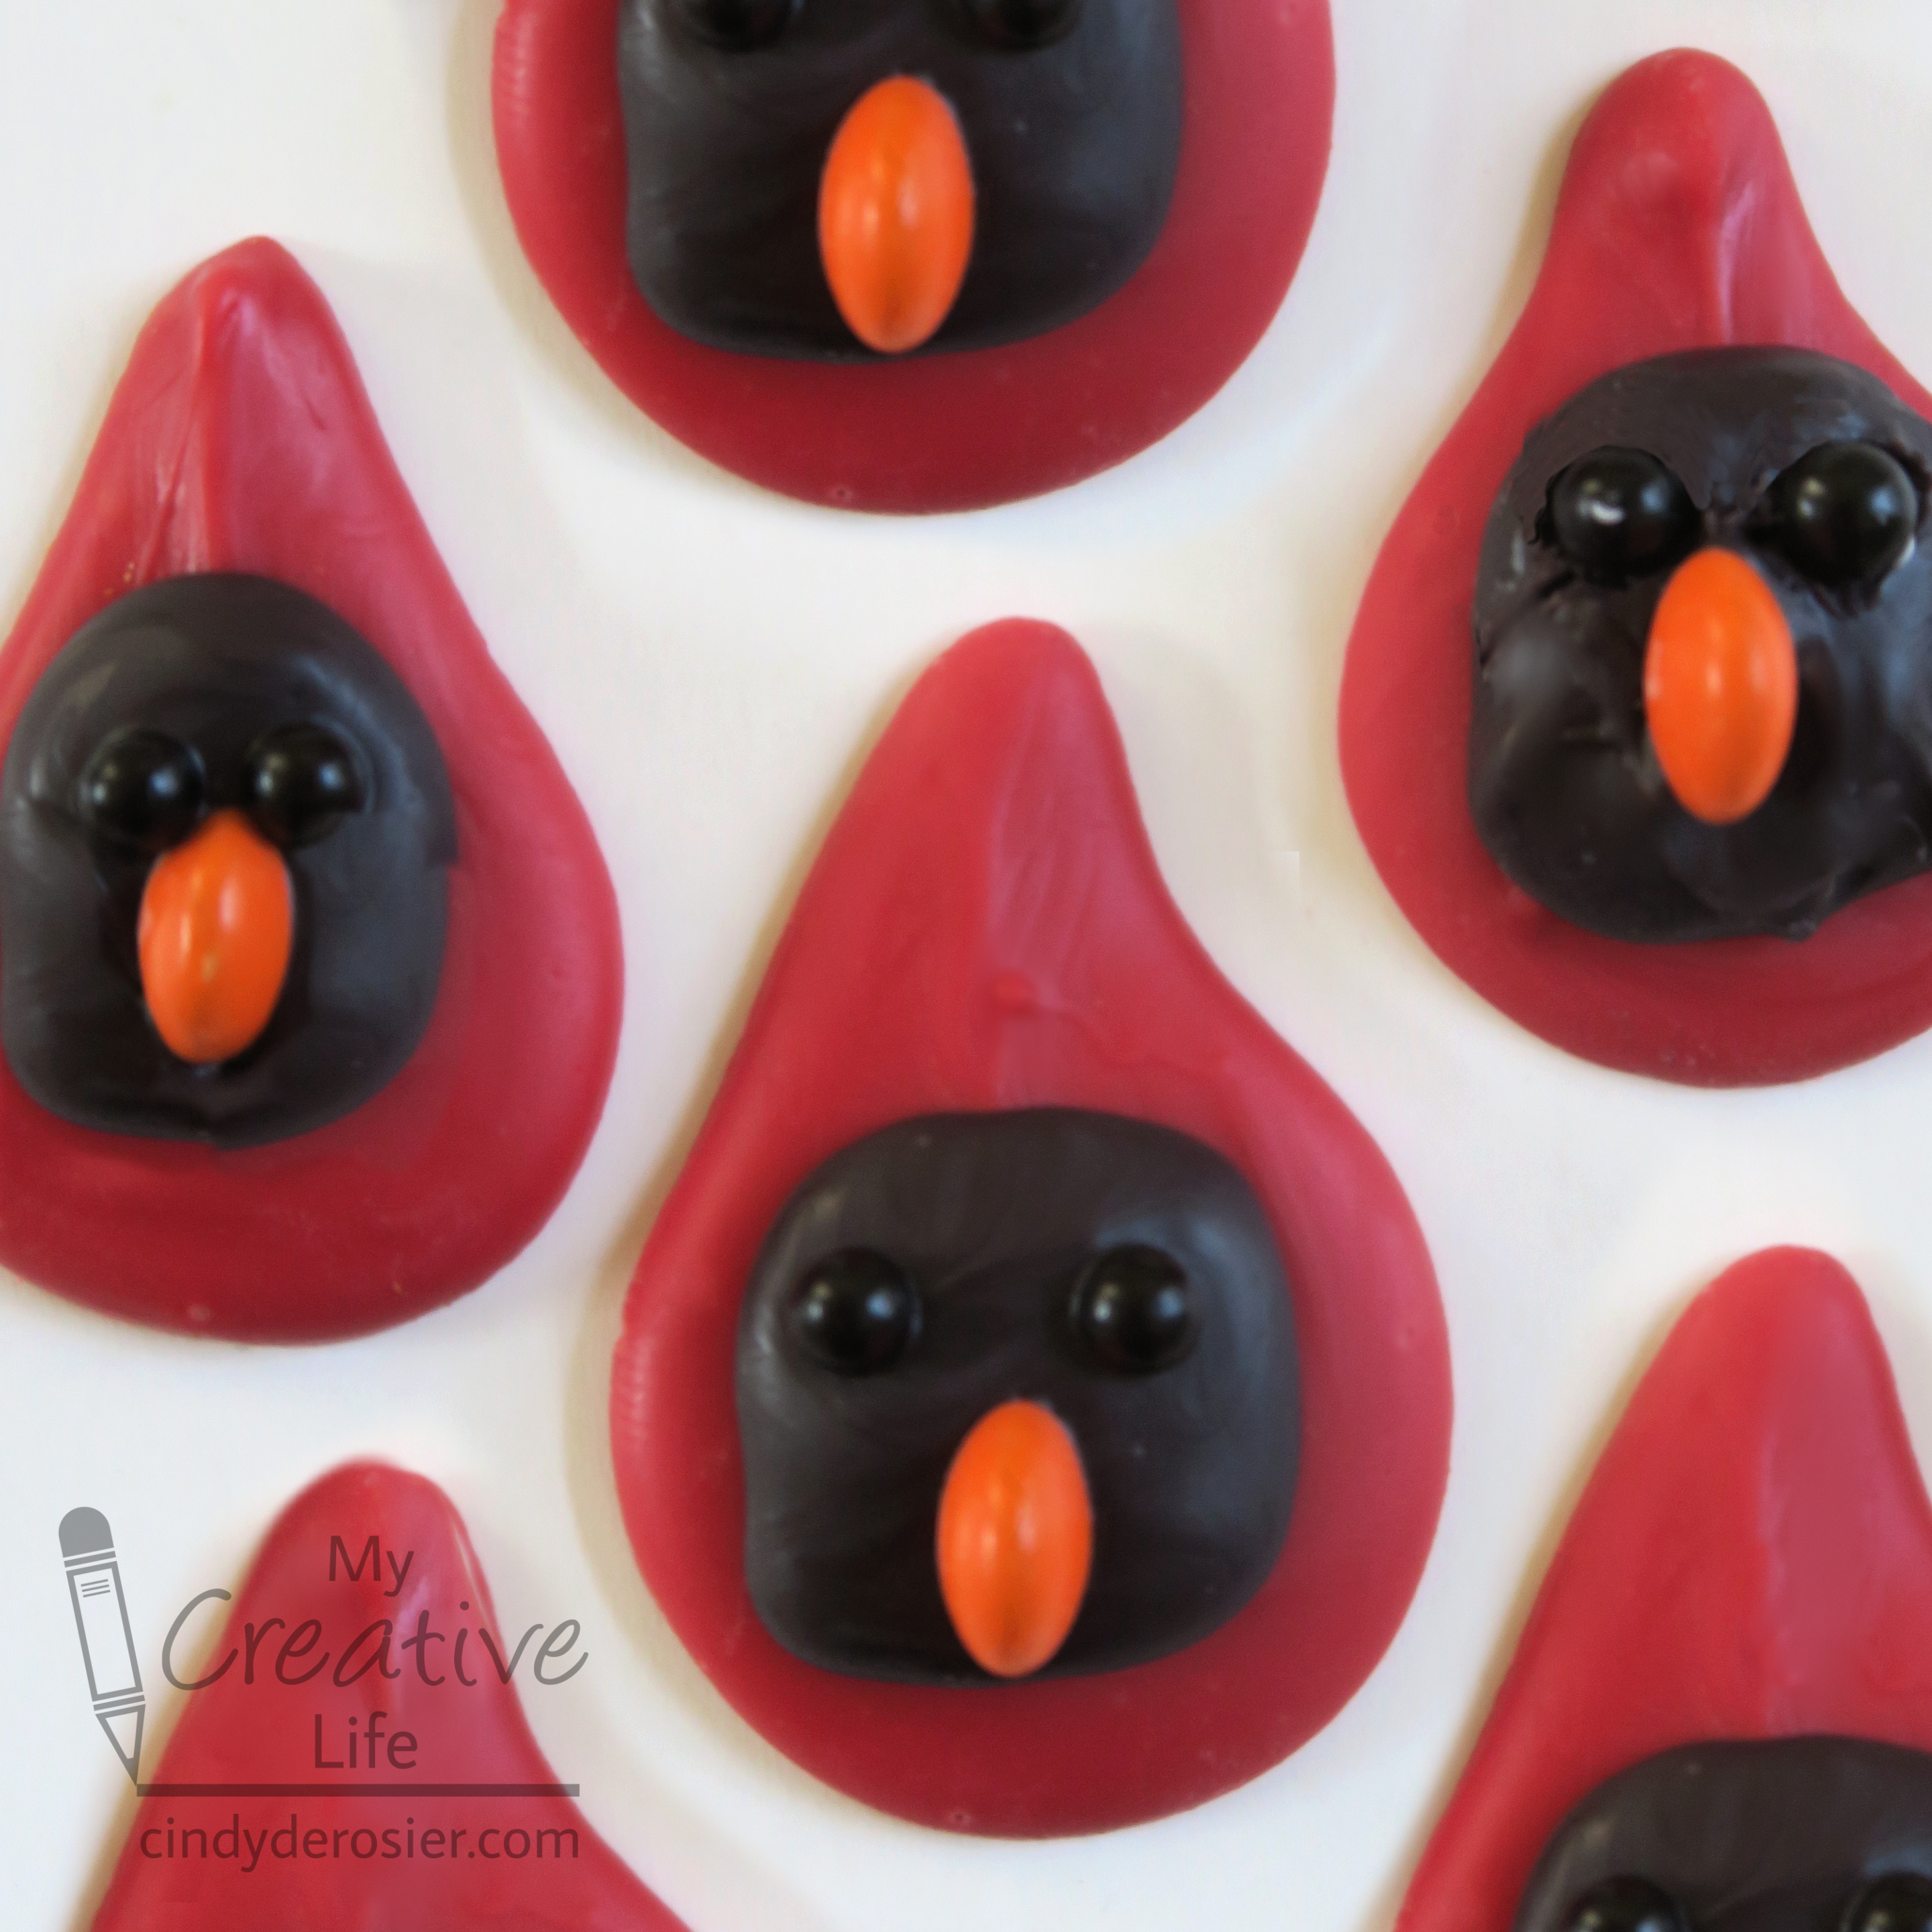
I had some extra black Candy Melts and black Sugar Pearls sitting out after I finished making the Pretzel Raccoons, so I used them to make Candy Cardinals. Can you tell what I used to make the beaks? Affiliate links below.   

Candy Cardinals


Materials:


Steps:


Melt the red candy according to the instructions on the package. Use a spoon to put a dollop of melted candy onto parchment paper, shaping it into the teardrop that makes the cardinal's head. While the candy sets, use a sharp knife to cut orange M&Ms in half. Press straight down firmly; they'll cut without shattering. 

Melt the black candy, then put a dollop onto the head to make the cardinal's face. Place two black sugar pearls and half an M&M onto the black candy to make the eyes and beak. Let the candy set completely, then peel it up from the parchment paper. 

---------


Looking for another cardinal project? I love this tissue paper cardinal craft! The cardinal is the state bird of Illinois, Indiana, Kentucky, North Carolina, Ohio, Virginia, and West Virginia, so it's an especially great choice to make if you live in one of those states. 

11/16/21

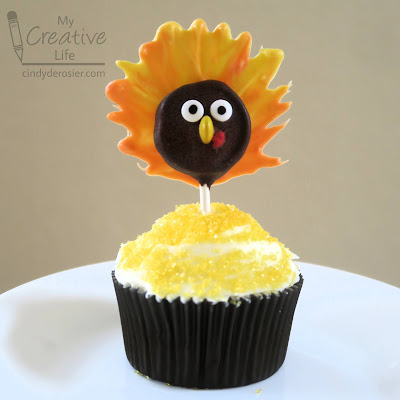
Turkey Lollipop Cupcake Topper

Pumpkin pie is ok, but frankly I'd rather have a turkey lollipop in a cupcake as my Thanksgiving dessert. Affiliate links below. 


Steps: 


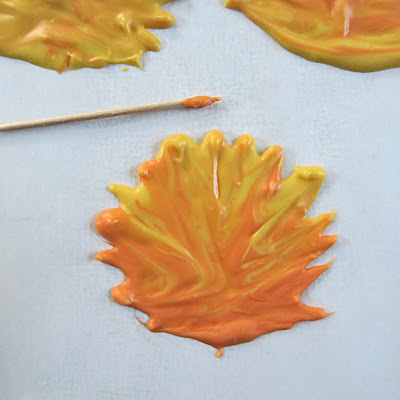
Put a sheet of parchment paper down on your workspace, then prepare the yellow and orange Candy Melts following the directions on the package. Spoon a quarter-sized dollop of orange Candy Melts onto the parchment paper, then add a nickel-sized dollop of yellow directly on top. Drag the toothpick through the candy to blend the colors and make the feathers. Repeat this process for each of the turkeys you'll be making. 


Prepare the rest of your supplies: unwrap the lollipops you'll be using, set out pairs of candy eyeballs, pick out pairs of red mini hearts, and use a sharp knife to cut the mini M&Ms in half (just press straight down, slowly and firmly).  Melt the Dark Cocoa candy melts according to the directions on the package. Dip a lollipop into the melted candy, turning to coat it on all sides. Place it on top of one of the turkey feathers, then place the the eyes, M&M (beak), and hearts (wattle) onto the face. The M&M should be sitting cut-side down and the two teeny hearts should be right up against each other without a gap. 

Repeat this for as many turkeys as you need. Let them set at room temperature for at least 15 minutes, then poke each lollipop turkey into a frosted cupcake. 


What about you? Would you rather have pumpkin pie or a turkey cupcake following the big meal? Or maybe both? Of course, you could pop these turkeys into slices of pumpkin pie or whatever else you're serving. Lots of possibilities!

3/10/21

Pretzel Butterfly Lunch

I met a mom recently who told me she is frustrated because her 5-year old daughter never wants to stop playing in order to eat. She asked if I had any suggestions to help her get her daughter excited about mealtime. I suggested she look through my edible crafts for ideas, but I also wanted to dream up something fun for that little girl to combine her love of play with her need to eat. I think these butterflies might be just the thing.
 

I chose the ingredients and quantities based on what a 5-year old might eat for lunch. You can, of course, substitute other ingredients and change the amounts to suit your child's needs and preferences. Affiliate links below. 


---------


Pretzel Butterfly Lunch


Ingredients:


Instructions: 


(Note: Before giving the ingredients to the child, an adult should use a sharp knife to cut 2 antennae per butterfly. If the child is younger than school age, an adult will need to help spread the ricotta; older children can do this themselves.)
 
Line up pairs of pretzels to make butterfly wings. Spread ricotta on the front side of each wing, then decorate it with peanuts, dried fruit, and candies. Continue until all the wings are decorated. 


Place a baby carrot between each set of wings, then add a pair of antennae at the top. Eat your butterfly creations and any leftover toppings right away while they are fresh and delicious.


This would be really fun as part of a full day of butterfly crafts!

2/25/21

Twinkie Bird on a Stick

You had to have guessed that after making a heart from Twinkies I wouldn't just let Steve eat the rest of the Twinkies in the box without using them for a craft first, right? You know me so well. 


I had originally planned to make blue birds, but when I went through my "still need to try" flavorings, nothing made sense with blue. So I switched to pink and used grapefruit oil to flavor it. Affiliate link here and throughout the post. 

Fun fact: When I was a teenager, we had a yellow parakeet named Twinkie. He had a ton of personality. His favorite bird-approved food was oat groats, but he would regularly help himself to all sorts of human food (including chicken) if we left our plates unguarded for two seconds. 


Twinkie Bird on a Stick


Materials: 


Steps: 

Unwrap the desired number of Twinkies (one for each adult bird and one for each pair of baby birds). Insert the lollipop sticks into the Twinkies. 


Set out a set of small eyes and a yellow TicTac for each baby bird. Use a sharp knife to cut yellow M&Ms in half, then set out sets of medium eyes and an M&M half for each adult bird. 

Next, you're going to melt the candy according to the package directions and flavor it as desired. Here's where you need to learn from my mistakes: Do not leave the Twinkies on a wire rack and pour the melted candy over them. And, do not pour the melted candy over the Twinkies and then place them on a wire rack to drain. Why? Because when you remove them, a bunch stays behind. 


Now learn from my next mistake. After the wire rack fails, do not put the melted candy into a narrow glass, thinking you can just dunk the Twinkie and then lift it out perfectly covered. Instead, the stick comes out and the Twinkie stays put. 

Instead, I had the best luck putting the Twinkies onto parchment paper and spooning the candy over them, adding the eyes and beak, and giving them a good dusting of sanding sugar. Then I lifted the bird out of the puddle, dipped the uncoated back side into the puddle, let the excess drip off, and then placed the bird in a clean spot to set up. 


There are five more Twinkies in the box. Any suggestions for what I should make next? I have a few ideas, but I'd love to hear what you think. 

3/4/19

M&M Candy Giraffe

I currently have two giveaways going on. You still have a chance to win. Follow these links to enter:

---------

When Trevor turned five, he had a zoo-themed party. While I was making my cut-and-color giraffe craft, I thought of a treat that would have been great fun for the party and the perfect compliment to his giraffe cake. I'm eight years too late for him, but hopefully it will help one of you out there who will be throwing a zoo party in your future. There are affiliate links in this post. 


---------


M&M Candy Giraffe


Materials:


Steps: 


Lightly sketch a giraffe head on yellow construction paper. Start with a peanut shape, about 2", which will be the head. Add ossicones directly on top of the head and pointy ears out to the side. Don't worry too much about accuracy; we're going for a whimsical giraffe. When you are happy with the head, carefully cut it out. 


Draw a giraffe body on construction paper. Start with a oval body, about the same size as the head. Add four long legs and a tail. Cut out the body. 


Use the Sharpie to color in two nostrils, the inner ears, the tips of the ossicones, the hooves, and the tip of the tail. Glue googly eyes in place. 


Fill a pretzel bag with yellow and brown M&Ms. You want about 80% yellow to 20% brown. The easiest way to do this is to put in a small handful of yellows, then drop in a brown. Repeat until the bag is mostly full. Use the twist tie to close the pretzel bag.


Use glue dots to attach the head and body to the pretzel bag neck (head attaches to the top front and  body to the bottom back). Cut a piece of green construction paper to make grass, then glue it to a blue background. Sprinkle some green M&M's along the edge of the grass.  


I'm just noticing now that my giraffe has no spots on his body. If you want, you can add some additional brown M&M's to his body to give him spots. Or leave it as is. We're going for whimsical, after all!