Showing posts with label tag. Show all posts

3/22/24

Easter Bunny Gift Tags (What to Do with Old Business Cards)

I recently came across some outdated business cards. Rather than getting rid of them, I turned them into bunny gift tags that I can put on Easter gifts. Obviously, you can make these with plain paper, but it's fun to repurpose business cards that are no longer useful. Affiliate links below. 


Easter Bunny Gift Tags (Made from Old Business Cards)


Materials:


Steps: 


Cover the printing on the business card with a thin coat of gesso. Add a second coat if the business information still shows through. 

When the gesso is dry, paint the business cards in the pastel colors of your choice. Let them dry, then paint bunnies onto the cards. I intentionally painted my bunnies in different colors and sizes. 


When the paint is dry, use the micron pen to outline the bunnies and add facial features. Again, I made each bunny unique. 

Snip off the upper corners of the business cards to create the tag shape, then punch a hole in each. Add coordinating ribbon. The back of the tags are blank, so you can add a name or a short message there. 


This is the first rabbit craft I've done in over a year since my heart was broken into a thousand pieces. Having Brayden here helps, but I miss Trouble every single day. It's less painful as time passes and I'm glad to be able to make rabbit crafts again. 

10/14/21

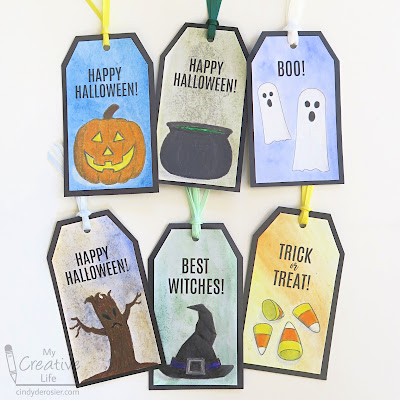
Printable Halloween Tags to Color

I've worked my way through almost all of Sarah's coloring videos and have learned so much! I mentioned awhile back that I'd found her video about the best paper for printing coloring pages to be extremely helpful. Based on her recommendation, I ordered a pack of Neenah Bristol Vellum (affiliate link here and below), waited impatiently for it to arrive, and crossed my fingers that it would work with our printer. I'm happy to report that it does! 

My first project was making Halloween tags. 


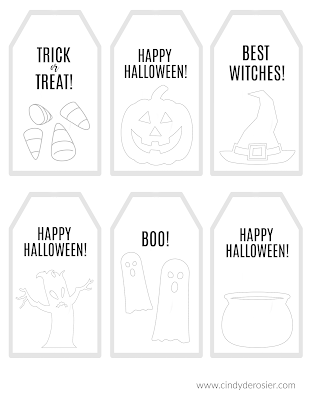
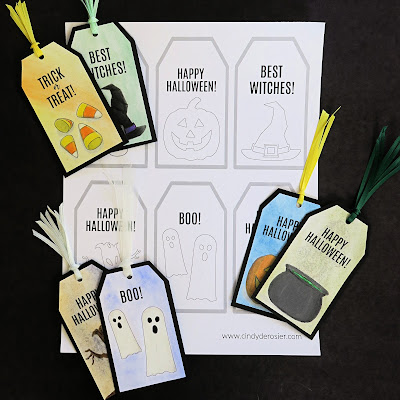
I started by designing the printable using PicMonkey. I printed the text at 100% but faded the borders and the graphics to 60%. (You can download it (for free) here.)


I used my Prismacolor Premiers to color the images and was delighted with the way the colors laid down on the bristol vellum. I was particularly pleased with the shadows on the candy corn and the hat, as well as the shading on the 'white' ghosts. My plan was to add a watercolor background to the tags... 


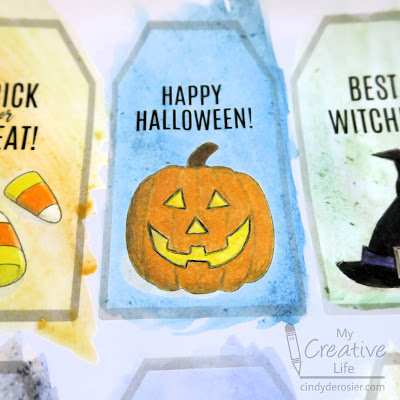
... which ended up being a not-good idea. When I tried to go any sort of blending, the paper pilled. And my subtle grey shadows ended up looking weirdly white. 


But no matter. I learned a lot. And by matting the tags with black cardstock and adding coordinating ribbon, the tags don't look half bad. 


I'm going to have to do some experimenting with watercolors over colored pencil using a more appropriate paper for wet media. I also want to try using the colored pencils over watercolor to see the difference.

4/22/20

Diamond Art Flower and Monogram Tags

The new Diamond Art Freestyle program by Leisure Arts lets crafters buy gems individually to get exactly the colors you want. They have over 400 colors of gems, including metallics, aurora borealis, neon, and even glow-in-the-dark. With all the colors of sparkly gems available and two different adhesives that work on practically any surface, you can now create any design you can dream up. Today I'm sharing ideas for gift tags. First up, flowers. Scroll down further to see the instructions for the monogram tag. Affiliate links below. 


---------

Diamond Art Flower Tag


Materials:


Steps:


Paint the tag and let it dry completely. Use the punch to cut flowers from the sandwich adhesive. Remove the white side of the adhesive and stick the flowers to the tag. Then remove the clear lining from one flower and start dotting. In this photo, you can see one completed flower. The second flower still has the clear lining on it. 


When the second flower is complete, use the liquid adhesive to draw leaves and vines on the tag. Let the adhesive dry until clear, approximately 15 minutes. Dot the leaves and vines. Finally, add embroidery floss to the top of the tag.


---------


Diamond Art Monogram Tag


Materials:


Steps:


Paint the tag and the wood letter. When the paint is completely dry, add a coat of Freestyle adhesive to the front of the monogram. Wait 15 minutes or until the adhesive is clear.

Add gems to the monogram. Glue it to the tag with Supertite, then add dots of adhesive randomly on the tag. Wait until the adhesive is clear, then add gems. Tie a loop of embroidery floss to the tag.


---------


For more ideas for using gems, check out all of my Diamond Art ideas! There is truly no limit to how you can use these. 

4/12/19

Using Leftover Diamond Dotz: Luggage Tag with Monogram

New luggage means a new luggage tag. It took less than 10 minutes to pull together cardstock scraps and extra Diamond Dotz to make a tag that perfectly matches my awesome new, inexplicably-inexpensive, purple suitcase. Make your own luggage tag! Affiliate links below.


---------

Luggage Tag with Diamond Dotz Monogram


Materials:


Steps:


Cut a rectangle of purple cardstock the same size as your tag holder. Cut a piece of white cardstock so that it is slightly smaller and run it through an embossing machine to add texture. Punch a scalloped circle from purple and a regular circle from white. Glue all the layers together.

Use the craft glue to write the letter of your monogram. Add Diamond Dotz along the glue line to make the letter. Then dot glue along each of the scallops and add Dotz. 


Write your contact info on the back (or attach a business card), then slide it into the tag holder. You're ready to travel!