Showing posts with label ribbon. Show all posts

9/30/22

Scarecrow Mason Jar

This Scarecrow Mason Jar is such a fun way to share a fall treat with friends! You can fill it with anything you want, but I designed it with Cinnamon Spice Caramel Apple Popcorn in mind. Affiliate links below. 


Scarecrow Mason Jar


Materials:


Steps: 


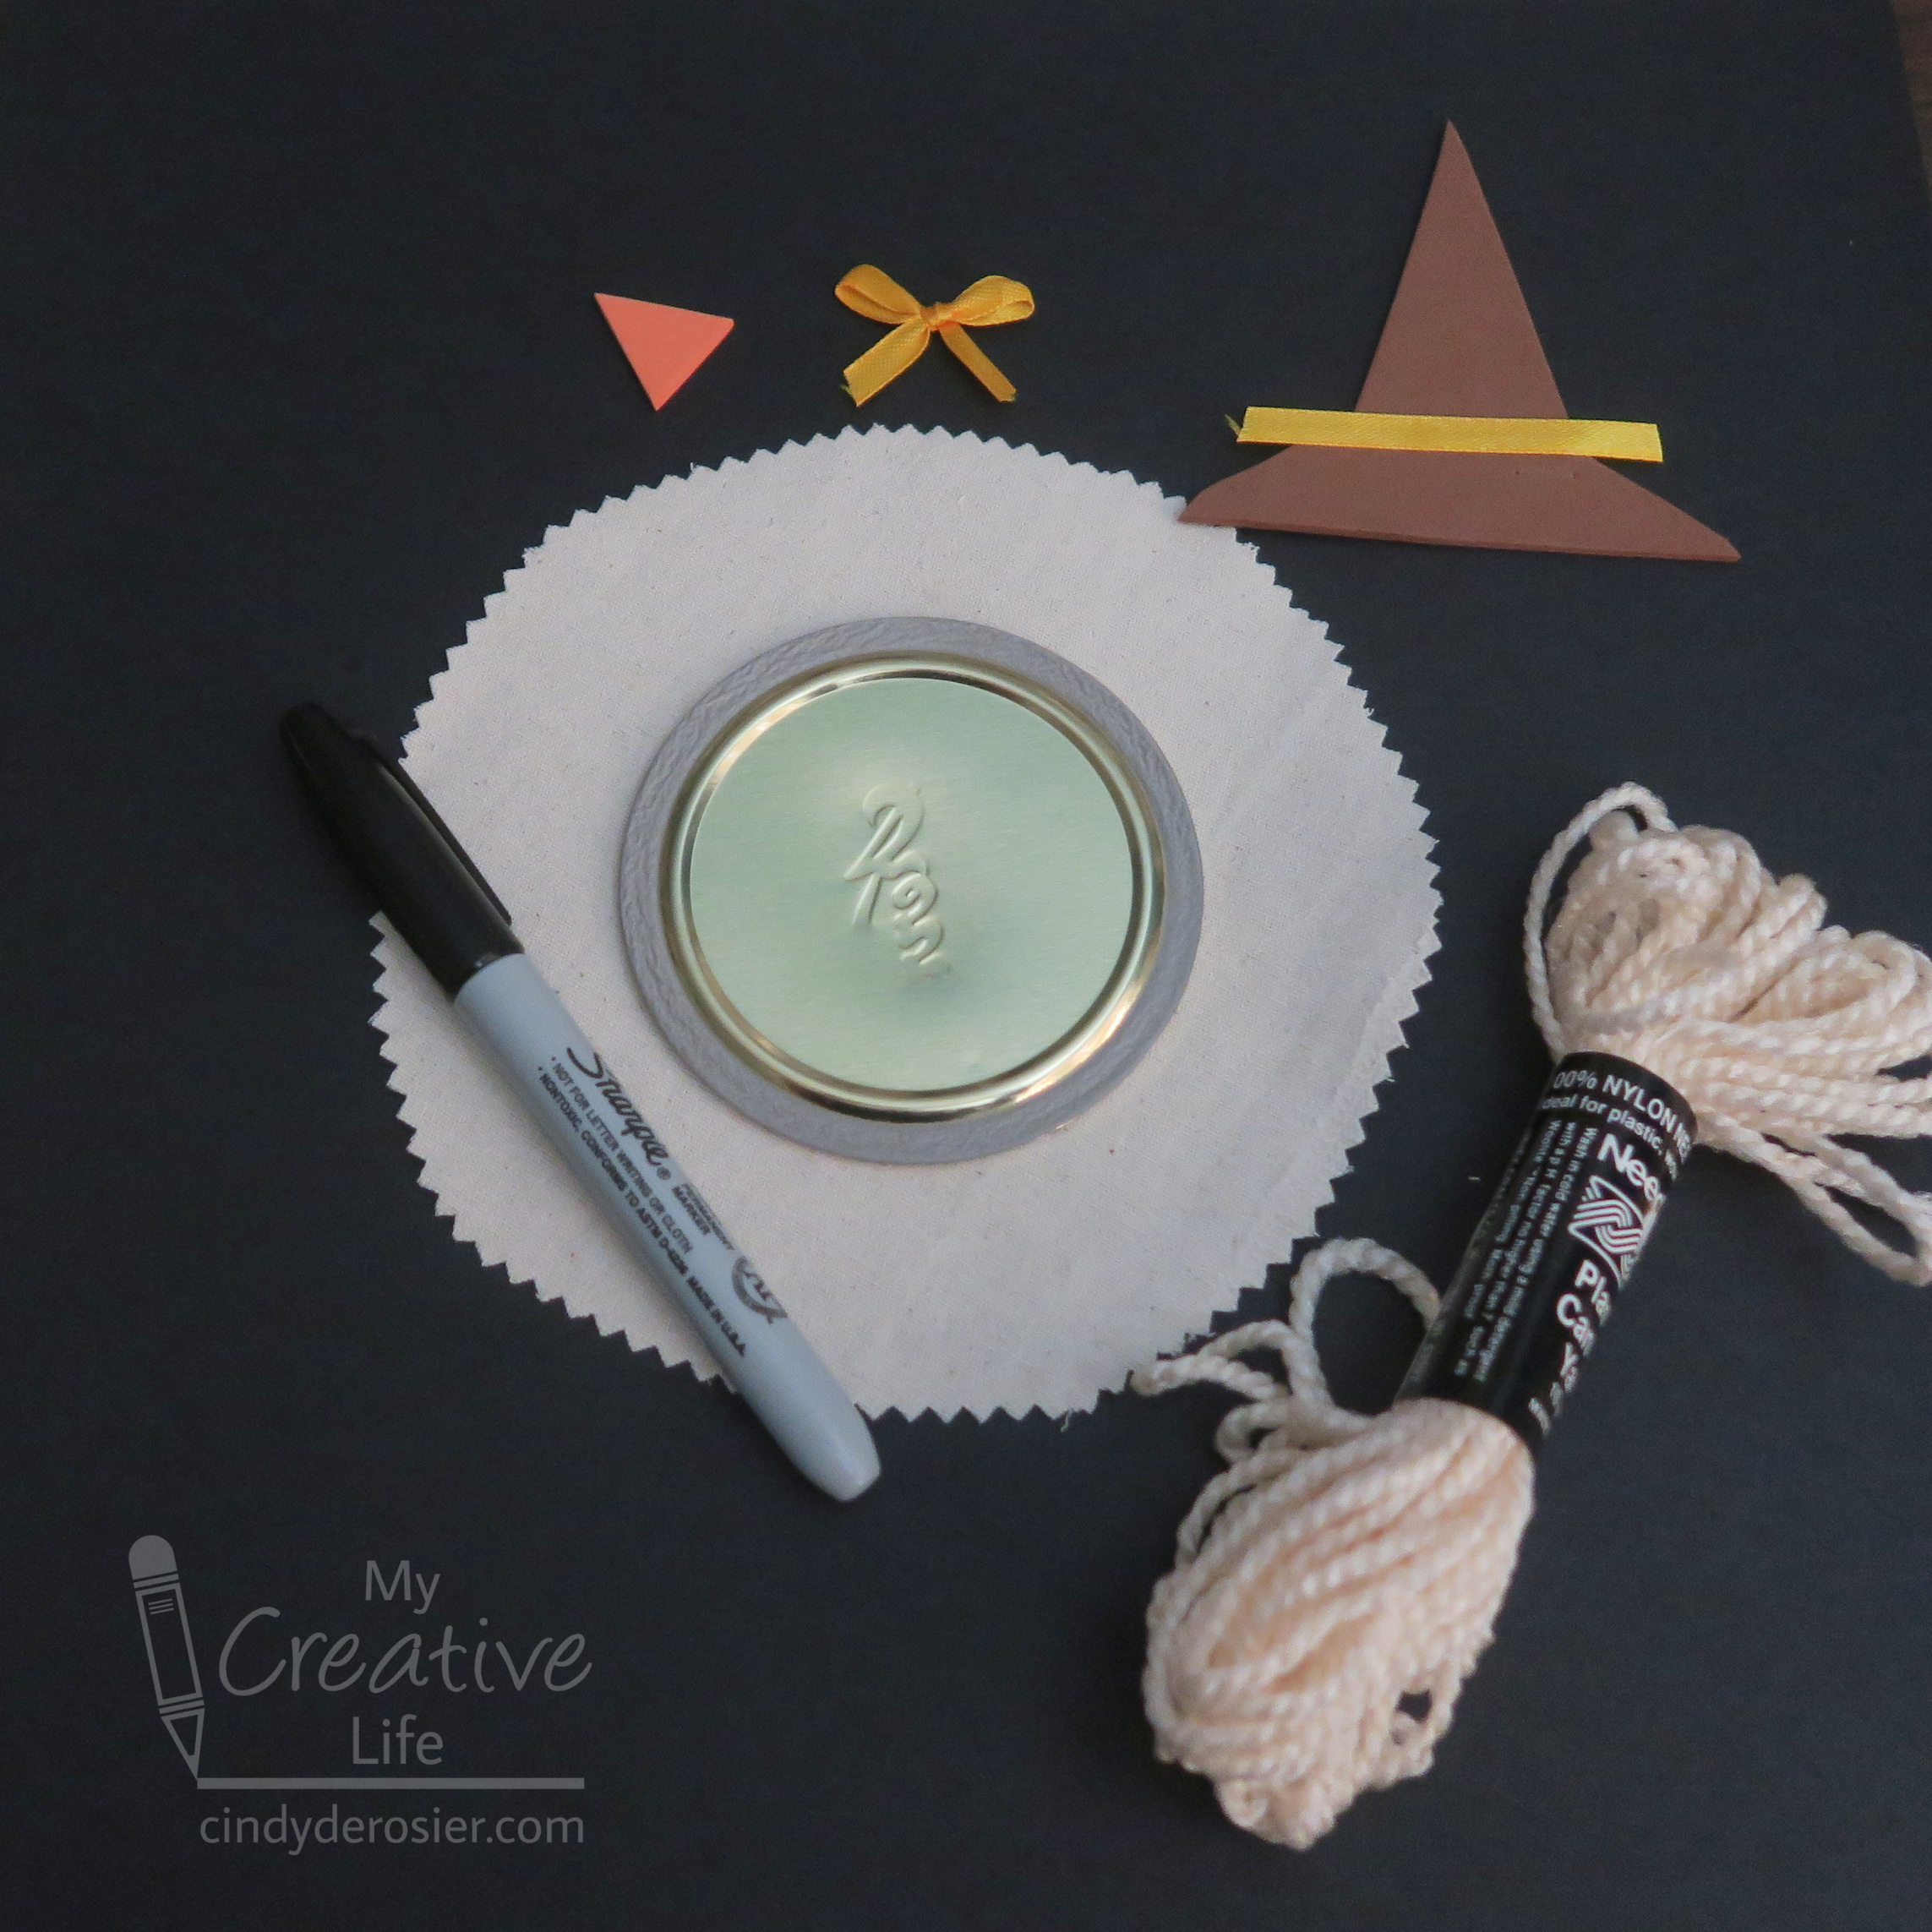
Use the pinking shears to cut a circle of fabric approximately 6" in diameter. Glue the lid to the center of the fabric. 

Use regular scissors to cut lengths of yarn for the scarecrow's hair. Then cut a triangle nose from orange craft foam and a pointy hat from brown craft foam. Cut a length of ribbon to make a hat band, then tie another piece of ribbon into a small bow. 


Fill the mason jar with the popcorn or other treat, then add the lid. Screw on the ring tightly. 

Glue lengths of hair to the scarecrow, trimming as necessary. Glue the hat on top. Glue the eyes, nose, and bow into place. Use the Sharpie to draw the scarecrow's mouth. 

12/15/21

Paddle Spoon Reindeer Ornament

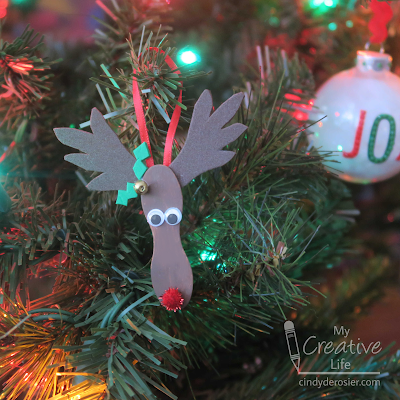
This is my latest homemade ornament, which I'm calling a Paddle Spoon Reindeer because "paddle spoon" is the search term that finally worked when I tried to figure out what to call the mini wavy craft stick that makes up the reindeer's face. It's hanging right by my Diamond Dotz Joy ornament. Slowly but surely, the homemade ornaments are crowding out the store-bought ones on the tree (as it should be). Affiliate links below.    


Paddle Spoon Reindeer Ornament


Materials:


Steps: 


Paint the paddle spoon brown and set it aside. Cut the brown craft foam to make a pair of antlers, then cut the green craft foam to make two teeny holly leaves. Cut a length of ribbon to make the hanger.

Glue the antlers behind the paddle spoon, then glue the eyes, pom pom, holly leaves, and bell in place. When those are dry, glue the ribbon hanger to the back. 

10/14/21

Printable Halloween Tags to Color

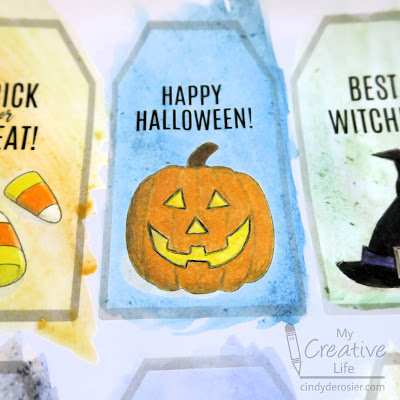
I've worked my way through almost all of Sarah's coloring videos and have learned so much! I mentioned awhile back that I'd found her video about the best paper for printing coloring pages to be extremely helpful. Based on her recommendation, I ordered a pack of Neenah Bristol Vellum (affiliate link here and below), waited impatiently for it to arrive, and crossed my fingers that it would work with our printer. I'm happy to report that it does! 

My first project was making Halloween tags. 


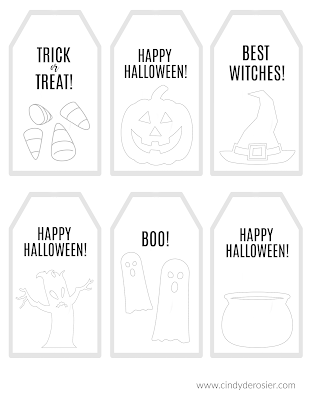
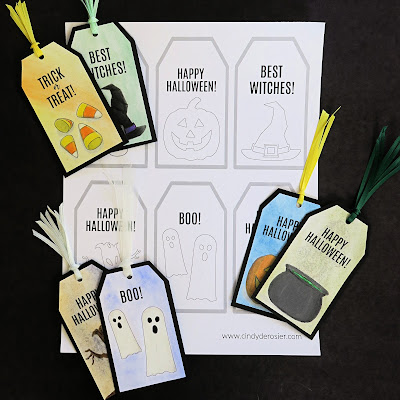
I started by designing the printable using PicMonkey. I printed the text at 100% but faded the borders and the graphics to 60%. (You can download it (for free) here.)


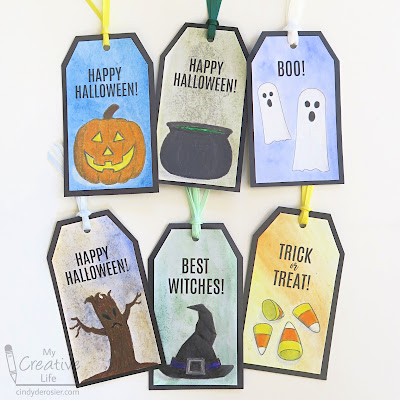
I used my Prismacolor Premiers to color the images and was delighted with the way the colors laid down on the bristol vellum. I was particularly pleased with the shadows on the candy corn and the hat, as well as the shading on the 'white' ghosts. My plan was to add a watercolor background to the tags... 


... which ended up being a not-good idea. When I tried to go any sort of blending, the paper pilled. And my subtle grey shadows ended up looking weirdly white. 


But no matter. I learned a lot. And by matting the tags with black cardstock and adding coordinating ribbon, the tags don't look half bad. 


I'm going to have to do some experimenting with watercolors over colored pencil using a more appropriate paper for wet media. I also want to try using the colored pencils over watercolor to see the difference.

1/22/21

Chinese New Year Ribbon Dragon Craft

January is a busy month in the world of kids' crafts. In January, lots of people search for crafts about Arctic animals (as if penguins and polar bears somehow don't exist if it isn't winter in the US). They're also looking for MLK Day ideas, Groundhog Day puppets and treats, 100th day of school crafts, and everything having to do with Valentine's Day. Mardi Gras searches rise dramatically, as do projects featuring Presidents Washington and Lincoln. And then there's Chinese New Year. Technically, it's Lunar New Year, as many other Asian cultures celebrate it. 

Something unique to Chinese New Year is that the crafts people want follow a 12-year cycle. This year, people want Ox crafts. Last year's Rat crafts won't be popular again until 2032, an eternity (and literally a lifetime) for a child. This time next year, the Ox crafts will hold no appeal as everyone makes Tiger crafts. No other holiday is like that. Can you imagine if everyone decorated for Halloween with only witches one year, then threw them all out (or stored them for 12 years) and decorated only with mummies the following year?!

Fortunately, there are some perennial Chinese New Year decorations that make excellent crafts. Red lanterns, firecrackers, plum blossoms, and fish are great choices. And then there are dragons. Dragons are unique among the 12 animals of the Chinese zodiac in that they are the only mythical creature. As a symbol of power and luck, they are an important part of every New Year's celebration. I had so much fun designing this dragon, made with wired ribbon! Affiliate links below. 


Chinese New Year Ribbon Dragon Craft


Materials:


Steps:


Cut red cardstock to make the dragon's head, two horns, four feet, and a tongue. Cut gold cardstock to make the hair, eyebrows, nose, beard, and tail. Cut two lengths of Twisteezwire to make the mustache. (The photograph below shows most of the red and gold pieces, but is missing the tongue, eyebrows, and nose.) 


Cut eyes and teeth from white cardstock. Then cut pupils, nostrils, and a mouth from black cardstock. 


Glue all the face pieces together, then set it aside. 

Bend the wired ribbon into gentle waves to form the dragon's body. Glue the tail to one end and the feet to either side of the ribbon where it touches the table. 

Make a sharp fold to make the dragon's neck, then the glue the face to the folded portion. When the glue is dry, you can arrange your dragon however you'd like. 


Obviously, you can change out the colors, features, and proportions of the dragon to make it more or less traditional. Enjoy!

11/5/20

Diamond Art Joy Ornament

This time last year, I was frantically designing Diamond Art holiday crafts. I was contracted to make fifteen projects that would appear in Leisure Arts' Sparkle Holiday book, along with four projects for their Paper Crafting book. I had a ridiculously short turn-around time and I did pretty much nothing except Diamond Art for two weeks in November. It was awesome and I loved the whole experience. Plus, I am really proud of what I designed. 

Leisure Arts bought my actual projects from me. So when my friends at Creative Crafts invited me to participate in the 2020 Christmas Edition, I decided to make a Diamond Art ornament that I can keep and display. I actually like it better than the glass ornament I made for the book. :)


Diamond Art Joy Ornament


Materials:


Steps:

Remove the top from the ornament and fill it with glitter and feathers. Replace the top. 

Use Sharpies to color in the letters JOY while the stickers are still on the sticker sheet. Then, adhere the letters to the ornament. 

Use a small paintbrush to spread the adhesive onto the letter stickers, trying not to get any on the ornament itself. Add tiny dots of adhesive around the edge of the ornament top. Wait 15 minutes, or until the adhesive becomes clear. 


Time for dotting! Add red dots to the J and the Y and green dots to the O and around the top. Add a loop of ric rac and your ornament is ready to display!

  ---------

If you're looking for more ideas for holiday dotting, I highly recommend Leisure Arts' Sparkle Holiday book. It makes a great gift, too. Here are some of my favorite projects I designed for the book (the ones I most wish I still had and could display in our house):


For even more fun Christmas crafting ideas, check out these ideas!

1/31/20

Bunny Love Wall Art

Although we only have the one rabbit, there's no question that I'm a Crazy Bunny Lady. (That's an affiliate link for a shirt I NEED. There are more links throughout this post. That means I get a commission if you make a purchase through a link, at no extra cost to you.) This was the first thing I made with the Model Magic shapes I cut with cookie cutters. You did know that you can paint Model Magic, right? 


---------

Bunny Love Wall Art


Materials:


Steps:


Paint the embroidery hoop, the letter I, and the bunny gray. When the paint is dry, put the fabric in the hoop. 


Trim away the excess fabric, then use the Supertite to glue the edges down against the hoop. 


Glue the Model Magic pieces to the front of the fabric. 


Gather a bundle of hay and tie it with ribbon. Glue it to the top of the embroidery hoop, then add a second piece of ribbon as a hanger. 


I really do love bunnies. So much personality in such a small package!

12/16/19

The Ultimate Christmas Recycling Craft

Steve thinks I have a problem. Specifically, he thinks that I "hoard trash." Clearly, he doesn't understand how important it is for a kids' craft blogger to have a large stash of cardboard tubes, corks, plastic lids, and empty Tic-Tac containers available for craft emergencies. Obviously, I don't have a problem. I have a perfectly normal collection of valuable crafting materials.

Yet, for someone who accuses me of "hoarding trash," Steve is my biggest enabler. He changed a burned-out light bulb the other day and asked me if I wanted it. Of course I did. Because otherwise, I couldn't have made this:


I'm assuming you spotted the light bulb right away, but can you find any other "trash" in there? Look closely! Did you spot an empty spool? A plastic lid? A Tic-Tac container? I used all of those and more in this project that I'm calling The Ultimate Christmas Recycling Craft. "Hoarding trash." To that I say, "Hogwash!" And anyway, I'm USING the trash important craft stash, not hoarding it.


To make my creation, I painted the light bulb with Classic Green Folk Art acrylic paint (affiliate link here and elsewhere). It took two coats to get good coverage. I added a coat of brown to the empty spool. When those were dry, I added self-adhesive enamel dots to the tree and glued a craft foam star in place. Then I attached the spool to the light bulb using Supertite. I'm a relatively new convert to Supertite. It has the holding power of hot glue, but is repositionable for much longer than hot glue and obviously doesn't have a cord or heating time. I always get it on my fingers though, so I probably should be using my Hot Glue Finger Caps with it, now that I think about it.... 

Anyway, here's a look at my workspace midway through the project. As you can see, my next step is gluing a scrap of felt to a plastic lid. It BARELY fit, but the whole point of my project was to use up stuff, not cut a new piece. 


Once I had my tree skirt, I glued the tree in place. I decorated the presents by wrapping ribbon scraps around them. Finally, I glued them under the tree. 


Clearly, I use recyclable materials cleverly, not "hoard trash." I challenge each of you to make your own version of The Ultimate Christmas Recycling Craft. It's a lot of fun!

11/6/19

Pez Dispenser Halloween Costume

This year, Trevor dressed as a Pez dispenser for Halloween. 


Specifically, he was this reindeer Pez dispenser. 


A perfect resemblance, no?


I made 95% of the costume during the power outage. No glue gun, sewing machine, or artificial light for me! Given the choice, I recommend electricity. Affiliate links below. 


---------


Pez Dispenser Halloween Costume


Materials:


Steps: 


Remove the sleeves from the t-shirt. Print out PEZ and put it under the t-shirt on the light table. Carefully trace the letters onto the shirt. (Yea, electricity!)


Cut the styrofoam so that it has the same proportions as a package of Pez. Ideally, you should use a foam cutter. I used a steak knife, which is really messy. (As an added bonus, you can't vacuum without electricity and trying to sweep up staticky bits is impossible. I shouldn't have done this indoors, but hindsight is 20-20.) 

Wrap the ends with duct tape. 


Wrap the felt around the middle of the Pez package, leaving the silver edges exposed. Glue it in place with the FabriTac. Print out PEZ in blue, cut out the letters, then glue them to the fabric. Use the Sharpie to write the other information onto the Pez package. I wrote exactly what was on the actual Pez container, except I changed the net weight to the weight of the styrofoam prop.

Measure a piece of ribbon to fit around your neck, add an extra inch, then cut. Sew the snaps onto the ends, then sew the bells to the front center.

After you're dressed, add a red reindeer nose using face paint. (Fun fact: This is the very first time Trevor has worn face paint. All his life, he has refused face paint, temporary tattoos, and anything similar. I only put the tiniest amount on to give him a red nose. He hated it, but was cooperative for the pictures.)


Due to the insanity that was our life last week, Trevor tried on his costume for the first time about 30 minutes before his friends showed up to trick-or-treat. If he'd tried it on sooner, I would have made some changes. I would have altered the shirt to make it narrower to more closely mimic the shape of the Pez dispenser, plus added a rigid piece to define the rectangular shape. Brown sweatpants would have helped the look too. But even without those improvements, both Trevor and I were happy with how it turned out. And we all had an awesome Halloween. 

2/22/18

Coloring Book Jar Toppers

Look at my cute jar of strawberry jam! The topper is made with an image from the same coloring book by Leisure Arts that I used for the cupcake card. This project is ridiculously easy to do, and you can get quite a few toppers from just the one coloring page. Wouldn't this make a great gift? Affiliate links below.


---------


Strawberry Jam Jar Topper


Materials:


Steps:


Color the strawberry page. Use the punch to cut circles out of the completed coloring page.


Use hot glue to attach a coordinating ribbon to the outside of the jar ring.


Glue the coloring page cut-out to the jar's lid and tighten the ring around it. 


Now give out the jam to friends and family!

3/23/15

Kool-Aid Bunny Craft (Bunny Week, Day 1)

Welcome to the 3rd annual Bunny Week here at My Creative Life! 


All week long, I'll be sharing rabbit-themed crafts and information. It's like Shark Week, only fuzzier. If you're a new reader this year, I'd recommend going back and reading previous years' Bunny Week posts. Or, you can see all my rabbit-themed crafts, scrapbook layouts, videos, foods, and more here.

Bunny Week 2013

Bunny Week 2014


OK, let's start Bunny Week 2015 off with a fun and easy kids' craft!


These cute bunnies started life as Kool-Aid containers! The wrapper slides right off, revealing an unmarked container. You can either make the bunny with a full container of Kool-Aid (like my pink rabbit above)....


... or, you can wash and dry the container and fill it with a treat. Trevor chose to put Kix in his bunny. The only other materials are white craft foam, pink craft foam, googly eyes, ribbon and a glue gun.

Start by cutting out white craft foam ears. You'll want a slanted base on each ear. Adjust the angle until you're happy with them. Cut a small triangle from pink craft foam for the nose. Glue each feature in place. Hold the ears upright for a few seconds until the glue sets. Finally, tie a ribbon around your bunny's neck. I opted to add a bow to my girl bunny. Cute, right?! And so easy.

.....

And, as promised, it's time to pick a winner for the "Rescue is My Favorite Breed" t-shirt, benefitting Contra Costa Rabbit Rescue! Random.org chose #12, so the lucky winner is Miriam! Congratulations! Send me your t-shirt size and address at cindy.derosier at gmail.com.

11/26/14

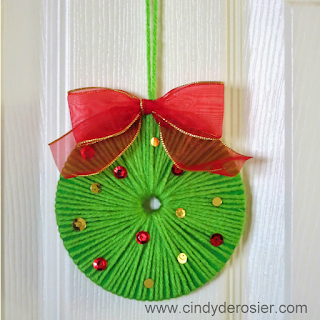
CD Wreath

Time to share another of my CD crafts! We're gearing up for Christmas around here (the decorations will go up Sunday, the start of Advent) so I made a wreath. 


CD Wreath


Materials

  • old CD
  • gesso
  • green paint
  • green yarn
  • sequins
  • ribbon

Steps


Put a coat of gesso on a CD and let that dry. Paint the CD green. Tape one end of the yarn to the back of the CD, then wrap it around and through the center until the CD is covered. Cut off the excess and tape it to the back. 


Use the excess yarn to make a hanger. Glue sequins randomly to the front of the wreath. Add a bow and it's ready to go!


For those who celebrate, when do you decorate for Christmas?

9/29/11

Our Acorn Wreath

Trevor has always been a collector, specifically of nature items such as rocks, pine cones, feathers, oak galls, and acorns. Lots and lots of acorns. Not long after we made the acorn napkin rings, Trevor discovered that the trees by the field where he plays soccer had just started dropping acorns by the thousands. He happily gathered up a few hundred to take home.

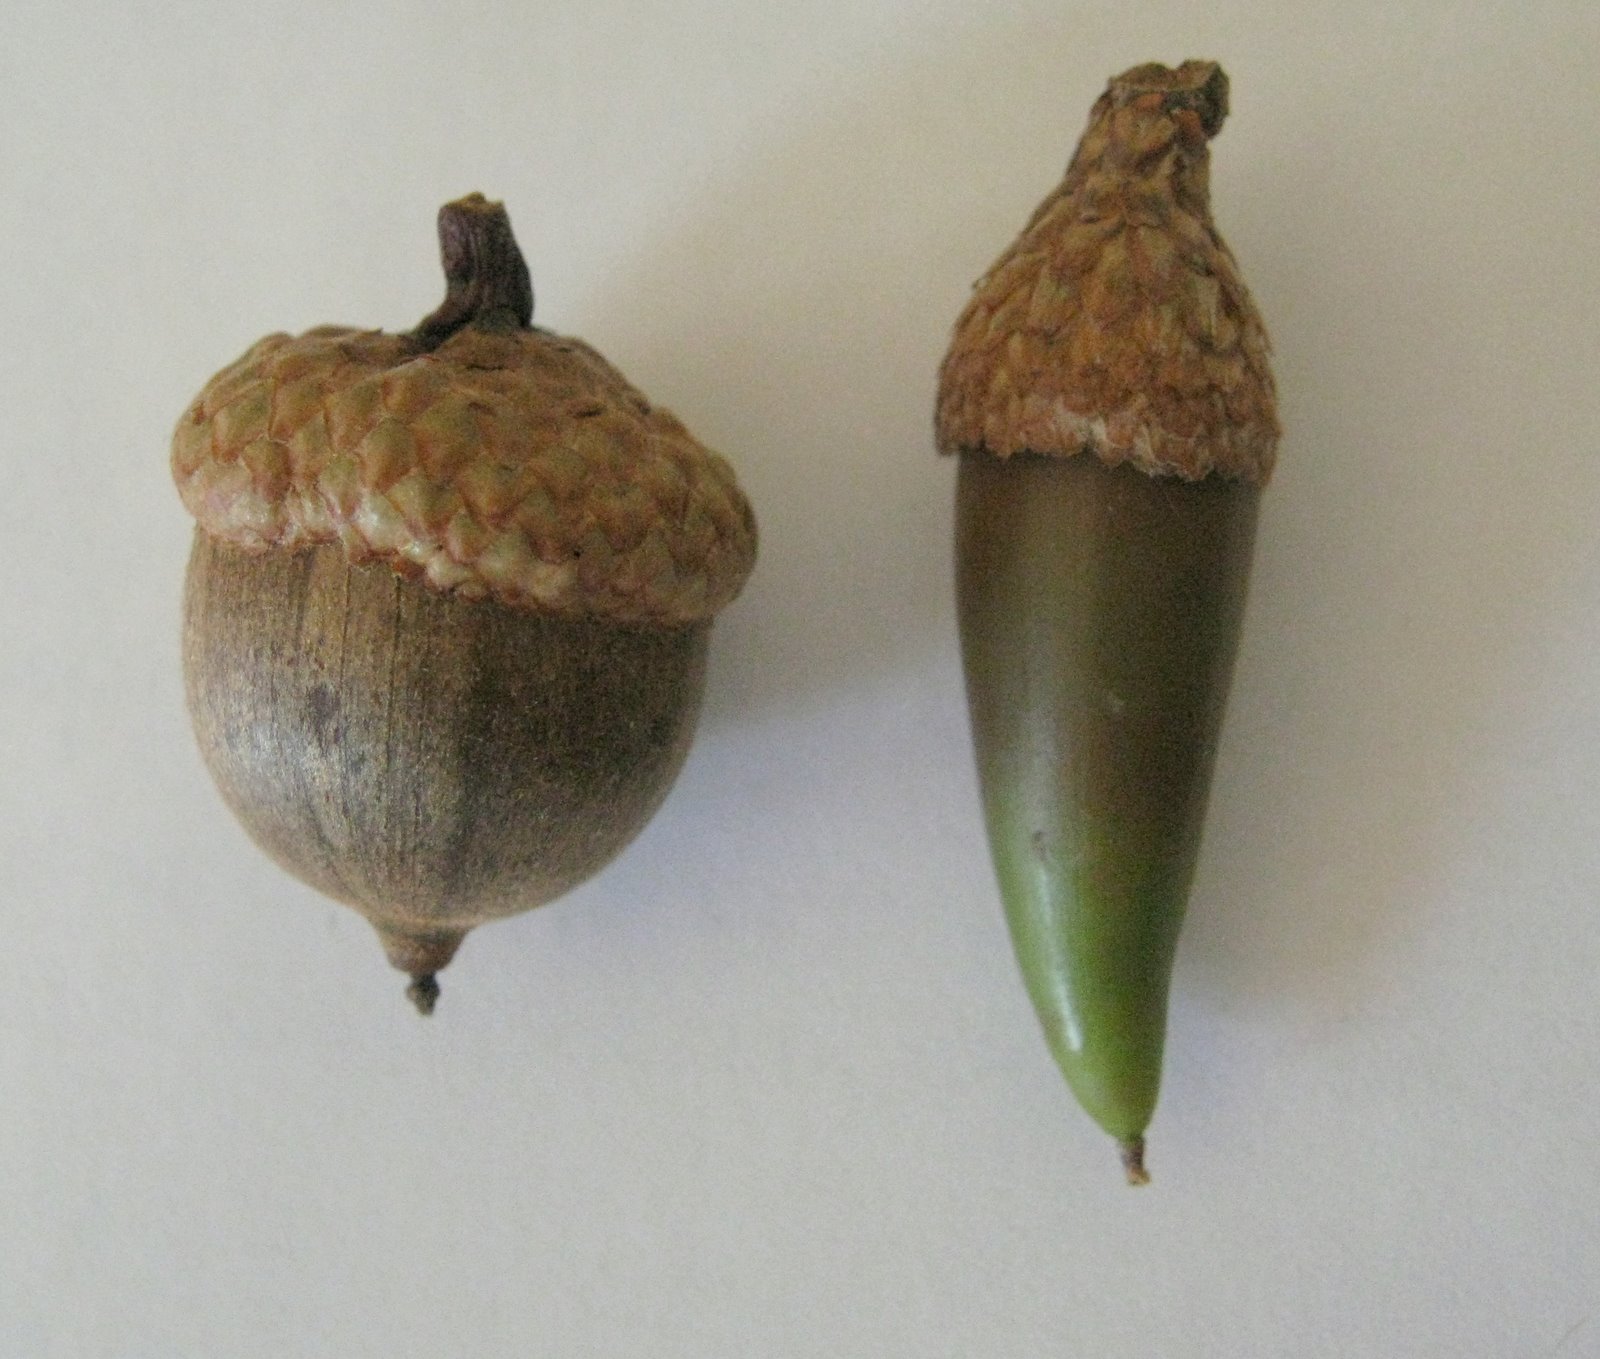
He was fascinated by how different the two types of acorns looked. The one on the left is the type I collected near his school to make the napkin rings. The one on the right is from the soccer field.


We decided to make a wreath. We took a cheap paper plate, cut off the outside edge, and then cut out the center. This left us with a basic wreath shape.

We painted it brown.


Then we used the glue gun to attach the acorns around the perimeter. I operated the glue gun and Trevor placed the acorns. While he is extremely responsible and very cautious, I don't think at 5 he is old enough to operate a glue gun yet. That was fine with him. 

We added a bit of orange ribbon and hung up our wreath. I really like the way it turned out. And you can't beat the price, since everything in the project we either gathered ourselves or found around the house.


Make one of your own! It's so easy and so much fun.