Showing posts with label tree. Show all posts

8/26/25

My Life in Tree Rings: A Dendrochronology Craft

I loved counting tree rings as a kid. It's really interesting to be able to determine the age of the tree, but absolutely fascinating that the rings reveal times of drought, fire, or other stresses, as well as good times with rapid growth. Dendrochronology is so cool! I love visiting state parks and museums with events from human history marked on a cross-section of a tree. That's the inspiration for today's project. 

This craft is best for kids who are at least 11 or 12 and is even better for teenagers. For my sample, I went back to age 18. Making this craft as a 53-year old would have taken a lot more time and much larger paper! Affiliate links below. 


My Life in Tree Rings


Materials:


Steps: 


Use a paper trimmer to cut the paper so that it is 9" x 9". Cut some of the scraps into 1/4" strips; these will be what you use to label your rings. 

With a pencil, lightly draw a small circle in the center of the paper. Then draw rings around that circle, stopping when you reach your age. It is perfectly ok if the rings are uneven; that's how they are in a real tree! Draw bark around the outermost ring. It should be thicker than the rings and have an uneven, craggy texture. 


Trace each of the rings with a brown colored pencil. Use a darker brown to trace the bark. 


Paint your tree rings. The innermost ring should be the darkest and the outermost rings the lightest. Be sure not to add so much pigment that the lines are obscured. You can add as much (or as little) pigment as you want to the bark and the background. 


While the paint is drying, make a list of the most important events in your life. These can include the birth of younger siblings, starting school, major vacations, adopting a pet, changing schools, joining a club or team, or whatever else you deem important. Write each item on a strip of paper, then cut the ends to make an arrow. Glue each strip so that it points to the proper tree ring. 

Here's a closer look at my sample. I've included my birth (1972), my sister's birth (1975), the start of kindergarten (1977), joining 4-H (1983), my first international travel (1986), MOAS (1989), and high school graduation (1990). 


I wonder if I would have chosen the same items at age 18. I'm guessing not. There's probably something else that would have felt more important. From my perspective at 53, it's a lot easier to see which events from my childhood had the biggest impact on the rest of my life. One item that's missing from my project (because I don't know when it happened) is my first visit to UC Davis. It was probably around 1984 or 1985, but whenever it was, I instantly fell in love and knew that's where I wanted to go to college. That day had a huge impact on me, because not only am I a UCD alum, but I'm also a UCD wife and a UCD mom!

1/11/24

Grieving Tree Craft

While I was in Idaho, I got an email from a psychologist who runs a group for parents who have lost a child. He came across my fall tree with tissue paper leaves, which gave him the idea for a project he and his fellow grieving parents could make. He envisioned writing phrases along the branches that represent the things about their children that are still growing. Along the ground would be the things they feel they've lost forever. He asked me for advice about what papers, ink, and glue to use that wouldn't smudge or hide the written words. 

I was honored that my simple craft inspired such a meaningful project. Rather than just make an educated guess about which materials would work best, I wanted to make an actual sample to be sure the parents' projects would be successful. He shared the seven things about his daughter, Ali, that are still growing, along with the five things he feels he has lost. I used them to make this:


As you can see, I used six phrases on the branches. I wrote the seventh (I love you always) repeatedly up the trunk of the tree. I'm calling this project a Grieving Tree. I've listed the exact materials I tested in the materials list below; feel free to use other items, but test them first to be sure your words don't smear. Affiliate links below. 


Grieving Tree Craft


Materials:


Steps: 


Sketch a tree on a piece of watercolor paper. I did mine lightly in pencil, traced over the lines with the pen, then erased the pencil. Draw your own, or feel free to use my image below as a template. Print it at the size you want, then either cut it out and trace around it, or use this graphite transfer method


I tested multiple pens on a scrap piece of watercolor paper to find one that did not smear and wrote legibly and smoothly on the irregular surface of the watercolor paper. The Zig 0.8 worked beautifully. 


Next, watercolors. Notice that there are a few places where my colors blended a bit (above "sharing old stories" or I went over the lines ("I know you still exist"). This totally doesn't matter. Embrace imperfection, our most universal human quality. Besides, you can cover mistakes with leaves later. 


While the paint is drying, cut out leaves. I folded up tissue paper into 8+ layers before cutting. 


When the paper is completely dry (overnight is best), glue the leaves in place. I used a toothpick to spread glue onto one small area at a time, then placed the leaves by hand so they wouldn't cover the words. Use all five leaf colors in the tree. 


After the tree is full of leaves, glue leaves to the ground surrounding your words. Don't use the shades of green, as those wouldn't have fallen yet. 


What a privilege to make this tree in Ali's memory. I hope this project is meaningful to her father and his patients, as well as to any of you who might have come across this randomly. I am so, so sorry for your loss. 

4/10/23

Bat Flyout Scene in Ink

One of the coolest things I've ever done was witnessing a bat flyout. We live about 30 minutes from the Yolo Causeway, one of the top ten places in the world to see a bat flyout. We recently drove home from Sacramento at just the right time to be driving over the Causeway when hundreds of thousands of bats came pouring out from beneath us. Well, not pouring. They were flying. Hence "flyout" and not "pourout." It was spectacular and incredibly awesome because we totally weren't expecting it. 

I'm always happy to see bats, wherever I am. Every bat I see feasting means fewer mosquitos biting. Bats live all over the world, in a wide variety of habitats. You can find different bat species in forests, deserts, and everything in between. Today's project honors these nocturnal helpers. As a bonus, it gave me the chance to test out my new blending brushes. Affiliate links below. 


Bat Flyout Scene In Ink


Materials:


Steps: 


Apply black ink to a blending brush, then add the ink to the cardstock. Use a light hand. You want some small areas of black, but mostly gray with white peeking through. You can see my example in the upper left. Ignore the other backgrounds; I was testing out different ink pads to see how they worked with the brushes. By the way, I LOVE my new blending brushes. They're super comfortable, have great control, and hold just the right amount of ink. 


Punch a circle from some scrap cardstock to make a template for the moon. Blend yellow and orange ink into the open space. 


Use a straight edge to draw tree trunks. To keep them looking natural, keep the spacing irregular and don't have all of them be perfectly vertical. 


Use quick, upward swoops to draw branches and twigs on the trees. As you go, thicken the trunks of a few trees to add variety. 


Now add bats! Start with a central blob and add short wings to each side. You can add as many or as few bats as you want. Finish by adding the ground to anchor your project. 


It's a shame that bats are typically only associated with Halloween. These wonderful creatures deserve to be celebrated year-round.
 

3/30/23

Washington Monument Cherry Blossoms Craft

The cherry blossoms in Washington D.C. are iconic. I have several friends who live in the D.C. area who post photos when the blooms are at their peak. One such photo inspired me to make this craft featuring the Washington Monument. Affiliate links below. 


Washington Monument Cherry Blossoms Craft


Materials:


Steps: 

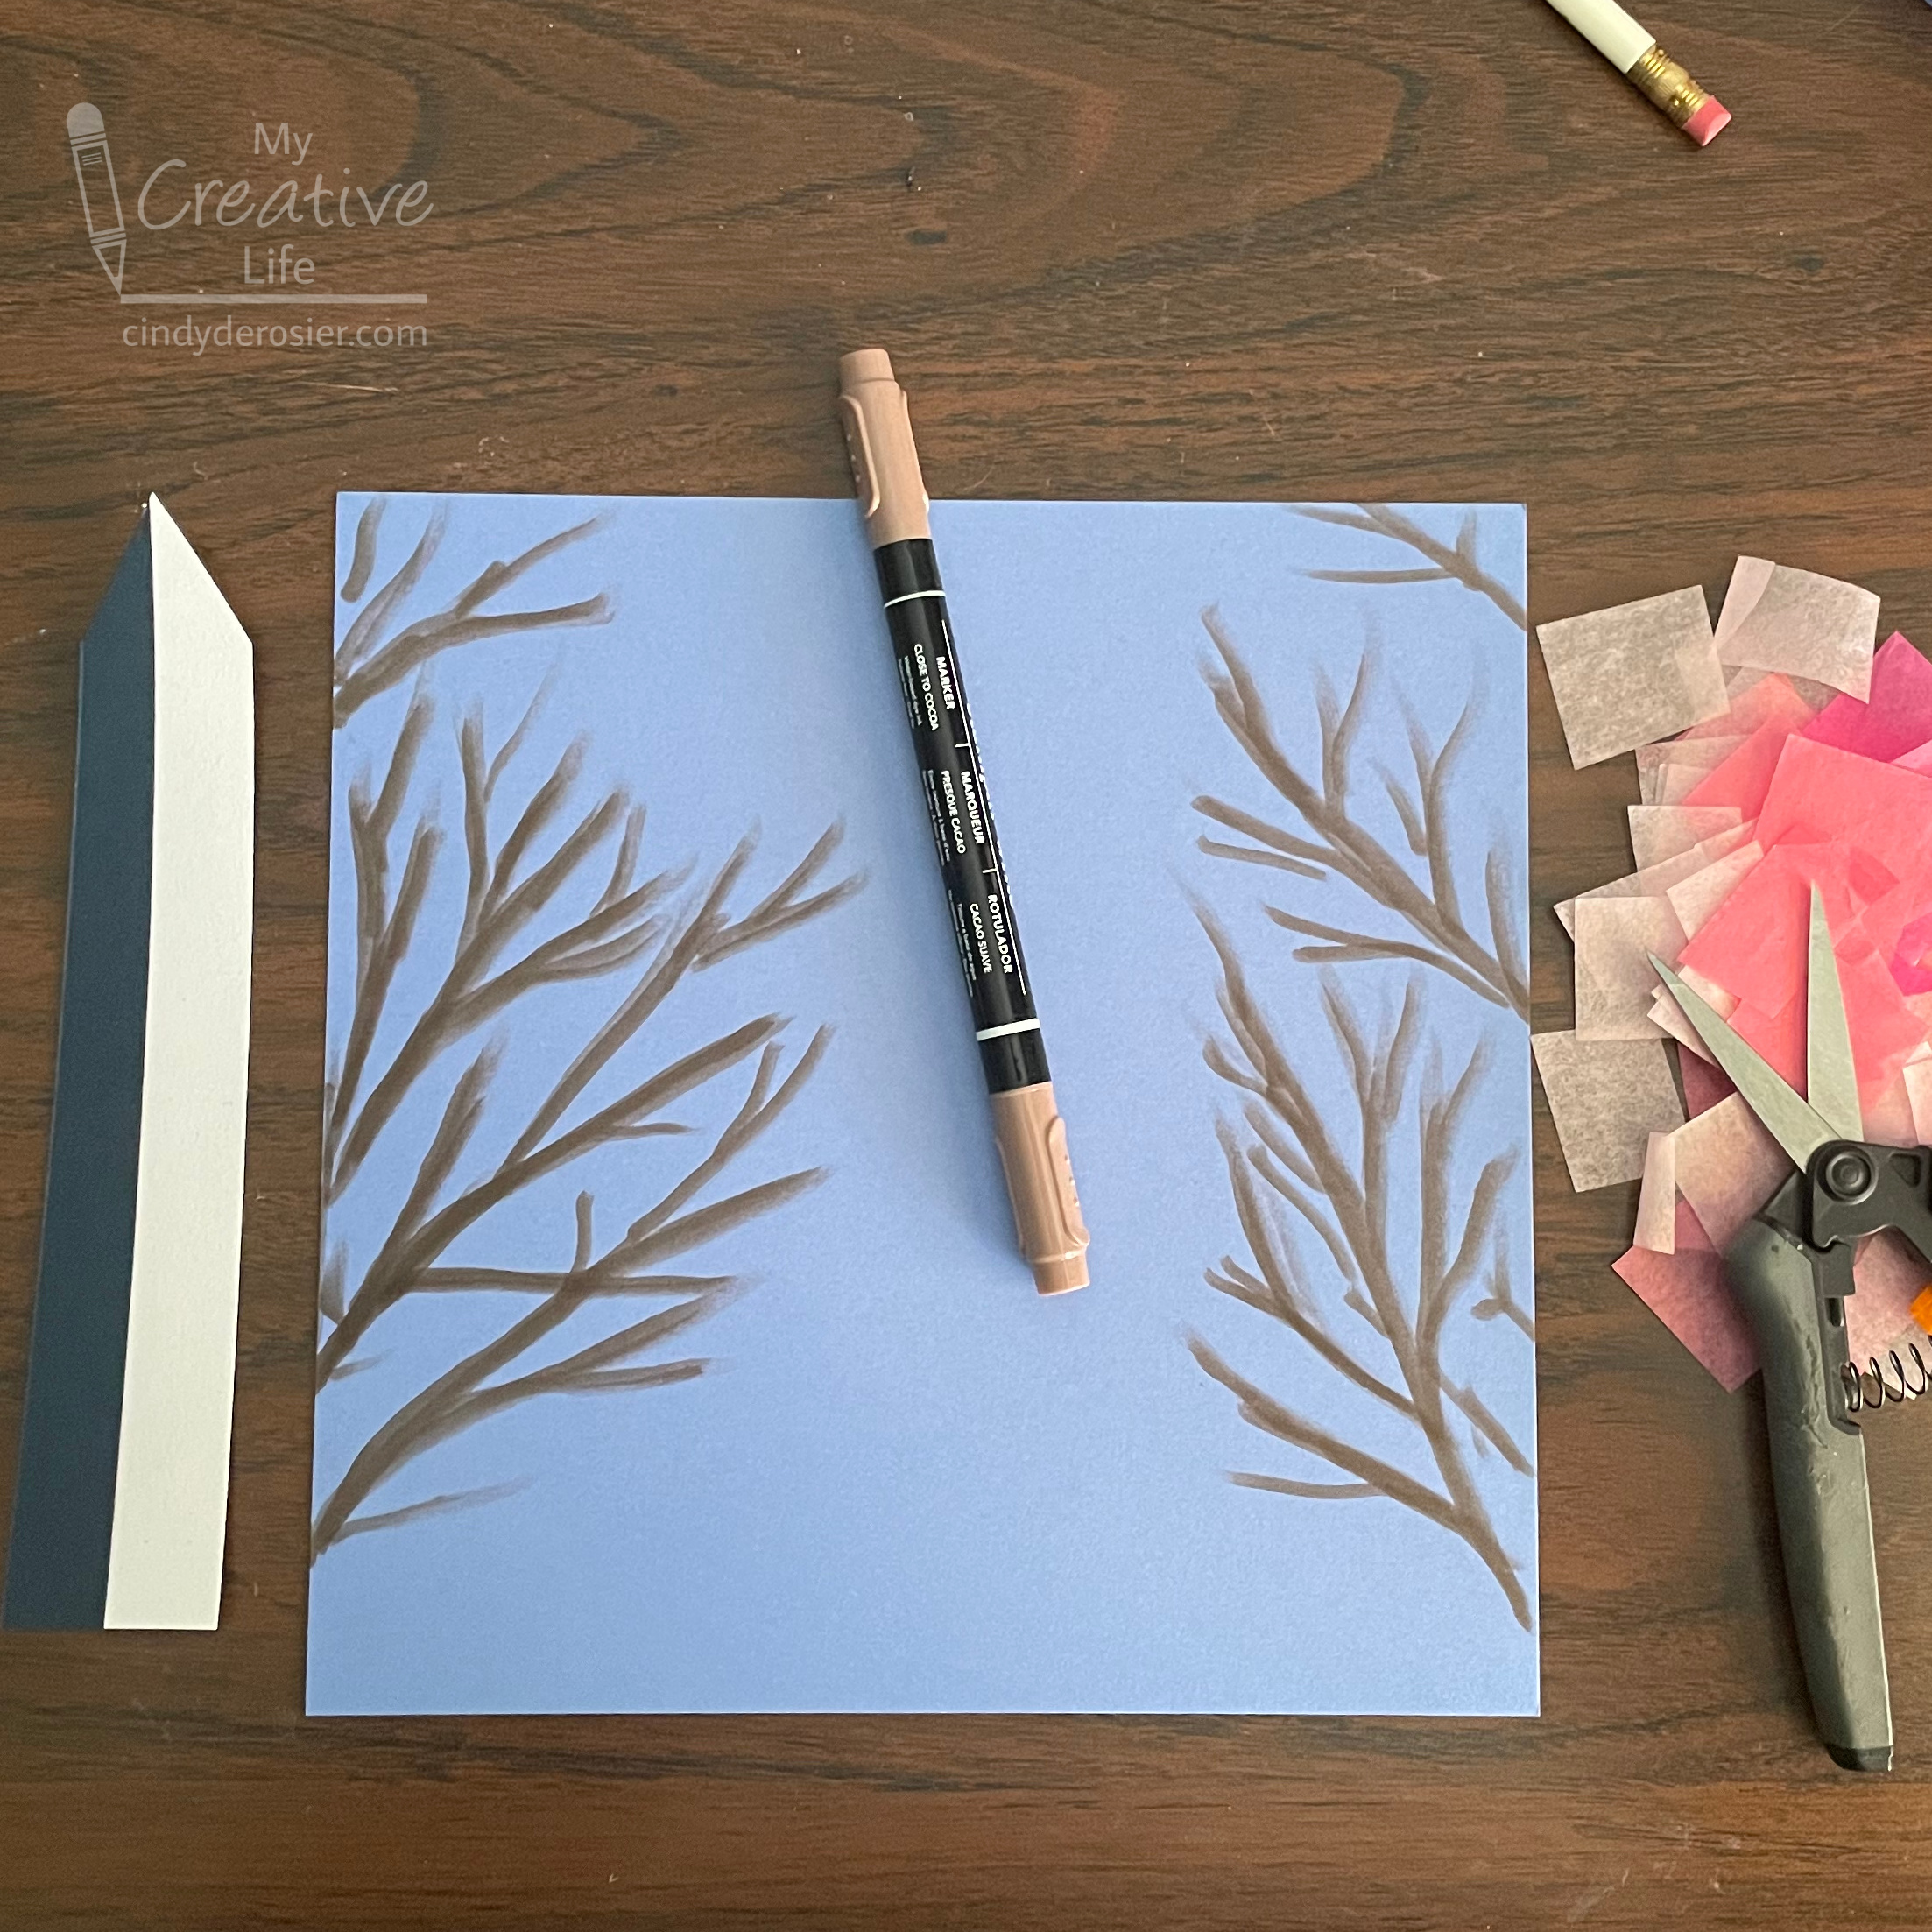
Use the brown marker to draw branches and twigs on either side of a piece of blue cardstock. They'll largely be covered with blossoms. 

Cut a narrow rectangle from the white and black (or dark blue) cardstock. Glue them together so that half of each color shows. With scissors, trim the top of each color to make the point of the Washington Monument. Then, on each side, cut a slight taper from the top of the rectangular part to the bottom. 

Cut shades of pink and/or white cardstock into 1" squares. 


Glue the Washington Monument onto the blue cardstock. Put a dot of glue onto one branch, then crumple up a square of tissue paper and stick in to the branch. Repeat this process until you've filled the branches. You might find it easier to do all the crumpling and then all the gluing. I worked in batches of about 10 blossoms at a time. 


In researching this project, I came across these fun facts about the Washington Monument, courtesy of the National Constitution Center. We visited in 2017 and LOVED it. I hope to return someday. George Washington will still dwarf Trevor, but not by nearly as much!

11/30/22

Fun with Math Puns: Making Winter Symme-trees

My favorite puns are the really intellectual ones, where you have to have specific, often esoteric knowledge to get the joke. I'm sure that I miss many of them completely as they go over my head, but that only makes the ones I do get all the more satisfying. It's like a little reward knowing that you're educated enough (in at least one specific area) to understand an intellectual pun. 

The first time I remember really appreciating a pun was around 1st or 2nd grade, when I discovered The King Who Rained (affiliate link here and below). I laughed out loud in our silent school library, checked out the book, and laughed about it every time I thought about it. I checked that book out at least a dozen times over the rest of my elementary school career. I was also a huge fan of Amelia Bedelia. We had a Japanese exchange student and her teacher stay with us when I was 8 and they LOVED those books. Getting the joke in a language you're learning must be even more satisfying than in your native language. 

Back in my teaching days, my students loved discovering a punny book in our class library that they hadn't previously understood. Like when we would first encounter circumference in the math book... one year, a student yelled, "Hey!" and ran giggling to the class library to pull out these books, super pleased with himself to finally get the joke. That totally made my day. It's an amazing feeling to see kids not only learning, but making a strong enough connection with material to understand a pun. 

I was thinking of those kids when I made these Symme-trees. Naturally, they go perfectly with a math lesson about symmetry. Wouldn't a whole bulletin board of them look great?


Winter Symme-trees


Materials:


Steps:


Set aside one sheet of light blue cardstock. Cut the other sheet into six pieces, each approximately 4" x 6". Use the scoring board to make a fold line down the center of each. Add green paint to the right-hand side of each piece, vaguely forming the shape of half a tree. Start with a conversative amount of paint. You can add more, but can't remove it. 


Fold the paper along the scored line, pressing the paint onto the other side. Open up the paper; if you're happy with the tree, set it aside to dry and move on to the next one. If there wasn't enough paint, just add more on the right side and press again. 

Let all six trees dry completely. When they are dry, add horizontal swaths of white paint to mimic snow. Fold and press. Again, you can add more paint in it doesn't transfer well. 


When the white paint is dry, add brown for the trunk. Let all the paint dry completely, then fold the trees the opposite direction, so that the paint is facing out. Carefully cut around each tree. 

Cut the white cardstock into snowy hills. Ink the edges with pale grey ink, then glue them to the background paper. You can glue your trees directly to the background paper too, but I used foam tape to pop them up and add extra dimension. It's hard to tell in the scanned image, but it makes a big difference in person. Finally, decorate with snowflakes. Adding a "SYMME-TREES" title is optional. 


If I were making these in the classroom, I'd follow up with challenging the students to think of tree puns to work into a story or other piece of creative writing. I would love to cedar clever ideas... fir sure!

9/15/22

Dimensional Fall Tree (Experimenting with Piping Flour-Thickened Paint)

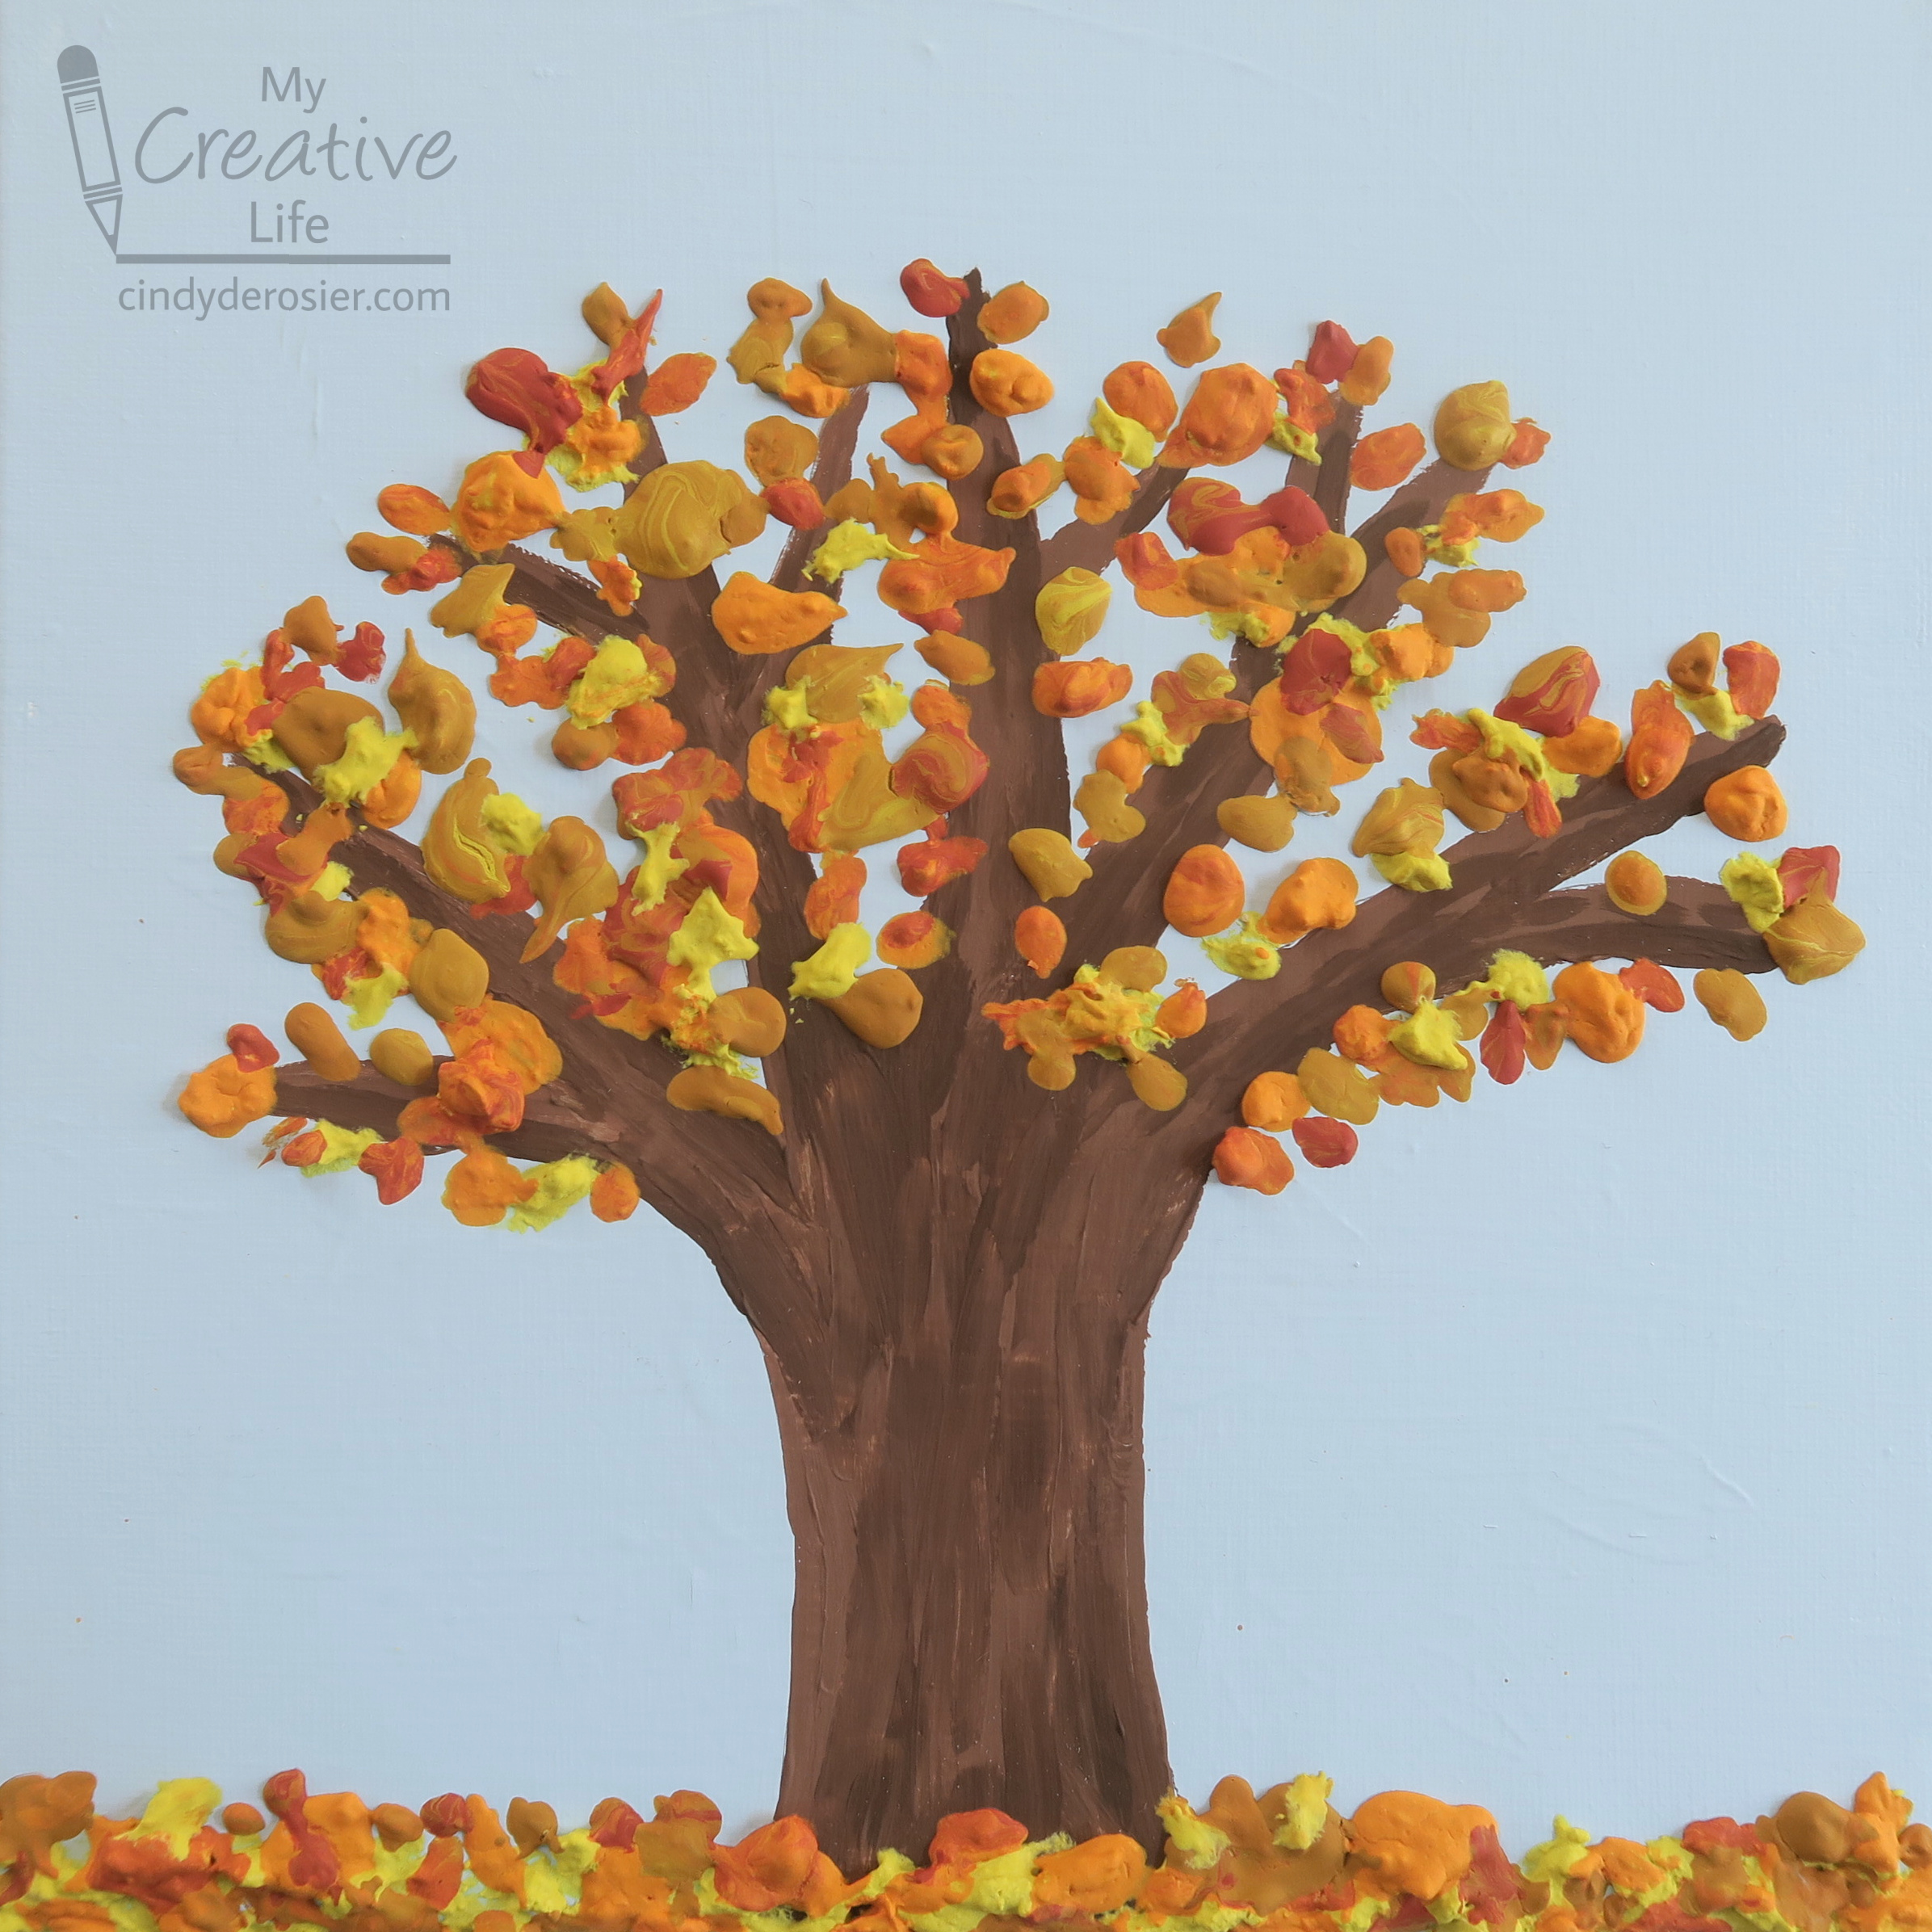
A large number of the crafts I make could start with the introduction, "So I had this idea and wanted to see what would happen if..." In this case, I wanted to see if I could thicken inexpensive acrylic paint with flour*, then pipe it onto a canvas as if it were frosting. It didn't quite work as I'd hoped, but I'm happy with the end result. And it was a lot of fun to make!


I started out by painting a blue background on a square canvas, then painted a tree onto that. While the paint was drying, I got out the flour, acrylic paints in fall colors, and ziplock bags. 


I put about 1/4 cup of flour into a bag, then added a very generous squirt of yellow paint and a teaspoon or so of water. I added more paint and kneaded the bag until everything was evenly mixed and the consistency of thick frosting. I cut a tiny hole in the end of the bag, then started piping leaves onto my tree. 


It worked well at first and I was enjoying piping little leaves onto the branches. But then my bag clogged. I removed the clog, only to have another clog a few seconds later. I tried to squeeze out that second clog (not wanting to get as messy as I had carefully extracting the first one), but that just made things worse. The more I piped, the globbier the paint got.  


Time for a new technique! I mixed up some orange flour paint and applied it in globs with a plastic knife. It was actually really fun to drop paint globs onto the branches. 


I kept going using that technique, adding two more colors of leaves. When I was happy with my tree, I let the whole thing dry overnight. Success!


*I'm fully aware that there are artist-grade options for thickening paint, like gel medium and modeling paste. And of course, I could have bought thicker (i.e., more expensive) paint to begin with, but the point of my experiment was to make a kid-friendly project using things from around the house. Thus the basic craft paint, flour, ziplocks, and plastic knife. 

Shop Tombow

11/24/21

Fall Colors Tissue Paper Sun Catcher

I know we're two months into fall and thus it's a bit late for a fall craft, but we're just getting our fall color now here in northern California. Besides, fall technically lasts for another month. 

Anyway, I had a lot of fun making this tissue paper sun catcher. All of the tissue paper is reused. I'm that person at birthday parties stopping people from throwing away barely-crumpled tissue paper. If you're not that person, I've included affiliate links for tissue paper and other supplies below.


Fall Colors Tissue Paper Sun Catcher


Materials:


Steps: 


First, find a location. You'll be making your artwork directly on a window or glass door. It worked perfectly for me to sit on the floor by our back door to make my project, but it would work just as well standing at a window. 

Cut a piece of contact paper that is slightly larger than you want your finished art to be. I used the width of the contact paper (18") by about 22" for mine. With the NON-sticky side against the glass, start peeling away the liner of the contact paper. Use two pieces of tape to hang the contact paper onto the glass. 


Continue peeling away the rest of the liner, then tape the bottom of the contact paper to the window. The sticky part of the contact paper is facing you. 

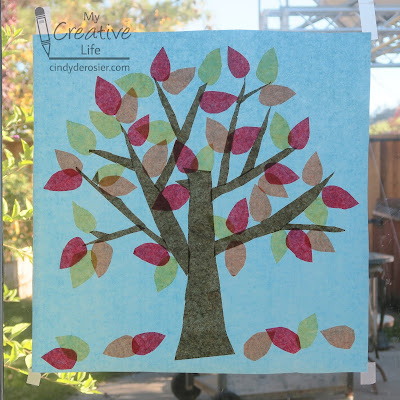
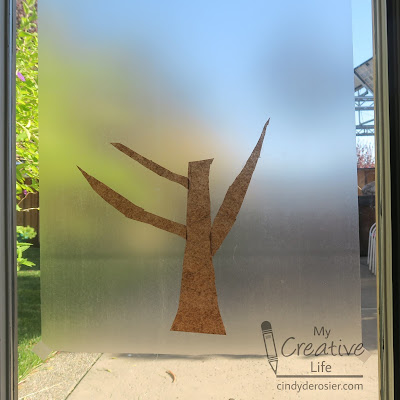
Cut a brown tree trunk and place it on the contact paper. Add a few limbs.   


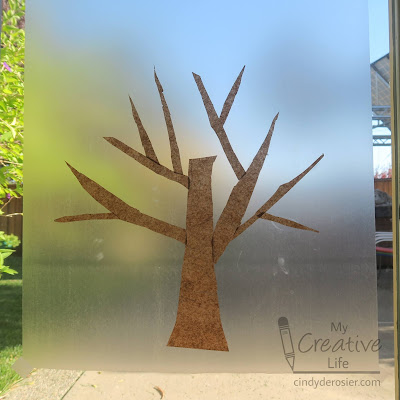
Continue adding smaller branches and twigs until you're happy with the shape of the tree. You'll notice my pieces are not cut evenly, which totally doesn't matter. You may also notice I got some fingerprints on the contact paper. That doesn't matter either. 


Layer red, orange, and yellow tissue paper and cut out stacks of teardrop-shaped leaves. Attach the leaves to the tree. Don't forget to add a few that have already fallen!


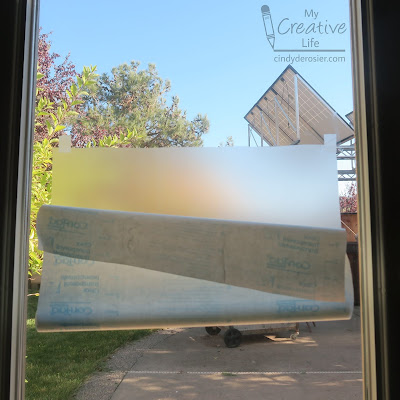
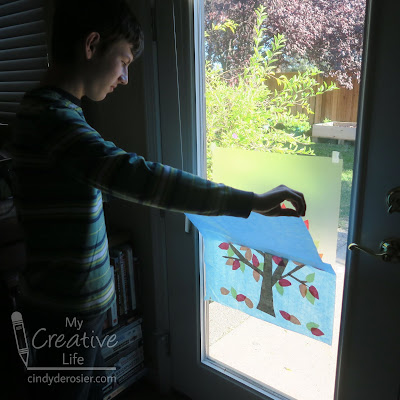
Next, layer a sheet of sky blue tissue paper over the entire design. I strongly recommend getting a helper for this. I had Trevor hold the top of the tissue paper taut while I smoothed the bottom section into place. I worked my way up, pausing halfway to snap this photo...


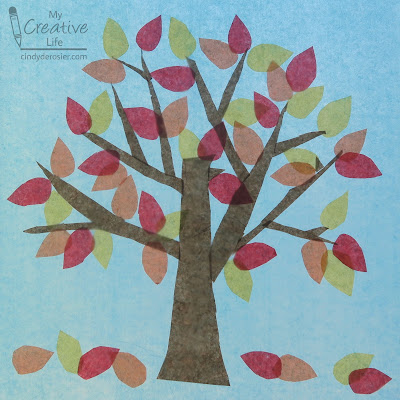
... then smoothed the rest of the tissue paper in place. This is how it looked, cropped to get rid of the door and surrounding glass. The fingerprints aren't visible. 


You can leave your artwork on the window as is, or you can take it down and trim the edges, which is what I did. When I hung it back up, I put the tissue paper side against the glass where it is protected. Did you notice it was mirrored from before?


I'm taking tomorrow and Friday off from blogging. I'll be back on Monday with another tissue paper craft tutorial. Happy Thanksgiving!

9/14/21

Splatter Paint Fall Trees

After sharing so many splatter-painting backgrounds, it's time for a splatter-painted foreground. Rather than the thumb-across-toothbrush technique, I used a different method to achieve the dots and drips. It was so much fun!


Splatter Paint Fall Trees


Materials:

  • watercolor paper
  • crayons (brown, black)
  • acrylic paint (blue, orange, yellow, red-brown)
  • two paintbrushes

Steps:

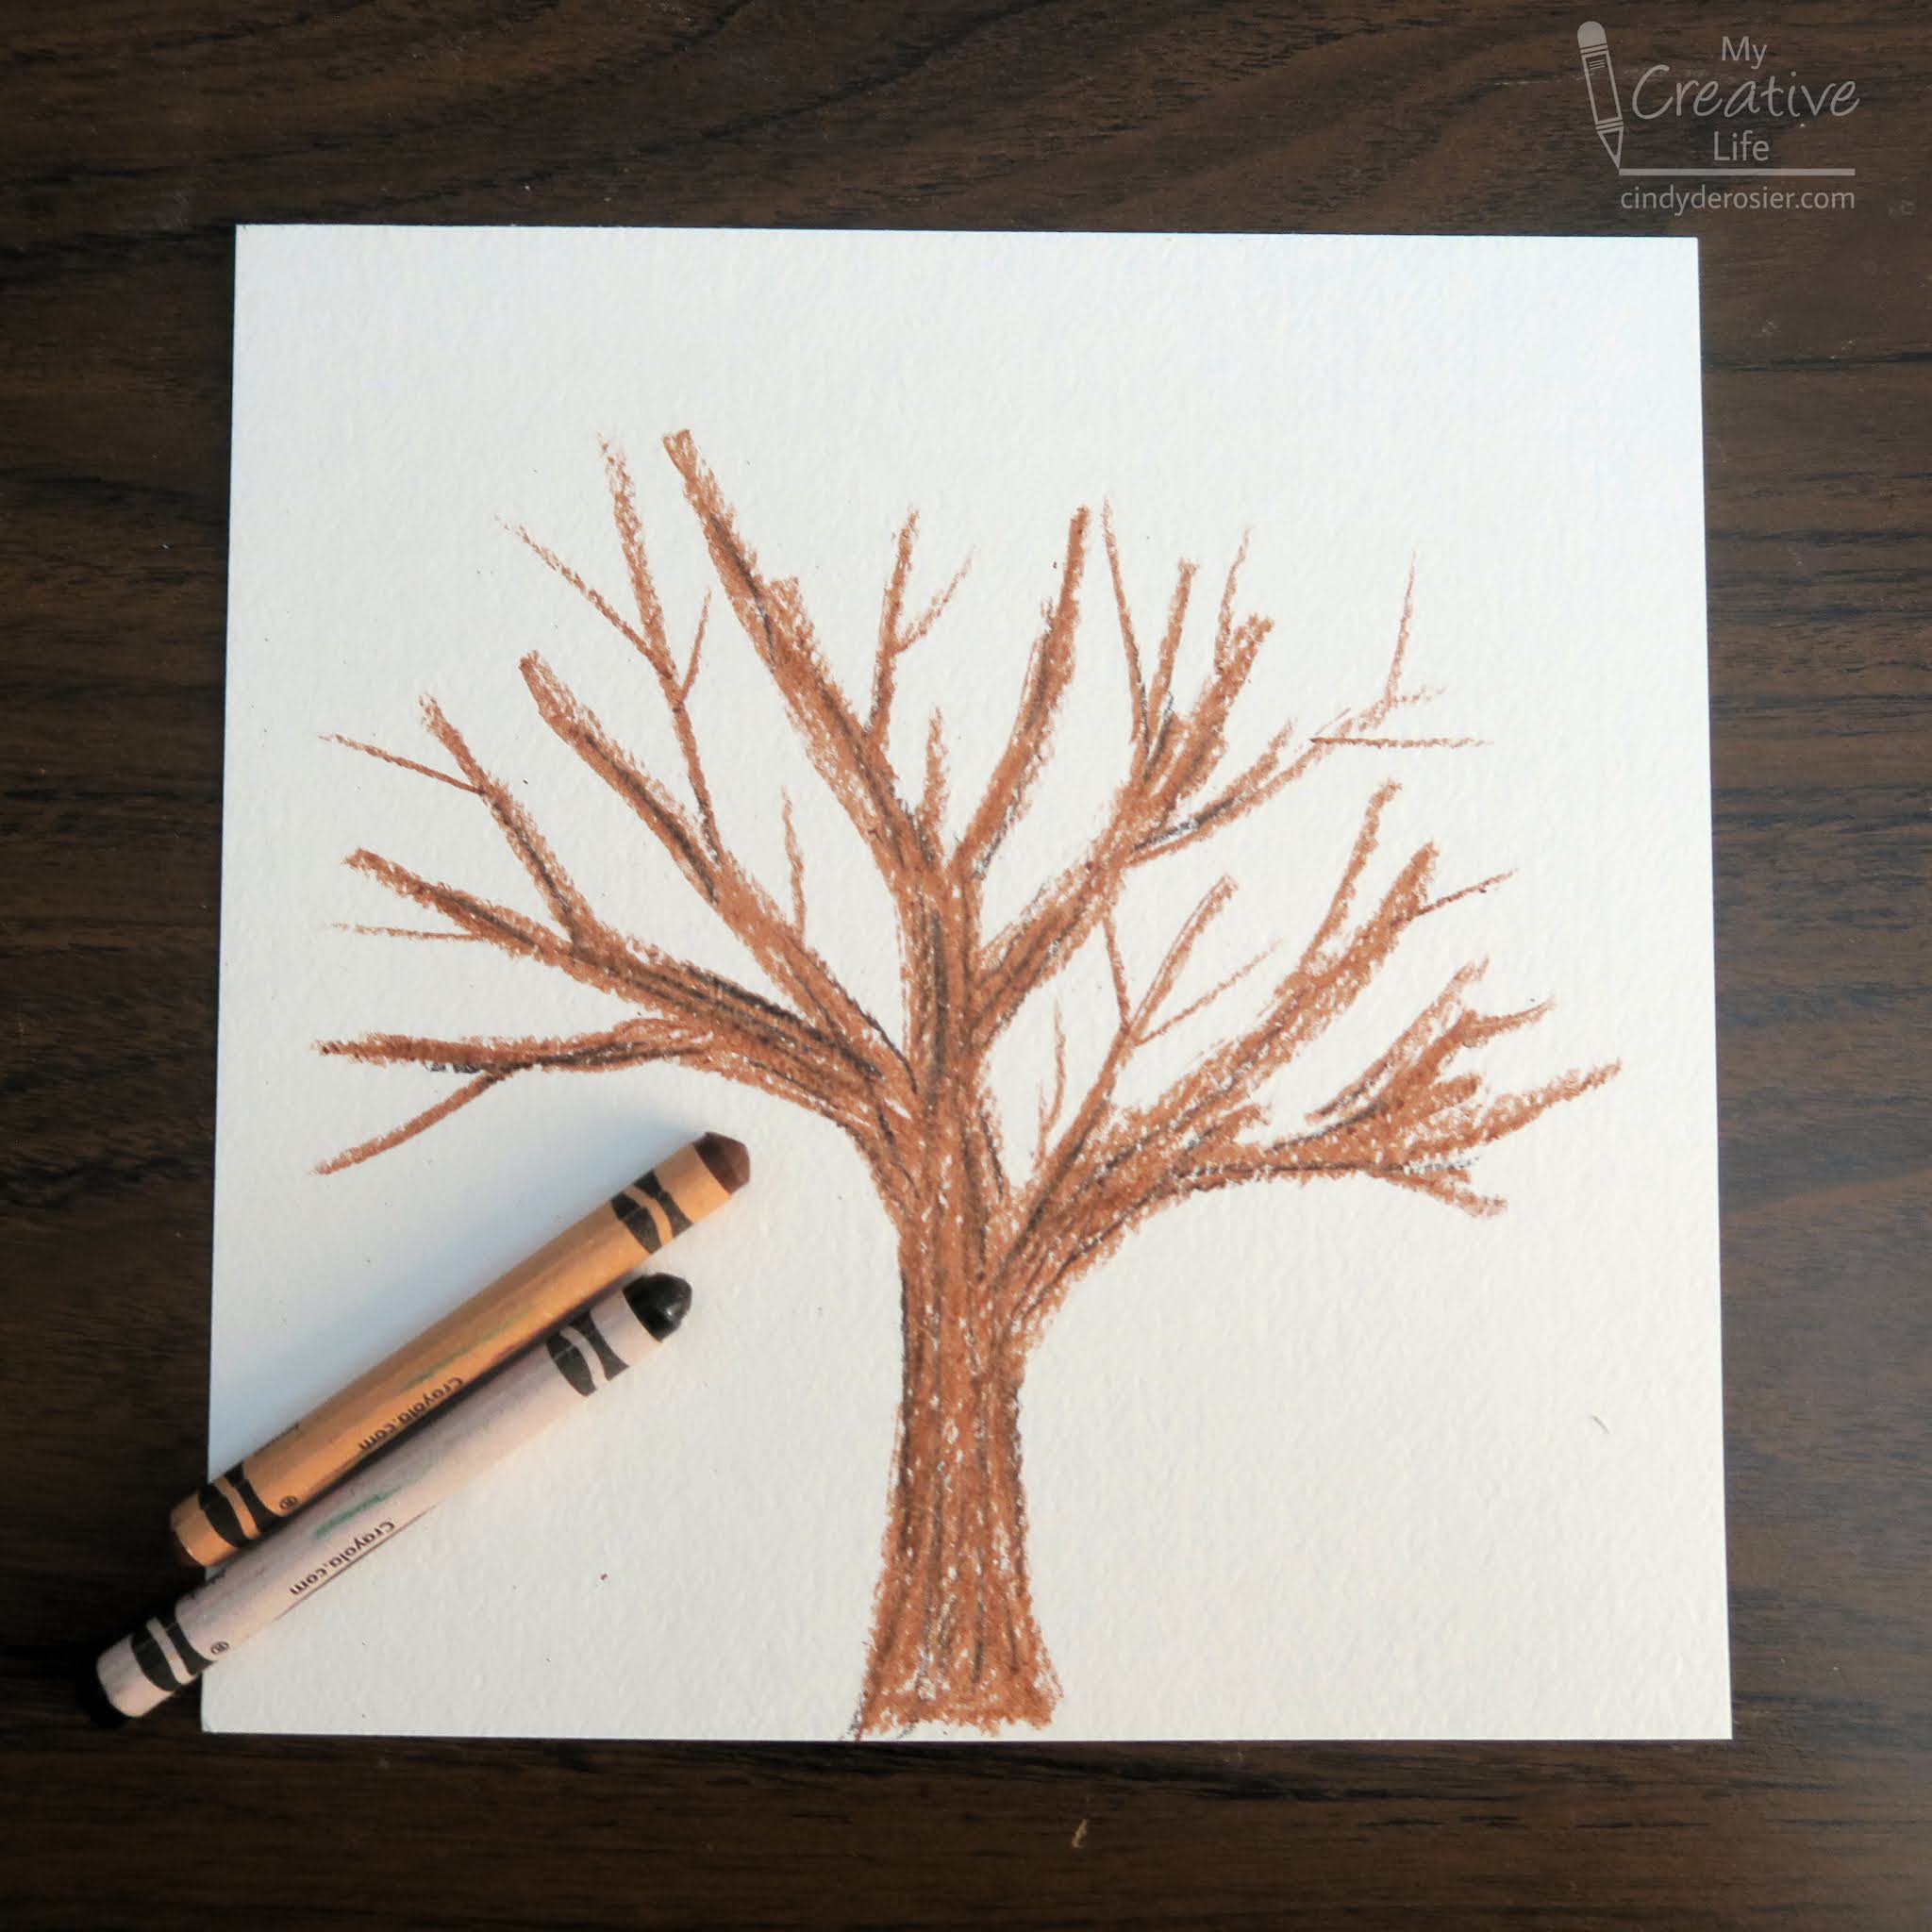
Use crayons to draw bare trees on the watercolor paper. I drew four trees, each with plenty of branches and twigs, then added a bit of shadow with the black crayon. 

Thin the blue paint and use it to create a wash of color on the entire paper. These bits of sky will show through between the leaves of the tree. Let the paint dry. 

Put the painting into a cardboard box. I have a designated box I use to contain the mess when splattering, misting, dripping, and spraying. Hold one paintbrush in each hand. Dip one paintbrush into the red-brown paint, then tap it on the handle of the second paintbrush. This will cause small flicks of paint to splatter down. Experiment with the quantity of paint on the first brush, where you tap on the second brush, and how far from the paper you hold the brushes to get different sizes of splatters. Concentrate the splatters along the base of the trees and in the branches, leaving the space along the middle of the trunks and above the branches relatively unsplattered. You may need to rotate the paper to accomplish this. 


Without cleaning your brush, switch to orange paint and use the same technique to add splatters. Switch to yellow, building up the layers. When you have a good amount of splatters in the two main sections of the painting, use a pouncing motion to fill in any gaps between the leaves on the ground. With the same pouncing motion, do the same to add leaves to bare branches (if desired). 


It's up to you how many leaves you want on your finished artwork. I kept going until I liked how the trees looked. 


This really is a ton of fun to do. There's something very satisfying about seeing drips of paint transform into leaves. 


9/1/21

Fall Tree with Tissue Paper Leaves

The calendar says that fall is coming soon, but here in the Bay Area our leaves won't be falling for another 2 or 3 months. All the more reason to embrace fall colors via crafting! 


---------

Fall Tree with Tissue Paper Leaves


Materials:

  • watercolor paper
  • crayons (brown, black)
  • watercolor paint (blue)
  • tissue paper (red, orange, yellow, green)
  • scissors
  • glue


Steps:


Use crayons to draw a tree on the watercolor paper. Add plenty of branches and twigs. 


Add a wash of blue watercolor over the entire paper. The wax of the crayons will resist the paint; dab gently with a paper towel if any droplets remain. Let the paint dry completely. 


Use scissors to cut the tissue paper into tiny bits. I cut a few squares from each color, layered them, and then hacked at them randomly with the scissors. Dot glue onto the branches of the tree where leaves would be. Sprinkle the tissue paper bits onto the branches. Repeat until all the branches are covered. Lift the paper vertically to allow any pieces that are not attached to fall. 


Repeat the steps of cutting tissue paper into bits, dotting the paper with glue, and sprinkling the tissue paper onto the glue, except this time do not include any green tissue paper. (Green leaves wouldn't have fallen yet. I thought of this a little late, so you can see hints of green behind the fallen leaves. I'm pretending its grass.)


This project was really fun to make and took a lot less time than I'd originally expected. It's a great way to reuse ripped or wrinkled tissue paper. Give it a try!

CLICK.BUY. CREATE. Shop Michaels.com today!