Showing posts with label Crayola. Show all posts

9/2/24

Model Magic Name Art

I'm back to crafting and excited to share my latest name art project! It was a lot of fun to make and is easy to do in the classroom or with other groups. Affiliate links below. 


Model Magic Name Art


Materials:


Steps:


Decide how large you want the finished name to be. Mine is about 5" x 1", which required a half-ounce of Model Magic. For longer names (or if you want a larger version, regardless of name length), add more Model Magic accordingly. 

Open your clay onto a piece of parchment paper. I used a cutting board because I had it out for another project, but parchment paper is a better choice, because you'll be able to paint your artwork directly on it. Divide the Model Magic into X pieces, based on the number of letters in your name. Some letters, like the I in my name, will need less clay. Add it to letters (like the N) that need more. 

Roll each ball into a snake, then shape it into the correct letters. 


Let the Model Magic dry completely, then turn it over to let the other side dry. Plan for a total of at least 24 hours of drying time. 

When it is completely dry, arrange your name on a piece of cardstock, then mark it and cut it to the desired size. Set the cardstock aside, then pick a paint palette.


Paint each letter with one of the colors. Let the paint dry. 
 

Select colors of Extreme Glitter to compliment your palette. Add a coat (or two!) to add a ton of sparkle. 


Use a small amount of glue to adhere each letter to the cardstock. 


I've been a fan of Extreme Glitter for many years and Plaid has just come out with a palette of pastels. I can't wait to give them a try! Any suggestions for what I should make?

1/21/24

Clay Rose Wreath for Valentine's Day

I made this rose wreath using air-dry clay and acrylic paint, with Valentine's Day in mind. Now that I'm seeing it on the screen, I'm wondering if I could have used bread dough to make an edible version. I may have to try that! Affiliate links below. 


Clay Rose Wreath for Valentine's Day


Materials:


Steps: 


I used four 1-ounce packets of Model Magic for my project. You can obviously use more or less clay to make a larger or smaller wreath. I used a blend of colors of Model Magic because that's what I had on hand; painting would have been easier if I'd started with colors closer to what I wanted the finished wreath to be. 

Knead the clay to condition it, then divide it into fourths. Set one portion aside; you'll use it for roses and leaves. Roll the other pieces into long ropes. They should be approximately the same size and thickness. Press them together at one end.


Braid the ropes. When you reach the end, form the braid into a circle and gently press the ends together to make a wreath. Set it aside to dry. 

Divide the remaining clay into four equal pieces. Three will become roses and one will be leaves. For each rose, you'll have four petals. Divide the clay into four balls and roll each flat. Pick up one petal, then roll it up to form the inside of the rose. Pick up the next petal and roll it around the center of the rose. Do the same with the next two petals. If you don't like your rose, smoosh it and start over! 

To make the petals, roll the clay into tiny balls. Smoosh them with your thumb, then gently drag your thumb. This will curl the edges and make a point. 
 

Let the finished shapes sit overnight. Turn them upside down and let them side until they are completely dry.

Paint the wreath brown, the roses pink, and the leaves green. When the paint is dry, ink the edges of each piece. It's a small touch, but it makes a big difference. Finally, glue the roses and leaves to the wreath. 

10/12/23

Trying Crayola Paint Sticks

While I love using my growing collection of artist quality supplies like Prismacolor and Ohuhu, there's a special place in my heart for Crayola. It was the first art brand I loved as a kid, the brand I used in my classroom as a teacher, and the one I introduced to Trevor when he was a young toddler. Crayola products are the best among student-grade art supplies and their huge product line provides kids (and adults) a very affordable way to explore different media. My favorite Crayola products are their iconic crayonscolored pencils, Model Magic, and Silly Scents.   

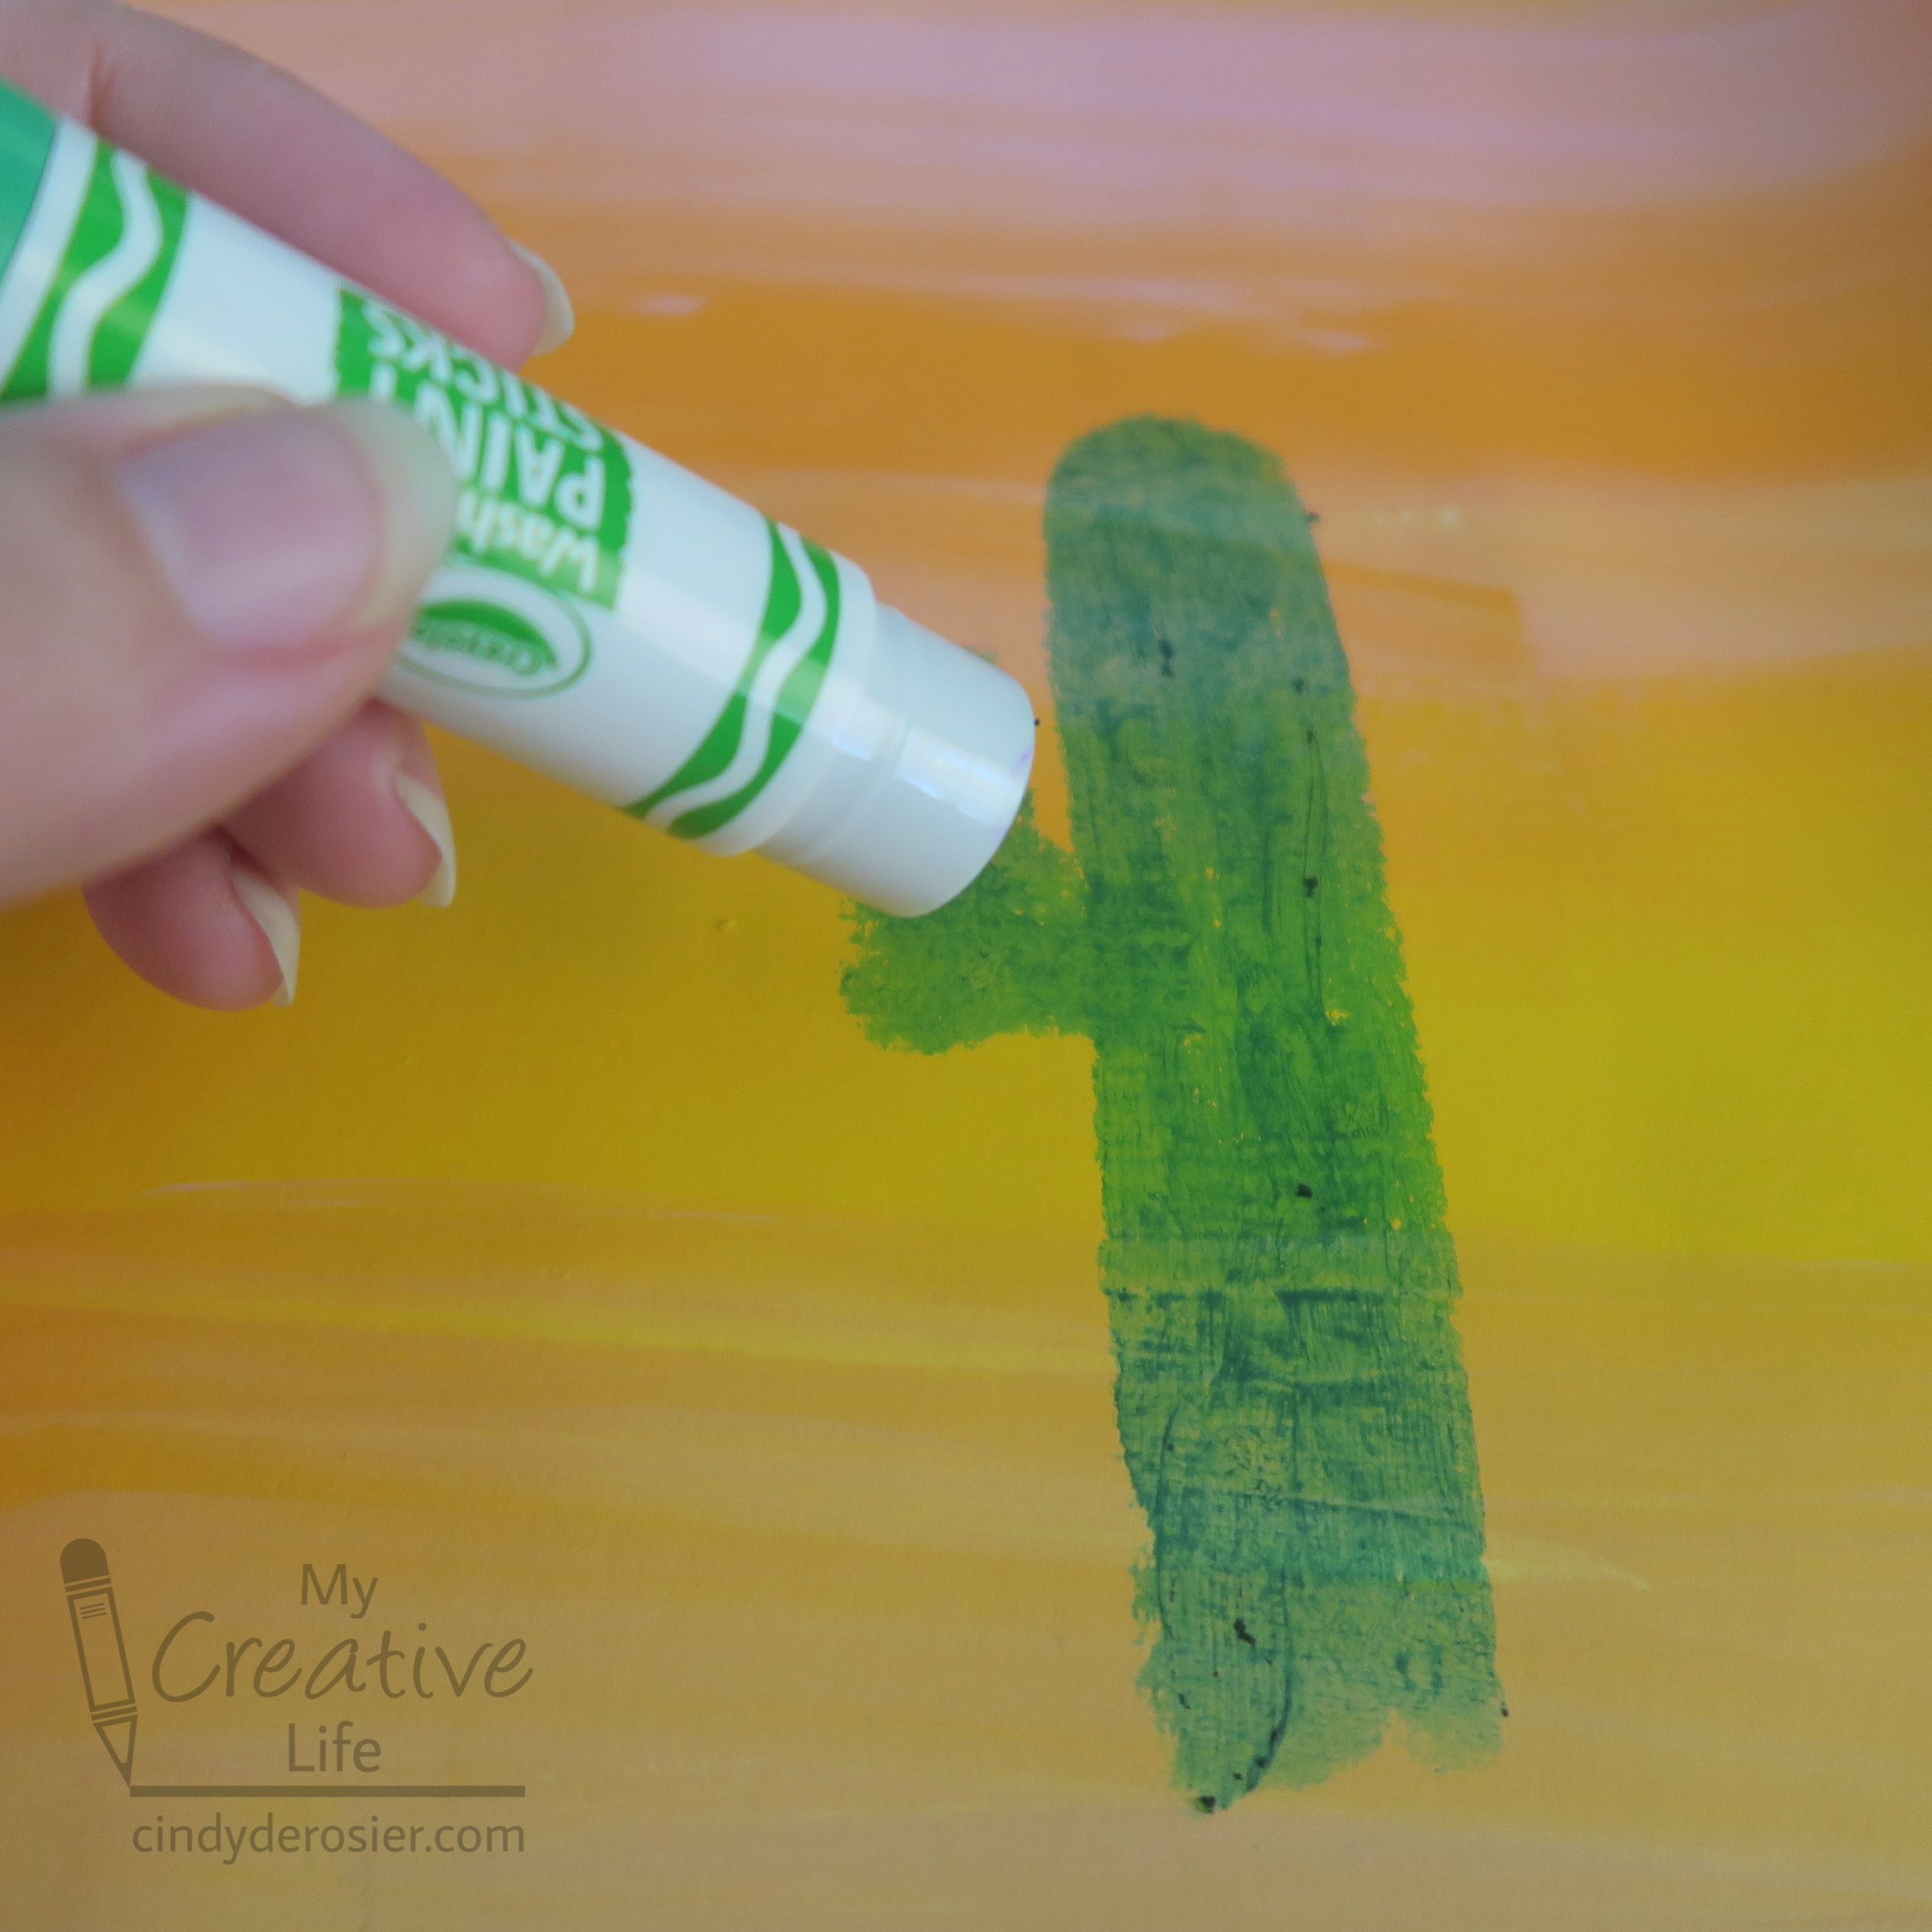
Crayola's Washable Paint Sticks (affiliate link) have been around for a couple of years, but I hadn't tried them. I thought it would be fun to get my hands on some and give them a go. I got the 12-pack, which contains the usual rainbow colors plus silver and gold. The paint sticks are about the size and shape of a glue stick and the paint is similar in consistency. I tried them on some pre-painted paper I had laying around to see how they would perform. The paint went on fairly smoothly with decent coverage but some small paint blobs.  


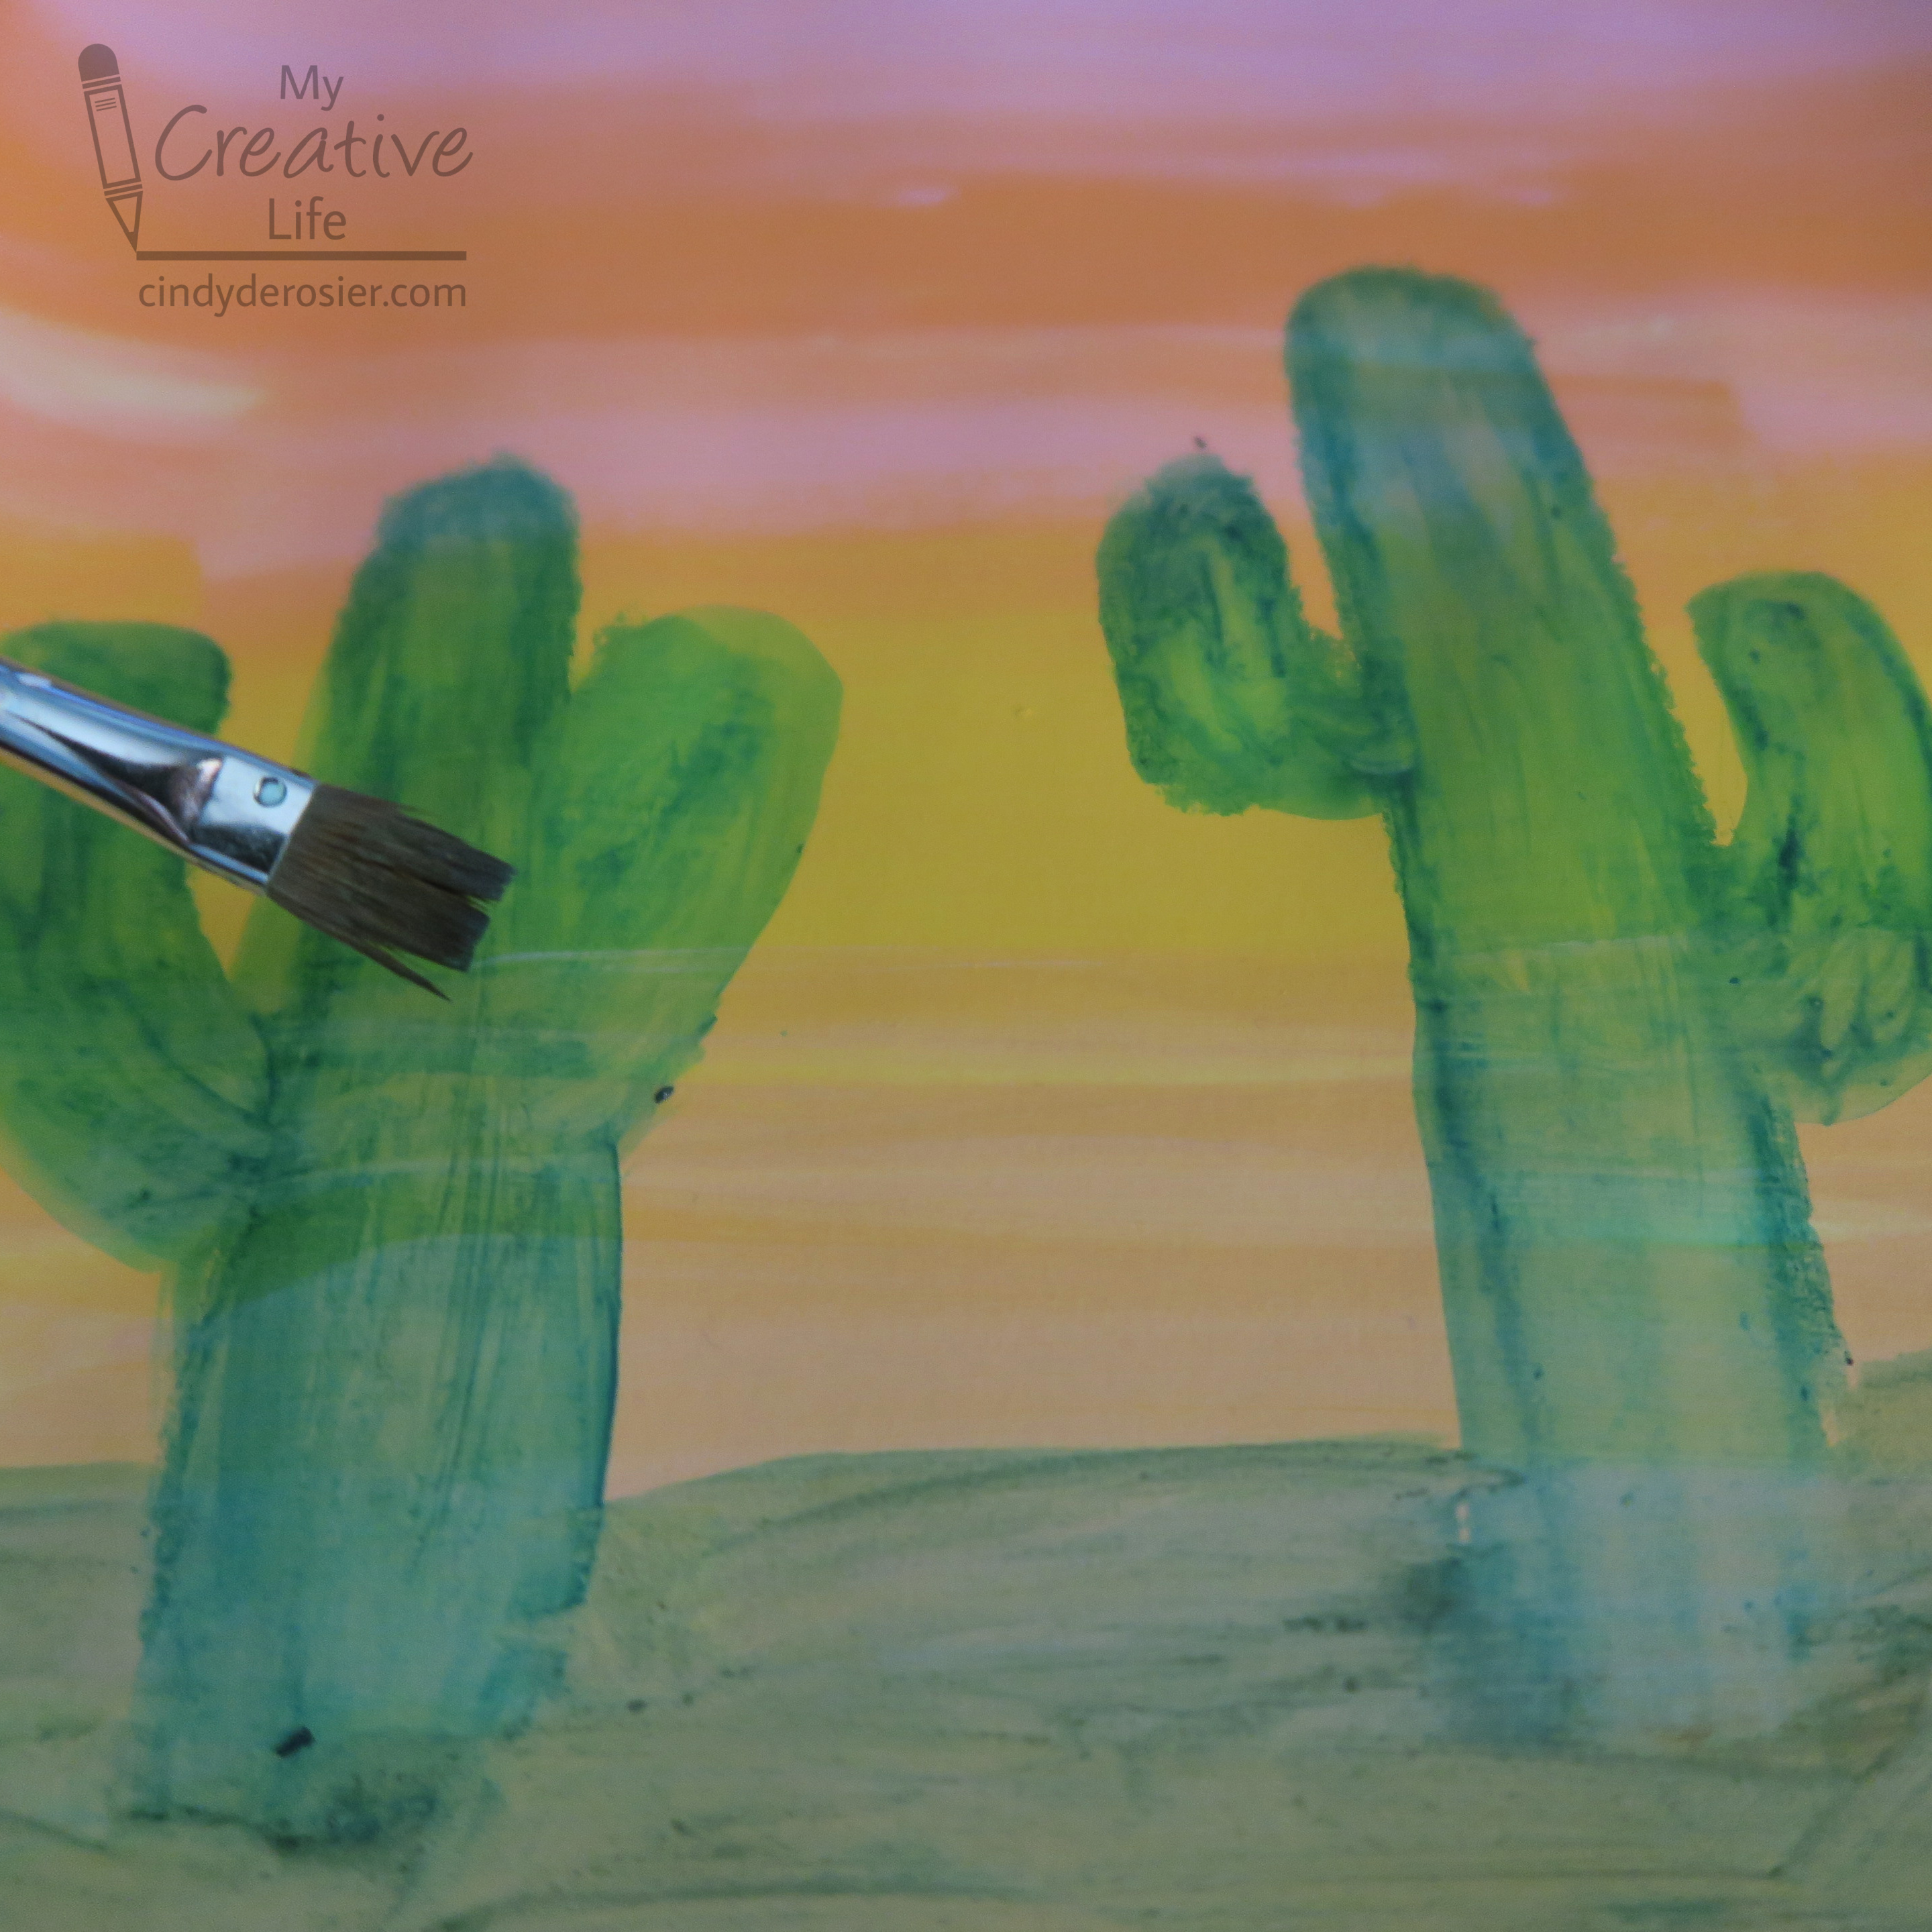
I thought I'd be able to smooth out those blobs with a wet brush, but instead the water basically erased the paint. The more I tried to smooth it, the more of the background showed through. I tried applying the wet brush directly to the paint stick and then painting with that. Meh.  


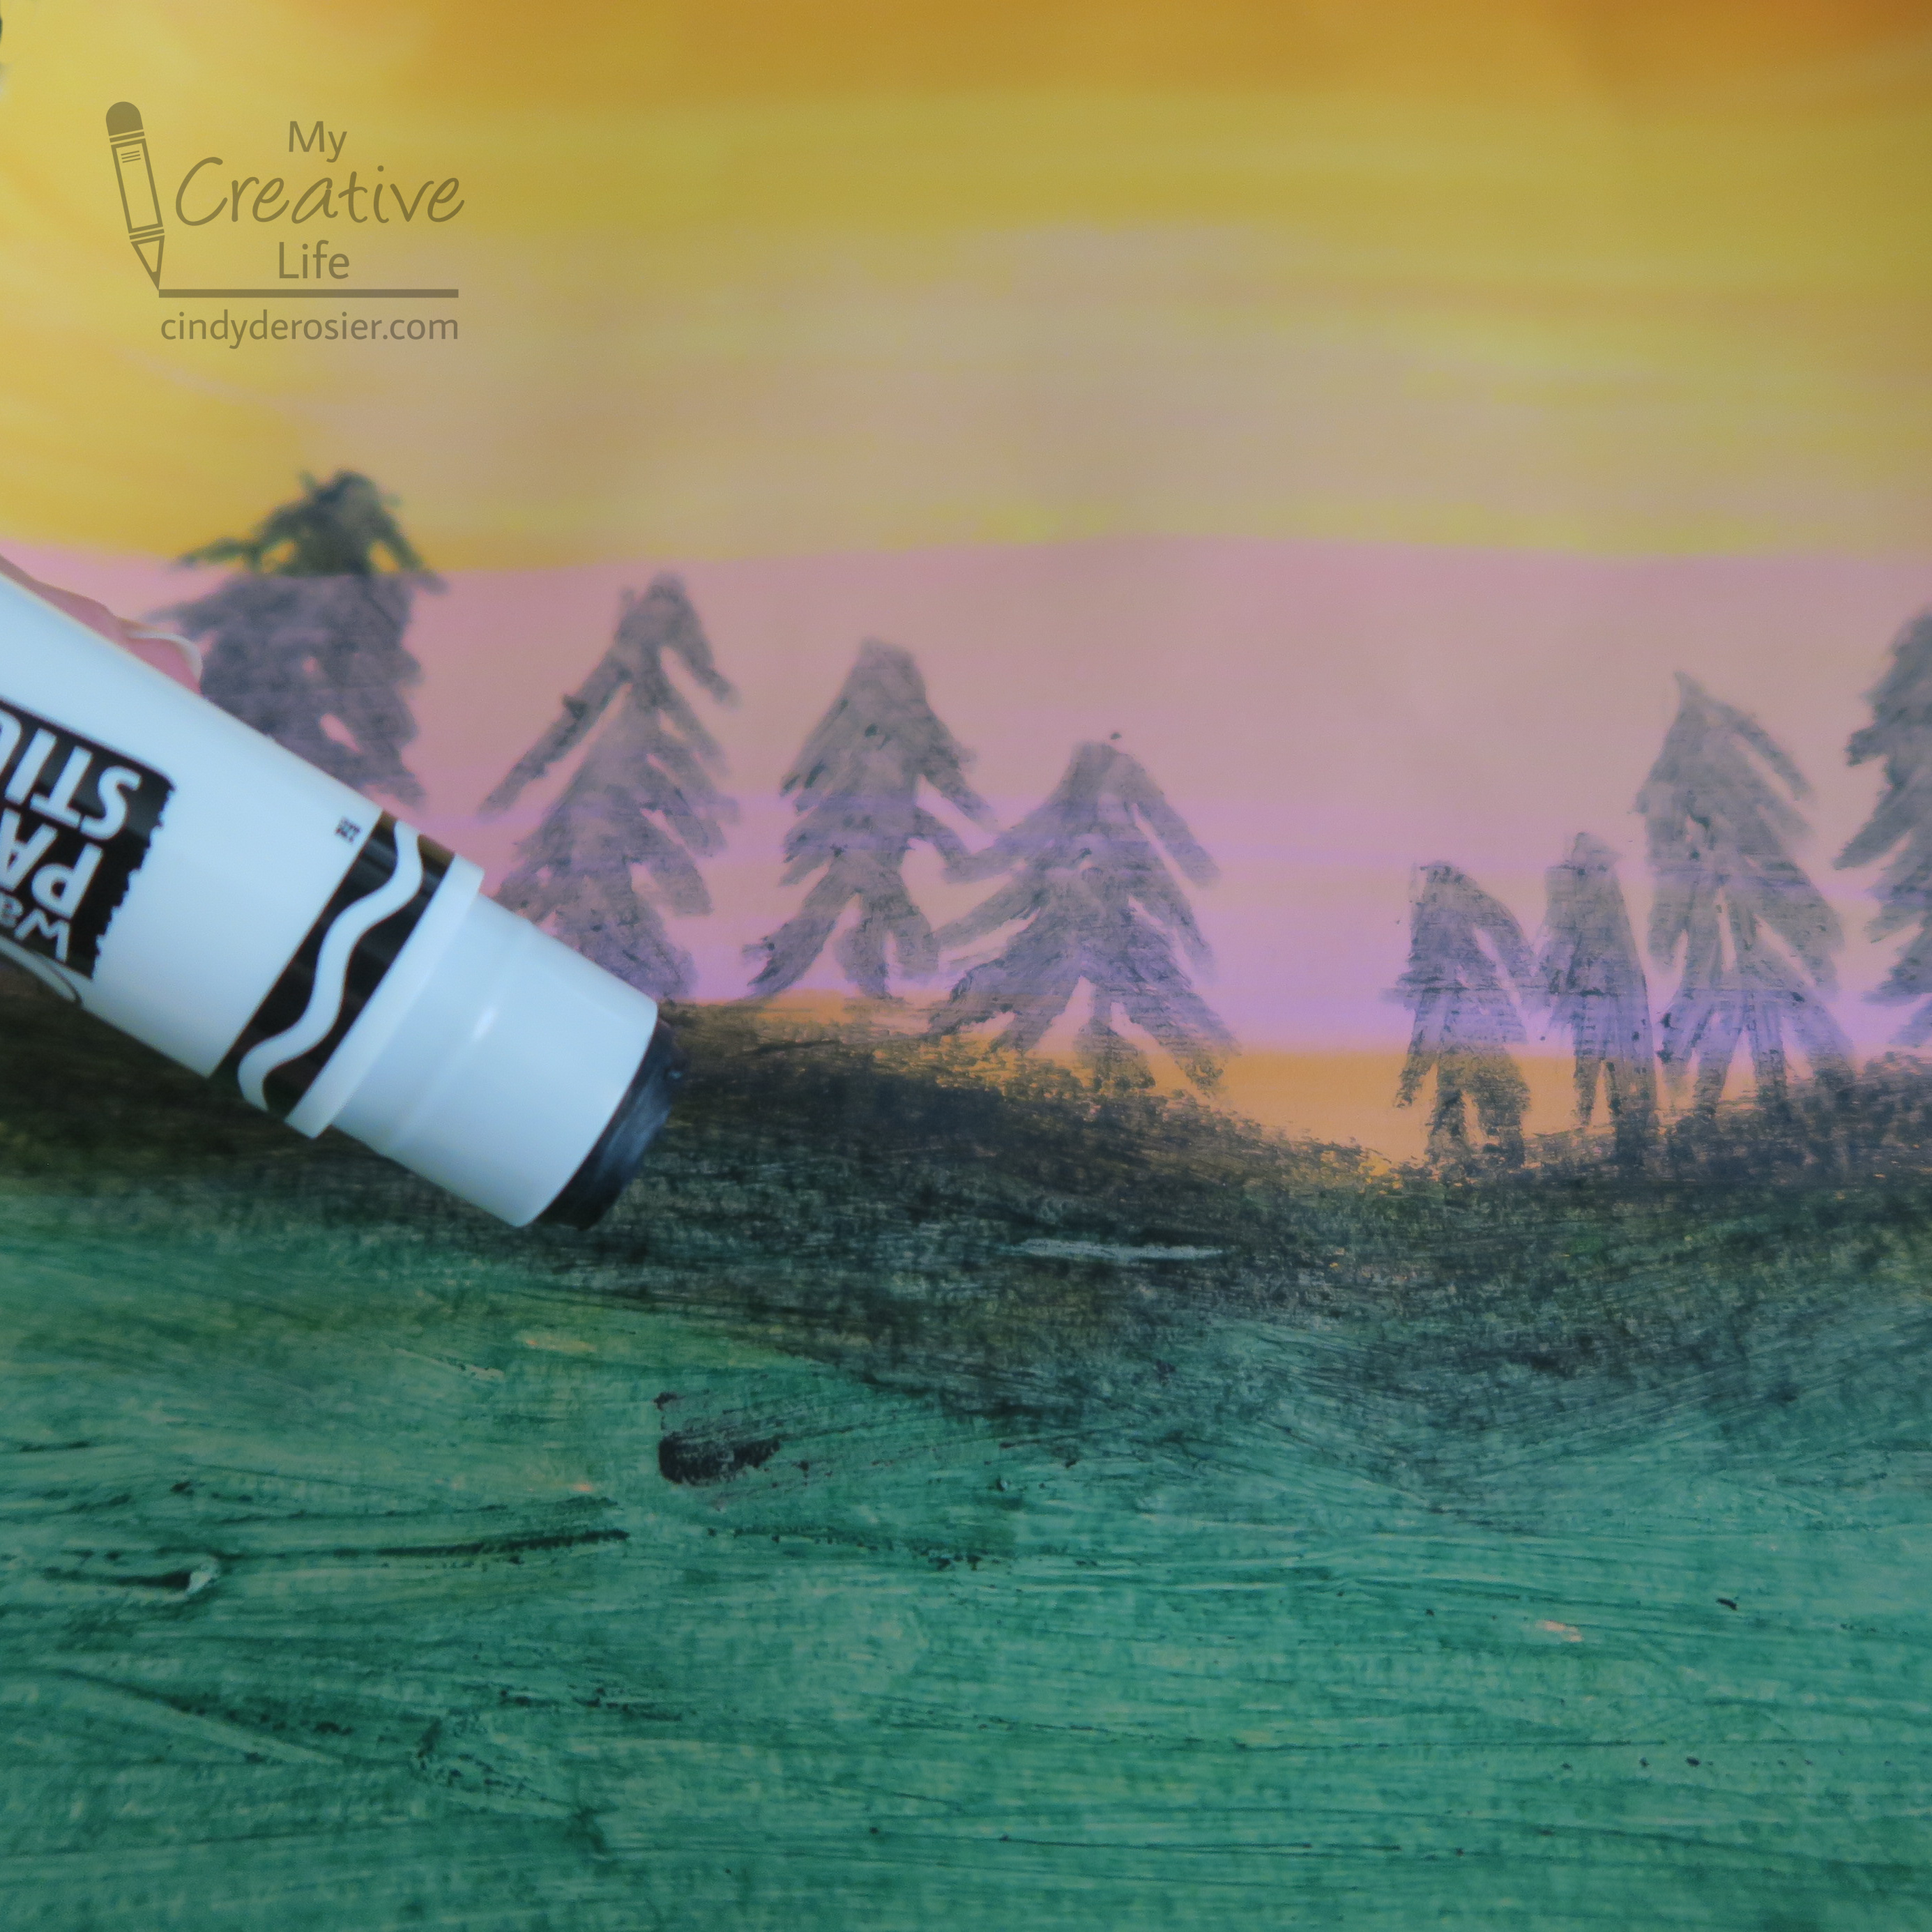
I used a different section of the pre-painted paper to see what kind of detail and blending I could get with just the paint sticks. The black really didn't want to go over the existing paint, especially the pink areas. 


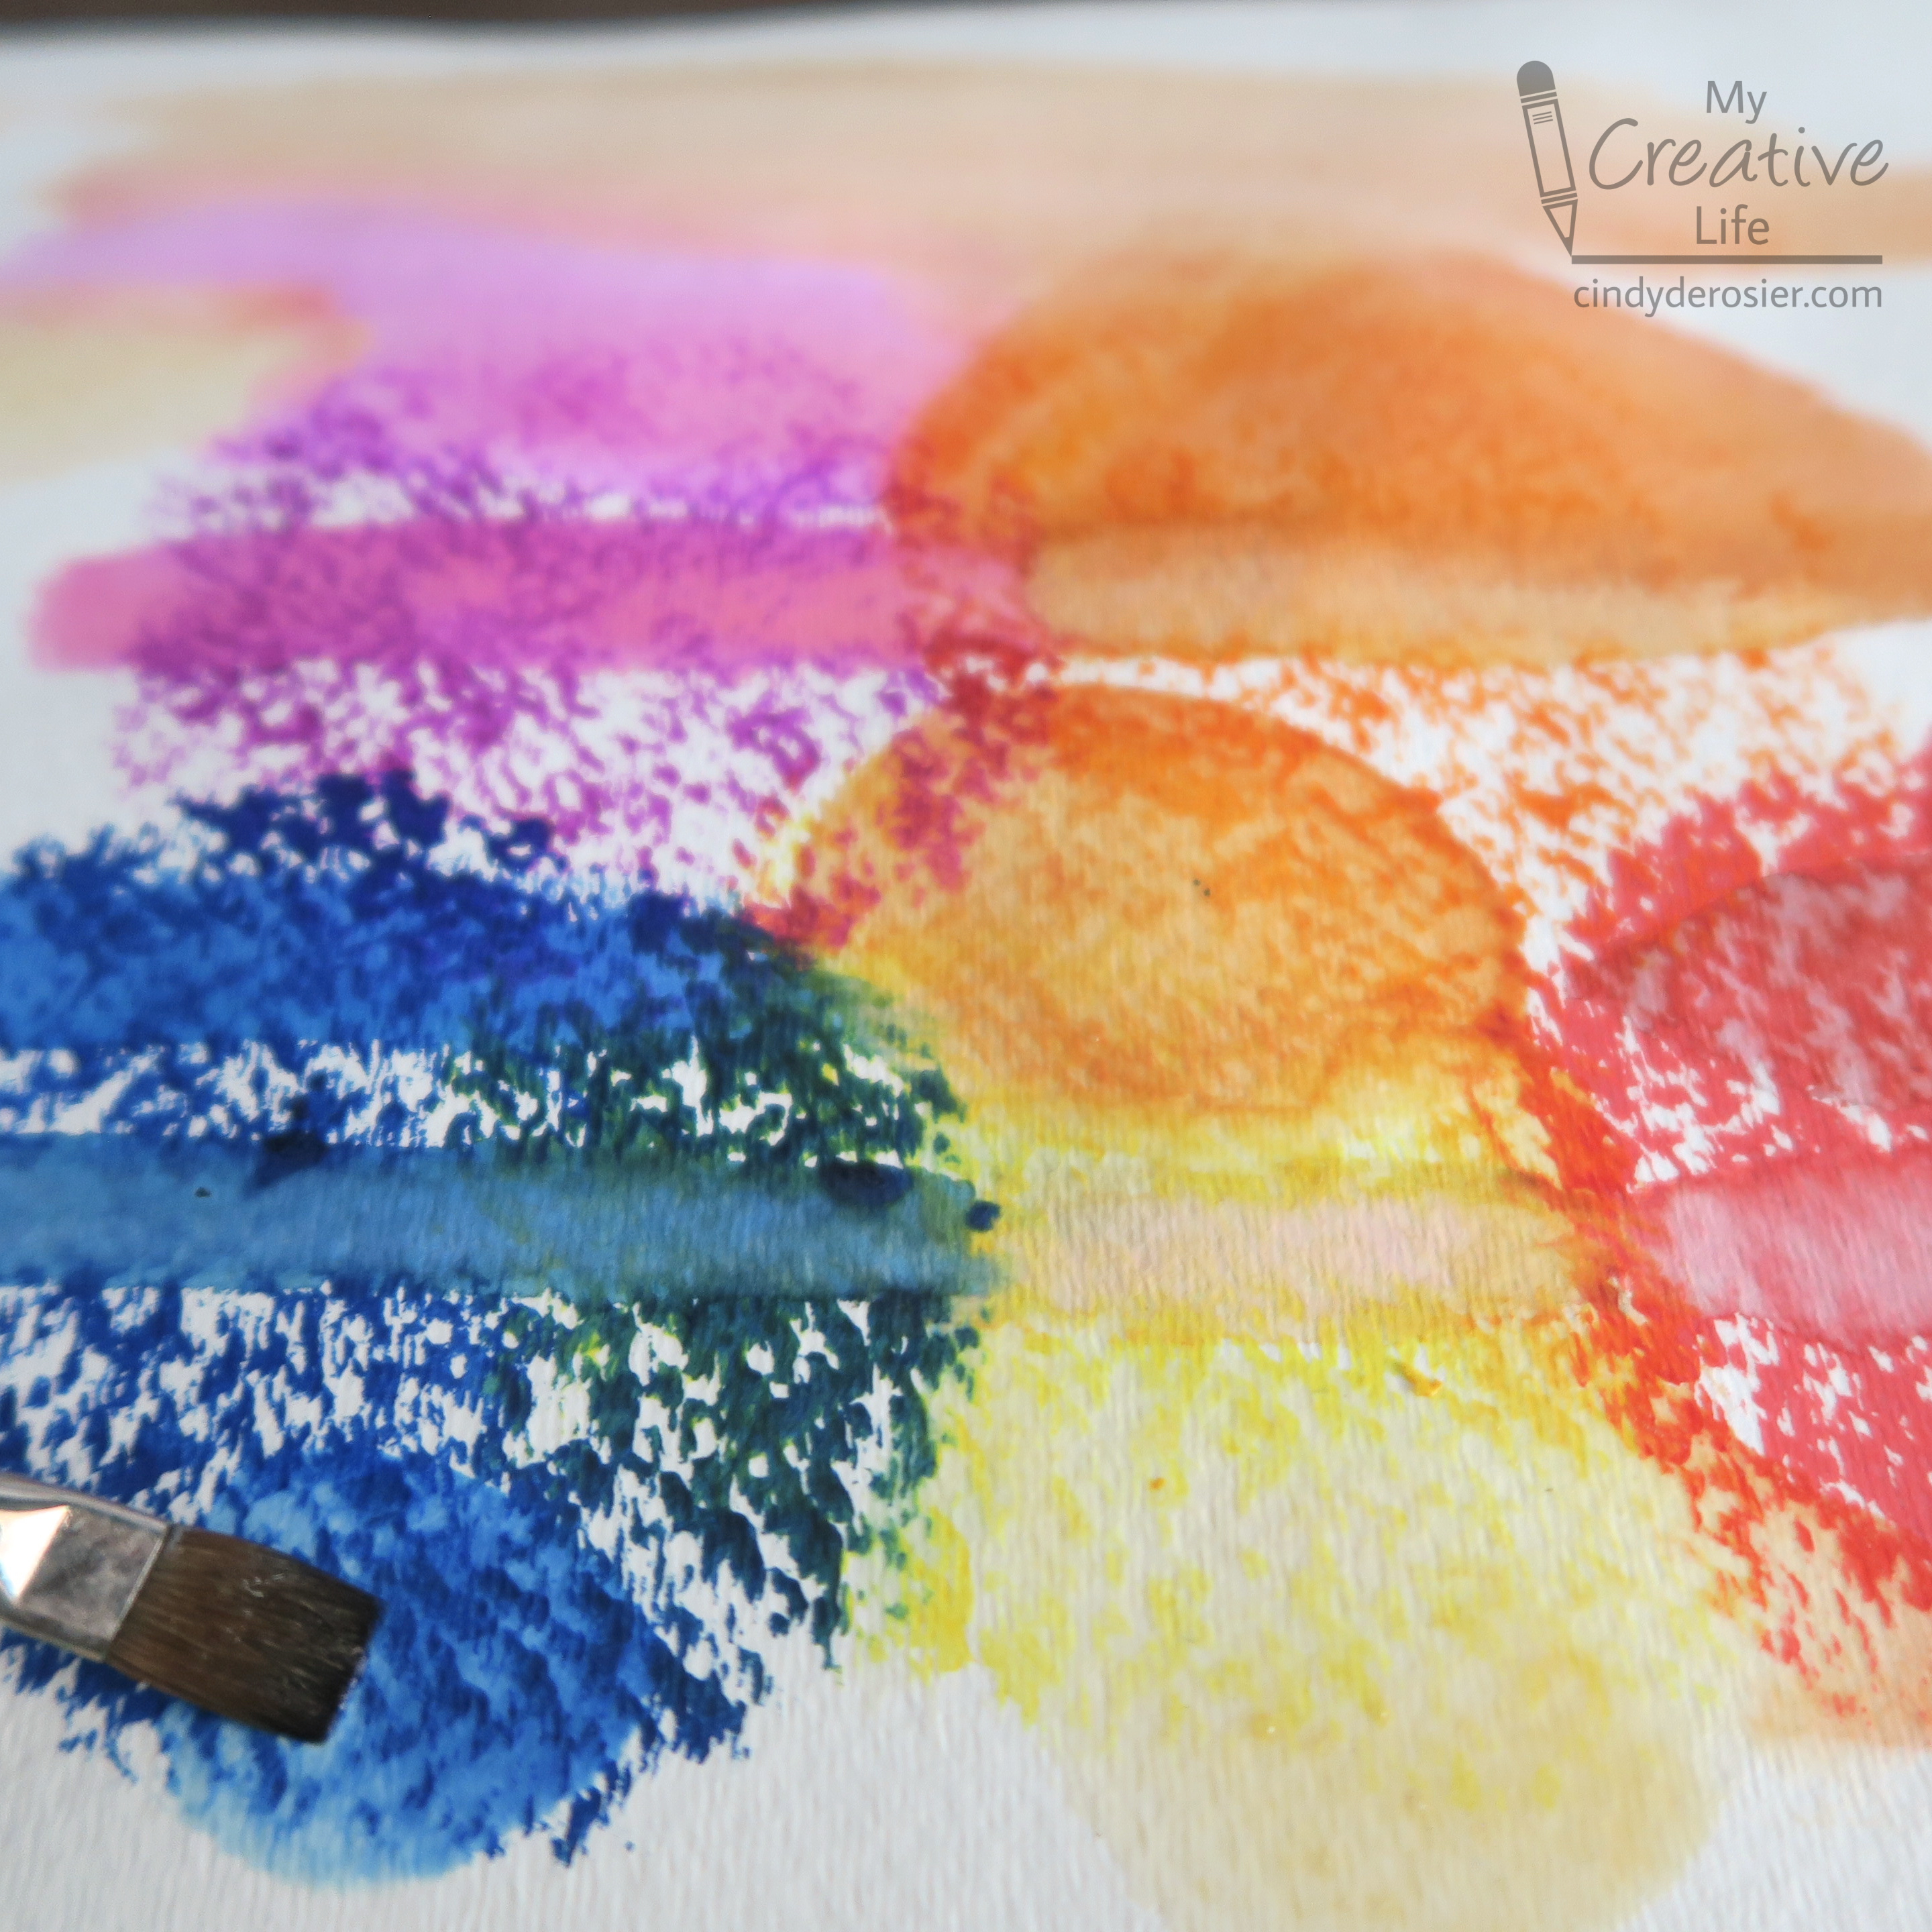
I switched to watercolor paper and made some blobs of color with four different paint sticks. 


Then I dragged a wet paintbrush through them. Very satisfying!


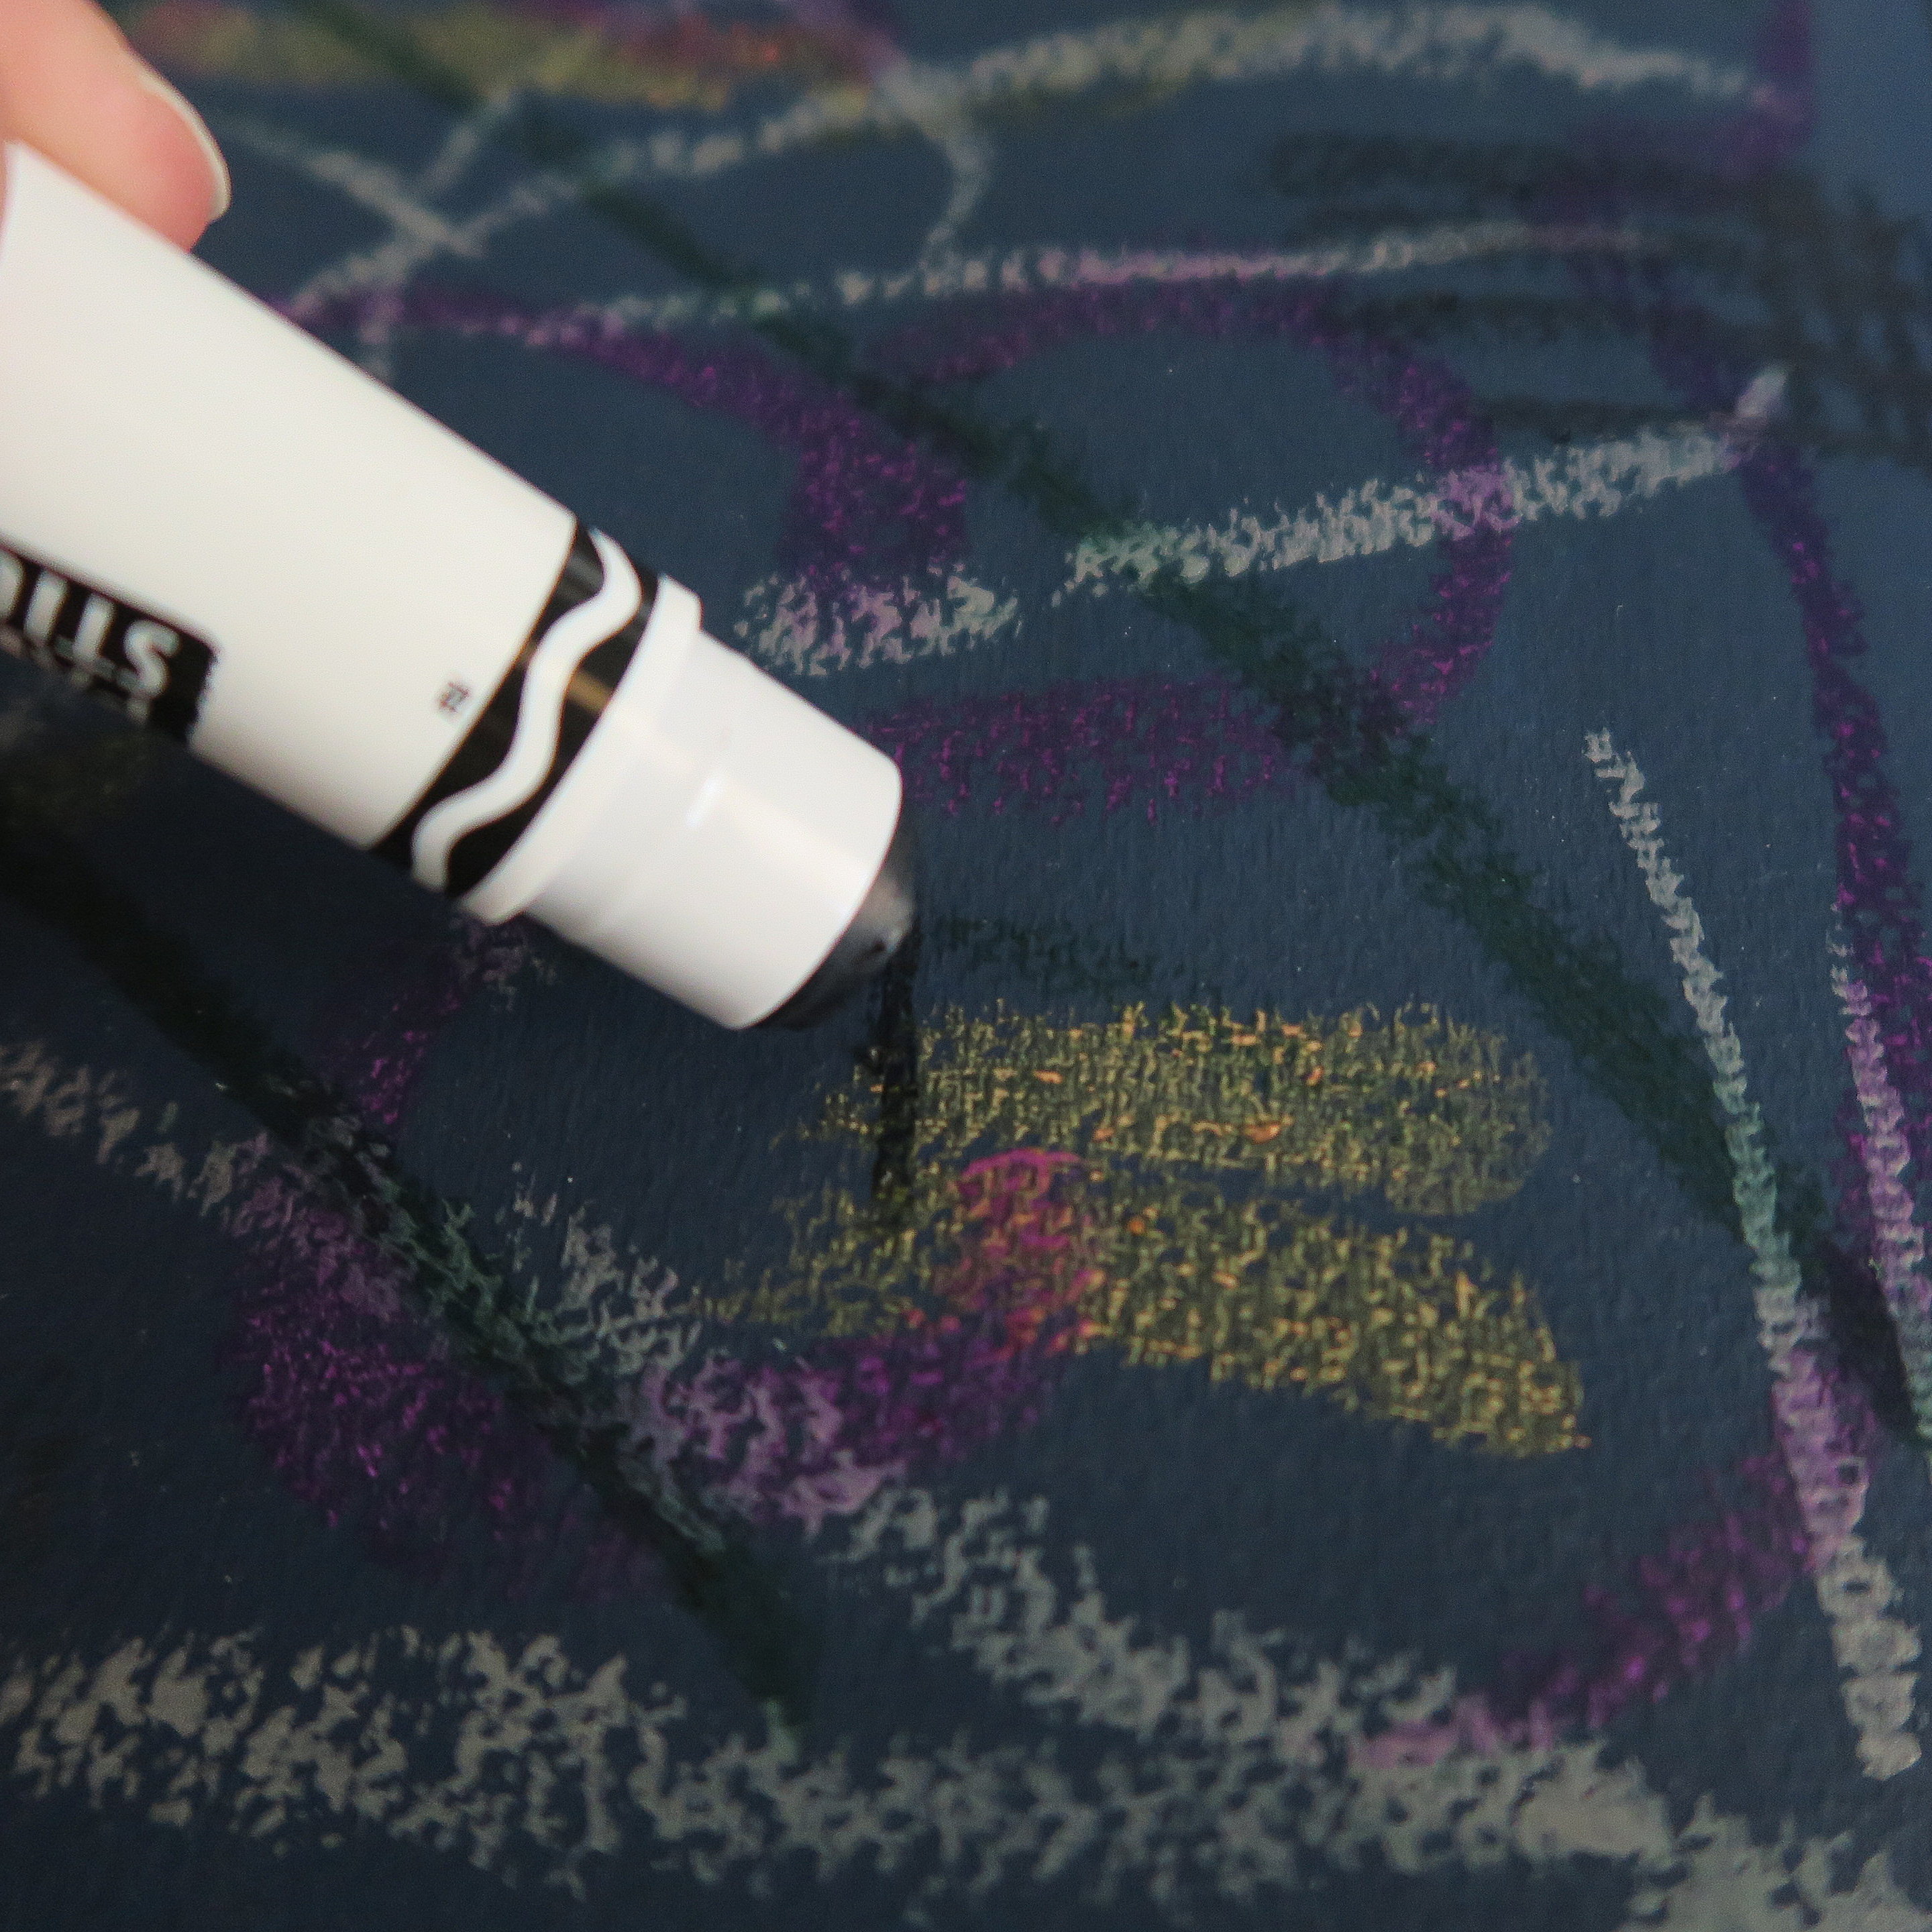
I tried each of the colors on a pre-painted dark navy page in my sketchbook. This is where the gold and silver worked best. 


Overall, I had fun trying out Crayola's Washable Paint Sticks. Like all washable art supplies, they are marketed toward young children. That's definitely the audience that will appreciate them the most. I can see myself using them in abstract paintings like this one, but otherwise I'll save them for crafting with young kids. 

Have you tried Crayola's Washable Paint Sticks? Or a different brand? Tell me what you think in the comments.

10/1/21

Crayons: The Problem with Being the Best

As I was hunting for any stray colored pencils that might be hiding throughout the house, I decided to reorganize our huge collection of crayons. ("Because why not start a big, messy project when you're literally in the middle of doing something else!" I always say.) 


I'm not kidding when I say we have a huge collection of crayons. Back in 1995 when I started teaching, I had a small collection of crayons - a few small sets, plus the big set with the built-in sharpener. I kept one set at home, but dumped the rest into a crayon bin for the classroom. The school issued every student a box of crayons each year. Most kids kept their crayons in good shape all year long, but for the 3 or 4 kids who lost them or otherwise needed more, they could take what they needed from the bin. At the end of the year, I told them they could take home their crayons or dump them into my bin. Most dumped them into the bin, knowing they'd get fresh crayons when the new school year started.... one week later. (For my first few years as a teacher, our school was four-track year-round. My section started in August and ended in July, with September, January, and May off. When school ended in July, we had one week off before the new school year started in August. Our school eventually switched to a modified traditional schedule, but almost everyone still dumped their old crayons in the bin.)

We did a lot of crayon art in the classroom, but still the collection grew. There were kids who dumped crayons they didn't use at home into the bin. Eventually, one large bin became two. 

When Trevor was born and I moved out of my classroom, I left one bin behind and took one home. Over the years, more crayons have come into the house as gifts, manufacturer samples, party favors, and with kids' menus. All that to say, we have a huge collection of crayons. 

Now, a question. At the top of this post is a photo of eleven blue crayons. What brands do you remember seeing? 


-----


-----


-----


-----


Chances are, you remember seeing Crayola (or guessed correctly that it was among the eleven). In fact, two of the eleven crayons are Crayola. They're from different eras, so the logos differ a bit. You might also remember seeing Prang or Cra-Z-Art, as there is one of each. But I guarantee that's all you saw. Why? Go back and look at the photo. 

The remaining seven crayons are not branded. Instead, they have the word Crayon(s) in fonts that are intended, in varying degrees, to fool you into thinking they're Crayola. Distinctive Crayola font? Check. Black oval around the text? Check. Black bands at the ends of the wrappers? Check and check. 

I chose the four blue crayons whose branding were most obvious Crayola rip-offs and put them to a color test. The results speak for themselves. 


The problem with being the best is that everyone else wants to be like you. Some manufacturers do that through hard work, developing their own superior products. Others do it by pretending to be the best only long enough to fool people into thinking they are getting a great bargain on a great product. You couldn't complain to these manufacturers if you wanted to, because there is no manufacturer information available. 

This is a problem beyond just crayons. In the craft industry, it is a major issue with pricier items, like metal dies or clear acrylic stamps. The reputable brands produce high-quality items with popular designs, then unethical manufacturers swoop in and put those designs on their own low-quality materials and sell them for a fraction of the cost. And the consumer who thought they were getting a bargain has something that breaks or otherwise doesn't work like the name-brand product. Know what you're buying, and know who you are hurting when you buy a knockoff. Chances are, you're also ultimately hurting yourself. 


9/14/21

Splatter Paint Fall Trees

After sharing so many splatter-painting backgrounds, it's time for a splatter-painted foreground. Rather than the thumb-across-toothbrush technique, I used a different method to achieve the dots and drips. It was so much fun!


Splatter Paint Fall Trees


Materials:

  • watercolor paper
  • crayons (brown, black)
  • acrylic paint (blue, orange, yellow, red-brown)
  • two paintbrushes

Steps:

Use crayons to draw bare trees on the watercolor paper. I drew four trees, each with plenty of branches and twigs, then added a bit of shadow with the black crayon. 

Thin the blue paint and use it to create a wash of color on the entire paper. These bits of sky will show through between the leaves of the tree. Let the paint dry. 

Put the painting into a cardboard box. I have a designated box I use to contain the mess when splattering, misting, dripping, and spraying. Hold one paintbrush in each hand. Dip one paintbrush into the red-brown paint, then tap it on the handle of the second paintbrush. This will cause small flicks of paint to splatter down. Experiment with the quantity of paint on the first brush, where you tap on the second brush, and how far from the paper you hold the brushes to get different sizes of splatters. Concentrate the splatters along the base of the trees and in the branches, leaving the space along the middle of the trunks and above the branches relatively unsplattered. You may need to rotate the paper to accomplish this. 


Without cleaning your brush, switch to orange paint and use the same technique to add splatters. Switch to yellow, building up the layers. When you have a good amount of splatters in the two main sections of the painting, use a pouncing motion to fill in any gaps between the leaves on the ground. With the same pouncing motion, do the same to add leaves to bare branches (if desired). 


It's up to you how many leaves you want on your finished artwork. I kept going until I liked how the trees looked. 


This really is a ton of fun to do. There's something very satisfying about seeing drips of paint transform into leaves. 


9/1/21

Fall Tree with Tissue Paper Leaves

The calendar says that fall is coming soon, but here in the Bay Area our leaves won't be falling for another 2 or 3 months. All the more reason to embrace fall colors via crafting! 


---------

Fall Tree with Tissue Paper Leaves


Materials:

  • watercolor paper
  • crayons (brown, black)
  • watercolor paint (blue)
  • tissue paper (red, orange, yellow, green)
  • scissors
  • glue


Steps:


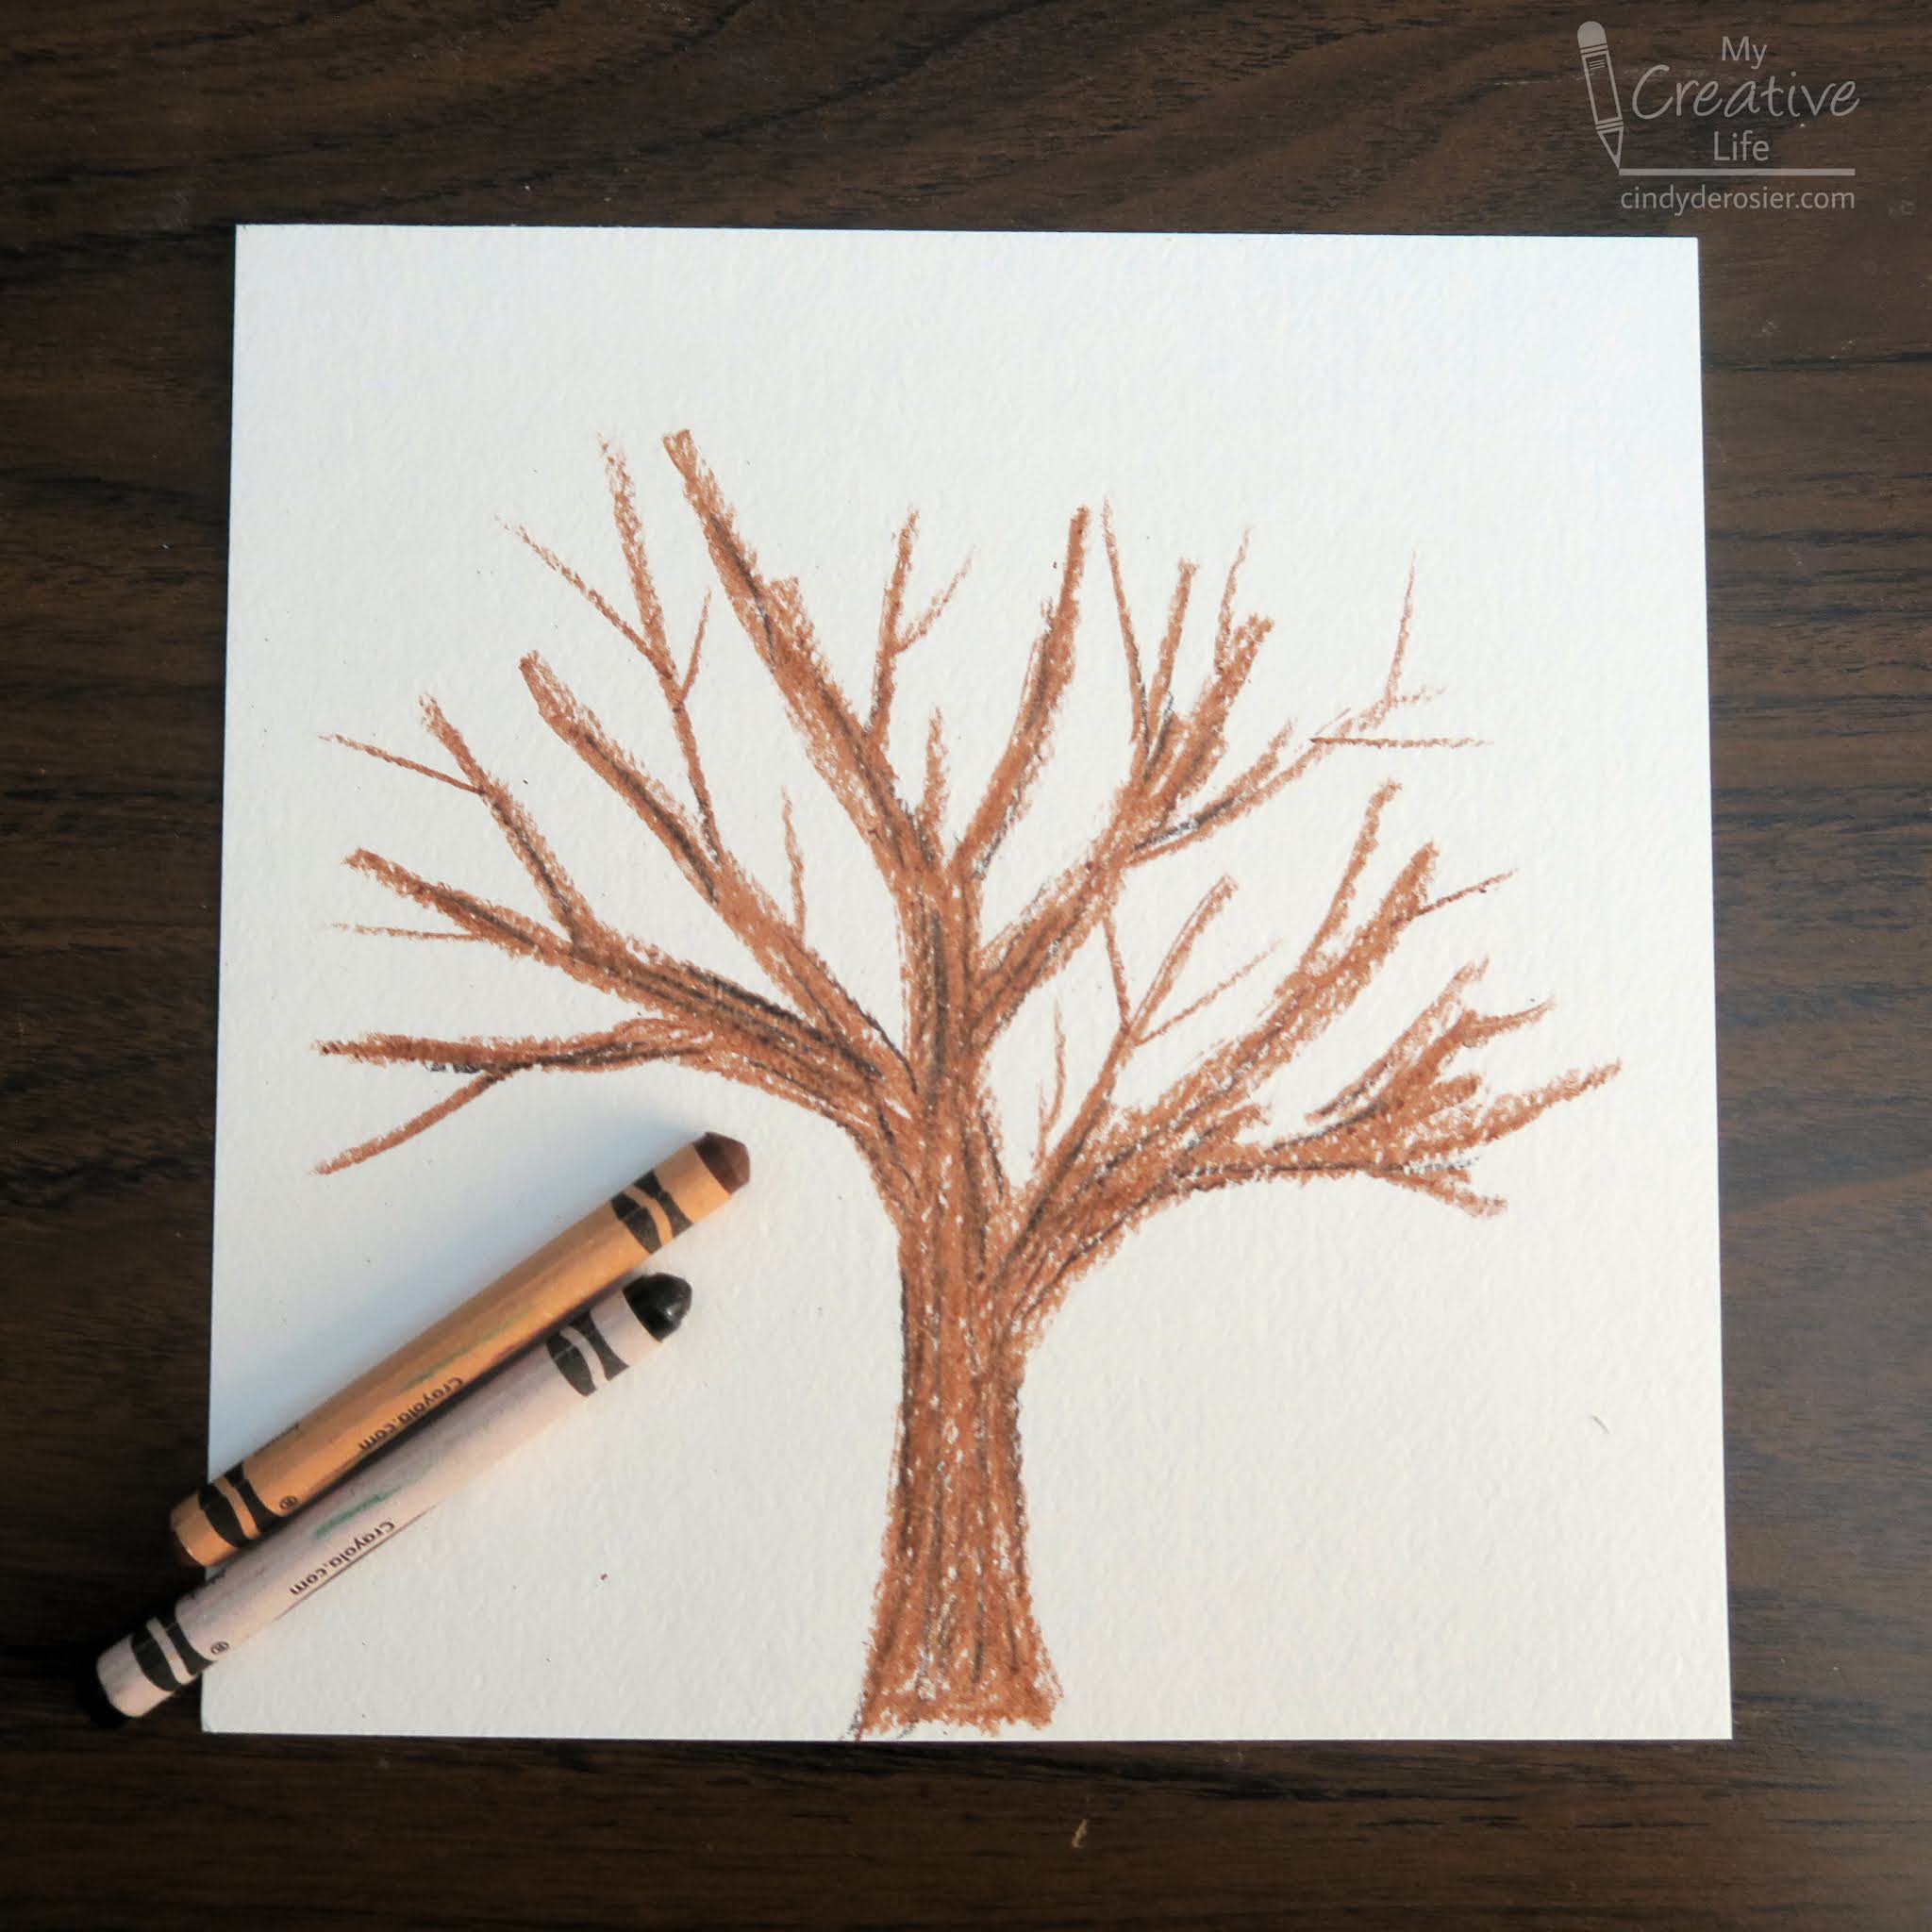
Use crayons to draw a tree on the watercolor paper. Add plenty of branches and twigs. 


Add a wash of blue watercolor over the entire paper. The wax of the crayons will resist the paint; dab gently with a paper towel if any droplets remain. Let the paint dry completely. 


Use scissors to cut the tissue paper into tiny bits. I cut a few squares from each color, layered them, and then hacked at them randomly with the scissors. Dot glue onto the branches of the tree where leaves would be. Sprinkle the tissue paper bits onto the branches. Repeat until all the branches are covered. Lift the paper vertically to allow any pieces that are not attached to fall. 


Repeat the steps of cutting tissue paper into bits, dotting the paper with glue, and sprinkling the tissue paper onto the glue, except this time do not include any green tissue paper. (Green leaves wouldn't have fallen yet. I thought of this a little late, so you can see hints of green behind the fallen leaves. I'm pretending its grass.)


This project was really fun to make and took a lot less time than I'd originally expected. It's a great way to reuse ripped or wrinkled tissue paper. Give it a try!

CLICK.BUY. CREATE. Shop Michaels.com today!

8/25/21

Whimsical Clay Narwhal

This is not a narwhal. I'm calling it a narwhal, but it's a narwhal in the same sense that Mickey is a mouse and Bugs is a bunny. I've taken some anatomical liberties, to say the least.


A narwhal is an Arctic whale related to the beluga. The body is torpedo-shaped, not round like a ball. A narwhal is not blue; it is white, mottled with brownish-black markings on the dorsal side. Like other whales, its eyes are on the sides of its head, not toward the front. Its most distinguishing characteristic (usually only present in males) is its long, spiral left canine tooth that can grow to be 10 feet long. Since it is a tooth, it protrudes from the mouth, not from the top of the head.
 
If you are looking for a realistic craft about narwhals, this is not the tutorial for you. This whimiscal version plays on the narwhal's nickname, "the unicorn of the sea." Affiliate links below. 


Whimsical Clay Narwhal


Materials:


Steps:


Use the Model Magic to shape the rounded body of the narwhal. Its tail fin should be gently forked. Form two small triangular pectoral fins. Set all three pieces aside to air dry.  

Coat a toothpick with craft glue and twist a piece of embroidery floss around it to form the narwhal's tooth. Set it aside to dry completely. 


Paint the narwhal's tooth an off-white so that the toothpick and the embroidery floss are the same color. Let the paint dry. As you can see, I didn't paint the one end - that's the end I was holding and that would be hidden once I inserted the tooth. 


When everything is dry, assemble the narwhal by gently pushing the toothpick into the narwhal's forehead (again, we're going to "unicorn of the sea," not realism). Glue the eyes in place and give the narwhal a Sharpie smile. Glue the fins to the body. 


If you're looking for other narwhal ideas, check out my ideas for a narwhal-themed party and a Twinkie narwhal. And then look at this fabulous tea infuser - so much fun! 

8/2/21

Crayon Rubbings over Hot Glue Texture Plates

Check out this crayon rubbing I made. Awesome texture, right? 


I did the rubbing using homemade texture plates. They couldn't be easier to make - just hot glue on scraps of chipboard, in whatever patterns (or scribbles) you want. 


I put a piece of copy paper onto my completed texture plates and used one color of crayon per texture. 


So pretty, and the possibilities are endless. 


If you have very young children, make the texture plates for them and have them do just the rubbing portion. But kids as young as 6 can safely make their own texture plates (with supervision, of course), particularly if you use a low temp glue gun and/or finger guards (affiliate links). Just make sure you have a lot of spare glue sticks, because once you start making texture plates, it's hard to stop!

6/4/21

Crayola Crayon Coloring: California

I'm a big fan of everything Crayola. I loved my Crayola crayons and markers as a kid, and I still love them as an adult. I love the newer products they've added since my childhood, particularly Model Magic. How much do I love Crayola? I added a day to our time in Pennsylvania in order to detour to Easton, home of the World's Largest Crayon and Crayola Experience. It was awesome. 

Because I'm such a fan, I jumped on the chance to become an affiliate for Crayola. (Affiliate link here, obviously, and throughout the post.) Eager to see if they had any new products of which I wasn't already aware, I poked all around the Crayola site. And that's when I found a treasure trove: Crayola's free coloring pages. There are a bunch of categories, like Disney, Seasons, and Animals, but it was Places that called to me. They have flags, maps, and symbols for most of the countries of the world and all 50 states. These printable pages have instructions for coloring the flags and symbols accurately. 

I printed out this page about my home state of California, then got happily to work using my Crayola crayons to color the Bear Flag, the Golden Poppy, and the California Dogface Butterfly. I cut out my drawing and mounted it on black paper. I love how it turned out.


It's really tempting to drop all my responsibilities and make myself a coloring book of all 50 states. I'm resisting, but barely. 

3/24/21

Bunny by the Craft Stick Fence (Bunny Week 2021, Day 3)

It's Day 3 of Bunny Week 2021 and I have another craft for you. Not only is it adorable (if I do say so myself), but this project uses up the craft sticks that have knots and other flaws that kids (and craft bloggers) usually reject. Affiliate links below. 


Dig through the craft sticks and find the 14 worst ones you can - knots, uneven, visible grain, etc. 


Mix a small amount of nutmeg brown paint with water to make a stain. Brush it over the craft sticks and let them dry. 

Meanwhile, prepare the cardstock grass. The three steps are show in the photo below:
  1. Cut cardstock pieces approximately 1" x 3", then snip to create fringe. (I don't have any, but fringe scissors will speed up this process.) 
  2. Snip the ends of the fringe on an angle at random heights. 
  3. Bend the fringe to mimic the look of grass, then fold a tab at the bottom. 


Glue the dry craft sticks together to make the fence, then glue the tabs of the grass onto the bottom of the fence. Glue an extra strip of green cardstock to the back of the fence, just peeking out below the grass tufts. Finally, glue the bunny in place.

2/5/21

Crayola Sweet and Stinky Markers

Trevor and I both love pens, so when I see a set I want that I know he'd like too, I buy it as a gift for him ("To Trevor and Mom, From Mom"). Such was the case for Crayola Sweet and Stinky Scented Markers (affiliate link here and throughout the post). 


I fell in love with Mr. Sketch markers when I was a kid and I introduced them to my own kid at a young age, so I was eager to see how these Crayola markers compare. I was careful not to read the box or even do more than glance at it before trying them for the first time so that I could test the scents with an unbiased nose. 

When I opened the outer box, I discovered two inner boxes- one stinky and one sweet. 


I discarded the inner boxes, mixed up the pens, then organized them by color. I made a chart, then tested them one by one. 


First up, a pure red that smelled just like strawberries. Delightful! Then a pink that smelled like watermelon candy. Not my favorite, but fine. The fuschia color smelled like overripe fruit. Not BAD, per se, but off just a bit. And then, I removed the cap on a pale peach marker and was met with an overwhelmingly bad smell. I couldn't place the smell - it was medicinal and rotten and horrifying - but eventually labeled it "awful diaper rash ointment." I was VERY surprised to learn it was supposed to be mushroom. 

Fortunately, what turned out to be my very favorite scent in the whole box was next - orange. I followed that up with what I thought was "rotten lunchmeat" but turned out to be Cheese (really?), then "smoking sugar" (Pizza), "lemon soap" (Lemon), "garlic + exhaust" (Onion), and "marshmallow" (Banana).  


The mushroom was the only scent in that bunch that was truly horrifying. Not only that, it performed the worst as a pen. As you can see, most of the colors above are rich and uniform. The mushroom marker didn't color as nicely as the rest. 

Moving on to the cool shades. I started off on a roll, correctly guessing both Green Apple and Pickle. However, what I thought was "spoiling chives" turned out to be Old Rotten Tooth. Never would have guessed that! It was unpleasant, but not awful. I guessed "lime soap" for lime, then got three in a row - Blueberry, Smoke, and Garlic. I guessed "hair conditioner" for Coconut.

I was not prepared for the next marker. It ranks among the worst things I've ever smelled in my life. "How bad could it be?" you might be thinking. Bad enough that my guess was "dirt + death = grave." When I rotated the pen to read what it was, I was fully expecting it to be corpse or gangrene or something. Nope. Dirty Potatoes. 

Let me make something clear: dirty potatoes do not smell like this. We grow potatoes, which I harvest from dirt. During my biweekly shift at the Food Bank, I divide tons (literally) of fresh-from-the-dirt potatoes into portions suitable for families. I know dirty potatoes. They smell nothing like that pen.

I ended on a sweet note, as the final pen was Grape. Phew! 


Overall, I'm very happy with our new set of markers. Other than the Mushroom pen, the quality is what I expect from Crayola. I will never willingly open Mushroom or Dirty Potatoes again, but I'll be holding onto them solely to make people smell them once we're back to having visitors in our house. While I was surprised there isn't a black marker in the set, I appreciate having three different gray shades, which is quite unusual. 

I highly recommend getting a set of Crayola Sweet and Stinky Scented Markers for the child (or pen-loving adult) in your life!

11/2/17

Easton: Crayola Experience and Fine Dinering

This is my seventh post about our adventure traveling through Maryland, Delaware, New Jersey, and Pennsylvania. You can find the first post from this trip here and links to all the other educational US travel our family has done here

Because I blog about educational travel, I received free admission tickets, discounts, media rates, and other benefits for some of the hotels and attractions we visited throughout the trip. Many attractions we toured are free to everyone. I paid full price for the rest. This has no bearing on my reviews. Everything I'm sharing is something that I whole-heartedly recommend. If you notice any gaps in my narrative, it is because I didn't love a particular hotel, attraction, or restaurant enough to recommend it to you, regardless of how much I paid or didn't pay.

---------

Easton, Pennsylvania


We simply could not pass up an opportunity to see the World's Largest Crayon, so we added a day in Easton, PA to our itinerary. 


The World's Largest Crayon is housed at Crayola Experience. I've been wanting to go there for years and when I realized we'd only be an hour away, I was so excited. And it did not disappoint. We loved it!


I wonder what the neighbors would say if I put a statue just like this one in the front yard. Because I totally would, except mine would be a trio of three crayons in our family colors


We got to Crayola Experience right at opening on a Sunday and there were a lot of people there already. So we used our time-honored technique of zipping up three flights of stairs to the 4th floor and working our way down in hopes that most people would be working their way up. Success! We had the 4th floor almost completely to ourselves. And what a great place to start! We painted pictures with melted crayons. We molded crayons into rings and car-shaped souvenirs to take home. And we made beautiful spin art. Those three activities are reason enough to go to Crayola Experience! It was so much fun. 


In the activity center, we played with watercolors, markers, and Twistables (affiliate link here and below) At one station, we turned our artwork into a puzzle! I totally need their drying ovens at home. They are a game-changer when it comes to wet media, like watercolors. Someday when I have the budget to commission a Crayola statue for my front yard, I'll have a drying oven installed at the same time. 


Next, we watched a live show about how crayons are made. It was geared toward young children, but full of interesting facts for older kids and adults as well. 


One of the (many) highlights of the day for me was designing and printing my own crayon wrapper and using a machine to apply it to a crayon. Best souvenir ever! 


I should explain that when you pay admission to Crayola Experience, you are given two tokens. It costs a token to make your own crayon wrapper. You can also spend your tokens to get Model Magic from the world's most awesome vending machine.


Everything else is included with admission. You can buy more tokens if you want to make extra crayons or take home extra Model Magic, but I love that you don't need to spend extra money to experience the activities. 

Technology plays a big role throughout Crayola Experience. It was awesome to see your drawings come to live on screens and paper creations dance on a stage. We also loved the room filled with challenging puzzles that you solved via tablet. The best part is that there is no waiting. Your tablet automatically assigns you to a particular puzzle, so you can walk right up to it and work on it until it assigns your next puzzle! Brilliant!


The gift shop at Crayola Experience is a dangerous place for art-lovers like Trevor and me. We did our best to control ourselves. It helped that we had almost no extra room in our luggage to bring home new stuff. Check at the bottom of this post for links to some of our favorite Crayola products!

As a side note, we were surprised to find souvenirs personalized with Trevor's name not only at Crayola Experience, but at many other places we visited. That was not the case for the first ten years of his life.


Trevor is not a very common name, which is exactly why we chose it. When he was born, it was ranked 125th amongst boys' names - common enough that people had heard of it and recognized it as a boy's name, but rare enough that he wouldn't find himself in a classroom with four Trevors. I haven't checked on the popularity of the name Trevor in years, so I popped over to the Social Security baby name page to see if it had suddenly become popular. Answer: No. It's actually been declining in popularity. 


But when I went back a decade, I learned that the name Trevor peaked in popularity (ranked #58) in the mid-90's. So apparently now that those Trevors are adults, they're putting their name on souvenirs to make up for not being able to find them when they were kids. At least that's my best theory of why a name that isn't all that common is showing up in gift shops all of a sudden. 

Anyway, we had a fantastic time at Crayola Experience. After we got our souvenirs, we took the back exit to head toward our car. The backside of the building is so incredibly cool. I might have to change the plans for a trio of crayons in our front yard to a sculpture of a box of crayons spilling out over our doorway.  


After all the fun crafting, it was time to eat. I'd run across reviews for Diner 248 during my Easton research. They describe their food as 'fine dinering' which cracked me up.


And it was indeed fine dinering. The food was classic diner food, elevated. The decor likewise was much nicer than in a standard diner. The prices were in line with what you'd expect at a diner. No wonder every spot in the parking lot was full! 


Next stop, Hershey!